
I've always wanted my photography education on here to be free, so although there is no paywall to any of my -Technique Tuesdays-, any and all support is greatly appreciated. ❤️
PLUS: Donate any amount and I’ll send you a link to the hi-res print version of my studio lighting book.
||
PLUS: Donate any amount and I’ll send you a link to the hi-res print version of my studio lighting book. ||
I recently had the opportunity to work with Profoto's brand-new LED lights. I’ve been working with strobes for over 20 years and only recently started using LED lights in my work, but LED lights have come a very long way in recent years, so I was extremely excited to see what these new heads from Profoto could do.
I’d never used these new lights before, but I’d read the very comprehensive specs sheet and long list of features, so I had a pretty good idea of what I wanted to test and play with. Below, I’ll share 4 photoshoots that I believe tested several key aspects of the new L600C LED lights. Take a look and see how the light faired in these 4 very different setups.
Preface: I will mention here that I was commissioned by Profoto to create these 4 campaigns with the new L600C LED lights. I was then asked to share my thoughts regarding the lights on their website. If you’d like a more concise version of the article I’m sharing below, you can find it on the Profoto website here: 4 Photoshoot with the new Profoto L600C LED
If you’re unfamiliar with the new L600C & L600D LED heads, that’s totally understandable. I’ll be sharing another hefty article on here soon that goes over my thoughts about these incredible new lights. If you’d like to learn more about the new lights from the Profoto website, you can do so here. The Full Colour L600C & The Daylight L600D
The 4 Photo Shoots
1. Huge Kelvin Range
The new L600C (the full-colour RGB LED head) and the new L600D (the daylight-only version) are extremely feature-rich. Both heads tout a triple white chip that gives them a truly colossal Kelvin range from 2000K to 15000K, and although I’ve used a lot of Kelvin shifts in my work in the past, I was keen to see just how much colour contrast I could achieve with this huge new range.
2. A LOT of colours
The L600C sports over 16 million colours, and although I love my coloured gels, even I only had around 20 colours for my strobes in the past. So, with all these extra colours at my fingertips, I was eager to see what I could pull from these new LED heads.
3. Continuous & Flash
One very interesting feature of these new lights is their ability to flash as well as run in continuous mode. To be clear, this isn't a ‘flash’ in the traditional sense. They don't have any xenon bulbs, but the heads can pulse the LED for a very short duration, thereby simulating a flash. This LED pulse doesn’t have anything like the power output of a traditional xenon flash, and although I’ve not tested the flash capabilities of the L600C/D extensively yet, I’m pretty sure the duration of the pulse is nowhere near as fast as the extremely fast flash durations that are typically as short as 1/4000th of a second.
The fact that the L600C/D can pulse like this is a pretty unique feature for LEDs, and to my knowledge, the L600C is the only LED in the world that can flash in any of its 16 million+ colours, and it can do so with any of the Profoto light-shaping tools attached. This feature alone is a game-changer for me, so I was extremely excited to try it out.
4. Environmental Lighting
Lastly, I wanted to quickly see how these LEDs would integrate into environmental lighitng. As we know, LEDs are great for video, but with these heads being 600w, they are more than bright enough for us photographers to use as well. That said, adjusting the power of LEDs to work alongside other lighting you may find in the surrounding scene for a more environmental shot is extremely easy. Often, ambient light on location is much dimmer than flash, so it can be tricky to mix the two. This felt like a great opportunity to test the new heads alongside some environmental lights I found at the studio.
The Setups
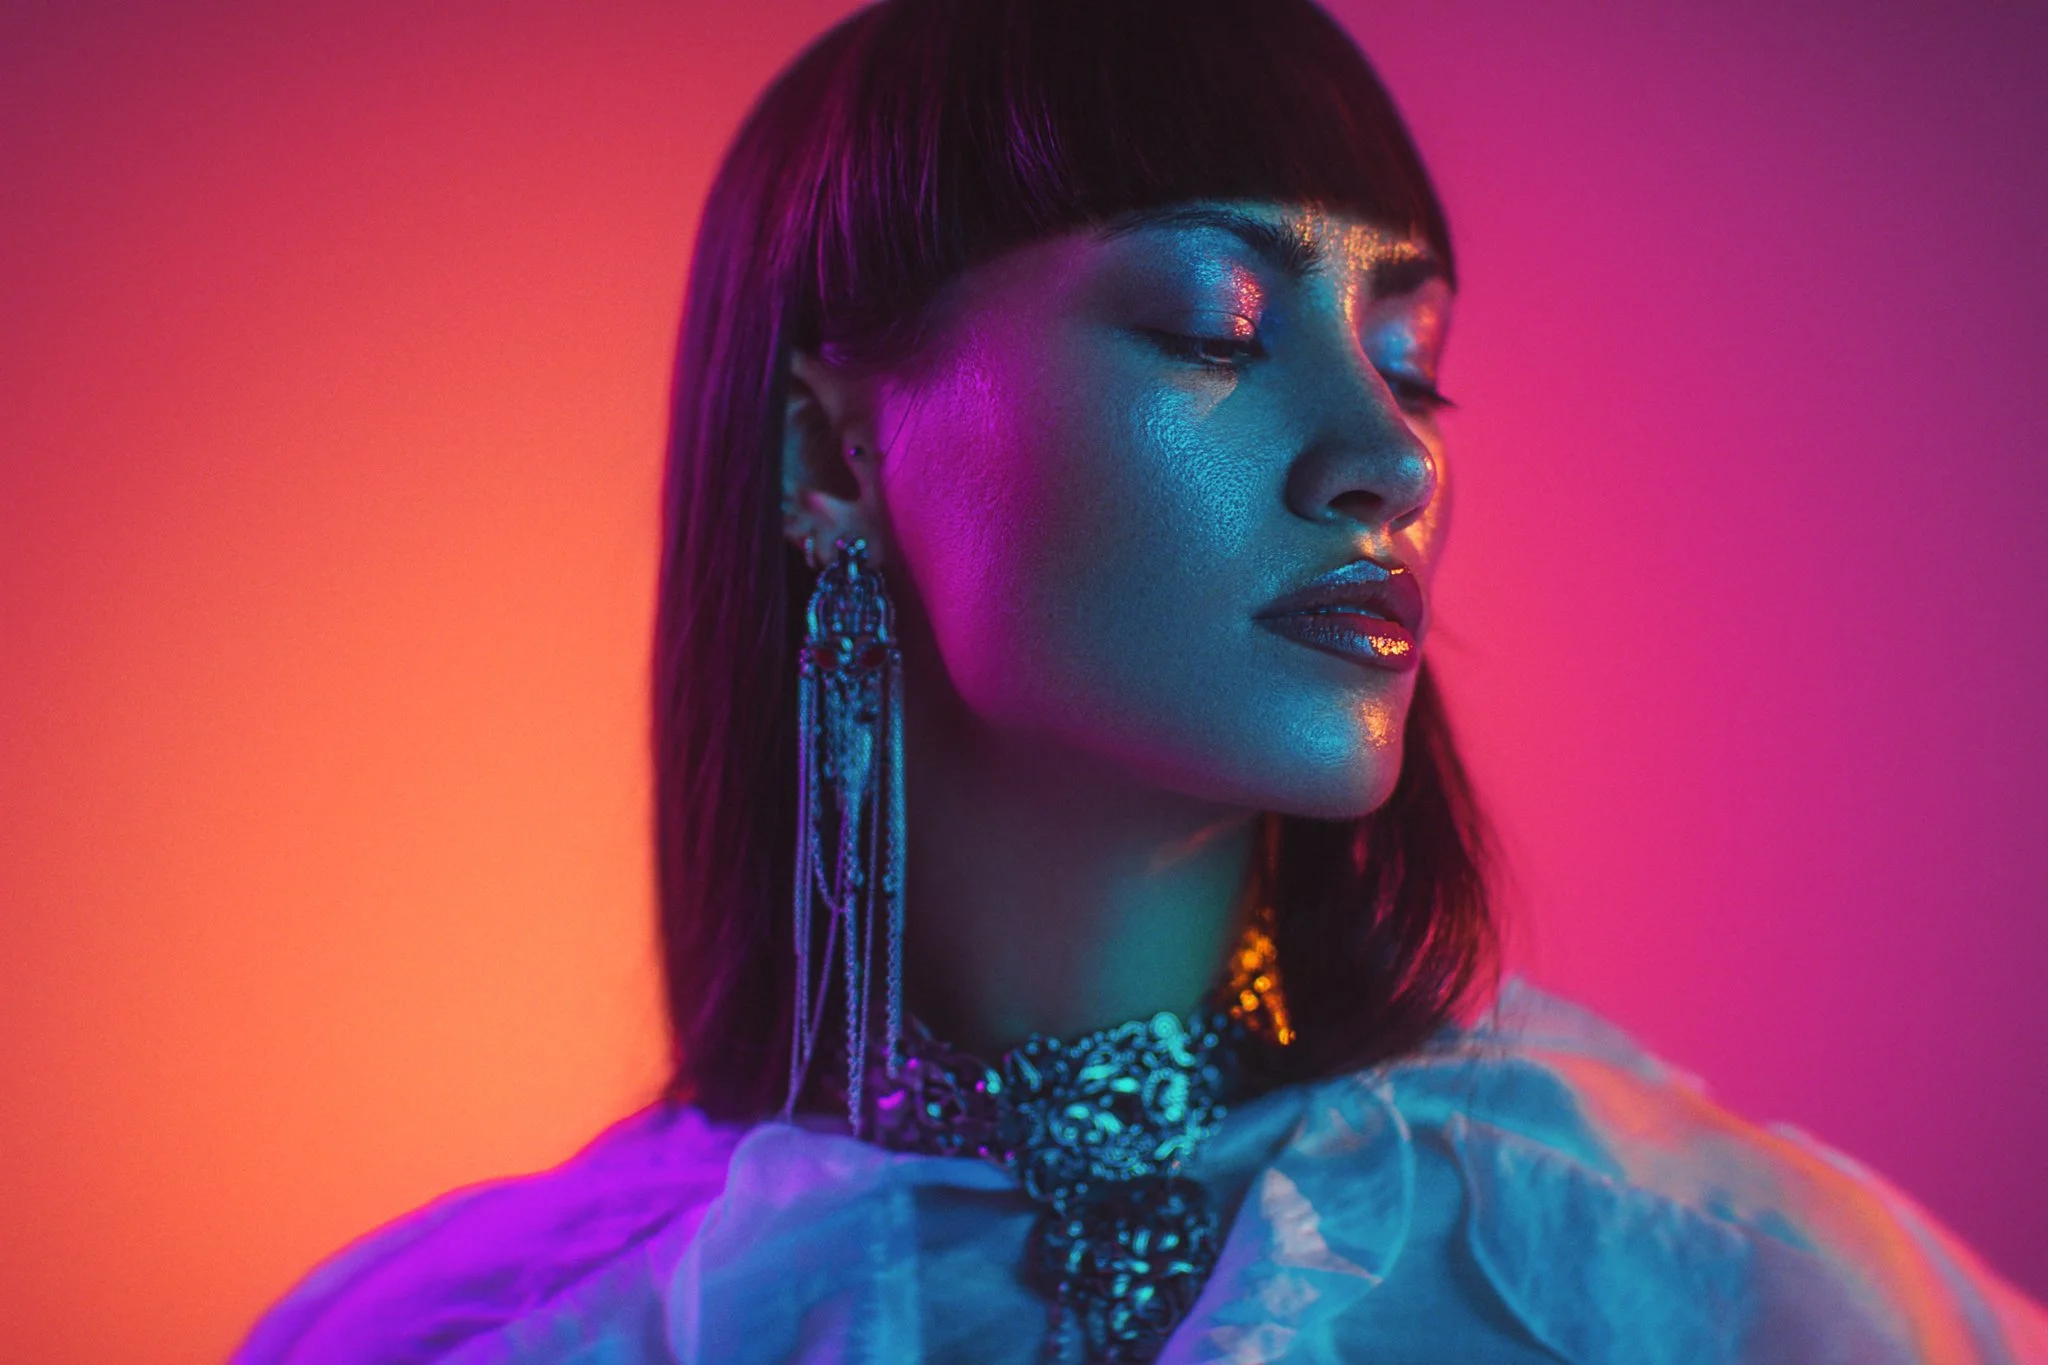
First Setup - The Kelvin Push

Camera Settings
Camera - Nikon D850
Lens - 85mm 1.4
Shutter Speed - 1/400th
Aperture - f1.4
ISO - 200
Kelvin - 4000K
Focal Length - 85mm
Kit Used
Profoto L600C x2
Profoto 4’ Octa Silver
Profoto Umbrella Deep White XL
The Breakdown
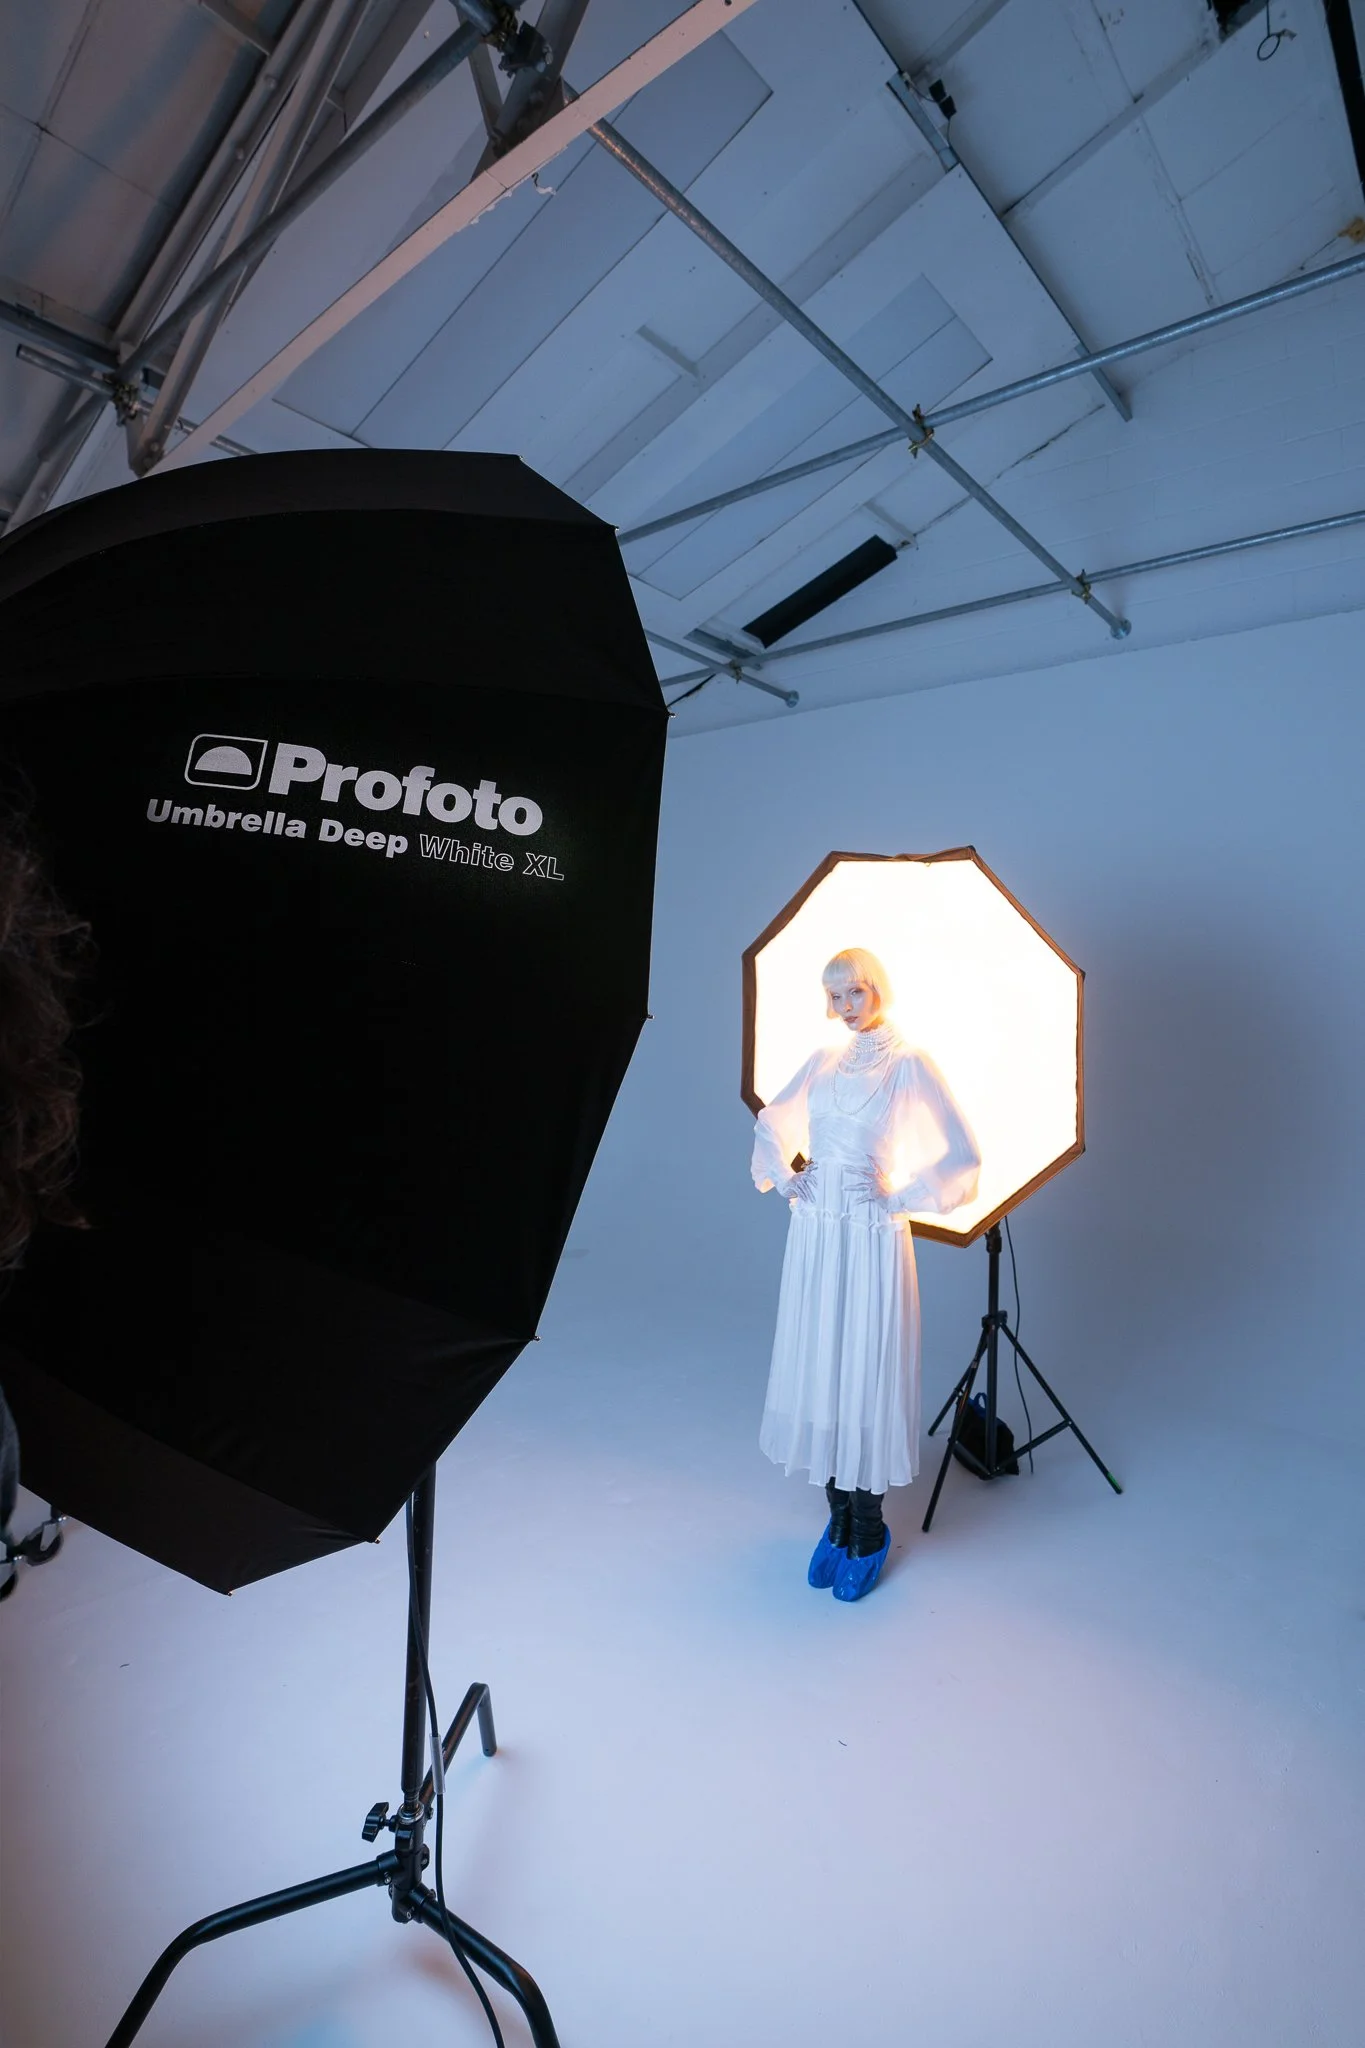
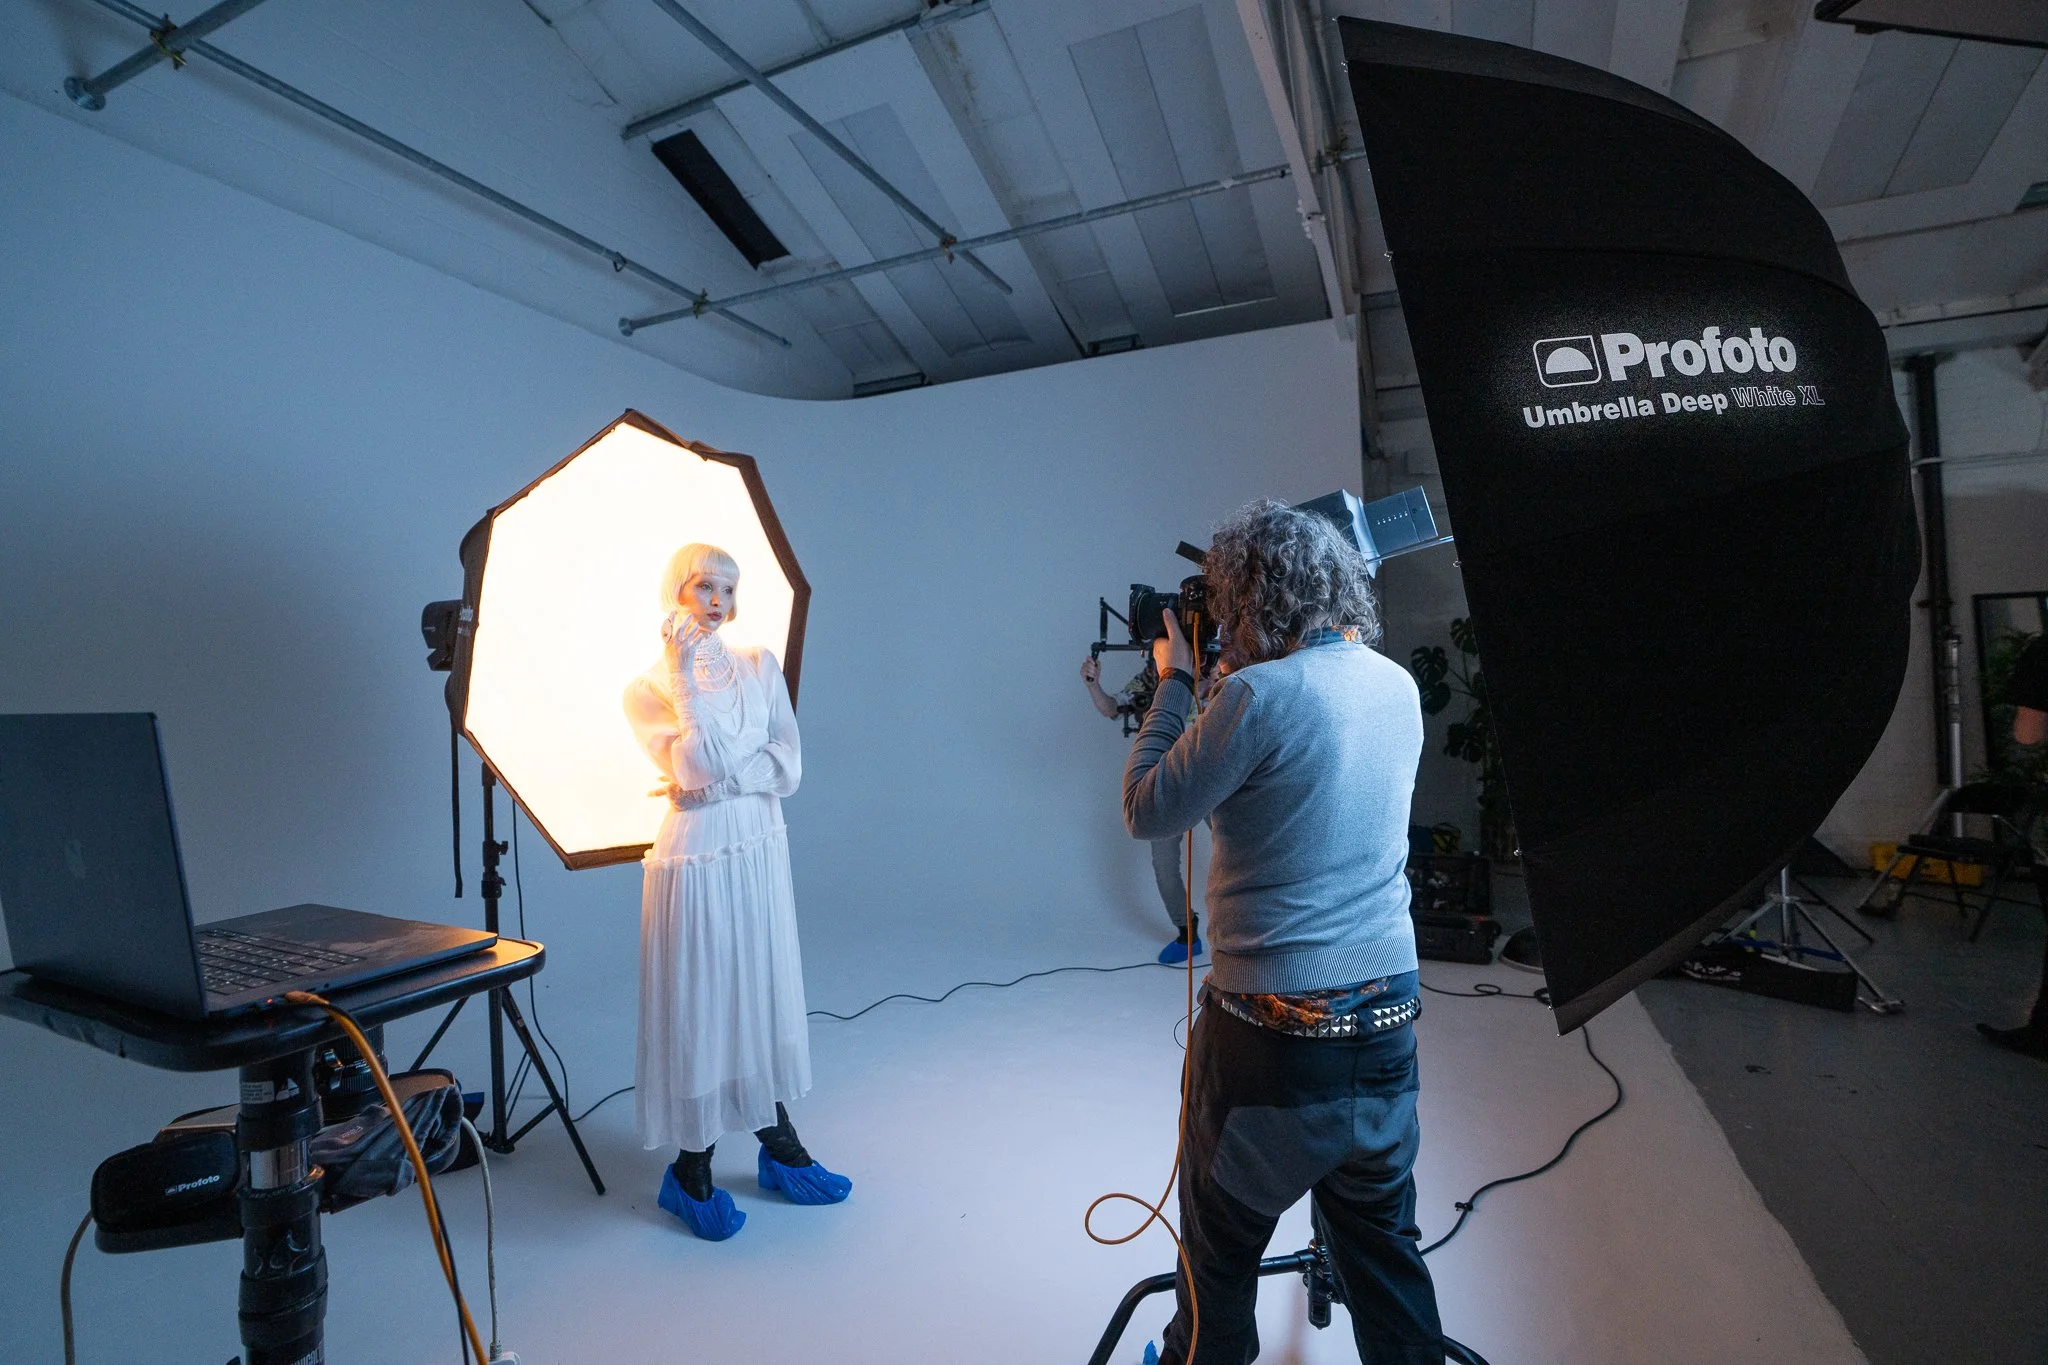
I’ll start with one of the easier setups, since it's actually pretty simple and very quick to set up: all you need are two lights and a couple of standard lighting modifiers. I’m using two L600Cs, but since we’re only using Kelvin colours here, you could just as easily achieve this setup with the L600Ds instead. -The L600Ds are the daylight equivalent of the full-colour L600C.
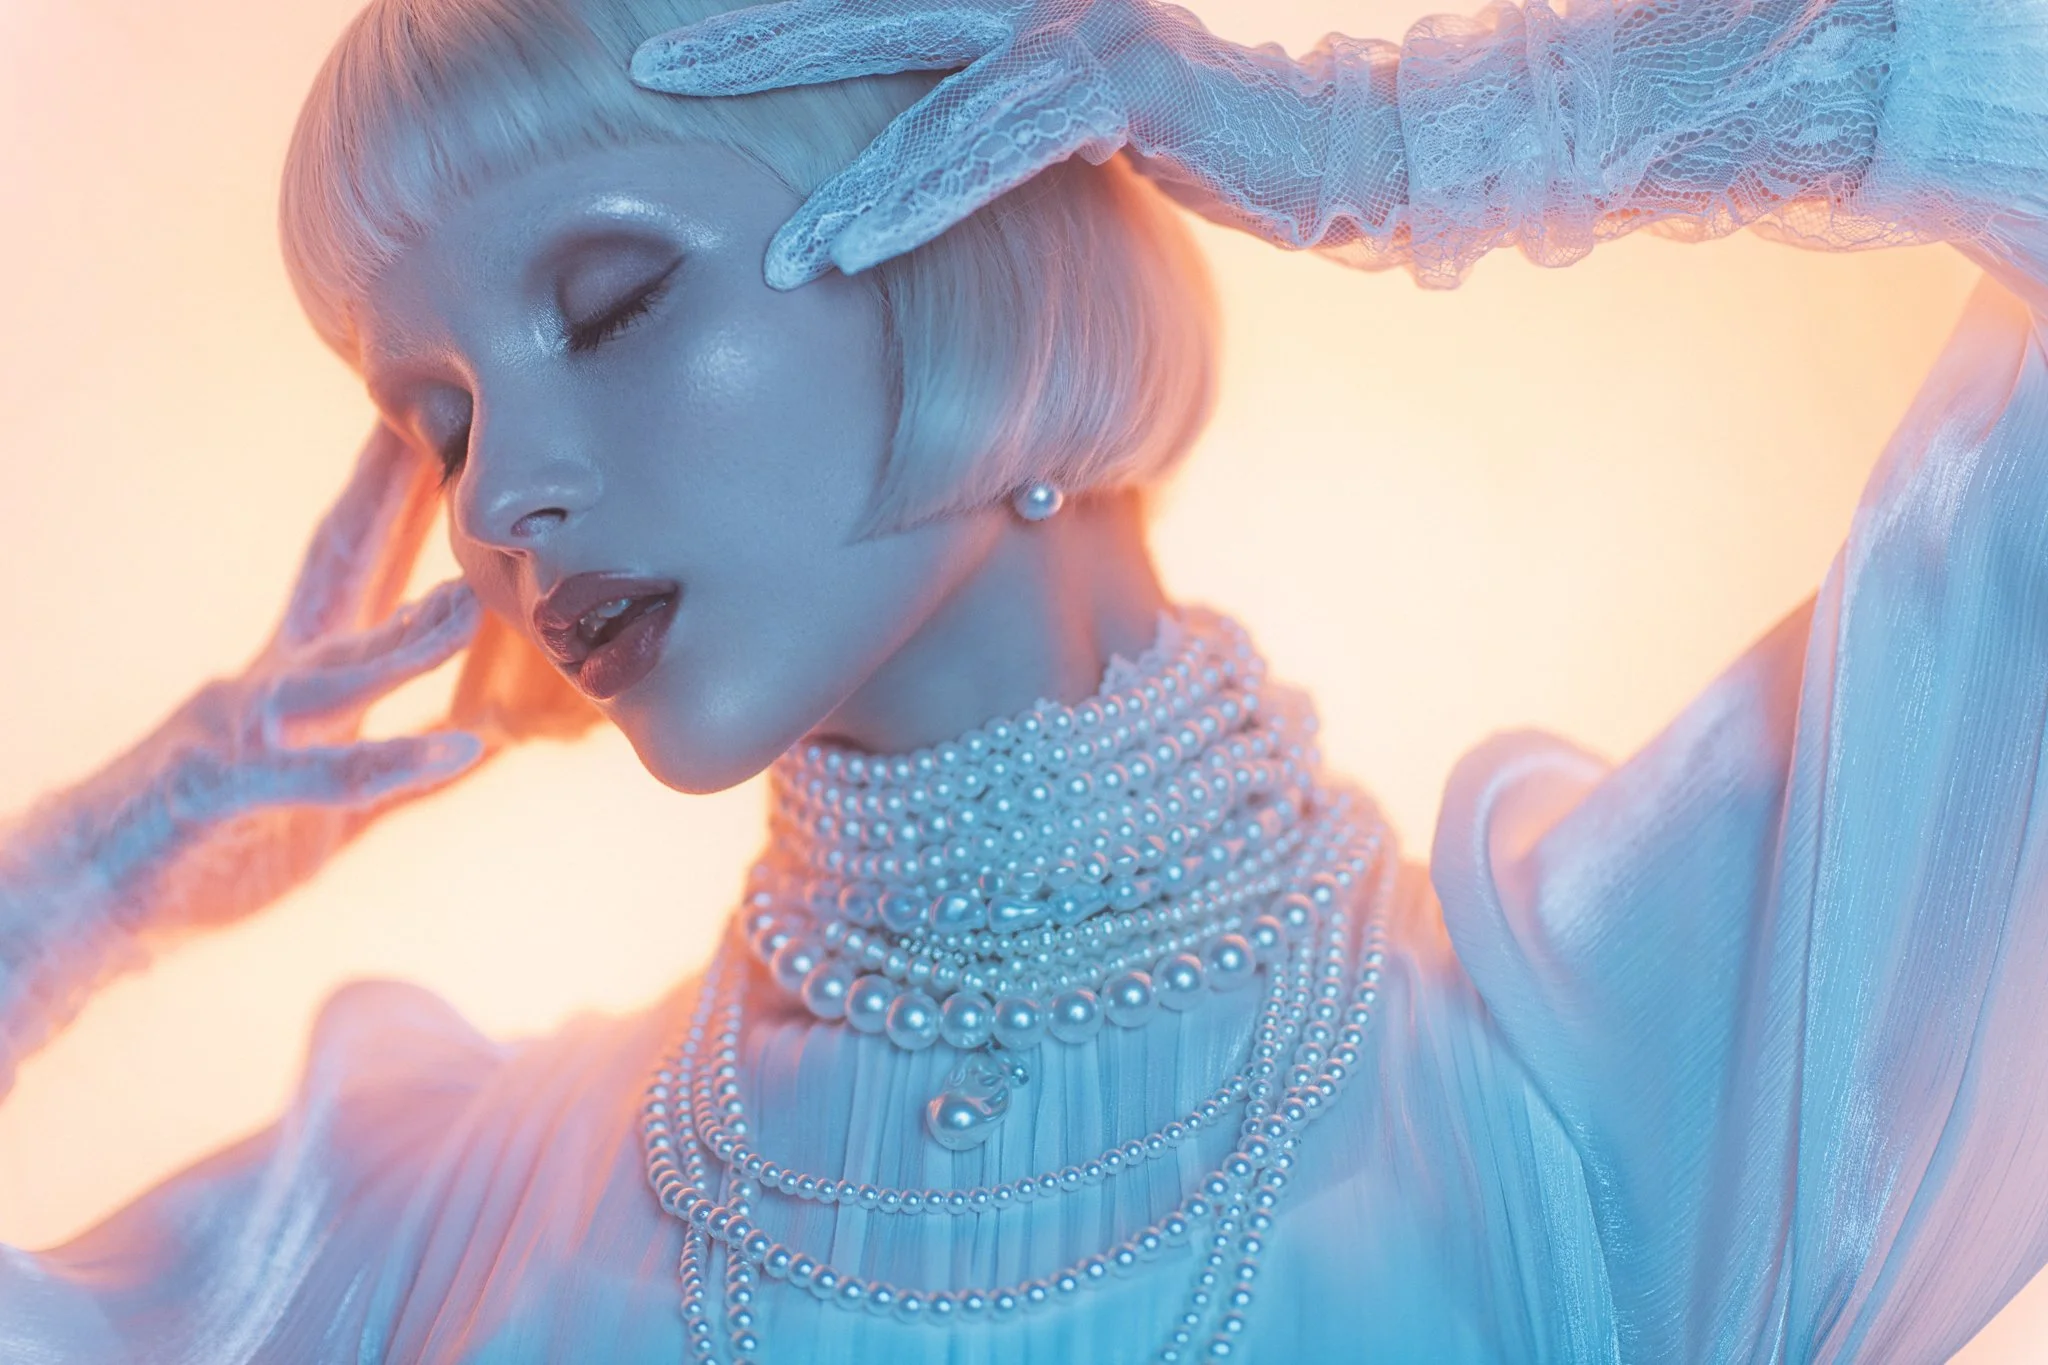
Start by placing a large softbox behind the model. I’m using a Profoto 4’ Octa Silver here. It’s this light behind the model that we want to shine the very warm light, so set the Kelvin to a low value. I’m using the L600D’s base 2000K here.
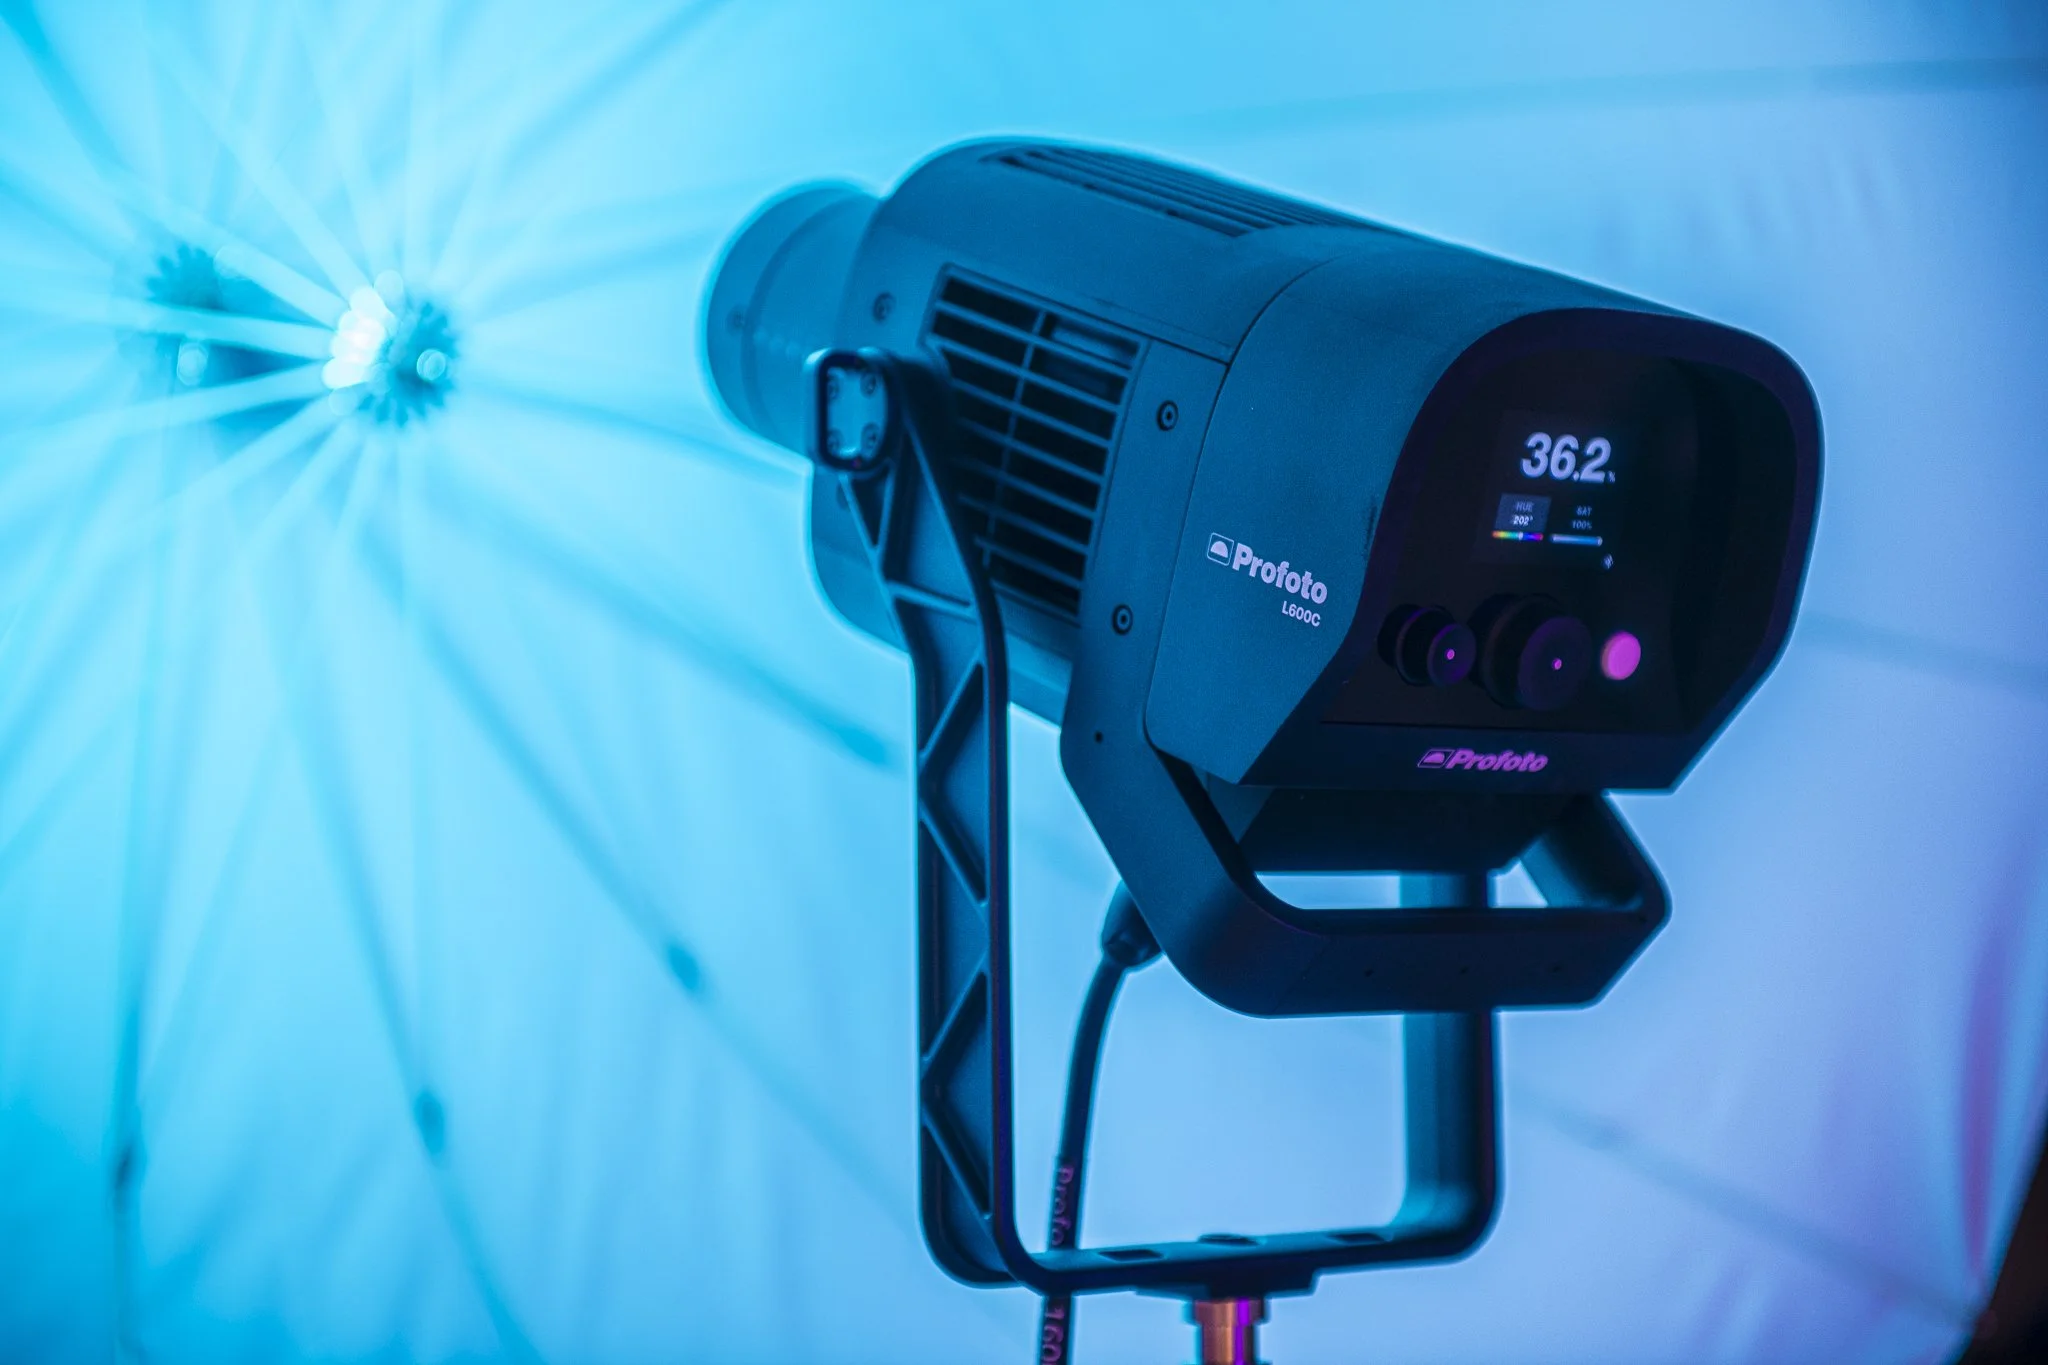
Next, you want to place another large light behind yourself. I’m using the Profoto Umbrella Deep White XL here. I will add that this giant umbrella produces a truly gorgeous wraparound light, and it’s immediately obvious as soon as you open it up and turn it on. It’s this light that you want to set at a contrasting Kelvin colour. For me, I wanted to test the extremes of Kelvin these new heads could offer, so I set this L600C to its maximum Kelvin of 15000K in stark contrast to the other light at 2000K.
That really is it. You’re almost done. All you need to do now is set your camera up and start shooting. Of course, the trick here is to set your camera to a Kelvin (white balance) value that you’re happy with. I’d suggest starting with a value somewhere in the middle. That way, the Kelvin from behind the model will shine through as orange, and the colour and the Kelvin from behind you will shine through as a slightly cooler blue colour.
Continuous & Flash: When I was shooting this set, I had both the L600C heads set to flash mode. They were in continuous mode the whole time, so I could see what each light was doing and focus the camera, but when the shutter was released, the L600Cs would flash. I shot like this primarily to make life a little easier on the model. Directly in front of her was a huge umbrella, and had the full brightness of that light been bearing down on her the whole time, it would have gotten pretty uncomfortable, pretty quickly. By setting the L600C continuous light to low and the flash to high, I can capture a bright image without annoying the model in the process.
Second Setup - Max Colour Set
Camera Settings
Camera - Nikon D850
Lens - 85mm 1.4
Shutter Speed - 1/125th
Aperture - f1.4
ISO - 200
Kelvin - 5300K
Focal Length - 85mm
Kit Used
Profoto L600C x3
Profoto B20
Profoto Umbrella Deep White XL
Profoto Umbrella Deep White L
Profoto Spot Small
The Breakdown
Now, I know it seems as though I’ve cranked up the difficulty with this next one, but remember, although we now have four lights on set, every light has its job, and as long as you know what each of them should be doing, you’ll be fine. We’ll start with our key, which in this case is the big blue light to my right.
The large blue light is the L600C with the Profoto Umbrella Deep White XL attached. This light will flood most of the set, but it’s angled to limit the light-spill on the background.
Next, I’ll place another L600C behind the model and to my left. This light has the Profoto Umbrella Deep White L and is set to a bright pink colour.
The third L600C light on our model is positioned off to camera right, set to a rich orange colour and has the Profoto Spot Small attached. The reason I’m using the Spot Small here is due to the unique way in which it modifies the light. This spot produces a very hard, very controllable light that can be positioned exactly where you want it on set without fear of the light spilling anywhere apart from where you point it.
Lastly, I’m using the Profoto B20 behind the model to light the background. This is actually a Profoto flash, but it’s very small and is far easier to hide behind the model than the larger L600C. Sadly, I didn’t have the convenience of simply choosing the perfect orange colour from a sea of options as I would on the L600C, but instead I had to strap the orange gel I had to the B20 with a couple of strips of gaffer's tape. It’s worth noting here just how easy it is to work seamlessly with both LED lights and strobe units in the same shot, too.
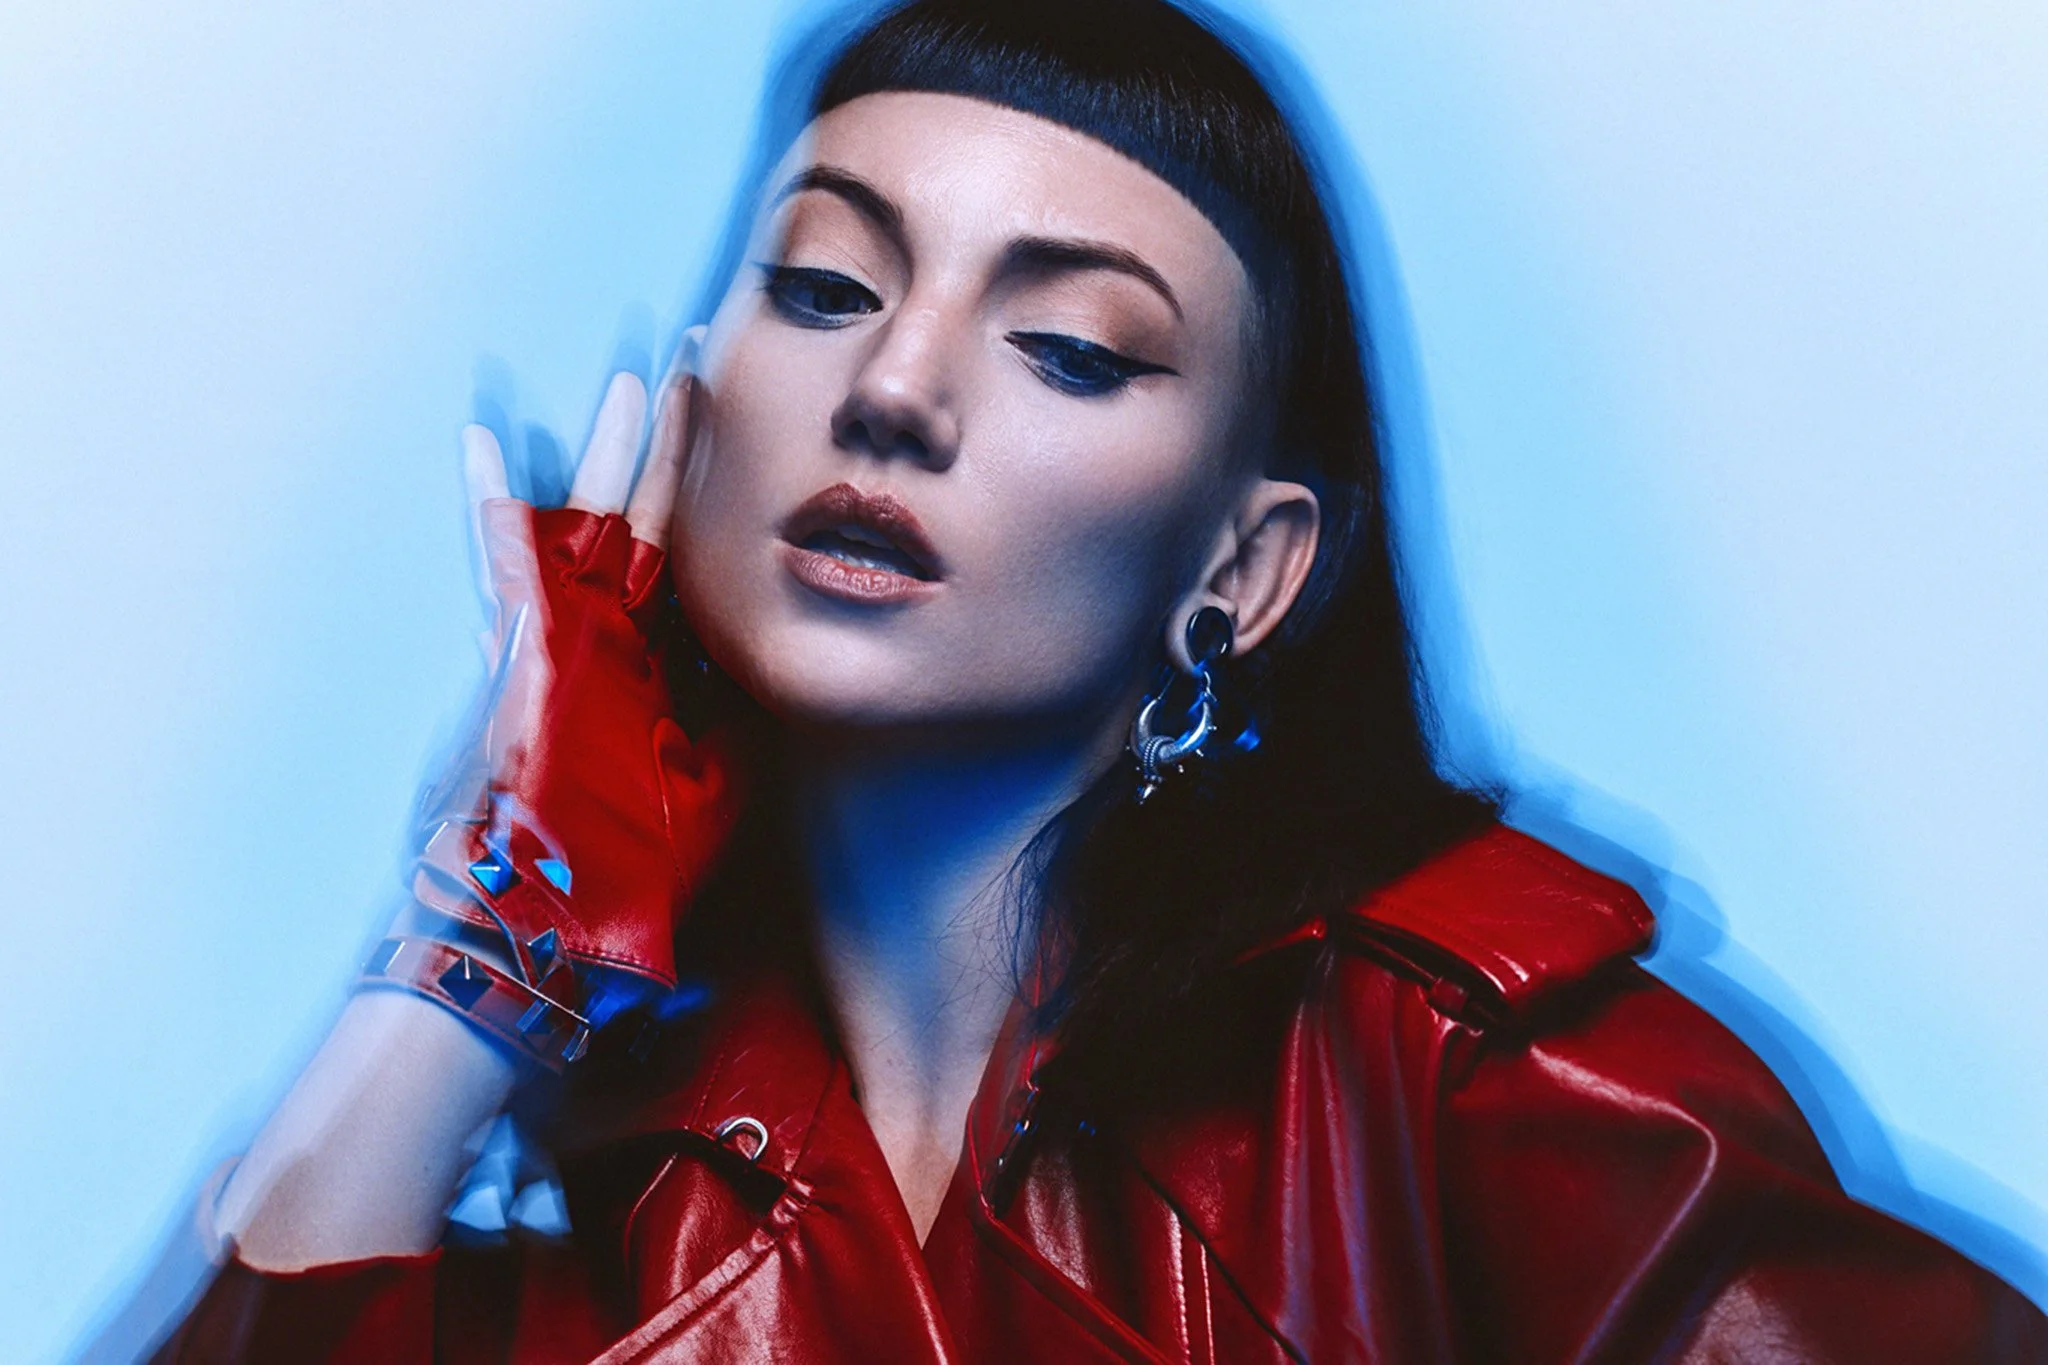
Third Setup - LEDs that Flash
Camera Settings
Camera - Nikon D850
Lens - 85mm 1.4
Shutter Speed - 1/2 Second
Aperture - f4.5
ISO - 30
Kelvin - 4500K
Focal Length - 85mm
Kit Used
Profoto L600C x2
Profoto B20
Profoto Umbrella Deep White XL
Profoto Softlight Reflector White
Medium (6ft x 6ft) Scrim
The Breakdown
It’s here that things start to get a little more creative: in this set, we’re going to mix flash with continuous light in the form of a long exposure image. You may have noticed in the camera settings above that my camera’s shutter speed is set to 1/2 second. It’s during this half-second that the creativity happens, as it's here that we can start creating unique-looking imagery.
To start, let’s get the key light in place. For this shot, that’s the Profoto B20 flash with the Profoto Softlight Reflector White attached. This is positioned above the model’s head and angled down, leaving enough room for me to shoot underneath it. Although it’s obvious that this B20 will be flashing, it’s worth noting that I didn't have the modelling light on for this unit.
Next, we can add the large light behind me in the form of the L600C with the Profoto Umbrella Deep White XL attached. This light is set to a cool blue colour, and the LED light is also set to flash mode. It’s worth noting that I also had this light on continuously. It was set extremely low so as not to affect the image too much, but it did help a lot with the whole ‘focusing in the dark’ issue.
Lastly, we can add our third and final light, positioned behind the model and pointed back toward the white background. I’ve also placed a white scrim between the model and the light to help soften any hotspoting that can occur when using lights close to the background like this. Note that this third light is set to a cool Kelvin value and is set to continuous mode only.
So, to clarify what’s going on in the shot. The light above the model is flashing as soon as I press the shutter. This light captures a frozen image of the model in the frame. Behind me, the big blue umbrella with the L600C is also flashing, and that is also capturing a clean, frozen image of the model. Lastly, the light behind the model is always on, so when I press the shutter and the camera captures light for that 1/2 second, it’s seeing that bright white background behind the model and because I’m not shooting on a tripod, any movement I create with the camera during that time, is displayed as that blue ghosting effect around the edge of the model.
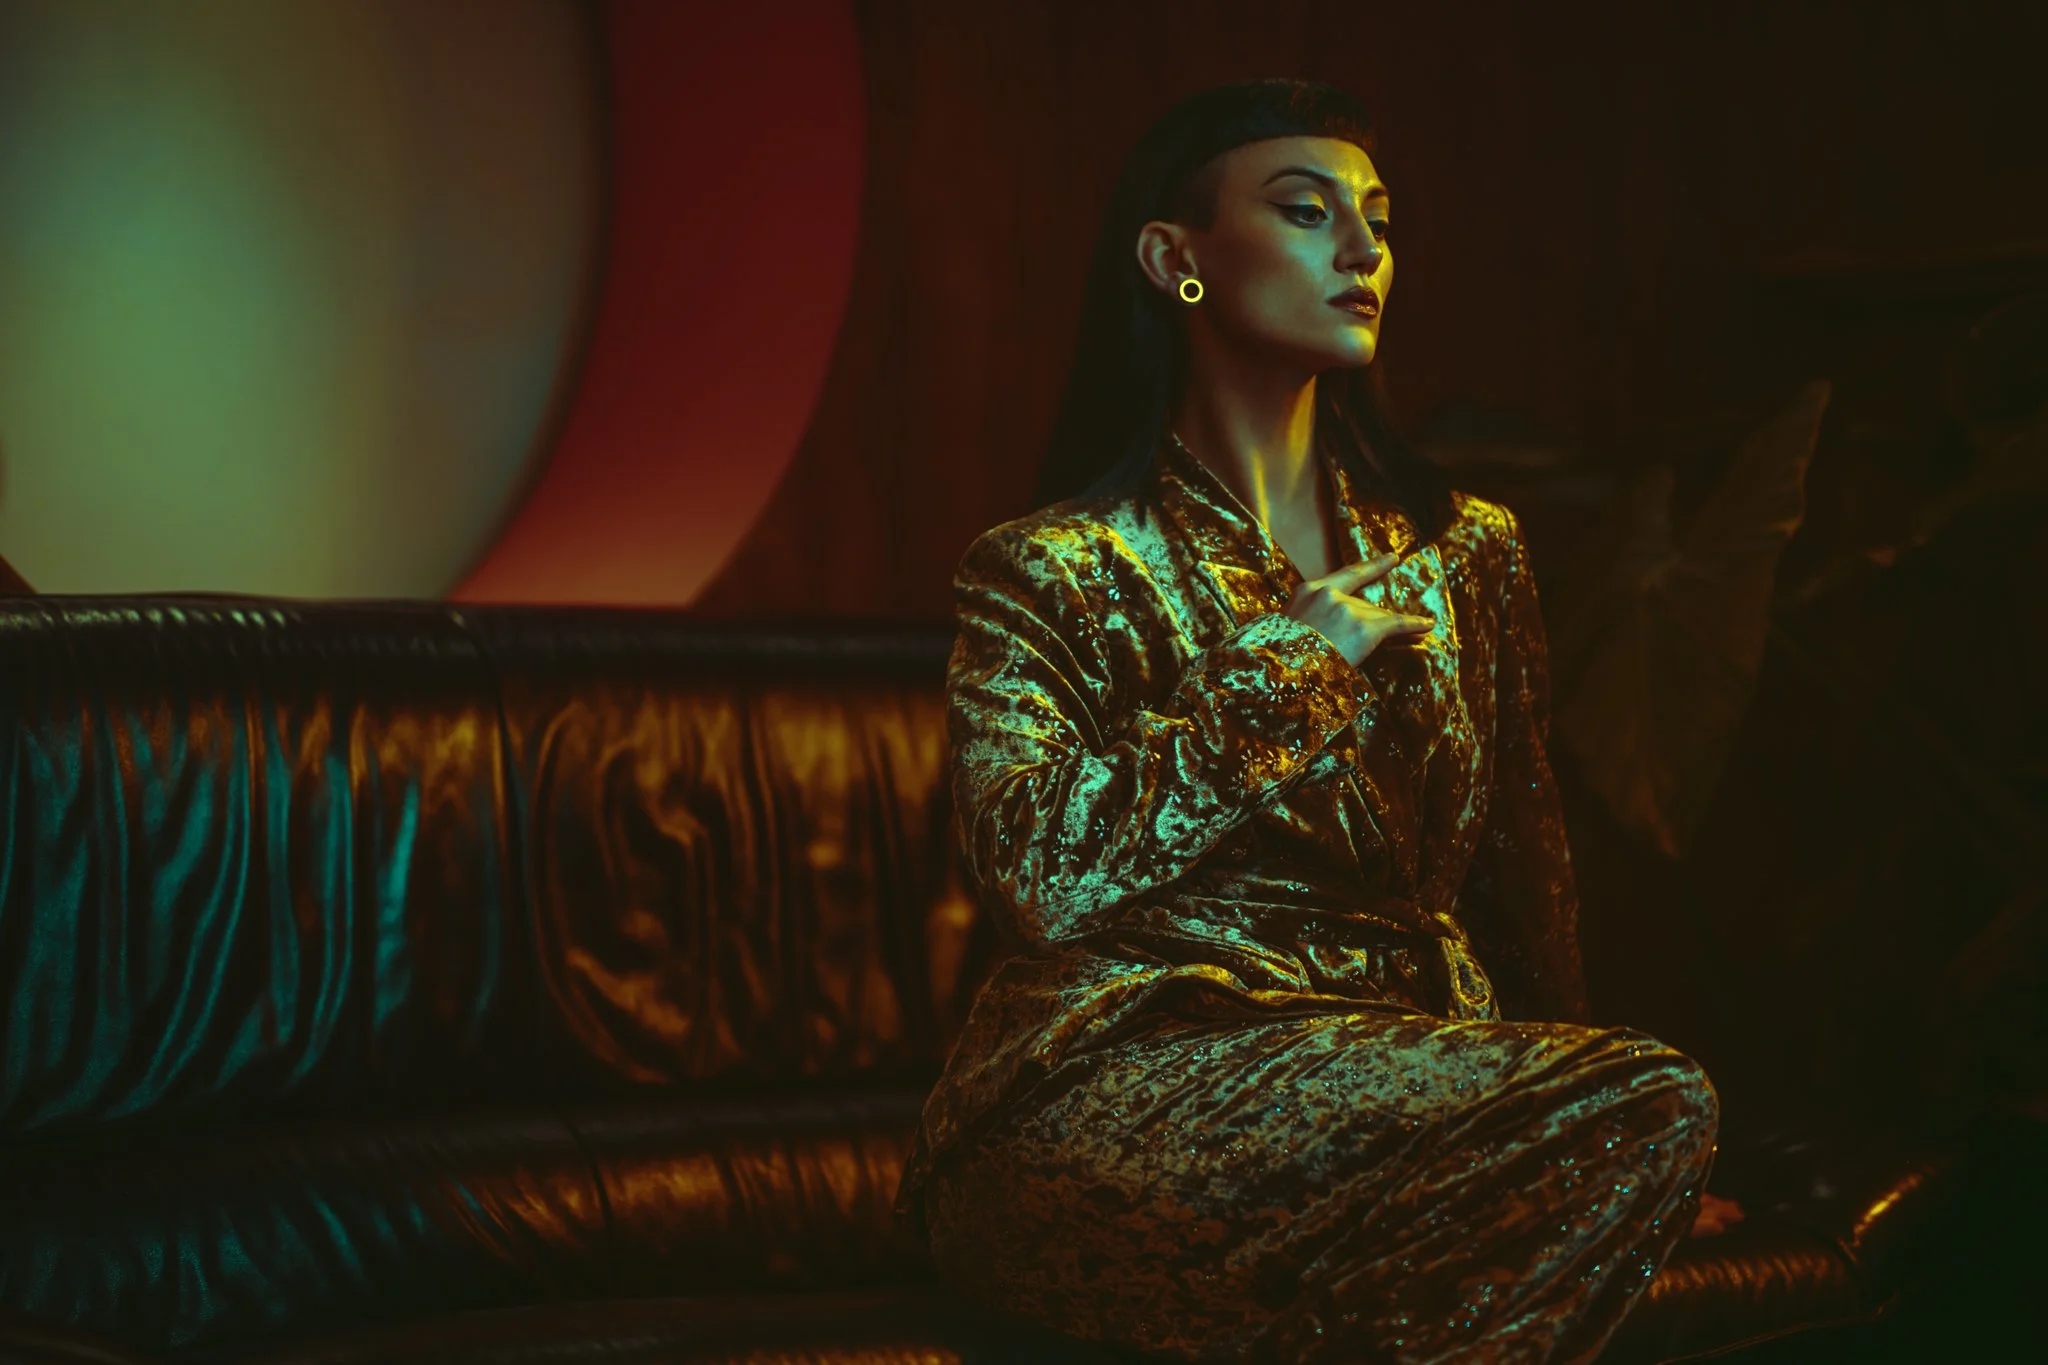
Fourth Setup - Environmental Lighting - Cinematic Set
Camera Settings
Camera - Nikon D850
Lens - 85mm 1.4
Shutter Speed - 1/125th
Aperture - f1.4
ISO - 125
Kelvin - 4000K
Focal Length - 85mm
Kit Used
Profoto L600C x3
Profoto Umbrella Deep White XL
Profoto Softlight Reflector White
Profoto Zoom Reflector White
The Breakdown
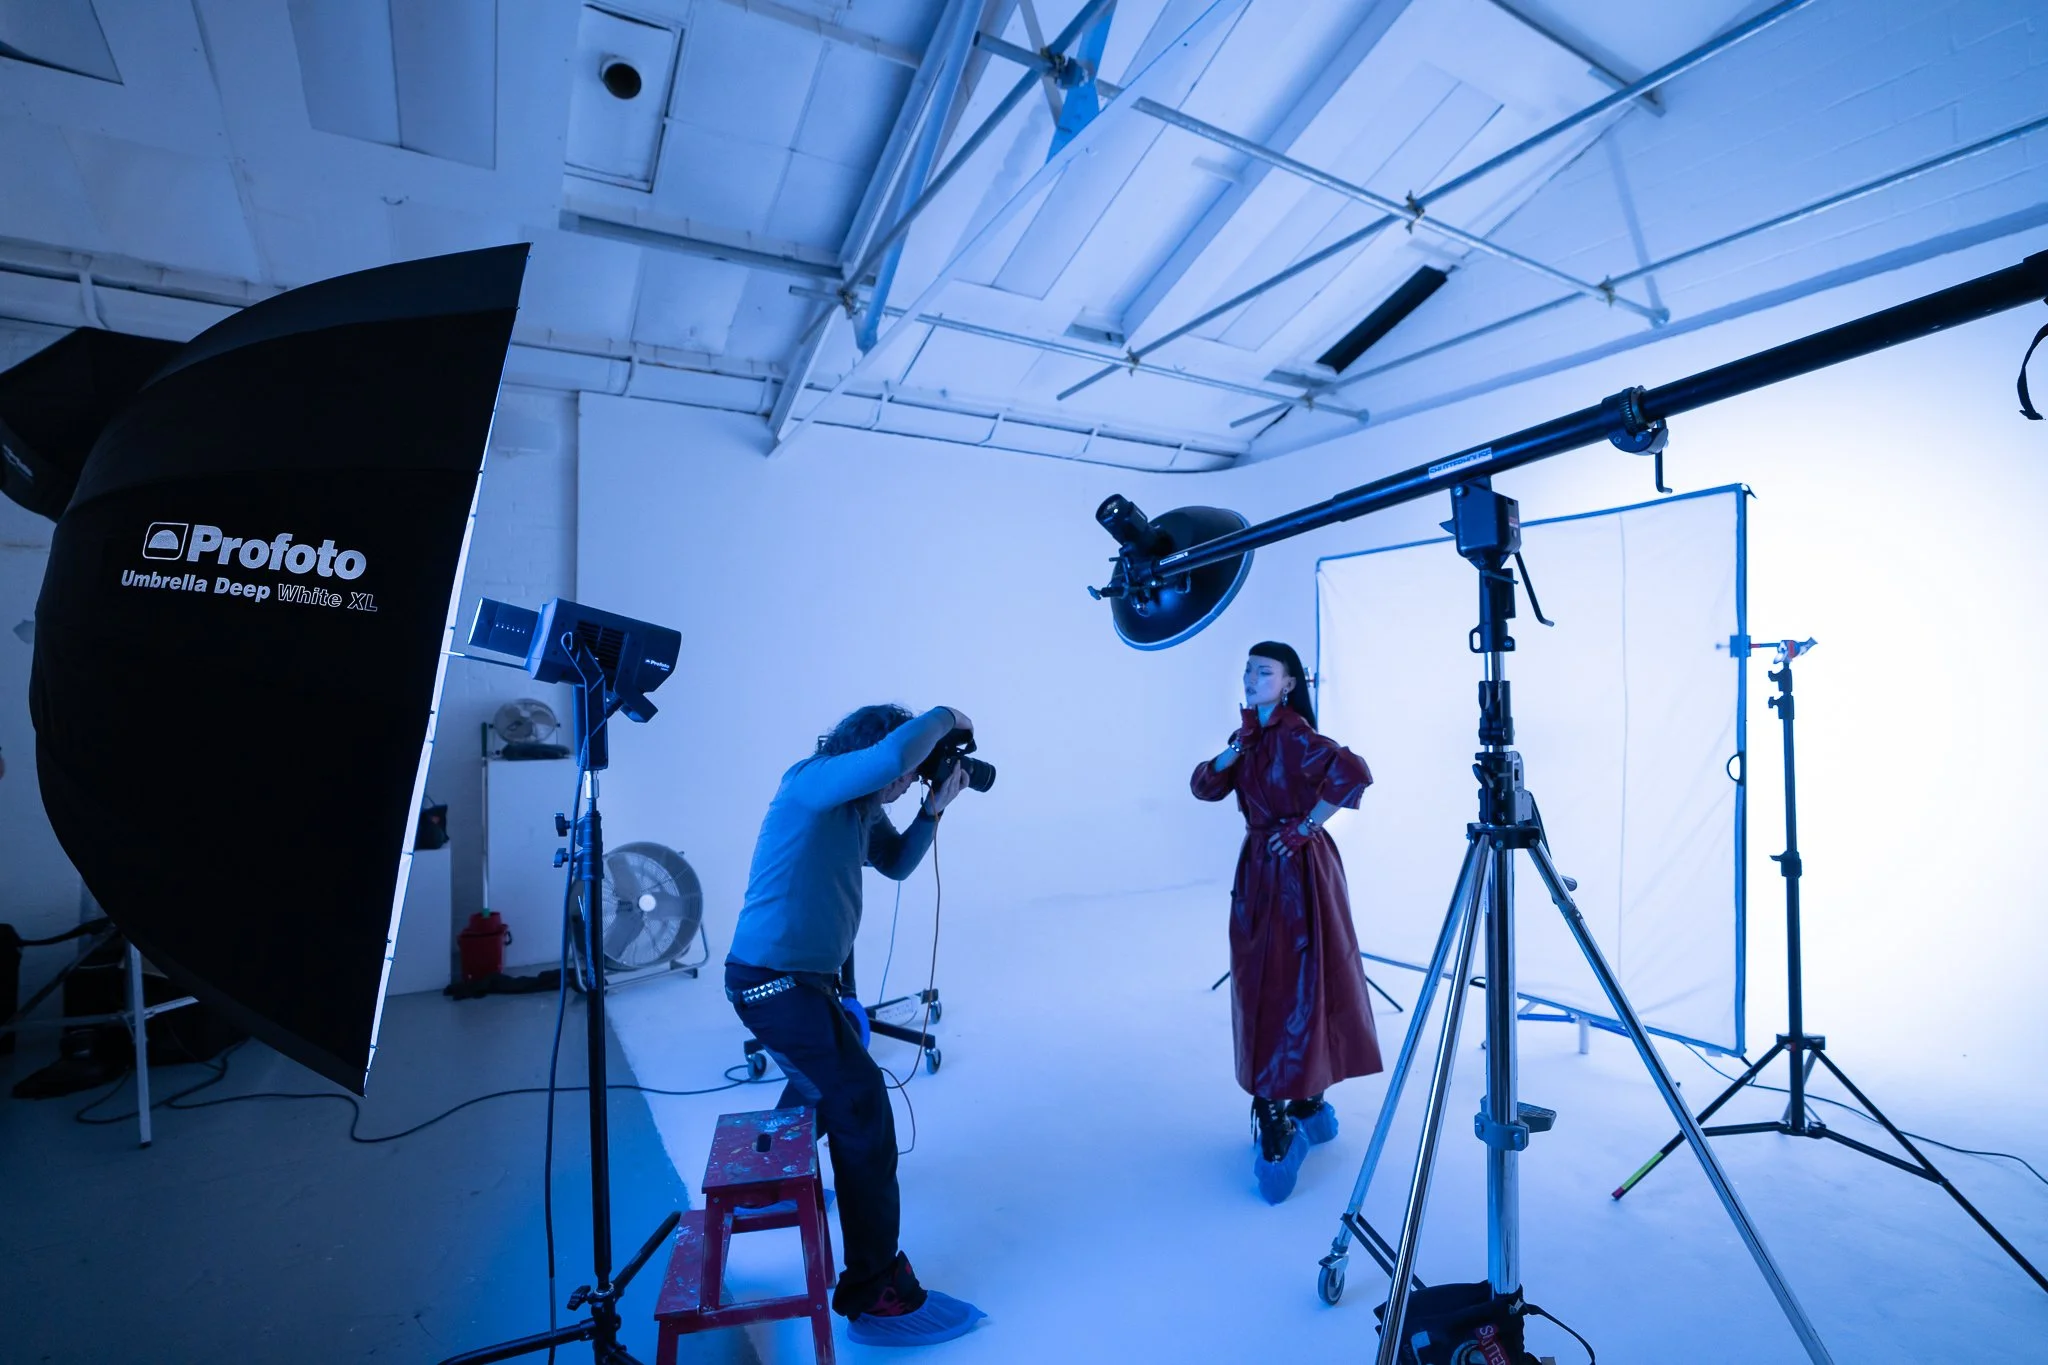
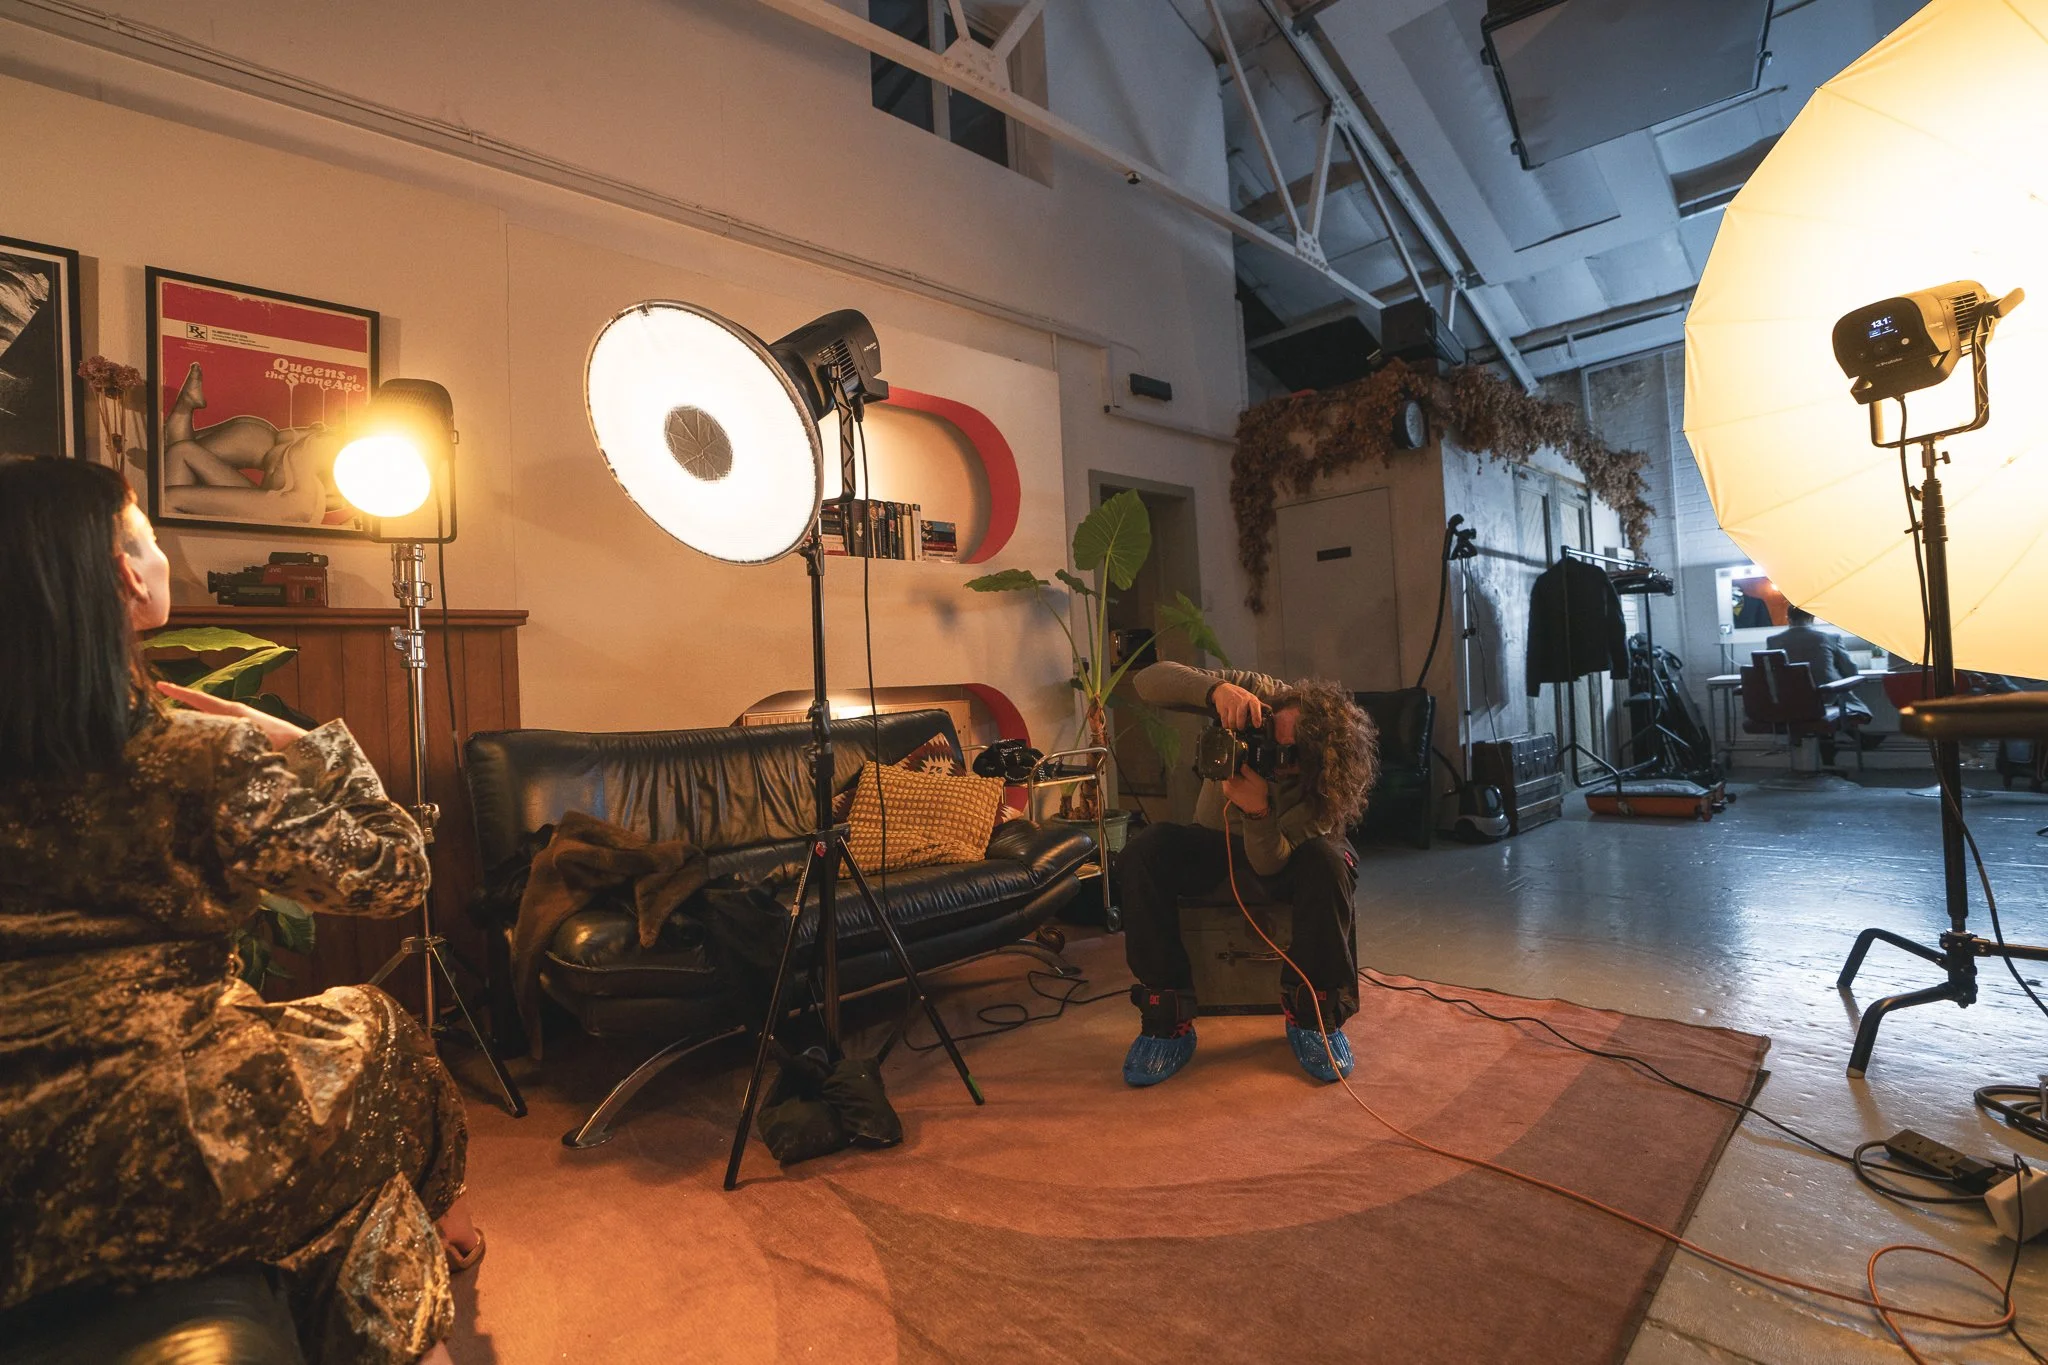
The whole premise of this setup was to incorporate the scene and its lighting into the final image. Most studio lighting starts with a blank black canvas, and you add lights from there. With environmental lighting, you often want to add to what’s already there. One of the biggest problems with this is that you rarely have any control over the lights you’re working with. Take this set, for example, I have two globe-style lights above and behind the model. I can’t control the power of those lights in any way, nor can I control their colour. This setup was about seeing how I could work in conjunction with the environment's lights, not simply overpower them and wash them out.
Firstly, you want to work out the exposure values and colours you're working with on set. So, before I turned on any of my lights, I took a few frames of the scene. From here, I was able to start adding my own lights. To begin with, I brought in my L600C with the Profoto Softlight Reflector White attached. This would act as my keylight on the model and was positioned to my right and angled down. As with a lot of my work, I’m always looking for ways to introduce colour, and you may have noticed my Kelvin is already fairly cool, which enables me to show some colour contrast from the lights. For example, my key-light was set very cool, and you can see that on the model's skin.
The second L600C light was set to camera right, with a simple Profoto Zoom Reflector White attached. This modifier allows for a large spill of light quite quickly, but due to its small size, it also produces a very hard light. This was set to a far warmer Kelvin, and you can see that very rich yellow colour flooding the scene from camera right.
Lastly, I added the final L600C with the big Profoto Umbrella Deep White XL attached. This was set to a low power so as not to dominate the scene, but I did want it to eliminate any heavy shadow areas that might be distracting. Again, this was set to a warmer Kelvin value.
Closing Comments
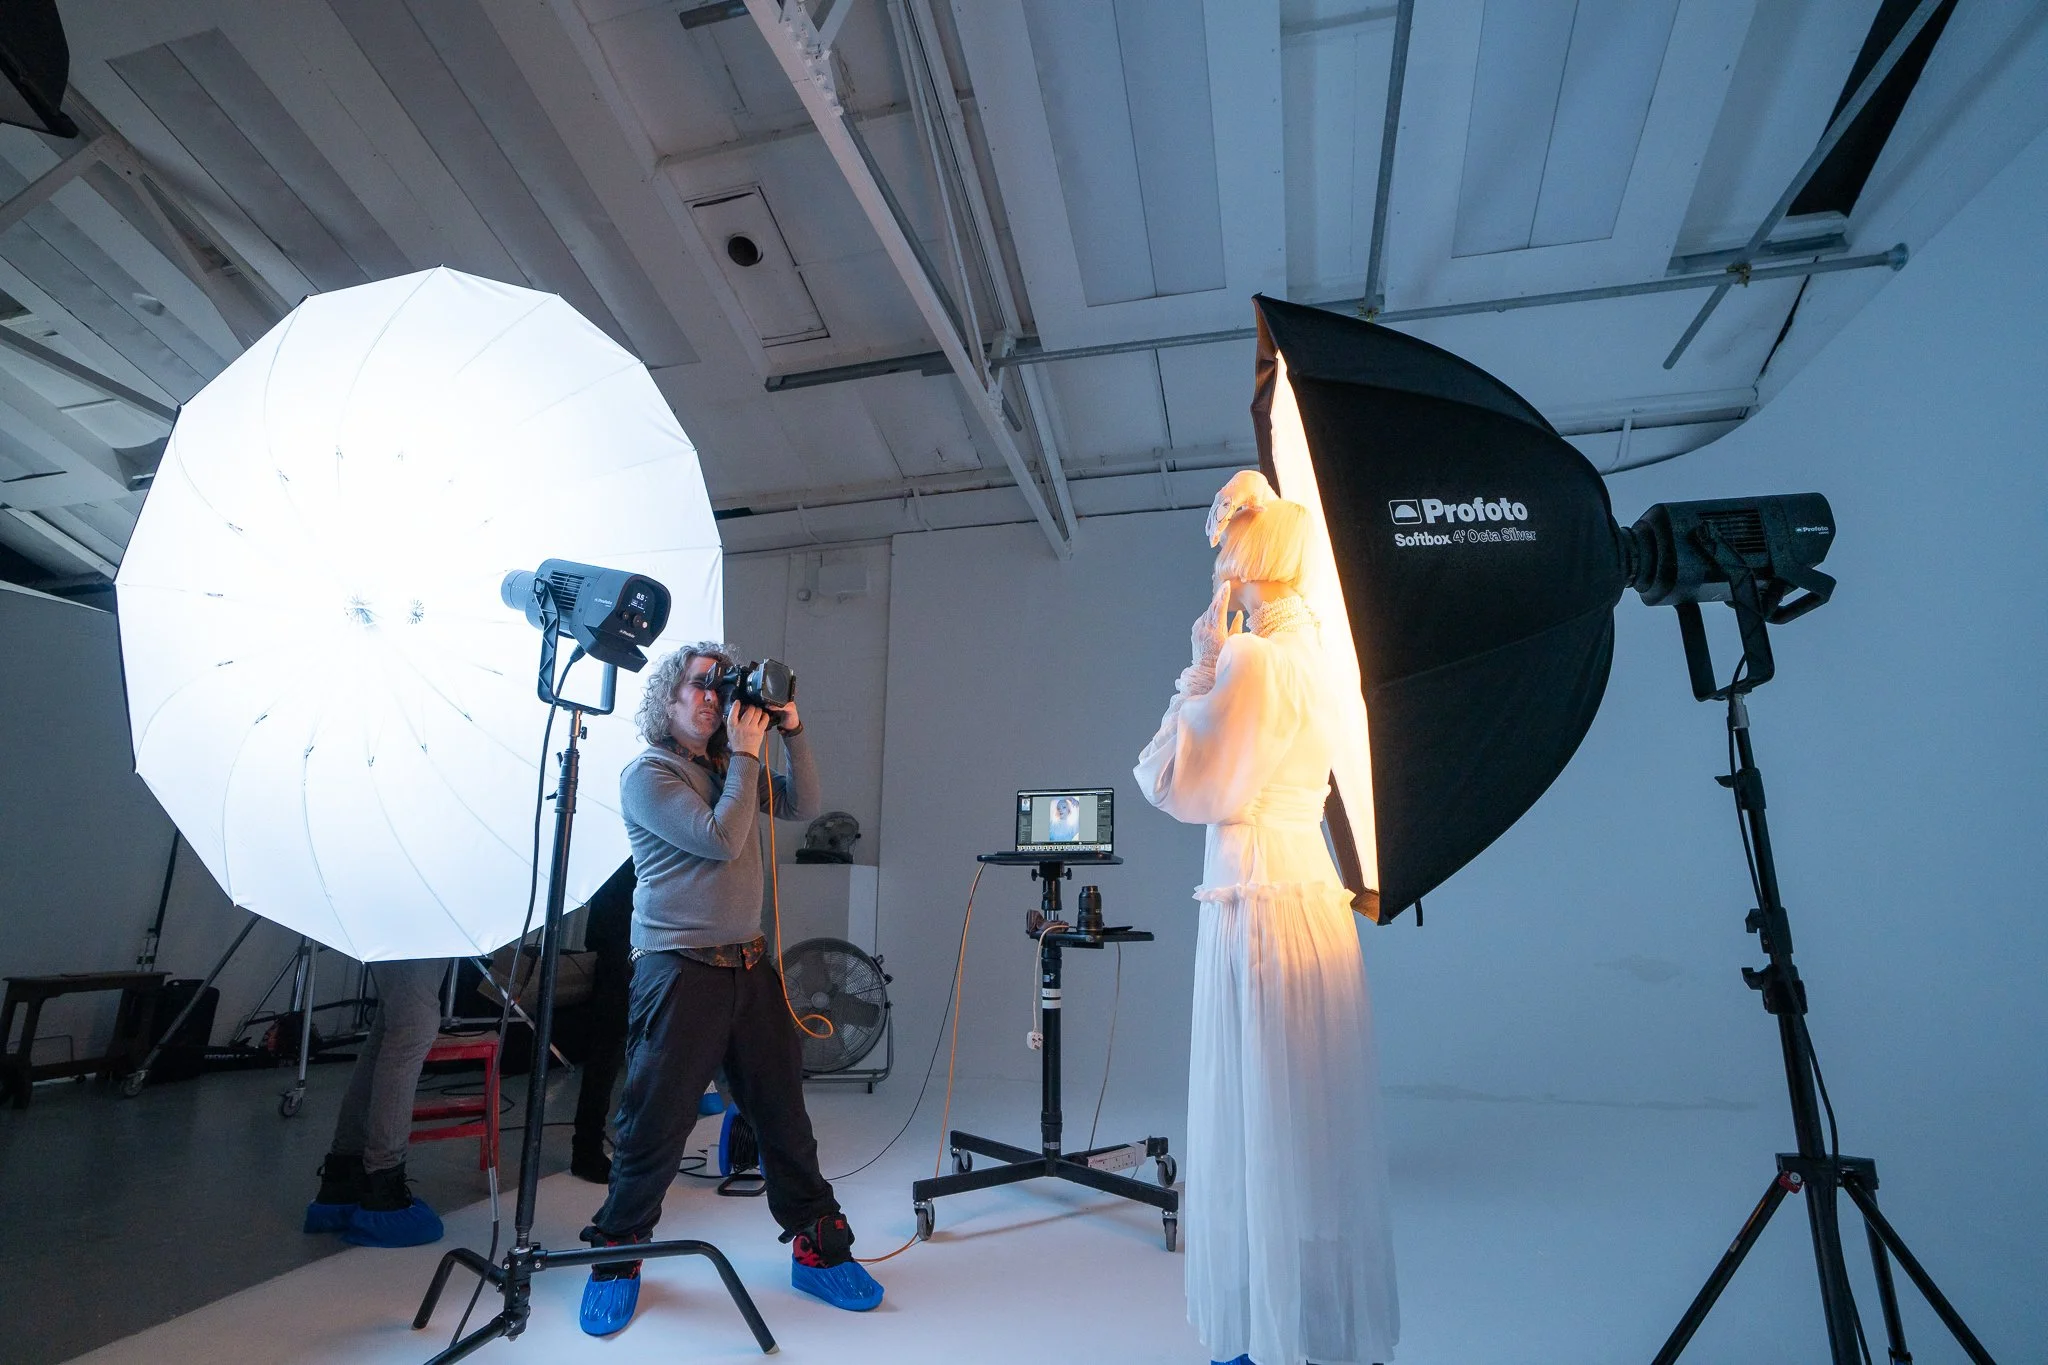
It should be very apparent that these four setups are all extremely different from one another. I shot from clean Kelvin looks to full-colour looks; I mixed flash and continuous for long-exposure shots; and, lastly, I quickly set up an environmental scene at the back of the studio. It’s worth noting that I shot all four of these setups alongside a film crew that was filming the whole thing. And they weren’t just a fly-on-the-wall documentary crew either; every setup had to be broken down and explained through talking-to-the-camera segments, and plenty of B-roll shots were captured as well. We did all this in a single day.
This isn’t me trying to flex; I just want to highlight how quick and easy these LED heads are to work with. I’m not struggling with huge LED lights and their accompanying power-bricks and control boxes. I’m not struggling to gaffer-tape a CTO gel to my softbox. I’m not struggling to set up multiple lights for both flash and continuous lighitng. We got all of this done in a day, and much of that is thanks to how easy and convenient these new L600 LED heads are.
The new L600D and L600C are a best-of-both solution to so many of my shoots. They have the ease of use that millions of colours and a vast Kelvin range offer over faffing with gels, they are very quick and easy to use, thanks to their single monobloc design that many strobists like me are used to, their 600w of power is more than enough power for most studio shoots and I think I was only using them at between 30% and 50% power for many of the shots on the day.
Plus, these new LED heads can flash, and they can do so with all the conveniences and benefits that LEDs offer, like all the colours and Kelvin settings, and, more importantly, they can do all this whilst accepting any of the Profoto light-shaping tools. Meaning it's just as easy to shoot with all these lighting benefits with softlight, like a softbox, or a hardlight, like a spot. This convenience, flexibility, and power are an industry first, though I can see it quickly becoming an industry standard for how comprehensive these new lights are.
To learn more about the new Profoto L600C & L600D, head over to the Profoto website.
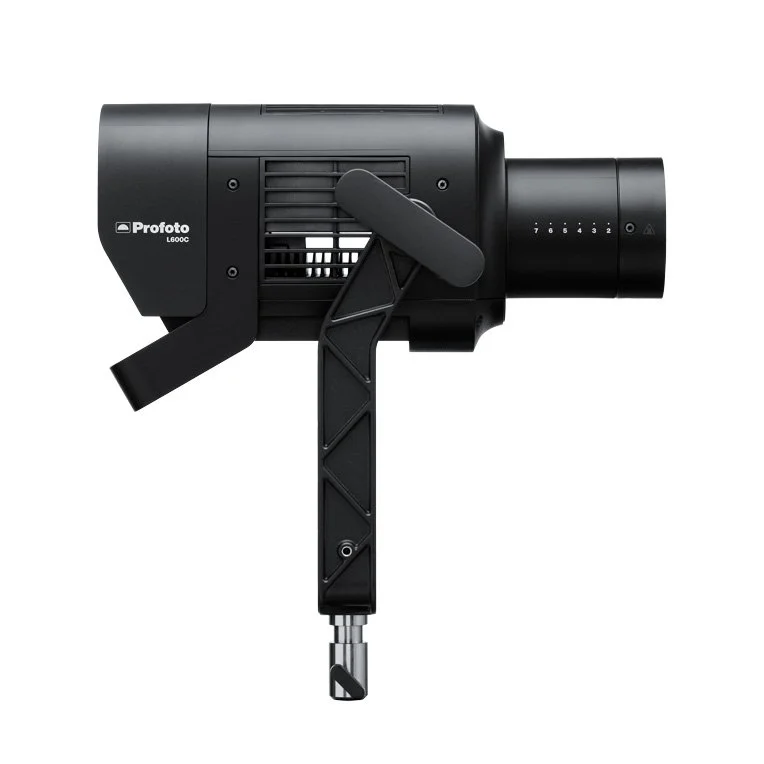
The L600C - Full Colour 600w LED Light
>> Profoto Website Direct Link
The L600D - Daylight 600w LED Light
I've always wanted my photography education on here to be free, so although there is no paywall to any of my -Technique Tuesdays-, any and all support is greatly appreciated. ❤️
PLUS: Donate any amount and I’ll send you a link to the hi-res print version of my studio lighting book.
||
PLUS: Donate any amount and I’ll send you a link to the hi-res print version of my studio lighting book. ||

JHP Livestreams…
I livestream every other Tuesday night via YouTube and there I answer your questions, critique your shots, take community images into Photoshop to work on them and discuss all manner of lighting tips and techniques. I look forward to seeing you and your work there real soon. Jake Hicks Photography - YouTube
