
I've always wanted my photography education on here to be free, so although there is no paywall to any of my -Technique Tuesdays-, any and all support is greatly appreciated. ❤️
PLUS: Donate any amount and I’ll send you a link to the hi-res print version of my studio lighting book.
||
PLUS: Donate any amount and I’ll send you a link to the hi-res print version of my studio lighting book. ||
We can dress up my job and photographic style all we want, but ultimately, all of it has simply been about ‘playing with light’. That may sound cliché, sure, but when you’re trying to create something, by very definition, you’re trying to do something new. And to do something new, you start with what you already know and then play outside the lines a little.
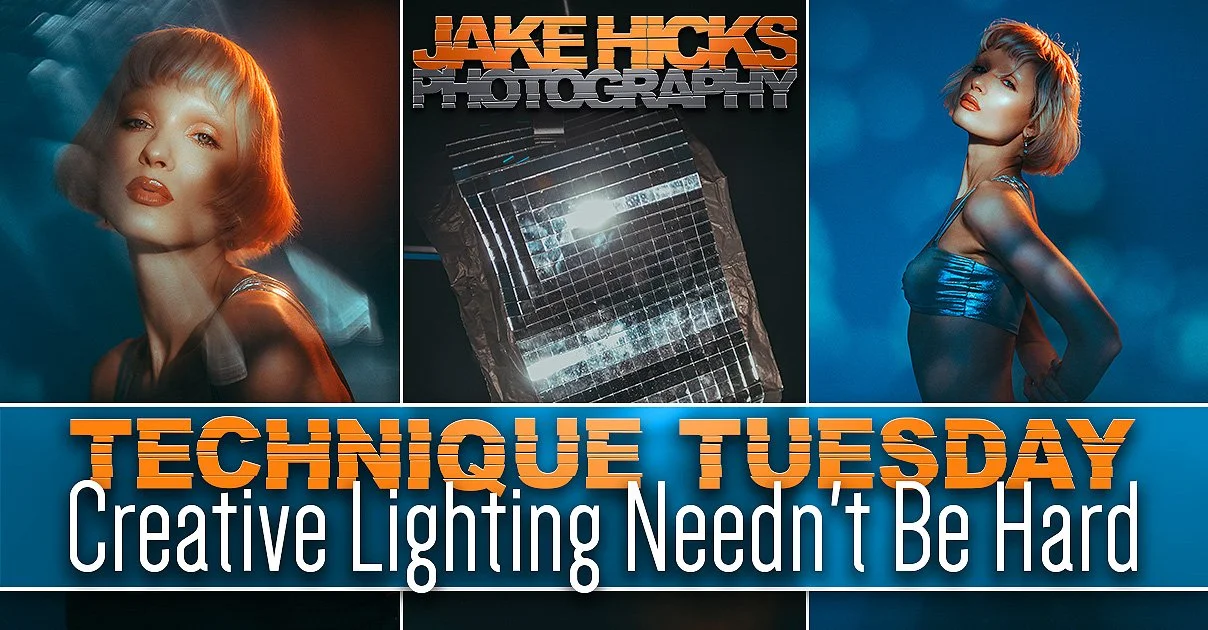
This may look complicated, but it really isn't . Plus, in this setup, we’re getting creative with a very inexpensive tool for a change!
My new spiritualisation book foreword aside, my point still stands. To be creative, you have to be prepared to get a little messy, make some mistakes, build on them and then hope that, over time, a usable idea emerges. So many of my ideas start as incredibly rough sketches in a notebook, a phone snap of some light on concrete or even a random purchase of something interesting that may materialise into something one day. Believe me, my office is filled with crap that I’ve bought over the years that I ‘think/hope’ has the potential to inspire an idea at some point, and this particular setup is from one such random purchase.
The Prep
I’ll jump straight into it this week, as I know our collective attention spans are melting faster than a 99 on Brighton Beach in July (I’ve definitely aged myself there. I’m sure an ice cream on Brighton Beach is probably closer to 9.99 these days!)
The setup is simple in principle, though there are several things going on here that we need to be mindful of.
The Hero
The hero of this setup is not actually a light, or even anything particularly fancy; instead, it's a humble sheet of mirrorball squares. Essentially, this is a sheet of adhesive tiny mosaic square mirrors. I’ve had a bunch of these tucked in my shelves for years and always wanted to do something with them. Finally, their time has come, and with a little extra help from some Cinefoil to give them some strength, they were ready to shoot with.
This is not a specialist item, and you can easily find these in a variety of stores or arts and crafts shops. Of course, you can also find them very easily via your local online megacorp. Just search ‘mosaic mirror sheet’, and your friendly all-consuming corporate giant will gladly help you out.
This small sheet of mosaic mirror tiles is super cheap, plus it can create some beautiful lighting effects if used correctly.
The Cinefoil
I just mentioned I used some Cinefoil with my mirror-sheet, and that’s simply to give the sheet a little extra rigidity. The effect we’re after is simply light bounced into these squares, but the true power of the effect comes to life when the mosaic mirror-squares are misaligned and slightly warped. This is what casts that beautiful dappled light on the background, but I need the Cinefoil to hold the squares in that slightly warped shape. Thankfully, all the mirror sheets I’ve seen come with self-adhesive backs, so it was very easy to affix them to the Cinefoil.
If you’ve never heard of Cinefoil before, it’s essentially just matte black, extra-thick tinfoil. We typically use it to shape and sculpt stray light or simply to flag off unwanted light. I’m just using it as a backing to the mirror-sheet here, as I had some, and I thought it would hold the mirrors roughly in place. It’s really not quite strong enough, but it did the job.
Cinefoil can be found at any number of camera stores, and now it can be found almost anywhere online via the usual places too. Just search Cinefoil, and you’ll get the results you’re after. Be aware that Cinefoil is a brand name, so the results will likely be tailored to their products.
Cinefoil can be a little pricey, but if you have someone to help you, you don’t even need to use it.
Note that you don’t need Cinefoil if you have someone helping you. If someone is free to hold and manipulate the mirror-sheet, you’ll actually get far more varied and interesting results. If you're solo, some way to hold the squares in place, either via Cinefoil or not, will be key.
Points to Keep in Mind
The Key-Light
The key-light is not actually pointed at our subject in this setup; instead, the key will fire across the studio between the model and the photographer, hitting the mirror-sheet on the opposite side. This obviously seems a little crazy on paper, but once you set it up, it will certainly make more sense. And take a look at the lighting diagram below for more context.
The Colours
The colours in this setup are all achieved via Kelvin shifts. I’ll explain this as we go, but you can obviously achieve this setup with or without colours, and you could even make it work with actual coloured gels. For me, I preferred a more delicate, natural colour palette to match what I perceive as a dappled light effect, similar to the light passing through tree leaves.
The Setup
As always, I’ll share the final images below, but first, let's go over the setup and what's involved.
Click to enlarge: Cut out & keep
Click to enlarge: As you can see, not too bad in terms of scale and if you’re only shooting 3/4 length, this is a comfortable shoot in most spaces.
Click to enlarge: The large umbrella on the L600C
Click to enlarge: The ML100R as the hair light behind the model
Click to enlarge: Here is the mirror-sheet affixed to the Cinefoil and then mounted on my stand
Click to enlarge: I know, I know. There are 101 ways to mount this to a stand, and the way that I chose is clearly overkill... by a LOT!
Click to enlarge: The reverse of the mirror-sheet
Click to enlarge: Here you can see the gap between the light and mirrors
Camera Settings
Camera - Fujifilm GFX 50SII
Lens - Fuji GF 63mm f2.8
Shutter Speed - 1/125th
Aperture - f2.8
ISO - 200
Kelvin - 4500K
Focal Length - 63mm (~50mm 35mm equivalent)
TL;DR/ADHD/Artist Setup Explanation
Set up white backdrop behind model
Position model a few feet in front of it
Place hair light behind and set to a warm Kelvin ~2000K
Place large umbrella behind you and set to a cool Kelvin ~7500
Place strong directional light to the side and aim it at mirror-sheet
Affix mirror-sheet to stand and angle the bounced light onto model
Kit Used
Godox ML100R LED Head + Lens Reflector
Nanlite FC-120C LED Head
Nanlite FM Mount Projection Attachment
Profoto LC600C LED Head
Profoto Umbrella Deep White XL
Stands and clamps
Mirror-Sheet
Final Shots
Click on any of the shots below to fill the screen
I’ve shared a bunch of the final shots here, but I’ve shared others along with more context on my Instagram. So if you’d like to check them out….
Jake Hicks Photography Instagram: https://www.instagram.com/jakehicksphotography/
Featured model: Saida https://www.instagram.com/saich0tic
Points To Consider
Hopefully the lighting diagram and BTS have given you a little more context as to where everything is placed, but I will admit it is a little weird having the key-light not pointing at the model and instead firing across the path you’re shooting through.
Colour Contrast
The colours in this set are purely from Kelvin mismatching, AKA white balance. I personally prefer this slightly more natural colour look over the more saturated full-colour gels for this setup, but of course feel free to experiment with it. Also, the benefit of Kelvin is that it's very easy to micromanage with LEDs. Yes, I’m using extreme Kelvin shifts here, but don't feel like you have to stick with that. If you want a more subtle look, tone down the Kelvin on one or both lights, and don't forget that shifting your Kelvin in-camera also affects how blue or orange these colours look.
Flares
You may have noticed that in a couple of shots above, I have some lens flare entering the lens. Yes, this is intentional, and yes, I've encouraged those flares by adding a lens filter. Feel free to play with this, but don't forget you can hold a variety of transparent objects in front of the lens to achieve a similar look. Try a wine glass or a vintage ashtray. Really experiment with it, and you might be surprised at what works.
Blurred Images
This aspect is likely the more controversial one. No, I didn't mainline a pint of IRN BRU before shooting; those blurred images are an intentional choice and, of course, totally optional. Some of those images were taken at a shutter speed of around 1/6th of a second, and as a result, we see some motion in the model. As many of you know, I mainly shoot with LEDs these days, so I’ve been enjoying using my shutter speed dial again. For example, had I shot this set with flash, the motion wouldn't show up, as the model would be frozen by the flash, regardless of the shutter speed. Do you need to have all the shots blurred? Of course not, but when presenting a series of shots like an editorial-of-old, we’d often include a little motion in some of the frames. It’s not perfect, but it speaks to a story and adds a little life to the frame.
Do I Need to Use LEDs?
Yes, I’m using LEDs here, but you could just as easily shoot this setup with flash. Yes, the Kelvin adjustments on an LED are convenient but not mandatory, and I used to shoot Kelvin-contrast work like this in the past using colour-correction gels. In fact, Godox has just commissioned a video from me on their new AD800Pro flash, and I want to shoot this setup using flash and colour-correction gels. So if you’re a flash-only shooter and are interested in seeing that, be sure to keep an eye out for it.
Click to enlarge: A creative idea can come from anything
Closing Comments
I personally love shoots like this. The final images look gorgeous and very involved, but in reality they weren't too tricky to pull off, and, best of all, the secret behind the look was a very inexpensive, easy-to-use tool.
I often get asked, ‘What inspires you?’ And the simple answer is often anything and everything, but it's often non-photography-related. To be creative in photography, you have to look outside of your discipline. Sure, look at other great photographers out there to motivate you, but to truly ‘create’, you have to adapt and iterate, and the easiest way to do that is by doing it to non-photography-related things. What does the light look like if I shine it through this vintage ashtray? How can I use that anime colour palette in my next shoot? How can I bring that dappled light-through-leaves effect into the studio? And how can I use that cheap sheet of mirrors in my next shoot?
The internet is an incredible resource, but don't overlook the power of getting creative with items and objects around you at all times. You don’t have to buy another lens or modifier to get creative. Sometimes, going to a thrift store, an arts and crafts shop, or even a junkyard can be a catalyst for your next shoot. It may not be next week or even next year, but keeping your mind and eyes open to random creative tools like this cheap sheet of mirrors is all you need.
NEED SOME DIRECTION?
||
NEED SOME DIRECTION? ||
One-2-One Mentoring
The biggest problem we as photographers face today is that we don’t know what we don’t know. I get it; it sounds cliché, but with so many ideas, options, videos and new pieces of kit out there, it can be tough to know where to start. So if you feel like you could benefit from a few tips and techniques to get you headed in the right direction, or maybe you’ve been shooting for a while and want more guidance on your personal style, get in touch. I’ve been helping photographers from all over the world develop their skills and their photography businesses for many years. Maybe I can help you too.
Products Used
Note: None of the links below is affiliate links, and I do not make any money on clicks. By all means, source the best store in your own region.
Profoto Umbrella Deep White XL
I've always wanted my photography education on here to be free, so although there is no paywall to any of my -Technique Tuesdays-, any and all support is greatly appreciated. ❤️
PLUS: Donate any amount and I’ll send you a link to the hi-res print version of my studio lighting book.
||
PLUS: Donate any amount and I’ll send you a link to the hi-res print version of my studio lighting book. ||

JHP Livestreams…
I livestream every other Tuesday night via YouTube and there I answer your questions, critique your shots, take community images into Photoshop to work on them and discuss all manner of lighting tips and techniques. I look forward to seeing you and your work there real soon. Jake Hicks Photography - YouTube
