
I've always wanted my photography education on here to be free, so although there is no paywall to any of my -Technique Tuesdays-, any and all support is greatly appreciated. ❤️
PLUS: Donate any amount and I’ll send you a link to the hi-res print version of my studio lighting book.
||
PLUS: Donate any amount and I’ll send you a link to the hi-res print version of my studio lighting book. ||
Many of you already know that I’ve been heavily invested in LEDs for a couple of years now. In fact, apart from the occasional niche speedlight setup, I’ve not used flash for a single shoot in well over a year. During that time, I’ve reviewed scores of incredible LEDs, all touting features simply not possible with flash. So, you’ve all heard me praising the benefits of LEDs, but as with anything in life, there are always tradeoffs.
No one product is perfect at everything, and LEDs are no different. So, if you’re a strobist and thinking of jumping in with LEDs, what are some limitations or quirks of LEDs you need to be aware of?
Power
This is the elephant in the room, and to be fair, this is the question I get asked the most: “Are LEDs powerful enough?” This is, of course, subjective, and the answer is very much contingent on what you’re going to be shooting. For me, 90% of my work is done in a controlled studio environment or at least on locations where I can cover or block unwanted light. So for me, yes, LEDs are absolutely more than powerful enough for what I need. But let’s be real, LEDs are nowhere near as powerful as most strobes.
One common misconception is that a 500Ws strobe (flash) is the same as a 500W LED. It’s an easy mistake to make, and I think some brands may even lean into that misunderstanding on occasion. But the key is to remember that flashes are measured in watt-seconds, not continuous watts or draw like LED lights.
One gives you a very intense light for a fraction of a second, and the other is a continuous power output. A 500Ws flash can deliver hundreds of thousands of lumens, whereas a 500W LED may only reach 50-75,000 lumens.
Or in non-nerd speak, a 500Ws strobe at 2m (6.5ft) reads 1/125th second, ISO 100 and just under f22. A 500W LED at the same distance is 1/125th second, ISO 100 and just under f8.
I just went next door to the studio to test this myself, so variables like room size, brand, modifier used, etc., will affect the results slightly, but it does illustrate the power gap between these two units.
Click to enlarge: On the left is the 500Ws strobe set to full power. On the right is a 500W LED set to full power. You simply cannot compare the two 500W/s in terms of power as the flash is around 3 stops brighter than the LED.
With a 500Ws strobe being around 3 stops brighter than a 500W LED, the difference is certainly noticeable, and if you think that doesn’t seem like much, remember that every stop of light is double the amount of light, so that’s like the difference between a 125Ws strobe and a 1000Ws strobe. The instantaneous power output of flash is extremely bright, and if you think your work needs that extra power, there really is no substitute.
Client Comfort
I’ve just spoken about the power output differences between flash and LED, and some of you may be thinking that LEDs are getting brighter all the time and that maybe it’s just worth waiting until LEDs are powerful enough to compete with flash. I’ve no doubt that LEDs will get more powerful, but the practicality of that brightness also needs to be considered.
Think about a client sitting in front of a 500W LED. I just went into the studio to test it and, yeah, you definitely know you’re sitting in front of a bright light at full power! It’d be pretty miserable for extended periods, so I really wouldn’t want to subject a client to anything much brighter than that for extended periods.
Flash has none of that client discomfort, as the bright flash is only on for a fraction of a second. In fact, before the shot is taken, all the client sees is a very dim (by comparison) modelling lamp, and this can have more impact on the final shot than just the client's comfort.
Remember, our eyes do their best to limit harsh brightness by constricting our pupils into a tiny dot. Conversely, in dim lighting, pupils dilate to let in as much light as possible, and it is widely believed that these dilated pupils are perceived as more attractive for several reasons.
Click to enlarge: In the images above, you have the continuous bright light of an LED on the left and the very small pupil as a result. On the right, you have the dilated pupil of the eye taking in the much dimmer light of the strobes modelling bulb. When the flash fires, we capture an image of the eye before the pupil has time to constrict, yielding a beautifully large pupil.
Many portrait photographers will actively seek these dilated pupils in their work as they believe the final image shows their subject in the best possible way. Bright LED lights make these dilated pupils almost impossible to capture, whereas this look is relatively easy to achieve with flash.
Freezing Motion
This is another major factor that may well impact the type of work you produce. I’ve spoken about flash durations in the past and how, no matter what your shutter speed is set to, the subject, when being captured by flash, is actually frozen by the flash duration of ~1/4000th of a second and not your actual shutter speed choice. So, even if your shutter speed is 1/250th second, the subject is captured at ~1/4000th.
This is not the case with LEDs. With LEDs, your subject is always captured based on your shutter speed.
Click to enlarge: My Bowens XMT strobes actually showed you the flash duration, depending on the power you were using. At its lowest 2.0 power, the flash duration was actually 1/10,309th sec, compared to 1/222th sec at full power. When using flash, it’s not your shutter speed that dictates the amount of visible motion in the shot.
So if you’re someone who shoots a lot of fast-moving subjects like children and dancers, maybe even fast-moving clothing and hair, and you’ve been doing so with a shutter speed of 1/250th with flash, you may not get the exact same results with LEDs. Remember that although your camera was set to 1/250th of a second, the flash was actually freezing them at ~1/4000th.
Click to enlarge: I’d encourage you to click this image and view it full screen. If you look closely, you can see a ton of movement in this shot, especially in the hair. This image was taken at 1/15th of a second, and it’s simply not possible to capture this type of energy and sense of motion in a shot while using flash.
Again, this is very dependent on the work that you do, but even slight blurring in hair and clothes can have an impact on the final image, especially if you’re someone who shoots for composites. Masking and cutting out subjects with crisp, sharp hair and clothes is far easier than masking out moving objects with slightly blurred, feathered edges.
Chromatic Adaptation
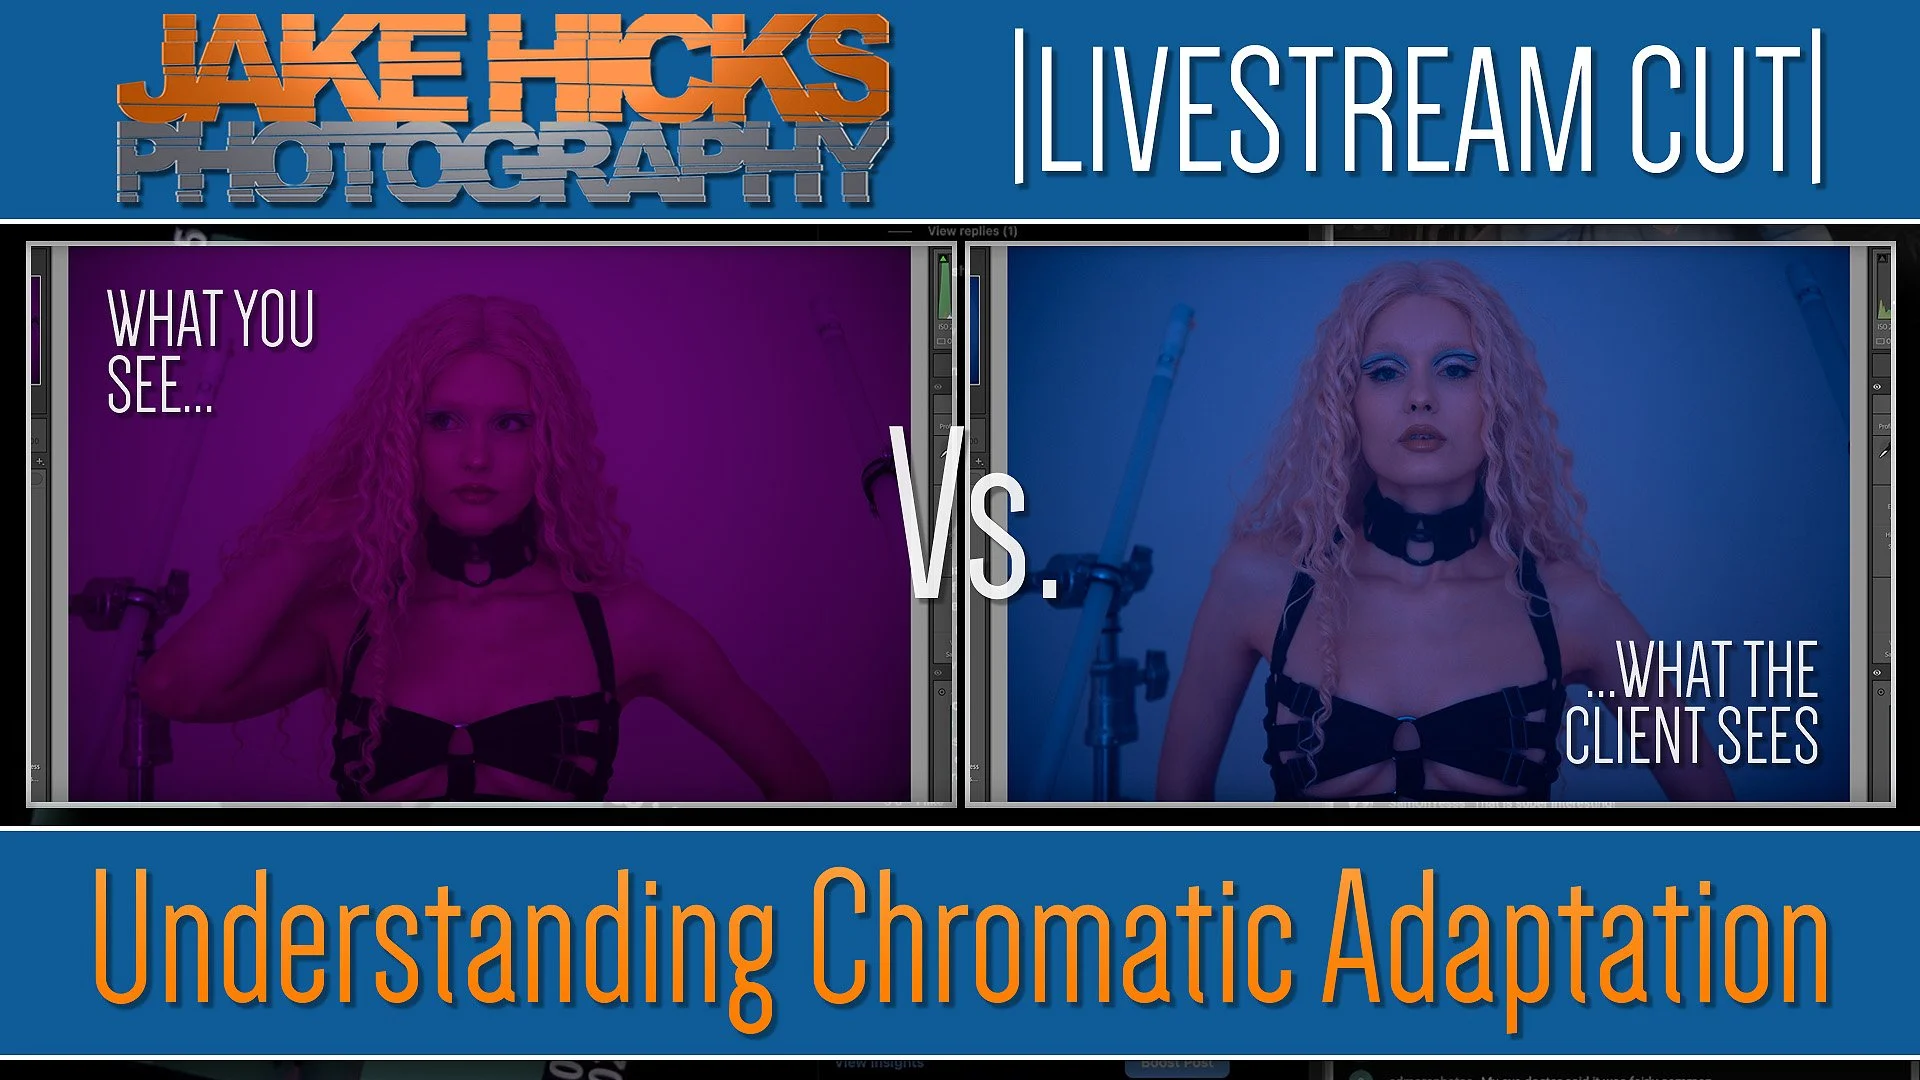
This topic is a little more niche and may not affect your work as much as it affects mine. If you’re not familiar with ‘chromatic adaptation’, it refers to our eyes' natural ability to white-balance and colour-correct the world around us. Most people don’t tend to see the rich orange dawn and sunset, as our eyes try to balance them out so we see the world in a more uniform tone. This ability is so strong, however, that we can often be tricked or fooled by it and because it happens so subtly and gradually, many of us aren't even aware of it happening.
Why is this a bad thing? When I used to shoot with flash in the studio, I’d typically have some ‘house lights’ on, or the normal ceiling lights most rooms have. The flashes had coloured gels, but the modelling bulbs weren't bright enough to overpower the room's overall colour. This meant the client's eyes weren't adjusting to the coloured gels and remained neutral due to the overhead studio lights. That way, when I fired a shot and showed them the resulting brightly coloured flash image, they loved what they saw.
With LEDs, I need to be far more mindful of chromatic adaptation affecting the client's eyes, as the bright, very colourful LEDs are always on and overpowering the room colour. This is a very nerdy topic that I’ve covered in more detail in the past, but if the room is bright blue due to the LEDs, our eyes will try to neutralise that so that when the client sees the resulting image with their ‘neutralised’ eyes, the shot doesn't look anywhere near as blue as they had hoped.
I covered this in a little more detail in a video cut from one of my previous livestreams. It shows some examples of chromatic adaptation at work and how companies can use it in interesting ways. Take a look at the video below to learn more.
This is a very real problem and one that needs a little experience and confidence to overcome, because remember, it's not just the client's eyes getting fooled, it's yours too. Like I say, this is a very real factor that needs to be addressed. Ever notice why the ceilings in rooms are always white, even if the walls are painted a certain colour? Interior design uses the ceiling as a neutral ‘anchor’, and our eyes use it as a point of reference to colour the surrounding walls. Paint the ceiling the same colour as the walls, and our eyes will adapt to it, and the room's walls will lose their visible colour value as a result.
Brightly coloured LED shoots lack a white ceiling as a neutral reference point, and this can skew colour perception for the client and us. Faith in the hue values and Kelvin settings on our cameras is enough for us experienced photographers, but you may have to convince the client that you need to take them outside to a well-lit neutral-coloured room and show them the final images; otherwise, you’ll never achieve the specific blue colour they're after.
As a final note on this, I’m not talking hypotheticals here, and I genuinely do have to either take clients out of the room to a more neutral-coloured space or give their eyes time to adjust to the room with the house lights back on. I’ll leave it up to you as to whether you want to try and explain chromatic adaptation to your clients, but just be warned that this is a fairly esoteric concept to many, and you're probably just far better off just turning the house lights on, and then taking your time on purpose before showing the clients the images. But, be warned, if you’re tethering and the client is looking at the shots as they come in and chromatic adaptation has taken hold, you’ll find it tough to explain the problem beyond ‘trust me bro’.
Speed and Safety
I spent well over a decade working in studios with cables crisscrossing and spider-webbing the floor. It’s a problem I didn’t know I had, as I’d never known anything else. So when I got some battery-powered strobes, I had no idea how much faster and easier it was to avoid all those cables on the floor. Not to mention, cableless strobes are infinitely safer, without the risk of clients or models tripping over unsecured cables, which can result in, at best, having to buy a new light, and, at worst, them getting hurt and suing you.
It’s kind of ironic then that I only had this quality of life for a few short years before I brought all the cables back into the studio when I switched everything over to LEDs.
Sure, there are many battery-powered LED lights that run without cables. But for studio shooters who need the extra power, nearly all the LEDs over 100W will need to be plugged in. Yes, there are options for attaching battery packs, but if you’re in the studio shooting for many hours, it’s just easier to keep them plugged in rather than switching batteries in and out all the time.
With this cable issue in mind, I actively seek out LEDs that don't require additional cables to the control box or ballast. This box often needs to be secured, and the cables will need to be tidied away or, ideally, taped down on a busy set. All this takes time, and if you don’t have that time to spare, just popping a single battery-powered monoblock strobe on a stand and shooting is a very desirable alternative.
Click to enlarge: I spent years dealing with flash cables until I finally got my battery-powered strobes. And then, all the cables came back with the more powerful LEDs. Cables aren't just an inconvenience; they can be a safety issue too. With this in mind, I try to avoid the additional cables that LEDs with external control boxes come with, as the studio can look like a spiderweb very quickly once you have several lights set up.
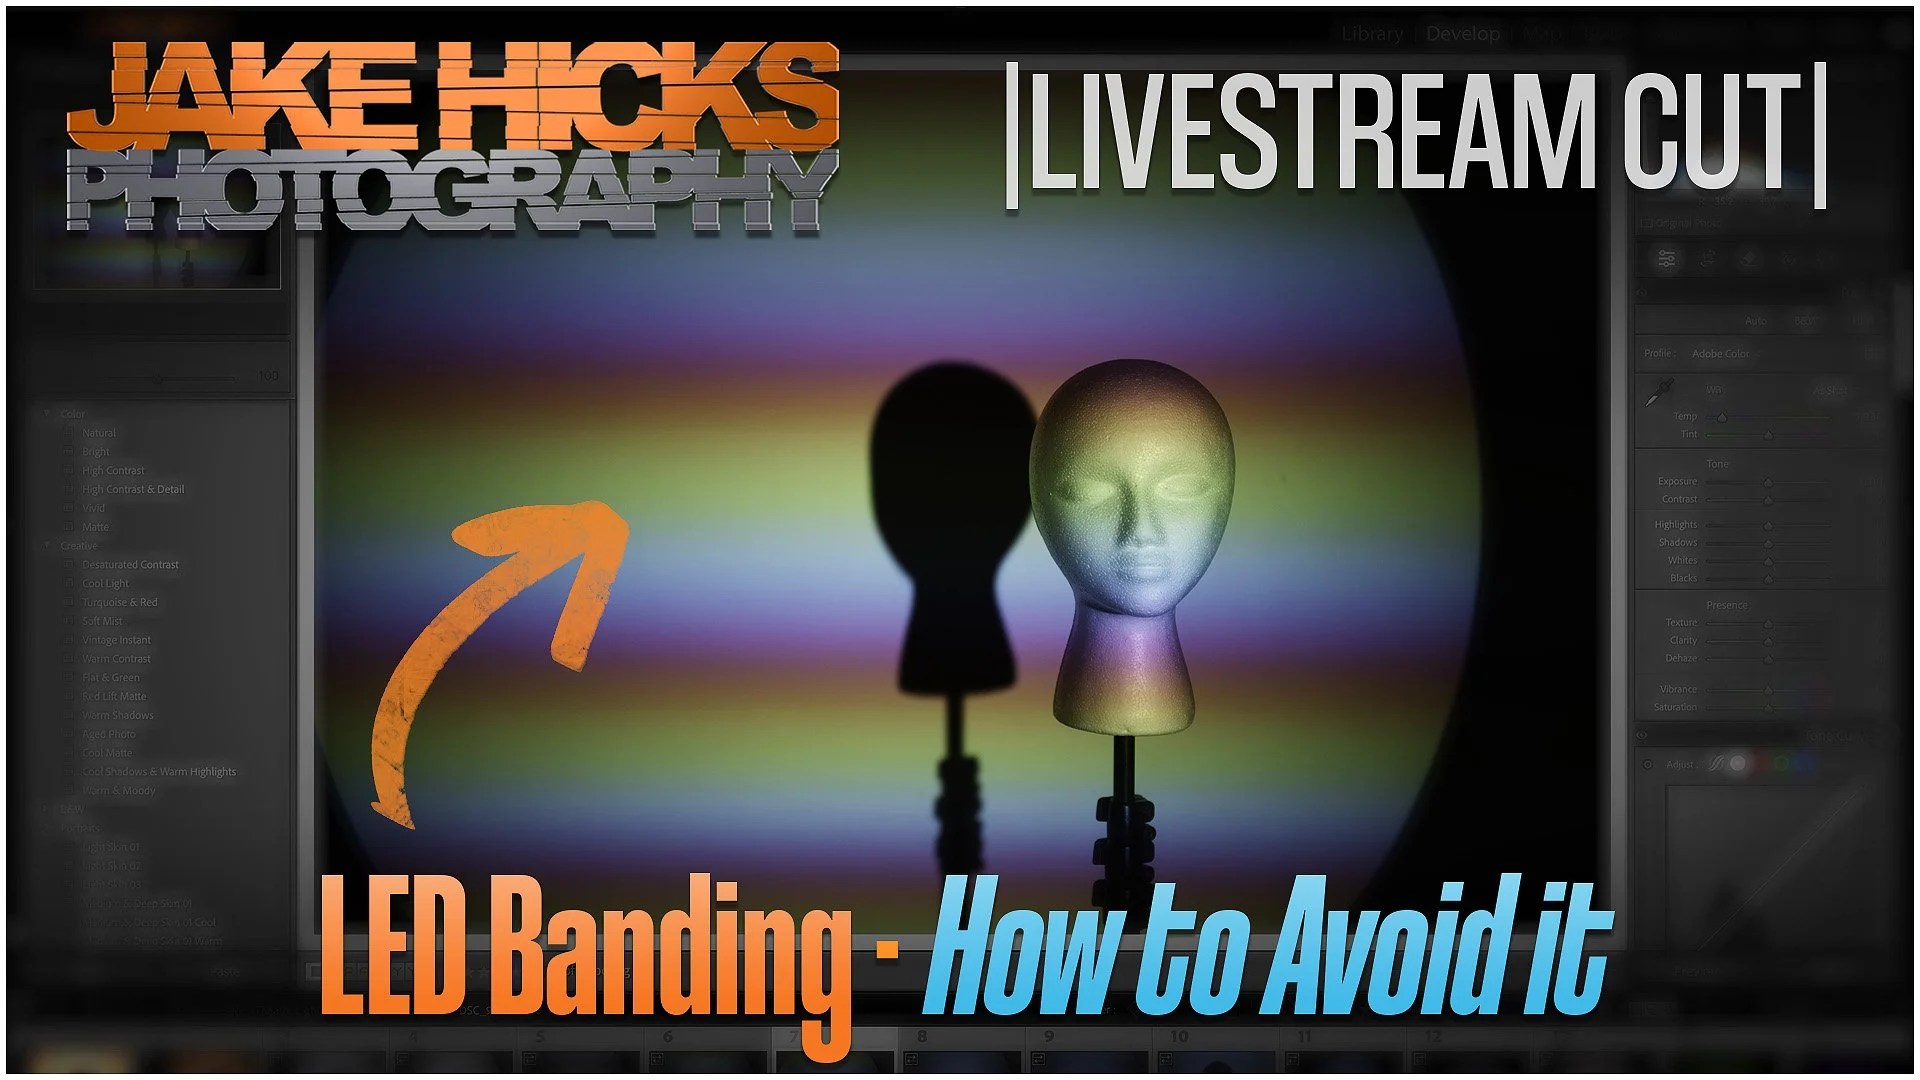
Banding
I’ve left this point until last, as it’s not an issue that arises with all LEDs and in all shots, but if this banding issue does appear in your images, it can be utterly devastating, and the reason it's so devastating is that you may well not notice it until it's far too late.
So what is this ‘banding’ issue? The technology in LED lights is a little different from that of many other lights you may be used to, as most lights are simply either on or off. However, some LEDs operate a little differently, and some cheaper or early LEDs essentially turn on and off very rapidly, thereby flickering. This flicker is so fast that our eyes don't notice it, but our cameras can, especially when you're shooting at higher shutter speeds.
Click to enlarge: The above images are taken with the same LED light, the only difference between these two shots, is the shutter speed used.
This flickering or frequency of LEDs is measured in Hertz and indicates how many times per second they turn on and off. Now, you may have looked at the images above and been shocked by how bad the flicker is and the resulting rainbow banding, but I’m sure most of us would spot that in a photoshoot. And I agree, the images above are among the worst I’ve ever seen in terms of banding, but sadly, they can often be far more subtle, and consequently, far more damaging than that, as they may well go undetected while shooting.
Click to enlarge: This is the same image taken at 1/4000th sec, the only difference is that I’ve sharpened the image on the right in post.
Take a look at the image above. This is the same image on both the left and right; the only difference is that I sharpened the right version in post. At first glance, you may not have spotted that banding on the left, and remember, this is a white wall that makes it far easier to see. But once you’ve wrapped the shoot and got home, sharpening these images reveals an ugly effect that is almost impossible to fix.
The LED flicker issue and the resulting image banding are a whole article in their own right, so I won't get too sidetracked by the boring technical details here. The quick version is that this banding mainly appears on old or cheaper LED lights. That said, some of the tests I’ve shown you here are from reputable brands. The other very important factor is that the banding only really shows itself when shooting at fast shutter speeds or when the LED light is set to a very low power, and combining fast shutter speeds with low-powered, cheaper LEDs is all but guaranteed to produce a hideous banding effect.
But this flickering and subsequent banding isn't a new problem; in fact, it could be argued to be a feature in some situations. After all, it's one of the reasons why LEDs are so cheap for us to run at home in our house lights. Many of them flicker faster than our human eyes can detect, thereby reducing the power they consume and the heat they produce.
Sadly, this is also why I think some people get chronic headaches from certain lights, while other people don't. Some people, sadly, can see the flicker, which causes huge strain on their eyes and brains. In fact, this happened to my wife until I checked her work LED lights and switched them out for better bulbs, which has now fixed the headache problem for her.
As I mentioned, the flickering and banding is a huge can of worms that I find odd more people aren't talking about, but in short, I’d urge you to invest in some very good LEDs if you’re thinking about shooting at faster shutter speeds, as some of the good ones have absolutely zero flicker at any shutter speed and power output.
If you’re interested in more information about this banding issue, take a look at my livestream cut, which covers my findings in more detail.
LEDs Vs Flash and Me
Click to enlarge: LEDs do have some caveats, especially for those of us used to certain features already present in flash. But with features like their millions of colours that I can fine-tune at will, the pros far outweigh the cons for me.
Ultimately, the limitations of LEDs I’ve outlined above are only limitations if they affect you and your work. In fact, I’ve noted the continuous light and the inability to freeze motion as limitations, but for my work, I see them as positives. I’m no longer limited to every shot being frozen at 1/4000th of a second, and I like that I can use my shutter speed for creative control again. But your mileage may vary. The power output doesn't affect me as I simply close the curtains and carry on shooting if the sun comes out. I’m not overly concerned with dilated pupils in my work, so I’m fine with the brighter lights on set. Now that I’m aware of the chromatic adaptation problem, I work around it by showing the clients their images in a neutrally lit room. The cables everywhere can be a pain, but I worked with the problem for many years before, and I can work with it again now. Lastly, I use high-quality LEDs and rarely shoot above 1/125th of a second, so banding is not a concern for me either.
Click to enlarge: The comparatively low power of LEDs vs flash can be an issue, but again, the benefits like having unique-shaped LED lights like tubes, more than outweigh the fact that I have to shoot at ISO 400 instead of ISO 100 with flash.
No single lighting solution is perfect for every scenario. Yes, there are certainly some downsides to working with LEDs, especially if you’re someone who is used to working with flash. But for me, the millions of colours, the Kelvin and saturation sliders, the ease of colour matching, and the ability to use all my old vintage film cameras in the studio again far outweigh these downsides.
I've always wanted my photography education on here to be free, so although there is no paywall to any of my -Technique Tuesdays-, any and all support is greatly appreciated. ❤️
PLUS: Donate any amount and I’ll send you a link to the hi-res print version of my studio lighting book.
||
PLUS: Donate any amount and I’ll send you a link to the hi-res print version of my studio lighting book. ||

JHP Livestreams…
I livestream every other Tuesday night via YouTube and there I answer your questions, critique your shots, take community images into Photoshop to work on them and discuss all manner of lighting tips and techniques. I look forward to seeing you and your work there real soon. Jake Hicks Photography - YouTube
