
I've always wanted my photography education on here to be free, so although there is no paywall to any of my -Technique Tuesdays-, any and all support is greatly appreciated. ❤️
PLUS: Donate any amount and I’ll send you a link to the hi-res print version of my studio lighting book.
||
PLUS: Donate any amount and I’ll send you a link to the hi-res print version of my studio lighting book. ||
I’ve reviewed scores of these modifiers over the years. From the early days of the original Bowens Universal Spot Attachment back in 2014, to the subsequent eBay Optical Spot knock-offs and 3rd party copies, all the way up to the far more modern and sophisticated, albeit monstrous, projection attachments. But now, in this new era of more powerful LEDs in smaller packages, we’re seeing a new wave of spotlight attachments. Sure, they’re a lot smaller and more compact, but are they any good?
Disclaimer: Godox sent me this product for review. They are not paying me for this review, and all my opinions are my own.

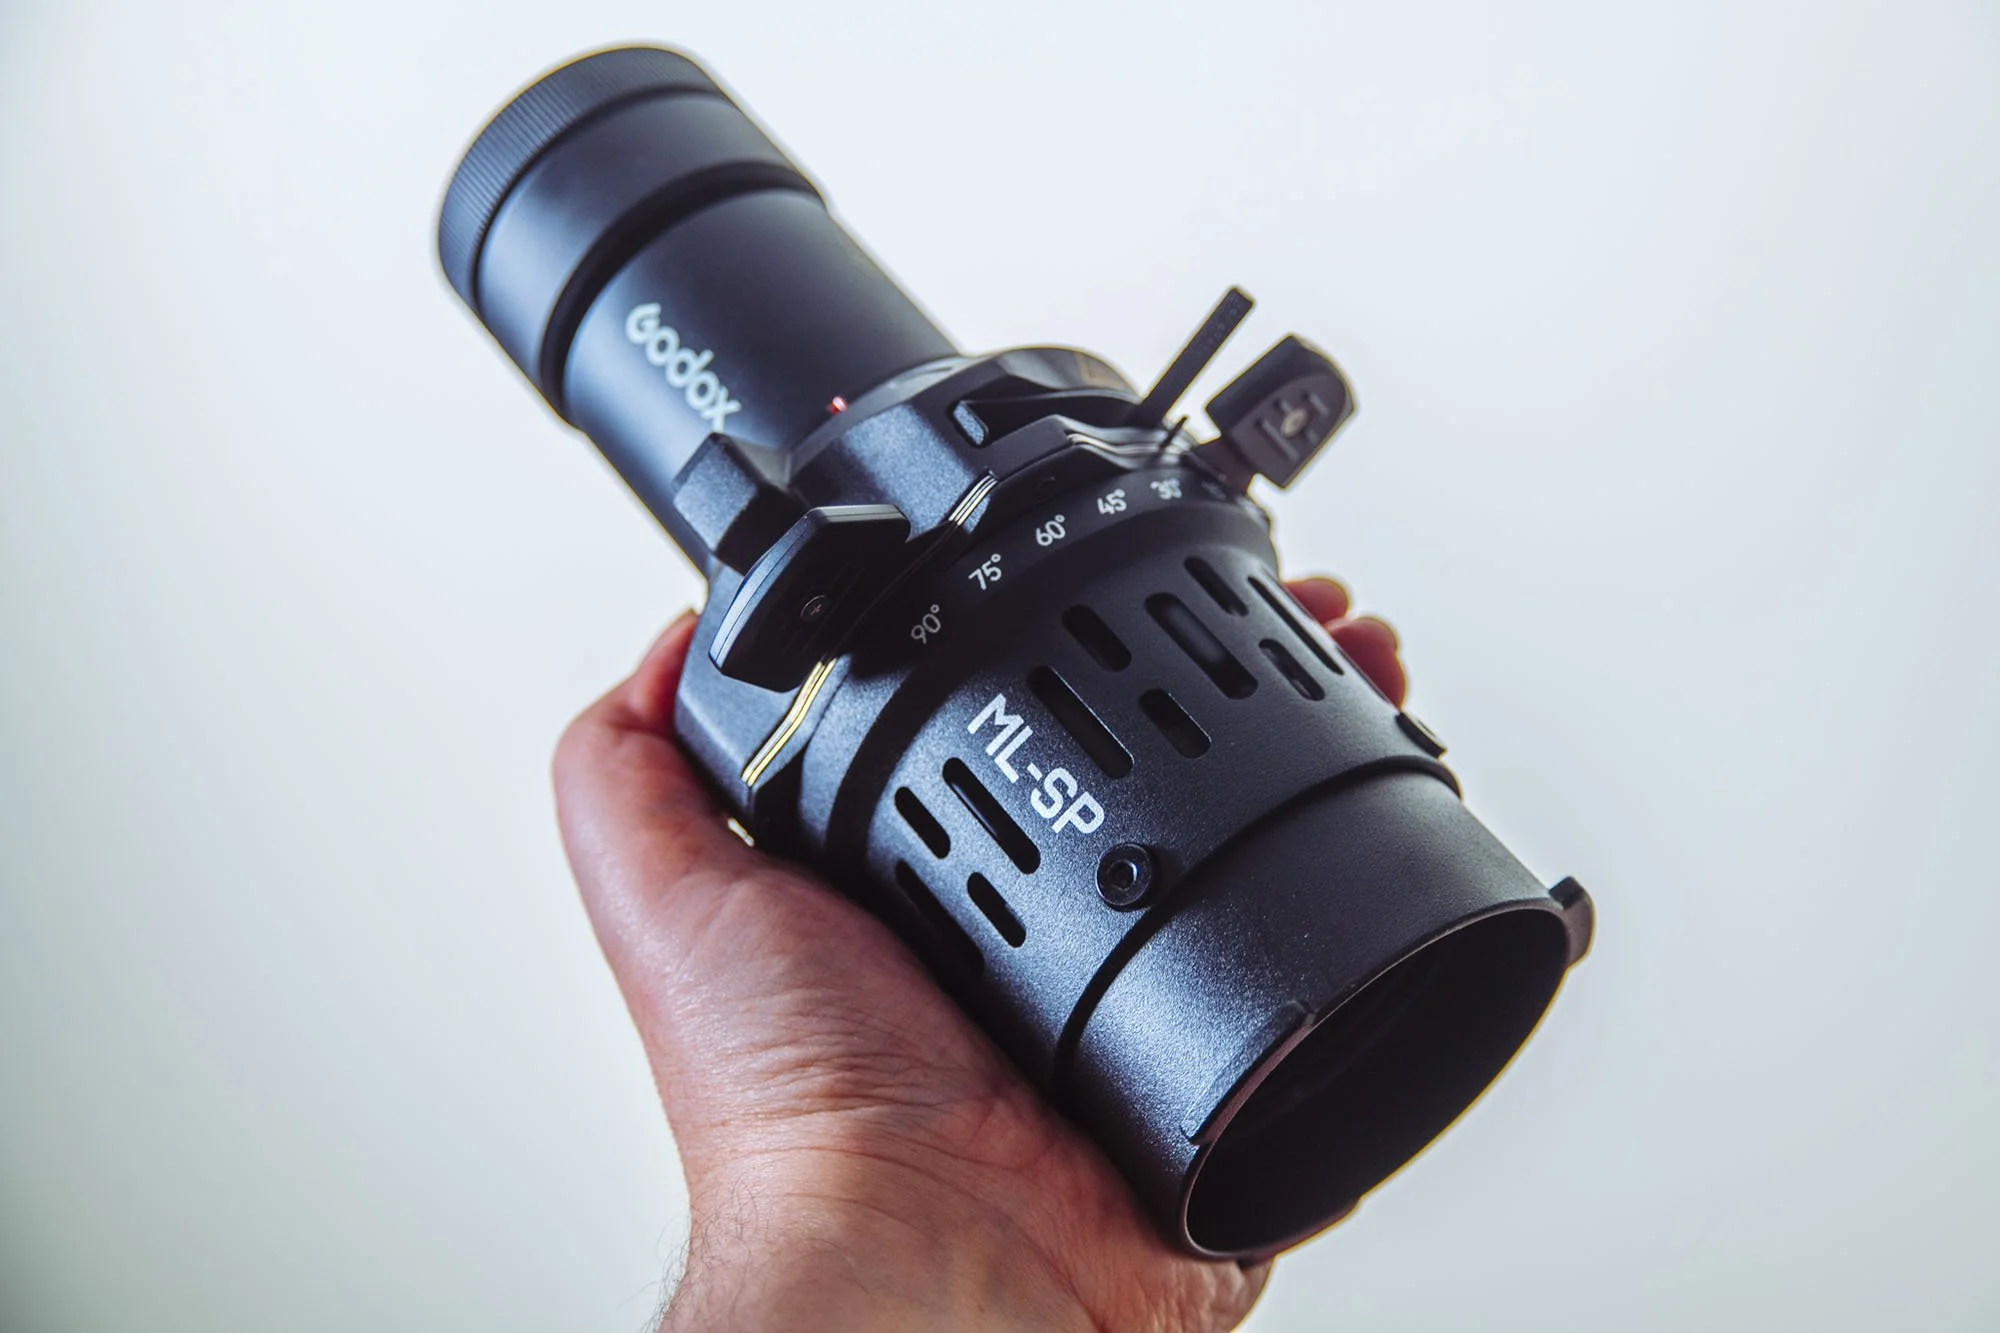
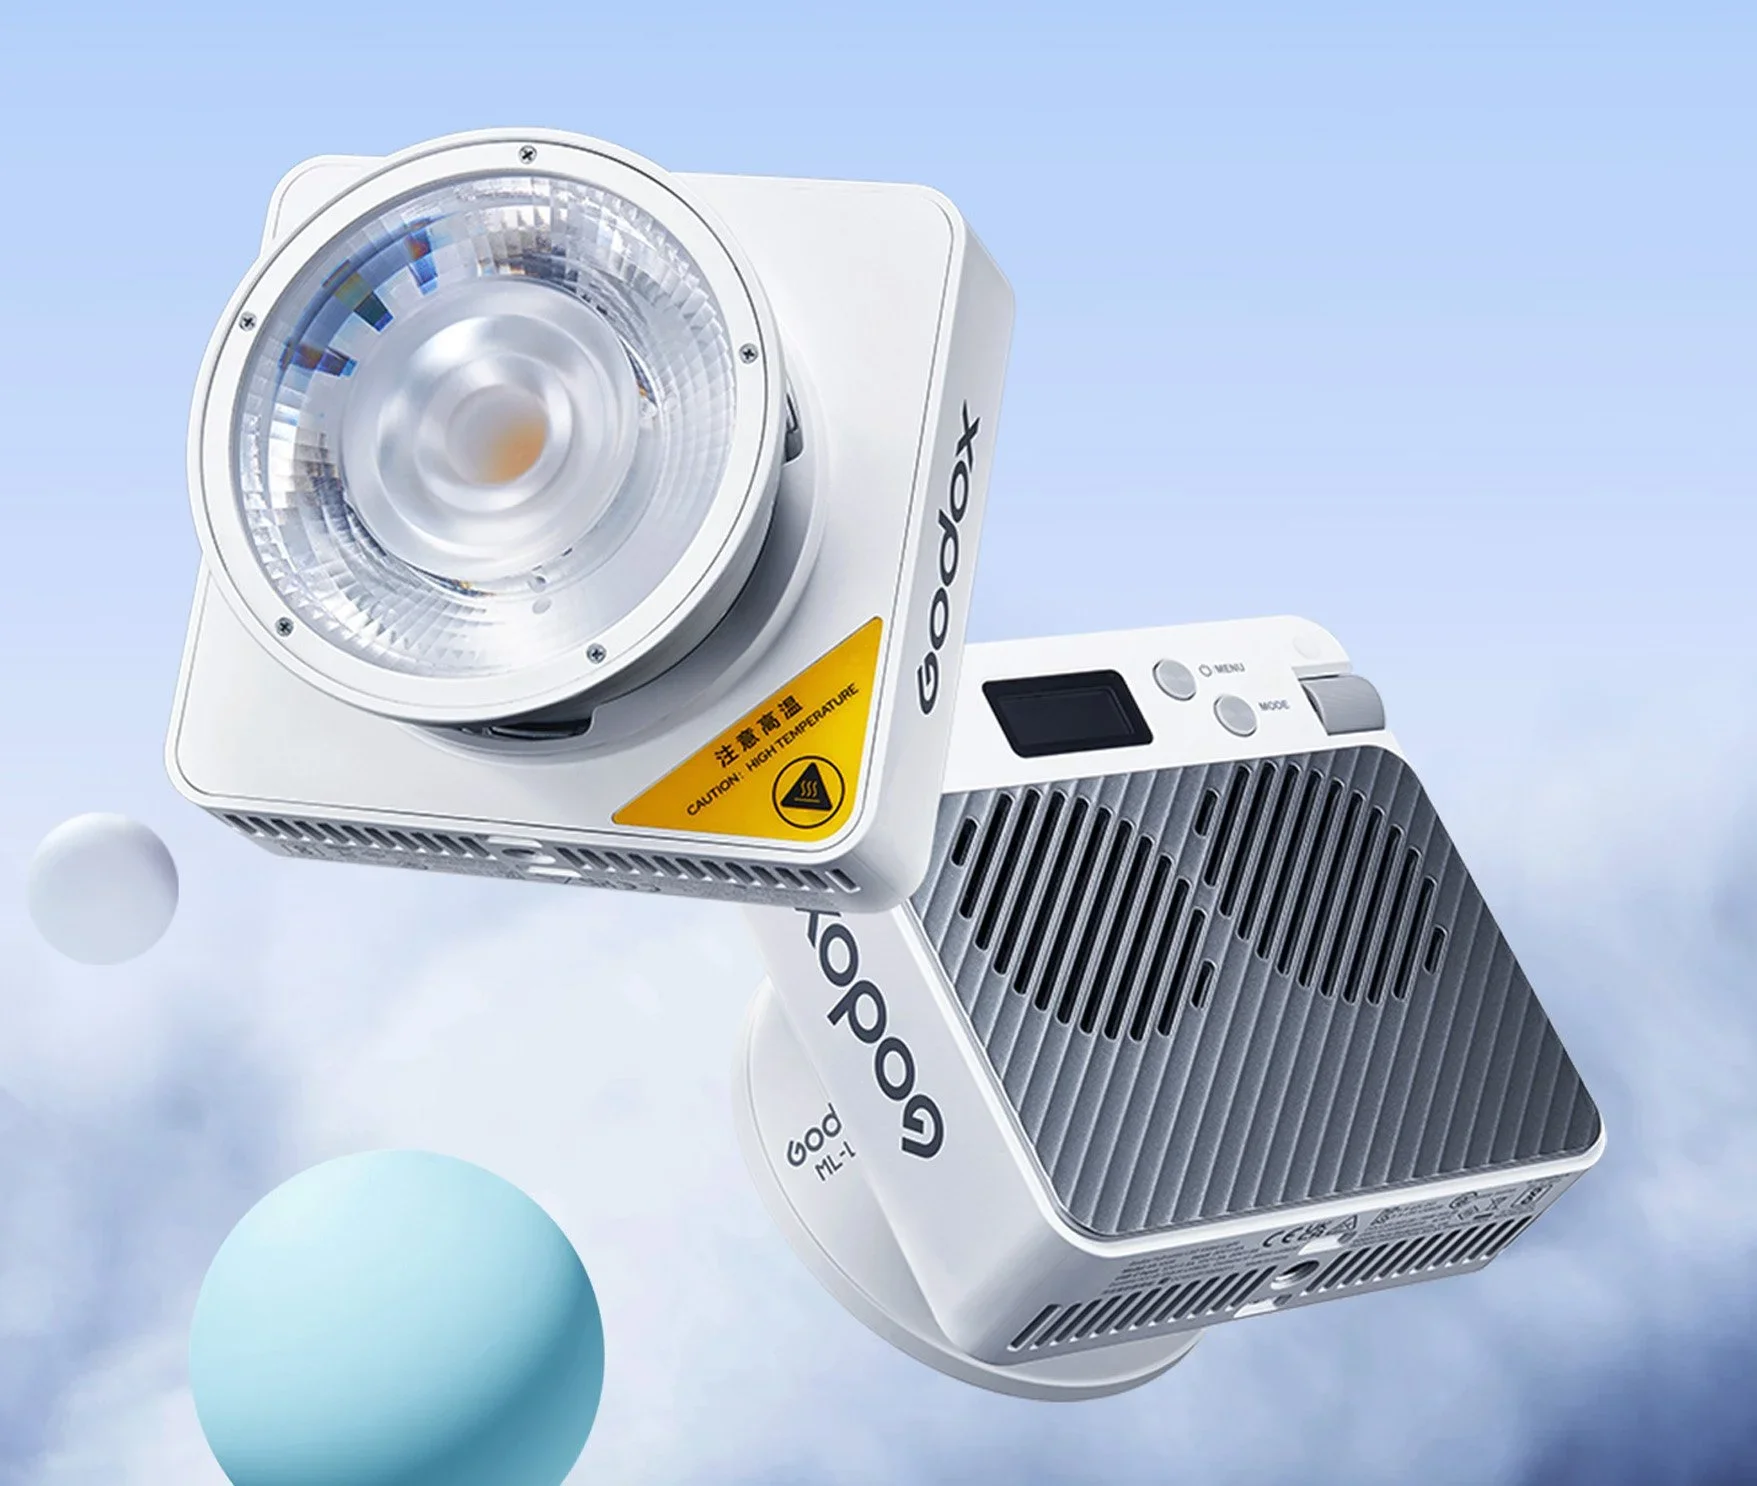
One thing that is immediately obvious with the Godox ML-SP LED Projection unit, is just how small it is! Surely it can’t hold its own against far bigger spotlights.
What are Spotlight modifiers?
So what are these spotlight modifiers I’m referring to? If you’ve never seen or used them before, they are hard-light modifiers that shine a very controlled spot of light onto your subject or background. What makes these modifiers different to other hard light modifiers, like grids and snoots, for example, is their ability to focus that spot of light, and they do this via an actual lens at the front of the modifier.
The focusable spot of light has many uses and benefits. Firstly, there is zero spill of light anywhere except where it’s pointed, and secondly, we can now apply gobos to that focused light.
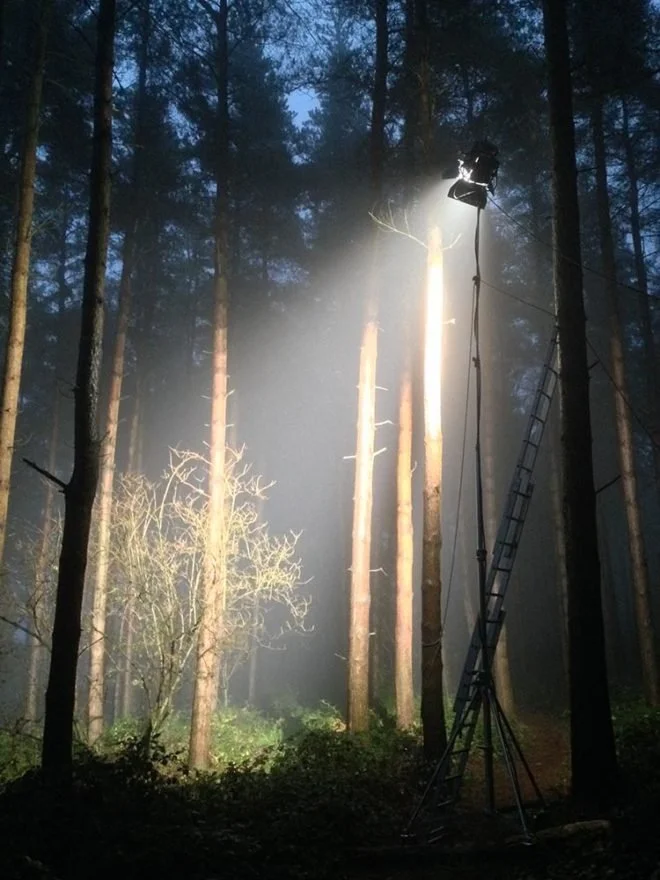
Neil Osman faking moonlight through trees. The branches are the gobo that casts shadows on the scene.
What’s a gobo?
Gobo is short for go-between and refers to an element placed between the light and the subject/background. Back in the early days of cinema, you’d place whole tree branches in front of the light to get that dappled light effect, but today, with these more modern tools, we can make gobos that replicate that same look via a small metal disk with holes laser cut into it.
The metal disk or gobo is then placed in the spotlight modifier, and by focusing the lens at the front, we can control the dappled light pattern wherever we want.
Of course, with this new technology, we can not only replicate tree branches but almost anything we want, and today there are scores and scores of gobos, including everything from company logos to stars, spots, geometric patterns, and, of course, the obligatory window blinds.
The Good, the Bad and the Worse
I established at the start that there are now a lot of these spotlight modifiers available today, and now that we know what these spotlights are supposed to do, what makes one spotlight bad and another one good?
As I mentioned earlier, I’ve reviewed scores of these modifiers in the past, and the reason I keep being sent them for review is that I use them all the time in my work. Sure, you may not know that I’ve used one in a shot, but you don’t always have to use these spotlights with a gobo in place. These spotlights can create a truly beautiful hard light that is hard to beat with any other type of modifier. But perhaps I should rephrase that statement: ‘good’ spotlight modifiers create truly beautiful hard light, as sadly not all spotlights are created equal. So what makes one good and one bad?
Spotlight Trifecta
Light Spread - How wide can we spread the light in any given area?
Vignetting - How much light do we lose towards the edges of the spotlight?
Brightness - How much light is lost as it passes through the spotlight?
Whenever I review any of these spotlights, I consider these three factors crucial to determining whether the spotlight is viable. So let’s take a look at the brand new ‘Godox-Mount LED Projection ML-SP’ and see how it fares.
Godox-Mount LED Projection ML-SP
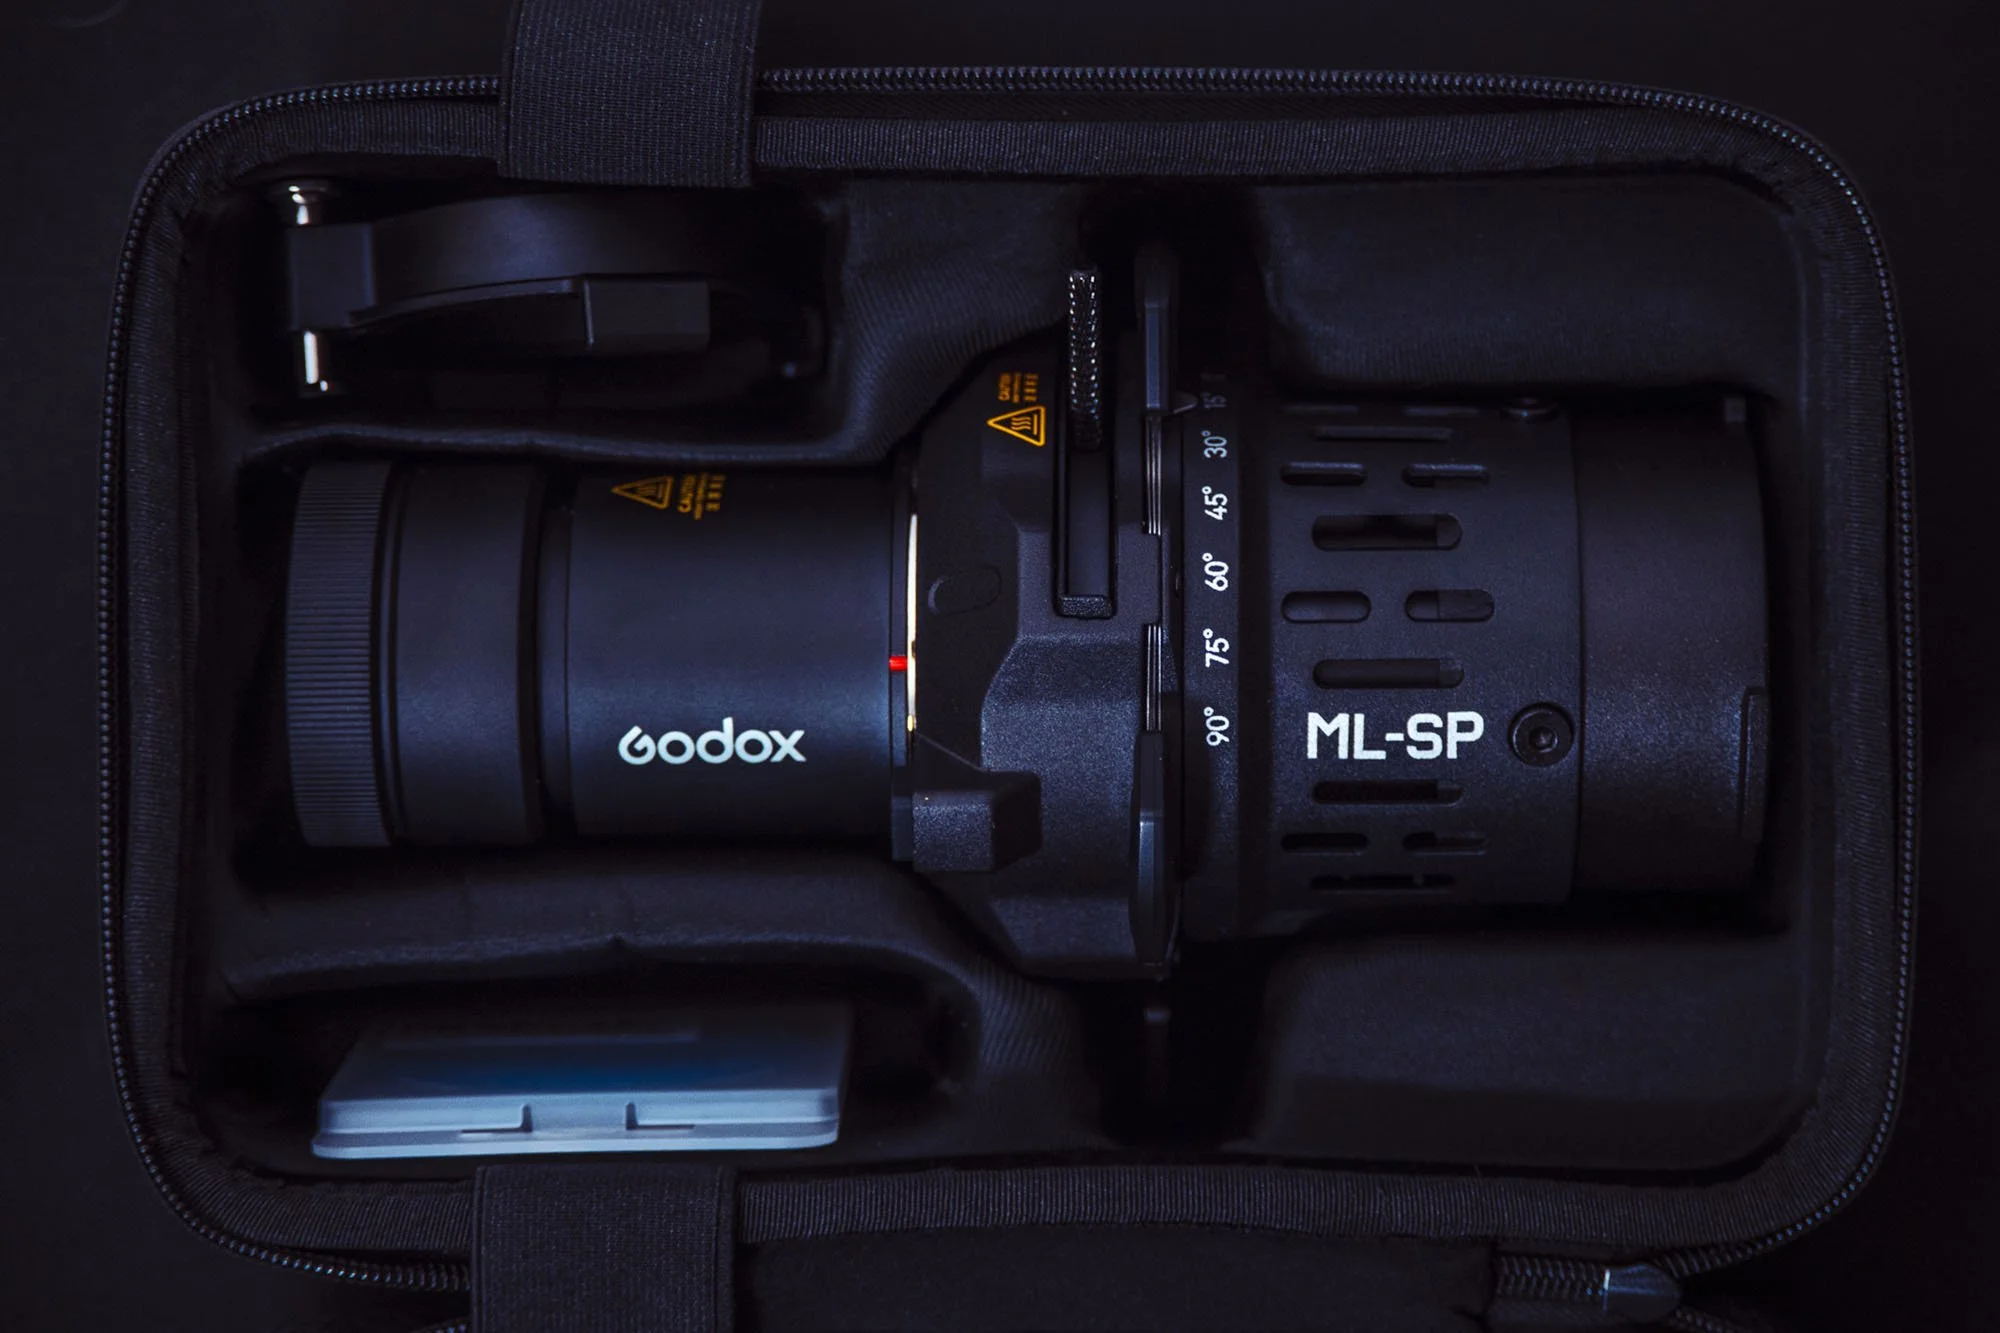
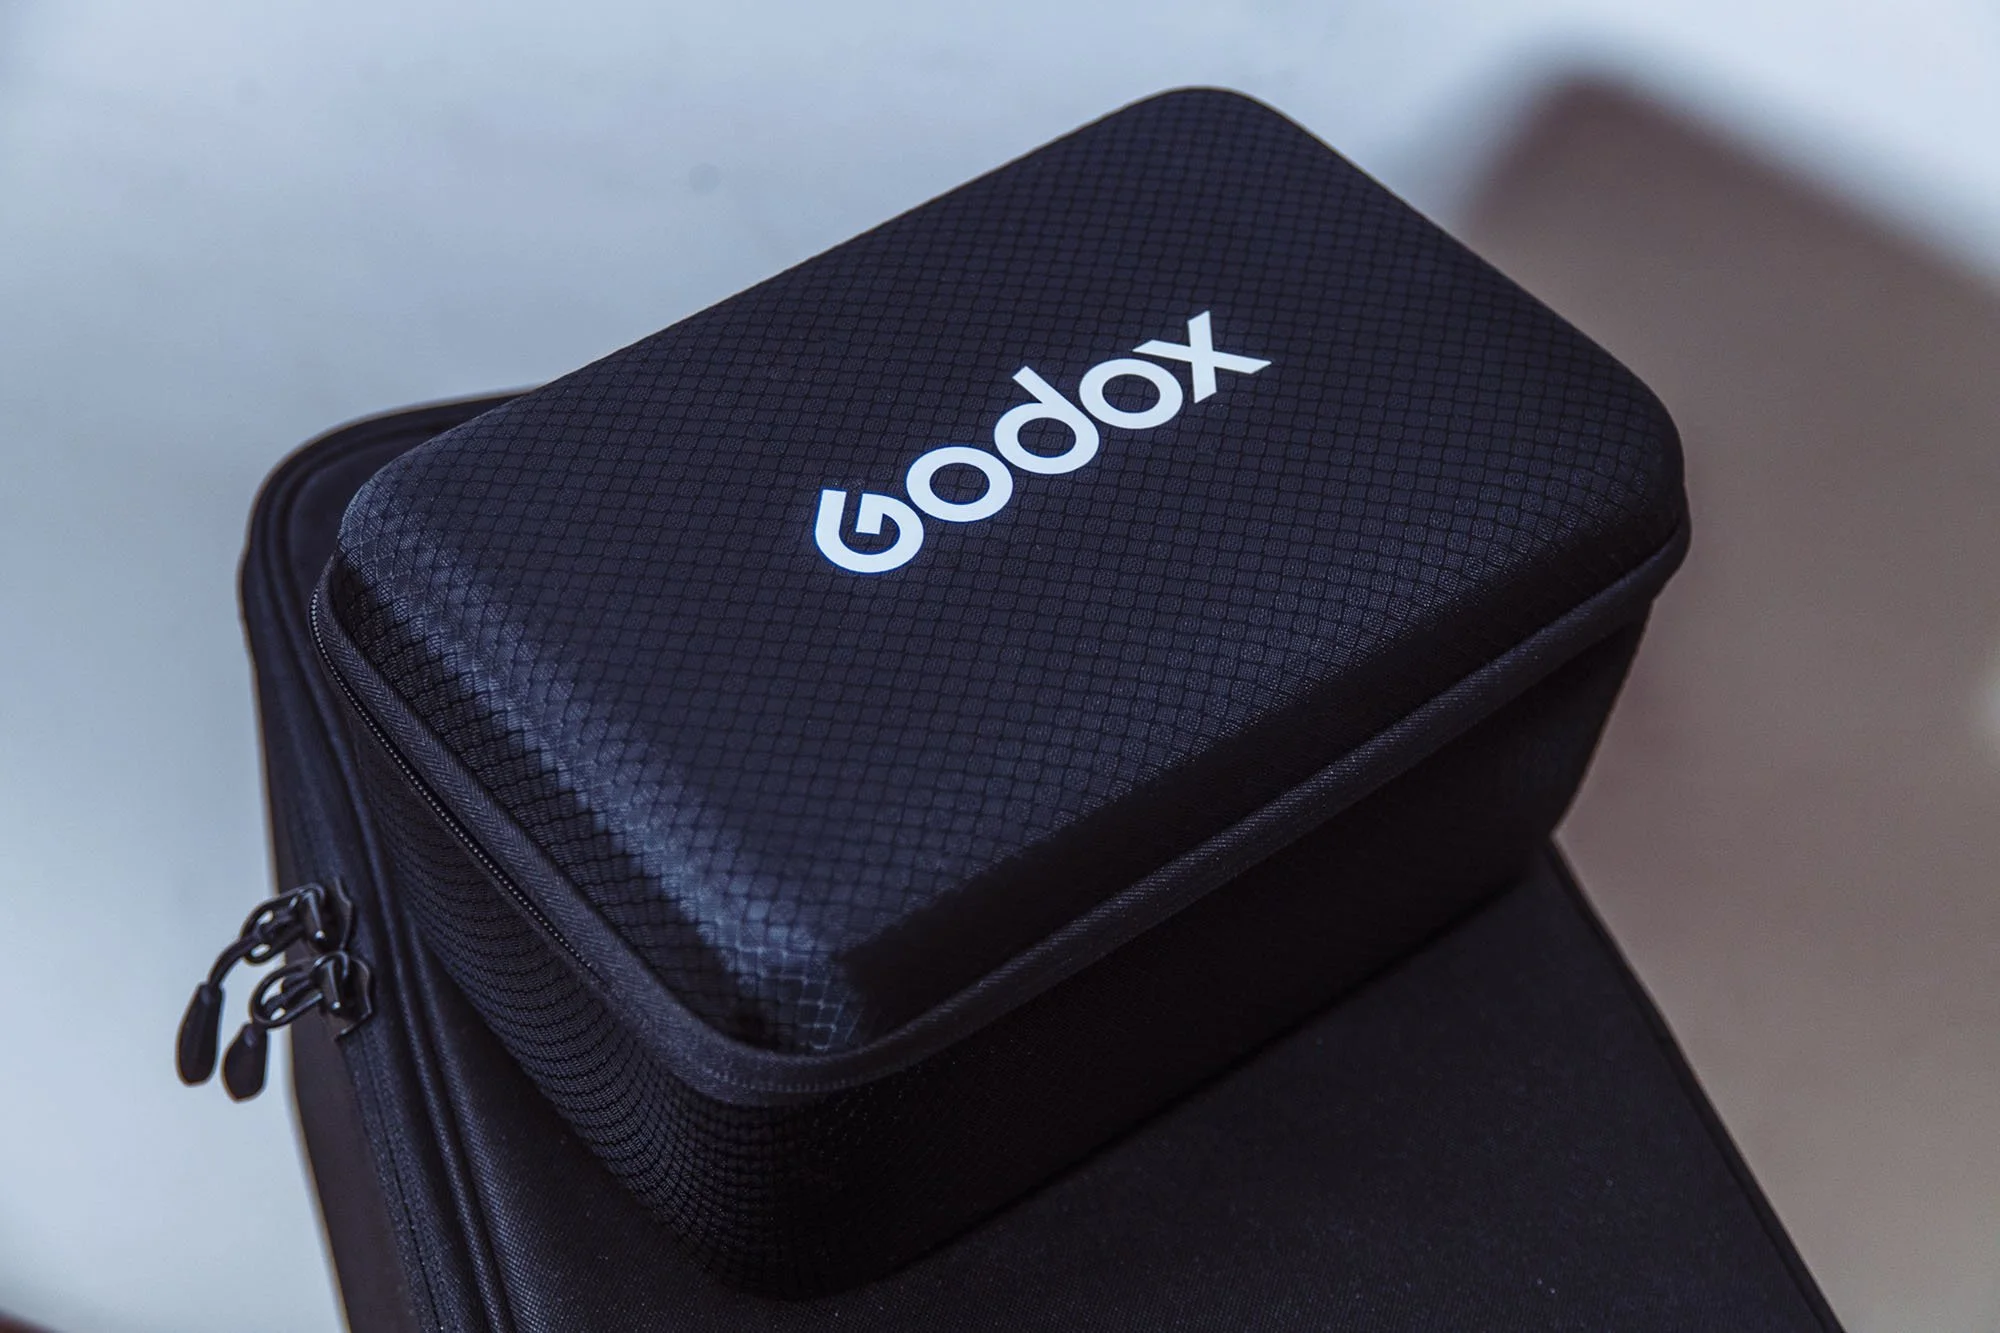
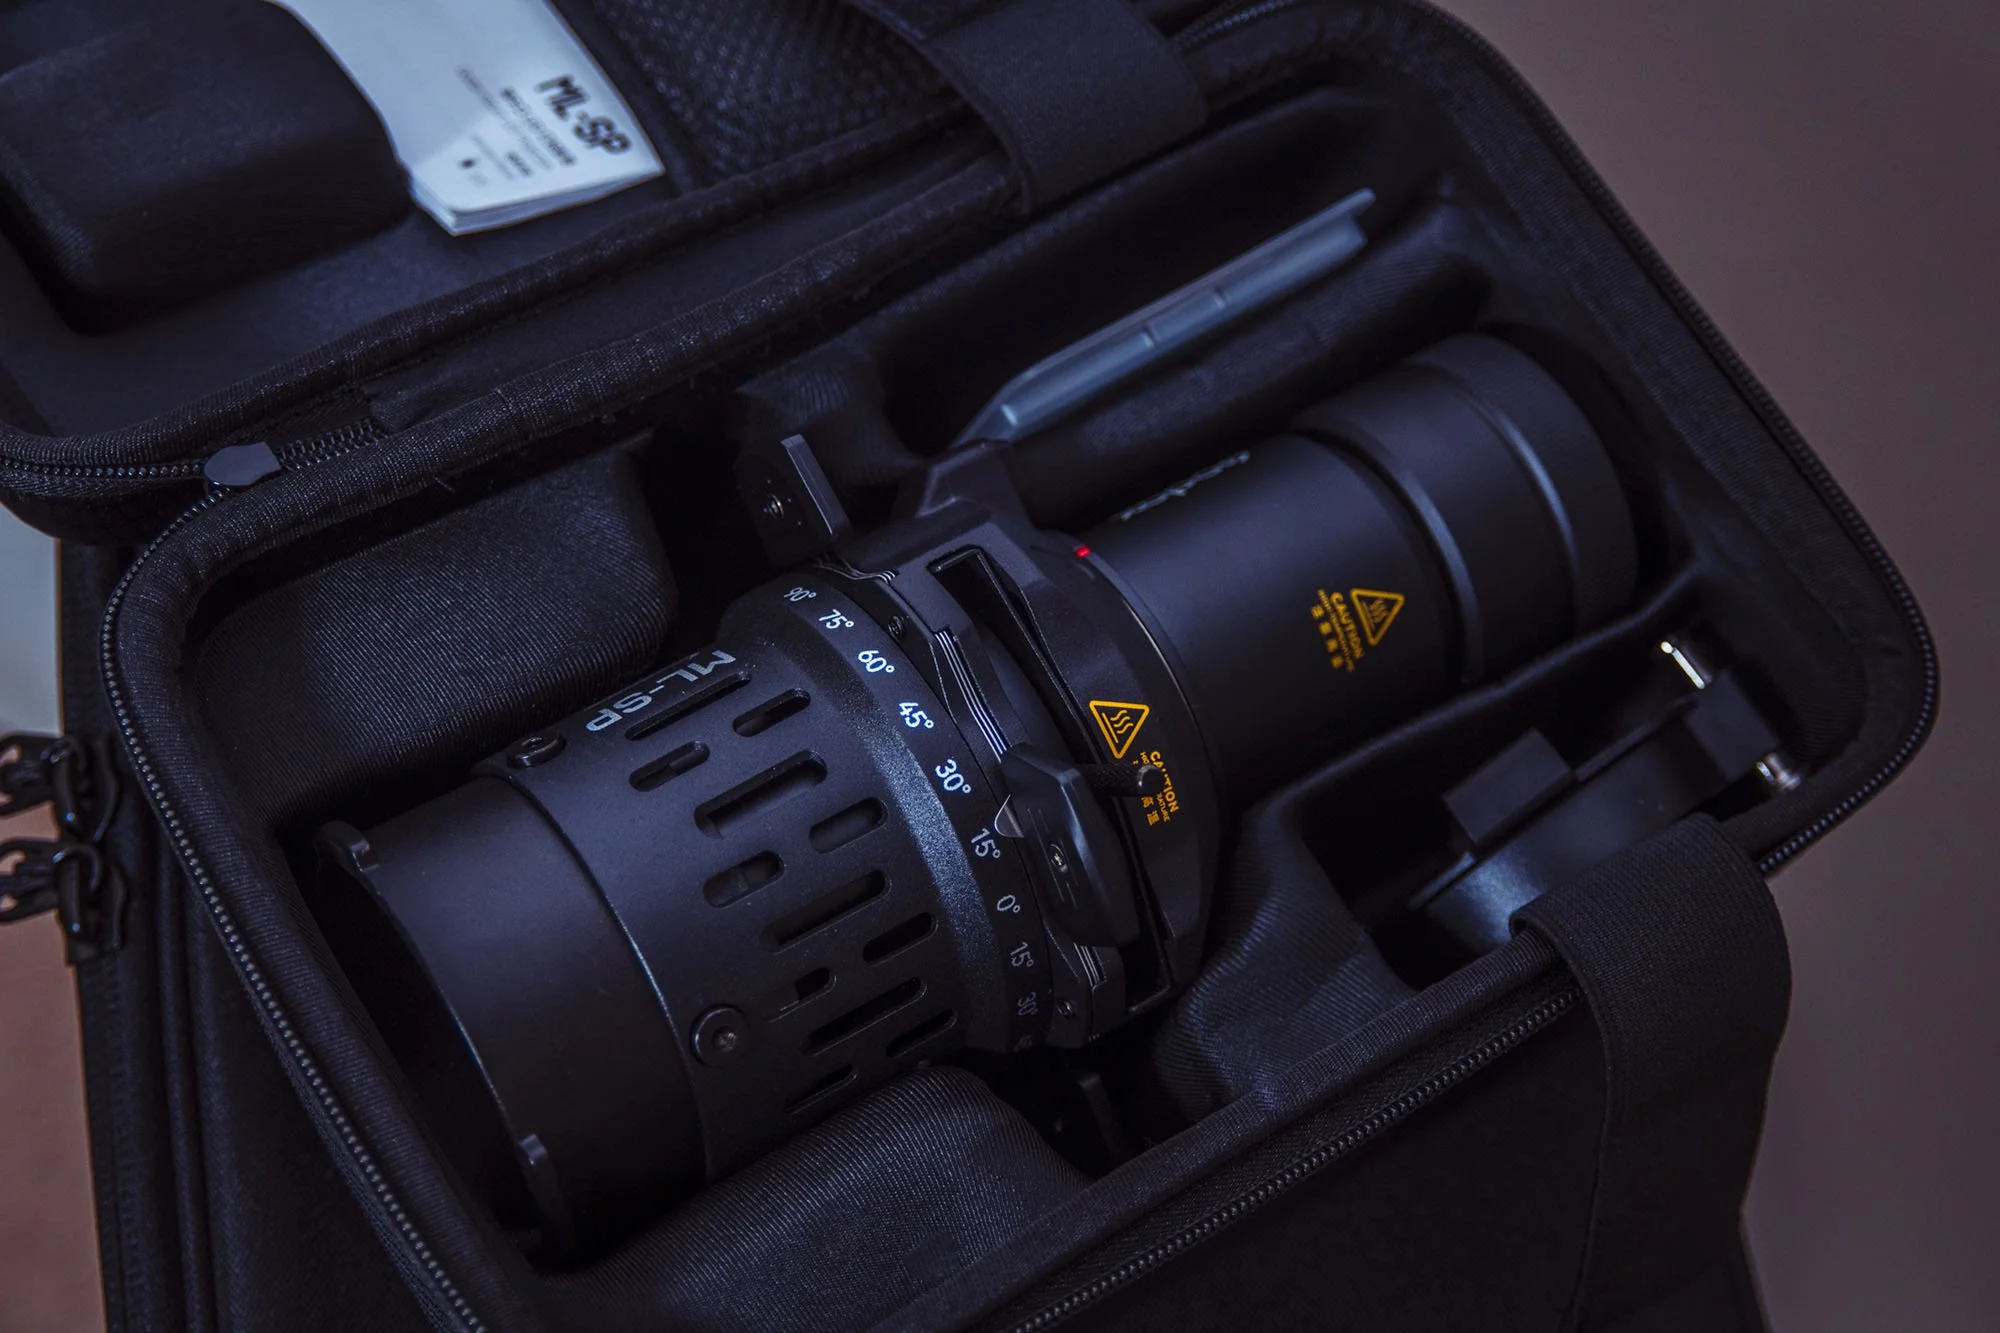
First off, what’s included? Thankfully, it comes in its own padded carry case. This may not seem like a big deal, but when packing for a shoot, it’s very handy to have everything all ready to go in its own pack so that you're not hunting around for the accessories and gobos that go with it before you leave.
Inside, we have the spotlight itself, the lens (typically already attached -more on that below), the gobo holder, the colour frame (gel holder), some gobos and the instructions.
The Lens
This will be the most important aspect of any spotlight attachment, and the new Godox one here is no different. This lens pretty much dictates all three aspects of the Spotlight Trifecta I mentioned above, and you should be careful about which lens you choose when purchasing. Yes, you can purchase different lenses later on, but be sure to get the right lens for you and your work first.
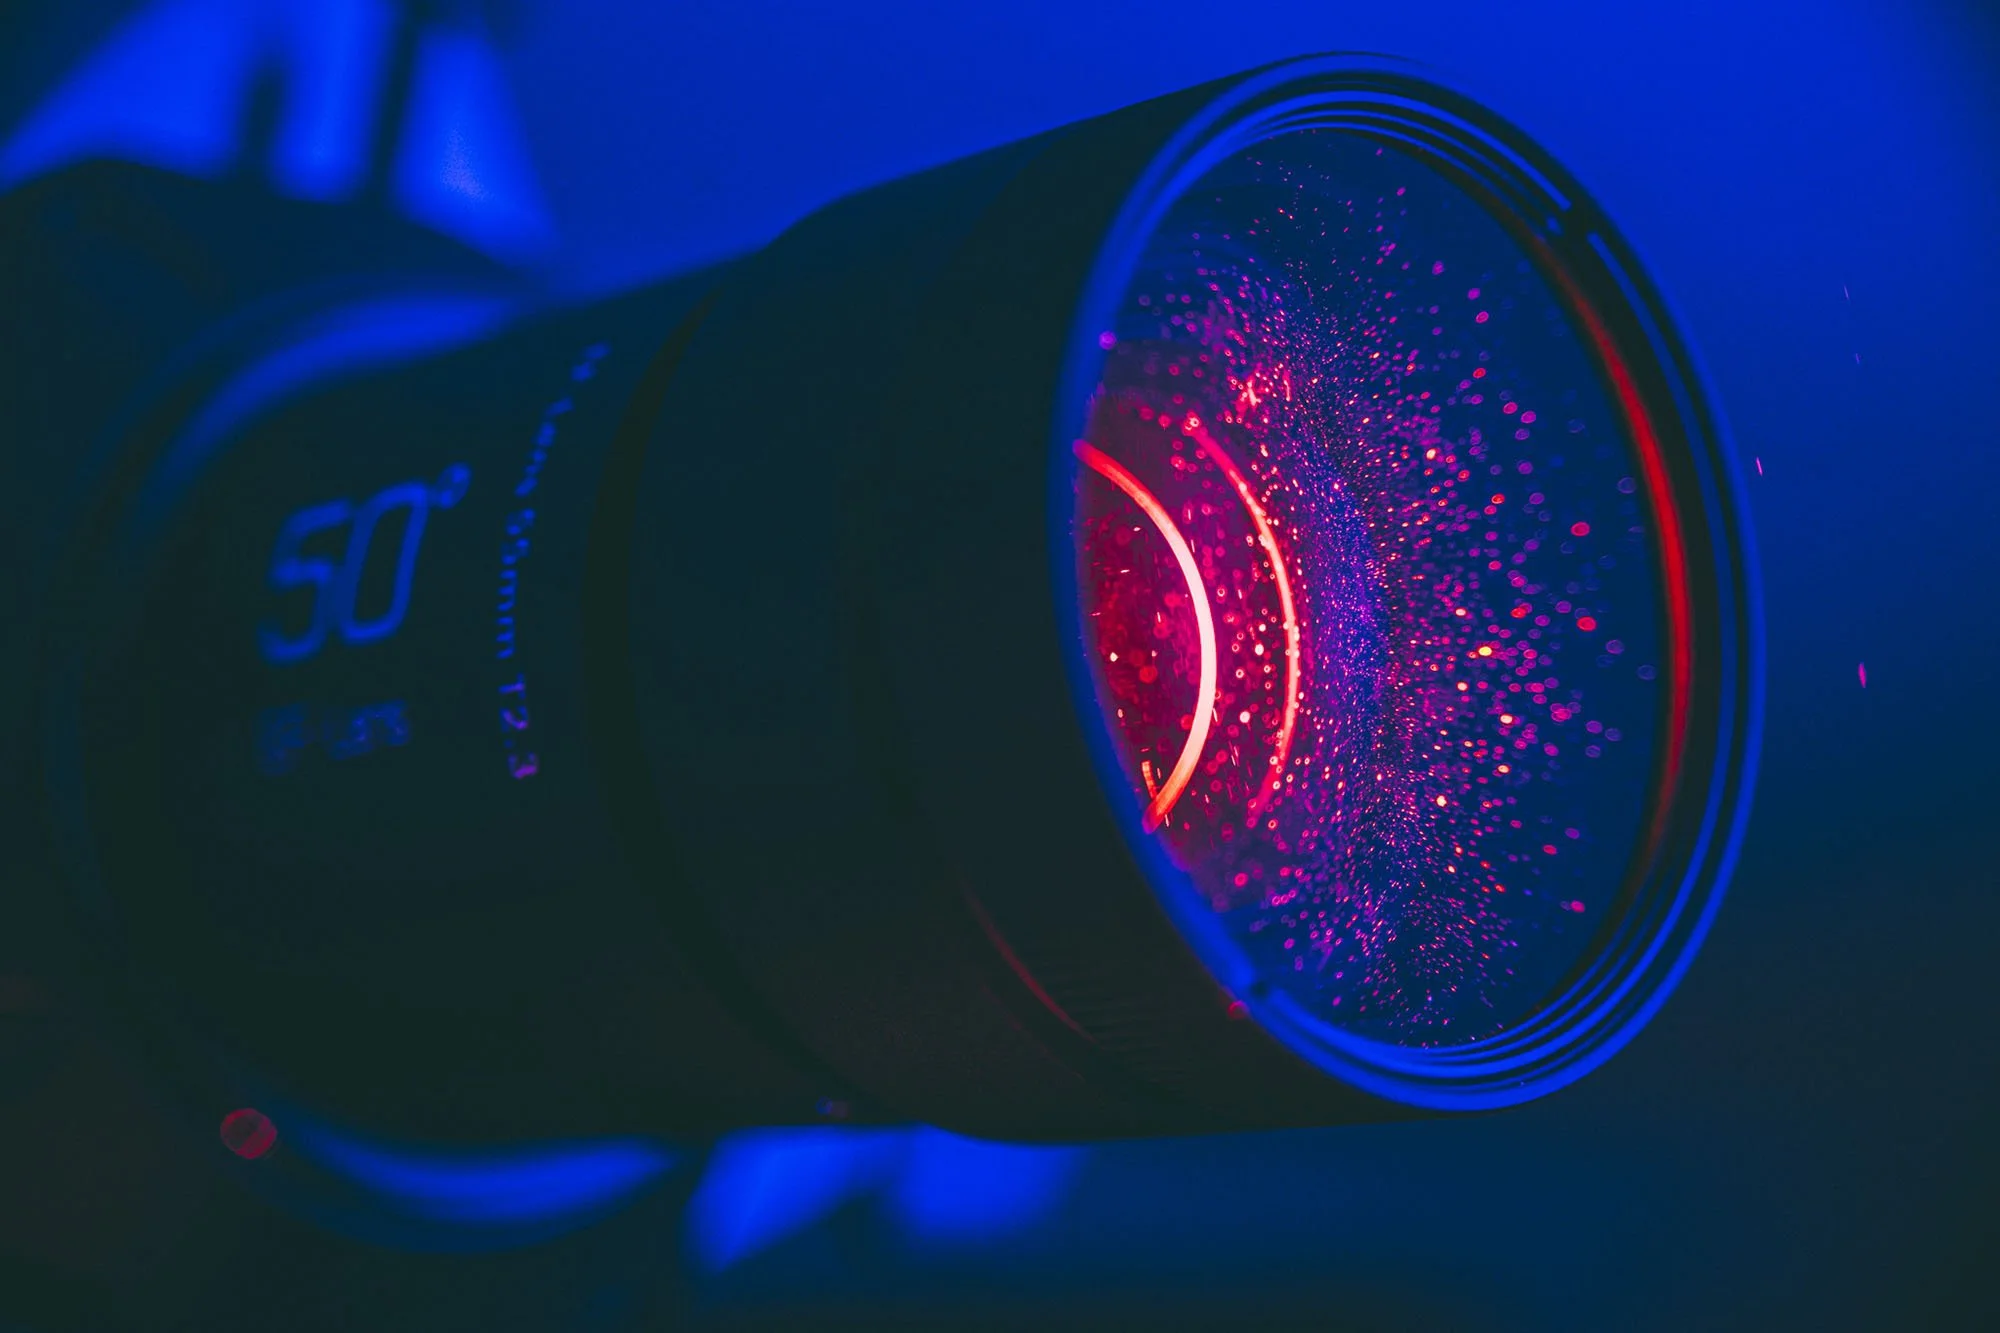
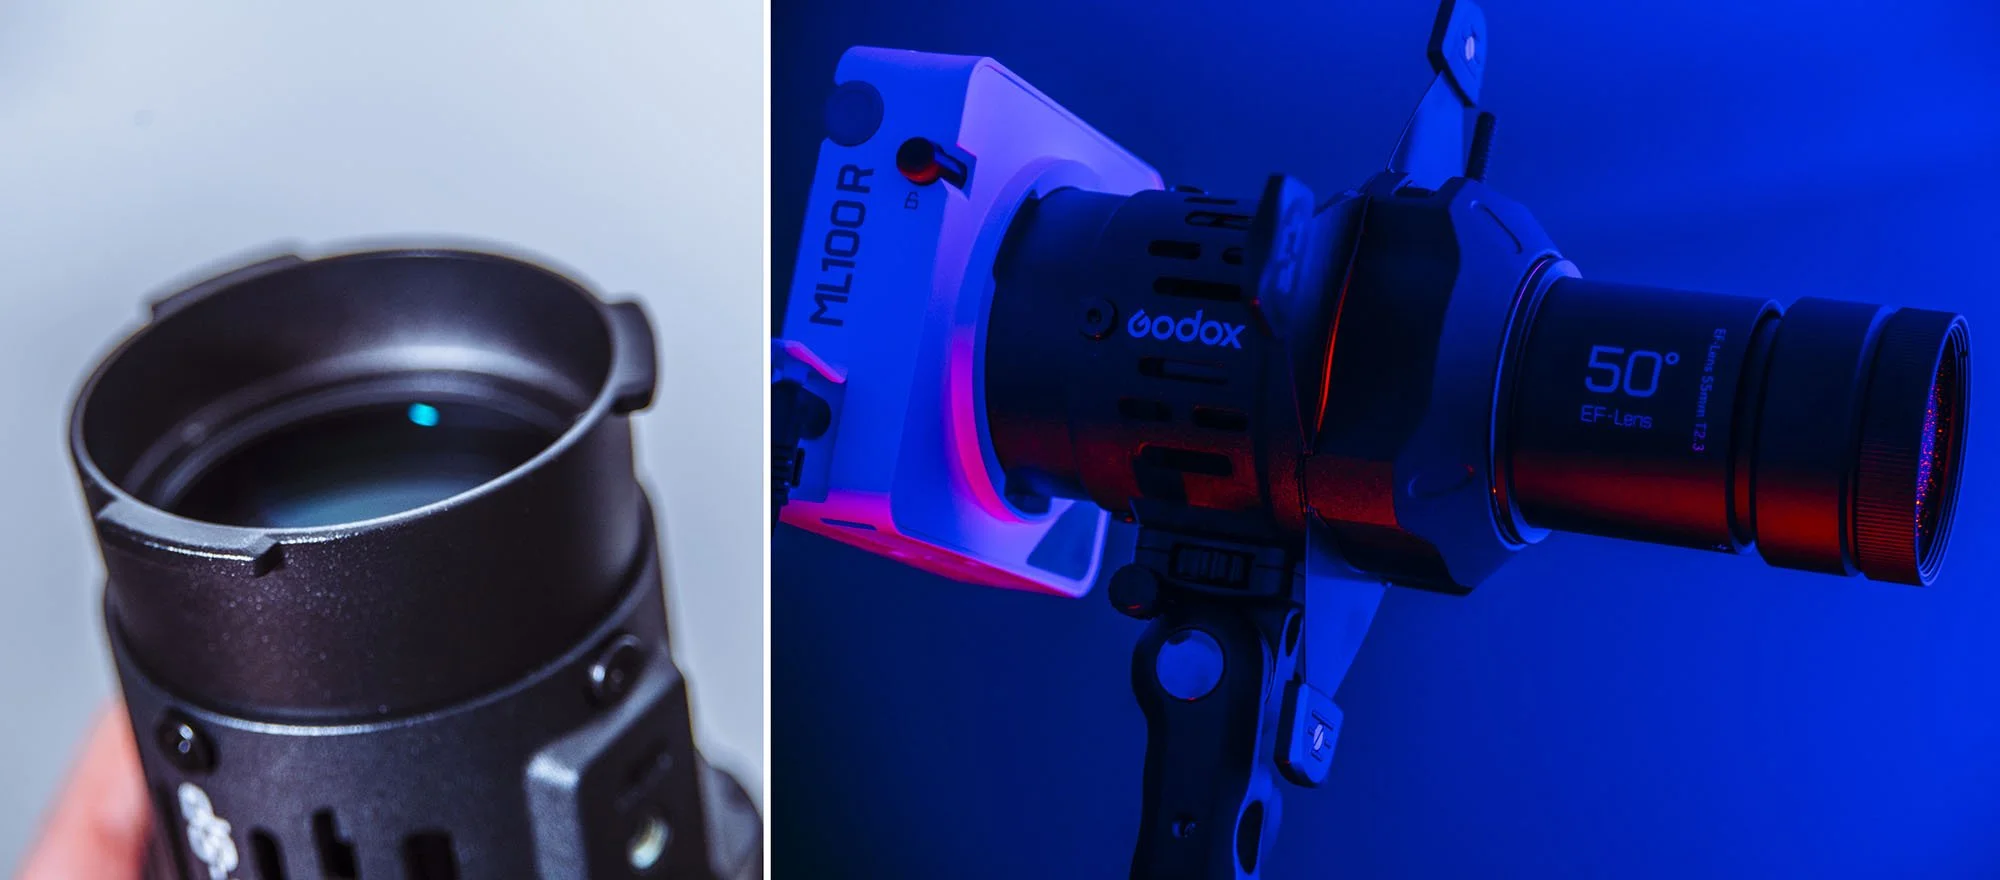
The Godox-Mount LED Projection ML-SP can take any of the three available lenses: 19°, 36°, or 50°. I opted for the 50° as that’s the widest lens, and I’ll explain that in a moment. Remember, these lenses are measured in beam angle, not in mm, unlike other lenses.
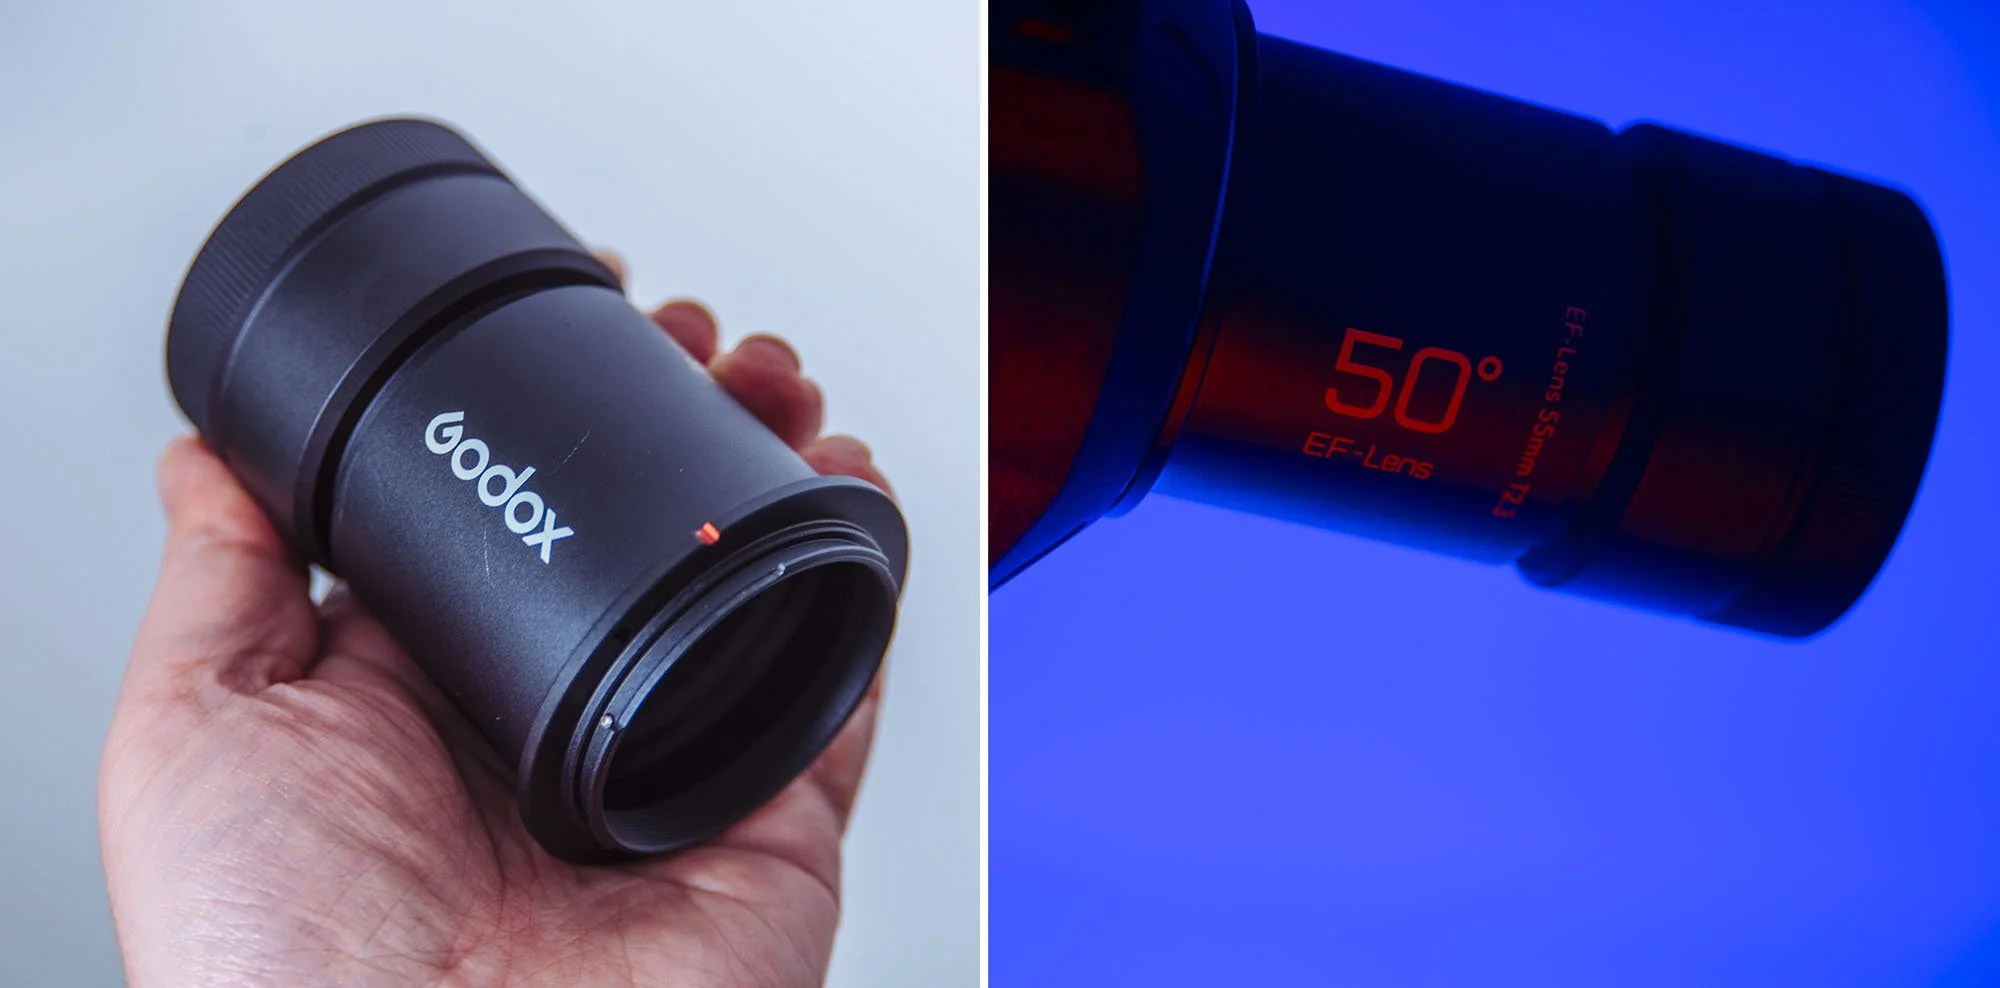
You can choose from 3 lens choices. The 19°, 36°, or 50°. I opted for the widest one at 50°.
What lens should you choose?
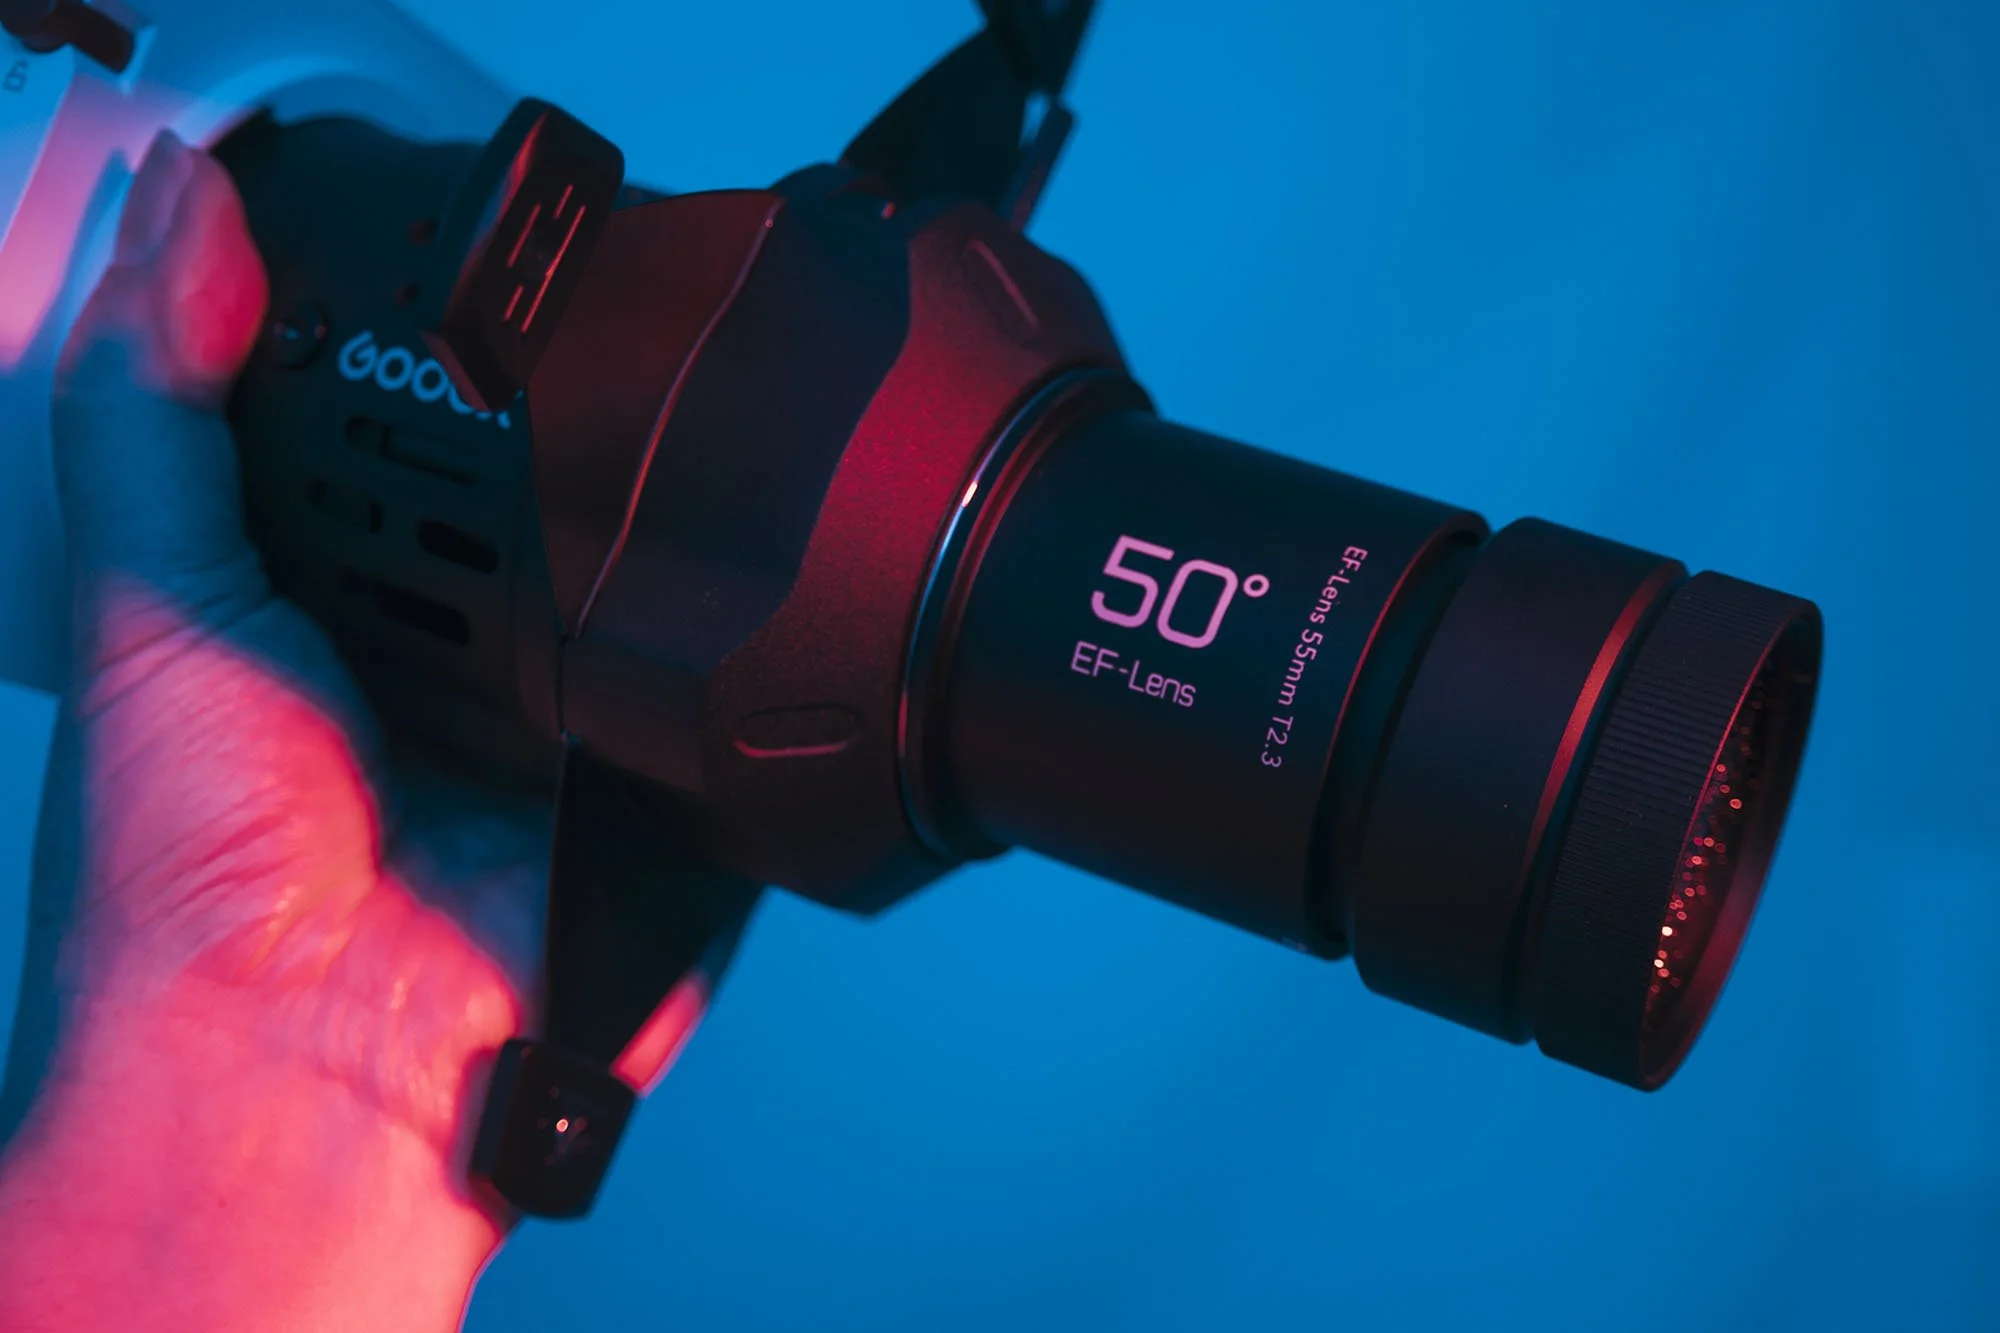
The 50° lens is the widest, which means it spreads the circle of light over the widest area at the shortest distance. For much of my work, I work in smaller sets, on location or even in home studios. So, to spread the light over a wide area in a small studio is perfect for me. But, if you need this spot to be further away from that subject or background, then you’ll need to be mindful of how much that spotlight will spread. For example, let's say you shoot a lot of film sets and you’re shooting wide sets where you absolutely cannot have the lights and lightstands in shot. Instead, you’ll need to move your spotlight much farther away from the talent; therefore, a 36° or 19° lens may be better for you and your work.
Choosing the right spotlight lens for your work is crucial.
Are there any downsides to the wider lens?
An argument can be made that it’s also possible to channel and flag the light from the wider lens using the inbuilt blades. Thereby making the wider lens the best choice for all scenarios. Although this is technically true, you can indeed cut the light down into a very small spot or slice with the internal blades, the wider lens will result in less power reaching the target. That wider lens is designed to spread the power of the light over a wider area, so when we cut that light down, you ultimately have less light at the target than if you used a longer, more focused lens to begin with.
TL;DR: If you shoot in home studios or smaller locations like offices. I recommend the 50° lens. If you’re planning to shoot in wider sets and place the light farther away from the talent, go for the 19° or 36° lens.
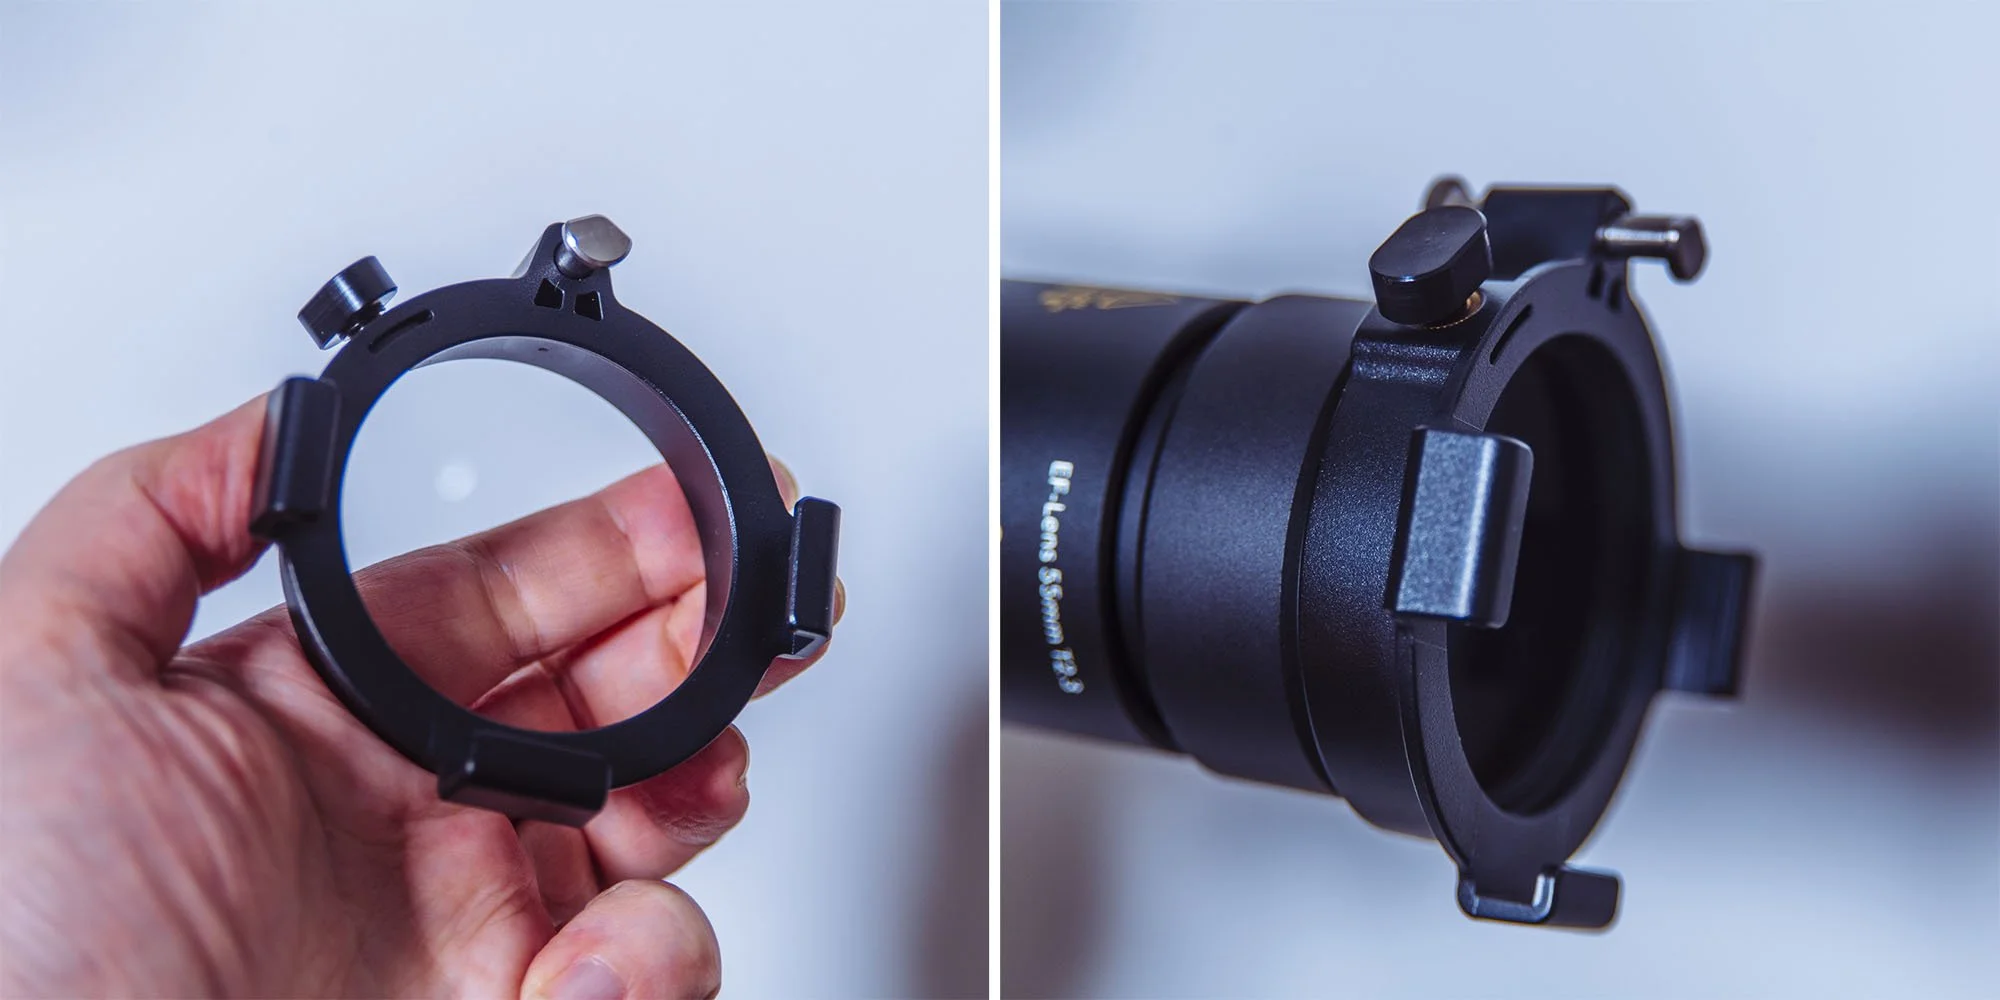
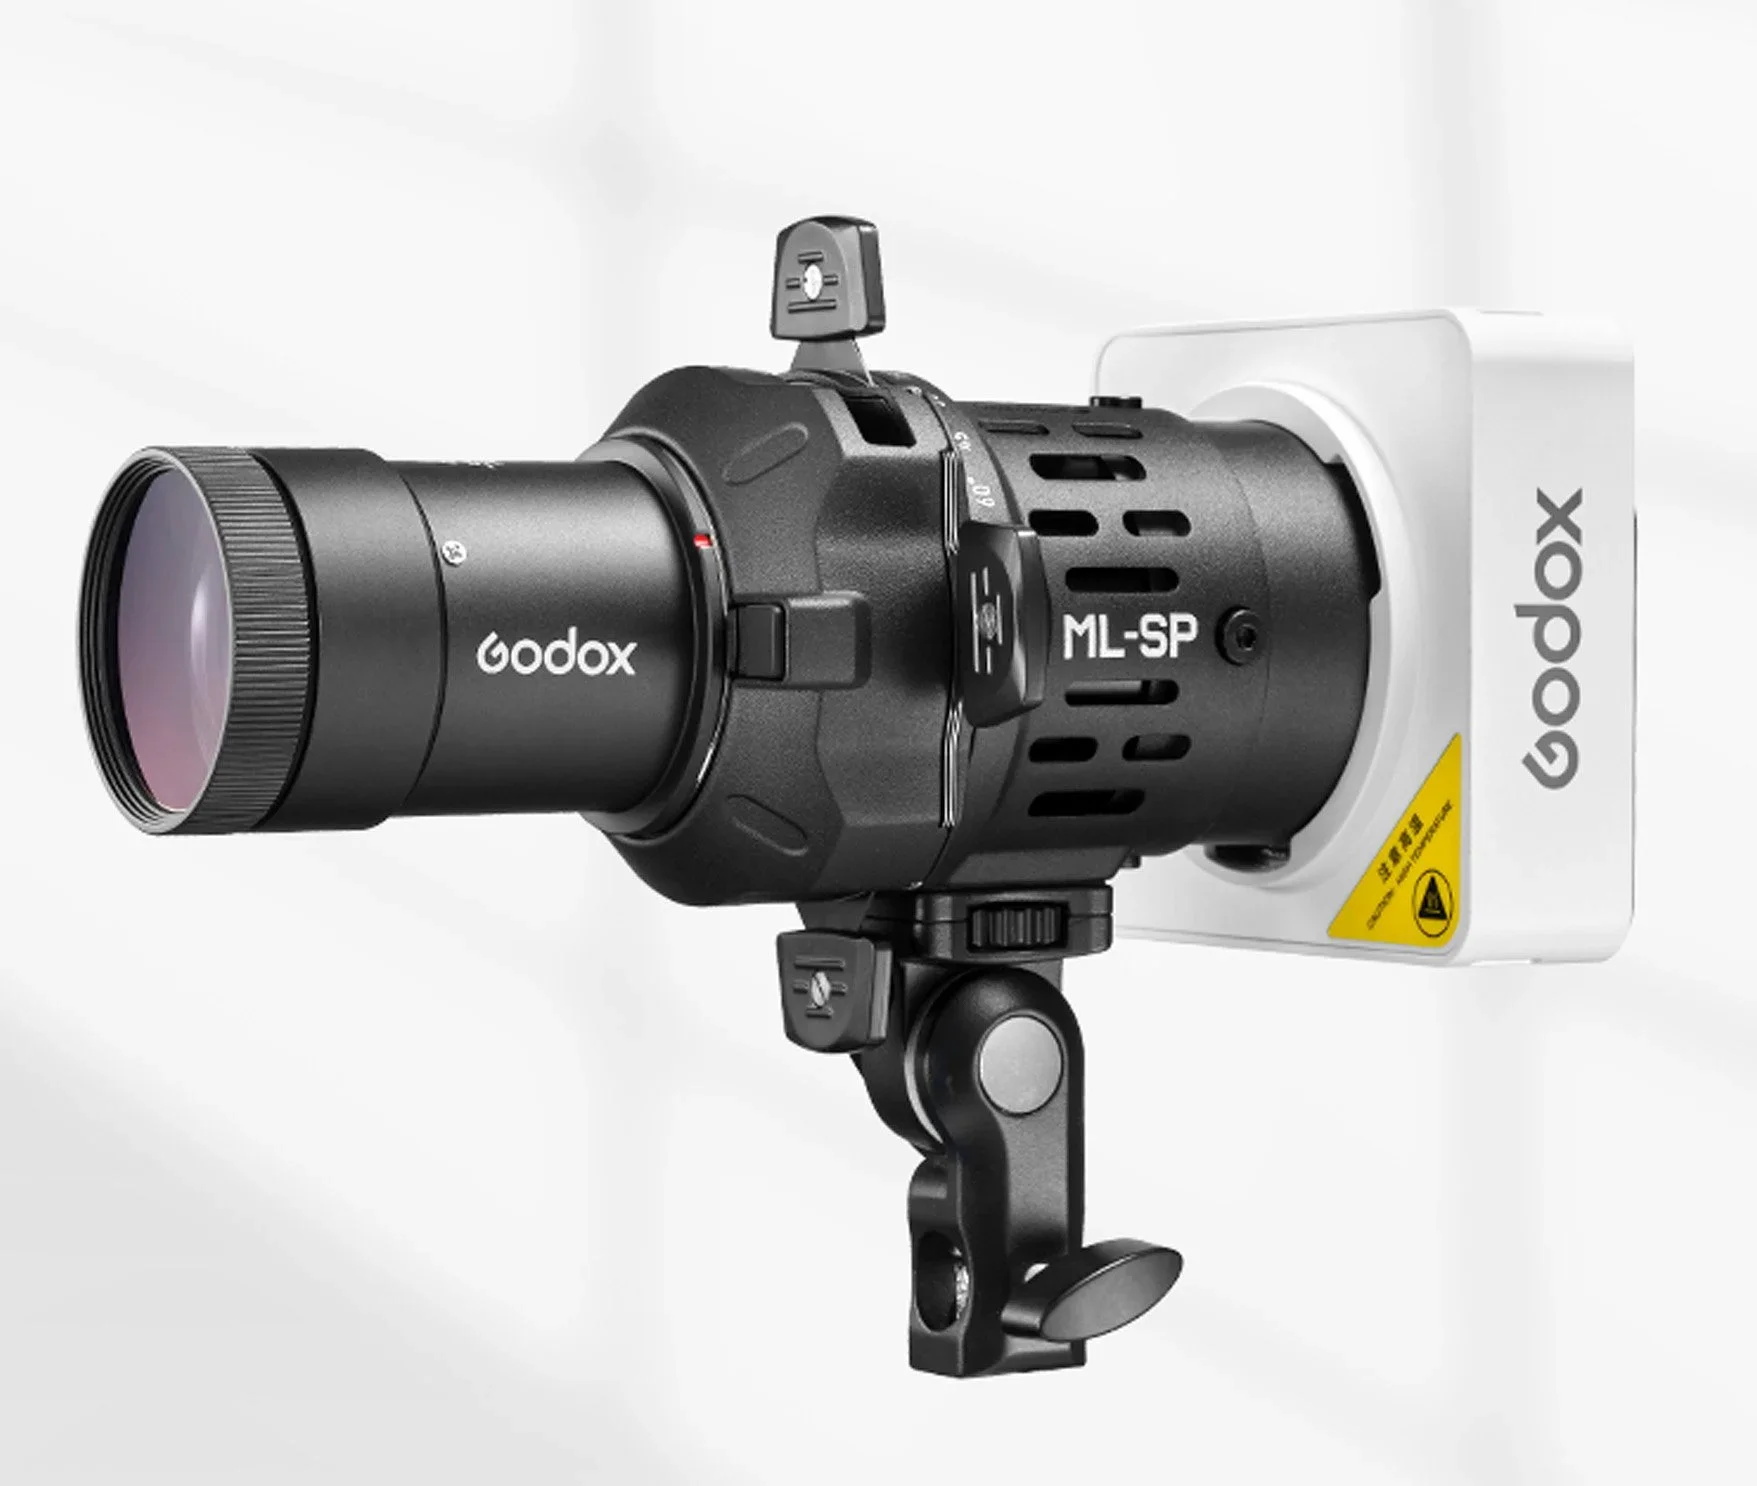
Lastly, it’s worth noting that, like many other spotlights, this one comes with a Canon EF mount as standard. In theory, you can, of course, use any Canon EF lens on this spotlight, but just be warned that those lenses are not specifically designed for this spotlight and, as such, will likely not offer you great results. Remember, most Canon lenses are designed to focus light entering the lens, whereas the lenses on this spotlight are specifically designed to focus light leaving the lens.
The ML-SP will accept EF-mount lenses although keep in mind that the lenses designed for the ML-SP will provide the best results.
Focusing
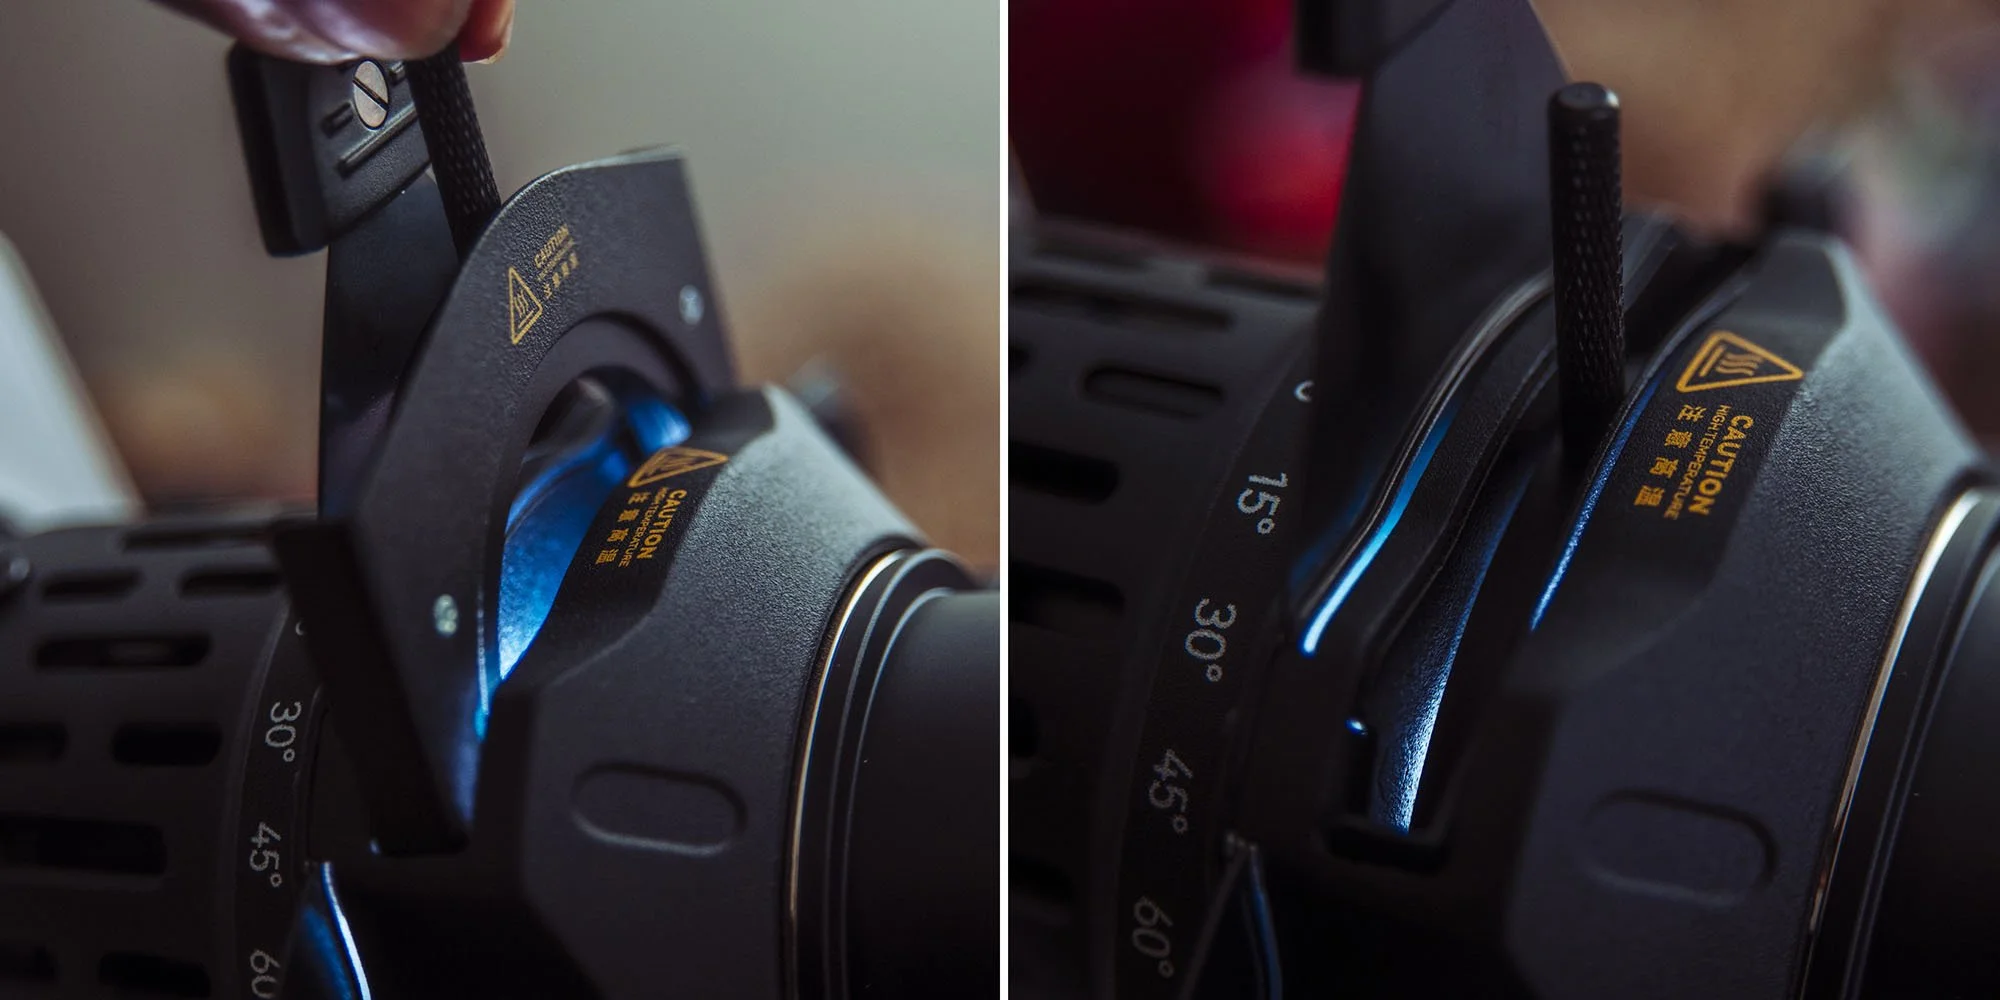
Another unique aspect of this spotlight is how it focuses the light and, more importantly, its gobos. Nearly every other spotlight I’ve tested uses the same focus method. A push-and-pull focusing method that requires you to move the entire lens barrel closer to or farther away using a thumbscrew to tighten it off. This is painfully inaccurate and, in most cases, extremely ineffective. Remember, these lenses are designed to be as bright as possible on the modifier, which means they have an insanely shallow depth of field, making it very tricky to get your gobo pin-sharp. Once again, though, Godox has solved this issue by allowing you to fine-tune the spotlight's focus via a highly accurate, friction-based rotating lens, making pin-sharp focus extremely easy.
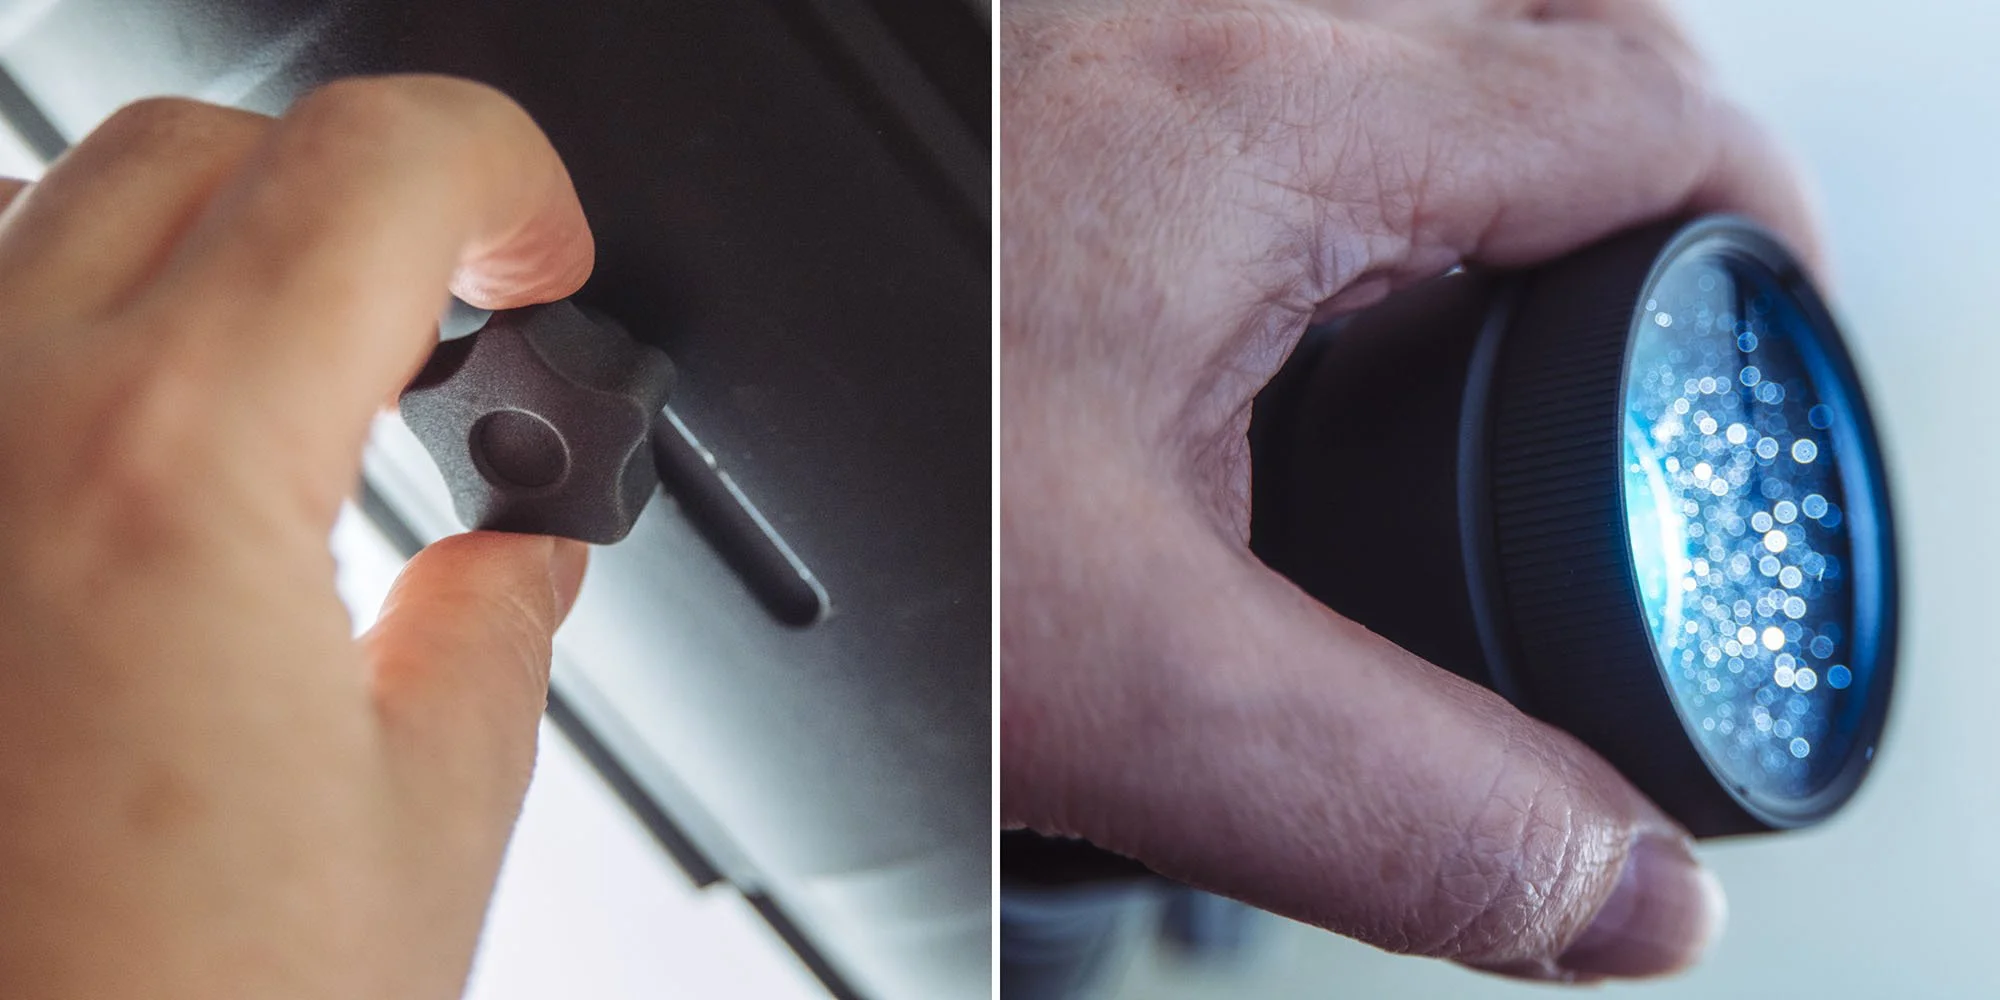
On the left above, you have the traditional way of focussing spotlights which is very inaccurate compared to the ML-SP simple focusing ring.
The Gobos
Nearly all of these spotlights come with a mini pack of gobos to get you started. As I stated earlier, there are hundreds to choose from if you need something specific, but this pack covers 10 different options to get you started.
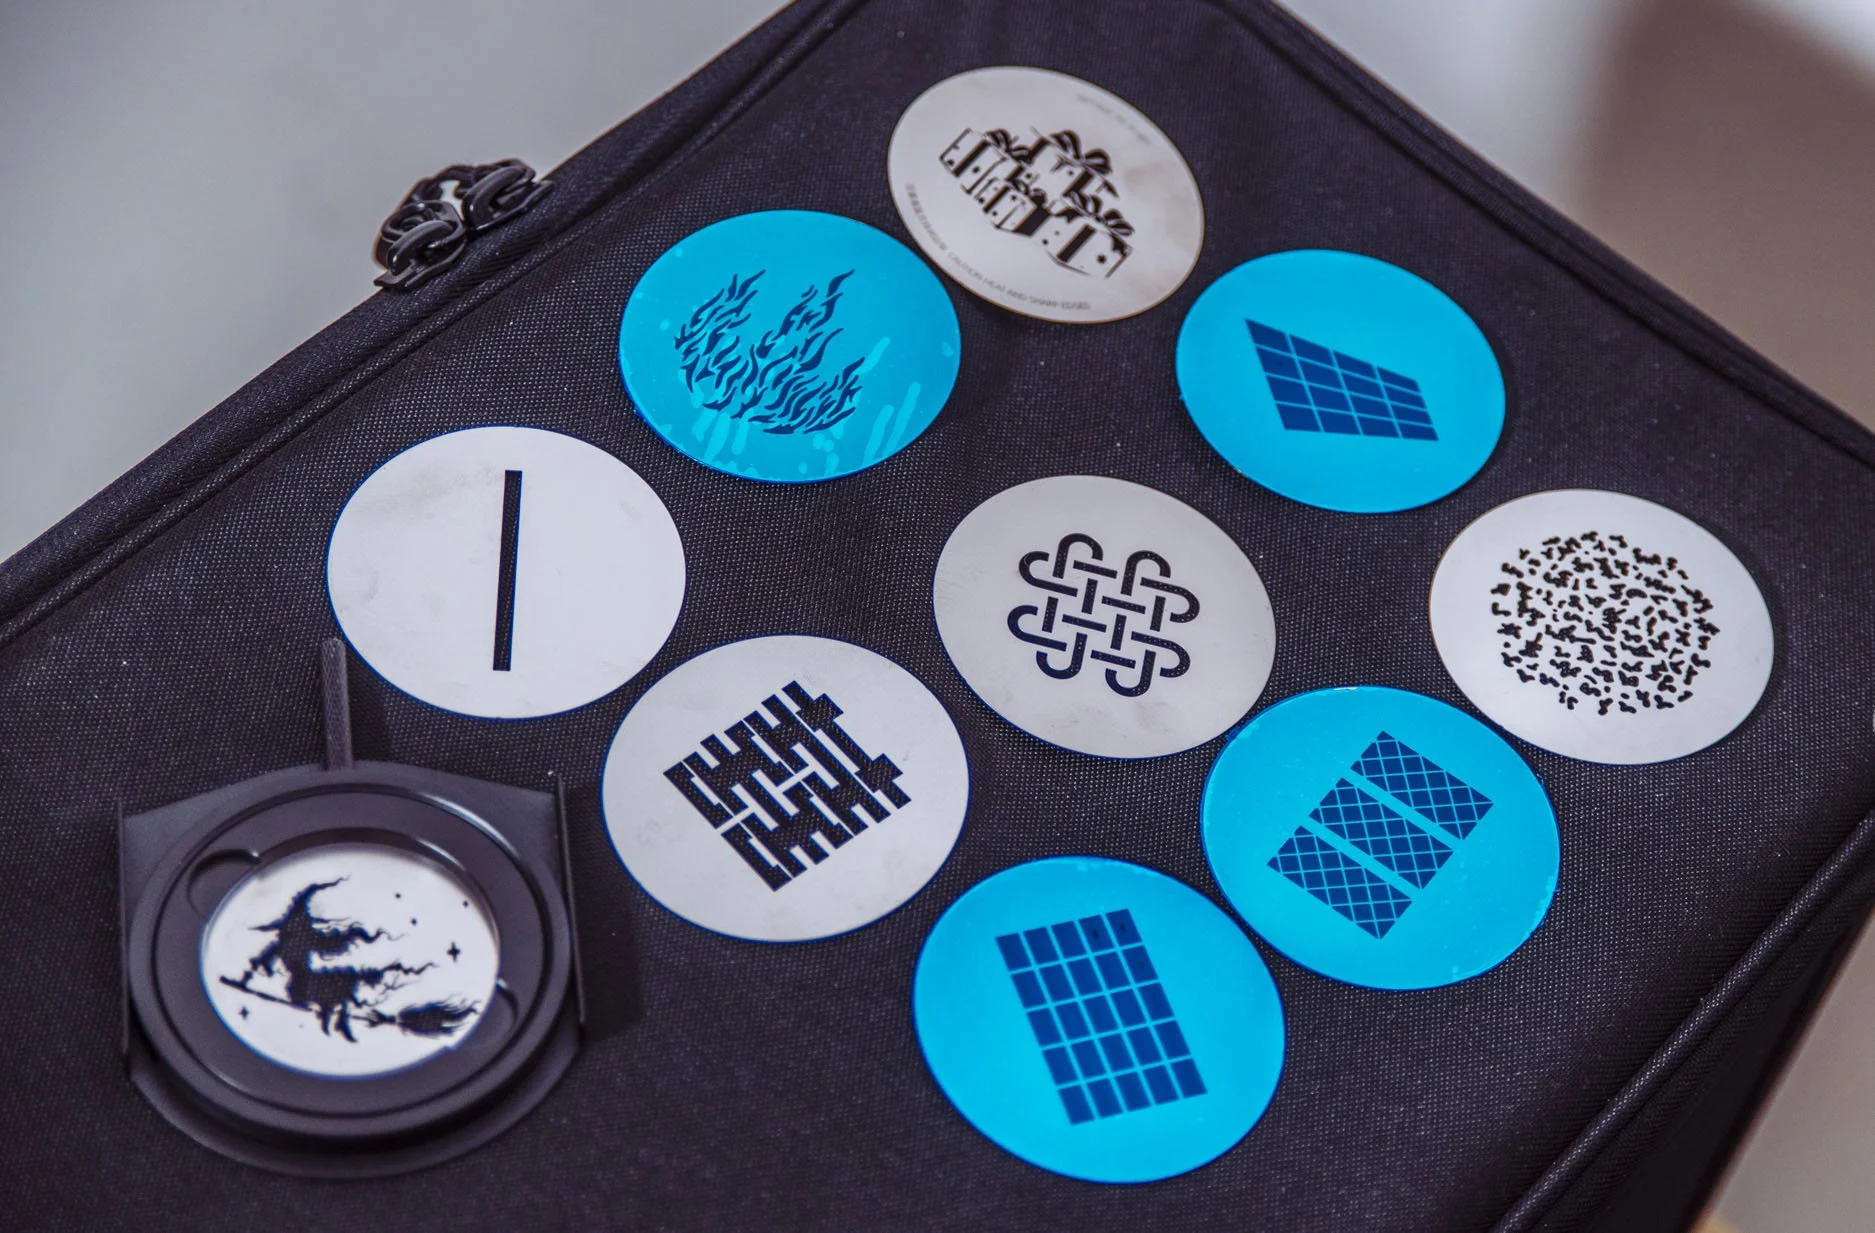
Included with the ML-SP is a selection of 10 gobos. (The ones in blue just haven’t had their protective film removed)
Colour Frame
This is simply a frame held to the front of the spotlight with a thumbscrew on the side. In a world of RGB LEDs, it’s unlikely you’ll need this. But if you’re one of those crazy people who only buy daylight LED lights and not RGB ones, you could, of course, use this gel holder to secure your little squares of vintage gels like the Victorian squire that you are.
You likely won’t need this gel holder, but it’s nice to have.
Gobo Holder
This is the tool you actually place your gobo into before lowering it into your spotlight. At first glance, this seems like a standard gobo holder, but there are actually a couple of unique and fairly clever design choices here that bear further inspection.
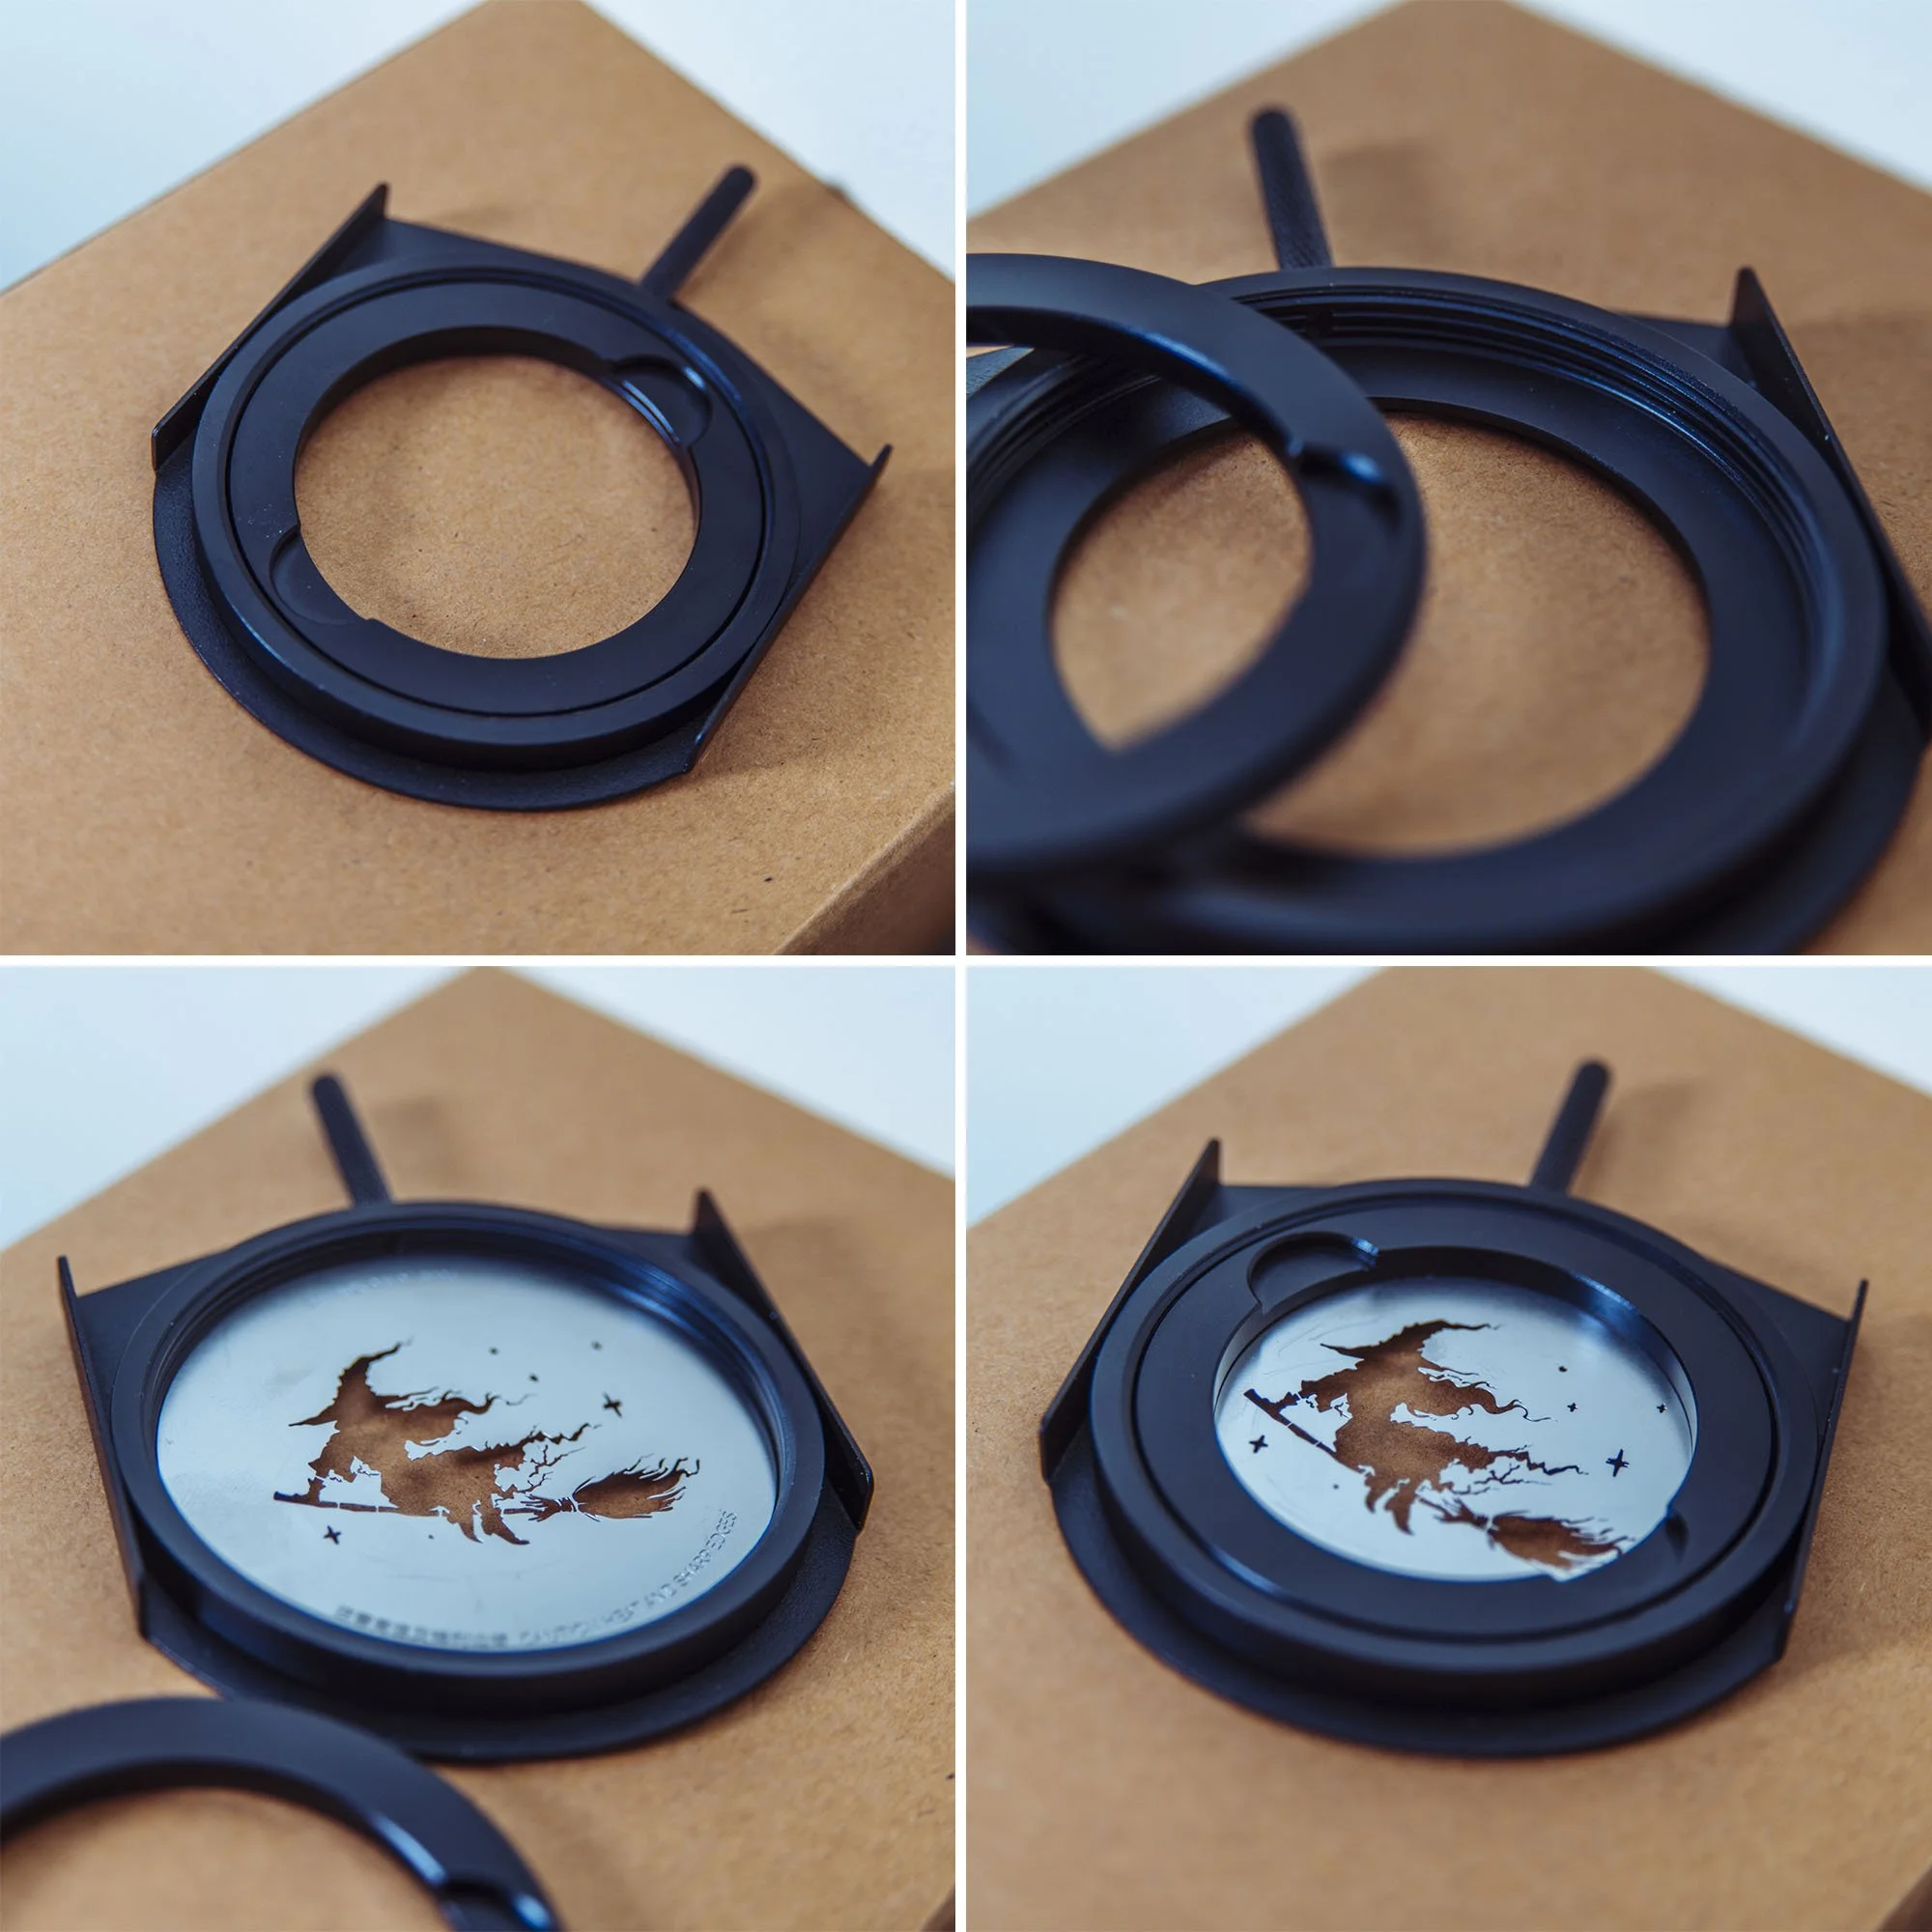
The unique design of this gobo holder is a little fiddly at first, but it does offer some very unique benefits.
Firstly, most gobo holders are simply two sheets of metal, often hinged at the bottom. You simply drop your gobo between the two sheets of metal and drop it into the spotlight. There’s nothing overly wrong with this design, and it does the job, but there are a couple of annoying things that can happen when you do this. Firstly, and most importantly, that hinge doesn’t always stay closed, which can leave a gap at the top of the spotlight where you've dropped the gobo. As you may well imagine, this gap is now letting out light, and in some extreme cases, I've had to cover it with a cloth because it was bouncing light around the set. This holder is not hinged; in fact, it's a disk that you have to unscrew, drop your gobo into and then screw back in place. This means the entire gobo holder is now one enclosed unit when placed into the spotlight, thereby eliminating any chance of light spilling out.
The design of the gobo holder means that there is almost no light at all being lost or escaping the gobo slot.
This screw-in disk approach also has another benefit: it keeps the gobo extremely flat and flush against the holder. This, in turn, results in an extremely crisp gobo shadow when focused. Why is this a big deal? Remember when I said that other gobo holders were hinged? Well, those don't always keep the gobo inside, flush against the holder, and this results in a gobo that is almost impossible to focus from edge to edge. Essentially, these spotlights aim to push as much light as possible out, and as a result, the lens they use has an EXTREMELY shallow depth of field. So, if your gobo isn't set perfectly flush against the holder inside, you may get the top of the gobo in focus on the wall, but the bottom of the gobo will be out of focus. This problem is exacerbated the smaller the spotlight gets, so Godox have come up with a very clever solution, as I’m sure a hinged holder would plague a small spotlight like this one.
The only downside of this screw-in holder is getting the gobo into just the right position before you screw it into place… but Godox have already thought about that, and they have a solution to that other very annoying gobo issue that I’ll discuss below.
Unique Rotating Barrel
This spotlight has a very unique feature that I've actually never seen before on another spotlight unit, and that’s the fact that the front of the entire unit spins. Yes, the entire front element spins, and it even has degree markings on the barrel to show you exact angles.
Why is this useful?
Firstly, the issue of a wonky gobo is incredibly annoying. If you’ve never used a gobo in one of these units before, you need to know to place the gobo upside down and back to front, as the lens will flip and reverse the design. So with that new orientation in mind, you also need to make sure its level…. once flipped and inverted! Consequently, you rarely get it perfect the first time, and you often need to remove the holder, slightly rotate the gobo and try again. But with this new ML-SP unit, you don’t need to worry about the rotation of the gobo in the holder, as you can just spin the barrel once it's in place and adjust it later.
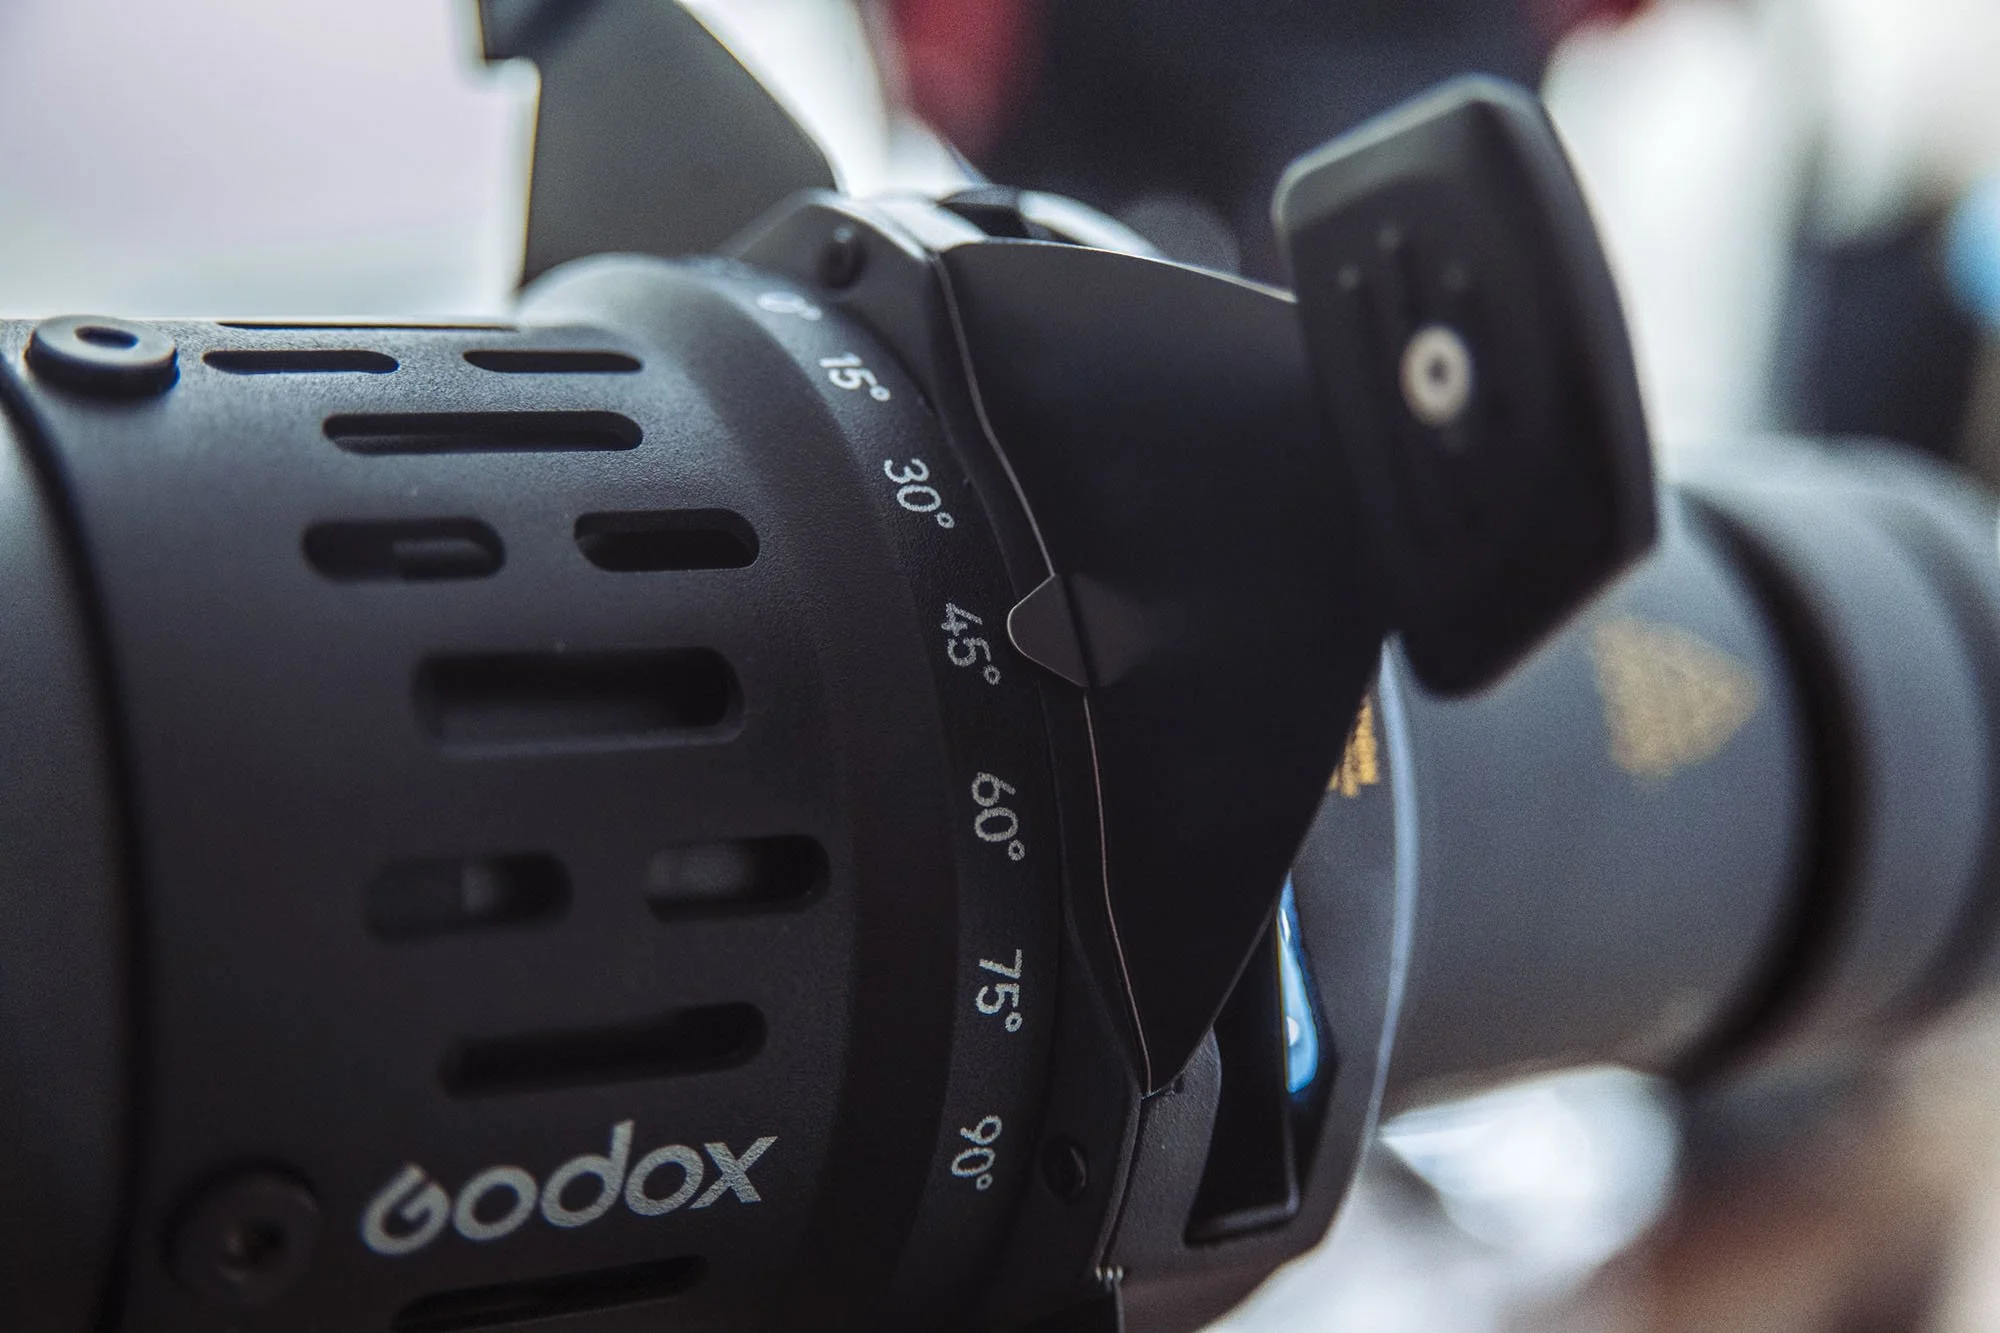
The barrel of the ML-SP can be rotated. This is actually more useful than you may think.
Blade Adjustments
If I’m being honest, I don’t typically use gobos very often; instead, I use these spotlights to cut slices of light across the background or the model. Instead of using a gobo with a slice in it, I often opt for the spotlight’s internal blades to craft a slice of light. This is easy to do, and you simply bring them together to get the size of slice you want. The issue comes when you want to angle that slice, for example, place that slice of light at 45 degrees across the wall behind the model. This seems simple enough, but these blades are typically designed to go up and down and from side to side. The slot housing the blades doesn't often allow you to angle them at extreme angles, and even if you can, you can often lose light in the corners as a consequence.
But this isn’t a problem with Godox’s new rotating barrel. Simply place the blades together at right angles to maximise the spread of light, and then rotate the whole barrel afterwards to the desired angle.
This is one of those features you didn’t know you needed until you have it.
One of the benefits of the rotating barrel, is the ability to cast slices of light at any angle.
The Shots
Let me show you a recent shoot where I used the spotlight and the blade-angle feature in the background.
Click on any of the images above to fit them to your screen.
If you’re interested in seeing the rest of that shoot as well as lighting diagrams and a breakdown of how it was shot, take a look at my recent review of the Godox LiteWafer to learn more.
Trifecta Test
We’ve seen the features of this new Godox Projection unit, but no matter how good they are, I assure you they’re all completely mute if the unit fails the trifecta test. Features are nice to have, but light quality is always the most important part of any modifier.
Light Spread
Just a reminder: I have the 50° lens, the widest available for this unit.
At 2m I was able to get a spot of around 2m in diameter across my white backdrop. And for scale against the other images, it's worth remembering that my backdrop is 2m wide.
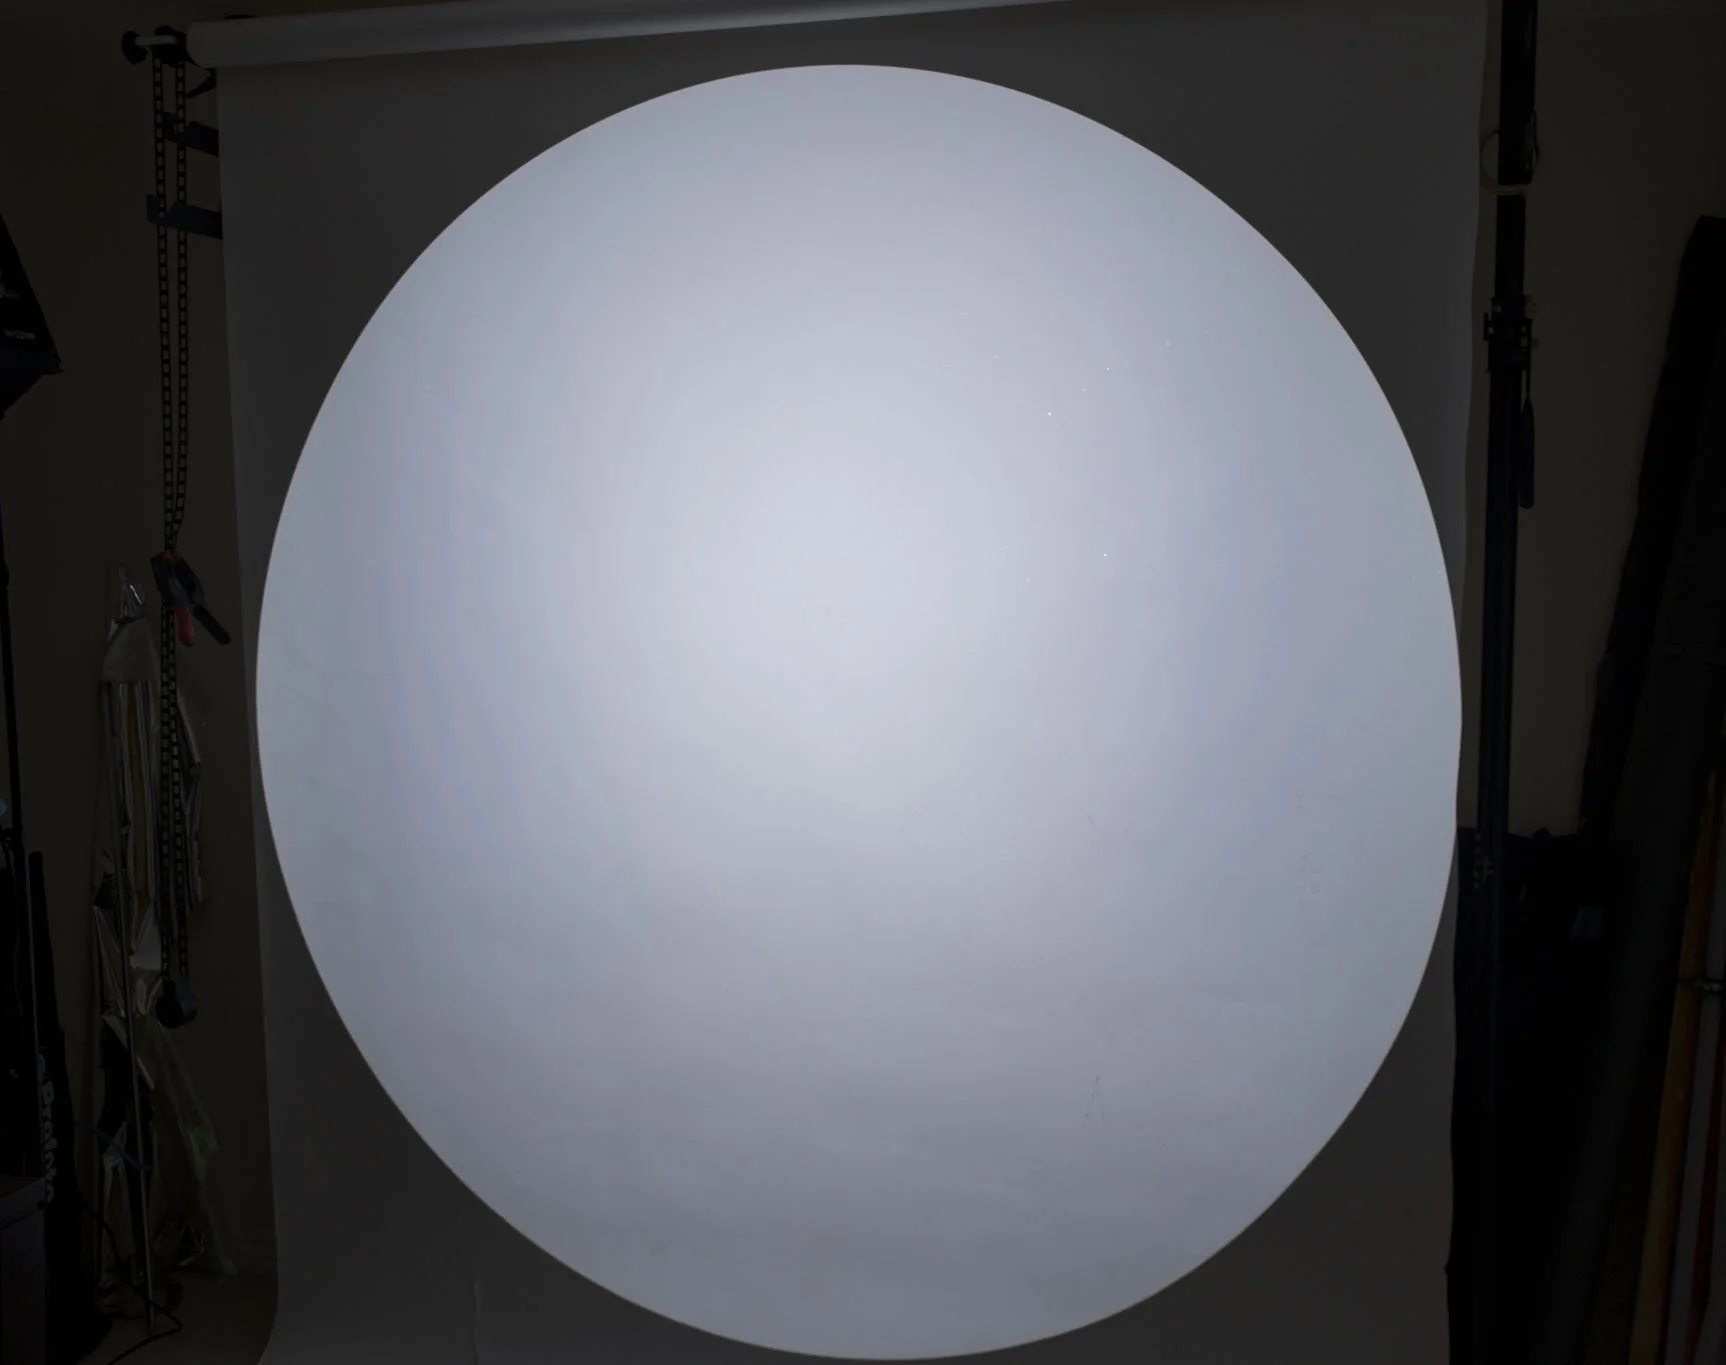
Spoiler Alert: But that’s extremely good!
I won't be naming any names here, but let's look at the competition with their widest available lenses attached.
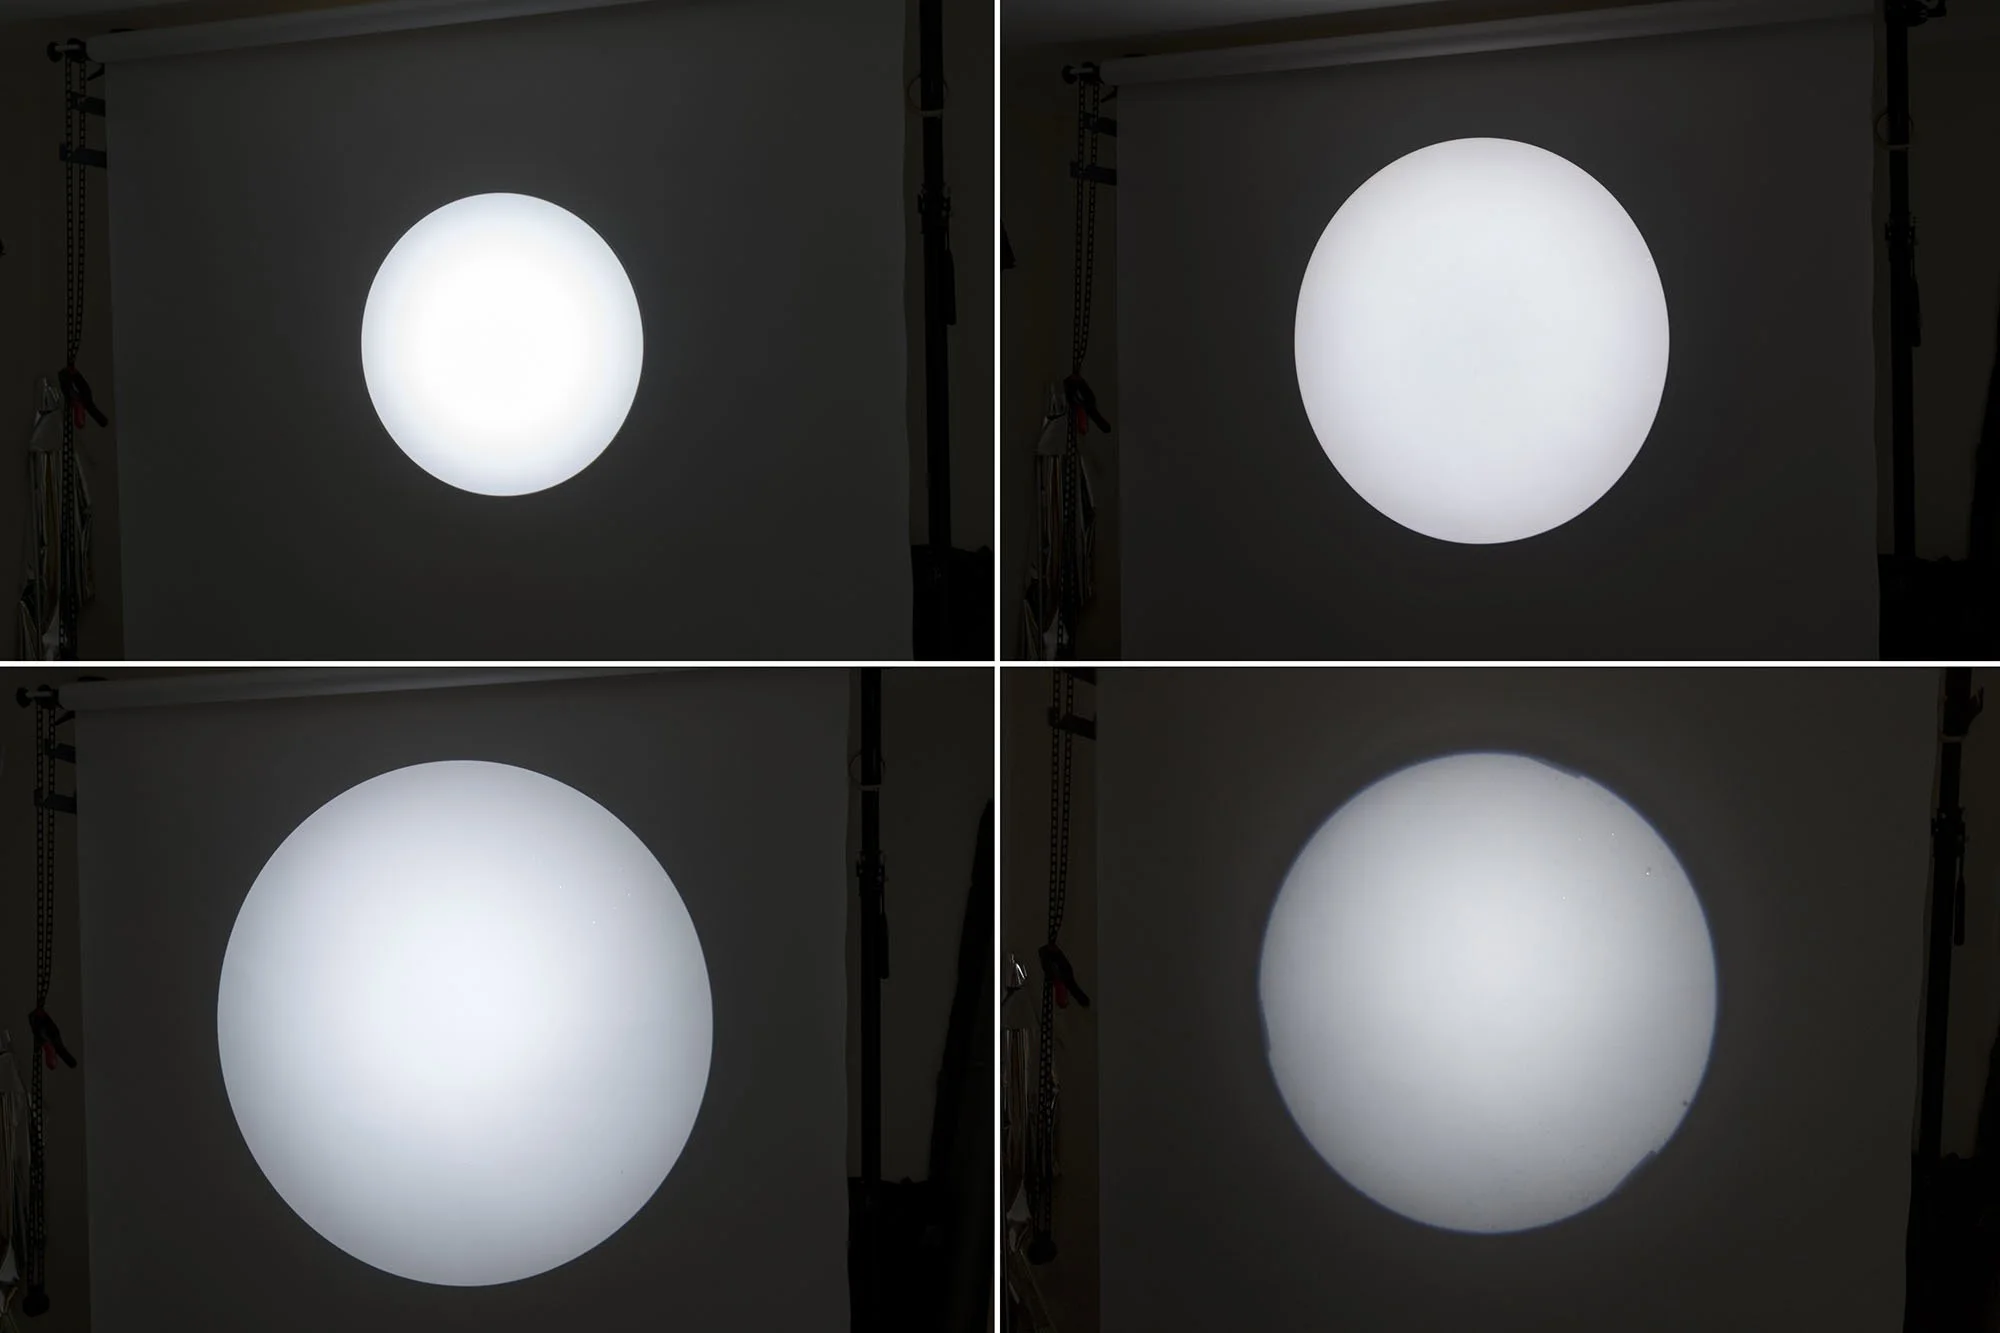
Firstly, yes, I have a lot of spotlights, and no, this isn’t all of them. As I mentioned above, remember that this backdrop is 2m wide, and you can see that none of these reaches the edges of it like the ML-SP above did. Again, this is a remarkable spread of light from the ML-SP for such a small unit.
Vignetting
This is a way to describe how dark the edges of the spot are compared to the centre of the spot, and you can liken this to a hot-spot from other modifiers. As lenses have gotten better and these spotlights have gotten more advanced, so have the lenses attached to them. For me, the cleaner the edge-to-edge brightness, the better, as dealing with an exposure range across the light on a wall or subject can be problematic.
Firslty lets take a look at the edges of the spot from our ML-SP. Note that to make it easier to see any variance in the exposure across the spot, all of these images are underexposed by one stop.

Above is the ML-SP under-exposed by one stop to show any vignetting towards the edges.
If you’re new to these spotlight modifiers and not sure what you’re looking at or for, note that this one is very good. It’s almost the same exposure at the centre as it is at the edges. It’s also worth highlighting that this hot-spot effect is more pronounced in wider-lens spots. Therefore, the bigger the spot, the more noticeable the vignetting towards the edges becomes. So again, a spot of this size with minimal vignetting is excellent.
Below, I‘ll share some competition spotlights for comparison.
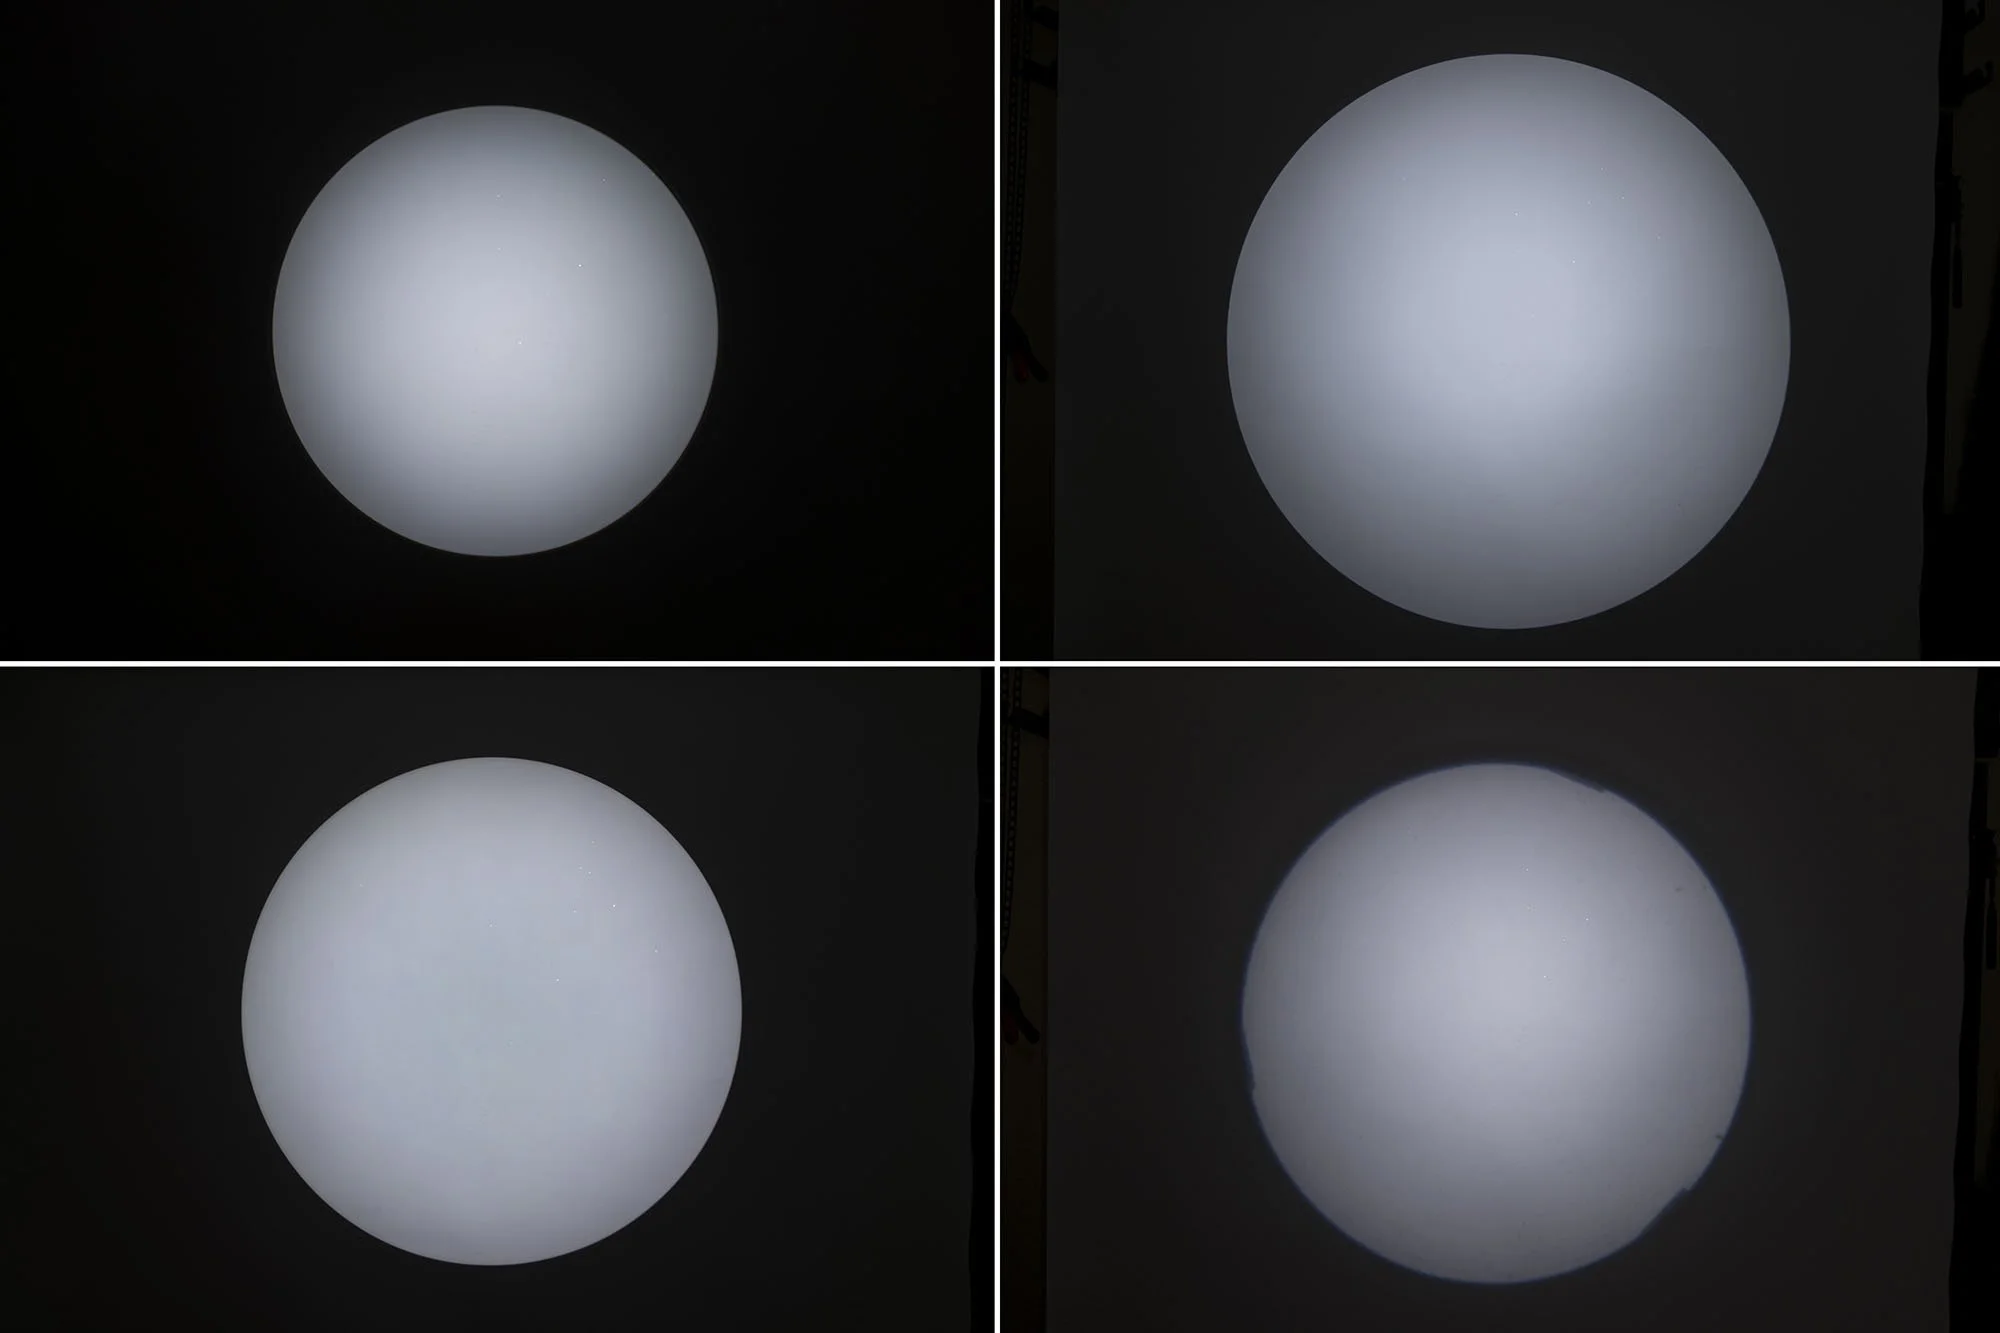
Above, you can see how the vignetting compares across a wide range of spotlights. Most show far brighter centres than edge,s and only one is excellent down there in the bottom left, but that one is very expensive and a colossal unit with a lens on it almost the same size as the entire ML-SP.
Brightness
This speaks to how much light is lost as it passes through the spotlight. This is often highly dependent on the lens, and those spotlights that use actual camera lenses tend to lose a tremendous amount of light due to all the elements and aperture leaves inside them. The ML-SP lens, on the other hand, is very clean and has very little inside it to limit the light.
For context, I’m using the Godox ML100R LED with the spotlight, which is a 100W LED.
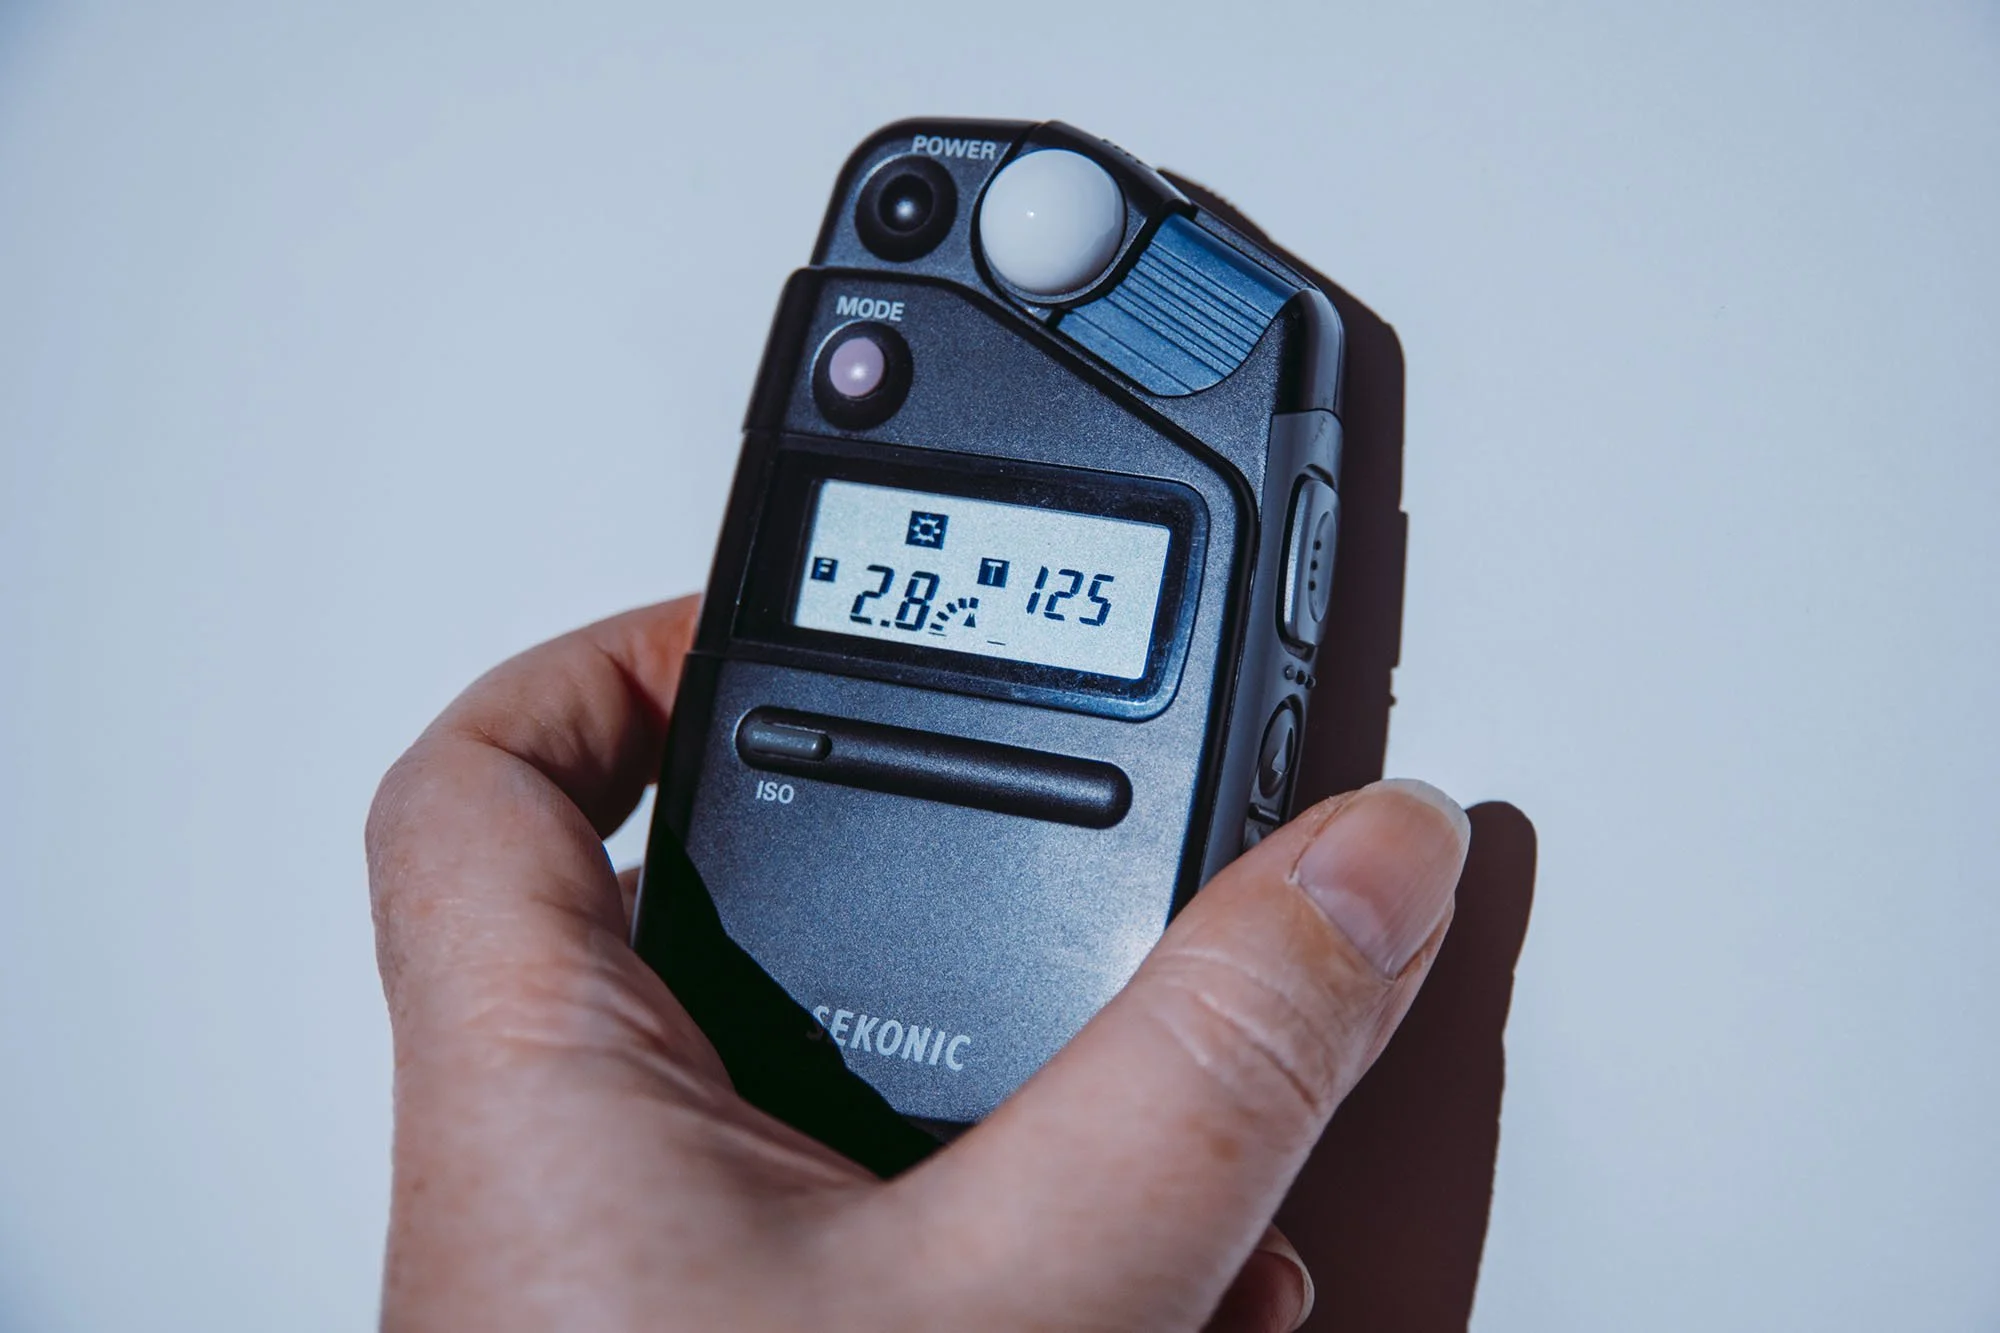
Note that the light and spotlight are 2m away from the background. The light was set to 100% power, and the resulting exposure was ISO 400 / Shutter Speed 1/125th / f2.8 ½.
Without the spotlight attached, the ML100R at full power at 2m away gets ISO 400 / Shutter Speed 1/125th / f5.6.
TL;DR The spotlight loses around 1.5 stops of light. In my experience, this is pretty good, as some of these spotlight and lens combos can lose as much as 3 or 4 stops of power. The 1.5 stops of light loss is certainly manageable.
Other Factors
Size
The body of the ML-SP is very small and far smaller than any other spotlight I've tested. This is excellent if you're someone on the go, or working by yourself and cant carry a ton of kit. Plus, this may not be a modifer you use all the time, with this being so small, you would feel fine to bring it along ‘just in case’.

Weight
The ML-SP may be small, but it certainly isn’t lightweight. This is good and bad, of course, because the reason why it’s heavy is due to the entire unit being made of metal, and it all feels incredibly well-made. But that comes at a cost and at over 2 ½ ibs / 2.2kgs, you’ll certainly know it’s in your bag.
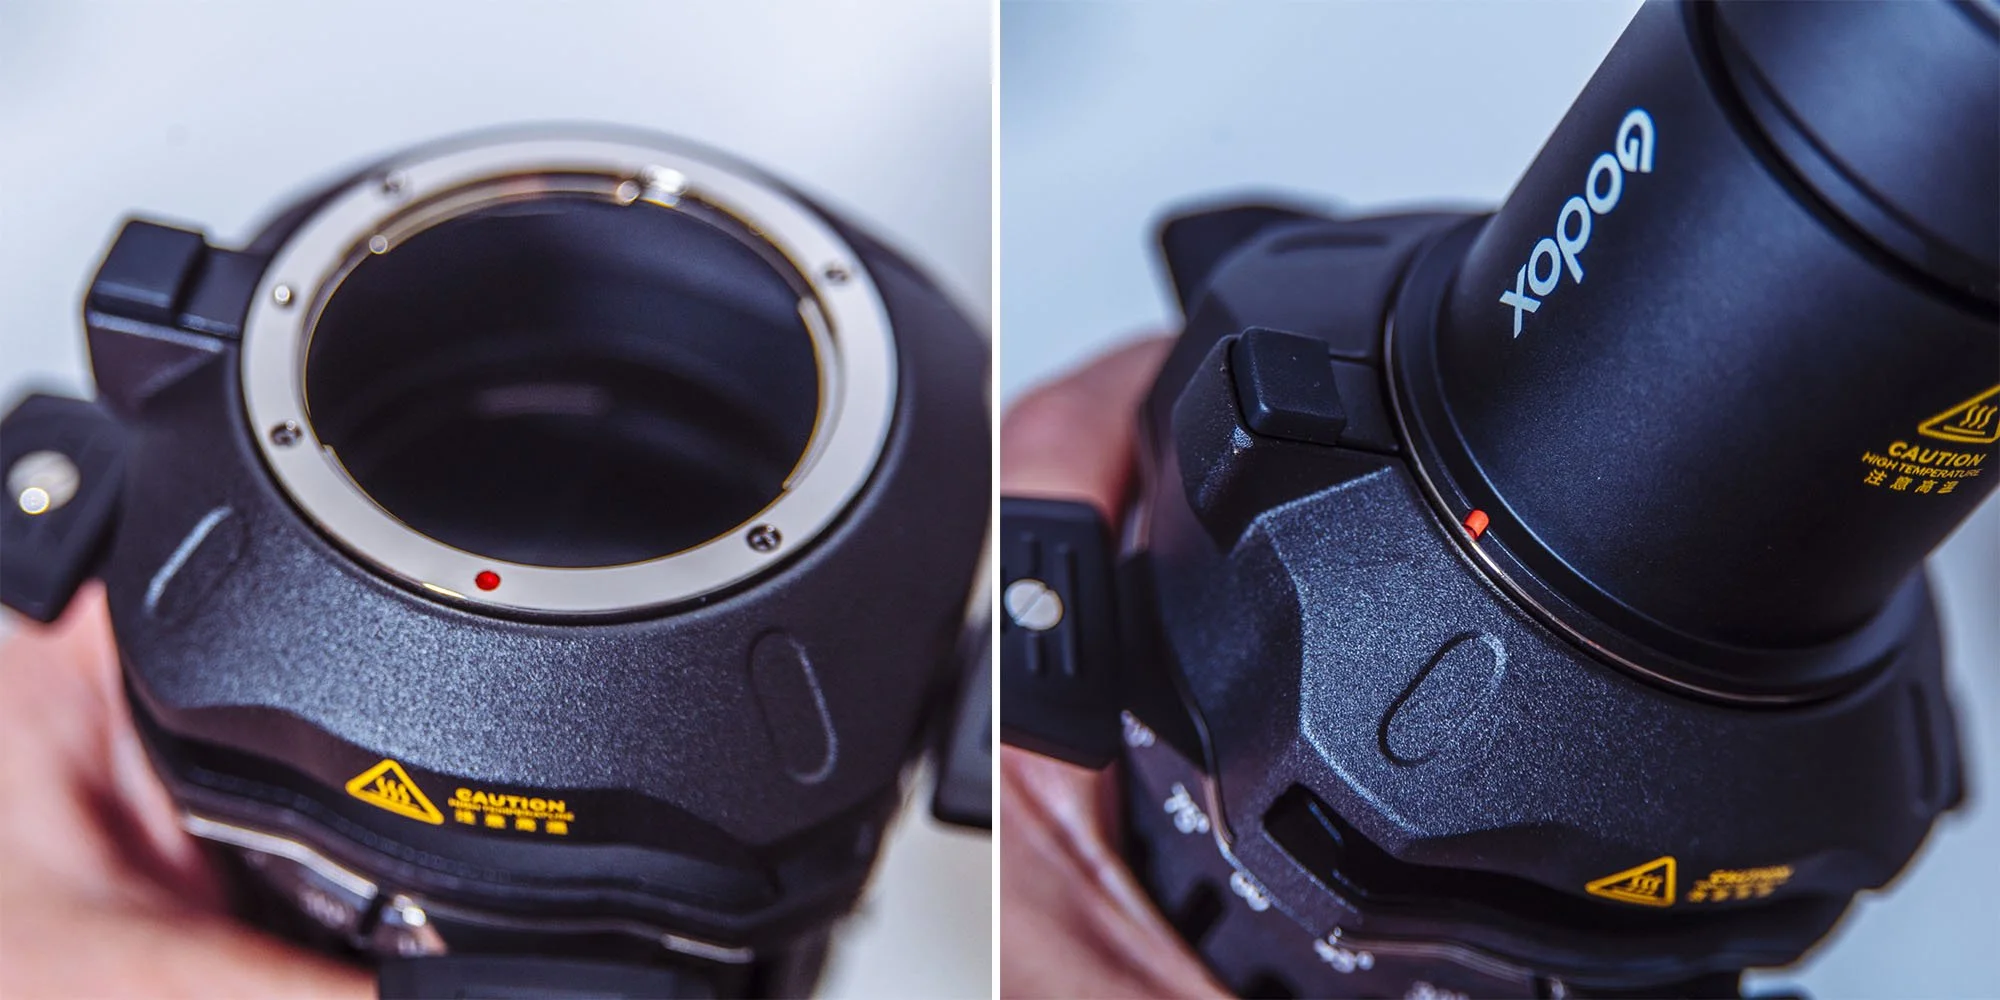
Compatability
I’m referring to what this spotlight will actually attach to. What light can we actually shine through it? Remember, the smaller size of this unit means it isn’t your standard Bowens S-fit modifier; instead, it uses the Godox proprietary mount that is seemingly only the ML series of COB lights. At this time, there are only a handful of lights, and the brightest among them are a 100W full-colour ML100R and a 150W ML150Bi. This could be an issue for some, as it most likely means you will have to buy a light along with the ML-SP. The other consideration here is power. At this time, the brightest full colour ML series light is only 100W. Is that enough power for your work? I’ve shot with this unit a couple of times now, and I will say that due to the large spread of light you get from this spotlight, you don't need to put it so far away from the subject, and therefore, you don't need as much light to operate it. That said, my ISO was still at 400. Can you make this work for you and your work?
What about conversions?
Although converting S-fit modifers to ML Series lights is very easy, and I was sent one of the adapters, going the other way is not so simple. For example, in this instance, we want the ML-SP to fit onto an S-fit light. To my knowledge, and I did a little research of my own, I cannot find any adapter that turns ML modifiers into S-fit lights. Maybe this changes in the future, but typically it's easier to scale up than to scale down. If that converter exists, do please let me know, as Id love to try this spotlight on a larger, more powerful light myself.
The ML-SP spotlight uses a Godox propriety mount which means it can only be attached to other Godox ML series lights.
In Conclusion
Overall, this is an excellent spotlight and arguably one of the best I’ve ever tested, especially when you consider its very small size.
The Pros
Very small unit and far smaller than any other spotlight I’ve tested.
Huge spot size in small spaces, and this is even more impressive when you consider how small the unit itself is.
Very clean edge-to-edge brightness with very minimal vignetting.
I love the lens and how easy it is to focus compared to other spots with a push-and-pull knob system that is very tricky to use accurately.
Clever gobo holder that ensures the gobos are always flush to the unit and keeps them focused across their entirety.
A rotating barrel that allows for easy slices of light with the internal blades at any angle.
The Cons
The spotlight is small, but it’s far from lightweight. At over a kilo, you certainly know when you’ve packed it.
Limited compatibility with other lights. At this time, the ML-SP only works with other ML lights; the brightest they get is 100W.
Final Thoughts
There are many pros to this spotlight and very few cons. Sadly, those few cons are its compatibility with other lights; more importantly, the power of light it can be used with is limited.
It’s very rare that I would recommend this, but if you’re someone like me who uses spotlights in their work a lot, and you’re somebody who works in tighter spaces a lot of the time, like offices or home studios, I honestly think this spotlight warrants the additional purchase of a light just to use it. Granted, that light is only 100W, but given the size and spread of the spotlight, and how clean the resulting light is, I think having a light dedicated solely to this spotlight is actually worth it.
Products Used
For transparency, as I mentioned at the top, this is not a sponsored post, nor am I being paid. Godox sent me the items to test and leave my feedback, and as such, none of the links below is affiliated links, and I do not make any money on clicks. The links will take you to Essential Photo here in the UK. They’re good guys, and I’ve worked with them in the past. By all means, source the best store in your own region.
ML-SP Series Godox-Mount Projection Attachment Kit For Godox ML-Series (ML-SP19/ML-SP36/ML-SP50)
ML100R Compact Portable RGB LED Video Light With ML-L15 Lens Reflector
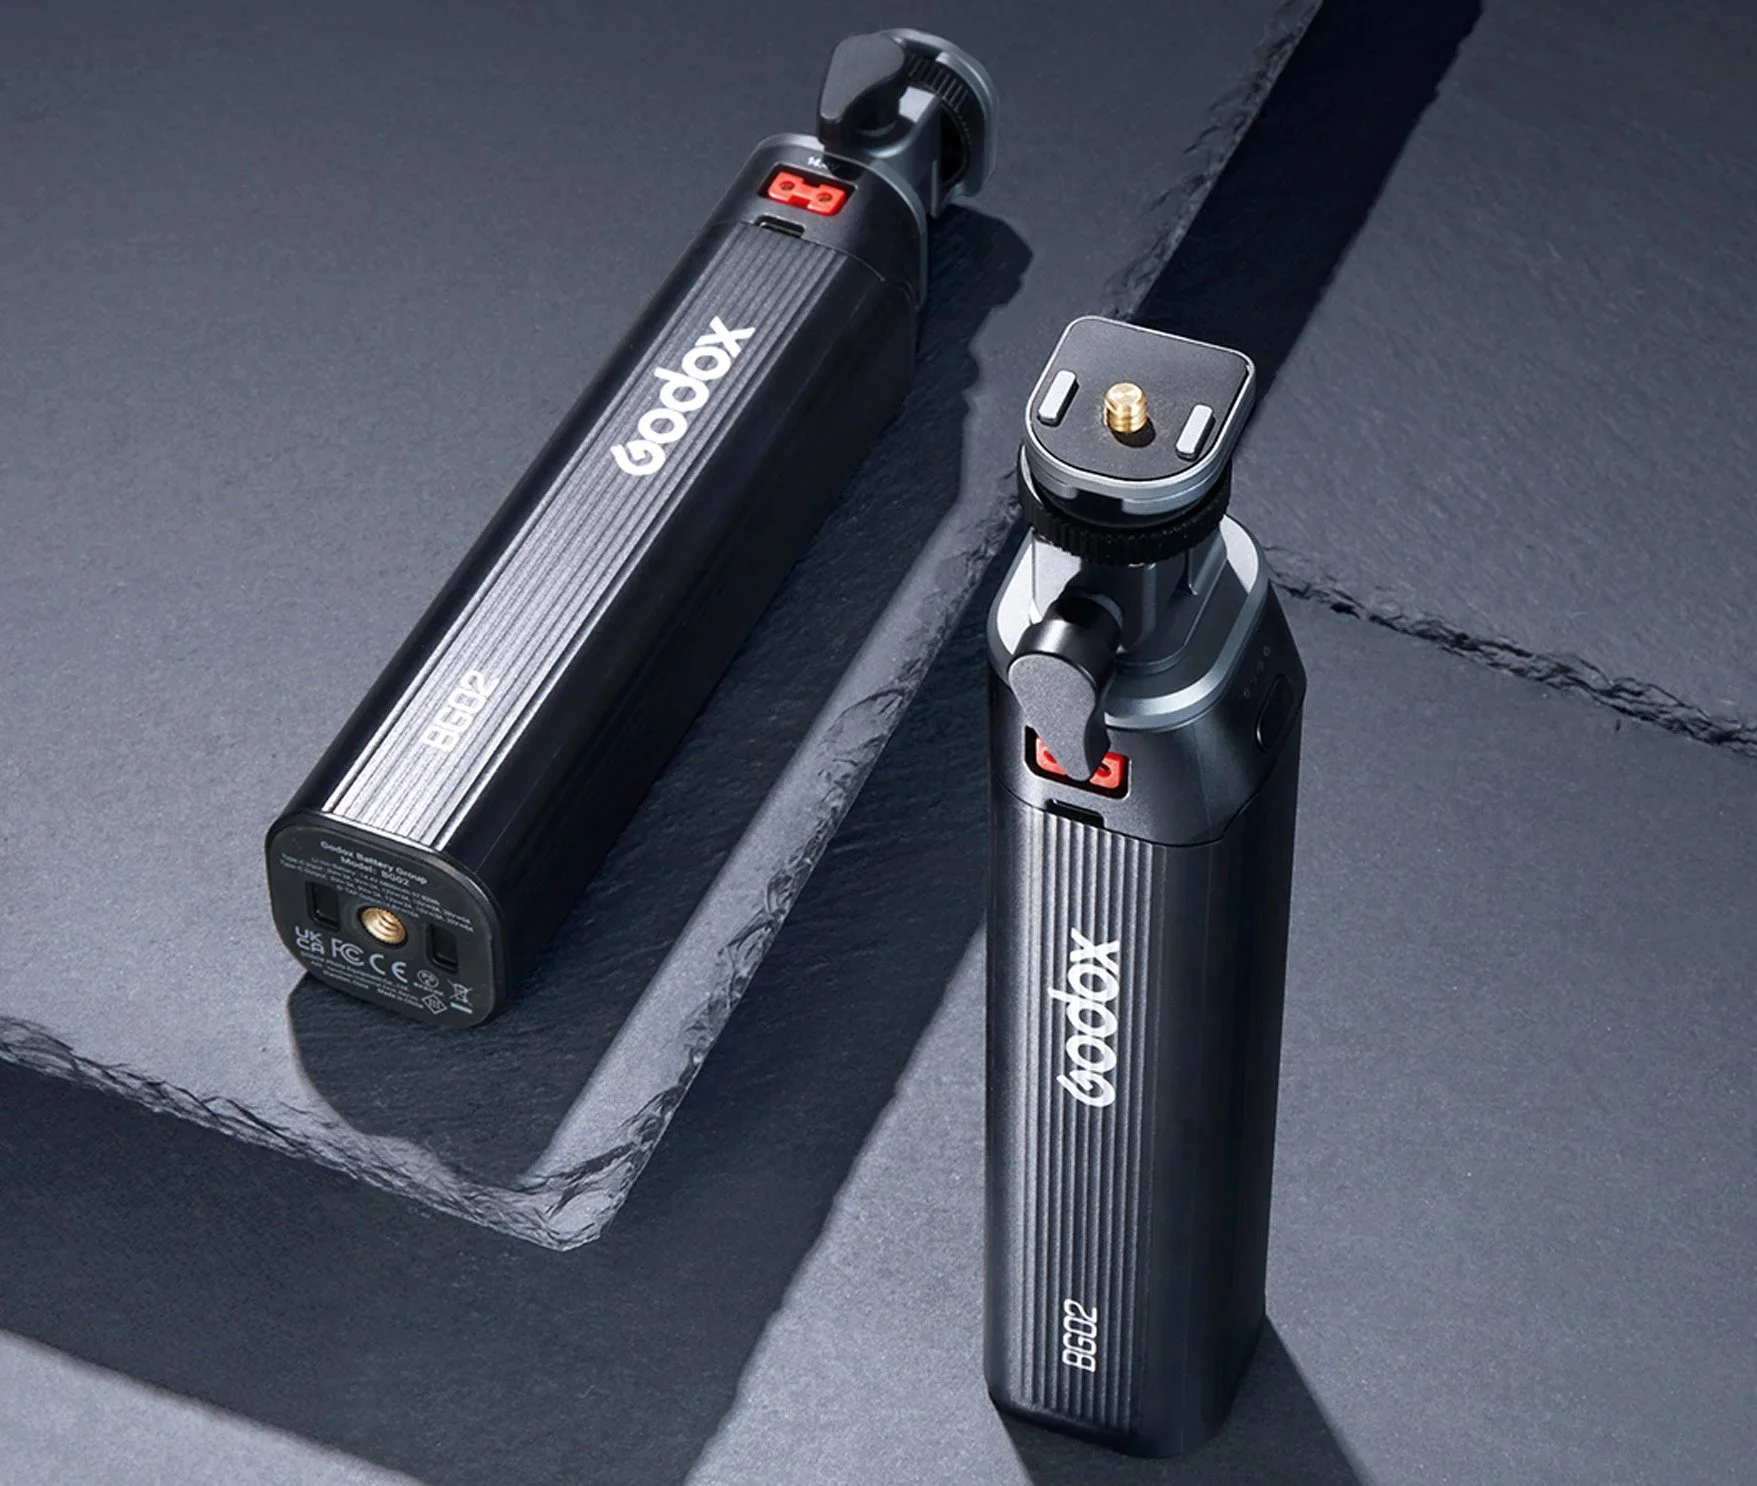
BG02 95W5 Battery Grip By Godox
I've always wanted my photography education on here to be free, so although there is no paywall to any of my -Technique Tuesdays-, any and all support is greatly appreciated. ❤️
PLUS: Donate any amount and I’ll send you a link to the hi-res print version of my studio lighting book.
||
PLUS: Donate any amount and I’ll send you a link to the hi-res print version of my studio lighting book. ||

JHP Livestreams…
I livestream every other Tuesday night via YouTube and there I answer your questions, critique your shots, take community images into Photoshop to work on them and discuss all manner of lighting tips and techniques. I look forward to seeing you and your work there real soon. Jake Hicks Photography - YouTube
