If you’re reading one of my articles, then I think we both know you’re no fool. You also know I’m not going to give you a definitive answer to this flash vs LED debate, but what I will give you is some points to consider. After all, I happily shot with flash for over 20 years, what made me switch to LEDs?
To provide a little context for those not familiar with my work, I pretty much exclusively shoot indoors in the studio and even when I’m out of the studio, I’m turning my location into a studio. This information is relevant as we need to broach the mammoth-in-the-studio debate which is…. brightness.
No, LEDs are not currently as bright as flash. If you’re someone who regularly uses 1000w strobes and you’re often using them at full or close to full power, LEDs are likely not going to be suitable for your needs at the moment. That said, if you’re someone who works in a studio or any light-controlled space, you may find that the sheer volume of other benefits that LEDs can provide, may outweigh this initially concerning downside.
Lighting Characteristics
Let’s look at some of the characteristics of both flash and LED first and then we can discuss a few of the more important ones in more detail.
Characteristics of LED
Continuous
Adjustable Kelvin values
Brightness can struggle in certain situations
Easily used for both stills and video
Millions of coloured light options
Very stable exposure and colour
Models can struggle under constant bright light
Panel LEDs have almost no modifiers
Panel LEDs create beautiful even lighting
Anyone can use an LED light
Characteristics of Flash
Instant
One fixed Kelvin
Bright enough for almost any situation
Only used for stills
Only available as white light
Minor exposure and colour variances
Model friendly exposure
Extremely versatile for lighting modifiers
Flashes suffer from localised hot-spotting
Certain knowledge and skills required to use
The biggest argument against LEDs is always, power. No, LEDs aren’t as powerful as many big strobes, but I’ve still used my LED panels outside on a sunny day in conjunction with the daylight.
Convenient and Nice to Have Features
Let’s now break down some of those characteristics and put them into the context of my work as a fashion and portrait photographer. These benefits are all important, but for me, they are bonuses and nice-to-haves, kinda like your car having heated seats and electric windows. These features aren’t going to sell me the car, but they all add up to clearly making your life a little easier.
Flash is Instant - I don’t need to capture fast-moving objects
If you’re someone who is photographing dancers or sports where there is a lot of fast action and movement, the 4000th of a second flash duration (often flashes are even faster than that now) is going to be very useful to you. For regular portraits of regular people, LED can easily capture everything crisply with your regular shutter speeds applied.
Flashes Extra Brightness - I work in the studio, I don’t need super-bright lights
There is no denying flash is certainly brighter than LEDs. But how often am I utilising all of that power when I’m working in a dark studio and my f2 lens? For me, the LED brightness is enough, but I would need to be mindful of shooting with them outside in bright sunlight…. if I ever decided that I wanted to do that for some reason!
Flash can be Easier on Models - Most professional models can cope with both
Recently I’ve heard talk of models getting tired, fatigued and even uncomfortable under bright LED lights. You have to remember that LEDs are constantly bright whereas flash is just a split-second of brightness. It’s worth noting that all movie and theatre sets are using constant lights and the vast majority of those sets are using tungsten hot-lights. LEDs are nowhere near as oppressive as those lights so although LEDs may be different to what they’re used to, most professionals will be absolutely fine with this.
Flash Requires More Skill - Experienced shooters will already know how to use both
There is no denying that flash requires significantly more skill than LEDs to use, after all, LEDs show you in real-time exactly what the final image will look like. What you see is what you get. Flash is a little less forgiving and will often require more experience or at best, more trial and error to get the look you want. In short; experienced shooters will already know how to use both and new shooters will benefit greatly from the ease of use of LEDs.
LEDs Continuous Light - I don’t shoot video
Many photographers today are being asked to shoot video more and more. I personally don’t shoot any video at all, but if I did, the convenience of LEDs allowing you to simultaneously shoot video alongside stills is huge. If that’s you, then this alone is almost a deal-breaker.
LED Colour and Brightness Stability - Nice, but its minor for my work
Several disciplines within photography require multiple images in a set or series to be visually identical when it comes to colour and exposure. If you’re shooting a lot of e-commerce fashion, having rock-solid colour consistency throughout a very long shoot, is crucial. Many cheaper flashes will vary their Kelvin value significantly as the bulbs get warmer, cooler, older etc. Still-life is another discipline where constant exposure and colour are vital. If you’re doing a focus-stacked image of a watch containing 60+ photos, having the exposure and colour exactly the same in all of them saves you an incredible amount of time. I can’t speak to all LEDs, but I’ve shot many setups locked off on a tripod and the exposure and colour are so consistent, you can't even tell the image is changing. If you’re after consistency, high quality LEDs deliver.
Benefits with Everyday Use
Next, I want to look at the important features to me that I know I’ll use in nearly every single shoot I work on. To me, these are the features of a car that decide whether I buy it or not. Engine power, boot space, how many doors etc. These may not sound sexy, but like I said, they will all significantly impact how I use these lights day to day.
LEDs Adjustable Kelvin Values - I adjust Kelvin…. a lot!
For some, this won't be a deal-breaker, but for me this feature is huge! I don’t say this lightly, but I personally put my Kelvin adjustments up there with aperture, shutter speed and ISO in terms of importance. Not a shoot goes by where I don’t make an informed decision on what white balance to set my camera to in relation to my lights. Flashes have one single Kelvin colour and to change that, you have to use colour correction gels like CTO (Colour Temperature Orange) and CTBs (Colour Temperature Blues). Yes, you can adjust the Kelvin value of your flash with these gels, but it's a faff at best and at worst it's a time-consuming guestimation of 1/4, 1/2 and full colour temperature gels.
Click to enlarge - I’ve included a couple of screen grabs here from one of my studio lighting workshop PDFs and they should help provide some context. For example, here we can see the Kelvin range of flash vs LEDs.
LEDs Millions of Colours - I shoot a lot of colour
Unless you’re new to planet Earth, you should know by now that I use a lot of colour and for the last 20 years I’ve been using coloured gels to colour my lights. This is fine and there’s nothing wrong with that, but we all know how much of a time-consuming pain that can be. Have you ever tried to gel a softbox? But even if you’re a pro origami master at wrapping your lights in coloured gels, there are limits to how many colours you have immediate access to. Sure, there are thousands of coloured gels available, but most of us don't have a warehouse of different coloured gels at our fingertips. Full RGB LEDs completely revolutionised that by putting millions of colours in their lights all instantly accessible at the touch of a button. I can’t speak to all LED lights, but my Rotolight NEO 3 and AEOS 2 Pros have over 16 million colours all right there on the easy-to-use touchscreen. If you’re a fan of using coloured light in your work, using RGB LED lights is just inevitable at this point.
Click to enlarge - Again, here we can see the limitations of flash colour vs the incredibly comprehensive colour palette that is immediately available to RGB LED lights.
Click to enlarge - The first ever shot I took using the Rotolight AEOS 2 and NEO 3s - I was immediately struck by how incredibly clean and beautiful the light quality was, even without any modifiers on the lights.
LEDs Light Panel Quality - Panels produce beautifully even lighting
We’re about to get into the realm of subjectivity here, but when it comes to light quality, I can’t understate just how vital this ‘quality of light’ factor is. You’ve just heard me gushing over all the other benefits of LEDs above, namely the instant access to millions of colours at my fingertips, but none of these features swayed me to ditch my flashes and change to LED. The one feature that made me switch to LED was not that they’re incredibly lightweight and super simple to use. Nor was it the huge Kelvin range or their millions of instantly accessible colours. The one thing that immediately got my attention above all else, was the quality of light on portraits.
To illustrate my point here, let me tell you a story.
I’m not known for being at the forefront of tech. I still shoot with a Nikon and that Nikon still has a mirror. So when I happened to be in the same studio as an LED demonstration a couple of years ago, I was not particularly interested. My flashes work fine and I’ve been using them for decades without issue. If it ain’t broke, why fix it, right? So, during this LED demonstration, there was plenty of talk of all the typical things we all know LEDs can do. Kelvin adjustments, millions of colours etc etc. No, I’m not an early adopter when it comes to tech, but I still know what a lot of it does and I was already very familiar with the average LED bullet-point sales pitch. Instead, the eye-opening moment happened when I was asked to photograph the model there on the day as part of the demonstration. As soon as the first shot was taken, my eyes were engaged. What was going on here? Why did this portrait look so good? It was just a basic LED panel pointed at the model’s face with no modifiers attached, why did the lighting look so beautiful?
You can see the first shot I took with LED panels shown here and although the following information gets a little esoteric and borders on the ‘trust me, bro’ side of things, there are a couple of interesting aspects happening here when it comes to quality of light and none of which are present in a single flash unit on the market today.
NERD ALERT
||
NERD ALERT ||
NERD ALERT - Dissecting ‘Quality of Light’
The following gets into the ‘weeds’ a little and is arguably only going to be of interest to those with a little more experience and patience. The following isn’t going to be fundamental knowledge for the topic of this article and none of this information will be included in the test at the end.
Click to enlarge to fullscreen
In the image above, I’ve broken down the areas and elements that immediately stood out to me as soon as I looked at this photo on the back of my camera. For context, this image was taken with a Rotolight AEOS 2 as my key-light. That is a round LED panel, roughly 12-13inches in diameter. Behind the model on either side are two NEO 3 LED panels. Again, these are round panels, but these are only the size of the palm of your hand AKA, they’re small. -Details on these lights are included at the end of this article.
Image 1 above is the full shot.
Image 2 shows the beautiful highlights on the models face. These are very clean and even though the model isn’t wearing any specialist makeup, the large AEOS panel is providing a big specular highlight on the surface of the models skin very easily.
Image 3 is showing the NEO 3 edge light set to pink. What’s important about this, is the even lighting and very controlled exposure from the top of the head all the way down the shoulder and even the arm! Remember, this is a palm-sized LED panel! Stripbox users in shambles right about now!
Image 4 looks at the opposite side of the model, specifically the hair. The hair is being blown and is separated into smaller fly-away strands. The models hair is also fair coloured. The hair-light is also just out of frame as I was looking to create a little flare into the lens too. AKA this is a recipe for those tiny, light-coloured hairs to be blown-out and over exposed, but that is absolutely not happening at all.
If we look past the fact that this was the first shot straight out of the gate (remember, these are LED lights, what you see is what you get - photography has never been easier, especially if you’re also using a mirrorless electronic viewfinder that shows you the exact shot before ever pressing the shutter), this was pretty impressive to me. Yes, these elements may be minor to many of you, but to those of you with a little more experience under your belts, I’m sure you’re seeing what I’m seeing too.
This is tough though, right? LED brands can’t market the ‘trust me, bro’ approach that we’re looking at here. How do they put on the specs sheet ‘you’ll burn your stripboxes tomorrow the light looks so good!’
In the next section I’ll aim to look at what I think is causing these types of light qualities as more and more LED panels like these really are upsetting the meta within lighting. And don’t forget, movie sets have been using extremely expensive versions of these LED panels for years so it was only a matter of time before it became financially viable at a consumer level too.
NERD ALERT OVER
||
NERD ALERT OVER ||
A Single Point of Light Vs Many Points of Light
Flashes have a single bulb from which all of their light is emitted. This single bulb is easily modifiable, but that lone point of light does result in the light being pushed outwards in all directions. Conversely, LED panels distribute their power over far larger areas thanks to lots of smaller bulbs rather than a single powerful one. The LEDs evenly distributed light results in some beautifully clean-looking light thanks to the beams reaching the subject more uniformly. This pattern of light is also similar to the collimated light you’d find with natural light and again, it's this even look to the light that makes the LED panels light so visually appealing.
Here’s another illustration from my PDF workbook that accompanies my latest lighting workshop, but it essentially demonstrates how having a mini-wall of light produces smoother, cleaner and ultimately more beautiful-looking light when compared to a focused single point of light.
I’ve spoken about trying to define the ‘quality of light’ several times in the past, so I won’t bore you with it yet again, but essentially, natural light is the most beautiful looking light there is. Why? It’s due to the very clean parallel lines of light that illuminate the subject and these parallel rays of light are often referred to as collimated light.
Click to enlarge - Even as a studio shooter, I have to admit that natural light is still the most beautiful-looking light. The reason for that is due to how the rays of light reach us. The sun is so far away and so massive, that the small group of rays that light us are striking us in parallel lines and these parallel lines are known as collimated light.
As I said, this is one of those characteristics that you’ll never see listed in any brochure. How do you quantify the ‘quality of light’? You can’t, but what I will say is, when it comes to using key-lights on my subjects, there is zero hesitation when it comes to always using my AEOS 2 Pro here, yes I use it with the diffusion dome attached, but that’s it. This is one of those occasions where I’d really encourage you to see it for yourself and I’m sure, like me, you’ll use an LED panel for a portrait and never look back.
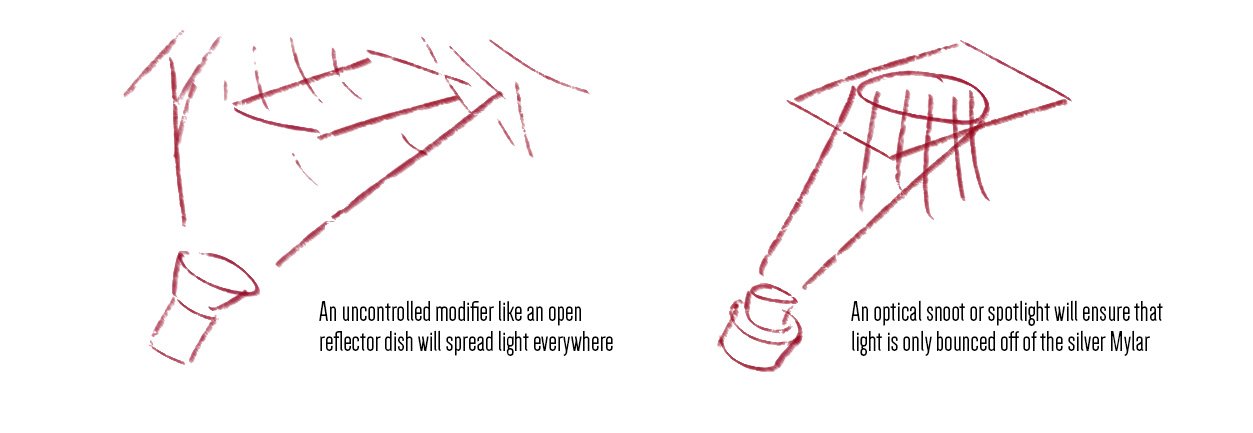
Flash Modification - Thousands of options
Ironically, LED panels greatest strength, is simultaneously its greatest weakness. That’s right, the truly beautiful light produced by that panel, is also very tricky to modify. The single point of light found on strobes is clearly a very versatile shape to work with as you can now make that single point somewhat-soft as well as somewhat-hard. For example, we can use a snoot on that strobe or we can use a softbox. So yes, that single point of light is incredibly versatile, but in my opinion, it’s a jack of all trades and master of none.

I think it’s hard to understate just how modifiable modern strobes are today. If you want one tool that does the job of many pretty well, a strobe will serve you incredibly well and I’ve collected countless modifiers over the years that all fit onto the same light. From vast softboxes and umbrellas, to ring-lights and fresnels, the strobe is truly the most versatile light on the market, but is it the jack-of-all-trades-master-of-none?
So, yes you can use a softbox on that strobe to create a soft light, but you’re always fighting with that very prominent hot-spot you find when working with single-point lights. The same can also be found when using a hard-light modifier like an optical snoot. Yes, you can make the light hard, but again you’re also fighting with that hot-spot.

In the test shots from my PDF, you can see how a strobe struggles to spread the light evenly with a variety of modifiers. This won’t happen with all modifiers, so it’s good to know which one produce the best quality light.
As you can see in my test shots above, hot-spots are the bane of beautiful-looking light and sadly, as versatile as strobes are, many of them struggle to really spread the light evenly when they have such a powerful and centralised light source. Oh, and this is your weekly reminder to stop using stripboxes! You’re unlikely to simply take my word for it, so please, at the very least, do your own tests and see for yourself if my tests above are too in the realms of ‘surely, my modifiers can’t be that bad?!’ And woe betide you poor souls using recessed Profoto heads, as those hot-spots are far, far worse than these exposed flash-tube shots shown here.
So, what’s the solution?
Yes, the singular source of light can be tricky to manage and spread evenly, especially when used close to the subject. But there are modifiers that you can use that spread the light more evenly. Again, I spoke about this at length in the past, but beauty dishes, fresnels, spotlights and even umbrellas do a fantastic job of eliminating the hot-spots. If you don’t already use those, you should certainly give them a try.
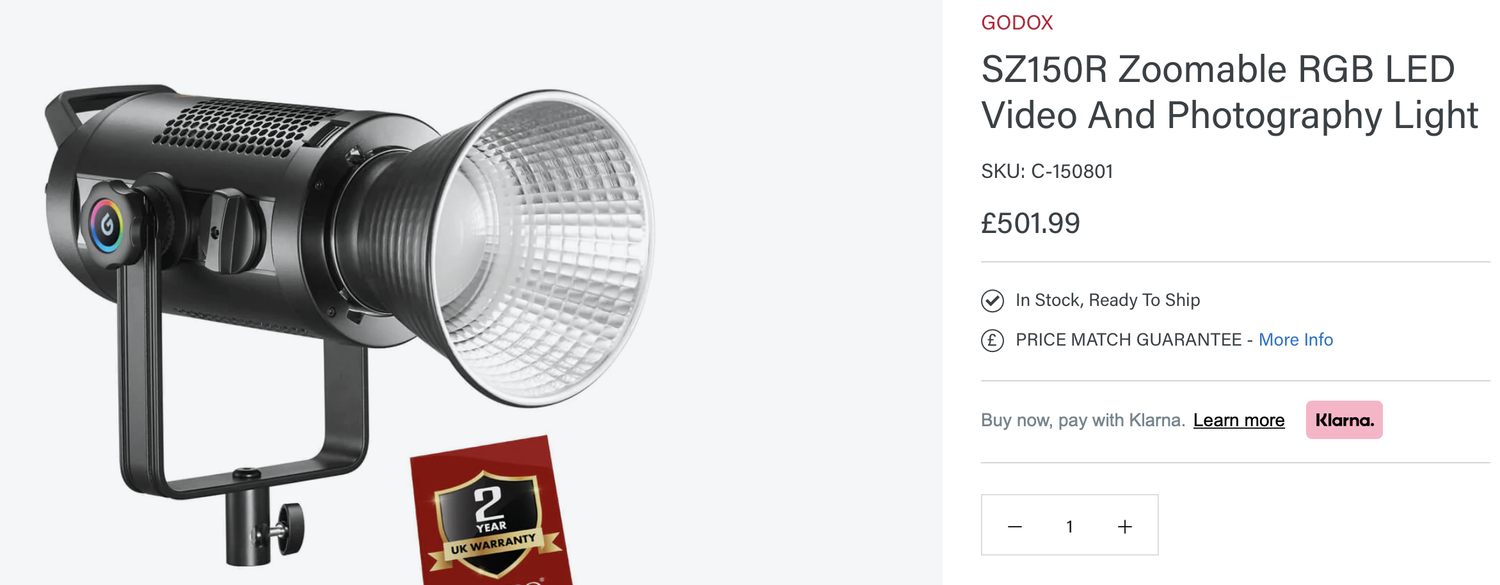
Are there alternatives?
So what do you do if you love the flexibility and ease of use of LEDs, plus you love the ability to adjust your Kelvin values at will and you love having millions of colours so easily available? The simple answer is to get a single-point LED light.
Click to enlarge: My Godox SZ150R is the happy middle-ground between the convenience of millions of colours and Kelvin adjustments vs the annoying hotspots of single-point lights.
Pictured above you can see the single-point LED that I use and it’s the Godox SZ150R. The single-point light at the front is a very diffused white dome that simply hides a very large and powerful LED behind it. As big as this LED is, it’s still small enough to be housed inside of the S-fit (Bowens mount) attachment bracket. This now means I can use all of my old Bowens modifiers on this LED head. Yes, it will still suffer from the hot-spotting present on any single-point light (that said, this inbuilt diffusion dome reduces hotspots more than I thought it would), but it means I have all of the convenience of LED colours and Kelvins that I’ve now become accustomed to.
Click to enlarge - Can you tell if this is shot with LED or flash? Does it matter in the end? No, if you can’t tell then the process is irrelevant, but if that process also happened to be extremely easy to the other, does it matter more to you then?
Closing Thoughts
Shock-horror, once again there is no easy answer to the flash vs LED debate. That said, I know what personally works for me and if you’re a studio portrait shooter, you may well find the Goldilocks formula works for you as well. Yes, I am a Rotolight ‘Master of Light’ aka they pay me to provide training and workshops for them, so take the following as you will, but their AEOS 2 Pro panels are simply outstanding.
You have to remember that a couple of years ago, I thought LEDs were an absolute joke. I thought LEDs were lights for people who were too daft to know how to use strobes. Yes, LEDs are very easy to use and the what-you-see-is-what-you-get style of lighting can be argued as cheating today, but it’s that quality of light aspect that made me originally sit up and take notice.
Times change and new tech is always coming out. You have to remember that strobes were once the convenient, inferior lights compared to the old hot-lights with fresnels. Strobes were very adaptable and easy to use thanks to not getting third-degree burns every time you wanted to move them, but their quality of light was always a bone of contention and it’s why so many still swear by the old hot-light and Fresnel combo even to this day (remember I mentioned that Fresnels collimate the light? That’s why people love the look). The LED panel as a key-light produces a gorgeous-looking light and I could see that as soon as I took the first shot.
I currently use 4 Rotolight AEOSs (2 regular and 2 Pro) and I will always use them directly on the skin whenever possible. But of course, as a creative light shooter, there are times when I need a hard light, a sliver of light on the face or background for example and this is where the panels struggle and it’s for this reason that I use the single-point Godox LED SZ150R.
No, LEDs aren’t comparable to strobes in terms of raw brightness just yet, but they are getting brighter and brighter with each passing month. That said, how much brighter can they get before it literally becomes too uncomfortable to model underneath them for extended periods? Models are already mentioning the brightness is fatiguing so even if there was an affordable super-bright LED available, would I even be using it on my models?
For me, the millions of available colours, the Kelvin flexibility and just the gorgeous quality of light far outweigh the downsides of them being a little dimmer than strobes. Plus, as a Nikon shooter, I don’t get to say this very often, but you gotta quit being stuck in the past 😜
Products Used
Rotolight
Although I’m sharing my own personal thoughts and findings about the lights mentioned in this article, many of you will want to know that I am now a ‘Master of Light’ for Rotolight. As such, I have been given a discount code to share with you when purchasing any of their products via the Rotolight website. Use my code ‘JAKEHICKS10’ when purchasing and you’ll save a bunch of money. I’ve never earned a penny of commission on this though, so if you find a better deal elsewhere, go for it.

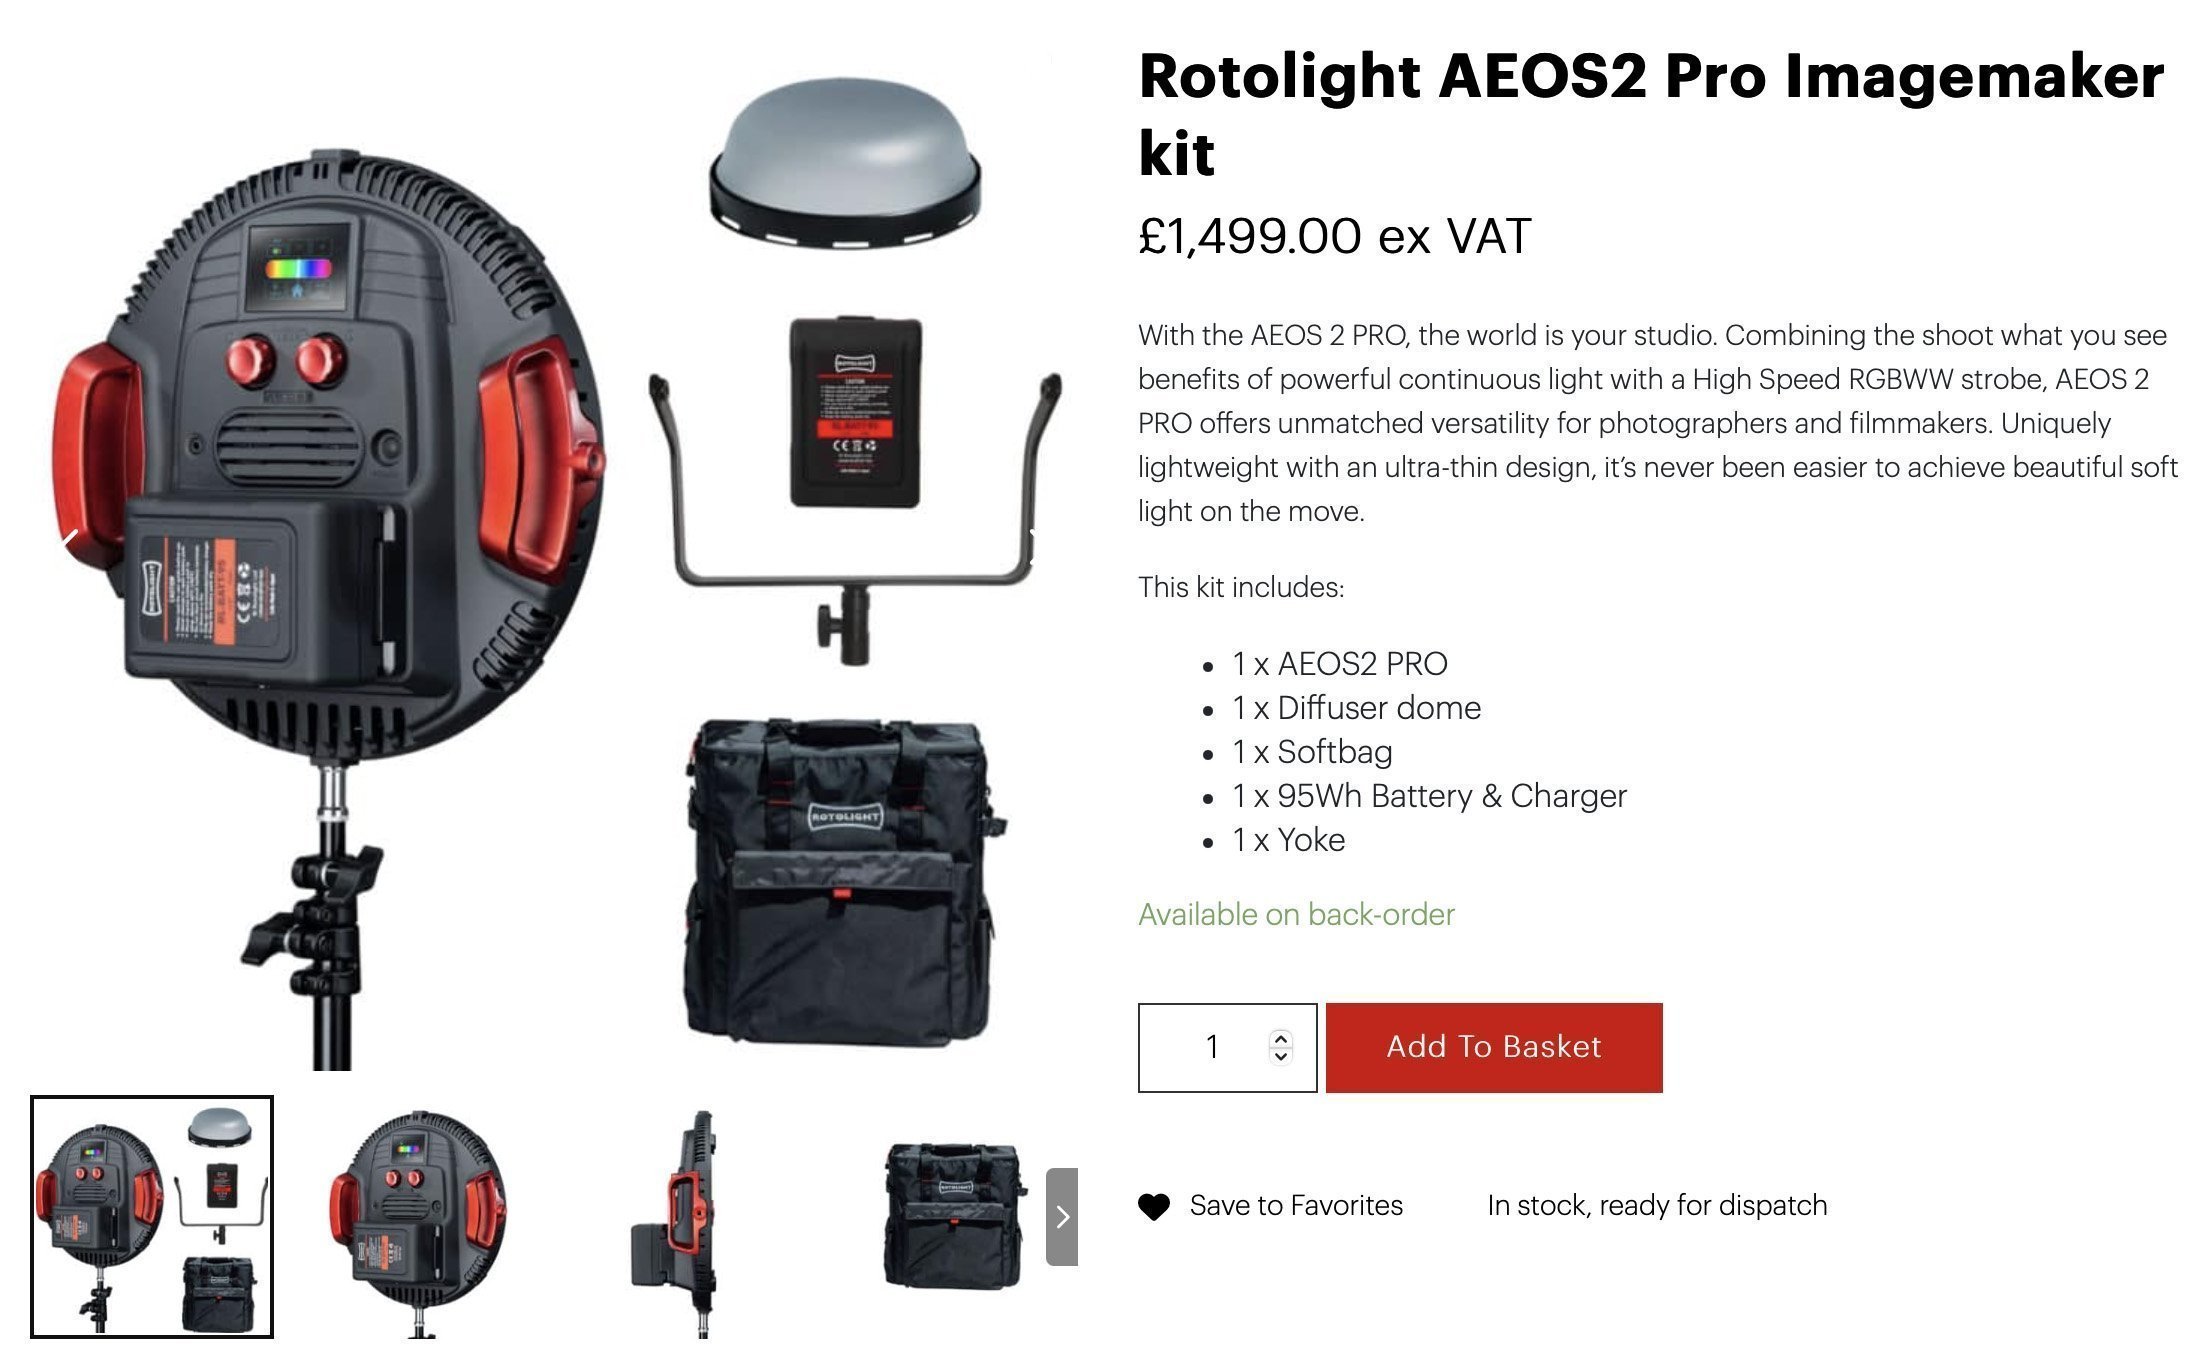
Rotolight AEOS 2 PRO
With the AEOS 2 PRO, the world is your studio. Combining the shoot what you see benefits of powerful continuous light with a High Speed RGBWW strobe, AEOS 2 PRO offers unmatched versatility for photographers and filmmakers. Uniquely lightweight with an ultra-thin design, it’s never been easier to achieve beautiful soft light on the move.
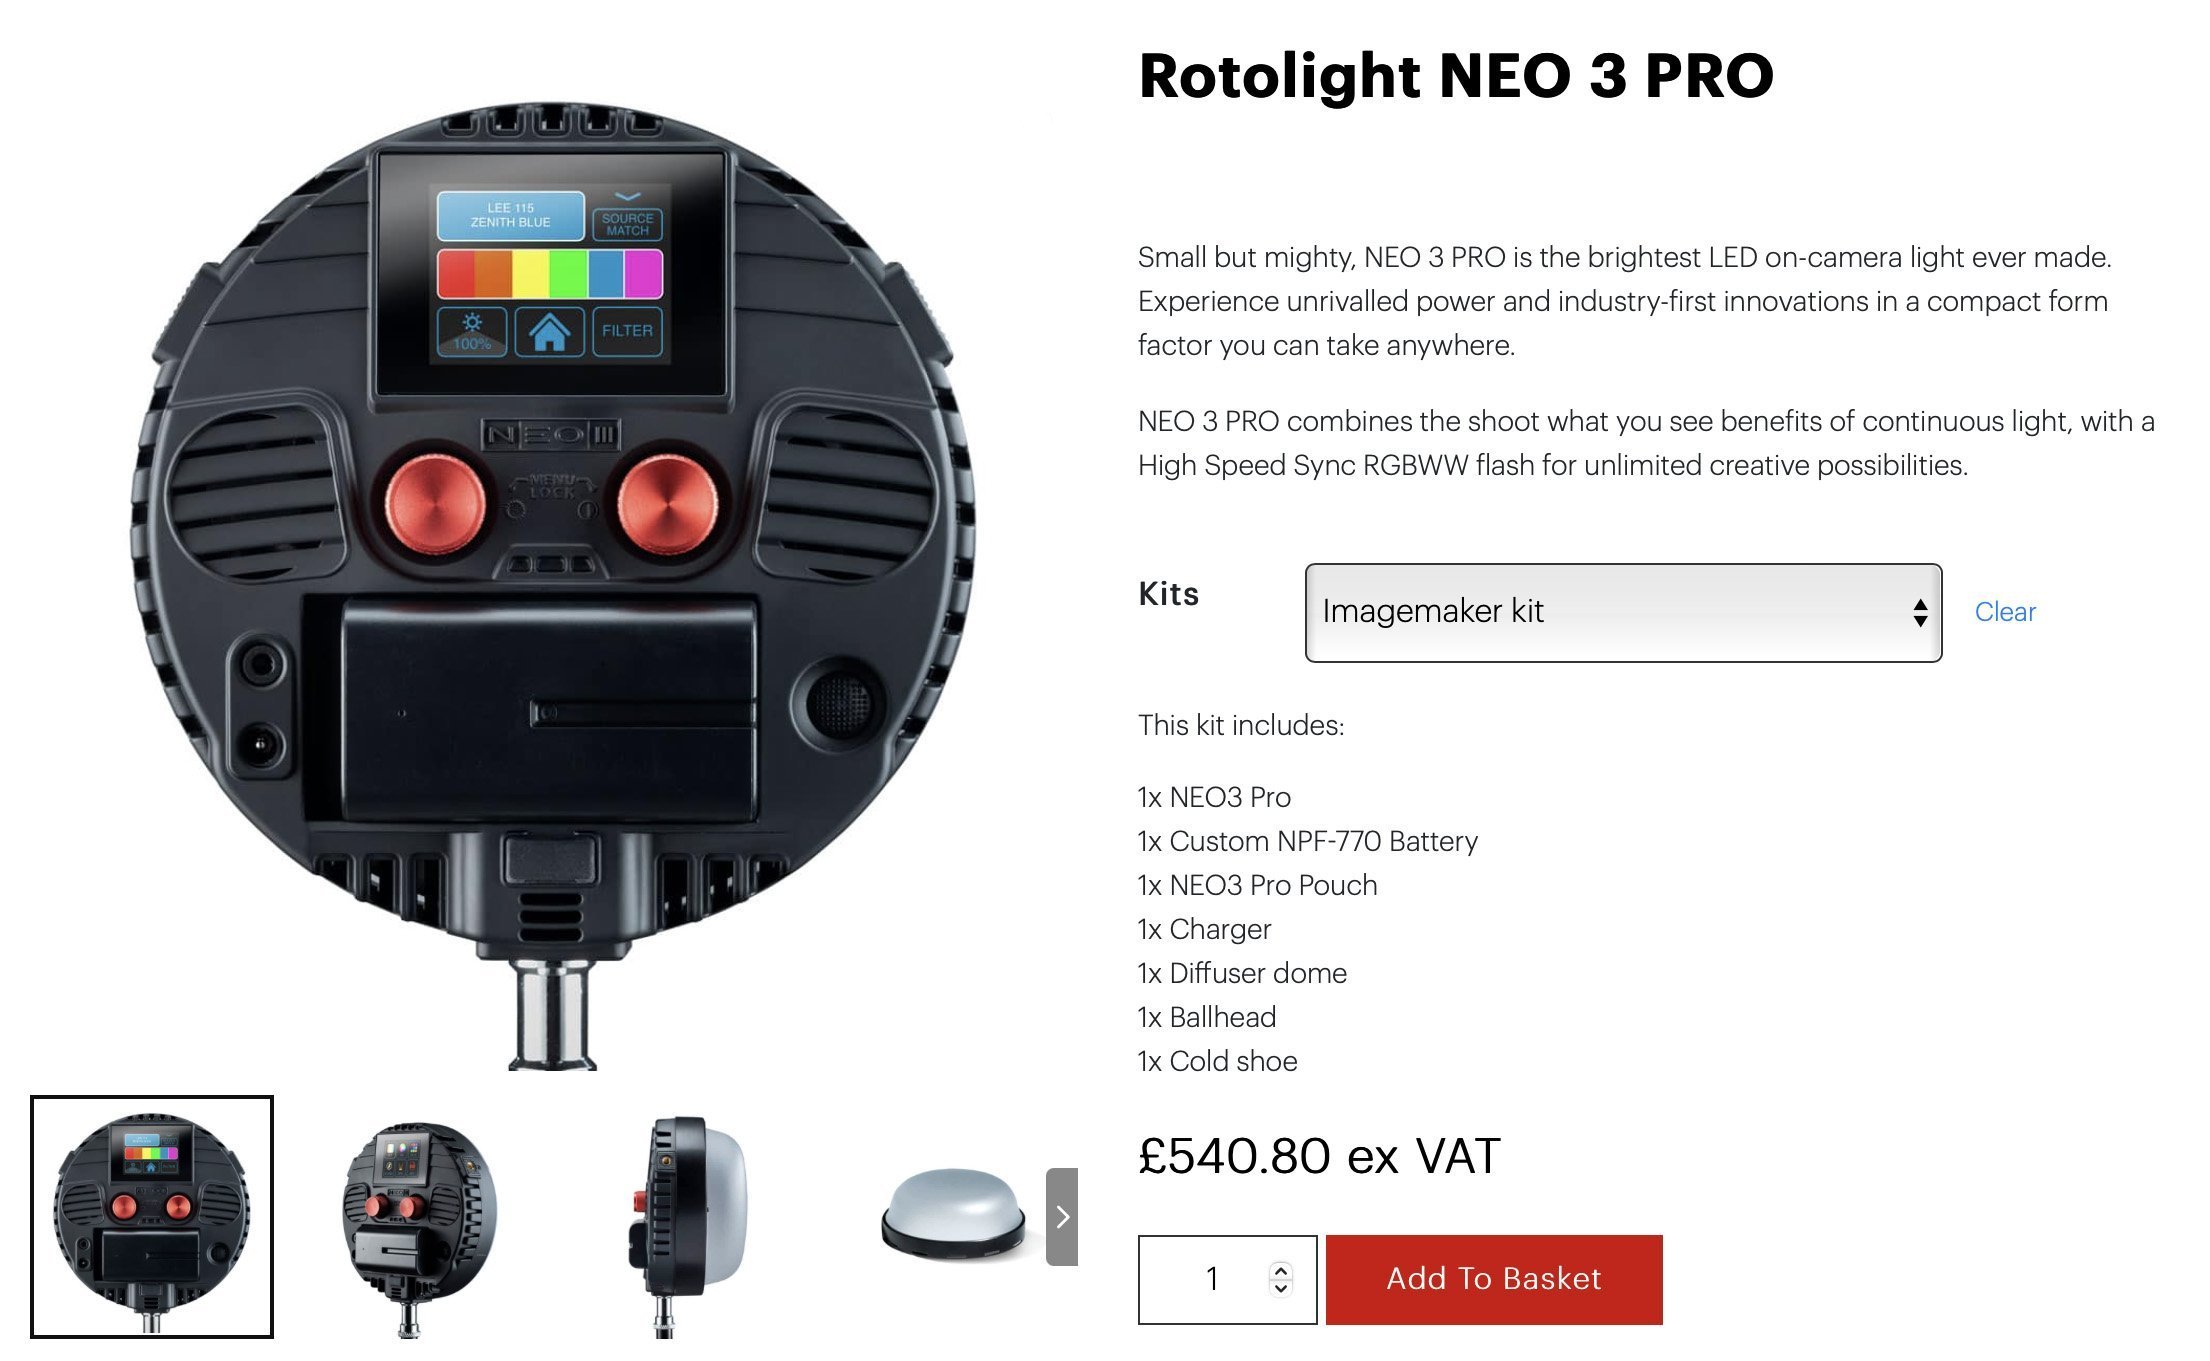
Rotolight NEO 3 PRO
Small but mighty, NEO 3 PRO is the brightest LED on-camera light ever made. Experience unrivalled power and industry-first innovations in a compact form factor you can take anywhere.
NEO 3 PRO combines the shoot-what-you-see benefits of continuous light, with a High Speed Sync RGBWW flash for unlimited creative possibilities.
Essential Photo - PixaPro
Please note that I’ve included affiliate links below for PixaPro and I will benefit (albeit minimally) from the sales of any of these products should you purchase them. To that end, please feel free to use my discount code ‘HICK5-OFF’ at Essential Photo to receive a discount on any purchase via their site.

Godox SZ150R
Essentially this is an LED studio strobe. You can use it with any S-Fit modifiers like beauty dish and softbox you already own, plus you can also change this to any colour and any Kelvin you’d like. It’s only 150 watts though, so you will want to use this in a controlled studio environment.

JHP Livestreams…
I livestream every other Tuesday night via YouTube and there I answer your questions, critique your shots, take community images into Photoshop to work on them and discuss all manner of lighting tips and techniques. I look forward to seeing you and your work there real soon. Jake Hicks Photography - YouTube