• Technique
    • Latest Techniques
    • FREE TIPS
    • Quick Tips
    • Video
    • Site Search
    • Blog
    • Archives
  • Mentoring
  • >Online Workshops<
  • Workshops
  • Studio Lighting Books
  • Contact
    • Newsletter
    • Contact
    • Statement
Jake Hicks Photography
  • Technique
    • Latest Techniques
    • FREE TIPS
    • Quick Tips
    • Video
    • Site Search
    • Blog
    • Archives
  • Mentoring
  • >Online Workshops<
  • Workshops
  • Studio Lighting Books
  • Contact
    • Newsletter
    • Contact
    • Statement

Small LED Light Tubes: Godox TL30-K2 Review

If we put aside the fact that the photographic industry is seemingly obsessed with these progressively more complicated and seemingly AI-generated product names for a moment, the TL30 from the K2 pack is actually a pretty good light. Now that the ‘man shouts at clouds’ section of this review is out of the way, I can happily speak as to why this is a very powerful and versatile little light in the right situation.

The little TL30 LED can be brought in unbelievably close to the subject and can result in some gorgeous light drop-off, even in tiny spaces!

To clear up any disclaimers right out of the gate, I reached out to Essential Photo here in the U.K. and requested this product to test and play with. As I normally do with these products, I offer to talk about it and share my thoughts, but once I’m done, I’ll send it back. So to be clear, I am not being paid to write this.

The reason I requested this little light in the first place, was to test some theories on light drop-off, specifically with LEDs in this case. I know long-time readers will have heard me mention this a few times over the years, but using LED lights (specifically panels and tubes) is very different when compared to strobes.

Real groundbreaking thinking so far, right? “Yes, Jake, strobes and LEDs are completely different. We get it!” But no, I’m not talking about flash durations or power outputs, I’m referring to light spread and light drop-off and why this is so fundamentally important for us to fully understand where it differs with different lights.


LED Lights and Their Unique Light Drop-Off

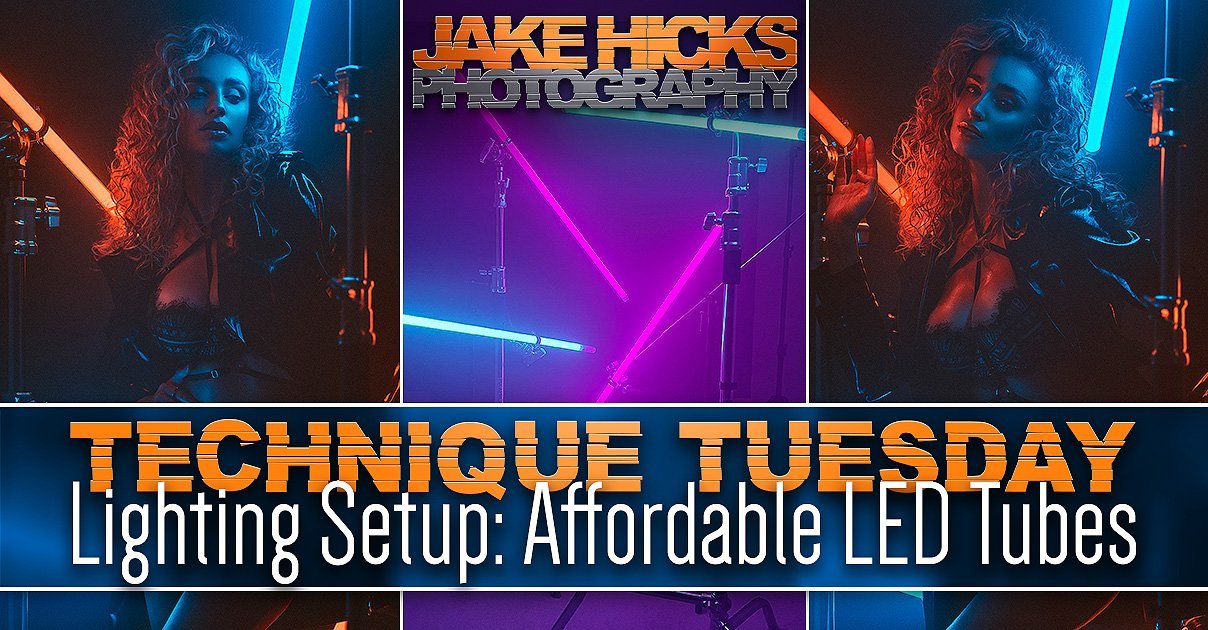
I have already spoken about this LED light drop-off at length in the past, so I won’t bore you with the details once again, but if you’re interested you can take a look at my previous article on it here Lighting Setup: Affordable LED Tubes

The main point I want us to be mindful of as we look at these little TL30-K2’s (catchy right?), is that they’ll enable us to throw light onto a very small area without it spreading to unwanted areas like the background. You can see more of what I mean from the diagram below which shows the drop-off of LED light from tubes versus the drop-off of a single point strobe.

Click to enlarge: On the left, we have a single point of light from a flash and on the right we have an LED tube. The brightness is measured to be the same at 50cm from the source at f5.6, but you’ll see that this drops off differently between the two light sources.

It doesn’t take a genius to see that the tube is spreading light far more evenly over a larger area here, granted the tube pictured above is far larger than the 30cm one I’ll be testing, but that smaller size will actually work in our favour in this instance as we’ll be able to control a very even spread of light in a very small area, namely the body.

Before we start nerding-out about lighting theory though, let’s first look at the lights I’ll be testing.


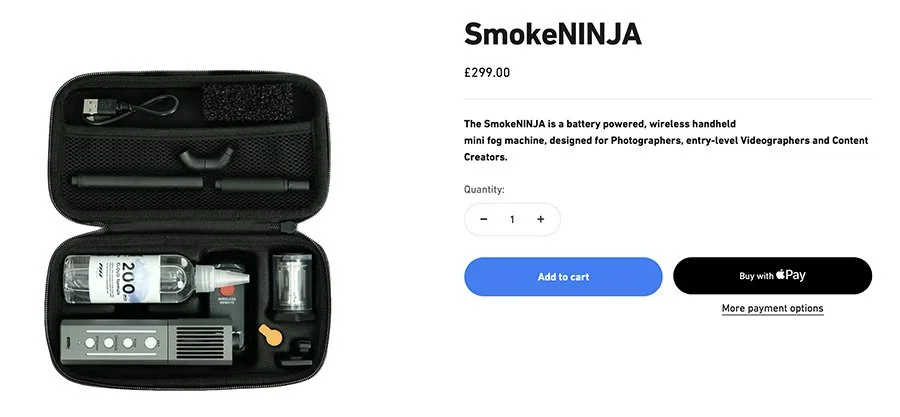
What are these TL30-K2 LED tubes exactly?

The TL30 refers to Tube Light and that it’s 30cm in length. The K2 part refers to the fact that it’s a 2 light Kit. The individual tubes are 30cm long and are capable of producing colours from the full RGB spectrum as well as white light ranging from 2700K to 6500K. They weigh in at only 0.30Kg and have a battery duration of 60 minutes at full power.

I opted to get the 2 light kit so I could play with mixing colours, plus this kit comes with a ton of additional accessories that certainly enable you to get the most from these lights in almost any situation… including underwater!!!


What Accessories are Included in the Two-Light-Kit?

Click to enlarge: Tube Clamp

Tube Clamp (TL-C2 Retaining Clips)

One of the most important accessories is the tube clamp. This clamp sits snuggly on any part of the tube before you firmly secure it in place. On the rear, you then have 2x 1/4 inch thread holes to easily mount the tube to a variety of light-stands, clamps and tripods.


Tube Extender (TL-M2 Coupler)

Each of the LED tubes has a 1/4 inch hole in each end that allows for the tubes to be connected to one another to effectively extend their length. Each tube can be connected via this two-disc thread that sits between them. Each of these discs moves independently meaning you can screw the tubes together firmly and align them to the correct position very easily.


Tube Grids (TL-G30 Grids)

These grids are attached via three elastic straps that enable them to be secured snuggly to the LED tubes. A little fiddly to put on and I usually just skip the middle strap, but the grids do stay in place and don’t droop down once they’re positioned. They can also be used along with the tube clamps and although they don’t look pretty when in place, the clamp doesn’t hinder the grids from channelling the light in any way.

The tubes with the clamp and grids together. It looks ugly, but neither product stops the other from doing its intended job.


Waterproof Bags (TL-W30)

A nice bonus to have in this kit is the waterproof bags. I say it’s a ‘bonus’ as this won't be something a huge number of people will need, but I think it's great to have this included, even if it’s just to combat weatherproofing concerns. The bags seem fairly durable, but thin enough for you to easily use all of the buttons….. just not the dial! They also have an easy-to-use and firm closing mechanism, meaning there is no concerns when it comes to wondering if you’ve closed the bag properly or not. These waterproof bags are generous in size too, meaning you aren’t fighting to get the tubes in and out either. Again, I can’t see myself using them, but they’re certainly nice to have.


Additional bits…

The kit also includes a few extra bits including wrist straps that screw into the ends of the tubes and of course, the USB to USB-C charging cables. You charge the lights via a USB-C port in the base of each of the tubes (pictured above). Lastly, you also get 6 metal plates. I’m not entirely sure how often, if ever I’d use these, but they are designed to be stuck onto surfaces via their adhesive pads and then the LEDs are supposed to be attached to them via their internal magnets. I will just add that these magnets in the tubes are surprisingly strong and they have no trouble at all when it comes to holding themselves both vertically and horizontally to any metal surface. Not a mandatory feature, but I could see it being useful in more places than you think. Edit: I just tested it and they even stick themselves to my C-Stand upright and even on the thinner boom arm too. Like I say, these magnets are pretty strong!


Controlling and Adjusting the Tubes

You’ll be very pleased to know that these lights are very simple to control, plus you won't have to go through numerous menus to get to where you want to be. Each tube has 3 buttons; Power, Mod and Dim. Plus it also comes with a thumb wheel/adjustment dial. Hold the power button down to get going and then simply hit the MOD button to switch between each of the 3 white light, RGB and effects modes. From here you can then adjust each of the relevant values by turning the wheel and then adjust the brightness by first hitting the DIM button before again turning the wheel. Pressing the wheel in can also allow access to further adjustments.

As I mentioned, there are only 3 modes to cycle through so getting to where you want is very fast. The first image above shows the White Light mode and then above on the left is the RGB mode and on the right are all the video effects like lightening, TV flicker etc.


The Godox Light App

Don’t forget that these tubes all have Bluetooth connectivity too which enables you to control them via the Godox Light smartphone app. I personally don’t have the patience for controlling my lights via an app unless I have to, but the Godox Light app is supposed to be pretty good and if you’re using these lights up high or in hard-to-reach places, apps like this can make your life an awful lot easier!


….but how bright is it?!

Now I know all my strobe brothers and sisters are trawling this article looking for this little smattering of data that shows you how weak this latest LED light is. Well, here you go…

  • Power Output: 8w

  • Brightness: 740 lux

Super useful, right? I mentioned it at the top, but yes, LEDs are indeed very different when it comes to their outputs and you’ll often read power values that don’t translate well, if at all, to what we’re familiar with in our strobe world.

So instead of the tech-specs, let’s look at how bright this is in practical terms.

The above image was captured at f2.8 / ISO 200 / 1/60th sec

Above we can see a practical result in a language that we all understand. I measured the power of the light at 100% at a distance of 50cm, 100cm and 150cm away from the LED using a light meter and here are my findings.

At 50cm away the light measures f2.8 at ISO 200 and 1/60th sec. It drops off consistently from there and you can see that in the above photo.

I know we’re talking about power outputs in this section, but just look at how clean that light is on the wall!

At this stage, you may be surprised or even disappointed with what you’re seeing. After all, f2.8, ISO 200 and 1/60th sec at 50cm away is not bright, but remember, this is a tiny LED tube and we’ll be using it specifically as a key-light or at the very least, very close to the body. Every light has its optimum job and although this won't be lighting any big spaces on location, we can still utilise this tiny package to create some unique lighting styles.

Not convinced? Take a look below and see how I intend to use mine.


Using the TL30 to take portraits

If there’s one thing I’ve learned over the last couple of years while playing with LEDs, is to always test it out for yourself. With so many of these LED lights, it’s always the same concern; ‘will it be bright enough?’ You look at the spec sheet and many of them look like they’ll do nothing, but when you use them, you quickly find out that they’re far more capable than you initially thought and a lot of this comes from how they distribute light.

But enough specs and theory, let’s see the shots from my initial tests…

Clicking on any of the images below will fit them to your screen

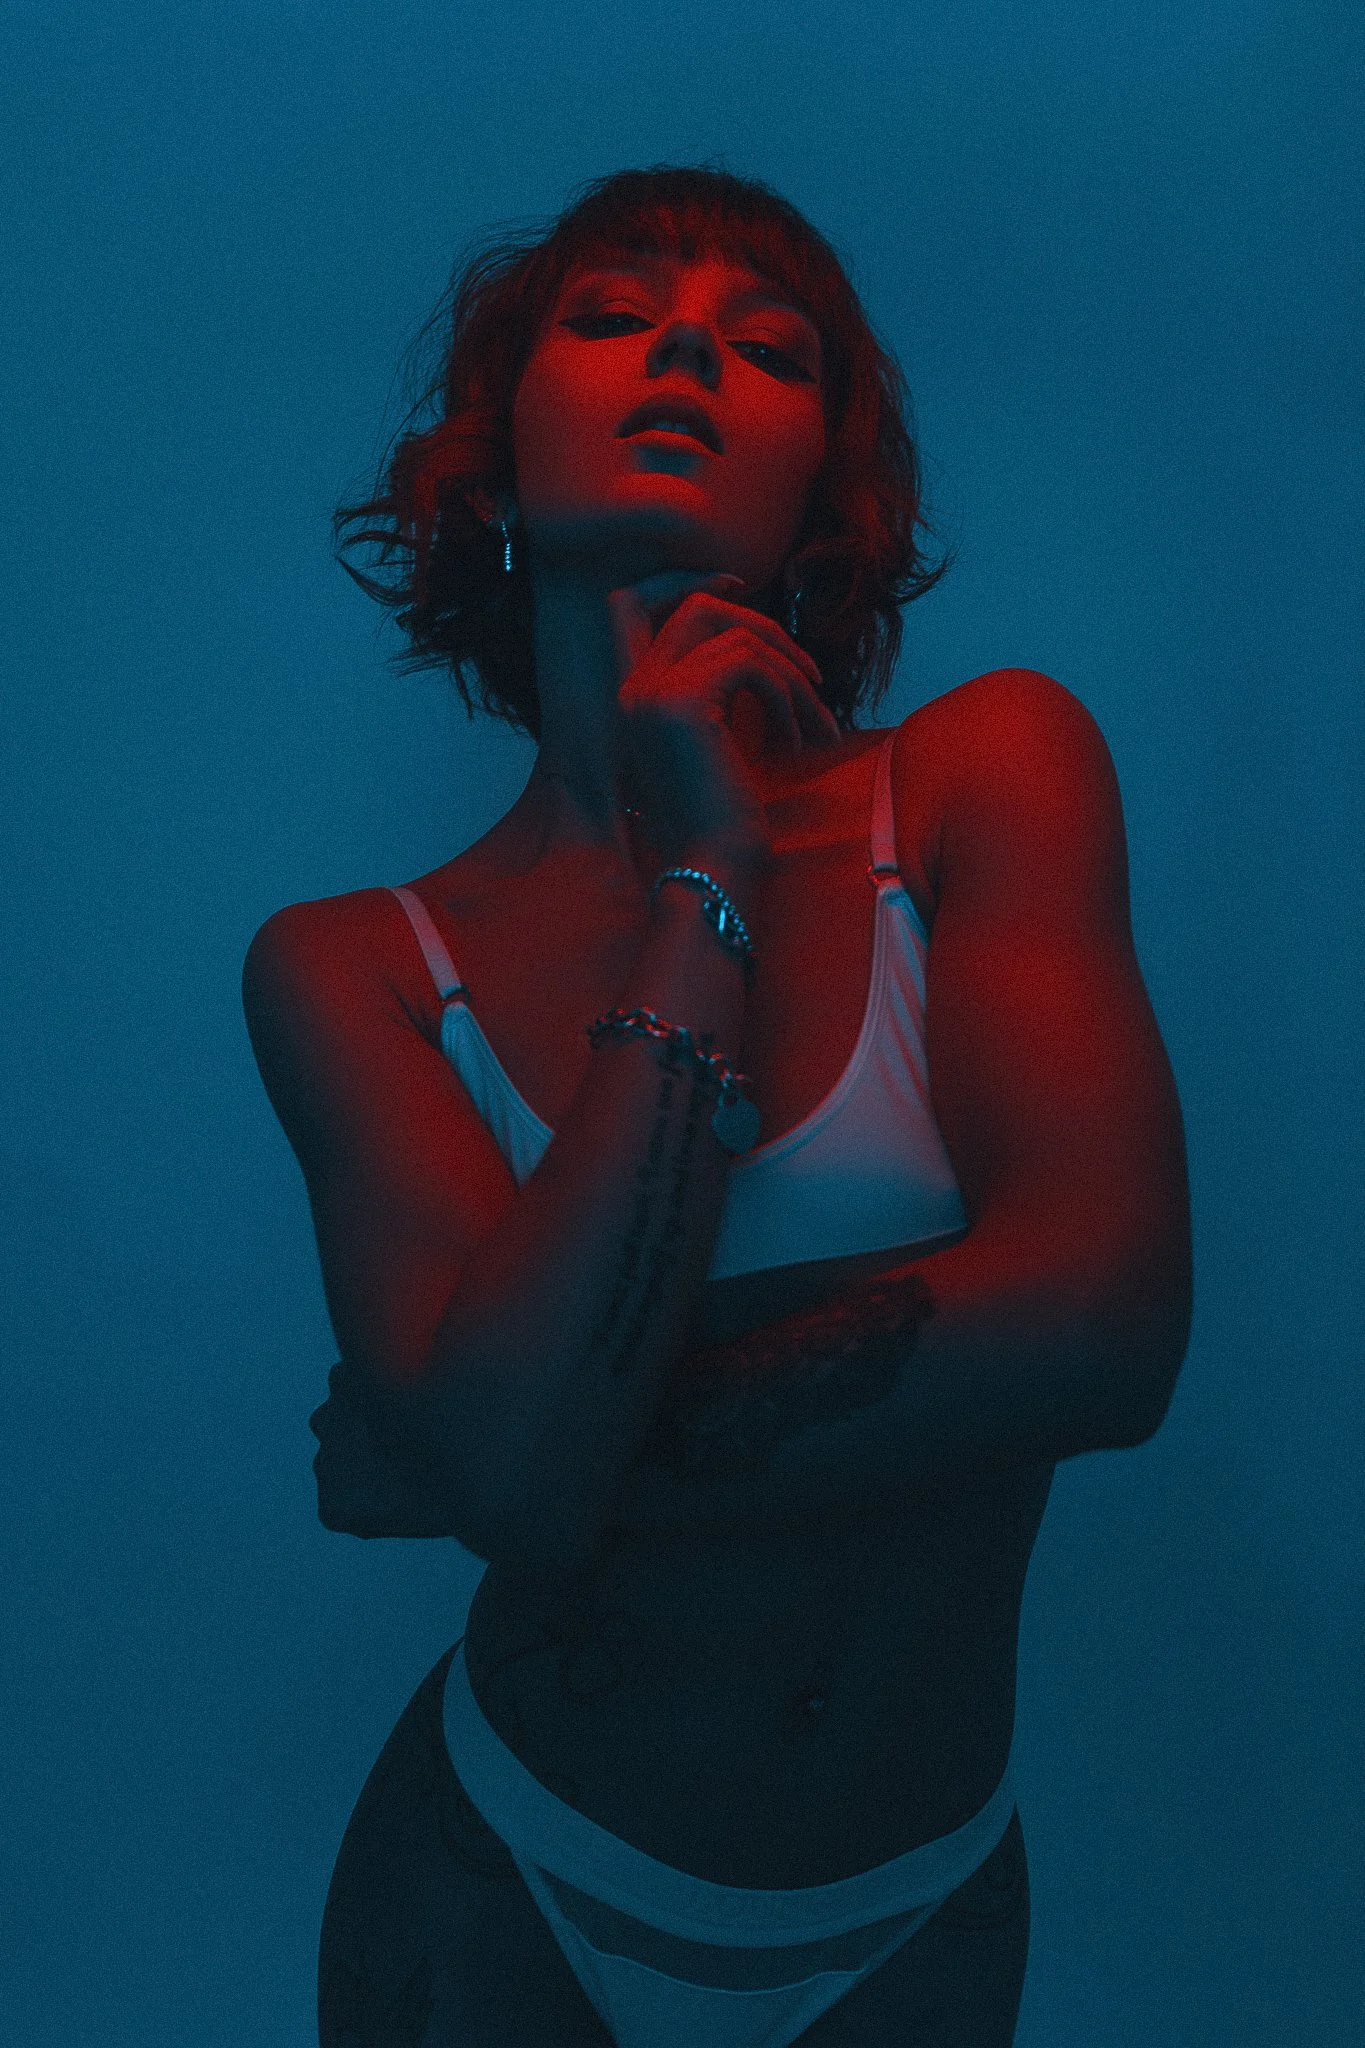
Click to enlarge: The initial test saw me connect two TL30s together via the included screw and use the now 60cm LED tube as a red key light.

The Initial Test

I started off by actually joining 2 of the TL30s together via the included screw attachment from the pack. I then used this now 60cm tube as my key-light and set it to pure red (Hue: 0 - Saturation: 100). I positioned it above the model and just out of shot so I could shoot underneath it. To complement this red light, I added a large blue light behind me via my Rotolight AEOS 2 Pro in a R120 softbox (AKA big soft light).

Camera Settings

  • Camera - Nikon D850

  • Lens - 24-70mm f2.8

  • Shutter Speed - 1/60th

  • Aperture - f2.8

  • ISO - 200

  • Kelvin - 5500K

  • Focal Length - ~40-58mm

Points of Note

The one thing I was keen to test with this light drop-off, was just how quickly the light would dissipate. What I mean by this, is how quickly the power of the light becomes effectively powerless and we can really start to see that here when we look at how close the model is to the background. Edit: I’m looking at the 3D diagram again now and in reality she may have been even closer to the background than is shown here. My point is, that the light from this very bold red key-light barely touches that background at all and it’s kept only on the model before it drops off entirely.

Looking Closer

To really demonstrate what I mean, I shot the same test image below with both a regular strobe with a basic reflector dish attached and then with the TL30. I made sure that the mannequin forehead was light metered at exactly f5.6 between each shot and both lights were positioned at the same distance from the subject too. What’s important for you to observe here, is just how much light is being spread/spilt onto the background behind the head. As you can see, the strobe spreads a lot of light back there, but the LED tube has almost none at all. You should also note just how similar the lighting between the two faces is here too.

It’s this incredibly tight light control that an evenly distributed light source like an LED tube or LED panel has that’s so important and it’s what I hoped to find when I requested this TL30-K2 lights to test.

Nerd-Note: I had to use a reflector dish on the strobe to try and make it a little fairer on the strobe. With no dish, the bare flash bulb threw light all over the studio and this resulted in the background being far brighter than it is here. Plus, due to the nature of lighting never happening in a vacuum, that bare bulb bounced light around the studio and ultimately that light filled in a lot of the shadows below too.

Click to enlarge: A practical light drop-off comparison between both a strobe and a small LED tube.


What about just one TL30?

I knew you were all just dying to ask that, and if I were you, I’d be dying to ask that exact same question!

Yes, the above shots were taken with 2x TL30s joined together and I did briefly test what just one of them solo looked like as a red key-light too.

This shot looks very similar to the earlier shots where I used 2 tubes joined together above, right? Yes, you’re not imagining things, the two resulting shots look very similar and that’s purely down to the size of the subject being clearly covered by one light when brought in close like this. So regardless of whether you only have one tube or two, you can still achieve the same look. The only core benefit of the two tubes is each of them will need be emitting slightly less light compared to one on its own.


The White-Light Alternative

I get it, not everyone is as obsessed with the crazy, bold colours as I am, so for the normies out there, here are some white-light alternatives.

Click to enlarge: Here we can see that I’ve changed the key-light to white-light and that I’ve also added a second tube to camera left. Again, this is set to red.

Note: The Set.a.Light 3D software I use to make these diagrams currently doesn't support small LED tubes, hence why the diagram shows the longer versions.

For this set, I’ve changed the key-light above to white light (4500K) and then I’ve added a second TL30 to the side of the model and this is now set to red (Hue: 0 - Saturation: 100). For this one, I also decided to move her a little further away from the background due to the red light below needing to be pulled further back to remain out of shot.


Alternative Fill

Lastly, I simply switched the red fill-light to be in front of the model instead of to the side.

Again, here I moved the white light up a little higher to get more spread down the body. This also helps prevent any white light from spilling down onto the backdrop behind her which would in turn wash out the blue colour. To avoid this, I moved the model and all of the lights a little further away from it.


The power of this light, is its size!

Early on in this article, we spoke about its concerning power output. The specs told us it was an 8w light! If you’re a studio shooter, you’ve likely got some flashes that are 500w, maybe even 1000w! How can this 8w light even be usable?

I hope you’ll agree now that those 8ws can be deceiving. You’ve just seen a bunch of portraits all very well-lit and my camera settings weren’t anything too crazy to achieve them. Yes, I was at 1/60th at ISO 200, but don’t forget that the LED tube was also only set to 20 (out of 100) in terms of power. I do not doubt that if I’d been bothered by either the ISO 200 or 1/60th sec I could easily have given that little light more power.

But the beauty of this little light is not its versatility, far from it. In fact, I got this light to test because of its small size not in spite of it and it’s this small size that enables me to bring that light extremely close to the subject's face to get some truly beautiful and very controlled light.

Uncontrolled light

To illustrate my point, what happens if I pull the light further away from the subject? By doing so, I’d need to increase its power to still properly illuminate the model. But in doing so, I now create a situation where the light is no longer controlled and this results in light spilling and spreading around the set.

In this example here you can clearly see the red light spilling onto my background behind the model. This isn’t terrible in itself and if you like the look, by all means, go for it, but it does show you how uncontrolled the light can be if not brought in close to the subject and the power brought down to compensate.

A similar look would also happen if we had a far larger tube here too. If we use my 100cm tube here, even close to the model, it’s likely that it’d spill onto the background too. Again, the TL30s power lies in its small size.

Featured Model: Little_b1989


Light Spread

It’s also worth noting the effective illumination angle of these TL30 tubes is about 180 degrees. I also own some 100cm LED tubes and always use those lights ‘in-shot’. and you can see the results here, but see how those tubes seemingly spread light from everywhere? That is very different to these TL30s as the angle of light spread is closer to 180 degrees rather than the 360 degrees you see in those other images. This is not a problem as I never intend to use these TL30s in-shot as I do with my longer tubes, but I just want you to be mindful of that in case you were planning to use them in-shot yourself.

Click to enlarge: I’ll speak about this later in the article, but LED lights are often about the right tool for the right job. Yes, those tubes throw light in all directions, but that also gives you far less control of your light too. The 180 spread of the TL30 ensures the light goes only where you want it.


Final Thoughts on the TL30-(K2)

At this stage, I think you’ve likely made up your mind with regards to this little light, my only hope is that your decision wasn’t purely based on the power output alone. Is it a ‘powerful’ light? No, but it’s more than powerful enough for the job it’s trying to do. I got this LED tube to illuminate small areas of the body with clean-looking light and to do it with precision. I had hoped that’s what it would do and thankfully it did it extremely well.

If you’re still on the fence, then here are a few bullet points to help you out.

  • Full RGB Colour Spectrum - As you’d expect, truly more colours than you’d ever need.

  • Detailed Saturation Adjustments - Bold colour not your thing? Don’t forget that this light also has a saturation dial for all colours and its increments are as small as 1%!

  • Kelvin Adjustments - This isn’t the biggest Kelvin range at 2700K-6500K, but it has enough adjustability for most needs.

  • G/M Tint Shifts - The Kelvin mode also allows for Green and Magenta shifts which is ideal if you’re ever matching lights to fluorescents.

  • Video Effects - I don’t even use these, but I know a lot of videographers that do. If you need a flickering fire or TV lighting effect for a video, this light has tons to choose from too.

  • Very Easy to Use - With just 3 buttons and a dial, this light is very simple and quick to use. Plus, with only 3 modes to cycle through, you won’t be wasting time trying to find what you want either.

  • Useful Accessories - Most of the time, these kits contain fillers to simply try and add value, but this kit really does contain some very useful accessories. Among them are the light-stand clamp, grid and even the waterproof bag.


LEDs are more flexible than you think. Sure, you’ll need to adapt your thinking from years of strobe use, but the effort will be rewarded with a better quality of light. Plus, there are certain instances where LEDs can offer something unique. In this image, the red light is coming from the little TL30 we’ve been discussing. See how the light is going both up and down the model thanks to its tube shape?

Closing Comments

If you’ve read all this nerd-speak so far, you likely think I’ve lost my mind. I get it. I really am getting into the weeds of understanding the dynamics of light drop-off with this one and for the most part, you’ll be able to take a lifetime's worth of portraits and never need to know all of this. But for those of you who want to dig a little deeper and for those who want to control complex lighting AKA coloured lighting in small areas like the human body, understanding lighting drop-offs based on the size of the light source and not simply via the Inverse Square Law, will certainly help you to achieve that.

A different chapter

Understanding and mastering LEDs is a very different chapter in the broader book of lighting knowledge. Yes, many things are the same, but the more I use LEDs the more I realise there are aspects of lighting that I’ve simply always taken for granted or simply overlooked until now.

This isn’t a new problem either as I went through a similar rediscovery when I transitioned to flash from hot-lights. All of these lights are like instruments. The notes stay the same, but you need to learn the intricacies of each instrument as you move around them.

Understanding the difference between points and planes of light

As I stated earlier, I’ve used flash extensively over the years and due to its design, flash nearly always emanates from a single point. From here we modify that single point in a variety of ways, from a large soft-box to a hard snoot. The resulting light is fine, but soft-boxes can produce hot-spots and the channelled and bounced light of a snoot can cause rough and even double shadows. Flashes are fine, but they are jack-of-all-trades-master-of-none when it comes to lighting and that’s absolutely fine for the most part. After all, you can very happily take many amazing images with flash, it’s just that when trying to do very precise lighting with colour, flashes can be tricky to fully manipulate.

LEDs are far from perfect though and the biggest most obvious flaw of LEDs is that they’re almost impossible to modify. The shape of the LEDs, whether it be a panel or a tube, is the shape of the light you’ll get. No lighting modifier can turn an LED panel into a viable snoot. But this lack of flexibility means the quality of light you get from that panel or tube if used as such, is truly remarkable.

Quality vs power

These little LED tubes won’t outright replace any of your strobes as they simply don’t do anything that your strobe already does. But your strobe also cannot do what this little light can do either.

I think as the years go by, LEDs will get brighter and brighter and for many, only then will they dare to even try LEDs. But like it or not, I really do see us switching to LEDs and as we do so, we’ll have to remember that it’s the right tool for the right job. One LED light won’t be as versatile as one strobe, but using the right LED for the right job will always produce gorgeous results and those will always speak for themselves.


Your thoughts?

As always, I truly appreciate anyone who reads all of my nerdy articles. Hopefully, you’ve learned something new or even better you’ve been inspired to test your own theories and ideas on this. If you do, I’d love to see or hear about them and always feel free to share your work via my Facebook Pages -Share-a-Shoot- post every Monday. Although the calibre of work being shared on there now is so high, I’m starting to feel pressured…. which is never/probably isn’t a bad thing! Also, if you have any questions about any of this, feel free to fire away below.


Products Used

Please note that I’ve included affiliate links below for PixaPro and I will benefit (albeit minimally) from the sales of any of these products should you purchase them. To that end, please feel free to use my discount code ‘HICK5-OFF’ at Essential Photo to receive a discount on any purchase via their site.

TL30-K2 RGB LED Tube

A 2 light LED kit that includes 2x 30cm full RGB LED tubes plus a whole host of useful accessories including grids and mounting clamps.

TL30-K2 Two Light Kit Link


Although I am sharing my own personal thoughts and findings about the lights mentioned in this article, many of you will want to know that I am now a ‘Master of Light’ for Rotolight. As such, I have been given a discount code to share with you when purchasing any of their products via the Rotolight website. Use my code ‘JAKEHICKS10’ when purchasing and you’ll save a bunch of money. I’ve never earned a penny of commission on this though, so if you find a better deal elsewhere, go for it.

Rotolight AEOS 2 PRO

With the AEOS 2 PRO, the world is your studio. Combining the shoot what you see benefits of powerful continuous light with a High Speed RGBWW strobe, AEOS 2 PRO offers unmatched versatility for photographers and filmmakers. Uniquely lightweight with an ultra-thin design, it’s never been easier to achieve beautiful soft light on the move.

AEOS 2 PRO Website Link


JHP Livestreams…

I livestream every other Tuesday night via YouTube and there I answer your questions, critique your shots, take community images into Photoshop to work on them and discuss all manner of lighting tips and techniques. I look forward to seeing you and your work there real soon. Jake Hicks Photography - YouTube


Learn more about my online workshops

 
Tuesday 03.12.24
Posted by Jake Hicks
Comments: 2
 

TWiP 835: Is AI the new Microstock?

It’s always a great honour to be invited onto TWiP (This Week in Photo) and as you can see by the episode number, it’s been going on for a long time! In this episode, I was chatting with hosts Frederick Van Johnson and Alastair Jolly as we discussed AI in photography.

Yes, I’m sure you’re all bored-to-tears about the discussion surrounding AI and its impact on photography, but that aside, I still think we worked through a lot of interesting topics. Is AI really that bad? Is it really taking our jobs? What effect is it having on our general perception of images? What can we as photographers do to make our work stand above that of AI?

If any of that sounds like it might be of interest, be sure to check it out and thanks once again to Frederick for having me back in the show ❤️

To watch the full interview check the video below or visit the This Week in Photo website here


JHP Livestreams…

I livestream every other Tuesday night via YouTube and there I answer your questions, critique your shots, take community images into Photoshop to work on them and discuss all manner of lighting tips and techniques. I look forward to seeing you and your work there real soon. Jake Hicks Photography - YouTube


ONLINE WORKSHOPS - LEARN MORE
JHP COLOUR GEL PACKS - BUY NOW
ONE-2-ONE MENTORING - LEARN MORE

 
Tuesday 02.13.24
Posted by Jake Hicks
 

Lighting Setup: Hanging Bulbs Portrait

I’ve been shooting for a long time now, but there are always some lighting setups that I’ve never gotten around to shooting. I’m sure we all have ideas for setups that may languish in an ‘inspiration folder’ somewhere on our hard drive and this hanging lightbulb shot was certainly one of them for me.

There’s nothing too tricky about this shot which is nice, but it did involve a little prep work as it requires a few unique items that I ultimately made myself to get the look I wanted. Again, this wasn’t too tricky and you can do it fairly cheaply if you cut the occasional corner like I did.

The Setup

As always, let’s jump into the shot we’re looking to achieve and then I’ll go over exactly how I achieved it and share some of the problems I encountered so you won't have to. I’ll also do my best to provide alternative options for as many of the items used as I can. I know we’re in this transition period right now where many of us have moved on to LEDs but there’s certainly a huge number of people still using strobes and I’ll do my best to offer up solutions to those that are.

Click to enlarge

A selection of vintage-style bulbs

The Godox Spotlight as the hair-light

Rotolight AEOS 2 Pro as my key

Bring everything together with a forest of lightstands!!!!!

Click on any of the images above to enlarge them


TL;DR/ADHD/Artist Setup Explanation

  • Suspend your lightbulbs around the subject

  • Place key light just out of shot in front of subject - set to 10,000K

  • Add hair light on opposite side behind subject - set to 2000K

  • Set camera to ~5000K


What You Will Need

Key-light - You can use whatever your preference for portrait key-light is here, but a beauty dish is ideal if you're shooting with strobes, or like me, I simply used the diffusion dome on my Rotolight AEOS 2 Pro light as it provides gorgeous soft light that is extremely controllable when brought in very close to the subject like this.

Hair-light - Again, you have plenty of scope to use what you’d normally use for a hair-light here. If you're shooting with strobes then an optical snoot will give a lot of fine control of exactly where the light will fall. Failing that, a gridded reflector dish or even barn doors on a reflector dish will work.

Dark Backdrop - I used a hand-painted backdrop here, but it turned out there wasn’t enough light in most of the images to actually see any texture on it. This was fine and I didn’t want it to be distracting anyway. If you don’t have a hand-painted backdrop, any dark grey backdrop will be absolutely fine here, but I'd avoid black.

Assortment of Vintage-Stye Bulbs - These are the only somewhat unique items in this setup. I did end up making all of the hanging bulbs myself and if I can do it, I assure you, you can do it too. I’ll outline the DIY method I used below.

A Lot of Haze - This is somewhat optional, but I really do recommend you try and add some atmosphere to your shot in some way. I used a smoke machine (AKA SmokeNINJA), but a normal smoke machine can also work. Alternatively, if smoke really isn’t an option for you, you can choose to use lens filters to get a very similar effect and I’ll discuss those later on as well.


Camera Settings

  • Camera - Nikon D850

  • Lens - I used a lot of lenses on this setup, but I recommend a longer lens like an 85mm or 105mm

  • Shutter Speed - 1/50th (I’ll explain why later on)

  • Aperture - f2.8

  • ISO - ~50

  • Kelvin - 5000K

  • Focal Length - 50 - 105mm

You should notice that a lot of these camera settings are all over the place and that’s simply due to how much I was experimenting with when I was shooting with so many older, vintage-style lenses. That said, I have outlined the starting settings that I recommend you begin with.


The Results

Click to enlarge any of the shots below.

Model: Lucia Kosta

Makeup: Tumsilt Makeup

Designer: Jolanta Pilinkaite Designs


Breaking it Down

DIY Hanging Bulbs

I think it’s safe to say that the hanging bulbs are the star of this particular show, but most of you won't have a bunch of these vintage bulbs on strings (I’m resisting the urge to say ‘hanging about’ here). I was the same, so I looked at how to make them myself. Here are the steps I went through to make mine.


1. How many do I need? - I actually mocked up this lighting setup using the 3D studio tool Set.a.light3D (that produced the 3d render you just saw above) and from there I was able to work how many bulbs I would need to fill the frame with a certain about of depth in mind. I landed on 7 bulbs, but seeing as one was often hidden behind the model, you could get away with 6.


2. What should the bulbs look like? - This would seem obvious, but trust me, there are so many options when you search ‘vintage style bulbs. I got mine from eBay as they were the cheapest place I found with reasonable shipping times, but there were a couple of factors I wanted to consider when actually deciding.

Firstly ‘cost’, I was buying 7 of them so I did want to be sensible with the individual price.

Secondly, the size of them. I knew these bulbs were going to be ‘in-shot’ so I didn’t want them to be tiny little fairly-light looking things. Alternatively, I knew they couldn’t be too big as I wanted the model amongst them.

Ultimately I landed on the old ‘T10 E27 40W RC’. A real classic bulb to be sure and although I don’t need to explain why this is such a fan favourite to your refined selves, I will just briefly go over the aforementioned Enigma code for the uncultured few still in the dark.

The T10 was perfect due to the fact that it was long enough to make an impact in shot, but not so wide that it would give the model third-degree burns every time she breathed in and out.

The other core reason was it being very good value at £1.45 per bulb from China and as long as you’re prepared to wait a little bit for it to arrive, you wont finder a better deal than that.

The E27 simply refers to it being screw fit and this is important to remember when purchasing your holders.

40W refers to the fact that its 40 watts. This isn’t too important, other than that you’ll need to remember that fact if one of these bulbs accidentally and immediately breaks as soon as you remove it from the packet and need to urgently buy another bulb from a closer seller that also sells 60w versions. FML!

Pro Tip: Buy more than 7 bulbs on your initial purchase!!!!


3. Bulb Housing - Again, this feels like it’ll be obvious, but once again there are a million and one options. I went for …. wait for it… the cheapest one I could find.

Again, we’re buying 7 of them so I wanted to keep it cost-effective whilst still looking somewhat cool. And by cool I mean it didn’t look bright white and plastic…. I got halfway there. Sadly, the sexy-looking metal ones were considerably more expensive so I decided to leave it and just go for the black plastic, clean-looking design.

7 of these cost about £20


4. Cables - I’m sure you’ve worked out a running theme in my choices here, but yes, once again I tried to do this as cheaply as possible, so cheap in fact that I actually made my life considerably harder in the process. Let me explain. I knew the cables would be hanging in shot, so I didn’t want some dirty old white plastic cable dangling there, so instead I went for that cool-looking braided vintage-style cable. Unsparingly this is more expensive than your regular fridges extension cord so I decided to buy enough ‘fancy’ cable to hang in-shot and then splice it into cheaper crappy cable for the sections that were out of shot.

I purchased 10m of the vintage-style cable for £21 and 10m of the flat black flex for ~£7. Like I said, that cheap cable, really was a lot cheaper.


5. Cable Joiner - One extra expense in splicing the cables like this was a cable connector. I'd have to splice the 2 cables on all 7 strings and to do that I needed a cable connector/joiner. Thankfully these are very cheap.

I got mine for ~£3.


6. Plugs - Lastly, I of course needed plugs to actually plug all of these hanging bulbs into the wall. I’m sure there is a far better solution to the one that I had, namely, I just purchased 7 plugs for all 7 of my hanging bulbs, but I’m sure the more electrically minded among you will know of some way to attach all these stings to fewer plugs.

The one major benefit of making them all separately like this though, is that you have the ability to split each of the cables up and run them exactly where you want them. As you can see from the BTS above, there was a lot of messy cabling involved to string everything above the model and then back down to the floor and then to the power. So with that said, I still think I prefer having the separate plugs to give me that flexibility when arranging the bulbs, even though there is ultimately a lot of plugs to deal with.

I purchased 10x 13 amp plugs for ~£10


Total Cost*

  • Vintage Style Bulbs x7 = £10.75

  • Vintage Style Bulbs (spares) x2 = £3.33

  • Vintage-Style Fabric Cable 10m = £21.34

  • Regular Black Electrical Wire 10m = £6.97

  • Retro Bulb Holders x7 = £19.98

  • Cable Connector Block = £2.85

  • Electrical Tape = £1.95

TOTAL = £67.17

*Pricing as of 2023


The DIY Part

These steps aren’t very tricky, but they are fairly time-consuming when you have to do everything 7 times. You don't need any special tools either and a screwdriver will cover it. That said, I did end up buying a wire-stripper after the first couple of strings as that made stripping the scores of wires far faster.


Connecting the wires

As I’m a cheapskate and decided to buy nice wire for only half the setup, I had to splice the cheap stuff onto the nice stuff. To do this, simply use your wire connector and attach the vintage-style cable on one side and the regular flex on the other side. Just be sure to match the coloured wires on both sides. I then recommend wrapping the entire block in black electrical tape so it doesn’t look like a completely lethal fire hazard to the model and team when on set!


Wiring up the Bulb Holder

Again, this is fairly straightforward and you just have to strip the plastic sleeve off of the cable and attach it to the corresponding screw and then tighten everything back up. Many of these bulb holders will also have a tightening screw on the tip where the cable enters. Once everything is in place, be sure to tighten up that screw as it will take the weight of the bulb and not your connecting wires inside.


Attaching the Plug

Lastly, we just need to attach the plug. Again, nothing tricky here, it is just time-consuming. Just make sure you’re attaching the right colours to the right pins.

Disclaimer: Just in case it wasn’t abundantly clear, I am not an electrician and I do not claim to be able to advise you on any of this. You wire all of this together at your own risk.


Things to consider

Suspending the Bulbs

The setup itself is pretty straightforward, after all, I’m sure most of you have shot a portrait with a key and hair light before. The trickiest part for me was getting the bulbs to look good in the framing. I had 7 bulbs to think about and I wanted to showcase depth in the shot, meaning I wanted to have some bulbs close to the camera and some further away. Again, in principle this is easy, but I also logistically really only had 2 crossbars to suspend them from so the depth was managed via two bars crossing each other above the model and placing the bulbs along the length of them in a random way to make it look visually pleasing.

Click to enlarge

In the images above you can see that I clamped all 7 lights to only 2 crossbars. I would then place them in position and adjust the height of the bulbs to give them a more random look. This process will be easier if you have several additional crossbars or booms to attach the bulbs to. Regardless, I recommend getting this as close to in place before the talent actually stands there as this will take some back and forth.

One other aspect that is painfully obvious from the images above is how short the cables ended up being and you can see extension leads hanging from the stands as a result. This miscalculation happened due to me planning on having this rig closer to the ground. As it turned out, the model was taller and wore heels and I wanted the option to shoot wider if need be and I didn’t want to see the crossbars above if I did. If you can, maybe consider getting more of the cheap flex cable and making all of your strings longer to give yourself more options.

Choosing the White Balance

The white balance choice in this shot is crucial to the final image and in my opinion, failing to carefully consider what all of the lights and camera is set to will result in a very different image.

Click to enlarge

If we quickly recap the white balance settings we had:

  • Camera: 5000K

  • Key-Light: 10,000K

  • Hair-Light: 2000K

  • Bulbs: 2000K

With the camera set to ~5000K it makes the key-light on the model appear blue due to it being set to 10,000K. That is nicely contrasted by all the other Kelvin colours in the image as the hair-light is set to 2000K along with the hanging bulbs which are naturally 2000K.

It seems complicated, but remember, whenever you’re following any of my lighting setups, I’m never interested in what’s accurate, I’m only interested in what looks good. Here, none of the lights are set to the ‘accurate’ white balance of the camera and therefore all of the lighting in this shot is either cool or warm in relation to the camera.

Adding Atmosphere

I don't recall taking any images where there wasn’t smoke in the room so I can't show you what it would look like without it, but I do think adding some form of smoke or haze to this setup makes a huge difference.

I used the handheld SmokeNINJA to add the haze and atmosphere to these images

I used a SmokeNINJA to add the smoke here as it's a super-quick handheld smoke machine. Adding some form of atmosphere helps to give those bulbs in shot that gorgeous warm glow, plus it helps to force separation between the subject and background too. And by background I mean the bulbs further away compared to the closer ones as well as the actual background. The haze forces us to perceive an extra layer of depth when the bulbs further away appear slightly less distinctly than the ones closer to us. This all helps add depth to the shot


Getting Creative

Lens Filters

With everything finally in place, we can now afford to get a little creative with how we capture the shots. One of my favourite ways to do that is with lens filters. There are a lot to choose from, but here are some images where I was playing with some of my favourite filters.

Click to enlarge - Filter Used: Prism FX Dream Filter

This is one of the more subtle filters, but it’s very effective when you have lights either in-shot like I have here or at the very least, lighting coming back into the lens. If you look closely, you can see a distinctive glow around the bulbs which is a beautiful effect, albeit simple.


Click to enlarge - Filter Used: Prism FX Flare FX Filter

This Flare FX filter produces a very dominating effect and it's hard to miss. That said, once again this filter only works when there are points of light in-shot. Without them, you can barely tell it does anything at all. This effect is supposed to replicate the classic anamorphic flares we see in movies. It's very distinctive but it should be used sparingly.


Click to enlarge - Filter Used: Prism FX Chromatic Flare FX Filter

Lastly, I tried a far warmer version of the anamorphic flares from above and as you can see, it produces a similar effect, just in reddish hues instead of the colder blues. Once again, this only works when there are lights visible in-shot.


Artistic Lenses

As a studio shooter myself, there are limited visible effects when using vintage lenses in my work. Most old or even modern art-lenses display their unique traits and qualities at the edges of their frame and for the most part, the centre of the frame is left fairly untouched by their unique looks. This is great if you shoot a lot of work outdoors with tons of data at the edge of the frame, but in the studio, a lot of that look can be lost entirely when there's nothing but a neutral background at the edges.

With a setup like this hanging bulbs one however, there’s far more going on at the edges of the frame and that results in far more of the individual lens properties shining through. Take a look at some of the ones that I played with below.

Click to enlarge - Lens Used: Petzval 58

It’s tough to think of a more distinctive lens-look than the Petzval as that incredibly swirly bokeh is legendary at this point. This lens is not easy to use though and not only is it manual focus, but a manual focus that is adjusted via a form of rack & pinion! On top of that, the aperture is adjusted by dropping in metal discs with holes in them via a slot on the top of the lens. User friendly it certainly isn't, but its distinctive look certainly makes up for it.


Click to enlarge - Lens Used: Lensbaby Velvet 56

Click to enlarge - Lens Used Nikon DC 105

Another ‘art lens’ I tried was the Lensbaby Velvet 56. This is a far more modern lens and although the effect is less distinctive, a unique look is still very much there. If you’re not sure what you're looking for then I've included a more traditional style image next to it for comparison. The key areas you want to be looking at are how the lens renders edge detail and how it renders points of light. You should see that the Velvet creates those distinctive halos with its bokeh and of course, all the highlights have a very generous glow to them compared to the cleaner Nikon lens shot next to it.


Closing Comments

As I mentioned at the start, this isn’t a particularly tricky setup to get right, it just takes a little more preparation than normal. The only real stumbling block I see many having with this one is the Kelvin shifts and how you may be inclined to go after ‘accurate’ colour. I assure you this isn’t the best approach with this setup and with that in mind, just make sure you’ve selected the manual white balance over auto white balance on your camera.

With this slightly more creative approach to the final image, I’d also urge you to add other elements to the shot too. For example, don’t be afraid to add smoke, lens filters and even art-lenses to the final look and do your best to try and get most of this in-camera over trying to add these effects later on in post. I assure you, it’ll look far better getting it right in-camera first.

Lastly, now that you’ve made your hanging vintage-style bulbs, I’d urge you to test out other bulbs in place of the vintage filament ones. How about coloured bulbs, maybe even more abstract-looking bulbs? Give it a try and let me know how you get on.

EDIT

I received a couple of messages and comments regarding some areas that I didn’t cover (even though I said I would, so I apologise about that).

Shutter Speed 1/50th - One aspect was my use of 1/50th second shutter speed in some of these images. This is purely a subjective choice and there is no technical reason for me to do this beyond a certain look that I’m after. Many modern cameras have provided us with a very clinical and saccharine look to our imagery and although that can be fine in certain situations, the final image can feel a little stark, cold and even lifeless. With this in mind, I will often look for ways to bring a little realism or life back to my shots and whether that’s though my colour balance, lens filters, vintage lenses or even shutter speed, all of these aspects can help make an image feel a little more real by adding these perceived imperfections. Again, please remember that this a personal choice and it does not mean its objectively better. I’d encourage you to play with a lightly slower shutter speed from time to time and see if you like the added movement for yourself.

Using Strobes instead of LEDs - As I mentioned at the top and then failed to follow up on, you can absolutely achieve this look with strobes instead of LEDs, the only problem you’ll encounter is the power of the strobes being extremely bright compared to these 40w hanging bulbs. In my experience, by far and away the best solution to this is to use ND (Neutral Density) gels over your strobes to reduce their output. These gels are simply grey gels that reduced brightness without affecting the colour. These ND gels are very common in TV and cinema so shouldn’t be too tricky to get a hold of either. Applying these gels to your light will reduce them by several stops and they can easily be stacked for even more power reduction.


Products Used

Although I am sharing my own personal thoughts and findings about the lights mentioned in this article, many of you will want to know that I am now a ‘Master of Light’ for Rotolight. As such, I have been given a discount code to share with you when purchasing any of their products via the Rotolight website. Use my code ‘JAKEHICKS10’ when purchasing and you’ll save a bunch of money. I’ve never earned a penny of commission on this though, so if you find a better deal elsewhere, go for it.

Rotolight AEOS 2 PRO

With the AEOS 2 PRO, the world is your studio. Combining the shoot what you see benefits of powerful continuous light with a High Speed RGBWW strobe, AEOS 2 PRO offers unmatched versatility for photographers and filmmakers. Uniquely lightweight with an ultra-thin design, it’s never been easier to achieve beautiful soft light on the move.

AEOS 2 PRO Website Link


SmokeNINJA

SmokeNinja is a portable, handheld smoke machine that requires almost zero heating up time. You turn it on and in mere seconds you have plumes of smoke filling the set. Plus, this little thing can quickly produce enough smoke for even large rooms too.

SmokeNINJA Link


Please note that I’ve included affiliate links below for PixaPro and I will benefit (albeit minimally) from the sales of any of these products should you purchase them. To that end, please feel free to use my discount code ‘HICK5-OFF’ at Essential Photo to receive a discount on any purchase via their site.

Godox Spotlight

S-fit spotlight that can be very finely controlled via inbuilt blades or via a range of Gobos. Due to the large lens at the front, this modifier can also produce some of the hardest-looking light available.

Godox Spotlight Link


Godox SZ150R

Essentially this is an LED studio strobe. You can use it with any S-Fit modifiers like beauty dish and softbox you already own, plus you can also change this to any colour and any Kelvin you’d like. It’s only 150 watts though, so you will want to use this in a controlled studio environment.

Godox SZ150R Link


JHP Livestreams…

If you give this setup a go, I’d love to see how the shots turn out, so feel free to share them my way. One way to do that is via my livestream. I livestream every other Tuesday night via YouTube and there I answer your questions, critique your shots, take community images into Photoshop to work on them and discuss all manner of lighting tips and techniques. I look forward to seeing you and your work there real soon. Jake Hicks Photography - YouTube


If you missed a previous stream, the VODs are all saved there too, so check them out!


ONLINE WORKSHOPS - Learn more
 
Tuesday 01.30.24
Posted by Jake Hicks
 

Top 5 Jake Hicks Photography Articles of 2023

That’s right, you knew this was coming so it’s best to close your eyes and let it happen. Each year I find it useful to look at what was popular over the previous 12 months. I’ll always continue to write articles on topics which I find interesting, even if nobody else reads them, but I’d be foolish if I didn’t also look at what you all find interesting too.

The top five articles of 2023 are based on the number of page visits throughout the year and although this isn’t the most accurate way to rank these due to articles at the start of the year having longer to accumulate views, it does give a rough idea at what’s popular and what’s not.


Number 1

Lighting Setup: Projection Backgrounds

This being number 1 actually surprised me a lot. Why? Well, firstly this is a very niche setup that requires a decent amount of kit before you can even begin to play with it. Secondly, this is a very creative setup. Broadly speaking, you get far more views on very basic articles as that encompasses most readers' skills. For example, my all-time most popular article by a mile is one on whether 50mm or 85mm is better for portraits. So to have this very creative and slightly trickier setup at number 1 is amazing. My best guess as to why it comfortably made it here, is due to the rise in projector usage. Even though I’ve been using and recommending people to use projectors for years, there’s still very little info on how to use them in more creative ways.

If you missed this article the first time around, definitely give it a look as I walk you through a shoot where I worked with a singer to capture a ton of variety in a short space of time thanks to the versatility of using a projector on set.

Lighting Setup: Projection Backgrounds

Number 2

Lighting Setup: Affordable LED Tubes

Long-time followers of my work will know that I’ve shot with these LED tubes a lot in the last year and although I’ve used them on several shoots since this was first published, this article talks you through how I went about problem-solving how to work with lights in frame and provide some DIY solutions on how to secure them in shot.

Plus this article also looks at how affordable these LEDs are. Many LED tubes are extremely expensive and although we sacrifice a little brightness and white light quality with these more affordable ones, there are some further benefits beyond actual cost savings too.

If you missed this very popular article from last year, definitely check it out as along with the actual setup, I also share my thoughts on the LED light drop-off versus flash too.

Lighting Setup: Affordable LED Tubes

Number 3

Lighting Setup: Using a DIY Scrim in the Studio

I think if you were an aspiring writer and wanted some quick tips on how to grow your article's popularity, one of my top tips would absolutely be to include ‘DIY’ in your title! Photographers LOVE to spend tons of money on camera gear, but when it comes to lighting and lighting modifiers, they’ll happily break out the toilet rolls and washing-up liquid bottles to save a few quid!

Last year's number 3 article isn’t quite that ‘Blue Peter’ (1980s kids rise up), but it showcases a few setups that use a DIY scrim to soften the key light along with diagrams and examples of what and where to buy your money-saving modifier, this article demonstrates just how much a scrim can change the quality of light in your portraits. If you’ve never used a scrim before, definitely check this one out.

Lighting Setup: Using a DIY Scrim in the Studio

Number 4

Rotolight's LED Flash Duration

As a more ‘mature’ gentleman myself, there has been a very rare occasion where I wasn’t completely up to speed on the latest and greatest technological innovations of our fine art form. Putting aside the fact that I still use a DSLR for a moment, one area where I have been hugely interested in its future advancements is lighting. Spoiler alert, that future is not flash.

Along with many of you, I’ve progressively been switching a lot of my lighting from flash to LED. But this switch wasn’t as simple as you might think. Yes, LEDs offer a ton of benefits, but there are also many aspects of that switch that we need to consider. For example, with LED panels, the inverse square law principle that we’ve all lived by for decades is completely turned on its head. Another very interesting aspect that’s changed with LEDs, is flash duration. I think it’s easy to assume that flash happens instantaneously, but that’s far from the truth. What happens to flash when we no longer need to ignite gas to create that bright burst we’re used to, how do LEDs do it?

This article looks at the flash duration of LEDs and I try my best to explain exactly what happens when you ‘flash’ an LED light. If you’re even remotely interested in the science behind photography AKA a nerd like me, then you should absolutely check this article out if you missed it originally.

Rotolight's LED Flash Duration

Number 5

Godox Spotlight - It's in my top 5 best lighting modifiers of all time!

I’m very happy this article squeezed into the top 5 last year as although it was first shared later in 2023, I’m glad to see it gained some traction. Why am I happy this made it in? Simply because this Godox Spotlight modifier is truly remarkable and likely one of the most versatile modifiers I’ve ever used. And as the title suggests, this modifier is easily in my top 5 favourite modifiers of all time!

If you know anything about this type of modifier, you’ll know that it's an extremely hard-light modifier, how on earth can it be versatile? This is where the article was interesting for me, as although there are scores of people talking about what this can do to channel and carve very defined hard-light looks, this modifier can also produce some of the softest light I’ve ever had the privilege of using. If you’re somewhat suspicious of how that’s even possible and missed this article when it was first published, be sure to take a look at the full article as I share tons of setups for both very hard-light light shots as well as super soft-light shots.

Godox Spotlight - It's in my top 5 best lighting modifiers of all time!

Closing comments…

Did you recognise any of those articles? Miss any of them when they were originally posted? Either way, this is a nice little catch-up on some of my more popular posts from the previous year and not only is it a handy reminder for you guys, but it’s also a useful process for me to see what type of content is more popular than others.

More often than not, these annual reviews see some surprises for me in the Top 5. Not articles that shouldn’t be there, but more often I’m surprised at certain articles that didn't make it, articles that I thought would be popular, but weren't. This year didn’t see me surprised at what didn’t make it, but I was still very surprised to see that number 1 article being taken by that very creative projector setup. Maybe that’s a sign I should be sharing more of those types of arty-farty setups! :D

Were there any surprises in there for you? Are there articles from last year that you thought should have been here? Also, do you have any suggestions for future articles this year? Let me know and as always, thank you for checking them out.


Never miss a killer article again!

Never miss a cool tip, technique or lighting setup again. Sign up to my newsletter and I promise to spruce up your inbox with only the best creative ideas for you to try and test out. I promise not to spam you though as I really only send out the updates a couple of times a month to keep you in the know.


JHP Livestreams…

If you give any of these setups a go, I’d love to see how the shots turn out, so feel free to share them my way. One way to do that is via my livestream. I livestream every other Tuesday night via my YouTube channel and there I answer your questions, critique your shots, take community images into Photoshop to work on them and discuss all manner of lighting tips and techniques. I look forward to seeing you and your work there real soon. Jake Hicks Photography on YouTube


ONLINE WORKSHOPS - LEARN MORE
JHP COLOUR GEL PACKS - BUY NOW
ONE-2-ONE MENTORING - LEARN MORE

 
Tuesday 01.16.24
Posted by Jake Hicks
 

The Slow Death of Creativity in Modern Photography

Is photography all the same today? What makes one image different from one another when not only technology allows us to rely on features that trivialise traditional skills, but the pool from which many learn new skills, is so easily accessible?

At a surface level this automation of foundational skills and us all having permanent access to a global knowledge pool that is continuously updated sounds amazing, but are we all becoming the same? If we all have the same tool and the same knowledge, do we run the risk of producing very similar work?


Photography has never been easier

Nearly all modern digital cameras are objectively good today, but even older cameras are excellent and arguably one of the greatest digital cameras ever made, the Canon 5D MKII can be picked up for less than £200 toady!

The barrier to entry for photography is extremely low today as almost any digital camera made in the last 20 years is objectively excellent and due to their popularity, even cameras that are only a few years old can be acquired relatively cheaply. In fact, one of the best digital cameras ever made was the Canon 5D MKII and that can be picked up for less than £200 second-hand today! Of course, all of this doesn’t even include the fact that we all own a mini-super computer coupled with an excellent camera in our pockets at all times. Almost anybody today can jump into photography and thanks to digital technology, there are no additional and recurring costs like there used to be with analogue film. Once you have your camera, you’re good to go.

Of course, owning a camera doesn’t mean you know how to use it. Right? Modern cameras have done away with the need for you to learn the skill of focusing, nor do you need to be a human light meter and remember things like the ‘Sunny 16’ rule. In fact, for the most part, pointing your camera in the general direction is quite literally all you need to do to get a great image, especially if you’ve ‘forgotten’ to turn off the film emulations the shot you’ve just taken is cover-worthy straight out of the gate.

Yes, your modern camera can all but walk the dog and render differential geometry of the shapes you point it at, but it’s still far from making any real creative decisions, right? It obviously can't create art, right?


We’re all artists

We as humans have an innate sense of beauty and yes, I mean everyone. At its most elemental level, we all agree that sunsets, puppies and tropical islands are beautiful. But from here, we start to diverge. Some may think babies are beautiful, flowers in bloom, maybe brunettes, fast cars and even knives and guns can be beautiful to some. Herein lies the sense of self that makes us unique from one another and when we translate what we personally perceive to be beautiful to our own work. This is our art.

Our ability to appreciate beauty is in all of us. Beauty is certainly subjective, but there our many staples of beauty we all agree on like sunsets, cute animals etc. The image above is taken from my as yet unreleased Colour 2.0 workshop, but on the left it shows images synonymous with beauty, but as we move to the right, our personal definitions of beauty may differ.

This innate sense of beauty is far stronger than you think too. Somehow you instinctively know what colours go well together, or at worst you definitely know what colours don’t go together. You know what tastes bad and what tastes good and whether you play an instrument or not, I could play you a note on piano and you’d somehow instinctively know if it was out of tune. So with your innate notion of beauty and your unique code of preferences, you're able to create art. Right?

Yes, anything created and viewed by an audience can technically be deemed as art. For many, the intent behind the work is a stronger signifier of what art is, but for the most part, all of us are very capable of art as we all have a unique voice and vision. But is that uniqueness being eroded today as we're all funnelled into what’s ‘trending’ at any one time? If we are all being inspired by a collective source, do we lose our unique vision?


Foundational Art

Human history has given us incredible artists. The early Renaissance of the 1400s gave us work from artists like Domenico Veneziano and Filippo Brunelleschi as well as many others. They largely pioneered the idea of perspective and Chiaroscuro, two incredibly fundamental tenets of nearly all art today. As the Renaissance period unfolded, we got geniuses like Leonardo da Vinci and Michelangelo in the early 1500s and although I’m sure they need little introduction, they made huge strides in understanding light-play and extremely detailed dimensional work. As we moved into the early 1600s, the baroque style emerged with Caravaggio producing work with heavy contrast and deep colours, work that not only holds up today but is arguably still unsurpassed. The 1800s saw the birth of neoclassicism, a style heavily driven by a need for realism as the Ancient Greeks saw beauty existing in the natural form. The work created by artists of the time like John William Godward and Jean Auguste Dominique Ingres is nothing short of breathtaking as their ability to render skin in pale tones and soft light is incredible.

Domenico Veneziano - The Madonna and Child with Saints c. 1445–47

Leonardo da Vinci - Mona Lisa c. 1503–1516

Michelangelo painted the ceiling of the Sistine Chapel - 1508–1512

Caravaggio - Saint Jerome Writing - c. 1605–1606

Jean Auguste Dominique Ingres - Grande Odalisque - 1814

John William Godward - Mischief and Repose - 1895

As we leave the twilight years of the 1800s and move away from the work of the ‘old masters’ we enter the 1900s and of course not only the introduction of modern art, but the heretical discipline of the devil worshippers now known today as photography.

Most of us are all too aware of the work of many of these more modern artists. In fact, most of this work is so iconic that we not only know the name of the artist but the names of the individual pieces they created. Work like Vincent Van Gogh’s ‘Sunflowers’, Paul Cezanne’s ‘Les joueurs de cartes’ (The card players), Monet’s ‘Water Lillies’, Edvard Munch’s ‘The Scream’ and Picasso’s ‘Les Demoiselles d'Avignon’ (you’ll know it when you see it). There are countless others I could list here, but the point still stands, that although all of these works are over a century old, we’re not only aware of them, but know them well.

Vincent van Gogh - Sunflowers - 1889

Edvard Munch - The Scream - 1893

Paul Cézanne - Les joueurs de cartes (The Card Players) - 1892–1895

Claude Monet - Water Lilies c. 1915

Pablo Picasso - Les Demoiselles d'Avignon - 1907

From here we even know world-famous works that explored expressionism and abstract art from artists like Wassily Kandinsky and his ‘Yellow-Red-Blue’ as well as Piet Mondrian’s ‘Composition II in Red, Blue, and Yellow’. And if we look just over our shoulders we can still almost taste the pop-art era thanks to the likes of Andy Warhol and his ‘Campbell's Soup I’.

Piet Mondriaan - Composition II in Red, Blue, and Yellow - 1930

Andy Warhol - Campbell's Soup I - 1968

Kandinsky - Yellow-Red-Blue - 1925

Although the photographic discipline is still in its infancy if compared to art in general, we still have many prominent artists who made strides where others hadn’t gone before. Nearly all know Ansel Adams, but most should also know other early pioneers like Richard Avedon, Henri Cartier-Bresson, Irving Penn and Helmut Newton. As I say, you should all know those names, but they were all from the very early 20th century, as we move forward, we get far fewer influential names appearing. I’m sure David Bailey and Annie Leibovitz is among the ones we know, maybe even Mario Testino - Personally, I’m not sure whether we should include artists who are famous for depicting other famous people, but the old masters painted lots of famous people of the time, so I’ll allow it. If it was up to me, I’d absolutely put Nick Knight amongst this lot and if you’ve somehow not heard of this incredible photographer, that only lends more credence to my next point. Why do we know a huge number of names from only the first half of the 20th Century? Are there simply fewer great photographers today?

Henri Cartier-Bresson - The Var department. Hyères, France - 1932

Ansel Adams - The Tetons and the Snake River - 1942

Annie Leibovitz - Leonardo diCaprio - 1997

Helmut Newton - Rue Aubriot - 1975

Mario Testino - Kate Moss - 2002

Richard Avedon - Dovima with elephants - 1955

Irving Penn -Salvador Dalí - 1947

David Bailey - Johnny Depp - 1995

Devon Aoki for Alexander McQueen - 1997


The end of ‘household names’?

So where does that leave us today? Where are the Caravaggio’s and Van Gogh’s today? Where are the Picasso’s and Mondrian’s, where are the Avedon’s and Bailey’s?

I find it hard to believe scholars will be looking back at one of the most ‘famous’ ‘artists’ of the 21st Century, only to find out they were a TikTok star.

Of course, you could argue that it’s simply the discipline that’s lost popularity. Today we have cinema and computer games and there are certainly household names to some degree in those fields. Everybody has heard of Steven Spielberg and Quinten Tarantino from cinema and to a lesser extent, Todd Howard and Hideo Kojima in gaming. These are undoubtedly huge names, but they are also the figureheads of major productions and studios. I’m sure none of them would claim to have created what they have alone and some of these artists sit atop the hard work of hundreds, if not thousands of other contributors and artists. Many film directors are famous, but they couldn’t light their way out of a dimly lit room. Is their art really theirs alone to own? If I had a great idea for a painting and I hired someone else to paint it for me, am I still the artist?

So, has original art from the individual artist reached its saturation point? Have all the new revolutions in art been discovered and shared? Have we really seen the end of household names like David Bailey and Mario Testino? If so, why?


Insane or just an artist?

I mentioned at the start of this article/thesis/manifesto that photography has never been easier thanks to not only a very affordable entry point but also extremely intelligent technology that removes a lot of the guesswork and foundational knowledge that was historically required to even see a useable image in the past. I also said that even though we have all this technology, it still can't produce art, after all, that is still a fundamentally human trait (put your pitchforks down AI zealots). So why aren’t we seeing any revolutionary work like we used to? To be clear, I’m not saying that incredible new art isn’t out there, but will it be remembered in a hundred years. let alone two hundred years?

Yes, everybody is capable of making art, but what makes some art ‘better’ than others? What makes some art stand out and be remembered?

Art is often the product of the self as I mentioned above, it’s what makes it unique, but for it to be really unique it has to stand apart from the norm and outside of the populous. It has to be revolutionary.

Why do you think many of the legendary artists I mentioned above died penniless? Why do you think they were often seen as mad or treated like pariahs? You don’t get to be unique AND hang out with the cool-kids. It’s simply not possible. If you’re producing work that is outside of the social norms and standing out, you’re doing something unique and original. This is why much of that historic art is heralded today as it was often well ahead of its time, this is why many of those artist were never famous in their lifetimes and many only scraped by. Van Gogh only sold a single painting in his lifetime before committing suicide at 37, yet in 2022, his ‘Orchard with Cypresses’ piece, sold for a record-breaking $117 million!

Claude Monet, the founder of French Impressionism, had his work at the time described as “formless, unfinished and ugly”. Consequently, he and his family lived in poverty for much of their lives, yet In 2019, his Meules (Haystacks), sold for $110.7 million.

These artists were producing work that was far from trendy, they were producing work that was very personal and unique to them and in certain cases, this work was different, because they were different. Many scholars today herald these great artists as geniuses, but the line between genius and insanity is often dangerously thin.

Self-Portrait with Bandaged Ear, 1889, Vincent van Gogh - Famously Van Gogh cut off his own ear, before then posing for a self portrait. Genius artist of his time, but was clearly troubled.

Van Gogh, who as I mentioned earlier tragically committed suicide at 37, famously cut off his own ear, wrapped it up, gave it to a prostitute and then went on to paint a self-portrait. Genius? Absolutely. Would you want him babysitting your kids? Maybe not.

Caravaggio was a convicted criminal who spent time in prison. He was also notoriously violent and even stabbed a man to death over a tennis match before going into exile while continuing to fight and paint. -I swear I’m not making that up and although I’m not trying to ‘romanticise’ it, movies have been made with plots far worse than a rouge artist on-the-lam from the law fighting and painting his way across the Roman countryside!

Picasso, who in my opinion is arguably one of the most influential artists in human history, was also known to be a ‘bully’ and ‘womaniser’ and I'm being kind here.

Einstein was clearly a genius, but that came with a brain that worked differently to yours and mine and he’s famously seen as being ‘quirky’ or ‘eccentric’ today, yet he was reportedly often ‘dishevelled’ and did everything he could to avoid socialising. Today many diagnose him as being autistic, but those eccentricities of the time made him different to most.

Andy Warhol, arguably one of the most famous artists in recent memory, was also frequently reported to be exploiting those around him for his art, misogynistic and abusive towards women. Andy Warhol has had an immeasurable impact on the art world, but there are certainly those who felt used during his stratospheric rise.

And, have you met David Bailey?

I’m not saying that you need be clinically insane to be an artist, although, yes, it certainly helped Salvador Dali. Nor do you need to be a womanising asshole and yes, you can still be all of those things and still not produce a single goddamn thing of note. But to create something different, it certainly appears that being different can help make you stand out and I’ve not even mentioned the horrendous curse that afflicts so many phenomenal musicians. Kurt Cobain, Chris Cornell and Ian Curtis all committed suicide often at the height of their success and that’s just the few in recent memory with a surname beginning with C!


In Susannah Butter’s article in the Standard, she discuses if we should “judge the work not the man”.

Cancel Culture

If the likes of Picasso or Warhol were alive today, would they simply be ‘cancelled’? This is tough to answer, right? What is the true cost of great art? Was Warhol reportedly a dick because he was famous thanks to his art, or was his art famous because he was an extremely driven individual with a seemingly limitless passion that simply wouldn’t take no for an answer?

This is often easier to answer in hindsight, but what would we have lost if Picasso had been ‘cancelled’? What is the human cost of Caravaggio’s talent? He killed a man whilst trying to castrate him over something as benign as a tennis match? Is, arguably some of the most influential contributions to human culture, worth a man's life?

Cancel culture has no doubt stopped some heinous acts from happening, but are they also stopping culturally relevant art from being created? Right now you’re likely either chuckling at the absurdity of the very notion that art is more important than stopping laws of decency and actual real laws being broken, or you’re thinking about trying to cancel me for even suggesting it. But if we cancelled every socially awkward misogynistic lunatic murderer we came across, how much art is left?

Excerpt from The New Yorker where Joan Acocella wrote a piece about Andy Warhol titled ‘Untangling Andy Warhol’

Don’t misunderstand me here, we as the populous today should absolutely stand up for those who may not have a voice. Violence and mistreatment towards others should never be an acceptable cost of art. If we want to call stamping out bullies, ‘cancel culture’, then so be it. My point here is not to argue against cancel culture, far from it, I simply want to highlight that historically, great art has come from people who may appear different to you and I and we shouldn’t always be so quick to categorise them as social outcasts for that.


The Era of Homogenised Art

A quick search on YouTube for ‘Studio Portrait Lighting Setup’ yields several pages of similar looking results. To be clear, there is absolutely nothing wrong with most of these, but with most being under 10 minutes and only 1 being longer than 20, are we really teaching or just simply showing you what to do?

I’ve spoken about how great art has historically come from those who are at odds with others. Sure, mental illness was sometimes a catalyst for this, but many artists were simply a product of their time and surroundings. For the most part, they learned their craft via personal experience. Today we quite literally have the resource of global knowledge in our pockets. There is no denying that this reserve of knowledge is incredible, but what happens when we all drink for the same well?

The internet is clearly a vast resource, but it’s now becoming so vast that tools are in place to make sure we can actually find what we’re looking for. You and I know these tools as algorithms and as amazing as they are at delivering us what we ask for, they are designed to please and when that happens, that’s the only content the next person who looks for the same thing gets. In its simplest form, this is the start of a trend as the algorithm repeatedly serves the same supposedly engaging content to multiple users. This is great and (mostly) harmless when we need a little endorphin hit with our morning coffee. After all, remember when I said we all have the same baseline appreciation for beauty? A quick cat video, a beautiful shot of a sunset, easy wins for all involved and we can all enjoy the same great things together. It becomes more problematic however when we want to educate ourselves on a topic we aren’t familiar with.

If I want to learn about photography, I don’t know what I don’t know, and here in lies the problem many self-taught artists can run into. What on earth do you search for?

Historically, many young artists would be taught by the previous generation. Years ago, mentors would share their decades of hard-earned knowledge with their pupils and in recent memory, you went to college or university to again learn from the previous generations. Today, you have inexperienced artists teaching other inexperienced artists as they are the ones who are leveraging the tools of the internet to their benefit.

Before you ‘x’ out of this in fear of listening to ‘yet another grumpy old man shouting at the moon’, hear me out for a moment longer.

Let’s put aside the fact that there are thousands of terribly inaccurate hours of inexperienced knowledge being shared for the moment. In fact, let’s just assume that this free knowledge is actually sound and useful and not just a grab at jumping on the latest trend for now. If that's the case, then we really do have a wealth of information at our fingertips. This is great, but we still need to be equipped to look for it and like I said before, we simply don’t know what we don’t know. How do we know what to look for and better still, how do we know where to look?

We need some form of direction and impetus to form a knowledge structure and simply copying money-see-monkey-do is rarely a great catalyst for creativity.

Historically this structure has come from our mentors and whether that was professors or elders sharing wisdom with the previous generation, they had been where we are now and they had the experience to understand what was valuable to grow and sometimes what we need to know isn’t always what we think it is.

I’ll admit, I’ve been extremely fortunate with my education. I was blessed with incredibly enthusiastic and very creative tutors and mentors, but they didn’t always teach me things I liked or even wanted to learn.

For want of a better term, I was ‘classically trained’ and by that I mean I was taught how to paint, draw and ultimately read a scene in front of me. I was taught those skills well over 20 years ago now, yet I still use those same skills today. Paint, charcoal chalk or camera, I was taught how to read the light and view light and shadow objectively. I was taught to look at dimension through light to see how light sculpts depth and texture as it transitions to shadow and more importantly, I was taught how to interpret that into my own work. I appreciate this may seem very airy-fairy to some, but I assure you, my ability to create new ideas today comes from my ability to accurately render light in my mind before even picking up the camera and ‘hoping for the best’. That skill was given to me a long ago and it's a truly invaluable one to me in my work today, but even with what I know now, I couldn't search for that skill online today.

It’s often in the areas we think we don’t need help that often helps the most. I had assignments that made me go out and shoot street portraits of strangers. Approaching strangers and asking to photograph them is hard (granted it was more bizarre approaching strangers with a camera in the late 90’s than it is now), but it taught me to rapidly build rapport and quickly understand a character in a short space of time before taking a portrait of them. I also had to learn architectural photography on a large format 5x4 bellows camera. I had zero desire to learn about how to photograph a building, but the skill involved in trying to make a building look straight when photographed from the street is substantial. Not to mention the battles with focusing on an upside-down and inverted image on a ground glass plate with a black cloth over my head on a busy street and couple that with the exposure latitude of large format E6 being about half a stop! Note that modern cameras have an exposure latitude of 15 stops today! You really have to be dialled into what you’re doing to take that one shot. Did I enjoy it? Hell no! It was horrendous and I don’t recommend that absolute madness to anyone, but did I learn a lot about checking and verifying a scene? Absolutely. Did I learn about parallax, perspectives and composition within repeating patterns? Absolutely.

It’s this very broad base of knowledge that ultimately makes us unique and its this uniqueness that allows us to unsurprisingly create unique art.

Hell, I’m loathed to admit it, but even the ceramics course I hated probably taught me something about light and texture, just don’t tell my tutor that.

The internet is clearly incredible, but when it's designed to repeatedly feed us pleasing content, especially when it's from those who are young and inexperienced due to their ability to leverage that algorithm in their favour over more experienced artists who are out of touch with the latest delivery platform, we have an issue when that content is supposed to be educational. We're left with a generation of children teaching other children and this trend may well continue as technology and its delivery method changes faster than the knowledge being gained.

The well of the internet is not quite as deep as we’d like to imagine as 'trends' are the only knowledge that makes it to the surface and what’s worse, we don’t even realise what we're missing below.

In the words of a great sci-fi icon who was concerned about the proliferation of the self being lost into a sea of digitisation, “Overspecialise, and you breed in weakness. It’s slow death”. (20 points to the cultured few who know who said that).

The homogenisation of knowledge seems amazing at a surface level, but it’s most certainly a slow death for creativity.


Mistakes are the seeds of creativity

I’ve just spoken about how the younger generation is the first in human history to actually teach one another art. I also mentioned that we all like to simply ‘Google it’ over actually trying to learn something for ourselves. I get it, if someone else can tell me now over figuring it out for myself, that saves me time, but that shouldn’t be the way we learn how to be creative.

Put aside for a moment that you’ve essentially walked up to a total stranger on the digital street and asked them to teach you something, but I assume the goal when Googleing for someone to teach you something, is to copy them, right? I’m not judging, but if you’re being told, you’re not technically learning how to do something, you’re simply copying them.

Think about the distinction between being taught how to do something and then being given an assignment to put said skill into practice over simply watching something and then copying it. What did we really learn here that set ourselves apart from everyone else doing the same thing? 

The tool we photographers use today is just so good that imagery begins to look the same when we simply copy one another. As I mentioned at the start, even bad cameras are amazing today, so the gear isn’t really setting us apart. Photography isn't like many other mediums as their tools require far more skill to use than ours does today.

If I got you all into a room and gave you all a pencil and asked you to draw the apple I'd placed on the table, all of those sketches would be vastly different. If I’d asked the same of you, but instead of a pencil I gave you a modern camera, how different do you think the results would really be? Copying is not the skill it used to be, but implementing learned skills in a project of your own making, however, will ultimately yield very different results from one person to the next.

Sadly though, you may not always be happy with those results.

Fear of failure is in all of us. It sucks. But it’s also an extremely necessary part of the individual creative process. When we make a mistake, it’s in our very nature to want to make a change to that process and ultimately, to get a different and hopefully better result. This change is us doing something new and this action is the very seed of a creative decision. Mistakes are quite literally the seeds of creativity, yet I see so many young artists being afraid to make them. I get it, we all want to be brilliant straight out of the gate, but getting it ‘right’ isn’t always what we actually need to make us better artists.

One reason the newer generation may be hesitant to make these necessary mistakes, is their desire to share absolutely everything they create with the world. Don’t get me wrong, I think that’s an amazing attitude to have, but don’t let the fact that a bunch of unqualified strangers may not like what you share stop you from making bold work.

I know I’m not the only artist who has grown and developed a look or idea from what was originally a mistake or undesired outcome. Mistakes are a very necessary evil and we as artists should never be afraid to make bold decisions with our work or be shy to try something new, just in case it doesn’t fit with what our online audience of unqualified strangers thinks. Ultimately, we don’t have to share everything we create and it’s not your audience's right to see everything you make. Just be sure to microwave all your old hard drives containing all those HDR portraits you took in the early 2000’s or the vultures will try and repackage them as ‘unrelesaed art’ when you’re gone as they did with Amy Winehouse and the Beatles!


What an incredible time to be alive as an artist!

If you’ve waded this far through all of the doom and gloom above pertaining to the current state of art, I assure you I’m not exasperated with the creative process just yet, far from it. In fact, this is a truly incredible time to be an artist and there are undoubtedly some unbelievably talented artists out there right now and I thank the modern state of the internet for being around so I can simply find that art and enjoy it.

Elizaveta Porodina

Helio Ferreira

Miguel Rodriguez

Drew Ochwat


If you're an artist today, then your barometer for success will be different to someone else, but if some form or fame is a part of that success to you, then remember that Van Gogh only sold one painting in his lifetime and even if you have a moderate audience today, more people will see your art than saw Shakespeare’s during his lifetime.


Ed Fairburn

Pascal Blanché

Nishe Anais Sardou

Daniel Archer


The internet is a truly incredible tool for not only sharing your work with a worldwide audience but also as a tool to learn from other artists from around the world. At no point in human history has so much human knowledge been so readily available to so many. But as the internet grows moment by moment, it will become harder and harder to be truly surprised and inspired by it as we will individually struggle to find qualified knowledge that sits outside of the popular or ‘trending’ ideas.


Clementine Art Gallery

Alexandre Farto

If you’re a young artist today or even a new artist looking to truly develop your one voice amongst the noise, I’d urge you to seek knowledge from artists that truly inspire you or at the very least, artists that have been doing it significantly longer than you have. Don’t be too quick to simply chase the 'likes' and online approval if you have an interesting idea you want to pursue. Remember, they all told me I was mad for turning beautiful young ladies bright blue and pink all those years ago too. Now everyone does it and it's the norm. Never be afraid to make mistakes and never feel like you have to share those mistakes if you don't want to.


Closing Comments

Sadly, I don’t have some master solution to all of this that I’ve been waiting until the end to share. This article was an amalgam of ideas that I’ve had swirling about in my ADHD artist's brain for some time and simply put, I just needed to get them out, if only as a way to exorcise them and move on. One of the original thoughts that triggered all of this was the notion that household artist names will likely never be a thing again and I was simply curious as to why that was. In hindsight, this is not necessarily a bad thing, far from it. In fact, there are likely far more artists alive today making a successful living at what makes them happy, what makes them get up in the morning, and what inspires them, than ever before and that’s simply incredible!

Banksy

I’d be interested to hear your thoughts though. Do you think this is the death of household names for artists? If not, whose work today do you think will be remembered in a hundred years? I’ve been puzzling on this myself and the closest I got was, Banksy. His work is a perfect storm of the time. His bold, very graphical style is instantly digestible and it transcends all language with his very easy-to-understand messages. Plus, his work is of the people. It’s mostly made on public streets and is accessible by all. There is no gatekeeping, no admission fee nor pomp surrounding meaning or class and this work came at a time when the internet made the world a much smaller place. With all this in mind, I do not doubt at all that Banksy’s work will be discussed in a hundred years. Who knows, maybe his pieces will be encased in perspex, walls ‘n’ all, in art galleries for future generations to marvel at why on earth we thought giant rats scrawled on walls was ‘art’.

But, again, I’d be interested to hear thoughts on who you think we’ll remember when we’re gone.

Lastly, I just wanted to clarify that this piece wasn’t supposed to be an ‘elitist’ post that diminishes the hard work that many extremely successful YouTubers and other online artists do. As I said, if you make a successful living doing what you love, you should absolutely do it. Nor am I trying to undermine the ‘self-taught’ artists out there who use YouTube as a way to enjoy practising their passion. Education has never been this free and the internet (although not completely free), now enables so many people the possibility to enjoy their passion and to see what’s possible with their tool of choice. Again, this is an amazing time to be an artist and I have great respect anybody who has the passion to pursue what they love.


JHP Livestreams…

We actually discussed this topic in detail on one of my recent livestreams. I livestream every other Tuesday night via YouTube and there I answer your questions, critique your shots, take community images into Photoshop to work on them and discuss all manner of lighting tips and techniques. I look forward to seeing you and your work there real soon. Jake Hicks Photography - YouTube


Further Learning

If you’re interested in getting some very detailed and thorough training on some more advanced lighting principles, be sure to take a look at my online workshops. Here is testimonial from one of my clients last week:

"Jake has a remarkable style of photography and I was absolutely happy when I learned that Jake shares his knowledge in workshops and one-on-one online sessions. Iooked two sessions on the topics gel- and cinematic lighting. Here is a bit of spoiler: My expectations were not only met but exceeded. Jake impressed from the very first moment with his friendly professionalism and was able to convey the various concepts using theoretical principles and practical examples. Jake devoted a lot of time to this, always responded to my questions and was able to answer any unclear points with his comprehensive expertise and on the basis of his broad experience. The numerous hints, tricks and practical tips guide me in my everyday life as a photographer and are helping me to achieve better results. With this in mind, I can recommend Jake's courses without reservation - they are instructive, inspiring and enriching."

Tobias B - Switzerland


ONLINE WORKSHOPS - LEARN MORE
JHP COLOUR GEL PACKS - BUY NOW
ONE-2-ONE MENTORING - LEARN MORE

 
Tuesday 11.28.23
Posted by Jake Hicks
Comments: 4
 
Newer / Older