• Technique
    • Latest Techniques
    • FREE TIPS
    • Quick Tips
    • Video
    • Site Search
    • Blog
    • Archives
  • Mentoring
  • >Online Workshops<
  • Workshops
  • Studio Lighting Books
  • Contact
    • Newsletter
    • Contact
    • Statement
Jake Hicks Photography
  • Technique
    • Latest Techniques
    • FREE TIPS
    • Quick Tips
    • Video
    • Site Search
    • Blog
    • Archives
  • Mentoring
  • >Online Workshops<
  • Workshops
  • Studio Lighting Books
  • Contact
    • Newsletter
    • Contact
    • Statement

Simple Full Cover Gelled Lighting

Controlling gelled lights can be tricky. We all struggle with washed-out or even muddy colours occasionally and the core reason for this, is your coloured lights overlapping and mixing.

The golden rule of coloured light is ‘you can only add a gel to a shadow’.

The reason I repeatedly say this, is because coloured light don’t mix like regular colours. When we mix paints, the more colours you add, the closer you get to a muddy brown colour. Cast your mind back to preschool and you’ll know what I mean.

Sadly, we have to forget how colours mixed when the greatest thing in our lives was a Dairylea Triangle. We now have to relearn how colours mix when applied to lighting, so fast forward a few years from preschool and you should recall a science lesson that explained how white light was actually the full spectrum of colours. Remember that glass prism that split the white light to reveal the rainbow?

This is why coloured light can so easily be washed out, as the more coloured lights you mix, the closer you get to white light, not that muddy brown paint-soup you were so proud of.

Click to enlarge

So that is why many gelled lighting shots may look washed out. But why is that important today? Because I’m going to break my one golden rule of coloured light and show you how to mix coloured lights in the same space.

Developing an Impactful Setup

The lighting setup I’m about to share with you is a setup I developed for a large group of portrait studios here in the U.K. nearly a decade ago. When I get called in to help develop photographers working in a studio or studios, there is usually a few guidelines I need to be aware of, especially if those lighting setups are to then be used in multiple locations.

If you’re a busy studio shooter, having a handful of impactful-looking lighting setups that can easily be implemented quickly, is a must!

These guidelines normally look this:

  • A setup that is quick to implement

  • Forgiving to get right

  • Must have an instantly impactful look

  • Should be achievable with minimal lighting kit

Time

As those of you poor souls, like me, who’ve spent many years of your life working in busy studios will know, time is everything! You need to set the next lighting setup up without the client getting bored or anxious. Plus the faster you set up your lights, the faster you can get another setup in play with the limited time you have and the more unique setups you have, the more money you often make.

Forgiving

The other aspect of this is that it shouldn’t take a lighting-genius to be able to make it look good. Some nutters out there are measuring out their lights and tripods with tape measures and using light meters to check each light! Very busy studios don’t have anywhere near that sort of time, so a setup that is generous with where the lights are placed and the powers they need to be is always a plus.

Impact

Coloured lighting is why I saw a rise in popularity many, many years ago, but in reality, the reason for this is due to how eye-catching a coloured lighting shot is. I know everybody and their estranged grandmother is shooting with coloured gels today, but 10 years ago, when you saw a shot with a bright pink and blue coloured lady in it, it caught your attention. With this in mind, an impactful gel shot often comes down to just how much colour you can cram between the sprockets, so a full-cover gel shot was always a winner.

Simple

This last aspect was always a tricky one for me to tick off, ‘The setup should be achievable with minimal lighting kit and lights’. The reason for this is that not all studios would have 6 lights and a dozen modifiers, so the lighting setup couldn't be too elaborate. On top of that, the more kit you use, the slower you become. Most studios have a minimum of 4 lights and basic modifiers like softboxes and grids, so that was often what most of the setups involved at the time.

If you’re looking to develop your own lighting setups, either for your clients or even just for yourself to freshen up your workflow, these 4 guidelines are a great place to start. Studio photography has never been as approachable as it is today and as a result, there are thousands of modifiers and tools for us to play with in the studio. More choice is always a good thing, but it can be a bit overwhelming for some and it can be difficult to know where to start. Sometimes giving yourself some constraints like this can help you narrow your vision and focus your results.


The Lighting Setup

As always, let’s show you what we’re shooting and then break it down from there.

Click to enlarge

Click to enlarge

Click to enlarge

Click to enlarge

Click to enlarge

TL;DR/ADHD/Artist Setup Explanation

  • Setup a large softbox to camera-right and point it at a white wall - affix blue gel

  • Place a small softbox to camera-left down low and aim at the subject - affix orange gel

  • Position an open reflector dish behind the subject and point it at the white wall behind - affix pink gel

  • Angle an optical snoot down and onto your subject’s face - no gel


What You Will Need

4 Lights - These can be strobes or speedlights or even LEDS. As long as we can modify the light with the following modifiers, this one is fairly flexible.

Large softbox - I’m using a 80x120cm one here which is perfect for what we’re trying to do and that’s cover a very large area with coloured light. The large softbox enables us to do that.

Small Softbox - I’m using a 60x60cm softbox here and that is ideal for a fill-light such as this. Using a larger one here would throw too much light around the studio and the small one allows us to get that light in nice and close to the subject.

Open Reflector Dish - This should be an easy one as nearly all strobes come with a simple dish and a small one like this is ideal for hiding behind the subject. One note worth mentioning here is that I’m using a diffusion gel along with my coloured gel.

Optical Snoot - I love my optical snoot as it enables me so much control over where the light is actually going. This particular optical snoot (I’ll list all the kit used at the bottom) is even better too as it has adjustable shutter blades to really narrow in the light if needed.

Alternatively, you could use an open dish with a tight honeycomb grid here instead. Yes, I always recommend an optical snoot, but as good as it is, the very hard light is not essential here and the control a gridded dish would offer is also more than fine.


Camera Settings

  • Camera - Nikon D850

  • Lens - 24-70mm f2.8

  • Shutter Speed - 1/125th

  • Aperture - f2.8

  • ISO - 100

  • Kelvin - 4500K

  • Focal Length - 70mm


The Results…

Click to fit any of the shots below to your screen.


Breaking it Down

This setup is fairly self-explanatory as it’s actually a simple setup that produces excellent results for the effort involved in setting it up. Every light has a clear role here, so simply set it up one light at a time and you shouldn’t have too many issues.

Click to enlarge

Blue Light

I prefer to start with the blue light when setting this up as that’s the light that is doing the most. One aspect I recommend taking advantage of, is the corner of your studio. I’ve set the whole thing up at one side of the room so that I can bounce that blue off of the side wall and let it then fall back on the subject as well as the background.

I know what some of you are already saying ‘Jake, I don’t have my own big, white fancy studio to work in!’

This can still be done in a home studio as the same principle of bouncing light applies no matter the size of your space. You simply need a white background/wall and then a white sheet to one side to bounce the light off of.


Click to enlarge

Orange Light

Next, you can bring in the small orange fill light. Be sure to have this low and angled up and also make sure you’ve brought it in nice and close to the subject to control the drop-off of light. One thing you’ll want to watch out for is to make sure no orange light falls onto the background behind. If this happens, it’ll wash out the blue and we definitely don’t want that.


Click to enlarge

Pink Light

Now that the two tricky lights are in place, the background spot should be easy. Do your best to hide the light behind the subject, but don’t panic too much if they move around when shooting and it starts to appear. It’ll be a very easy fix in post if that happens.

I know I mentioned it above, but I’ll say it again here; I did include a diffusion gel with the pink gel on this light. The diffusion gel is always a good idea on background lights as it helps to soften colour transitions as well as reduce any aggressive banding that might appear with the reflector.


Click to enlarge

White Light

Ironically, the key-light is often the light I add last. The reason for this is simply because it’s the easiest to add to any gel setup. Place this light above eye level and angle it down on the model’s face. I’m using an optical snoot here so I’m able to control exactly where the light falls, but even if you’re using a gridded dish, you’ll easily be able to position it to only light the head and shoulders as I’ve done here.


All Lights

Now that all the lights are in place, turn them all on and your shot should look something you see below.

Click to enlarge - With all the lights now on, it should look like this.


Breaking the Rules

At the start of this article, I recommend that you should never mix coloured lights, in fact, I went as far as to say that the golden rule of gelled lighting is that ‘you should only apply a gel to a shadow’.

Of course in this setup, I’ve broken that golden rule by shining both blue and pink on the same area. When I set the pink light up on the background, there certainly wasn’t a shadow there as it was already being lit by the blue light.

But as with many rules, most can indeed be broken in certain situations. Here I’m using a very bold and vibrant colour to overpower a darker, more muted colour. That pink is perfectly suited to dominate the blue, but it won’t work with any-and-all colour combos. Explaining combining coloured light is a book in its own right, let alone its own article, but if you want to play with layering colours in this way, just try them out. A yellow wouldn’t work here as the delicate colour would be overpowered by the blue. A red however would be fine. Try some colour combos yourself, but be prepared for some interesting and bizarre interactions with various colour combos that you might not expect….. Spoiler Alert: Red and Green make Yellow?!??!


Points to Remember…

As always, I’ve done my best to equip you with all the knowledge you should need and for the most part, the diagrams above will get you most of the way there to a half-decent shot. With that being said though, there are a few tips to bear in mind.

  • Consider setting up the lights one at a time like I’ve done here - Start with the blue, then the pink, then the orange and finally the white key.

  • Play around with how close the subject is, not only to the background but the side wall as well - Remember that the blue on the right of the model is coming from that wall bounce to camera-right.

  • Lighter-coloured styling is certainly preferred - Although possible with darker clothes, this setup will be far more impactful with lighter outfits.

  • Model blocking - This is a term I give to posing that blocks and affects how the lighting looks in the final image. You’ll notice in my shots that the model is always facing to one side. This is to allow the colours to clearly appear on each side.

  • Experiment with varying colours - As I mentioned above, the colours used in this setup will make a big impact in the final shot. Look at dominant and recessive colours to do the heavy lifting here and be prepared to switch things up if it isn’t looking right.

Good luck guys and if you give this one a try, please let me know how you get on. Plus, if ever want some feedback on your shots, be sure to post them in my -Share-a-Shoot- every Monday on my Facebook Page.

If you have any questions about anything then pop them in the comments below. Enjoy and stay creative!


Featured Model: Jaye Hicks

Studio: Aura Photographic


Products Used…

Please note that I’ve included affiliate links below and I will benefit (albeit minimally) from the sales of any of these products should you purchase them. To that end, please feel free to use my discount code ‘HICK5-OFF’ at Essential Photo to receive a discount on any purchase via their site.

FlatPak Softboxes

I got the 60cmx60cm and the 80cmcm 120cm softboxes and I’ve attached the links below.

Link - 60x60cm Easy-Open FlatPak Softbox (Patented Design)

Link - 80x120cm Easy-Open FlatPak Rectangular Softbox (Patented Design)

via GIPHY

NOTE: I’ve recently switched to these new ‘FlatPak’ softboxes. I was sent a couple by Essential Photo here in the U.K. and they’re very cool. Why? They quite literally take 3 seconds to put up due to their very clever new quick-open design. By all means, follow the link below to check the video about them, but they really are the easiest and quickest to assemble softboxes I’ve ever seen.


Optical Snoot

I know I’ve spoken a lot about optical snoots in the past and if you have one already, you’re all set. This particular one that I used is useful however as you can adjust the separate blades to channel the light exactly where you want it.

Link - Optical Snoot with built in shutter blades


Standard Reflector Dish

This is your standard reflector that you may already have. I prefer these wider, open dishes for backgrounds as they spread the light quite quickly if tucked in behind the subject.

Link - Standard reflector dish


Lighting

What you use to light this is fairly flexible, but some of you may have spotted a couple of unique items in the BTS so I thought I’d mention them here….

Link - Remote flash extension

Remote Flash Head

I absolutely love this thing and granted it won’t be for everyone, but it certainly has its uses. This extension requires you to pull out the flash bulb on your strobe (e.g. Citi 600 - see the full list of compatible heads via the link) and then you simply plug this in where the bulb was and plug your flash tube into the extension instead. Now you have a very lightweight extension to your strobe that can easily be hand-held with a modifier or even suspended above the model without fear of excessive weight above.


CITI600 PRO

This is your bread-and-butter strobe! This has more than enough power for 99% of what most of us do day-to-day. Its battery lasts all day and you have no cables to worry about, plus it has TTL if you need it too.

Link - Godox CITI600 PRO


Storm III 600

If you’re a busy studio shooter that needs a workhorse strobe that will go all day without fear of a battery letting you down, the Storm series are a great solution.

Link - Storm III 600


Colour Gel Packs

As always, my colour gel packs are still available. The saturated colours I used in this shoot all came from the Definitive Colour Pack and the diffusion gels came from my Utility Gel Pack.

Colour Gel Packs


Thank You

As always, thanks for checking out this article and spending a little bit of your day with me here. I hope you found it useful and if you left with a little more knowledge than when you arrived, it’s been worth it.

If you have any questions or comments, or if something doesn’t make sense, by all means, fire away in the comments below and I’ll do my best to answer what I can. Thanks again and I’ll see you in the next one.

Don’t forget to sign up to my newsletter to be sent all of these photo tips and techniques articles every month in case you miss one.


JHP Livestreams…

If you give this setup a go, I’d love to see how the shots turn out, so feel free to share them my way. One way to do that is via my Livestream. I Livestream every other Tuesday night via my FB Page and there I answer your questions, critique your shots, take community images into Photoshop to work on them and discuss all manner of lighting tips and techniques. I look forward to seeing you and your work there real soon. JHP Facebook Page


ONLINE WORKSHOPS - LEARN MORE
JHP COLOUR GEL PACKS - BUY NOW
ONE-2-ONE MENTORING - LEARN MORE

 
Tuesday 10.25.22
Posted by Jake Hicks
 

How to Easily Add Colour Gels to Softboxes

Let’s all just take a moment to appreciate how short and succinct this article is. Let’s all just assume that I’m being incredibly mindful of your busy lives and questionably short attention spans thanks to spending too much time on Instagram. Let’s definitely not just attribute this micro-bite of super-useful info to the fact that I’ve had man-flu all week and that I’m waaaaaay behind on my retouching! You’re welcome :D

Over the years I’ve seen all manner of crazy ways to gel a softbox. To be fair, yes it can be a real pain and the most common solution I’ve seen, is to simply gel the entire front of the softbox. This does make sense of course, but it can be pretty impractical. It’s certainly doable on a small 60cmx60xcm box, but on the larger models, it becomes increasingly difficult.

Back when we had tungsten modelling bulbs, we’d have to remove the bulbs first or risk the gel turning into a puddle!

In the olden days…

By far the best way to gel your softbox, is to simply open up the softbox and gel the actual flash tube itself. Years ago this was a pain, as we used to have to deal with very hot tungsten modelling bulbs, but even the old fossils like me are now using LED modelling bulbs in our strobes.

The previous fear of dripping hot plastic coating the inside of your softbox is thankfully a distant memory and even powerful LED modelling bulbs in strobes today still don’t get hot enough to melt the gels placed over them.

Don’t panic though, if you’re still using older strobes with tungsten modelling bulbs, simply do what I used to do and unscrew the tungsten bulb first. Sure, you won't have a modelling bulb, but you also won't start a colourful fondue party in your softbox!

Be one of the cool kids!

As I mentioned, I used to simply gel the inside of my softbox and I used to do that with gaffers tape. This was not pretty, plus it was a pain to do and sometimes the damn tape would even pull some of the silver lining away from the softbox too!

The smarter way to do it today is with magnets!


The Magnets

Get yourself some of those fancy ‘Rare Earth Neodymium Magnets’ and ditch that nasty old tape. The ones I use are about 3cm long and about 1cm wide. You can use any magnet, but I would highly recommend a strong magnet like these, as it’ll make your life a LOT easier when trying to attach the gels. I got told off for not warning people about these magnets last time I mentioned them and like I said, they are very strong and they’ll easily pinch your skin. Just be sure to keep them well away from children, pets and photographers that shoot black & white.


Metal Struts

Next up, simply open up your softbox - (I find it easier to open the back of the softbox as the inner diffuser can sometimes get in the way if you’re entering from the front), and check the softbox struts are metal. The overwhelming majority of softboxes have metal rods as their supports today and there are only a few very old ones that are plastic or very new ones that are carbon fibre. If they are metal then you’re good to go. Simply pop your gel in there and then place four magnets on each of the four struts.


Accessing the Softbox

I personally find it easy enough to put the gel over the flash tube when the softbox is mounted on the light. If you find it easier to attach the gel to the softbox with it off the light and positioned flat on the floor, then go for it. Just be mindful that some flash tubes will stick out more than others, so placing the gel over the tube whilst the softbox is on, means you’re less likely to pop the gel off when you attach the softbox afterwards.


Keep it Light-Tight

Once you’re happy the gel is nicely in place, be sure to button back up the rear flaps. I mention this here, and I know this seems obvious to some of you, but I see a lot of people with those back flaps open and they can allow a ton of light to bounce back out of the softbox. Gels can stop upwards of at least a stop of light in some cases and this means that any white light escaping from the rear here, will be very powerful and that white light can easily bounce around a smaller home studio and affect the gelled light being fired.


Check for Gaps

Lastly, it might be worth checking the gel is covering the flash tube as much as possible. You can do this from the back, but if you really want to check the gel is covering the flash, simply take a peek inside from the front. If it’s not covering it, simply pull the magnets out towards the edge of the softbox and that way it’ll spread the gel over the flash tube without having any unnecessary kinks and folds in it.


Check for Pure Colour

You should be all done! If you’re curious, fire a quick test shot just to double-check that only pure colour is coming out of the softbox. If it's not, just open it back up and move those magnets around on the struts until you’ve limited the number of kinks that might be spilling white light out.

It’s easier on larger softboxes as the strut angle isn’t so acute, but I did it here on a small 60cmx60cm softbox and it was still no trouble at all.


Closing comments

As I said, just a quick and simple PSA today and it really is pretty straightforward. Get those powerful magnets, make sure your softbox struts are metal (probably check that first), be sure that the gel doesn’t have large kinks that might let a lot of white light out, and you’re done!

I recently did some live demonstrations at the Photo Show here in the U.K. and I was very quickly swapping gels in my softbox using this magnet method. Several people mentioned that they’d never seen or thought of this, so I thought I’d share it here for those that missed it :)


Lastly…

I’ve recently switched to these new ‘FlatPak’ softboxes. I was sent a couple by Essential Photo here in the U.K. and they’re very cool. Why? They quite literally take 3 seconds to put up due to their very clever new quick-open design. By all means, follow the link below to check the video about them, but they really are the easiest and quickest to assemble softboxes I’ve ever seen.

I’ll speak more on these in the future, but for now, check them out!

FlatPak Softboxes

I got the 60cmx60cm and the 80cmcm 120cm softboxes and I’ve attached the links below if you’re interested.

Please note that I’ve included affiliate links below and I will benefit (albeit minimally) from the sales of any of these products should you purchase them. To that end, please feel free to use my discount code ‘HICK5-OFF’ at Essential Photo to receive a discount on any purchase via their site.

Link - 60x60cm Easy-Open FlatPak Softbox (Patented Design)

Link - 80x120cm Easy-Open FlatPak Rectangular Softbox (Patented Design)


Thank You

As always, thanks for checking out this article and spending a little bit of your day with me here. I hope you found it useful and if you left with a little more knowledge than when you arrived, it’s been worth it.

If you have any questions or comments, or if something doesn’t make sense, by all means, fire away in the comments below and I’ll do my best to answer what I can. Thanks again and I’ll see you in the next one.

Don’t forget to sign up to my newsletter to be sent all of these photo tips and techniques articles every month in case you miss one.


JHP Livestreams…

If you give this setup a go, I’d love to see how the shots turn out, so feel free to share them my way. One way to do that is via my Livestream. I Livestream every other Tuesday night via my FB Page and there I answer your questions, critique your shots, take community images into Photoshop to work on them and discuss all manner of lighting tips and techniques. I look forward to seeing you and your work there real soon. JHP Facebook Page


ONLINE WORKSHOPS - LEARN MORE
JHP COLOUR GEL PACKS - BUY NOW
ONE-2-ONE MENTORING - LEARN MORE


Tuesday 10.04.22
Posted by Jake Hicks
 

Lighting Setup: Pastel Coloured Light and Gobos

Ever since I started to use coloured lighting, I’ve always battled with the issues that many of us face when combining multiple colours and if you’ve shot with coloured gels in the past, I’m sure you’re familiar with what I mean. Images involving multiple coloured lights can sometimes look messy or display muddy colours that look almost blocky with clipped colour data. But why does this happen? Why do our coloured lights often look a mess?

The reason for this is actually fairly simple and in this lighting setup I’ll show you how to mix even delicate pastel colours in the same shot, whilst still maintaining a crisp look.

White Light Vs Coloured Light

The vast majority of us start flash photography with simple white light. We set up a shot where we have our key light, fill light, maybe even a hair light and then we quickly get to work shooting. For the most part, almost anybody can get away with lighting like this and the results will often produce a passable portrait with even the sloppiest of lighting placements.

A basic white light setup that creates a passable portrait.

Add coloured gels to this and the whole thing instantly turns into a mess.

To be clear, I am definitely not recommending the white-light setup above and there are many reasons for that, but for the most part, it still produces a usable portrait. But things really start to fall apart when we add coloured gels, as now the tone and shape of the subject is utterly lost in a mess of muddy and busy colours. But why?

The main reason for this is that white lighting is extremely easy and forgiving to use. You can overlap and combine multiple white lights on the subject with little to no issue. You get away with lighting like this because all the lights are the same colour as you simply can’t tell where one light ends and another begins.

Add different colours to those lights and now the whole thing turns into a Jackson Pollock. All of those lights now mix together on top of one another and this ultimately results in the clipping of colours and the ugly, muddy colour mixes we’re all too familiar with when we first start shooting with coloured gels.

Good-looking gelled lighting is about keeping those colours and ultimately the lights separated. As long as you clearly light separate areas of a subject with individual lights, the lights don’t mix and the colours don’t mix. This always results in the best-looking colours as they are left clean and highly saturated.

This separation of light is fairly easy to do with very controllable hard lights, but what about when you want to produce some softer, pastel washes of colour?

Keeping the lights and individual colours separated on the subject will always result in the best-looking colours.


The Lighting Setup

We’re all visual people here, so let’s first look at the setup and then I’ll explain it all in detail below.

Click to enlarge

Click to enlarge

Click to enlarge

Click to enlarge

Click to enlarge

TL;DR/ADHD/Artist Setup Explanation

  • Set up your artificial trellis in front of your subject

  • Position your optical snoot to shine through it, casting shadows onto your model

  • Add a very soft light with the aid of a V-flat to camera-right to wash soft colour across the subject

  • Accent that first colour with another pastel colour positioned to camera-left and behind the model


What You Will Need

3 lights - These can be any lights you like, but I’m using all LEDs here. I’ll cover those in a moment, but speedlights and strobes will also work just as well if you have them.

Modifiers - This may depend on the type of lights you’re using, for example, my soft blue light to camera-left is a large Rotolight Titan X1 LED panel. It’s a soft light by design of its size, but if you’re using a strobe or speedlight here, I recommend using a softbox to soften the light. Other modifiers are my DIY V-flats, but you could also use a white sheet instead. Lastly, I’m using a very hard light in the form of an optical snoot.

Optical Snoot - You’ve likely heard me praising the optical snoot modifier for many, many years now, so I won’t go over them yet again, but if you still don’t have one (I highly recommend you do), you could try to substitute this for another hard light source. If you’re using strobes, try a grid/honeycomb or an open dish and if you’re using a speedlight, I’d not use any modifier at all and keep the beam fairly focused.

V-Flats - I recently made these foldable DIY V-flats myself very cheaply. I put out a complete build guide on them not too long ago, so if you missed it, be sure to check that out. I’ll provide the links below.

Artificial Rose Trellis - Nearly all of my lighting setup guides have a wild-card, and here is this weeks one. If you’re not sure what this is, it’s simply a collapsable trellis that holds fake leaves and roses. It’s this that I shine my hard-light through to cast shadows onto my subject.


Camera Settings

  • Camera - Nikon D850

  • Lens - 105mm f2

  • Shutter Speed - 1/60th

  • Aperture - f2.8

  • ISO - 160

  • Kelvin - 4500K

  • Focal Length - 105mm


The Results…

Click to fit any of the shots below to your screen.


Breaking it Down

Now that the right-side of our brains has been momentarily sated, it’s time to dig into the details of the setup and understand exactly what’s going to make this look work and how we’re able to mix and layer delicate pastel colours like this, without the shot turning into the chroma-catastrophe we explained earlier.

The DIY Gobo - Artificial Rose Trellis

For those not sure what I’m talking about, a gobo (or go-between), is something that is placed between the light and the subject that will in turn cast shadows. You can do this with almost anything and placing plants, glassware and even knickers (it’s a long story) over or in front of the light will cast shadows, but ordinarily, I’d use a purpose-built gobo that goes in the optical snoot. The purpose-built gobos are little laser-cut metal discs that allow the light to pass through them and produce shadows, but this time around, I opted for something bigger in the form of a large fake trellis of roses.

I saw this in one of those cheap superstores and I picked it up for only £20. Me spotting this in the store was what gave me the whole idea for this setup and I actually built the lighting around the fake trellis as I immediately knew it would be perfect to shine light through and I knew it would cast some pretty cool looking shadows.

These artificial trellis’ are more common than you think and I just had a look online and you can get them in a bunch of those cheap superstores as well as in garden centres, although they are a little pricier there. We’re not worried about quality for this project as we’re only using it to cast shadows, so the cheaper the better. Plus, these fake ones concertina down to only about a foot wide too, meaning they’re very easy to store between shoots.


If you’re not familiar with an Optical Snoot, check out my review of the one I use here to learn more Lighting Modifier Review: Optical Snoot.

The Key Light - Optical Snoot

As I mentioned above, I love my optical snoot and I’d easily put it up there in my top five must-have modifiers for sure. The reason for that is due to it providing something very unique that other modifiers can’t and don’t do, and that’s focusing the light into a very hard beam. This hard-light is not only incredibly easy to control, but it can create sharp edges of light to cast specific patterns via gobos on subjects and backgrounds. Or in this case, we simply place a full-size gobo in front of our light and the optical snoot produces a hard enough light that it easily casts shadows onto our subject. If you’re interested in learning more, check out the full review of my optical snoot here.


The Key Light - The Godox SZ100R

As I mentioned at the top, these images were all captured using LED lights. The LED head that the optical snoot was attached to, was the new Godox SZ150R. As many of you know, I’ve been impressed with the quality of light from my new Rotolight panels, but as beautiful as that light is, I can’t focus it into a hard beam and this is where the excellent SZ150R comes in. The new Godox LED head can accept all S-fit (Bowens) modifiers which opens up tons of creative possibilities when you consider how many S-fit lighting modifiers there are.

The SZ150R also has the ability to produce any of its available millions of colours at the touch of a button and although I’m only using white light in this setup, having all those colours instantly available is certainly a very handy feature.


The Fill Lights - Rotolight Titan X1 & AEOS 2

I’ve been using these new Rotolight panels for the last couple of months and I have to admit I’ve been very impressed with them. The reason for this is their ability to produce super-clean and even-looking lighting in tight spaces like home studios and locations. For me, I need clean and even looking colours on my subjects and with a quick fall-off of light to avoid any unwanted light bouncing around a small space and these do that perfectly. Strobes and softboxes tend to struggle with this due to the inherent hot-spots always present on softboxes, and this is especially noticeable when used close to the subject in tight shooting situations.

The most important aspect of me using these lights in this setup, is how soft the light needs to be. The Titan X1 is a big panel that inherently produces soft-light and although the AEOS 2 (the round one) is a decent size too, I wanted to make its light even softer by bouncing it into that big white V-flat. If you don’t have large LED panels, then just be sure to substitute them for something equally soft. Place a medium softbox instead of the Titan and then simply fire your strobe or speedlight into the V-flat to heavily soften that light.


Making some DIY foldable V-flats is not as tricky as you might think. Check out my article on how I made mine DIY Foldable V-Flats

DIY Foldable V-Flats

I recently made these foldable V-flats and shared the process. If you’re interested, then I’ll share the link here as I highly recommend you make some yourself or at least get something similar. The reason for this is due to how soft we need to make the light in this setup and I’ll explain why that’s so important below. Firing your light into a large white V-flat like this results in that light being incredibly soft and it’s exactly that softness that we sometimes need in our shots. Look at these V-flats as a fundamental lighting modifier of your lighting kit just like a beauty dish or softbox. Failing this, bouncing light against a large white cotton sheet can also be a good substitute.


Bringing it all together

I’ve spoken about all the individual parts, but now let me explain how it all comes together, how to shoot this yourself and what to look for when doing so.

I mentioned at the start how it’s easy for multiple coloured lights to turn into a mess as overlapping colours become muddy and can even lead to clipped tones and ugly colour-banding issues, especially when the colours being produced by hard-lights result in saturated tones. In this setup, I wanted to create a softer, pastel colour wash and I did this with a soft blue from behind and a delicate pink from the front. The trick here is to place your subject between the two lights, that way, the body is always casting shadows for the other light to fill in.

For example; the blue soft-light behind is strong on the outside left edge of the model, but it’s casting delicate shadows on the right of the model. The pink light to the right is now filling in those shadows and is simultaneously casting a slight shadow on the left of the model that the blue is filling in.

Take a look at what each of the lights is doing individually in the images below to see exactly what I mean.

Click to enlarge

Click to enlarge

Click to enlarge

Lastly of course, we see the white light from the hard, optical snoot overpowering the softer colours below to bring it all together and that results in that extra level of visual interest we see in the final shot.


Points to bear in mind…

Hopefully all of the diagrams, BTS, breakdowns and explanations is enough to ensure you can recreate this yourself, but before you rush outside to try and find a bird to poo on you for good luck (yes, it’s weird being British), here’s a couple of pointers that might save you from needing to rely on faecal-rain alone!

  • Try to position your faux-trellis in such a way that there’s enough light on the model’s face. I had to push aside and pin back a few fake roses so that the spot of light over the model’s face was larger than everywhere else.

  • I didn’t speak about the background choice above, but it’s still an important decision to make. I went for a pair of cheap white curtains as the folds and texture not only look better behind than a flat white wall, but those curtain folds will catch the different colours from the lights on either side beautifully too.

  • With that background in mind and having to shoot in a small space, I wanted to make sure the area behind the model was out of focus. A longer lens like a 105mm or even an 85mm at a shallow depth of field is a great way to do this.

  • One final element that needs consideration, is your colour choices. As you can tell from the images above, when using very soft light like this, it’s almost impossible to keep the lights completely separated so thought needs to be given to the colours you use as certain coloured lights really don’t mix well. I’ve already written extensive articles about this topic in the past on my site, but I used the soft pink and blue here as I knew they’d mix to produce a muted, lavender purple which would subtly contrast the pink and blue in the foreground for extra separation. If you’re not sure, either dig into the archives of my -Technique Tuesdays- or simply experiment with colour combos on the day. Give a few different colours a try and see what works.

Good luck guys and if you give this one a try, please let me know how you get on. Plus, if ever want some feedback on your shots, be sure to post them in my -Share-a-Shoot- every Monday on my Facebook Page.

If you have any questions about anything then pop them in the comments below. Enjoy and stay creative!


  • Model: Jordan Ebbitt

  • Crown: Carbickova Crowns


Products Used…

Please note that I’ve included affiliate links below and I will benefit (albeit minimally) from the sales of any of these products should you purchase them. To that end, please feel free to use my discount code ‘HICK5-OFF’ at Essential Photo to receive a discount on any purchase via their site.

An LED studio strobe that will accept any of your current S-Fit modifiers.

Godox SZ150R

Essentially this is an LED studio strobe. You can use it with any S-Fit modifiers like beauty dish and softbox you already own, plus you can also change this to any colour and any Kelvin you’d like. It’s only 150 watts though, so you will want to use this in a controlled studio environment.

Godox SZ150R Link


Also, although I’m sharing my own personal thoughts and findings about the lights mentioned in this article, many of you will want to know that I am now an ‘‘Master of Light’ for Rotolight. As such, I have been given a discount code to share with you when purchasing any of their products via the Rotolight website. Use my code ‘JAKEHICKS10’ when purchasing anything from their website and you will save a bunch of money and I will enjoy a beer in your honour for doing so.

Rotolight Titan X1

Arguably one of Rotolight’s flagship products, this light does everything you could possibly imagine, including tint control and their very cool electronically controlled diffusion, SmartSoft. This is an awful lot of light and is often found on TV and film sets.

Titan X1 Website Link


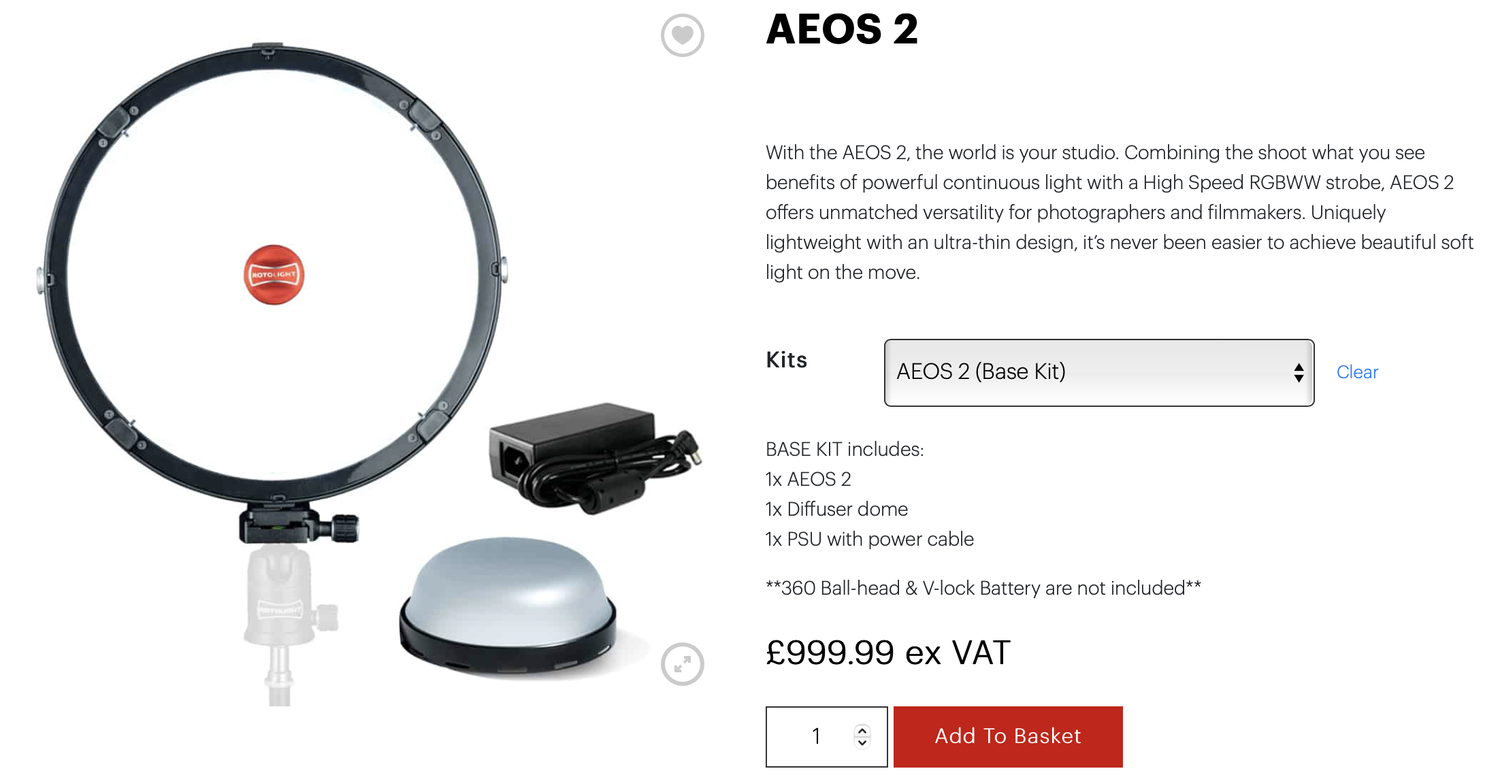
Rotolight AEOS 2

The AEOS 2 is one of the newest lights to market from Rotolight and with the design goal of bringing the majority of the features from their flagship Titan to an affordable package, I’d say they succeeded. This light is unfathomably lightweight for its output and features, plus everything is instantly accessible on the back of the light via a full-colour touch screen!

AEOS 2 Website Link


Thank You

As always, thanks for checking out this article and spending a little bit of your day with me here. I hope you found it useful and if you left with a little more knowledge than when you arrived, it’s been worth it.

If you have any questions or comments, or if something doesn’t make sense, by all means, fire away in the comments below and I’ll do my best to answer what I can. Thanks again and I’ll see you in the next one.

Don’t forget to sign up to my newsletter to be sent all of these photo tips and techniques articles every month in case you miss one.


JHP Livestreams…

If you give this setup a go, I’d love to see how the shots turn out, so feel free to share them my way. One way to do that is via my Livestream. I Livestream every other Tuesday night via my FB Page and there I answer your questions, critique your shots, take community images into Photoshop to work on them and discuss all manner of lighting tips and techniques. I look forward to seeing you and your work there real soon. JHP Facebook Page


ONLINE WORKSHOPS - LEARN MORE
JHP COLOUR GEL PACKS - BUY NOW
ONE-2-ONE MENTORING - LEARN MORE

 
Tuesday 09.06.22
Posted by Jake Hicks
 

Shooting in Natural Light with LEDs

The vast majority of us learn photography with the aid of natural light. Whether we started years ago with our parent’s film camera, or whether you found your passion for photography thanks to your smartphone, natural light was most likely the sole source of light in your shots.

For many, making that first step into the world of controlling the light can be a daunting one. Which light should I use and how do I learn to use it? Regardless of whatever light you choose though, one of the simplest first steps, is to use that supplemental light in conjunction with natural light and in this article I aim to show you a simple method of combining your lights with the ever-faithful natural light.

The Lighting Setup

At first glance, this is a fairly simple setup in that we’re only adding 2 lights to the sunlight that’s already present in the scene. Take a look at what each of the lights is doing below and then I’ll explain some of the finer details of the setup and try to explain how I got that more unique-looking colour in-camera.

Note: I was using LED lights from Rotolight in this shoot and they are named in these diagrams below as the Titan and the AEOS 2. I’ll talk more about using LED lights with daylight later on in this article, but for those simply interested in the setup itself for now, here are the details.

Click to enlarge

Individual Lights…

Below are shots displaying what each of the three lights in this setup are doing. The Titan X1 as the key. The AEOS 2 as the hair light and the sunlight as the fill light. Click on any of the images below to enlarge them.


TL;DR/ADHD/Artist Setup Explanation

  • Position your model with their back to the sunlight.

  • Ideally, place a backdrop behind the model to limit any direct sunlight from hitting the model.

  • Place a large white scrim/sheet in front of the model to bounce sunlight onto them.

  • Place a key-light to camera right, up high and angled down towards the model.

  • Place a hair light behind the model and off to camera left. Again, position this up high and angled down.

  • Set both your key and hair light to 3000K.

  • Set your cameras Kelvin to 3500K.

  • Underexpose your daylight by about 1 stop and allow it to act as a fill light.


What You Will Need

2 lights - Ideally these lights should have adjustable Kelvin, but if not, be sure to place full CTO gels on your lights instead.

Sun Placement - This seems like a big ask, but if you’re using a supplemental backdrop outside like I’m doing here, you can position your model wherever you like. The important part is to have the sun behind the model and I actually waited for the late afternoon when the sun was lower in the sky to avoid any direct sunlight on the subject.

Hand Painted Backdrop - This isn’t mandatory of course, but a block tone background behind the model will allow the lighting and colour you’re adding to the subject to shine through.

Scrim/White Sheet - Although I’m using a scrim here, you don’t need it and really any large white material to bounce the sunlight will work. A white sheet will work just as well, you’ll just need a couple of extra stands to set it up.


Camera Settings

  • Camera - Nikon D850

  • Lens - 24-70mm f2.8

  • Shutter Speed - 1/125th

  • Aperture - f2.8

  • ISO - 100

  • Kelvin - 3500K

  • Focal Length - Various ~50mm


The Results…

Click to enlarge/fit to screen any of the shots below.


Breaking it Down

I’m sure the lighting diagrams and BTS shots above have explained the setup for the most part, but I’ll still elaborate on a few key areas that you might have missed.

Note: These BTS were taken after the shoot was over and the sun had dropped lower in the sky, hence the shadows on the scrim here.

Sun Position

To begin with, position your subject with their back to the sun, ideally, this should be late afternoon or early morning…. we all quit landscape photography to avoid those early starts, so the late afternoon is fine unless you’re a masochist.

The late afternoon is to get that sun low in the sky. With it low, we can position our backdrop behind the model and avoid all direct harsh sunlight entirely. So with the sun behind the model, essentially being hidden by our backdrop, we can place our white scrim/sheet in front of the model and allow the sun to bounce off of that and light our model with a beautifully soft light.

The Fill Light

This bounced sunlight is our fill light, so be sure to underexposure that light by about 1 stop. The other important factor to consider at this point is the white balance. We want to take control of our camera and set the white balance to around 3500K. This cooler white balance setting ensures that the daylight colour is now a cool, blue colour.

Many good quality LED lights will allow you to adjust the Kelvin colour of the light output. This shot shows this Titan set to 4000K, but for this setup, you’ll need the light set to 3000K to get that rich, warm glow.

The Additional Lights

With our camera set to ensure that the fill light (the daylight) is a little dark, it’s now time to bring in our additional lights. I’m using LED lights here, but if you have other lights instead, that is also fine. Regardless of the light you use though, the one key aspect to note here, is that these additional lights must produce a visually warmer light than our daylight. For me, I simply set my LED panels to 3000K and I was done. If you don’t have that functionality on your lights, you may need to use CTO (colour temperature orange) gels on your lights to do so. With this warmer colour now present on our key and hair light and our camera set to around 3500K, the skin of the subject will take on a warmer glow whilst the surrounding environment will appear cooler and a little more visually interesting over the typical green foliage we might expect from this type of image.

Modifiers

As you can see from the BTS above, I didn’t need any modifiers on my LED panels as their larger surface area and naturally collimated light produces a beautiful look. But if you're not using panels and are instead using speedlights or strobes, what modifiers should you use? Personally, I’d recommend a beauty dish on the key here as that will produce a very even and clean light, similar to what I have here. For the hair light, I’d suggest a modifier that may give you a little more control if needed as you don’t want the light spilling onto your background. Either a barn-doors or even a gridded strip-box will provide the light control required.

Atmosphere

Lastly, I did add a very tiny amount of haze to this set. You can only see it in a few shots (more so in the bonus images below) as using haze outdoors is far from consistent. I wanted a small amount of atmosphere to be caught by the lights, especially by the hair light and although barely noticeable, I still liked the effect and wanted to mention it here in case you were curious.


The main aspects of this setup are that we’re using the sun as a fill light. To make this work, we not only have to soften the daylight, but we also have to make sure no sunlight directly hits the subject.

Key Takeaways

At its core, this is a very straightforward setup and although I’ve added further visual interest with Kelvin shifts, you don’t need to do this at all to achieve a cool-looking shot with some supplemental lighting.

As I mentioned at the start, the main idea behind this setup was to offer you a way to step into using additional lighting with your ever-faithful daylight. One of the core differences here to what you may be used to is that we’re using the sun mainly as a fill-light and not as your key. Ordinarily, the sun is your only light source so this may seem odd at first, but understanding the core principle of this technique will open up a lot of creative possibilities for you in the long run. Just remember to soften that daylight first like we did here with that bounce and then you can add harder keys and hair lights on top of that.

One other key aspect to remember is that the model should not be hit directly by the daylight as it’ll simply be too bright and ruin the effect. Either find a natural barrier behind them like a wall or tree or better yet, bring a backdrop outside to help block the sun.


Bonus Images

One huge benefit of using LEDs for me is their simplicity. What you see is what you get. No syncing or misfires to worry about and although with digital photography the consequences of a few blank frames are negligible, it can be a costly pain when it comes to shooting analogue film.

I’ve recently started to fall back in love with shooting film again and my favoured beast of choice right now is my medium format Pentax 67. If you’re unfamiliar with this thing, then just know, it’s a monster!

The following images are all taken with the aforementioned Pentax 67 and I have to say, I think I actually prefer these shots over the digital ones! Take a look and decide for yourself. What do you think, do you like this film look?

Click on any of the images below to enlarge them.

Featured Model: Sophieellaaa


LIGHTING NERDS ONLY BEYOND THIS POINT

||

LIGHTING NERDS ONLY BEYOND THIS POINT || LIGHTING NERDS ONLY BEYOND THIS POINT ||

Exploring LEDs with Daylight

I’ve already explained the core details of the setup above and the rest of this article will simply see me exploring the potential for using LEDs alongside daylight. What follows will likely be a little nerdy to some, so feel free to skip it if you like, but if you’re intrigued by how far LEDs have come in recent years like I am, take a look at what I found.

Lighting Used

Historically, I’ve shot with strobes for the past 20 years and I’ve only recently started to play and work with LEDs. One of the reasons I was so hesitant to use LEDs in the past, was my concern with their power output. Surely LEDs aren’t powerful enough to work outside in bright daylight, right?

To test this concern, I used the Rotolight Titan X1 and the Rotolight AEOS 2 LED panels during the shoot above.

Power Output…

In a controlled environment, how bright are these lights? Sure, I could paste some watts, lux or lumen values here, but what about some real-world figures we can relate to? How bright are they in reality?

To test this for you guys, I positioned each of the lights 1m away from a white background and measured the brightness with a light meter set to ISO 100 at 1/60th second shutter speed.

One other very important note to mention here is that these LED lights have adjustable Kelvin ranges from 3000K all the way up to 10000K. Due to how LEDs output power and colour via multiple LEDs, there is not a consistent power output throughout the Kelvin range. This is pretty normal and you’ll often find that the middle of this range sees the most power, as the LED light is combining multiple LED colours to output the desired colour temperature.


Titan X1

Light at 100% Power - No Diffusion and 1m from Background - Shutter Speed 1/60th - ISO 100

  • 3000K - f5.6 +2 tenths

  • 4000K - f8

  • 5000K - f5.6 +5 tenths

  • 6000K - f5.6 +1 tenths

  • 7000K - f5.6

  • 8000K - f5.6 +1 tenth

  • 9000K - f5.6 +1 tenth

  • 10000K - f5.6 +2 tenths

AEOS 2

Light at 100% Power - No Diffusion and 1m from Background - Shutter Speed 1/60th - ISO 100

  • 3000K - f4 +4 tenths

  • 4000K - f5.6

  • 5000K - f5.6 +2 tenths

  • 6000K - f4 +8 tenths

  • 7000K - f4 +5 tenths

  • 8000K - f4 +5 tenths

  • 9000K - f4 +6 tenths

  • 10000K - f4 +6 tenths

Rotolight Titan X1 & AEOS 2 Power Output at Varying Kelvins

Tested at 100% power output, 1m from white wall, no diffusion. Camera settings: 1/60th - ISO 100

NOTE: Due to f-numbers being weird and not scaling normally when placed on a chart, I couldn’t use them directly on this graph above.

For reference:

  • 1 = f4

  • 2 = f5.6

  • 3 = f8

Titan light output at full power, 4000K, 1m from a white wall. Camera settings: Shutter Speed 1/60th - F8 - ISO 100.

AEOS 2 light output at full power, 4000K, 1m from a white wall. Camera settings: Shutter Speed 1/60th - F5.6 - ISO 100.

Note: These lights are not casting those hard lines you see at the edges of the background. It’s actually the wall behind showing through this white backdrop.


Results…

As you can see, there’s actually minimal difference between the two lights. At its brightest (around 4000K), the Titan is only 1 stop brighter. What’s interesting though, is that using these lights at a common Kelvin value of 5000K, you’ll see that the lights are only minimally different in power with them only being 3 tenths of a stop different in power.

Why the comparison?

As I mentioned, I’ve only recently started to use these Rotolight LED panels and although I’ve been singing their praises, many have expressed their concerns about the cost of a Titan X1 and at nearly £3000, they’re certainly not for everyone's budget. That being said, I was convinced my AEOS 2 light had a similar power output and after doing these tests, I was right.

Yes, the Titan has a bunch of very useful features, but they’re maybe better suited to a film set. For most of us working on smaller projects, the new Rotolight AEOS 2 is doing 90% of what the Titan can do and if power is your concern, spending more on the Titan isn’t needed for around half a stop of additional power at a regular Kelvin range.

At almost a third of the cost at around £1000, the AEOS 2 is certainly packing a hefty punch when it comes to power. So if you ever see me using Titans in my shots, I’m not using them for that extra third of a stop in power and you can most certainly do everything I use them for with the AEOS 2s.


Conclusion

Using LEDs in conjunction with daylight was not something I thought possible years ago, but their power and affordability have come an awful long way. As many of you know, I’ve used strobes exclusively for over 20 years and it’s only very recently that I started to use and test the LEDs for their viability in my work. The core reason for me switching a lot of my lighting to LEDs has been the quality of light that they provide. That’s a very broad topic that warrants its own article, but my desire for better quality light was only thwarted by my concerns over power output. Thankfully, most of those concerns have been quashed and although I’ll keep my strobes for when I really do need that extra power on a very bright location, the LEDs will be taking over as my main lights.

Working with daylight is always a little tricky when it comes to balancing power, but this shoot was a great test of the power for these LEDs and although most of you may not have been interested in the finer details of their outputs, I was certainly very curious and I thought I’d take this article as an opportunity to share my findings.

Can you use these Rotolight LED lights alongside daylight? Absolutely, and I look forward to playing with this daylight and LED combo light setup a lot more in the future. As always, if you have any questions, let me know in the comments below.


Products Used

Please note that although I am sharing my own personal thoughts and findings about the lights mentioned in this article, many of you will want to know that I am now an Ambassador of Light for Rotolight. Also note that as much as I would love an affiliate link here to make some beer money, I DO NOT benefit directly from any Rotolight links clicked on in this article and they are provided purely for your convenience only.

Rotolight Titan X1

Arguably one of Rotolight’s flagship products, this light does everything you could possibly imagine, including tint control and their very cool electronically controlled diffusion, SmartSoft. This is an awful lot of light and is often found on TV and film sets.

Titan X1 Website Link


Rotolight AEOS 2

The AEOS 2 is one of the newest lights to market from Rotolight and with the design goal of bringing the majority of the features from their flagship Titan to an affordable package, I’d say they succeeded. This light is unfathomably lightweight for its output and features and everything is instantly accessible on the back of the light via a full colour touch screen!

AEOS 2 Website Link


Hand Painted Backdrop

Another one of those products where you don’t realise you need it until you try it. These definitely give your portraits an instant edge of professionalism and are best used with shallow depth of fields to get some gorgeous portrait backgrounds.

Hand Painted Backdrop Link


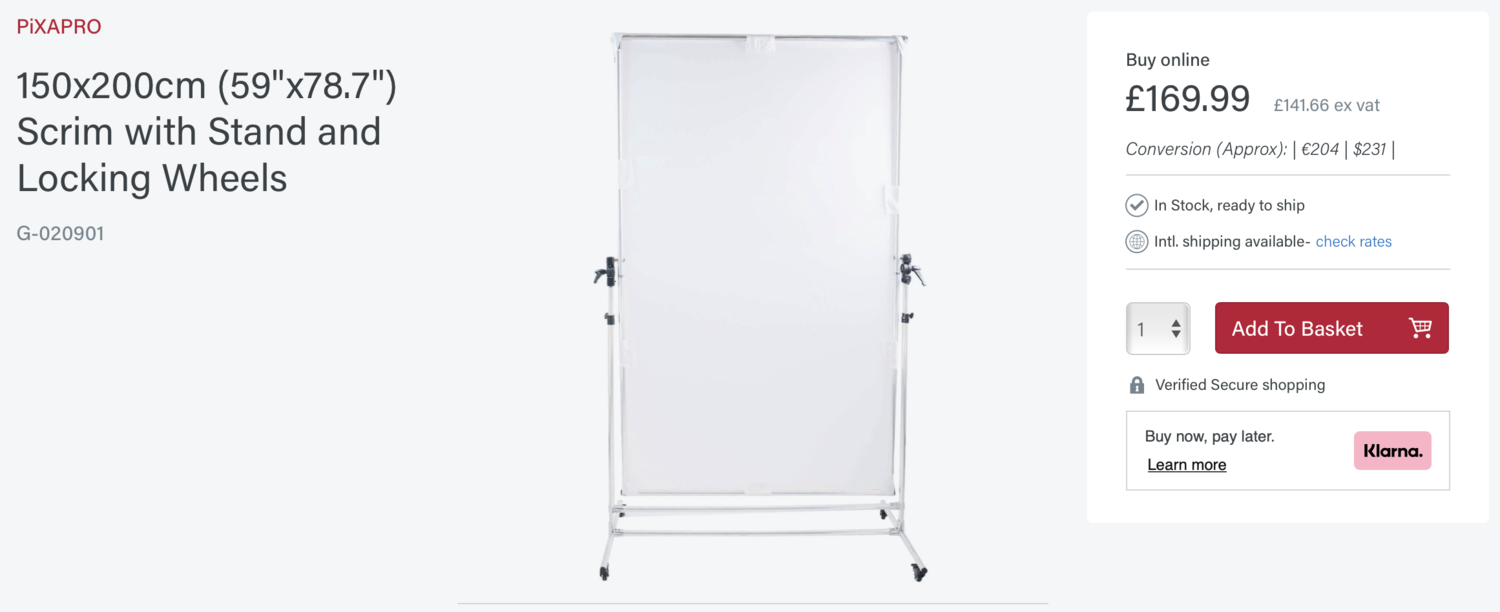
Large Scrim

I originally got this for cinematic studio lighting, but now I use it on nearly every shoot that requires a soft light. I know I only used it to bounce light in this shoot, but I love the softness it gives when used properly too.

Large Scrim Link


Thank You

As always, thanks for checking out this article and spending a little bit of your day with me here. I hope you found it useful and if you left with a little more knowledge than when you arrived, it’s been worth it.

If you have any questions or comments, or if something doesn’t make sense, by all means fire-away in the comments below and I’ll do my best to answer what I can. Thanks again and I’ll see you in the next one.

Don’t forget to sign up to my newsletter to be sent all of these photo tips and techniques articles every month in case you miss one.


JHP Livestreams…

If you give this setup a go, I’d love to see how the shots turn out, so feel free to share them my way. One way to do that is via my livestream. I livestream every other Tuesday night via my FB Page and there I answer your questions, critique your shots, take community images into Photoshop to work on them and discuss all manner of lighting tips and techniques. I look forward to seeing you and your work there real soon. JHP Facebook Page


ONLINE WORKSHOPS - LEARN MORE
JHP COLOUR GEL PACKS - BUY NOW
ONE-2-ONE MENTORING - LEARN MORE

Tuesday 08.02.22
Posted by Jake Hicks
 

DIY Foldable V-Flats

I’ve used poly-boards, bounce-boards, and even white sheets and white walls as lighting modifiers to soften the light in the past, but arguably the quickest and most efficient way to instantly achieve beautifully soft light, is the V-Flat.

V-Flats are pretty simple by design, but they can be pricey. A DIY version can literally save you hundreds of pounds/dollars!

What is a V-Flat?

In its simplest form, a V-Flat is 2 large sheets of white board joined together on the long edge. Imagine two regular white doors hinged together at the sides and it’s this resulting ‘V’ shape that allows them to stand by themselves without the need for further stands and supports. Fancy V-Flats are even black on the other side and the ultra-supremo ones are even foldable for storage too!

What does a V-Flat do?

A V-Flat can do several things in the studio, but they’re best used as a way to spread light over a wide area. This resulting light from this is often extremely soft and flat, and although some photographers will use this as a key light, you’ll more likely find this very soft light being used as a fill for portraits.

The other popular use for V-Flats is to take advantage of their black reverse side. Inverting the V and using the black sides of the V-Flat will help reduce bounced light in a studio and is referred to as ‘negative-fill’. This is a useful technique for adding contrast to a shot where you want the light to fall-off very quickly from the brighter side of the subject. This is especially useful in those very bright studios with white walls, ceilings and floors where light ordinarily bounces everywhere.


How do you use a V-Flat?

There are several ways to use a V-Flat, but ultimately the most popular way is to position your V-Flat open at a 45-90 degree angle and then place your light between the sides pointing back into the white V. The light will bounce off of the big white walls you’ve created and result in a beautifully soft light that is surprisingly controllable thanks to how you position and angle your V.

I’ll discuss other ways to use your V-Flat later, but for now, let’s look at how to make our own DIY foldable V-Flat.


Be aware of the room height you’ll be using your V-Flats in as you may need to cut them down to size afterwards.

Making your DIY Foldable V-Flat

Before we jump in, there are a couple of things you need to ask yourself and check before we start cutting and sticking…

How tall do you want your V-Flats?

Mine ended up being 84”/214cm tall. It started out being a little taller, but I wanted to use it in my home studio, so I cut it down to its current height for that. My V-Flat height consists of two A0 sheets of foam board stacked atop one another, this resulted in a height of 92”/237cm which was a tight fit at home for the ceiling, so I simply cut a little off the top.

Regardless of the size I ended up with, if I was to make these again, I’d still have made the larger version and cut it down afterwards as you’ll likely be saving money by buying standard size foam board, even if that’s bigger than you need. So buying larger and cutting afterwards will likely still be cheaper than a custom size to begin with. It’s still worth bearing in mind now though.

How many V-Flats do you want?

This may seem like an odd question, but many people only need one V-Flat. Personally, I recommend making a couple of them if you can afford it, as having two V-Flats opens up a lot of options over the one.

Do you want your V-Flat black on one side and white on the other?

I’d urge you to go for black on one side and white on the other as again, this will give your V-Flats a lot more versatility in the long run. Plus, it’s not a lot of extra work to make this happen either. Ultimately, it’s your call and just another thing to consider.

Do you want your V-Flats to be foldable?

For me, this was a no-brainer. Yes, the technique I used to add hinges to mine is a little extra work, but when not being used, they can easily be slid behind a door. Again, if you’re planning on leaving your V-Flats pretty much in situ at the studio, you could likely skip this portion of the technique.


What You Will Need

To be clear, I’m sure there are one-hundred-and-one ways you can achieve the same thing I have here, but I’m just going explain exactly how I made my V-Flats and with what products to either improve them and/or save money. If you find cheaper/better alternatives, by all means use those instead. Prices listed as of July 2022

Below, I’ll explain what you need and then I’ll tell you what I actually bought to save money along the way.

  • 8x A0 Black Foam Board - 5mm Thick

  • 8x A0 White Foam Board - 5mm Thick

  • White Gaffer Tape - 50mm x 50m

  • Black Gaffer Tape - 50mm x 50m

  • Adhesive Spray 500ml

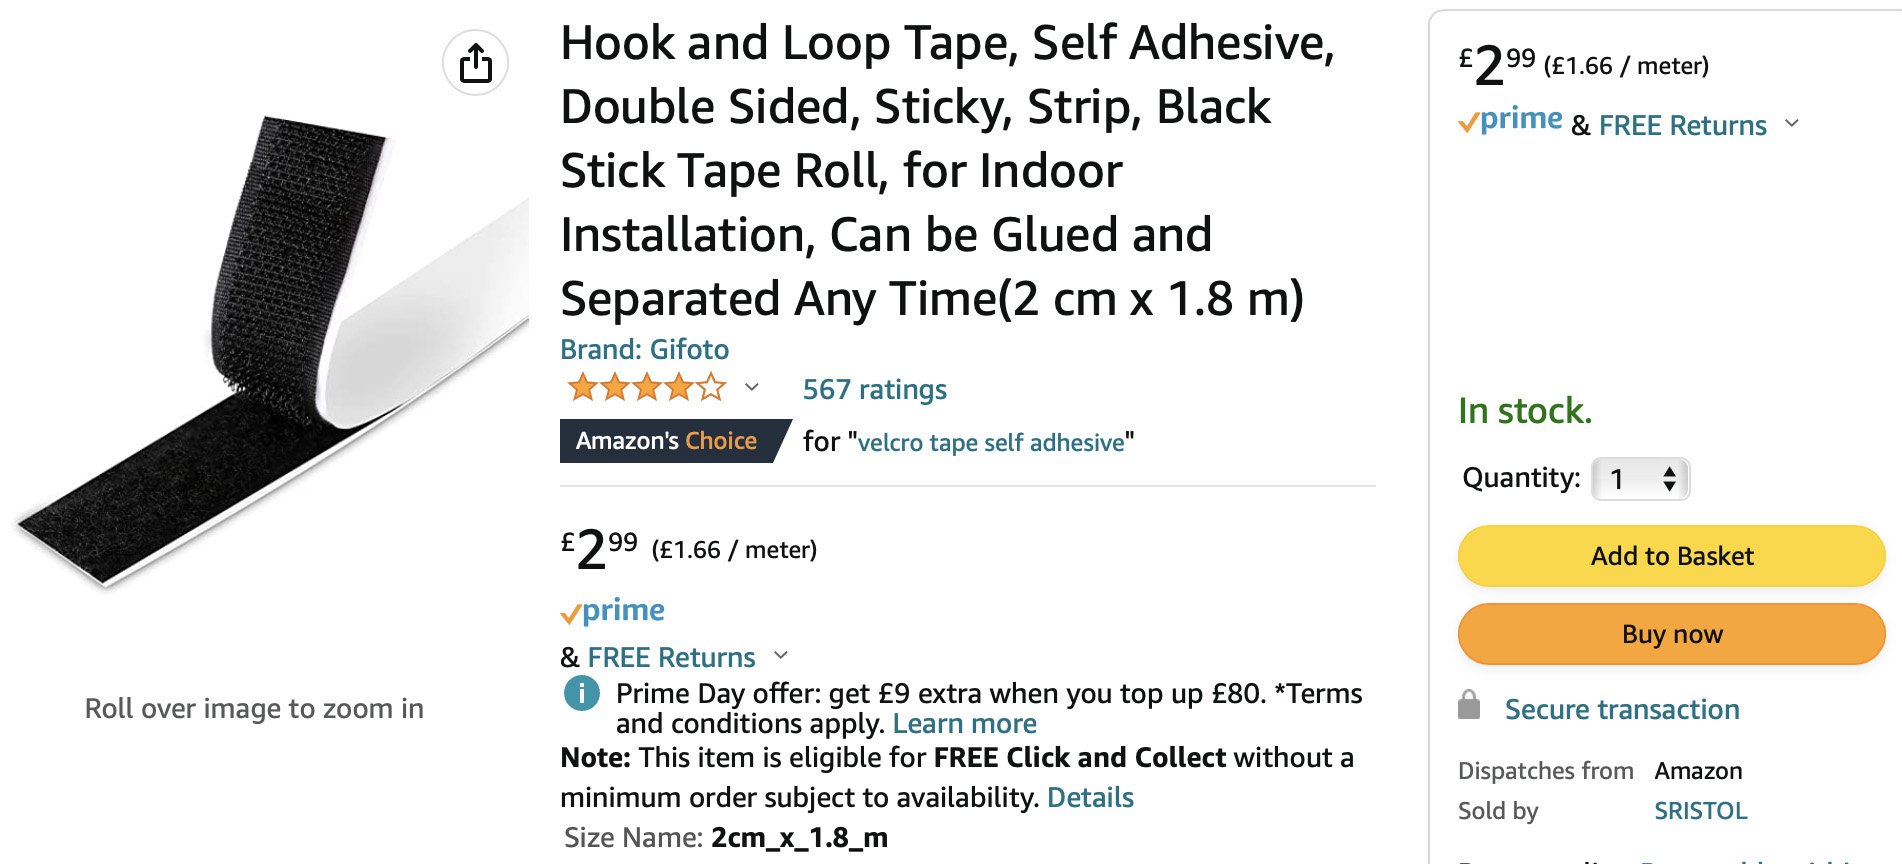
  • Double-Sided, Self-Adhesive Black Velcro Strip

Below, I’ll explain what I actually purchased instead to save some money.

  • 10x A0 Black Foam Board -5mm -You’ll often find deals to be had on packs of 10

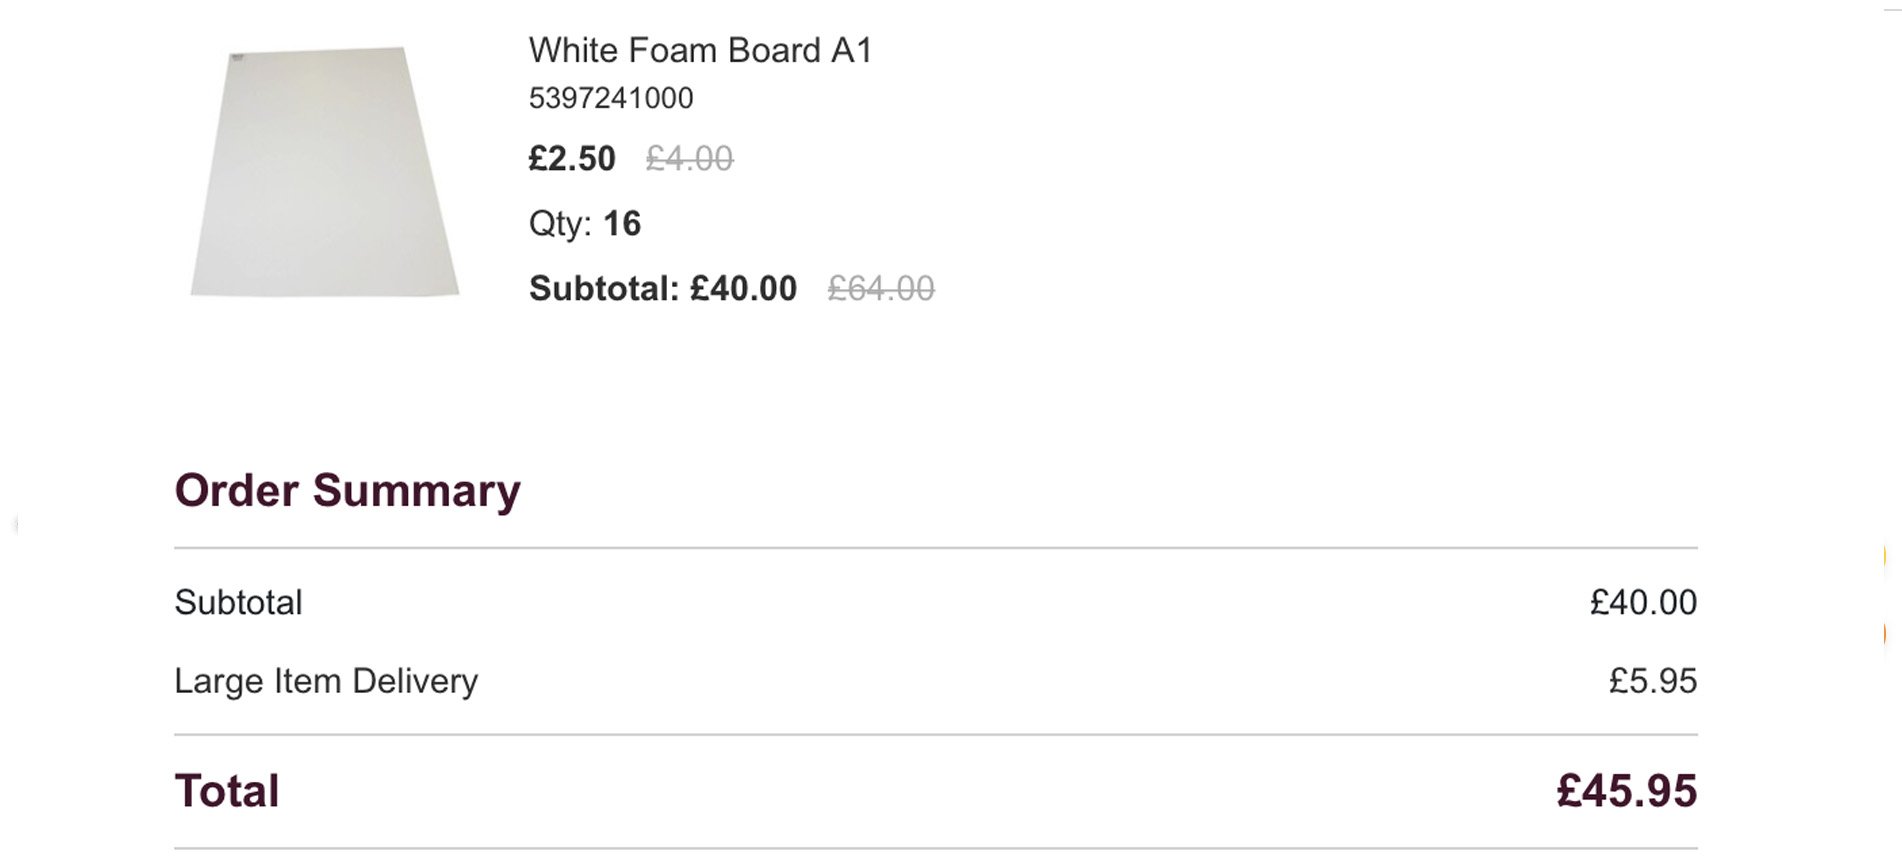
  • 16 x A1 Foam Board -5mm -A1 boards are a LOT cheaper than A0s. I just got these A1s and stuck them to the bigger A0s.


A0 Black Foam Board - 5mm Thick - eBay

I spent a long time trying to find cheap black, A0 foam board… it doesn’t exist!

Also, you can buy thinner sheets of foam board, but seeing as the V-Flat would have to support its own weight, two sheets of 5mm together is pretty sturdy and I’m glad I didn’t try to save money with the thinner ones in the end.


A1 White Foam Board - 5mm Thick - Hobby Craft

So although the cost of the black A0 was pretty steep, I think I managed to offset the financial sting of that, by buying these relatively cheap A1 white boards. I was going to have to glue boards together anyway, so buying these cheaper A1 boards didn’t affect the design in any way, but it did save a bunch of money!


White Gaffer Tape - Amazon

You’ll likely of noticed that I bought both white and black gaffers tape. This isn’t strictly necessary, but as you’ll see from the build later, I use a hinge technique that allows me to use both the white and the black tape to hide/disguise the tape on the different coloured boards. You could just buy one colour and leave it or even paint over it if needed.


Black Gaffer Tape -Amazon

The only other point worth mentioning here above the tape, is the fact that I bought FIFTY METRE rolls of the stuff! That may seem like overkill, but the regular roll length was too small for what I wanted and this far larger roll was simply more cost-effective than purchasing multiple smaller ones.


Spray Adhesive - Amazon

I didn’t need anything fancy for this, so I simply went with the cheapest I could find. I’m only bonding two bits of cardboard together so I really didn't need something pricey. The only point I would mention here is that I barely had enough glue to cover all of my boards. I may recommend a larger can, just to be sure you could finish the job.


Double-Sided Velcro - Amazon

This is probably the least important piece of kit of the build, as I’m simply only using this to hold the two folded sides of the V-Flat together at the top. If you have another solution, then go for it, but for a couple of quid, this worked well.


TOTAL

  • A0 Black Foam Board - 5mm Thick x10 = £95.95

  • A1 White Foam Board - 5mm Thick x16 = £40.00

  • White Gaffer Tape - 50m = £5.54

  • Black Gaffer Tape - 50m = £6.29

  • Spray Adhesive - 500ml = £5.56

  • Double Sided Velcro - 1.8m = £2.99

  • TOTAL = £150.79

Remember: This is the total cost of making 2 full-size double-sided V-flats. You would obviously reduce the cost a lot if you only need to make 1.


Making Your V-Flat

Many of you may think throwing together a V-Flat is fairly obvious, after all, it’s just two boards attached at the spine, right? Yes, in its base form, the design is very simple, but if you want to make them foldable, there are a couple of things I learned along the way that I think you’ll find useful. Chief among them is the ‘weave-fold’.

The Weave-Fold

I don’t know if this is its proper name, but this is what I’ll be calling the method with which I join my 10mm thick boards together from here on out. Note: I’ll explain this later on, but my V-Flats consist of two 5mm boards glued together, hence the final 10mm thickness.

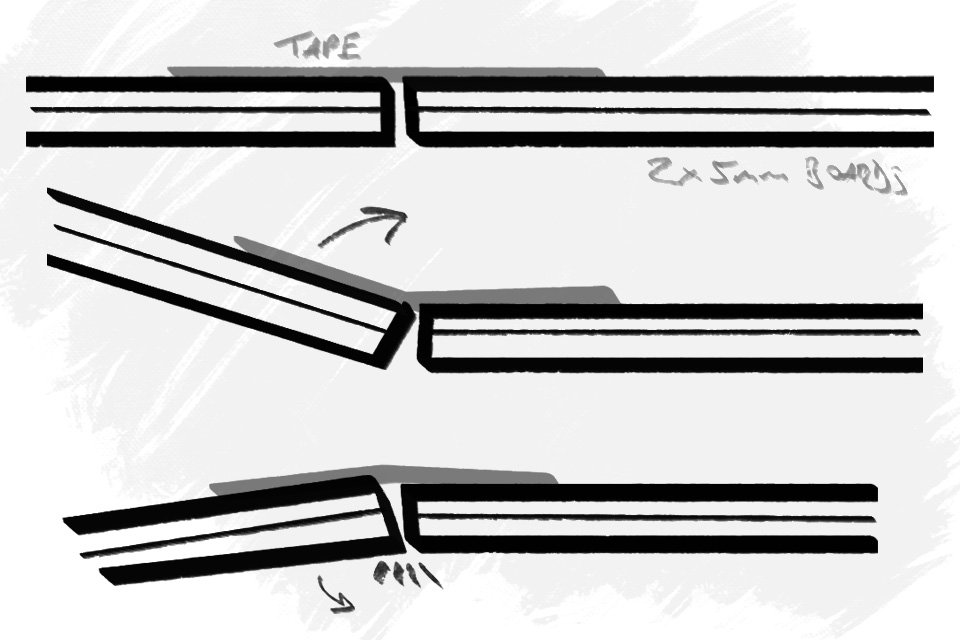
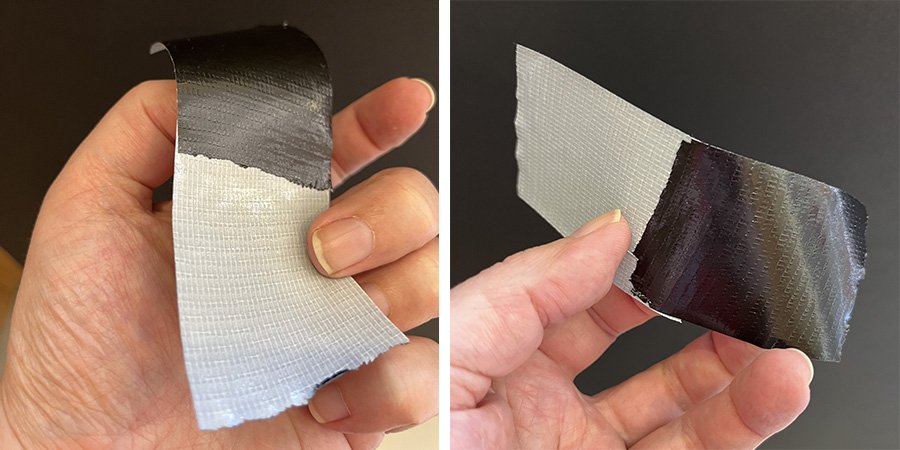
Why do we need this method? Why can’t we just tape the boards together? The issue we run into if we simply tape the two thick boards together is that they’ll only fold one way.

If you only need to use one side of your boards, this is absolutely fine, but what if, like me, you want to make your boards double-sided with white on one side and black on the other? We need to allow our boards to bend both ways. This is where the weave-fold comes in.

In the above (crude) diagram, you can see that the boards now fold both ways and I’m able to achieve this thanks to the weave-fold which essentially tapes the boards on both sides.

How is this done and how do we also give rigidity back to those hinges?

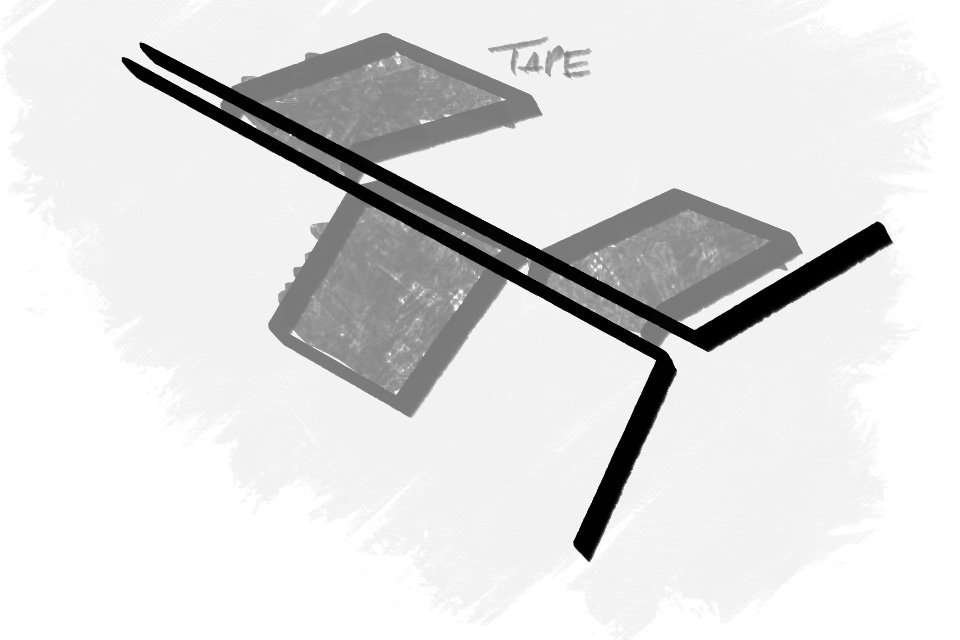
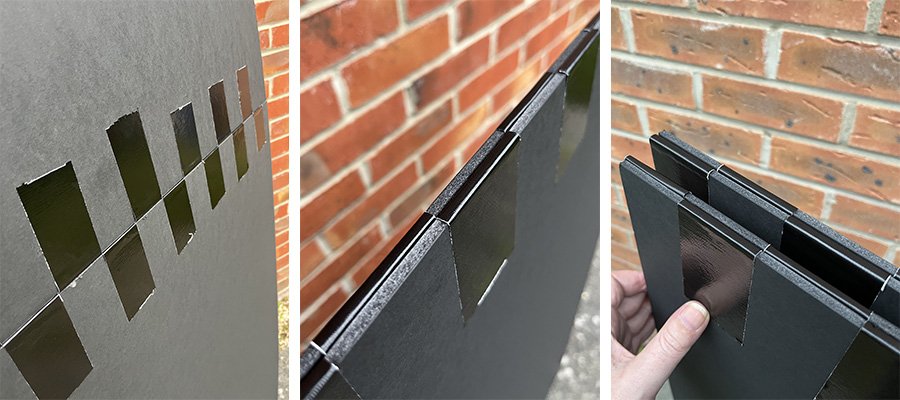
This is where the clever bit kicks in and this is where the ‘weave’ name comes from. You essentially do exactly what I’ve shown above, but you alternate each piece of tape with which board you stick it onto first. Look at the examples below to see what I mean.

This weave-fold not only gives the hinge great strength, but it allows you to fold the boards in both directions!

Making the hinges in this way actually creates a surprisingly strong hinge, in fact, it’s far stronger than if we’d simply taped it on one side, so I really do recommend you take the time to join your boards like this.

The finer details of the ‘weave-fold’

I had some left-over boards (remember I bought 10 black boards, but only needed 8), so I built a mini V-Flat to test the weave-fold first and I recommend you do the same if you have any off-cuts lying about. One of the core tricks to making the weave-fold is the taping method. Rather than one long piece of tape that connects the two boards, you have two shorter pieces of tape flipped and stuck together. This enables you to stick both sides of the boards at the same time.

The essential part of the weave-fold is the double-side tape you use to hold both sides of the board.

This was my mini-test V-Flat. I cut up 4 boards into A4 sizes and tested the weave-fold first.


Taking it one step further…

There is a reason I started with showing you the weave-fold before I spoke about getting your boards ready, and that’s because I integrated my weave-fold between my black and white boards. You don’t have to do this, as it is another layer of extra work, but I believe it makes the hinge even stronger by sandwiching the tape between two glued boards, plus it visually tidies up the look of the V-Flat on one side as the tape is completely hidden.

For my build, I chose to hide the tape between the glued boards as much as I could…

With that hidden tape method in mind, let’s now see the complete process from start to finish.


The Complete Build

Step 1 - Assemble

This is about double-checking you have everything ready. Plus, if you’re like me and bought the 16 A1s, now’s a good time to check you actually have the right number.


Step 2 - First weave-fold

As I’m hiding my main weave-fold between my boards, I firstly need to tape my black boards together at the top edge with the weave. You can do this in several ways, but for me, I got both boards primed by placing the tape on both boards separately first and then joined them as you see in the final image below.

Tip: I spaced the tape out on each board by using a piece of removable tape between each of my strips. As you can see in the shots, this accurate spacing then allows for the two boards to be joined easily afterwards.


Step 3 - First check

This is your first weave-fold, so it’s definitely a good idea just to check that the fold works. And by works, I mean that the boards bend both ways.


Step 4 - Gluing the white sides

Now that we have our black boards ready to go, it’s now time to glue our A1 white boards onto them. There’s no special trick here, other than I’d urge you to do this outdoors due to that spray adhesive being a nightmare to remove off of stuff you don’t want it on!


Step 5 - Your weave-fold is no longer double-jointed - BE CAREFUL

At this stage, we’ve hidden our tape and we’ve also made our hinge pretty strong, but the downside is that this hinge is no longer double-jointed. The boards will fold on the black side, but they will no longer fold on the white side. This is fine as we only need these flaps to fold up from one side, just be careful to remember this though as you don’t want to force this white side closed.


Step 6 - Making the V

Now that we have our two sides, it’s now time to join them together to make our ‘V’. At this stage, it’s really important that this hinge folds both ways, as we want to use both the white and the black sides as a stand-alone V-flat. This is simple to do though and the only downside is that we can’t hide the tape. This is where the two gaffer tape colours come in handy.

The two small strips of tape stuck together you’ve been using up until now were black, now we’re going to be making the weave with one small strip of white tape, stuck to one small strip of black tape.

We use exactly the same technique as before; tape one side first and space out the strips by using a removable piece of tape. Then do the same on the other board and then lastly join them together.


Trim Step

As I mentioned above, I trimmed my V-Flat down a little to make it a bit easier to use in a home studio. If you are planning on doing the same, now is the time to do it.

One thing to keep in mind is to keep the two flaps even. By that I mean, if you wanted to take 20cm off of the top of your V-Flat, take 10cm off of the top and 10cm off of the bottom. This makes sure that when the V-Flat is folded down, it’s also smaller and takes up less room. Plus it’s just neater.


Step 7 - Adding the Velcro

Lastly, we just need to add our double-sided velcro to the folding flaps. Most of the time I’ll be using the white side of this V-Flat, so I stuck my velcro to the back side to hide it. As you can see from the diagram below, it also very comfortably holds the flaps in place when you have the black sides of the V on show.

This is the best solution I could find to hold the two folding flaps in place when fully assembled, but if you have a better idea, I’d be interested in hearing it.


You’re done!

And just like that, you’re done! These foldable DIY V-Flats do have a few more steps than I first thought, but that’s mainly due to us going the extra mile with not only wanting them to be double-sided with both the black and the white side being usable, but also by us taking a little extra time to hide the tape where we could as well.

The cost of these DIY versions was also a little more expensive than I initially thought they would be. But, the store-bought foldable V-Flats are usually around $350!!! So I think making them yourself for less than half that price is still well worth taking the extra time to do if you can. You could obviously save even more money if you only need a single V-Flat, but another cost factor to consider is that the large black foam boards were far more expensive than the white boards. So if you didn’t want or need the black sides, or even if you wanted to make both sides white and simple spray one side black, you could likely save a bit of money that way too.

Ultimately I’m very happy with how they turned out. I’ve only had them a few weeks, but I’ve already used them in every shoot since then and in a variety of ways on each of them. The biggest benefit for me is that they’re quick to put up and I don’t need to sacrifice light stands and cross bars anymore to create bounce boards with sheets. Plus, and this is probably the best bit, they fold down to a very manageable size and are easily stored behind a door and are even small enough to go in the back of a car for location shoots. Lastly, one other bonus is that they are extremely lightweight, in fact, I can comfortably carry both folded V-Flats in one hand!

If you have the time and space, plus you don’t mind investing a few quid, I highly recommend you make at least one of these DIY foldable V-Flats as yet again, this is another one of those tools you’ll use far more than you think you would.

Good Luck!


BONUS LIGHTING SETUP!

I just retouched these model shots, so I thought I’d quickly share them here and discuss the setup where I used the V-Flats recently with coloured lights on a simple portrait shoot.

As always, let’s first look at the shots themselves and then I’ll explain how they were taken below.

-To enlarge any of these shots, simply click on them to make them full screen.

Featured Model: Sophieellaaa


Camera Settings

  • Camera - Nikon D850

  • Lens - 105mm f2

  • Shutter Speed - 1/60th

  • Aperture - f2.8

  • ISO - 30

  • Kelvin - 5600K

  • Focal Length - 105mm


The Setup

Click to enlarge

V-Flats

As you can see from the above diagram, the V-Flats are placed on either side of the model and the two coloured lights are bounced into them. This results in a very soft wash of light falling onto both the subject and the background.

Background

One benefit of the background being this folded curtain is that the individual folds catch the different colours from both sides. If this had been a flat backdrop, you wouldn’t see either of the colours being displayed properly as they would wash each other out.

Optical Snoot

Lastly, a hard light in the form of an optical snoot is shone onto the model and backdrop. This optical snoot has a simple windowpane gobo inside, and that’s what’s casting some much-needed interest into the shot via those shadows. You’ll notice that where the gobo light falls, is where you get less colour, but where the gobo casts shadows, you get a lot of rich colours. Use this knowledge to your advantage to create some very engaging and interesting effects.


Products Used…

Please note that I’ve included an affiliate link to the SZ150R and Optical Snoot below and I will benefit (albeit minimally) from the sales of any of these products should you purchase them. To that end, please feel free to use my discount code ‘HICK5-OFF’ at Essential Photo to receive a discount on any purchase via their site.

Rotolight AEOS 2 - LINK

PixaPro Optical Snoot - LINK

Godox SZ150R - LINK

Foldable V-Flats - MAKE IT YOURSELF ;)


JHP Livestreams…

If you give this setup a go, I’d love to see how the shots turn out, so feel free to share them my way. One way to do that is via my Livestream. I stream every other Tuesday night via my FB Page and there I answer your questions, critique your shots, take community images into Photoshop to work on them and discuss all manner of lighting tips and techniques. I look forward to seeing you and your work there real soon. JHP Facebook Page


Thank You

As always, thanks for checking out this article and spending a little bit of your day with me here. I hope you found it useful and if you left with a little more knowledge than when you arrived, it’s been worth it.

If you have any questions or comments, or if something doesn’t make sense, by all means, fire away in the comments below and I’ll do my best to answer what I can. Thanks again and I’ll see you in the next one.

Don’t forget to sign up for my newsletter to be sent all of these photo tips and techniques articles every month in case you miss one.


ONLINE WORKSHOPS - LEARN MORE
JHP COLOUR GEL PACKS - BUY NOW
ONE-2-ONE MENTORING - LEARN MORE

 
Tuesday 07.19.22
Posted by Jake Hicks
Comments: 7
 
Newer / Older