• Technique
    • Latest Techniques
    • FREE TIPS
    • Quick Tips
    • Video
    • Site Search
    • Blog
    • Archives
  • Mentoring
  • >Online Workshops<
  • Workshops
  • Studio Lighting Books
  • Contact
    • Newsletter
    • Contact
    • Statement
Jake Hicks Photography
  • Technique
    • Latest Techniques
    • FREE TIPS
    • Quick Tips
    • Video
    • Site Search
    • Blog
    • Archives
  • Mentoring
  • >Online Workshops<
  • Workshops
  • Studio Lighting Books
  • Contact
    • Newsletter
    • Contact
    • Statement

What's in my quick and nimble lone-wolf lighting kit?

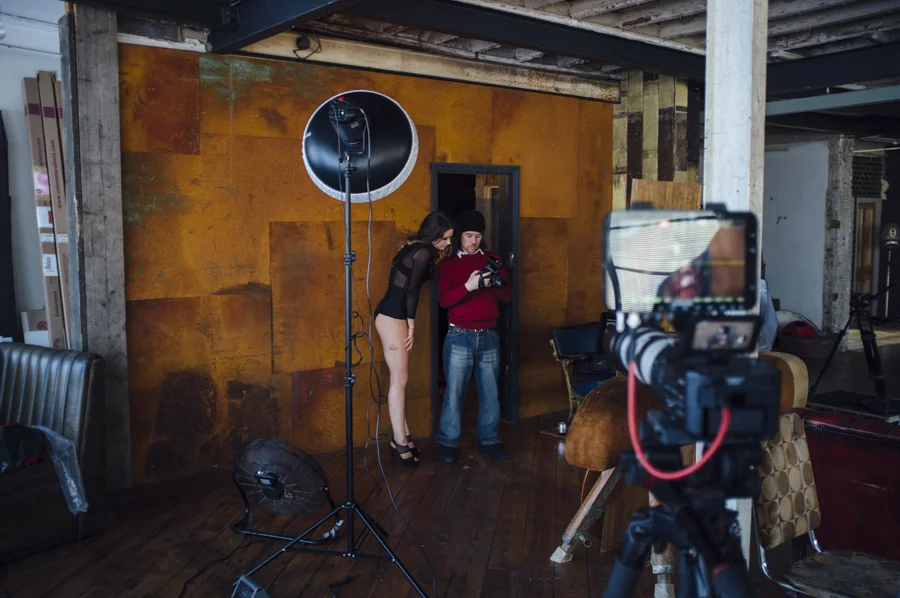
The majority of my work involves bigger more complicated setups that require multiple lights and consequently lots of bags, equipment and assistants to help with it all. There are jobs though that just require a couple of lights and myself to turn-up and deliver results quickly and efficiently. On those occasions in a big city like London I may also find it far more effective and certainly a lot quicker to use public transport. If that's the case then I need a lighting kit that is very mobile and compact. So alongside my camera bag in rucksack with a couple of lighting modifiers, here's what's in my two-head lighting kit.

Click for full screen view...

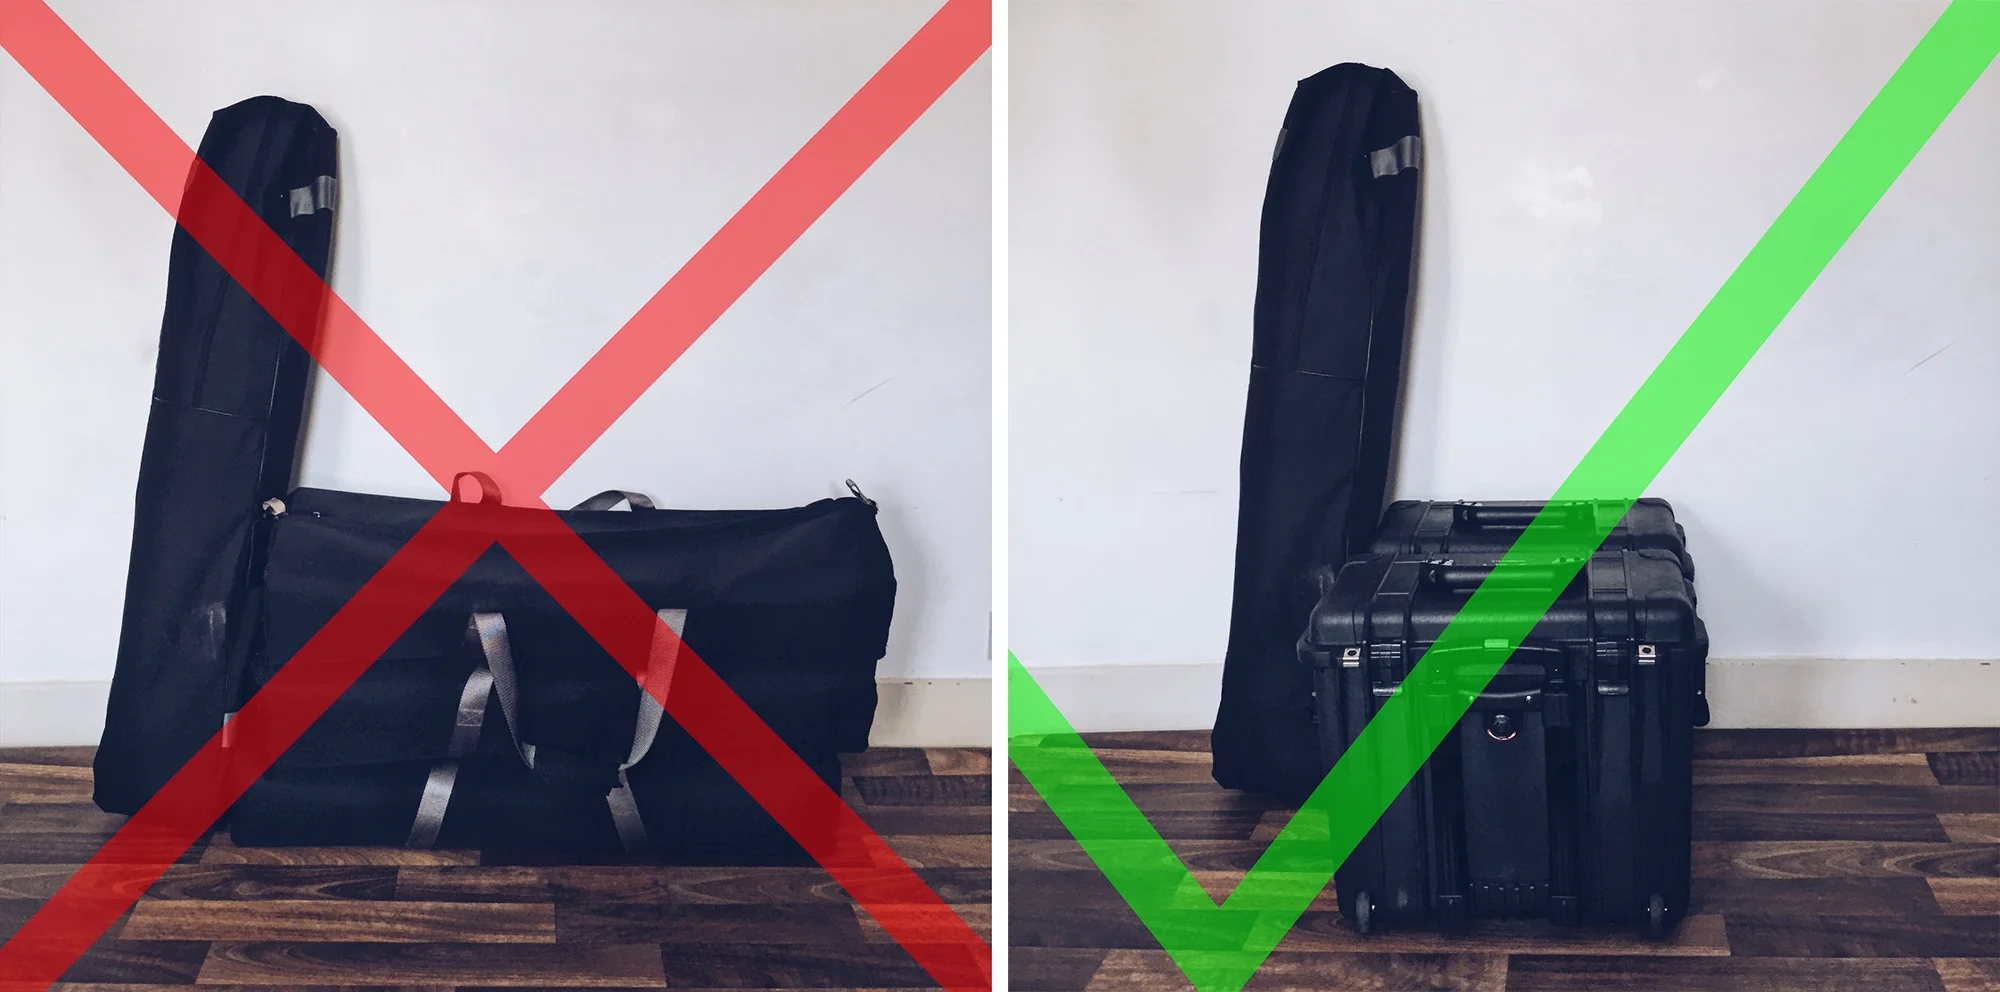
1. Peli Case 1440 - Wheeled with extending handle.

This is a perfect case for when I'm transporting kit on my own and on public transport. The wheeled unit also means that I'm not carrying or dragging those old kit bags like I used too. On top of that the Peli cases are practically indestructible and I can easily lock it if I feel I need too.

Peli 1440 Case

2. Two Bowens XMT 500 Location Heads.

Absolutely love these battery powered heads. As of July 2017 Bowens announced the liquidation of their company so I feel I should at least warn you before investing in the system that although they are excellent lights, parts, warranties and replacements are pending. I'm pretty confident that somebody will pick up the brand and continue the line in some form or another in the future. As of yet that hasn't happened as I'm sure potential investors are waiting for Bowens to shed its debts and pick it up for a rock bottom price. Time will tell.

Bowens XMT 500

3. Portable folding lighting stands.

These are great stands and super lightweight too. They fold to pretty much the exact width of my Peli 1440 which is perfect and I just strap them over the top either side whilst still leaving the carrying handle accessible.

These come in the Bowens lighting kits but you can buy similar versions here Manfrotto 5001B Nano Stand

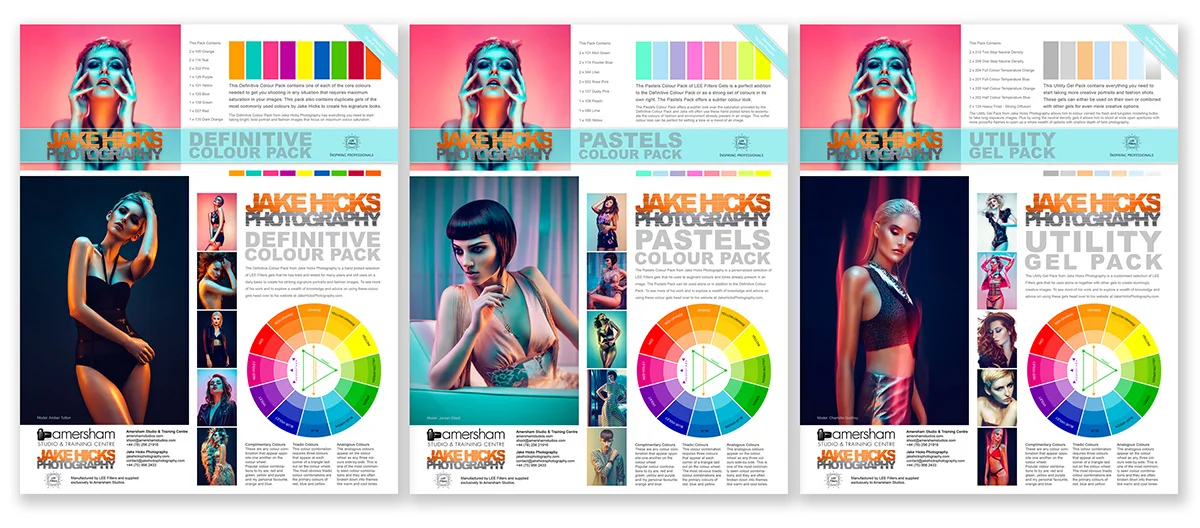
4. Jake Hicks Photography Gel Packs - Definitive Collection, Utility Gels and Pastel Pack.

I'm sure you're all aware that I sell my own gel packs by now. They've been selling all over the world every single day for years now so I must be doing something right with them. This is no sales pitch waffle but these are the gel packs I use on each and every shoot. They aren't just for show and a gimmicky sales opportunity these packs came from me shooting and using these gels consistently to the point where I was being asked what gels I use all the time. In the end I decided to formulate them into these packs and the rest is history :) Check out the links below for more details.

My website gel packs product info page

Definitive Collection

Utility Gel Pack

Pastel Gels Pack

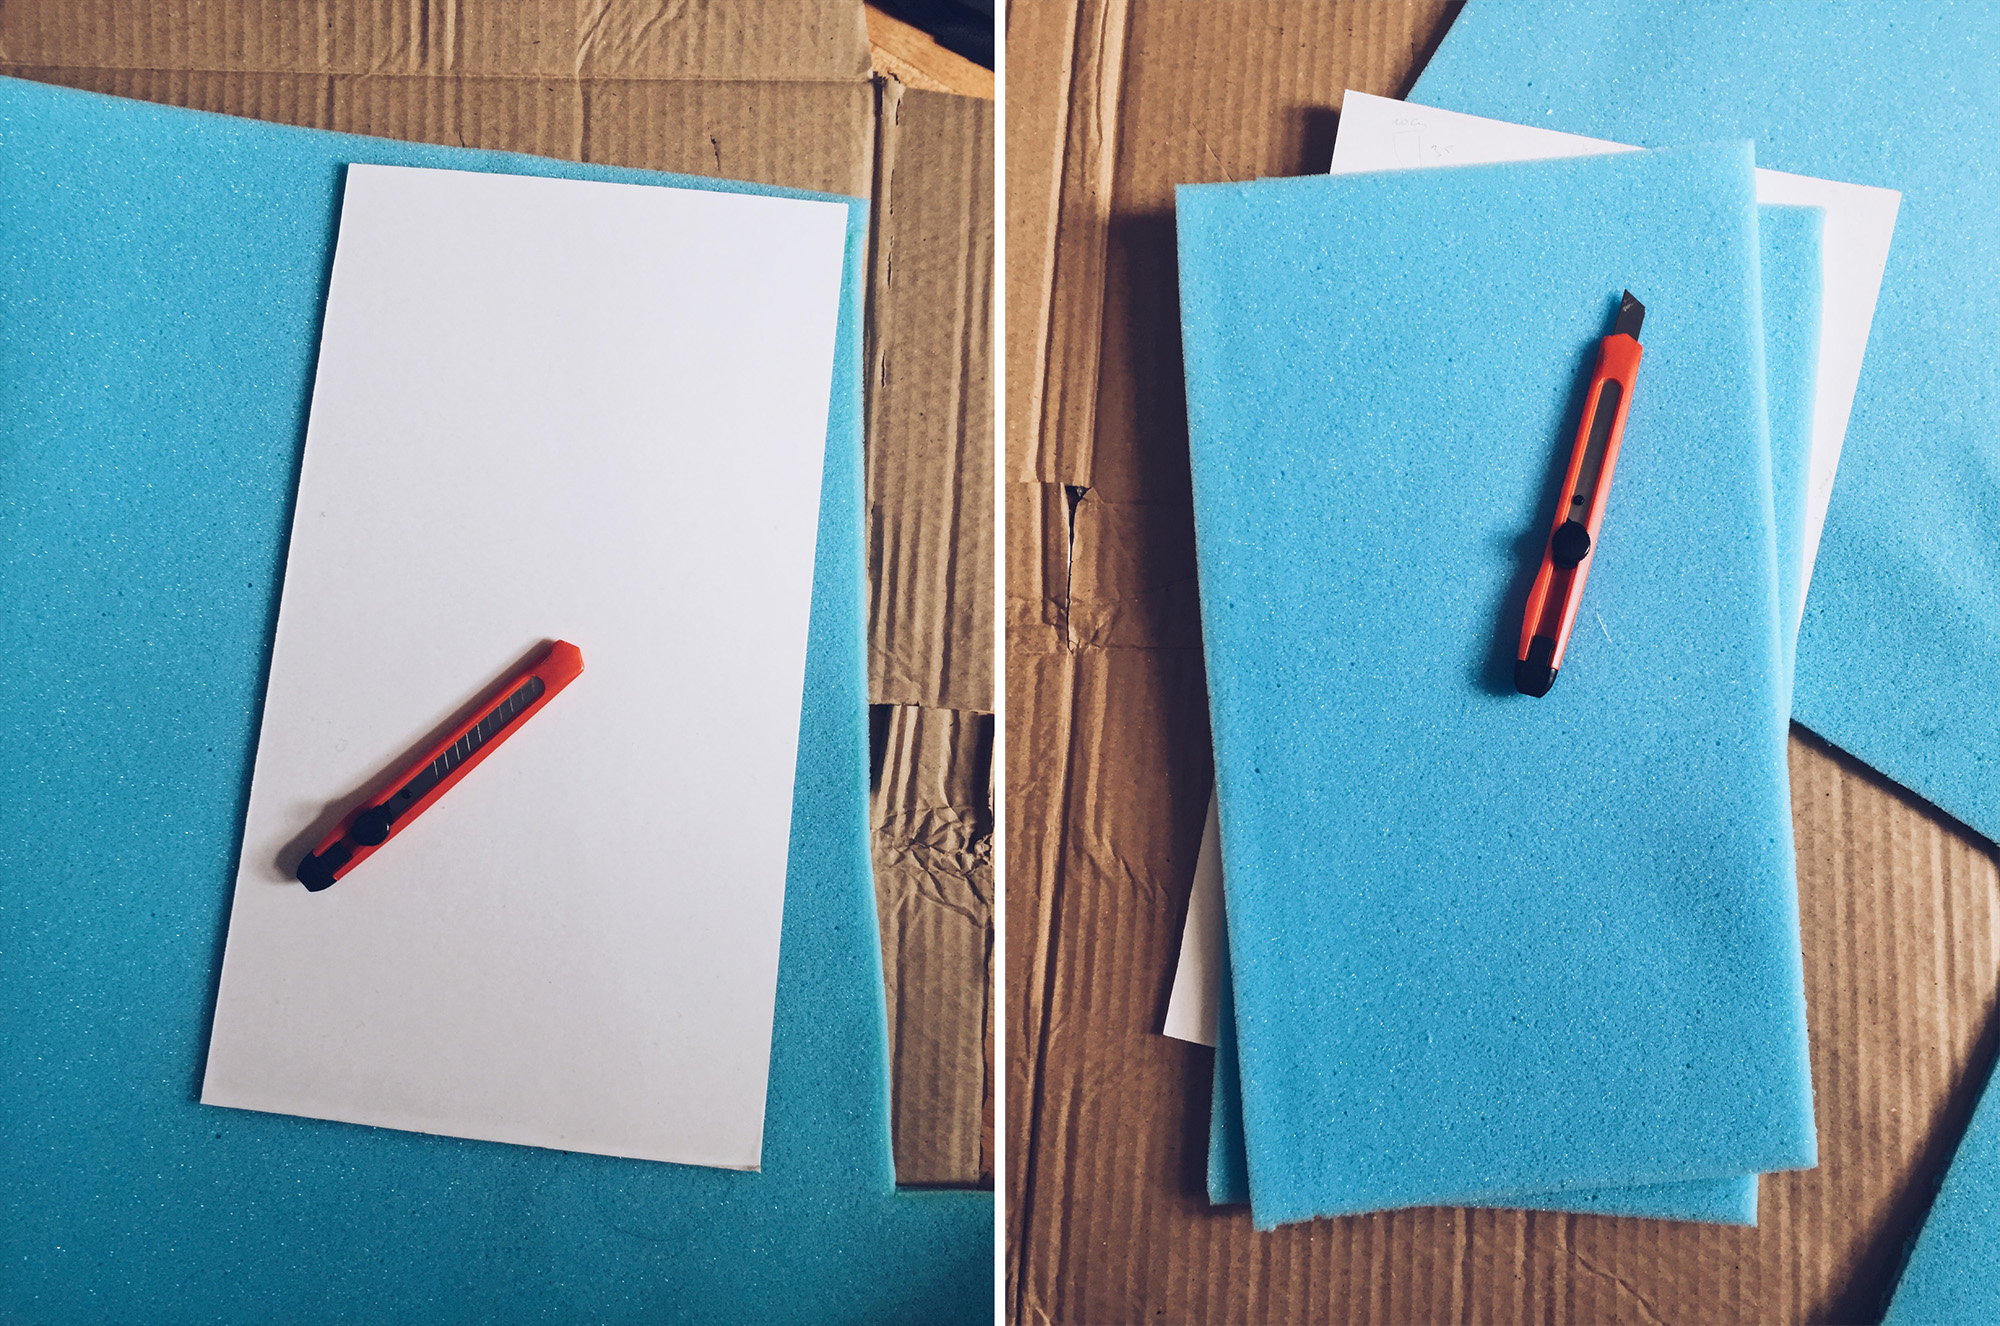
5. The ‘office divider’ 1440 Peli Storage case.

The Peli 1440 comes empty as standard and it's up to you to choose your innards. You can obviously choose what works for you and I know a lot of people go for the foam but I prefer the flexibility of the 'office divider' kit.

Padded Dividers for Peli 1440

6. Floor stands x2.

Pretty straight forward but these allow me to gel a background light behind the model or place a fill light at the models feet via a spigot and one of these floor stands.

Manfrotto Backlite Stand

7. Umbrella holder bracket.

A lot of strobes come with the umbrella mount off centre and the Bowens XMT heads are no different as they have the umbrella mount on the side. This simple bracket allows me to mount the umbrella directly under the strobe when it's mounted on top.

Umbrella Bracket

8. ‘Water Weights’ - Stand stabilising weights.

These are portable and foldable weights to weigh down your stands on location. You simply fill them with water or sand when you arrive and then empty them when you're done. Pretty clever design and super small and lightweight to have in your kit bag for those 'just in-case' moments. If you're thinking of getting one then feel free to use my discount code THANKSJAKE at the Trade Secrets site below.

Single Water Weight

Triple Pack Water Weight

9. Manfrotto 035 Super Clamp.

This big clamp has a huge number of uses that includes mounting a fill light to my key lights stand or with additional attachment of the Manfrotto extension arm, it allows me to create a mini-boom. For more info on these uses check my Quick-Tips page.

Manfrotto  Super Clamp

10. Mini Crab Clamps.

These little clamps screw to the top of my light stands and allows for a multitude of uses. They can hold light flags, and even backdrops via any additional pole. Again for more tips on their uses, check my Quick-Tips page.

Crab Clamps on eBay

11. Manfrotto 042 Extension Arm.

I mentioned in the Super Clamp info above that I use the extension in conjunction with the Super Clamp to fashion a mini-book for my key light. You guessed it, check my Quick-Tips page.

Manfrotto Extension Arm

12. Manfrotto 175 Spring Clamp.

I probably use this clamp the least but I still like to carry it. It can be used in conduction with the umbrella swivel to be attached atop my light stand to hold either black light flags or even small reflectors to bound light.

Manfrotto Spring Clamp

13. Manfrotto 026 Swivel Adaptor.

I use this heavy duty adaptor atop my key light stand and attach my key light to it. This enables the key light to be positioned either side of the light stand and offers me symmetrical lighting on my model without the light stand getting in the way of the shot. Again, more info on this setup then check my Quick-Tips page.

Manfrotto Swivel Adaptor

14. Adaptor Spigots and converters.

These have no use on their own and have to be paired with nearly all of the other clamps, adaptors and stands to connect them. For example, one goes into the floor stand and then you attach a strobe to the spigot. I always carry loads of these.

Spigots at Calumet

15. 3 metre 1/4in (6.35mm) Mono extension cable lead x2.

These cables are simply extension cords to plug into my strobe heads and then optical slaves into that. This allows me to place optical slaves to trigger my strobes in awkward situations where radio triggers fail. This is rare but they've saved my shoot from being a complete nightmare on more than one occasion.

Amazon Guitar Amp Extension Cable

16. 1/4in (6.35mm) Micro plug optical slaves.

These are the optical slaves that I plug into the aforementioned guitar amp extension cables. These are older models that are very hard to come by now and unfortunately pretty pricey.

B&H 1/4 inch micro slave

If you're looking for a more modern and accessible alternative then I recommend checking the significantly cheaper hotshoe trigger than can be connected via light-meter cable and then positioned and triggered in the same way as mine.

Amazon Wireless Hot Shoe Slave

17. Multi purpose lightweight clamps.

As simple as they sound. Just pick up a few cheap clamps. These cheaper plastic ones will break but they are a lot lighter to carry around so ensure you have a bunch of them handy just in case.

Amazon Mini Clamps


Okay so that's my lone-wolf lighting kit bag. If you have any questions on any of that then let me know. Of course I'd love to know what's in yours and if there's an item you have that you never leave home without. Also, do you see something here that  you've done away with to use something else? I'd love to hear if you swear by other alternative pieces of gear that do a similar job but better :) Let me know in the comments.


:WARNING: Yet more cool stuff to buy below!


That's right, I'm finally brining my workshops Stateside. After years of being pestered to sort this out I'm now bringing my Coloured Gels Workshop, my NEW Colour & Exposure Workshop and my entire Post-Pro Workshop to the U.S. of for the first time. If you'd like find out and to register your interest then check out the link provided. JHP U.S. Workshops


I have also just released a brand new 22 hour complete Gelled Lighting Tutorial video. I go over everything from studio lighting setups with gels to being on location with gels plus I also go through my complete retouching and post pro workflow. For more details and complete breakdown of everything that's include check out my Coloured Gel Portraits Tutorial


I also offer comprehensive coloured gel packs. These collections of gels are what I use day to day to create some of the most highly saturated colours around. If you're looking at getting into gelled lighting or need to get stronger and richer colours in your coloured gel work why not check out my Jake Hicks Photography Gel Packs

Tuesday 08.08.17
Posted by Jake Hicks
 

How to contact and book a photoshoot with a model

Whether you've been shooting for five minutes or five years, there will come a time when you'll have to book a shoot with another person. Maybe it will be a friend or coworker and maybe it will be a full-time professional model. Whoever you're contacting though, they'll need to know some fundamental facts about what's involved in your shoot before they agree to be involved. In this article I discuss some of the key things you should include when contacting and booking a model.

A lot of shoots rely heavily on the fact that a model is going to be there. A properly constructed message to a model can certainly reduce the chances of them declining the shoot or failing to turn up.

A lot of shoots rely heavily on the fact that a model is going to be there. A properly constructed message to a model can certainly reduce the chances of them declining the shoot or failing to turn up.

I'll start by saying that I'm no self proclaimed expert on contacting models, but I'd like to think that based on the huge number of shoots I've booked and planned over the years that I have a fairly solid understanding of what's important information when it comes to organising shoots and what's not. It's also worth noting that there is no one perfect way of doing this, we all prefer to be contacted in  different ways and we all consider certain shoot information to be more important over others. But I do believe that a properly constructed message that contains some of the following key information can go a long way to ensuring a shoot goes ahead as planned. A professional sounding message can reassure models that you know what you're doing and considering that out of the models I've personally booked I have never had a 'no-show' and only three or four cancellations (all for seemingly legitimate reasons) over the years I'd like to think I'm doing something right.

But don't take my word for it, after all I'm just a photographer. So to further cement my initial ideas on best practices for contacting models, I asked them.

A few weeks ago I put together a simple and straight forward questionnaire and asked all of the models I knew to take five minutes to give me their opinions on how best to get in touch with them when booking a photoshoot. 

Over 40 models kindly gave their time and feedback in the questionnaire and the foundation of this article is built on their responses and what they want to see in the messages they receive from us.
 
There's a huge amount of planning and preparation that goes into the perfect photoshoot and that includes contacting and booking a model.

There's a huge amount of planning and preparation that goes into the perfect photoshoot and that includes contacting and booking a model.

First Contact - What not to do

No matter what you're planning to shoot, there will always be a first message. To me this is the most important message and getting this right or wrong can determine a huge amount about how the shoot evolves into actually happening or not.

The photographic industry has never had so many people taking pictures as it does now and it has to be said that most of those photographers are not relying on taking pictures to feed their families. There's absolutely nothing wrong with this, some of the best photographers I know don't shoot professionally and enjoy the act of taking pictures in their spare time simply to enjoy taking pictures. The reason I mention this is to highlight the fact that whether or not you're shooting commercially or for fun, the model you're most likely contacting is trying to make a living from it. Nearly every model I've ever worked with is incredibly dedicated and hardworking and they take their job very seriously.

According to my questionnaire, 53% of the models I asked were booking between 5 - 20 shoots per month. They are busy people.

So if you are a photographer shooting for fun, remember that the person you're contacting is at work when you get in touch with them. They're looking at diaries and accounts, juggling traveling expenses and traveling times so please think twice about contacting a professional model in the same way you would organise a night out with the lads.

“Hi darling, I saw your photos on Instagram and you look gorgeous in them. Fancy shooting with me.”
— anonymous
 

First Contact - What you should do

Okay so we've established that modelling is a real job and that they're professionals or at the very least aspiring professionals. Consequently we should contact them like we contact any other business person. They need to know when the shoot is going to be, what's involved, how much it's going to cost etc. This may seem pretty obvious but trust me there's plenty of examples of information being missed off in the initial contact where this first message should clearly and comprehensively explain what's involved, who's involved and when it's going to take place. But let's take a deeper look at what we should include when initiating contact with a model.

“Just be cool! Remember, you’re talking to a person, not an object that purely exists to be photographed. Find the right balance between professional and casual and always be honest about what you are looking for.”
— Model: Josefien - Instagram.com/necianavine
 

Questionnaire Findings

The whole purpose of the model questionnaire was for this article. The internet is not known for its forgiving nature and although I thought I had all of the answers on how to contact a model, I felt I needed to back that knowledge up with evidence from the people in question. Firstly, I was obviously very humbled by the overwhelming response from the models who took part and their eagerness to contribute to this piece, (I get the feeling this subject is something that a lot of models have strong opinions on and rightly so) but I also learned a few things from the results myself as well.

Let's take a quick look at the demographic of the models that took part in the questionnaire. Remember that over 40 models took part in this so the following graphs shows answers as percentages of that total.

Are you represented by a modelling agency?

How many shoots do you book per month?

What level do you model up too?

Who books your shoots?

I think it's fair to say that most of the models who took part are not only very busy people but are also solely responsible for booking their own shoots. This is perfect for the article in question because it not only highlights the fact that you're contacting busy professionals but also that the model you're trying to book will be the actual person reading your message.


Should I do anything before I get in contact with a model?

Before we contact anybody about anything we need to know a little about them first. Every single model is different and they all have varying rates, preferred contact methods and 'levels' (this is the term that dictates what styles of photography a model is comfortable modelling up to, these include straight fashion, lingerie, implied nude and nude etc). So what information should we look out for before putting 'fingers to keyboard' and getting in touch for the first time.

In this next section of the questionnaire I asked models what was important to know about them before getting in touch.

Do you agree that a photographer should read your modelling profile before getting in touch?

Do you agree that a photographer should understand whether or not you shoot for TF (free) or paid shoots only?

Do you agree that a photographer should understand your modelling 'levels' before getting in touch?

Do you agree that a photographer should know where you are based before getting in touch?

So based on the information that was provided to us by our gracious models, we can see that a few things are pretty important to understand about them before getting in touch.

Firstly, 90% of models agreed that reading their modelling profile was important before getting in touch. It seems obvious I know but so often you'll ask a model a question that is clearly already outlined in their online profile.

Secondly, a staggering 95% of models said they agreed that photographers should understand their modelling levels before getting in touch with them. Again, this seems obvious but DO NOT contact a model and ask them to model nude if they only model up to lingerie levels.


What details should your initial message contain?

In the questionnaire I also asked the models for some pointers on specific content that the first message should contain when we reach out to them initially. 

“Try to give all the important and useful information in the first email. The location, duration, date, pay, and a little initial info about the shoot content are very important, but unless the booking of the shoot relies heavily on the exact content, your ideas can be exchanged later once a shoot is confirmed.
Use good English and be polite and friendly, we really appreciate that.”
— Model: Lizzie Bayliss - www.lizziebayliss.co.uk
 

How important is it to have the date and time of the shoot in the initial message?

How important is the location of the shoot in the initial message?

How important is it to include whether this is a paid or TF (free) shoot in the initial message?

How important is it to hear the photographers styling ideas in the first message?

Again, we have some more obvious results here. Things like date and time, location and whether the shoot will be paid or not should definitely be included in the first message. Your ideas and styling options for the shoot are usually preferred but not essential.


Writing the message

Okay so to those millennials with the attention span of a cornered badger who just skipped all the way down here, firstly welcome and thanks for joining us. Here's the 'magic bullet' content you were after.

I'll mention again that there is no one right answer for everybody but here is what I do and here is what I write. I personally choose to write one very comprehensive first message that it is clearly headed in bold at the start of each relevant topic. This way everything is there and if certain models aren't too concerned about styling notes on a shoot that's months away, they can skip it and come back to it later. Also I've found that using clear headers like this for each section allows you to find pertinent information in the message later on like location and time without having to read the entire thing again.

“Contain as much relevant info in the initial email as possible such as when you’d be looking to book, even something as vague as a weekend in June can be a good starting point. State how long you’d ideally be looking to book, any potential locations / studios you were thinking about using. Any links to inspiration etc.. is handy too.” “The more information like this, the easier it is (especially for very busy models) to answer the majority of your questions and get a shoot organised in good time rather than lots of unnecessary email ping pong.”
— Model: Atalanta - www.atalantamodel.com

The following letter is a good example of what I would typically send as an initial message to a model if I was planing a test shoot.


Dear 'Model Name', 

I am in the process of organising a test shoot and I am reaching out to you as a model because I came across your portfolio online and loved your work. If you don't mind I'd just like to check your availability and if you'd consider working with me on this project.

Dates & Times

I was looking to arrange this shoot sometime towards the end of this month. Do you work during the week or only on the weekends as I'd prefer one day during the week if that's possible. I know you're based quite far from me so I'm pretty flexible on a start time. I normally recommend starting at around 12 noon and finishing up around 6pm if that helps you with travel times but like I mentioned, I'm flexible on this if this doesn't work for you. Please let me know what dates you have available.

Shoot Location

I am currently based in 'state your location' and I am a five minute walk from the nearest train station if that helps you plan your travel arrangements.

A lot of my test shoots tend to be shot here in my home studio. Space is limited but some of my best shoots and collaborations have been shot here including the shoot I did a a couple of months ago with 'insert model name' so they can tell you all about it you want to know more 'insert a link to the shoot with the aforementioned model'.

Like I mentioned, I'm super easy to get to via train as the station is a two minute walk from my place and I can come and collect you off the train if you like. If you're driving instead, just let me know and I'll get you the address details and parking arrangements.

The Shoot Plan

I had some lighting ideas I wanted to put into practice but I can also get some shots more tailored to what you were after as well. 'Insert your predicted shoot times here e.g. Normally a shoot is 4-5 hours long and we would get at least three or four very different sets done in that time'. At the moment I'm shooting a lot of coloured lighting shots so that would probably be a key attribute in our shoot together too. 

Styling

Regarding styling, I'm happy to hear your thoughts on what you'd like to shoot in, especially if you have something interesting or more unique in mind or available. You should be able to get a pretty good idea of what works and what doesn't in my shoots from my site but as a general guide there are a few items that are always winners. Take a look at these previous shoots and ideas to see what I mean: 'insert links to previous shoots or mood boards here'

Any questions at all then please feel free to get in touch as I'd love to hear your thoughts on this too.

Also if you have some styling ideas, please feel free to either send me some shots or links of what you're thinking of so I can better plan what would look good with them lighting wise.

Final Images

From our test shoot you would look to get a minimum of 'Insert number of images you're happy you can deliver here' un-watermarked, hi-resolution, fully retouched files that I would choose. You would receive these over the period of around 4-6 weeks as I work on them around my commercial work.

…and finally (I promise)

Haha, I'm sorry if that's an information overload but I thought it better to get as much info across from the start to avoid too many messages backwards and forwards and so that you knew what you were getting into from the beginning.

I'd love to hear your thoughts though and by all means I'm always open to suggestions.

Thanks again, enjoy the rest of your week and I very much look forward to working with you soon :)

Kind regards

Your Name

Your Email

Your Website


So that's the message I send out and I amend it to suit specific needs like if it's a paid shoot instead a test shoot for example. Also let me explain a little further on some of the information I shared in this message.

The Opening Paragraph

The opening lines I've included here are pretty generic for the purpose of this article and I would advise you to tailor it more specifically to the model you wish to contact. The key points to include though are; state as early as possible if this is going to be a paid or test/free shoot. This is just courtesy as sometimes a model is so busy she's really only looking for paid jobs regardless of how amazing your portfolio might be. Secondly be excited about the prospect of working with them but don't be overly creepy. Avoid things like highlighting specific body parts that you love about them and avoid referring to models with terms like 'love', 'gorgeous' and 'darling'.

Dates & Times Details

You'll notice that I was specific but not too specific on a date. We all know models are busy so don't send your first message with only one option open to them. There's nothing worse than messages bouncing back and fourth trying to pin a day down so give them a few options. Also, check if they work during the week too, some models are excellent at what they do but might have another day job that prohibits them from working during week. Find this out early on to establish their availability.

Also, remember that they're the ones travelling to you, be sensible and please be realistic about your start time expectations. I think it's fair to say that a lot of the modelling community is fairly young, they may not have 'made it big' like you just yet and unfortunately may not have their own vehicle so will have to use public transport. Public transport takes time so provide them with information about the surrounding train or bus stations if you can.

Shoot Location Details

You'll notice that I not only stated where geographically I would be shooting but I also specified it was my home. This is an important distinction to make as it can sometimes be a shock to the model if she was expecting to turn up at a studio but when she arrives, she's  actually entering your home. A lot of photographers shoot from their home and there's nothing wrong with this but it's about being completely transparent right from the start. I also used this as an opportunity to include a link to a previous shoot with another well known model and I even went as far as to recommend they get in touch with them if they would like to know more about the location and experience. Again, I will reiterate that it can be a bit intimidating going to a strangers home for the first time so giving the model the option to check everything is okay with another model is a reassuring statement. Never underestimate how connected models are with other models as they wont hesitate to contact one another if they have doubts about the shoot.

I have also tried to make it as easy as possible for them to say yes by including details about convenient public transport nearby. I also mentioned that I would happily meet them at the train station too. Again this is another sign that you're well intentioned and a half decent human being for wanting to help them with all their bags etc. But most importantly, some models like to meet publicly first and you meeting them at the station is yet another reassurance that they can walk away if need be over simply turning up on your doorstep and hoping for the best.

“Since many photographers are males, and they usually address female models, they have to be aware, not to be crass- not to be creeps.
No sane woman would say yes to “hey, i’m a photographer, want me to shoot you?” nude or clothed, it’s not professional.
If you want to be seen as a pro, conduct yourself in such a manner- write a nice long message detailing your name and experience, why did you address me specifically, what project you have in mind (including style and location) and a rough date. Don’t use casual language which can be interpreted as a come-on, attach previous work, and be straight forward about whether it’s a paid shoot or not, how many edited pics will the model receive and after how long.”
— Model: Gal BePole - www.galbepole.com

Shoot Plan Details

In this first message you don't need to go into too much detail about the shoot but I still feel it's a good idea to include just a couple of sentences about what you're planning. Things like how many sets you're planning on shooting, whether it will be all indoors or some outdoors etc. Again this info can be handy for the model to have a cursory glance at. Nothing screams 'I don't know what I'm doing' more than 'Hi I'd like to book you for two hours and shoot seven different sets both indoors and out'.

Styling Details

Again, styling details needn't contain too much information and details in this first message but I still think it's reassuring for the model to glance at before they book a shoot. The reason for this is because it's a clear indicator of your shoot intentions prior to the shoot. Some models have different rates for different 'levels' so if you're paying for fashion level modelling yet you're asking for her to only bring lingerie this is a big alarm bell. Again I'll reiterate, be totally transparent about your shoot intentions from the start. There's nothing wrong with wanting to shoot lingerie, just make it clear from the start.

Final Images Details

This section is probably going to cause you the most problems starting out because there is no information anywhere on what you should or should not offer to models after a test shoot. In my questionnaire I asked models what importance they gave to receiving information on the retouched files they would receive in exchange for their time at a 'test' shoot. 

How important is it to understand exactly what you get in exchange for your time on a 'test' shoot?

How important is it to know how long you'll have to wait before you receive your images from a 'test' shoot?

100% of models said that they would either definitely want to know or would prefer/would be nice to know what to expect in return for their time at a test shoot.

What you choose to offer in exchange for a test shoot will ultimately be up to you but I personally think that a model receiving 15 or more exceptional images 1-2 months after the shoot is minimum requirement for an afternoons worth of their time.

I'll also add here that I understand I'm in a privileged position and that I've been doing this a long time and as such I am able to dictate more than I could do ten years ago. I only shoot a handful of test shoots a year now and as such it takes me a lot longer to retouch their images around my commercial projects.

I also stipulate that I will be deciding which images get retouched. These are things that I couldn't get away with ten years ago so if you're starting out you might want to be realistic on what you're offering. For example a lot of models would want to choose a handful of shots themselves. You can offer to split it and say 'you'll get 10 shots, you can choose 5 images and I'll retouch them for you and I'll choose 5'. I would also say that most models expect to see some retouched images within 4 weeks of a shoot.

Whatever you decide make sure it's clearly stated in your initial message so that both parties are officially happy and no bad feelings are felt after the shoot. Additionally, whatever you decide to offer, STICK TO IT. Don't say 'okay you'll get 20 shots within two weeks' and then only provide 5 or worse, none. If that happens, you're a bad photographer and you can't blame it on bad 'modelling' so there wasn't many shots. It's our job to take great pictures regardless. If you don't want that pressure of guaranteeing great shots then perhaps a test shoot isn't for you, pay the model instead. Do your best on the day, pay the model for their time and treat it as a training exercise without the stress of having to perform. That way if the shots turn out crap, you learn something and the model isn't hounding you for images and spreading bad words about you. If the shots turn out great then that's a win no matter what. You can then also decide to share the shots with the model if you'd like them to share your awesomeness too.

Make the shoot happen.

This might seem like a lot to cover in a single message but all of our time is precious. If I book a shoot, I don't want to give the model any reason whatsoever to cancel or postpone and all of these positives add up to them not worrying about what to expect on the day of the shoot. You are essentially taking away every single problem and providing them only with solutions and reassurances. If you do all of this, you'll book way more shoots and reduce your cancellations dramatically.

“Just to be conscientious, especially when talking to a young lady who is considering shooting with someone she does not know or has not worked with. If you can guide her to testimonials or people you have worked with previously for piece of mind then that will go a long way to putting her mind at ease. It’s not the easiest industry to break into when you’re starting out so putting yourself in someone else’s shoes and doing what you can to reassure them is a great way to build rapport and trust prior to the shoot, often resulting in better images when someone feels more comfortable around you.”
— Model: Sammie Howe - instagram.com/sammie_howe
 

Final thoughts worth mentioning

I love a good graph as much as the next guy but I promise you these are the last of them. Okay so you've finally got your message ready to send but wait, before you send it what is the best channel to send this message on?

When a photographer contacts you, what are your preferred methods of initial contact?

Multiple answers possible.

Based on these results, most models prefer to be contacted via email, Facebook messenger and directly via their website.


What happens now?

So you've sent your perfect message, the model has agreed to everything and you're both happy with the date and time so what should you do between now and the shoot date? Some models will provide you with a lot of contact information including a phone number prior to your shoot. It's worth bearing in mind that this phone number is often only provided to you for last minute updates and changes to the shoot. That phone number is not provided to you for a quick chat once a day several weeks prior to the shoot 'to discuss the shoot'. If you would like to remind your model about your photoshoot, take a look at what models recommend as the best way to stay in touch and remind them of the date and time.

Do you give out your phone number to photographers prior to a photoshoot?

After the shoot details have been confirmed, how many times do you feel it is appropriate for the photographer to 'remind' you of the details?

According to this, most models are more than happy to provide a number to contact them on. Like we established at the start of this article, models are busy professionals just like any other and as such only require one or two friendly reminders prior to shooting.

“- I prefer more details of the logistics (date, time, payment and location) first rather than ideas. Nothing worse than discussing and wasting time about their ideas, sharing pictures to find out he wants to shoot for two hours somewhere while is four hours away next week (when I’m fully booked for the next 3 months).
- A link to current work (not sending images in the message).
- If not know then a name of a model he has worked with recently that I would know that I can contact for a reference if they are not on purpleport.
- To always keep information about a shoot in one place rather than spread it through different media channels.
- Phone calls discussing a shoot are not ideal but sharing numbers is vital for communication on the day.”
— Model: Anonymous
 

Millennial Check List

So although this article was more of a thesis, I felt that I was in an extremely privileged position thanks to that fantastic data I had collected via the model questionnaire. All of that data came from professional models on some of the pitfalls we as photographers might encounter whilst arranging a photoshoot with them and as such I wanted to share as many of my findings as possible.

I totally get that not everybody wants to read all of that data so here's the highlights from what I've learned regarding contacting a model for a photoshoot.

  • Whether you're shooting for fun or commercially, remember that the person you're contacting is a professional person and not an object to photographed.
  • Find the balance of professional and casual when initiating contact.
  • Be positive and excited about the prospect of working with them but don't be a creep.
  • Always be entirely transparent about your photoshoots intensions from the start.
  • Ensure that you've read the models profile to check if they're appropriate for your shoot.
  • Always check the modelling levels of the model you're contacting. For example don't ask a lingerie model to pose nude.
  • If you're contacting a model about a test shoot, make sure they're happy to consider working for free.
  • In you're initial message to a potential model be sure to include these key details: is the shoot paid or not, some potential dates, your location, some basic styling and shoot ideas and what they can expect in return if it's a test shoot.
  • If at all possible, try and find the models preferred method of contact but this is normally either via email or Facebook Messenger.
  • In preparation for your shoot it's probably a good idea to remind your model once or twice in the week leading up to the shoot.
“Be professional; phrase things correctly and make sure the message is readable and makes sense. Include whatever details of the shoot that you have - paid or not paid, levels, the idea or theme for the shoot. Ideally the more details about possible outfits or looks the better, otherwise it can be very vague...which makes packing and planning hard!”
— Model - Neva Moria
 

Questions and Further Reading

Congratulations indeed if you read all of that. You are either writing a research paper yourself or you're about to dramatically increase the number of shoots you book and dramatically reduce the chances of models cancelling on you in the future. I appreciate that there is lot of info here and if you need to just pick the relevant sections out for yourself then please do so. I personally feel that there isn't an article out there like this already and I really wanted to back it up with the data that the working models so graciously provided.

To keep this article even remotely sensible I unfortunately had to omit certain data. If you'd like to see the results in it's entirety then I will provide a separate page of graphs and charts that you can pour over to your hearts content. If you use any of the data collected here then I would insist on being credited and sourced in the relevant document. You can find the complete questionnaire result here. Model Questionnaire Results Page

If you'd like to see the original full questionnaire, then it's still online here Model Questionnaire

As always, if you have any questions then do not hesitate to speak out and I'll do my best to answer them or at the very least ask a model that might know more than me.

Feel free to share this with your photographer friends as I think it can help photographers of all skill levels to develop better working relationships with models.

“...and my last bit of advice would be, us models don’t bite! ;)”
— Model: Amber Tutton - www.amber-tutton.com

All that's left to do now is to sincerely thank all of the models who took part in this questionnaire because without them this article would not have been possible. A lot of the models who took part in the questionnaire asked to be kept anonymous which is fine but plenty of them asked to be credited below so please make sure you check out their outstanding portfolios. May the Modelling-Gods have mercy on your poor photographer soul if you dare send any of these models a crap message though - you have been warned ;)

  • Ayla Rose - https://www.aylarosemodel.com
  • Layla - Www.laylabroers.nl
  • Josefien - www.instagram.com/necianavine
  • Lizzie Bayliss - www.lizziebayliss.co.uk
  • Neva Moria - 
  • Atalanta - www.atalantamodel.com
  • Jaye Hicks - https://www.instagram.com/jaye.hicks/
  • Gemma Huh - www.gemmahuh.co.uk
  • RoisinMM - www.facebook.com/roisinmm
  • Amber Tutton - Www.amber-Tutton.co.uk
  • Nina Hannaway - https://www.instagram.com/ninahannaway_fitnessmodel/
  • Sammie Howe - https://www.instagram.com/sammie_howe/
  • Rebecca Lotus - www.instagram.com/rebeccalotusuk
  • Maddi Marshall - https://m.facebook.com/Maddi-Model-394984970885463/
  • Sian - Siân.fran.sisco
  • Samantha Robinson - https://m.facebook.com/samalama.bangbang/
  • Gal BePole - www.galbepole.com
  • Lignum Vitae - www.instagram.com/lignumvitaemodel

:WARNING: Outstanding sales opportunities are mere moments away :D


That's right, I'm finally brining my workshops Stateside. After years of being pestered to sort this out I'm now bringing my Coloured Gels Workshop, my NEW Colour & Exposure Workshop and my entire Post-Pro Workshop to the U.S. of for the first time. If you'd like find out and to register your interest then check out the link provided. JHP U.S. Workshops


I have also just released a brand new 22 hour complete Gelled Lighting Tutorial video. I go over everything from studio lighting setups with gels to being on location with gels plus I also go through my complete retouching and post pro workflow. For more details and complete breakdown of everything that's include check out my Coloured Gel Portraits Tutorial


I also offer comprehensive coloured gel packs. These collections of gels are what I use day to day to create some of the most highly saturated colours around. If you're looking at getting into gelled lighting or need to get stronger and richer colours in your coloured gel work why not check out my Jake Hicks Photography Gel Packs


If you're interested in any of my work and would like to know more about how I created some of my shots then why not check out my workshops. Here you can find out everything there is to know about Gelled Lighting, Long Exposure Flash Photography and my entire Post-Pro Workflow. Jake Hicks Photography - Workshops

Tuesday 08.01.17
Posted by Jake Hicks
Comments: 1
 

DIY Camera Case Dividers for Less Than £10

I'm as interested in an 'easy life' as much as the next person, so if somebody else has already done the hard work of making a product for me, and I can purchase it for a reasonable price, I'm all over it. After all why make life hard for yourself if you don't have too. Unfortunately there are times when you literally can't purchase what you need and the only option is to get all arts-and-crafts on the problem!

I finally got around to upgrading my old long soft-bags to the Peli hard cases. Unfortunately I couldn't find quote the case dividers I needed...

I finally got around to upgrading my old long soft-bags to the Peli hard cases. Unfortunately I couldn't find quote the case dividers I needed...

I recently decided to upgrade my flash-head carrying bags from the old, long, soft and cumbersome kit bags to the sleek, compact and robust Peli cases. These new 1440 Peli cases hold three of my strobes upright, side-by-side. This upgrade not only offers me far more protection on the heads but it also makes it a lot easier to transport them with their wheels. But although they fit my three strobes perfectly, I needed some way of separating them inside to avoid them bashing against one another in transit. Thankfully Peli does offer many varying solutions to this problem including foam and of course their own standard dividers but alas they did not have the correct inserts for what I needed for separating the lights and I would have had to remove too much foam for it to be effective. There is one other option as well for all you Peli case fans and that's the TrekPak dividers. I love the simplistic nature of these but unfortunately TrekPak don't make them for the size Peli case I have :(

'If you can't buy it, build it.'

So when money can't help you, the only option is to make your own dividers and thankfully it's actually pretty easy. This quick tutorial is for making dividers for my Peli case but exactly the same thing can be applied to smaller soft camera bags too.

What you will need

  • Fairly stiff Cardboard
  • High density foam (not as tricky to find as you might think)
  • Sharp craft knife
  • Metal ruler to cut straight lines
  • Tape measure to ......measure stuff
  • Your preferred fabric (I personally used Nylon and that's what I would recommend)
  • Velcro strips (preferably with self adhesive sticky-backs)
  • Needle and thread (This is the worst part but bear with me)
  • Stapler (optional)
 

Cardboard

I shouldn't need to explain this one I'm sure but if you're stuck, just stack up two or three layers of cereal box cardboard to make one thicker piece. The cardboard is only there to offer additional support and is sandwiched between two pieces of foam. So don't worry, it will be completely hidden and nobody will ever know that you still love Lucky Charms.

High Density Foam

Like I mentioned before, this is actually really easy to get a hold of via sites like eBay who will sell it to you in small quantities. Here's a link to the one I used 60"x20" High Density Foam. Mine cost around £4.85 and it was the thinnest foam at a quarter of an inch thick.


Fabric

This is something that you'll need to decide for yourself but my recommendation is the Nylon. This fabric is essentially made of lots of interlinked plastic threads that means its harder to tear or rip as soon as you cut into it like other fabrics. This is very useful for us as we'll be making lots of thread holes close to its edges, so unless you're a master seamstress it just makes our lives a lot easier. Here's link to the sheet I got; 4oz Waterproof Black PU Coated Nylon Fabric. I bought a metre of this black fabric for around £3.75 but you can obviously get whatever colour you'd prefer to match you specific bag.


Velcro

This is that 'hook & loop' stuff that makes all the noise. You'll need enough of it for the size of the project you wish attempt but  I got a metre of it for £1.19. You're looking for the 'hook' part though as nearly all camera cases and bags have the 'loop' part as their lining, meaning that you can place your dividers anywhere inside. Here's a link to the strip I bought; 1m 20mm Black Self Adhesive Hook & Loop Fastening. Whatever you decide to go for it would be my recommendation that you get the self adhesive ones as again this will make your life a lot easier. The sticky side is the one covered in the white strip on one side in the picture.


Needle and Thread

This is the worst bit but to really make your camera dividers stand the test of time you'll need to do a little bit of sewing. WAIT! Before you close this window, you don't need any prior knowledge and it really is pretty quick and easy so I promise its worth doing. I had four pretty large panel dividers to make for my two cases and it took me about an hour to do them by hand. If you have access to a sewing machine (and a fully trained operator ;) ) though this is literally 5 minutes work. Obviously, if you have smaller panels to make it'll take no time at all. I'm sure you already have thread at home somewhere but if you don't, here's what I bought. Machine Thread 120s Spun Polyester 1000YD. And no I have no clue why on Earth I bought a THOUSAND YARDS of thread :O Pretty sure that's me done for LIFE!


Making the Dividers

Step 1

First off you'll need to measure the space for the dividers. Measure the inside of your case or bag so that you can cut out your cardboard. Pro Tip: Take care to check that the space is symmetrical. My Peli case has a slanted side on one side so I had to account for that too.


Step 2

Next up you'll need to translate those measurements to your cardboard. Once you've done that, you'll need to take care cutting the dividers out.

NOTE: Make sure to use a metal edge to keep the lines straight and alway ensure you're cutting into something below that wont lead to you spending a night on the sofa!


Step 3

Now that you've got you cardboard cutout, place it on top of your foam and cut around it again. NOTE: You'll need two pieces of foam for each piece of cardboard as we'll actually be sandwiching the cardboard between the two.


Step 4

Next up we need to cut our fabric. To do this I placed my stack of two bits of foam and sheet of cardboard and allowed the fabric to hang over by about 1-2 inches all the way around.

NOTE: We need this extra width to allow for the Velcro flaps to extend beyond the width of the actual divider.

To reduce the amount of sewing I also just folded the fabric back on itself to sandwich the whole lot in the middle rather than cutting two pieces of fabric top and bottom.


Step 5

Once you have your fabric, remove the foam and cardboard and turn it inside-out and begin to sew around the outside of two sides. Once you've done that, turn the whole thing inside-out again to reveal the proper side which will in turn hide all of your horrendous sewing work....just speaking from experience :(

Start to sew up your divider pocket by sewing along two sides (middle pic) ensuring you have one open side. When you're done simply turn the pocket inside out to hide the 'handiwork' (right hand image).

Start to sew up your divider pocket by sewing along two sides (middle pic) ensuring you have one open side. When you're done simply turn the pocket inside out to hide the 'handiwork' (right hand image).

 
You can see in the right hand image that I've stapled all the way around where I need to sew. This makes life a LOT easier without the foam ad cardboard moving about inside when you're sewing.

You can see in the right hand image that I've stapled all the way around where I need to sew. This makes life a LOT easier without the foam ad cardboard moving about inside when you're sewing.

Step 6

Now place your sandwiched foam and cardboard inside the fabric pocket via the one open end. This next step is more personal preference than anything but apart from looking as ugly as all hell this is actually a great way to hold everything in place when you start to sew it up. With the foam and cardboard inside, I actually went around and stapled it all into place. Once you've finished sewing along the line of staples you simply remove the staples and you're done. Of course there is no shame in just stapling the whole thing in this very manly way and leaving it. It serves its purpose and nobody will see it in you bag ...... but I'll know ;)


Step 7

Once you've stapled it, proceed to sew around the line of staples. This will ensure everything stays where it's meant to and leaves you flaps on either side to attach the velcro.

Once you're done with the sewing you can remove the staples.

Above you can see this is the most time consuming step. Firstly staple everything in place (left hand shot), next sew along the staple line (middle image) and then finally remove the staples (right hand shot).

Above you can see this is the most time consuming step. Firstly staple everything in place (left hand shot), next sew along the staple line (middle image) and then finally remove the staples (right hand shot).


Step 8

Now all that's left to do is affix your Velcro strips down each of the sides and you're done.

In my case the 'loop' section of Velcro only extends two thirds of the way up the case so that's why I only put the 'hook' part of the Velcro two thirds of the way up the divider. I would recommend you put as much 'hook' as you have 'loop' in your c…

In my case the 'loop' section of Velcro only extends two thirds of the way up the case so that's why I only put the 'hook' part of the Velcro two thirds of the way up the divider. I would recommend you put as much 'hook' as you have 'loop' in your case.

 
The same principles learnt here can make dividers big or small to fit any bag :)

The same principles learnt here can make dividers big or small to fit any bag :)

Congratulations!

You did it, you made a whole bunch of camera case dividers for under a tenner! :D Plus I'm pretty sure you can now add seamstress to the C.V.

Remember: I know I've just shown you how to make these camera case dividers for my large case but all the same ideas and techniques are just as applicable for far smaller camera bags too.

Now that you have your camera case dividers all finished its time to insert them into your case and never speak about how horrendous your sewing skills are ever again.


As always if you have any questions or queries feel free to fire away in the comments below. Also if you know of anywhere or anybody who actually makes bespoke dividers for all shapes and sizes then let me know too.


:WARNING: I just saved you some money so feel free to be tempted to spend it below ;)


If you're interested in any of my work and would like to know more about how I created some of my shots then why not check out my workshops. Here you can find out everything there is to know about Gelled Lighting, Long Exposure Flash Photography and my entire Post-Pro Workflow. Jake Hicks Photography - Workshops


I have also just released a brand new 22 hour complete Gelled Lighting Tutorial video. I go over everything from studio lighting setups with gels to being on location with gels plus I also go through my complete retouching and post pro workflow. For more details and complete breakdown of everything that's include check out my Coloured Gel Portraits Tutorial


I also offer comprehensive coloured gel packs. These collections of gels are what I use day to day to create some of the most highly saturated colours around. If you're looking at getting into gelled lighting or need to get stronger and richer colours in your coloured gel work why not check out my Jake Hicks Photography Gel Packs

Tuesday 07.18.17
Posted by Jake Hicks
Comments: 6
 

RGG EDU Podcast with Jake Hicks Photography

In this episode Gary and Rob sit down with the king of gelled lighting to talk about his career as a portrait photographer.

Tuesday 07.04.17
Posted by Jake Hicks
 

Lensbaby Velvet 85mm - Lens Review

The new Lensbaby Velvet 85

The new Lensbaby Velvet 85

I've been using several of the Lensbaby products for many years and most people will have heard of the company and what they do by now. Lensbaby as a lens making company has a long line of lenses currently on the market and they are probably most well known for producing what we might call 'art' lenses.

These so-called art lenses are the lenses that in my opinion produce a very specific look and Lensbaby's most popular products tend to distort the scene in such a way as to create a very unique and attention grabbing look. Their most popular lenses for this effect being the Composer Pro Sweet 50 that creates a stunning 'in-camera' radial blur and the Composer Pro Edge 80 that creates that iconic toy-town (tilt-shift) look but at a tenth of the cost of the other branded tilt-shift lenses.

More recently Lensbaby have taken a small step back from the aggressively artistic lenses like the ones previously mentioned and started to explore a more subtle, yet refined look that their lenses produce. In 2015 Lensbaby brought the Velvet 56 to market and then last year in 2016 the Twist 60, both of which were very well received for their slightly more user-friendly look so it was only a matter of time before they really targeted a solid portrait lens like this new Velvet 85.

The original Velvet 56 lens (used to capture the image above)&nbsp;that was released in 2015 was very well received for its subtle yet effective optics.&nbsp;

The original Velvet 56 lens (used to capture the image above) that was released in 2015 was very well received for its subtle yet effective optics. 

I was very fortunate to be one of the first people to get the Velvet 56 lens a couple of years ago and I have to say I loved the images it created, if you're interested in reading my review on that then please check it out here The Lensbaby Velvet 56mm f1.6 Lens Review. Like I said, I loved the results the Velvet 56 produced and it's an incredibly clean and subtle effect that doesn't dominate and entire image. But the 56mm focal length has its limitations for certain portrait work and although it didn't particularly bother me, I know there was a lot of concern from other portrait shooters at the time that this 56mm couldn't be used for their day-to-day portrait work.

It was only a matter of time before Lensbaby took the beloved look of the Velvet 56 and implemented it into a more traditional portrait focal length and thus the Velvet 85 was born.


The Velvet 85 Effect

Let's cut to the most important factor first, what look does the Velvet 85 produce? What makes this 85mm lens different to every other 85mm lens? The short answer is that as far as I can tell the look is almost identical to the look that the Velvet 56 produces, so if you're familiar with that and all you were looking for is an 85mm version of it you're done, it's here. If on the other hand you're brand new to the Velvet look, let me try to explain it alongside some images. First and foremost I'll reiterate again, this is not a dramatic art lens like some of the other Lensbaby products, in fact at higher apertures like f8 and above the Velvet's effect is barely noticeable at all and it's simply just an incredibly sharp 85mm portrait lens. It is at the lower apertures where the Velvet 85 really starts to come to life. Put simply the Velvet produces an image that on first glance looks like a simple soft glow. Look a little closer and you'll actually see that the image is made up almost two image, one being a sharp image and then the other being a glowing version of it on top. This look is most apparent when the lens is wide open of course and then as you stop down to f5.6 - f8 it's almost entirely gone.

Take a look at the series of shots below taken at varying apertures to see what I mean regarding the Velvet effect at f1.8 compared to f8. Images below are un-retouched raws

JakeHicksPhotography (1 of 6)a.jpg
JakeHicksPhotography (2 of 6)a.jpg
JakeHicksPhotography (3 of 6)a.jpg
JakeHicksPhotography (4 of 6)a.jpg
JakeHicksPhotography (5 of 6)a.jpg
JakeHicksPhotography (6 of 6)a.jpg
JakeHicksPhotography (1 of 6)a.jpg JakeHicksPhotography (2 of 6)a.jpg JakeHicksPhotography (3 of 6)a.jpg JakeHicksPhotography (4 of 6)a.jpg JakeHicksPhotography (5 of 6)a.jpg JakeHicksPhotography (6 of 6)a.jpg
View fullsize JakeHicksPhotography (1 of 6)a.jpg
View fullsize JakeHicksPhotography (2 of 6)a.jpg
View fullsize JakeHicksPhotography (3 of 6)a.jpg
View fullsize JakeHicksPhotography (4 of 6)a.jpg
View fullsize JakeHicksPhotography (5 of 6)a.jpg
View fullsize JakeHicksPhotography (6 of 6)a.jpg

Clicking on the above images will enlarge them

Now let's take a closer look below at a couple of these shots to see what I mean regarding the glowing image on top of a sharp one when wide open.

These images are simply close-up crops of the full size images above. Again, these are un-retoucehd raws. Click to enlarge

You should now be able to see what I'm referring too when I say about the glowing effect and when it's wide open like this at f1.8 it certainly is pretty dramatic. It's also worth pointing out my shortcomings as a mere human in that I seemed to have focused on the models eye furthest from the camera so it's actually the far eye that's in focus not the closest one. I thought I better mention that because at f1.8 the closest eye now appears out of focus. That's me, not the lens.

Another key attribute to the Velvet 85 lens is the slightly dewy look that the outside edge of the lens produces. It's almost like a vignette but rather than a darker edge the effect is a softer more dreamy edge to the frame. It's pretty hard to explain with words but take a look at the images below to see what I mean.

View fullsize JakeHicksPhotography (2 of 6)-2.jpg
View fullsize JakeHicksPhotography (3 of 6)-2.jpg

Clicking on the above images will enlarge them

In the above shots you should see what I mean by that slightly softer edge. Look at the chest area and certain sections of hair and you'll see that although they're on the same focal plane as the eyes which are in focus they appear a little softer. This is clearly one of the factors that made the original Velvet 56 lens so beloved and now that we have the same effect in a 85mm portrait lens there is surely some fantastic images awaiting to be taken with this lens.

It's also worth mentioning that although I very rarely leave the studio to take pictures I can see that if this lens has a background or distant objects to get its creamy vignetting teeth into that the Velvet effect would really shine. As a result I don't feel that my studio images do that effect justice so I look forward to seeing some shots with this outside of the studio too.


The Velvet 85 Look & Feel

Build

As with the previous Velvet 56 this Velvet 85 lens seems to be of an incredibly solid build. Its 530g weight does fill you with confidence regarding its build quality and you certainly feel like it's matte black metal casing will stand the test of time. The lens cap is also metal and sits snugly in place around the outside of the lens and finally for us Nikon shooters we have rear cap that stays on this time (haha just a personal minor gripe from previous lenses but I'm glad thats been sorted) :) ).

Focusing Ring

The lens has a very long travel distance for focusing that almost completely covers an entire 360 degree twist from minimum to maximum focal distance. That being said, this lens does have a much sought after 1:2 Macro functionality and the minimum focal distance on this 85mm lens is an impressive 24cm/9.5'. So once you remove that extreme in focusing the travel distance from 0.5m to infinity is a quarter turn. The focus ring itself is again reassuringly firm and just like the original Velvet 56 you have no fear of the lens focus slipping accidentally.

Aperture Ring

The aperture ring goes from f1.8 to f16 in whole stops and a quarter turn of the aperture ring would see you covering the entire range. It's important to note here that I actually have a beta model lens for the review. That being said, I have been assured that at this late stage the only differences between my model and the final production model is the distance between the numbers f2 and f1.8. On my version it looks like f21.8 is a thing but that wont be the case on yours. The aperture ring itself is firm but easy to move and the individual apertures aren't locked so if you wanted to have an aperture of f4 and a half you can adjust the aperture ring to do so.

Usability

Using the Velvet 85 is fairly straight forward and there was certainly no surprises. First and foremost though you need to remember that this is a manual focus lens and getting good with any manual focus lens takes time. As a guide I tend to shoot far more images than I think I need to when focusing manually as I am aware that a lot of them will be out of focus or at the very least not tack-sharp. If you're after some pointers on best ways to manual focus then you can check my articles on it here Tips on Getting Sharper Images with Manual Focus Lenses - Part 1 and Hacks for Getting Sharper Focus Shots - Part 2. One other important thing to note is that the apertures are fixed in view once they're selected. For example if you're looking through this lens at f16 the aperture hole will be tiny through the lens resulting in a fairly dark image to manual focus with. Conversely, focusing at f1.8 will result in a very bright image to focus with. In the studio I had no issues focusing up to f8 though so I don't think this would be an issue but certainly worth mentioning.

JakeHicksPhotography (2 of 10).jpg
JakeHicksPhotography (3 of 10).jpg
JakeHicksPhotography (4 of 10).jpg
JakeHicksPhotography (5 of 10).jpg
JakeHicksPhotography (6 of 10).jpg
JakeHicksPhotography (7 of 10).jpg
JakeHicksPhotography (8 of 10).jpg
JakeHicksPhotography (9 of 10).jpg
JakeHicksPhotography (10 of 10).jpg
JakeHicksPhotography (2 of 10).jpg JakeHicksPhotography (3 of 10).jpg JakeHicksPhotography (4 of 10).jpg JakeHicksPhotography (5 of 10).jpg JakeHicksPhotography (6 of 10).jpg JakeHicksPhotography (7 of 10).jpg JakeHicksPhotography (8 of 10).jpg JakeHicksPhotography (9 of 10).jpg JakeHicksPhotography (10 of 10).jpg
View fullsize JakeHicksPhotography (2 of 10).jpg
View fullsize JakeHicksPhotography (3 of 10).jpg
View fullsize JakeHicksPhotography (4 of 10).jpg
View fullsize JakeHicksPhotography (5 of 10).jpg
View fullsize JakeHicksPhotography (6 of 10).jpg
View fullsize JakeHicksPhotography (7 of 10).jpg
View fullsize JakeHicksPhotography (8 of 10).jpg
View fullsize JakeHicksPhotography (9 of 10).jpg
View fullsize JakeHicksPhotography (10 of 10).jpg

Clicking on the above images will enlarge them


The results

Now that we've got the stats out of the way we can take a closer look at what this lens produces in terms of image look and quality because to me personally that's what is most important. I will suffer almost anything in a lens if it gives me outstanding results so let's take a look at some shots from a simple portrait shoot I did last week when testing this lens for the first time.

JakeHicksPhotography (2 of 6)-2.jpg
JakeHicksPhotography (3 of 6)-2.jpg
JakeHicksPhotography (4 of 6)-2.jpg
JakeHicksPhotography (5 of 6)-2.jpg
JakeHicksPhotography (6 of 6)-2.jpg
JakeHicksPhotography (2 of 6)-2.jpg JakeHicksPhotography (3 of 6)-2.jpg JakeHicksPhotography (4 of 6)-2.jpg JakeHicksPhotography (5 of 6)-2.jpg JakeHicksPhotography (6 of 6)-2.jpg
View fullsize JakeHicksPhotography (2 of 6)-2.jpg
View fullsize JakeHicksPhotography (3 of 6)-2.jpg
View fullsize JakeHicksPhotography (4 of 6)-2.jpg
View fullsize JakeHicksPhotography (5 of 6)-2.jpg
View fullsize JakeHicksPhotography (6 of 6)-2.jpg

Clicking on the above images will enlarge them

For your reference the above image denotes the apertures used to take the corresponding images.

I tend to like the results speaking for themselves but in this instance I will just reiterate how varied a look this lens can produce almost immediately. From the incredibly soft and creamy f1.8 to the razor sharp portraits of f5.6 and all taken within moments of each other. In fact I simply adjust the aperture and simultaneously the ISO to compensate so all of those shots were literally taken moments apart. 


Final Thoughts

Frist and foremost, if you're a Velvet 56 owner and you're looking for the same gorgeous lens effects you're used to but just in a longer focal length, you're in luck. To my eyes Lensbaby has accurately transferred the results into the 85 fairly seamlessly and still maintained that incredibly fast aperture too.

If on the other hand you've never used the Velvet 56 and were perhaps hesitant of ever getting an 'art' lens but wanted something to give your images a little interest, this velvet 85 could be for you. The core reason I word it like that is because I think we're hesitant to get a creative lens like this because we can't use it all of the time, it's almost like a luxury that would be really nice to have but couldn't quite justify it. The thing that stood out to me most was how flexible this was at a range of apertures. Like I mentioned a moment ago, in a matter of seconds you have a dreamy, ethereal looking image and then a razor sharp portrait lens almost immediately. For me the f1.8 is just a step too far in terms of the effect. Yes it looks great and I'd definitely prefer to have that option than not but for me, just easing off to f2.8 creates a strong and very usable effect. On top of that I was also genuinely surprised at just how sharp this lens is at the f5.6 and beyond range. I've said it before and I'll say it again, if Lensbaby ever make a fully functional auto-focus range of lenses I'll be first in line because the image quality is outstanding from them.

So in short, if you're after adding a lens to your arsenal that creates a unique look without overpower the image I certainly recommend checking out the Velvet 85.

The Velvet 85 is available for the following mounts:

  • Lensbaby Velvet 85mm f1.8 Lens - Canon fit
  • Lensbaby Velvet 85mm f1.8 Lens - Nikon fit
  • Lensbaby Velvet 85mm f1.8 Lens - Sony A Mount
  • Lensbaby Velvet 85mm f1.8 Lens - Pentax K fit
  • Lensbaby Velvet 85mm f1.8 Lens - Sony E Mount
  • Lensbaby Velvet 85mm f1.8 Lens - Micro Four Thirds fit
  • Lensbaby Velvet 85mm f1.8 Lens - Fuji X fit

U.K. Price on 27/06/2017 release £499.00

U.S. Price on 27/06/2017 release $499.95


Stats

  • Focal length - 85mm
  • Focus modes - Manual Focus
  • Minium focal distance - 24cm/9.5in
  • Maximum focal distance - Infinity
  • Minimum aperture - f16
  • Maximum aperture - f1.8
  • Weight - 530g
  • Macro - 1:2
  • Aperture Blades - 12
  • Filter Size - 67mm
 

Velvet 85 Discount Code

I have been in a very fortunate position in recent years to have worked closely with Lensbaby to offer and provide feedback on their products. Occasionally they will send me a new lens of theirs to test and review and this Velvet 85 was one of those times. They have also provided me with a discount code for anybody to use that gets you 10% off any Lensbaby product via WEX Photographic here in the U.K. So if you're thinking of getting the Velvet 85 or any Lensbaby product and would like some money off your purchase simply enter JAKEHICKS10 at checkout :)


:WARNING: Yet more temptation lies below!


If you're interested in any of my work and would like to know more about how I created some of my shots then why not check out my workshops. Here you can find out everything there is to know about Gelled Lighting, Long Exposure Flash Photography and my entire Post-Pro Workflow. Jake Hicks Photography - Workshops


I have also just released a brand new 22 hour complete Gelled Lighting Tutorial video. I go over everything from studio lighting setups with gels to being on location with gels plus I also go through my complete retouching and post pro workflow. For more details and complete breakdown of everything that's include check out my Coloured Gel Portraits Tutorial


I also offer comprehensive coloured gel packs. These collections of gels are what I use day to day to create some of the most highly saturated colours around. If you're looking at getting into gelled lighting or need to get stronger and richer colours in your coloured gel work why not check out my Jake Hicks Photography Gel Packs

Tuesday 06.27.17
Posted by Jake Hicks
 
Newer / Older