• Technique
    • Latest Techniques
    • FREE TIPS
    • Quick Tips
    • Video
    • Site Search
    • Blog
    • Archives
  • Mentoring
  • >Online Workshops<
  • Workshops
  • Studio Lighting Books
  • Contact
    • Newsletter
    • Contact
    • Statement
Jake Hicks Photography
  • Technique
    • Latest Techniques
    • FREE TIPS
    • Quick Tips
    • Video
    • Site Search
    • Blog
    • Archives
  • Mentoring
  • >Online Workshops<
  • Workshops
  • Studio Lighting Books
  • Contact
    • Newsletter
    • Contact
    • Statement

Video Interview with Steve Brown Creative

I sit down with London based advertising and portrait photographer Steve Brown.
In this interview Steve shares how sets up and shoots in the high pressure and fast paced world of T.V. Steve discusses how he copes when he only has as little as 45 seconds to get the shot of famous actors, singers and sports personalities.
Steve also explains how he sets up his complex and large scale composite shots where he has to combine 10-15 people in a single shot when they all have to be shot separately.
Steve has also recently come back from 6 weeks in Nepal after spending time out there working on a personal project. He explains why he thinks personal projects are the most important part of his business and shares how he gets funding and compensation to travel the world and shoot what he wants to shoot.

P.S. Please forgive the slightly odd video sound. This entire interview was recorded onboard Steve's boat on the river Thames so there is a little echo present below deck :)

Check out more of Steve's work here:
http://www.stevebrowncreative.com
https://www.instagram.com/stevebrowncreative/

I sit down with London based advertising and portrait photographer Steve Brown. In this interview Steve shares how sets up and shoots in the high pressure and fast paced world of T.V. Steve discusses how he copes when he only has as little as 45 seconds to get the shot of famous actors, singers and sports personalities.
Tuesday 06.13.17
Posted by Jake Hicks
 

One Light Coloured Glow - A quick & simple single light setup with colour

It was a while ago now that I posted about using a single light to create a stunning beauty setup with only an additional reflector. At the time that article was shared and posted everywhere including all the big photo sites. In fact it seemed so popular at the time that the link I shared within the article that linked back to a cheap reflector sold nearly 60 of them in a couple of hours hahaha(if only I'd been selling reflectors that day ;) ). But if you missed it, here's the basics; the setup requires a medium sized silver reflector with a lens sized hole in the middle of it and a large softbox...that's it.

For the complete article and details please follow the link here, Simplest and most effective single single light setup I've ever used.

The original one-light and reflector article is still probably my most popular article to this day.

The original one-light and reflector article is still probably my most popular article to this day.

So now that you've read that and you now have your reflector with a hole in it, it's now time to take it to the next level. As those that have been following my work for a while will know, it was only a matter of time before I added some colour to this technique and although this won't blow you away with colour, it's a subtle look that can certainly add a little more interest to a currently simple looking shot.

 
At its core this is still a single light setup with a little trickery we can create a coloured glow around the model whilst keeping her the correct colour.

At its core this is still a single light setup with a little trickery we can create a coloured glow around the model whilst keeping her the correct colour.

What's the principles of the technique?

In the shot show here, the look appears to have a blue colour being shone from behind the subject with a separate colour on the actual subject themselves - this is because there is no blue colour on the subject so the light on the model is technically a different colour. This appearance gives a coloured glow from behind the model that warps around them and on first impressions you might not think this is anything extraordinary but remember this two-colour look is still coming from a single light.

What you will need:

  • Your medium sized reflector with a hole in the middle (mine is about 33" in diameter).
  • One light source (preferably a strobe but a speedlight should also have enough power with a higher camera ISO)
  • A large softbox
  • Coloured CTO and/or CTB gels (these are Colour Temperature Orange and Colour Temperature Blue colour correcting gels)
  • A camera with manual Kelvin control

With that list, there should be some of you with bells ringing in their heads who are now starting to put together how the technique works. Still not sure? Then read on.


The Prep

First and foremost you'll need to 'upgrade' your reflector with your coloured gels. My reflector is 33in/84cm in diameter so I just needed to get a sheet of CTO/CTB gel that was at least that in diameter. LEE Filters sells them on a roll so I had plenty of room either side for my reflector. The ones I used are the full CTO gel with a LEE filter number of 204 and a Full CTB gel which has a LEE filter number of 201.

Here are the rolls of gels I used. The LEE Filters 201 Full CT Blue and the 204 Full CT Orange.

Here are the rolls of gels I used. The LEE Filters 201 Full CT Blue and the 204 Full CT Orange.

Step 1

  • Cut a sheet of gel big enough to cover your reflector.

Step 2

  • Lay your sheet over your reflector so that it covers it completely and trace around the hole in the middle.

Step 3

  • Remove your gel from the reflector and place it on something you're happy cutting into. NOT your kitchen lino! Now simply cut the hole in the gel you previously traced.
 

The Setup

This setup is again, very simple. All you need to do is attach your gel to the front of your silver reflector. I usually hang my reflector from a stand rather than holding it so I used clips that meant I could remove the gel quickly and easily as required.

I just used clips to hold my gel in place in front of the reflector rather than fussing with loads of tape. It's also a lot quicker and easier to swop from the blue to orange when needed.

I just used clips to hold my gel in place in front of the reflector rather than fussing with loads of tape. It's also a lot quicker and easier to swop from the blue to orange when needed.

Next you just need to set up your softbox at the correct height behind the model and lastly you need to open up the Kelvin adjustment on your camera. It's slightly different for all cameras but here's what it looks like on the Nikon D610.

Here's how to adjust the Kelvin via the in camera menu on a Nikon D610

Here's how to adjust the Kelvin via the in camera menu on a Nikon D610

When choosing your Kelvin you first need to know which colour adjustment gel you will be using on your reflector as it's the Kelvin value in the camera that actually gives your subject that coloured glow not the actual softbox from behind them.

Here's the simple cheat-sheet for quick reference and then I'll go into this in more detail afterwards.*

No gel, just reflector - Set the camera to 4500-5500 Kelvin

Colour Temperature Orange gel on the reflector - Set the camera to 2500-3500 Kelvin

Colour Temperature Blue gel on the reflector - Set the camera to 9500-10500 Kelvin

*Kelvin varies from camera manufacturer to camera manufacturer and strobe to strobe so play around with what works best for yours

When you're ready to begin shooting, start off by positioning yourself fairly close to the model with your reflector (about two to three feet away). I tended to use wider lenses like a 50mm prime for these shots because I was so close to the model. The aperture you use is up to you but this setup does require a lot of power so start off with a wider aperture and adjust from there. All that's left to do now is start taking some shots and adjust the variables as required. In this instance that would be the power of the light or aperture and then playing with the Kelvin value until you got something you're happy with.

You should be able to see from the shot above just how close I tend to be when shooting this setup.

You should be able to see from the shot above just how close I tend to be when shooting this setup.


What is actually happening here?

Like I mentioned before, the coloured glow isn't coming from the light source it's actually coming from you balancing out the colour of the reflected coloured light from the reflector via your Kelvin. Take a look at the Kelvin values of the following images to see what I'm referring too.

This image has no colour correction gels on the reflector. Just a straight shot taken at around the 5000K mark which is a standard daylight/flash for my kit.

This image has no colour correction gels on the reflector. Just a straight shot taken at around the 5000K mark which is a standard daylight/flash for my kit.

Next up, I added a CTO gel to my reflector and adjusted the Kelvin on my camera to counteract it. Here I have a Kelvin 2500K which is adding a lot of blue into the shot to eliminate the orange light being bounded back onto the model.

Next up, I added a CTO gel to my reflector and adjusted the Kelvin on my camera to counteract it. Here I have a Kelvin 2500K which is adding a lot of blue into the shot to eliminate the orange light being bounded back onto the model.

Then I switch my gel to a CTB gel on the reflector. This time I countered the heavy blue light being bounce back onto the model by adjusting my Kelvin all the way up to nearly 10,000K. This is of course adding a lot of orange into the shot which res…

Then I switch my gel to a CTB gel on the reflector. This time I countered the heavy blue light being bounce back onto the model by adjusting my Kelvin all the way up to nearly 10,000K. This is of course adding a lot of orange into the shot which results in that warm glow around the model.

But just to show you how much I'm adjusting the Kelvin, let's take a look at what the shots would look like if we didn't adjust the Kelvin from daylight/flash (usually around 5000K).

This image has the CTO gel bounced onto the model but the Kevin value has been left on a standard 5000K for flash and daylight. It's very clear how much orange is actually bounced onto the model here.

This image has the CTO gel bounced onto the model but the Kevin value has been left on a standard 5000K for flash and daylight. It's very clear how much orange is actually bounced onto the model here.

Here we've left the Kelvin set to 5000K, a standard flash/daylight setting but you can see that the image is very blue because we're bouncing that light off of the CTB gel onto our subject.

Here we've left the Kelvin set to 5000K, a standard flash/daylight setting but you can see that the image is very blue because we're bouncing that light off of the CTB gel onto our subject.

I think one important point to note here is that with the CTB gel attached the effect isn't as dramatic as when you use the CTO. I think that is simply down to the fact that you are effectively firing blue light (it isn't really blue but for the sake of argument regarding Kelvin let's say it is) onto a blue gel. In effect the blue CTB isn't dramatically changing the colour of the source light by much which results in a less dramatic effect than the CTO which is making a significant colour correction to the source light.

In-Short: Using a blue gel (CTB gel) will produce an orange glow around the model and using an orange gel (CTO gel) will produce a blue glow around the model.
 

The Final Images

Below you can see the final images that I took from the shoot. I've included all three variations here as well; shots with no colour correction gel on the reflector, shots with the CTB gel attached plus shots with the CTO gel attached.

To recap, the shots with no coloured glow have no colour correction gel attached to the reflector. The shots with a warmer glow have the CTB gel attached to the reflector and the shots with a cooler blue glow around the model have the CTO gel attached to the reflector.

JakeHicksPhotography (1 of 10).jpg
JakeHicksPhotography (2 of 10).jpg
JakeHicksPhotography (3 of 10).jpg
JakeHicksPhotography (4 of 10).jpg
JakeHicksPhotography (5 of 10).jpg
JakeHicksPhotography (6 of 10).jpg
JakeHicksPhotography (7 of 10).jpg
JakeHicksPhotography (8 of 10).jpg
JakeHicksPhotography (9 of 10).jpg
JakeHicksPhotography (10 of 10).jpg
JakeHicksPhotography (1 of 10).jpg JakeHicksPhotography (2 of 10).jpg JakeHicksPhotography (3 of 10).jpg JakeHicksPhotography (4 of 10).jpg JakeHicksPhotography (5 of 10).jpg JakeHicksPhotography (6 of 10).jpg JakeHicksPhotography (7 of 10).jpg JakeHicksPhotography (8 of 10).jpg JakeHicksPhotography (9 of 10).jpg JakeHicksPhotography (10 of 10).jpg
View fullsize JakeHicksPhotography (1 of 10).jpg
View fullsize JakeHicksPhotography (2 of 10).jpg
View fullsize JakeHicksPhotography (3 of 10).jpg
View fullsize JakeHicksPhotography (4 of 10).jpg
View fullsize JakeHicksPhotography (5 of 10).jpg
View fullsize JakeHicksPhotography (6 of 10).jpg
View fullsize JakeHicksPhotography (7 of 10).jpg
View fullsize JakeHicksPhotography (8 of 10).jpg
View fullsize JakeHicksPhotography (9 of 10).jpg
View fullsize JakeHicksPhotography (10 of 10).jpg

Because I know some peoples screens can't accommodate the format of my website, clicking on the thumbnails above will automatically enlarge and resize the images to fit your window.

Featured Model: Colleen Deary

Makeup and Hair: Rose Forest Makeup

At first this seems like a tricky idea to get your mind around but trust me, once you set it up and start playing with it you'll see how it works very quickly. But don't stop with this simple setup, look at other ways you can employ the same principles in other ways. Try still-life setups with reflective surfaces, try adding more lights and gels and also replace your softbox for a window. Remember, it's the Kelvin adjustment that changes the colour not the light source.


Questions

As always, I'd love to hear your questions and comments. If there's something that doesn't make sense or needs further explanation, just let me know below and I will answer them as quickly as I can :) Also if you give this technique a go, don't hesitate to let me know and share the results my way as I'd love to see what you come up with.

If you're interested in getting some coloured gels of your own and would like to take a look at the ones I sell then please feel free to take at my 'Coloured Gels' page for more info :)


:WARNING: Potential sales opportunity ahead.....for me :D


If you're interested in any of my work and would like to know more about how I created some of my shots then why not check out my workshops. Here you can find out everything there is to know about Gelled Lighting, Long Exposure Flash Photography and my entire Post-Pro Workflow. Jake Hicks Photography - Workshops


I've also just released a brand new 22 hour complete Gelled Lighting Tutorial video. I go over everything from studio lighting setups with gels to being on location with gels plus I also go through my complete retouching and post pro workflow. For more details and complete breakdown of everything that's include check out my Coloured Gel Portraits Tutorial


I also offer comprehensive coloured gel packs. These collections of gels are what I use day to day to create some of the most highly saturated colours around. If you're looking at getting into gelled lighting or need to get stronger and richer colours in your coloured gel work why not check out my Jake Hicks Photography Gel Packs

Tuesday 06.06.17
Posted by Jake Hicks
 

Interview with Wayne Johns about his role in the production of the Fuji GFX Camera

In this sit down discussion with Fujifilm ambassador Wayne Johns, we discuss his role in the development of the new Fujifilm GFX camera and his part leading up to the release.
Wayne was the sole UK ambassador to shoot pre-production models of the GFX as it was being developed and he shares his thoughts and reasons for leaving his previous digital medium format Hasselblad and Leica behind.

Check out Wayne's work here http://www.waynejohns.com/

In this sit down discussion with Fujifilm ambassador Wayne Johns, we discuss his role in the development of the new Fujifilm GFX camera and his part leading up to the release. Wayne was the sole UK ambassador to shoot pre-production models of the GFX as it was being developed and he shares his thoughts and reasons for leaving his previous digital medium format Hasselblad and Leica behind.
Tuesday 05.30.17
Posted by Jake Hicks
 

Fuji GFX Camera - First Impressions

So here it is, my hands-on, first impressions of the new Fuji GFX camera after having it for a week.
In the video I discuss the basic specs and features, review some of its incredible raw files and speak about my personal thoughts regarding Fuji's first foray into medium format mirrorless cameras.

I'll just pre-warn you that it is a long video, so I apologise for that but there was a lot I wanted to say about this seemingly incredible camera. If you want to skip to a specific section then here's the timestamps below.

Camera Details & Specs 1:21
The Raw Files 18:51
Personal Thoughts 28:57

Big thanks to Fujifilm UK's X-Photographer Wayne Johns for letting me borrow and test this camera. Wayne was the only U.K. photographer to work on the prototype of the GFX before launch so if you have any questions at all about this camera that I can't answer then I will certainly ask him for you. If we get enough good questions maybe I'll pester him for a sit down chat/interview where I can get all the answers we need because I get the feeling I only scratched the surface of what this camera can really do.

Hope you find something useful in the video and as always feel free to let me know what you think. Are you one of the people considering getting a GFX? Did this video answer your questions? Will you be getting one now?

My hands-on first impressions after having shot with the new Fuji GFX camera. I discuss the basic specs and features, review some of its incredible raw files and speak about my personal thoughts regarding Fuji's first medium format mirror less camera.
Tuesday 05.23.17
Posted by Jake Hicks
 

Comparing the Nikon D610 vs Fuji X T-2 vs Sony A7R II

Aside from the aparent random string of letters and numbers in the title this actually proved to be a pretty interesting test. For those that have followed me for a while know, I've shot with Nikon cameras for many years but in recent times I have been less than convinced that Nikon has been at the forefront of camera technology. I wanted to see what else was out there and test some newer and different cameras outside of the Nikon sphere for myself to see if I really was missing out on anything.

This is not a camera review

I'll jump right in by saying that this is not a regular camera review, if you want the mind-numbing sheets of stats and figures on these cameras then there are many other places to get this data. I understand why those stats exist and I think that if you yourself are a camera manufacturer then that would be useful. If however you're a photographer, I feel that those type of camera reviews are ambiguous at best and I liken trying to explain how a camera feels and shoots to trying to explain the taste of a banana to somebody using words alone….you just can't. You're left with saying very few words beyond the obvious 'yellow', and that explains nothing about the actual taste. All you really want to say is 'just try it for yourself. But like trying to explain the taste of a banana without tasting it, you can't explain a camera without actually shooting it for yourself in your own style and with your own needs in mind.

The reasons I decided to shoot with these cameras is explained in more detail below but I'll also add that this wasn't meant as an article either. I had concerns with my current system and I wanted to see from a commercial standpoint if I could improve upon these concerns by shooting in the future with a different camera. The following thoughts and findings are simply my opinion based on my specific needs for the way in which I shoot and the type of things that I shoot day-to-day. I think it's also important to mention that because you may have used some of the cameras I refer to here, you may have found and seen something completely different to me. Neither of us are right or wrong but it highlights how important it is test and shoot a camera with your needs in mind before seriously investing in that system.

Obvious Differences I'm not concerned with at the moment

As previously mentioned, this isn't a camera review and although I'm going to outline some obvious differences in the cameras here, they weren't a concern of mine when I was testing the cameras. Yes mega pixels and sensor size play a part in the cameras resulting images but those differences may not be as significant as you might think and it isn't until you test something for yourself that you realise just how little an impact megapixels and other paper-based stats actually have on a resulting shot.

Above we can see a diagram of the camera chip sizes relative to one another plus a lot of their relevant info. The biggest point of note here is that size doesn't necessarily relate to performance (I know, big shock right), the Fuji has the smallest…

Above we can see a diagram of the camera chip sizes relative to one another plus a lot of their relevant info. The biggest point of note here is that size doesn't necessarily relate to performance (I know, big shock right), the Fuji has the smallest sensor size and megapixel count but the largest actual raw file size. I am hesitant to believe that ridiculously large file size is needed especially when you compare it to the full frame 42.4 mp beast of the Sony coming in considerably smaller. I personally believe they might not be using any compression whatsoever on the raw to look better on paper and this would have been a wise marketing call in this current stat-led marketplace.


Why test the Sony?

I personally shoot a lot of 3/4 length person shots at wide open apertures like f1.8. When shooting this type of shot, which requires the subjects eyes to be in focus, you will have to do a lot of focus-and-recomposing. At this aperture you will get a shift in the plane of focus and as a result a slightly soft and even out-of-focus shots.

The image above shows the viewfinder as you focus and then after you recompose.

The image above shows the viewfinder as you focus and then after you recompose.

This is the reality of what happens when you focus and recompose at very shallow depths of field.

This is the reality of what happens when you focus and recompose at very shallow depths of field.

The above images illustrate what I'm referring to and you can read a whole article on how and why this happens here "Stay Focused". In a lot of our DSLR's there are a lot of focal points but they're all clustered in the centre of the frame which means we have to focus and recompose a lot if we require the subjects eyes at the edge of frame. The smaller mirror-less cameras like the Fuji's and Olympus' etc combat this by placing their focal points anywhere in the viewfinder which means no more focus and recomposing. Now that Sony has brought out its cameras with full frame sensors and no mirrors it has meant that they've brought this very useful focus-anywhere feature to the larger chip size. I wanted to test this feature out and see if it would work for my shooting style and hopefully enable me to obtain sharper images at shallower depths of field more consistently.

Why test the Fuji?

It's been no secret in recent months that I'm less than impressed by my flagship Nikon lens, the 24-70 f2.8 zoom. In fact I was so unimpressed I actually thought I had a faulty one. It wasn't until I checked it side by side with a couple of other peoples 24-70 lenses on my workshop that I realised all of our lenses were less than impressive. My issue with the thing is the horrendously huge soft flaring centre it has and it's not just when it's shooting wide open that this happens either. The look is a very soft and cloudy centre that generates a flare on anything bright and is especially noticeable on objects with a lot of contrast like jewellery etc. I think this lens is popular with the wedding and portrait shooters as it will produce an 'in-camera' skin smoothing effect but in a high contrast and high colour studio environment it is less than desirable.

Here's a couple of raw files from a recent long exposure workshop of mine. The images were taken on the Nikon 24-70mm f2.8 lens and you can clearly see the flaring that is happening on the points of light near the centre of this shot. That flare is so huge it's almost hard to believe I didn't add that in post pro.

Here'e another shot from the same workshop again and that flaring effect can clearly be seen here once more. This might seem like a unique problem with these sequins and bright points of light in the centre but this same flaring can be seen on any b…

Here'e another shot from the same workshop again and that flaring effect can clearly be seen here once more. This might seem like a unique problem with these sequins and bright points of light in the centre but this same flaring can be seen on any bright highlights in shiny skin and jewellery towards the centre of a shot when taken with this lens.

Unless you're already shooting Hasselbald glass you should have heard by now that the boffins over at Fuji are bending space and time in the labs with how insanely sharp their lenses are. Although for years these super-sharp Fuji lenses have only been available on a smaller sensor, the Fuji glass has been impressing everybody that has picked it up so I had to see for myself and check if this miracle glass would stand up against the rigours and heavy flaring present in a my slightly unorthodox setups.

Why is there no Canon in this list?

I know I'll get asked this so I'm going to broach it head-on now. Nearly 10 years ago Canon rocked the photographic community with their 5D MKII. I honestly don't think you can underestimate the impact that camera had across the board and it literally changed the game for better or for worse by bringing the high-end quality of full 35mm size sensors to the masses at an insanely affordable price. I shot with that camera for a long time at weddings and location portraits and it really was a workhorse camera. Over time my photographic preference took me to the studio lighting setups more and more and as a result I started to notice things I wasn't happy with. I know there is going to be a lot of Canon shooters out there who will be rolling up their sleeves and getting ready to endure a bought of carpal tunnel pain as they respond to this but the following is based on my personal findings over hundreds of shoots in a specific area. Like I said, I used Canon for a very long time and if I was still shooting a lot environmental work like weddings and portraits of regular people I think I would still be with them, as it happens I'm now in the studio where I believe Nikon copes better under certain conditions. The issue I had was Canon struggling to deal with blank expanses of detail in frame, something that happens a lot in studio work. The Canon excels when it has a lot of detail and something to get its digital teeth stuck into like a wedding but when it encounters a blank wall it seems to want to fill it with information even if there is none.

The above images shows a studio shot from the Canon 5DMK II and how it deals with an absence of detail. There is a lot of noise and rainbow banding in this area of flat grey. Click to enlarge

The image above is taken with the Nikon D600 and it shows how the camera deals with these blank areas of grey. There is far less rainbow coloured noise and banding in these areas. *The subtle banding you might see here is from the web-res upload, there is none whatsoever on the actual raw.

Again, I will reiterate that this is specific to me and I am certainly not saying that Nikon is better than Canon but in this situation it is my belief that Nikon performs better. That being said, I have't seen the newer Canon models and how they perform so times might have changed but I think Canon knows it market and they produce a very solid all-round camera that is geared to the heavy use and workhorse mentality of wedding and portrait shooters.


The cameras involved

Like I said earlier, this isn't a review so I'll just talk about the models I used to introduce them and I'll link you to the DPreview site if you're interested in fining out more about them technically.

Nikon D610

This is my Nikon D610 that I've had for a while now. I used this in all of the tests alongside the other two to provide a baseline from which to compare against.

This is my Nikon D610 that I've had for a while now. I used this in all of the tests alongside the other two to provide a baseline from which to compare against.

The lenses used in these tests include the 24-70 2.8, the 85mm 1.8 and the 50mm f1.4.

For more details on those then you can read the words from Mr Rockwell, legend himself, giving his thoughts on them below.

Nikon 24-70mm f2.8

Nikon 85mm f1.8

Nikon 50mm f1.4

To see more pictures on and from this camera then either check the homepage of my site as they're pretty much all shot with this or follow this link to the DPReview site Nikon D610 Review


Fuji X-T2

The Fuji-XT2 with the three lenses I tested along with it.

The Fuji-XT2 with the three lenses I tested along with it.

I had the ability to test three lenses alongside the X-T2. The 56mm f1.2, the Fuji 35mm f2 and the Fuji zoom lens the 18-55mm f2.8.

For more details on those then you can read Ken Rockwell's thoughts via the links below.

Fuji 56m f1.2

Fuji 35mm f2

Fuji 18-55mm f2.8

To see more pictures on and from this camera then follow this link to the DPReview site Fuji X-T2


Sony Alpha 7RII

The Sony A7RII I used. There's not a massive lens list available for these yet when you compare it to other camera manufactures so I only had the single lens for it the 24-70 f2.8

The Sony A7RII I used. There's not a massive lens list available for these yet when you compare it to other camera manufactures so I only had the single lens for it the 24-70 f2.8

I only had a single lens to test on the Sony but it was a direct like-for-like lens compared to my Nikon so it proved to be a useful comparison. The lens was the 24-70 f2.8 GM

You can read more about that lens here via Ken Rockwell

Sony 24-70mm f2.8 GM

If you'd like to learn more about the camera itself then you can certainly do that via the DPReview link provided Sony A7 RII


The Comparison Test

Ok now that we know which cameras are involved, let's take a look at the sort of lighting tests I was going to be putting them through to compare them.

The fist setup involved a strong backlit look.

The fist setup involved a strong backlit look.

First up was a simple one light shot that involves an awful lot of flare from the behind the model as there was a softbox positioned directly behind them pointing straight back into the lens.

For each of the cameras I used the following lenses and settings for the first lighting test.

Fuji

  • Lens - 35mm f2
  • Shutter Speed - 1/125
  • Aperture - f2.8
  • ISO - 200 (ISO 100 not available on the Fuji)
  • Focal Length - 35mm (remember this is not a full frame camera so this is roughly a 50mm equivalent)

Nikon

  • Lens - 50mm f2
  • Shutter Speed - 1/125
  • Aperture - 2.8
  • ISO - 100
  • Focal Length - 35mm

Sony

  • Lens - 24-70 f2.8
  • Shutter Speed - 1/125
  • Aperture - 2.8
  • ISO - 200
  • Focal Length - 45mm
 
The second setup was a long exposure setup involving mixed light sources and extended shutter speeds.

The second setup was a long exposure setup involving mixed light sources and extended shutter speeds.

The second setup was to see not only how the camera dealt with focusing in very low light but also how they dealt with mixed lighting temperatures and long exposures of around 1 to 2 seconds.

For each of the cameras I used the following lenses and settings for the second lighting test.

Fuji

  • Lens - 18-55mm f2.8
  • Shutter Speed - 2 seconds
  • Aperture - f2.8
  • ISO - 200 (ISO 100 not available on the Fuji)
  • Focal Length - 47mm (remember this is not a full frame camera so this is roughly a 65 mm equivalent)

Nikon

  • Lens - 24-70 f2.8
  • Shutter Speed - 2 seconds
  • Aperture - 3.2
  • ISO - 100
  • Focal Length - 70mm

Sony

  • Lens - 24-70 f2.8
  • Shutter Speed - 2 seconds
  • Aperture - 2.8
  • ISO - 200
  • Focal Length - 70mm
 
The final setup called for some colour and this setup brought together two very contrasting colours that would establish a tricky setup to capture faithfully.

The final setup called for some colour and this setup brought together two very contrasting colours that would establish a tricky setup to capture faithfully.

The final setup was of course dealing with highly saturated gelled lighting setups. This last setup was crucial as I needed to see exactly how each of these cameras dealt with extremes in artificial colour for the colour work that I do day-to-day.

For each of the cameras I used the following lenses and settings for the third lighting test.

Fuji

  • Lens - 56mm f1.2
  • Shutter Speed - 1/125
  • Aperture - f2.8
  • ISO - 250
  • Focal Length - 56mmm (remember this is not a full frame camera so this is roughly a 80mm equivalent)

Nikon

  • Lens - 85mm f1.8
  • Shutter Speed - 1/125
  • Aperture - 2.8
  • ISO - 100
  • Focal Length - 85mm

Sony

  • Lens - 24-70 f2.8
  • Shutter Speed - 2 second
  • Aperture - 2.8
  • ISO - 100
  • Focal Length - 46mm
 

The Results

So now that you know the details of each of the shoots and the cameras, lenses and settings that captured them lets take a look at the individual results before we compare them.

Fuji X-T2

JakeHicksPhotography (1 of 6).jpg
JakeHicksPhotography (2 of 6).jpg
JakeHicksPhotography (3 of 6).jpg
JakeHicksPhotography (4 of 6).jpg
JakeHicksPhotography (5 of 6).jpg
JakeHicksPhotography (6 of 6).jpg
JakeHicksPhotography (1 of 6).jpg JakeHicksPhotography (2 of 6).jpg JakeHicksPhotography (3 of 6).jpg JakeHicksPhotography (4 of 6).jpg JakeHicksPhotography (5 of 6).jpg JakeHicksPhotography (6 of 6).jpg
View fullsize JakeHicksPhotography (1 of 6).jpg
View fullsize JakeHicksPhotography (2 of 6).jpg
View fullsize JakeHicksPhotography (3 of 6).jpg
View fullsize JakeHicksPhotography (4 of 6).jpg
View fullsize JakeHicksPhotography (5 of 6).jpg
View fullsize JakeHicksPhotography (6 of 6).jpg

To see the images larger then please click on the thumbnails above.


Nikon D610

JakeHicksPhotography (1 of 6).jpg
JakeHicksPhotography (2 of 6).jpg
JakeHicksPhotography (3 of 6).jpg
JakeHicksPhotography (4 of 6).jpg
JakeHicksPhotography (5 of 6).jpg
JakeHicksPhotography (6 of 6).jpg
JakeHicksPhotography (1 of 6).jpg JakeHicksPhotography (2 of 6).jpg JakeHicksPhotography (3 of 6).jpg JakeHicksPhotography (4 of 6).jpg JakeHicksPhotography (5 of 6).jpg JakeHicksPhotography (6 of 6).jpg
View fullsize JakeHicksPhotography (1 of 6).jpg
View fullsize JakeHicksPhotography (2 of 6).jpg
View fullsize JakeHicksPhotography (3 of 6).jpg
View fullsize JakeHicksPhotography (4 of 6).jpg
View fullsize JakeHicksPhotography (5 of 6).jpg
View fullsize JakeHicksPhotography (6 of 6).jpg

To see the images larger then please click on the thumbnails above.


Sony A7 RII

JakeHicksPhotography (1 of 6).jpg
JakeHicksPhotography (2 of 6).jpg
JakeHicksPhotography (3 of 6).jpg
JakeHicksPhotography (4 of 6).jpg
JakeHicksPhotography (5 of 6).jpg
JakeHicksPhotography (6 of 6).jpg
JakeHicksPhotography (1 of 6).jpg JakeHicksPhotography (2 of 6).jpg JakeHicksPhotography (3 of 6).jpg JakeHicksPhotography (4 of 6).jpg JakeHicksPhotography (5 of 6).jpg JakeHicksPhotography (6 of 6).jpg
View fullsize JakeHicksPhotography (1 of 6).jpg
View fullsize JakeHicksPhotography (2 of 6).jpg
View fullsize JakeHicksPhotography (3 of 6).jpg
View fullsize JakeHicksPhotography (4 of 6).jpg
View fullsize JakeHicksPhotography (5 of 6).jpg
View fullsize JakeHicksPhotography (6 of 6).jpg

To see the images larger then please click on the thumbnails above.


Conclusions

Before I analyse some of the resulting images, I'll talk a little about my thoughts from the shoot and actually how it felt using each of the cameras.

Nikon

Obviously I've been shooting Nikon for many years and I know my way around the thing in the dark. Nikon is certainly not renowned in recent times for being very innovative and mould breaking in any way whatsoever. They stick to what they know and once seemingly every other camera manufacturer in the known universe has weeded out all the possible bugs in a new technology they might consider, thinking about, possibly maybe, adopting it …..at some point in near distant future….probably. But that hesitance and apparent fear of change does mean that they continue to make cameras for photographers who like to take photographs. They build basic get-me-to-the-photo machines that endure years and years of punishment and you can always pick up one of their cameras and immediately start taking pictures without needing to be Dan Brown with an Enigma machine to work it.

Fuji

Shooting with this camera was incredibly pleasurable, obviously it's a lot smaller in actual size so it's far easier to operate during long shoot days. The Fuji cameras still insist on putting all of the dials and switches on the outside which is very important to me and so found I could get along with shooting quite quickly. In recent years they have dramatically improved the focussing in these cameras meaning that the XT-2 focused very quickly even in low light. Plus, with the focal point towards the edge of frame I wasn't focusing and recomposing. Everything about this system feels robust even though its size dictates otherwise and overall I was certainly very impressed from a usage standpoint.

Sony

I'll let you into a little secret. A little while ago I went around the internet grabbing a lot of images that I loved the look and feel of. I then fired them all through a metadata app to find out what camera they'd all been shot with only to find out that most of the shots I loved the look of had been shot with this Sony A7R II. I was ready to jump-ship into Sony's arms based on that alone. Alas my user experience was less than impressive. Firstly this camera obviously boasts the fact that it's mirror-less and as a result the body is very thin in depth and light in weight. Great right? Wrong. the Sony has such a small distance from lens attachment point to chip that it's simple physics that they have to do something funky with the lenses to focus the shot over such a short distance. It appears that the extra distance you gained by removing the mirror and prisms etc was actually just put back into the lenses. This results in a ridiculously front weighted system and all the bulk and weight is in that lens not the body anymore. If you place the Nikon and Sony side-by-side with their respective 24-70's attached, the Sony is actually longer! This proved to be very uncomfortable, if not painful very quickly. I shoot a lot of my work with one hand on the camera and one hand holding something else in front of it Whether that be ND filters, gels or crystals etc I'm holding, it simply isn't possible to hold the body of this camera alone with one hand for any more than a few frames. Yes I had the 24-70 zoom lens attached and not a 50mm prime but I'm used to only holding my Nikon with one hand and a 24-70 zoom all the time without too much trouble. This camera simply could not be used by me for a full day. I shot it for a couple of hours at most for this test and I was 'shaking out' my hands afterwards like I used to do after a long rock climb. Not good.

You may also remember one of the core reasons for me being excited about this camera was no longer worrying about focus and recomposing. Yes I could place the focus points exactly where I want them but alas the damn thing just would not focus unless it had the power of three suns bearing down on the subject. I shoot a lot of studio images and sometimes the modelling bulbs on the lights aren't that bright, the Sony just struggled hugely with this low light focusing and drifted in and out endlessly. Not a great result.

So apart from that, this thing will practically do everything but cook you toast, it has so many features to help you. Far too many for me to look at but I did like the focus-peaking feature that highlights the areas in focus. Very useful for precise manual focus shots. If you're an IT consultant with an engineering background then I reckon this has some pretty sweet features for you. If you're used to taking great images on an old OM-1 like me then this camera might drive you around the bend.


The Images

The first backlit set

The first set that was very backlit produced interesting results but above all the Fuji stood out. That camera showed no noticeable flaring at all, it's incredible. Now I know that's far more to do with the lens than camera but it just goes to show you how sharp and clear their glass is. Look at the Fuji shots again, every hair is defined because the flare isn't blowing them out. The Sony did a very good job as well and although not quite as clear, the images are still very contrasty despite the strong backlight. The Nikon of course was like shooting through an old pair of tights. Yes it could be that cheaper old lens but let's not forget the issue I have with the new expensive Nikon lens for exactly the same reasons. It is, what it is, you either like this effect or you don't. It kinda works here in an 'arty' way but it illustrates my concerns that these lenses are not clear.

The second long exposure set

This again divided the crowd but this time I'll start with my concerns on the Sony. Whilst shooting this camera I found it incredibly hard to focus in these low-light conditions. Yes you could say 'well what do you expect Jake?' but the other cameras didn't struggle anywhere near as much. In fact the Fuji didn't really show any noticeable difficulty at all. I was definitely very disappointed in the Sony as I really thought this wouldn't be a problem. This frustration is compounded because you can see the image clearly lit via the viewfinders auto-exposed live feed where it looks like there's plenty to focus to on. The resulting images from the Sony on this set were even more concerning, the blacks were very, very muddy in comparison and you should be able to see from the resulting shots that there simply isn't the definition in the blacks compared to the other two cameras.

The Fuji coped incredibly well with the focusing in low light and I had no concerns there but it did produce slightly muddier files at these 1 second exposures. When I say muddy, I'm referring to the colour rendition and contrast and on their own you might not notice anything but I did see a significantly cleaner and crisper file from the Nikon is this setup. The Nikon produced excellent detail in the blacks and even with this limited colour palette the files looked slightly richer than the others.

The third colour set

This is a tough test for any camera, this setup is incredibly unforgiving and I doubt any camera is tested with these extreme colour saturations in mind. The setup involves me using a strong orange and a strong blue colour that would meet on a subjects face. This is a potential nightmare scenario because orange and blue are opposite colours resulting in technology not knowing how to blend them when they meet, this will often result in colour banding that looks like subtle steps of colour. Not a good look. Call me biased if you want to but I honestly feel that the Nikon wins this one again as well. The colours are simply richer and have more depth to them in my opinion. I found the Fuji to 'top-out' in the reds meaning that some of the richer deep orange colours bunched up rather than showing any more saturation. Look at the outside edge of the orange background of the Fuji shots compared to the Nikon ones, the saturation and depth just isn't there. The same goes for the highlights too, they simply just appear flatter in comparison to the Nikon with a discernible lack of saturation. The Sony suffered a similar problem but not to the same degree, the Sony did appear to have a larger orange and blue gamut when compared to the Fuji though. But look again at the blacks. What is going on with the distinct lack of detail in the shadow area of these files? In these smaller files here they might look like they suffer in the blacks as much as the Nikon but trust me, there is a lot more detail in the blacks of the Nikon raw file.


Finally! In-Short

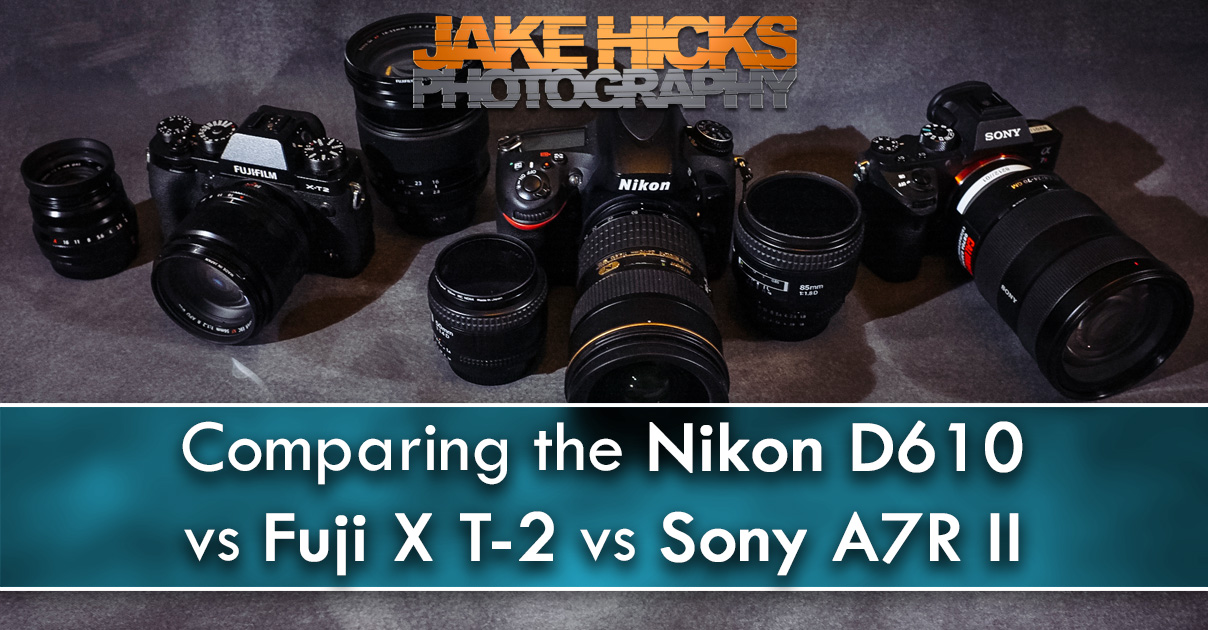
So it turns out, I'm not abandoning the Nikon ship just yet and I'll be shooting with my Nikon camera a little while longer it would seem.

The Sony was certainly a disappointment for what I personally need day-to-day. The weight distribution on that standard zoom lens and body is ridiculously unbalanced and borderline unusable over extended periods. I'm guessing that ironically adding more weight in the form of a battery grip to this camera would help this balance a lot, especially for us portrait orientation shooters, although that negates the marketing campaign for the reduced weight of a mirror-less DSLR. Not only that, but it struggled a lot when it came to auto-focusing in low light, an environment that I work in a lot for my specific work type. Plus I wasn't impressed with it's shadow detail in the long exposure shots. You might not notice it on its own but when compared to the Nikon and Fuji it was very apparent.

Personally I'm actually pretty disappointed, I'm a Sony fan-boy in other markets and I was ready to jump ship until I tried it. It has so much potential but rewind to when Fuji came out with their first mirror-less cameras, they were a joke in certain areas too. Things like focusing speeds and black details were very poor so hopefully in newer models of the Sony they can look at some of these issues.

Using the Fuji was a big surprise for me. I wasn't expecting big things from this little camera but it certainly packs a punch for what it is. I think if I shot more commercial white-light beauty work I'd get one just for that as the quality of the lenses on this little thing is almost unbelievable. But although the lens quality is fantastic and the detail it produces far exceeds the sensor size expectations, it's still a small chip. That means the images simply don't have the visual depth at similar apertures as the bigger sensors. It's just physics I'm afraid and quality certainly isn't everything when you're after a certain look. All this bodes very well indeed for the new medium format Fuji GFX. If they transfer these same qualities across to their new larger sensor camera then this could be a seriously exciting prospect.

The Nikon is a tried and tested workhorse camera. It's easy to use and it's certainly a no 'bells and whistles' product. The lens flaring issue will continue to haunt me and I will continue to search for at least ONE lens in their line up that doesn't have a Tupperware coating! For me though, the Nikon won hands-down in the colour range though. It was significantly noticeable to me how much more saturated the colour this D610 could capture compared to the others.

For now I will stick to my Nikon and watch the Fuji GFX very carefully :) In fact by the time this article comes out I hope to have tested it for myself and I will certainly keep you posted on what I find.

I thank you for reading all the way down this far, I know it was a long article but it was really just my way of sharing my thoughts to anybody that was interested. If you have any of these cameras yourself and would like to offer you feedback and thoughts on them then I'd love to hear your opinions as well. Feel free to do so in the comments below :)


:WARNING: Sales opportunities ahoy!


If you're interested in any of my work and would like to know more about how I created some of my shots then why not check out my workshops. Here you can find out everything there is to know about Gelled Lighting, Long Exposure Flash Photography and my entire Post-Pro Workflow. Jake Hicks Photography - Workshops


I've also just released a brand new 22 hour complete Gelled Lighting Tutorial video. I go over everything from studio lighting setups with gels to being on location with gels plus I also go through my complete retouching and post pro workflow. For more details and complete breakdown of everything that's include check out my Coloured Gel Portraits Tutorial


I also offer comprehensive coloured gel packs. These collections of gels are what I use day to day to create some of the most highly saturated colours around. If you're looking at getting into gelled lighting or need to get stronger and richer colours in your coloured gel work why not check out my Jake Hicks Photography Gel Packs

Tuesday 05.16.17
Posted by Jake Hicks
Comments: 6
 
Newer / Older