• >>>NEW Water Shoot Workshop<<<
  • Technique
    • Latest Techniques
    • FREE TIPS
    • Quick Tips
    • Video
    • Site Search
    • Blog
    • Archives
  • Mentoring
  • 2026 Workshops
  • >Online Workshops<
  • Studio Lighting Books
  • Contact
    • Newsletter
    • Contact
    • Statement
Jake Hicks Photography
  • >>>NEW Water Shoot Workshop<<<
  • Technique
    • Latest Techniques
    • FREE TIPS
    • Quick Tips
    • Video
    • Site Search
    • Blog
    • Archives
  • Mentoring
  • 2026 Workshops
  • >Online Workshops<
  • Studio Lighting Books
  • Contact
    • Newsletter
    • Contact
    • Statement

Comparing the Lensbaby Edge 80 to a Standard 85mm Lens

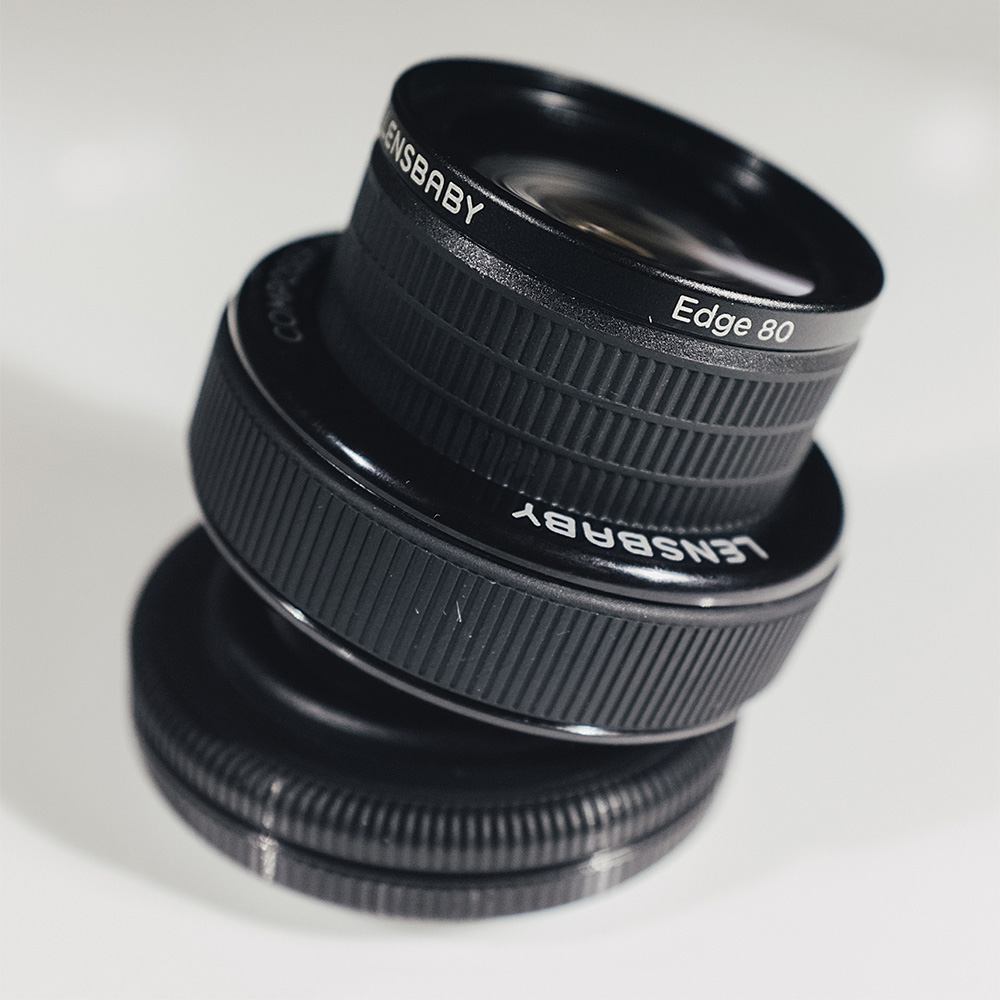
The Lensbaby Edge 80

The Lensbaby Edge 80

I'll start off by stating that this lens comparison test is really only interested in the resulting images created by the two lenses in question and not necessarily their technical features.

Both of these lenses create a very specific look and it is not my intention to prove one 'better' than the other but to show just how varied they can be if used correctly.

Along the way I'll discuss a few features of the Lensbaby Edge 80 but this is not meant as a review but more of a look at a real-use situation when shooting portraits and why the Edge 80 might be an interesting addition to your current 85mm portrait lens rather than a direct replacement.


The Lensbaby Edge 80

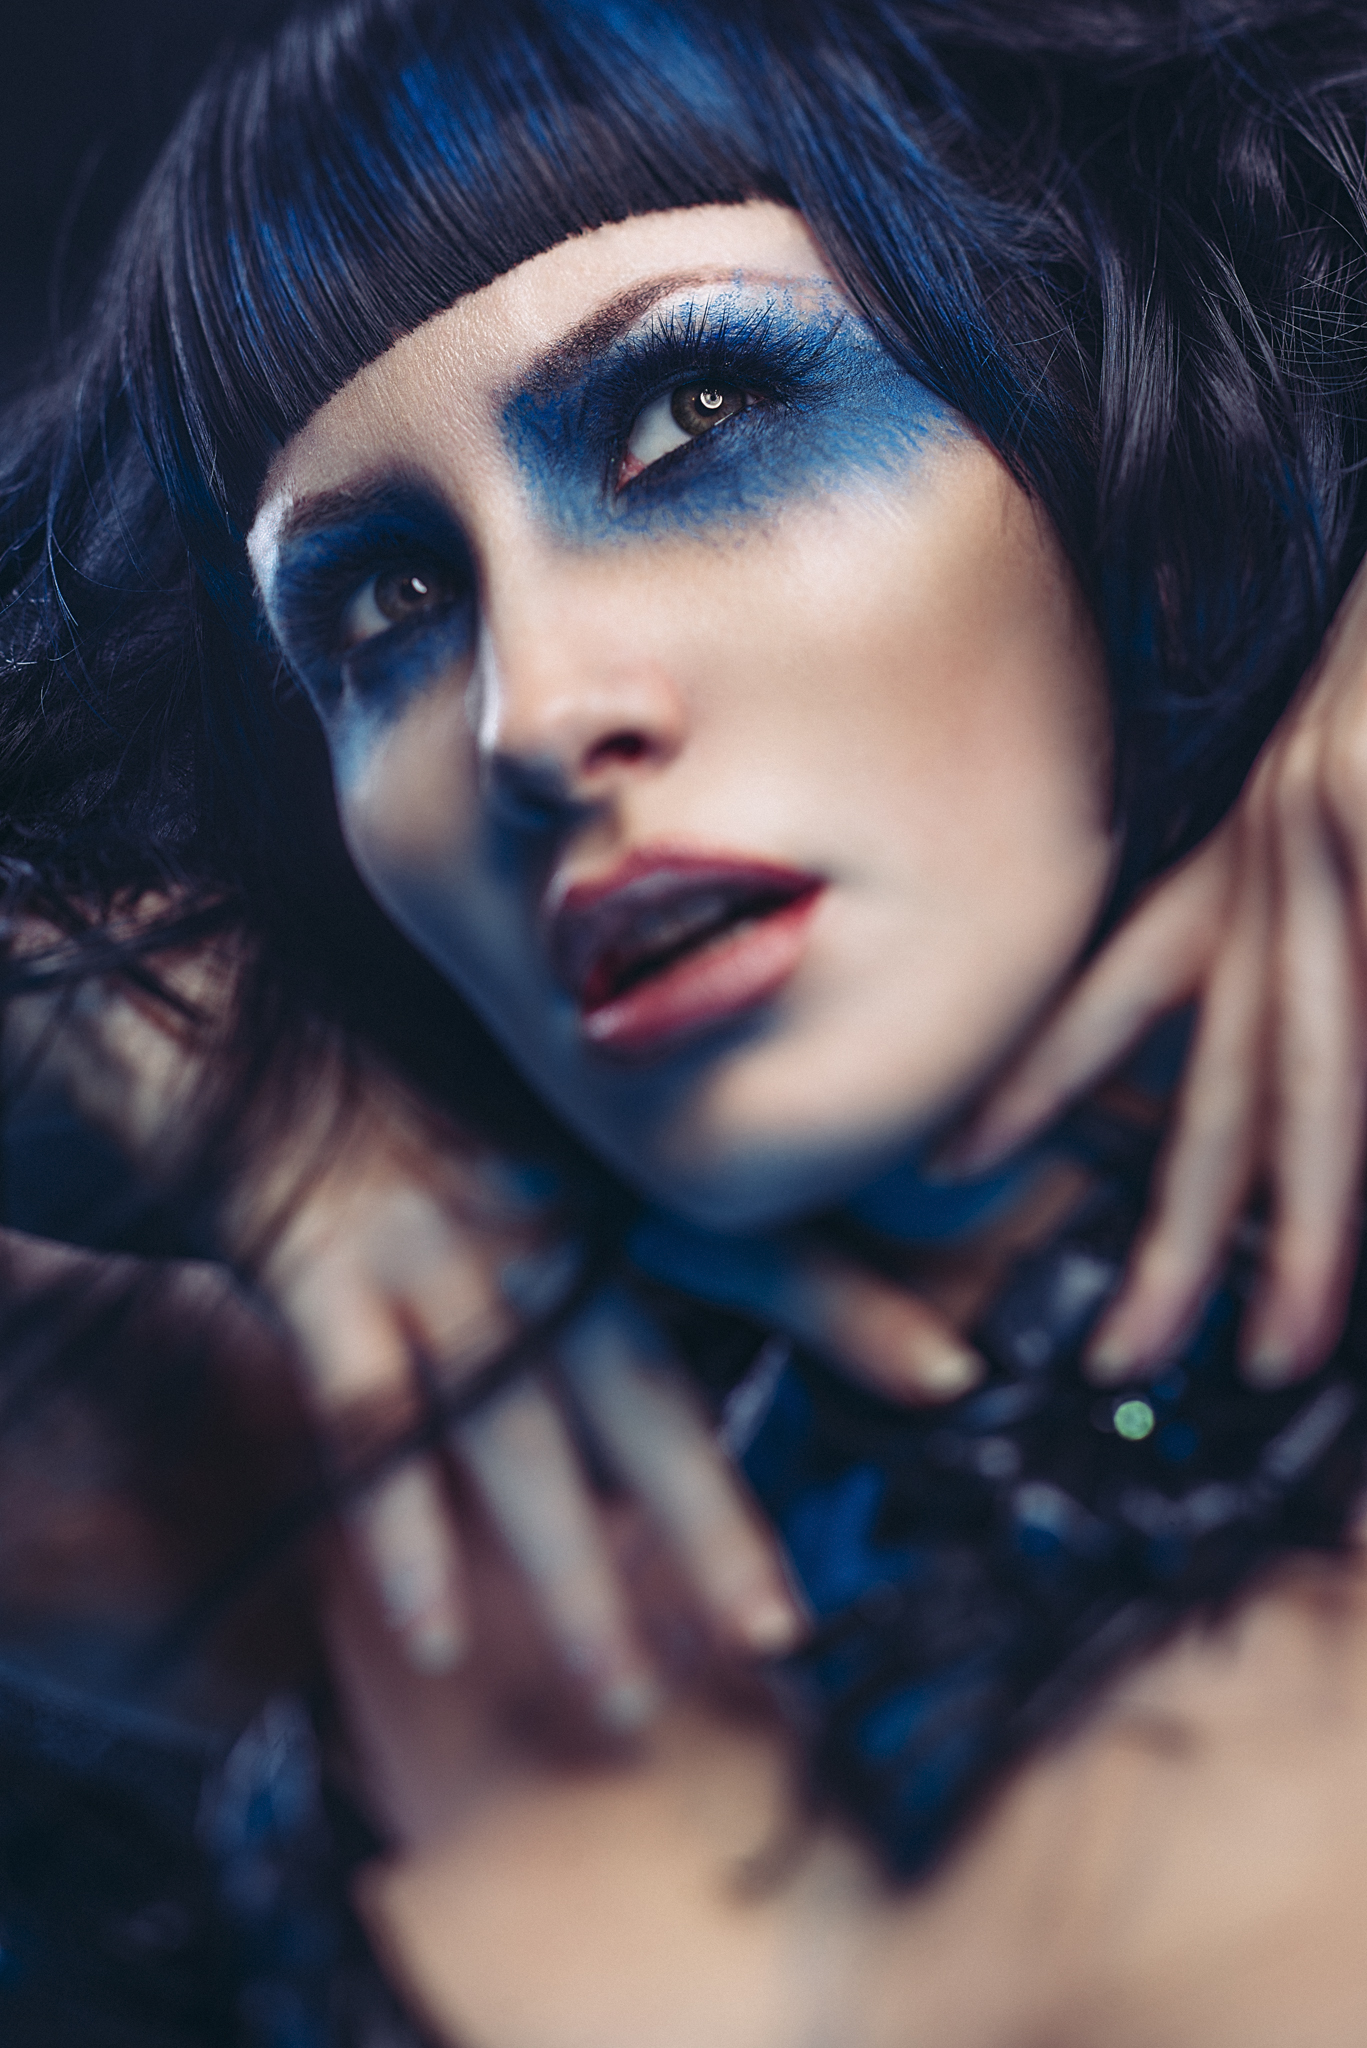
The image above is captured with the Lensbaby Edge 80. See how the neck and hands are oddly out of focus whereas the eyes are not. This is not through depth of field but rather a tilted plane of focus.

The image above is captured with the Lensbaby Edge 80. See how the neck and hands are oddly out of focus whereas the eyes are not. This is not through depth of field but rather a tilted plane of focus.

The Edge 80 is another lens in a long lineup of creative lens from the art house of lenses Lensbaby. The Edge 80 is a lens that shifts the plane of focus in a shot so that we see a slice of focus that we not only dictate the angle of but also the size of it.

I understand that might sound a little confusing so let me take a moment to explain how that works. The Edge lens often gets confused with a 'tilt-shift lens' which although understandable, is incorrect. A tilt-shift lens is a very expensive and precise piece of kit that corrects perspective errors in architectural and still-life photography. They are a real pain to use properly and although the Edge 80 has the 'tilt' section of those lenses it isn't able to 'shift' in the same way. As a result the Edge 80 is not designed (in my opinion) to correct perspective but rather the complete opposite as it does an amazing job of distorting the perspective.

The Edge 80 distorts the perspective by literally tilting the lens in the middle of the lens barrel. The lens attaches to your camera like normal but then you have the option the tilt the end of the lens up, down or side to shift the actual plane of focus.

In the diagram above I have depicted how the two lens see the subject. On the left we have our standard lens that we are all accustomed to and on the right the Edge 80 lens that splits at barrel to tilt the focal plane to our desired angle. The key …

In the diagram above I have depicted how the two lens see the subject. On the left we have our standard lens that we are all accustomed to and on the right the Edge 80 lens that splits at barrel to tilt the focal plane to our desired angle. The key here is the fact that the camera body hasn't moved at all thereby creating drastic distortions in the perspective of the resulting image.

As you can see from this shot above with the Edge 80 attached to my Nikon, the lens barrel is clearly tilted over to one side.

As you can see from this shot above with the Edge 80 attached to my Nikon, the lens barrel is clearly tilted over to one side.

As you can see from the diagram above this is a powerful tool because although you'd think you could simply tilt your regular lens up and down, the magic happens with the distortion because when using the Edge 80 the camera body doesn't move at all resulting in a mismatch of focal planes that thereby creates the perspective distortion. Believe it or not, I'm simplifying what's going on here and I'll go into a little more detail on what the resulting images look like in moment too.

The rest of the Lensbaby Edge 80 is much the same as any other lens you're used too, the only other key difference is that this lens is completely manual and doesn't 'talk' to the camera body in any way. The aperture ring is situated around the outside of the lens at the front and as this is a creative lens type it's also manual focus. Manual focusing is a bit of pain and it can put a few people off but you're not alone. Manual focusing is a skill just like any other so some practice is required to get good at it. To help you out I've already written a couple of articles to point you in the right direction. Tips on getting Sharper Images with Manual Focus Lenses Part 1 and Hacks for Getting Sharper Manual Focus Shots Part 2

The Edge 80 does have the option for macro images via a pull-out collar at the front of lens. Standard minimum focal distance is around 1m and with the collar extended that focal distance can be reduced to about half that at 48cm.

In the images above you can see the barrel extends slightly. In the shot on the right you can see that the barrel is extended fully, placing the lens in a macro mode allowing for closeup photography of around 48cm.

In the images above you can see the barrel extends slightly. In the shot on the right you can see that the barrel is extended fully, placing the lens in a macro mode allowing for closeup photography of around 48cm.

How Sharp is the Edge 80?

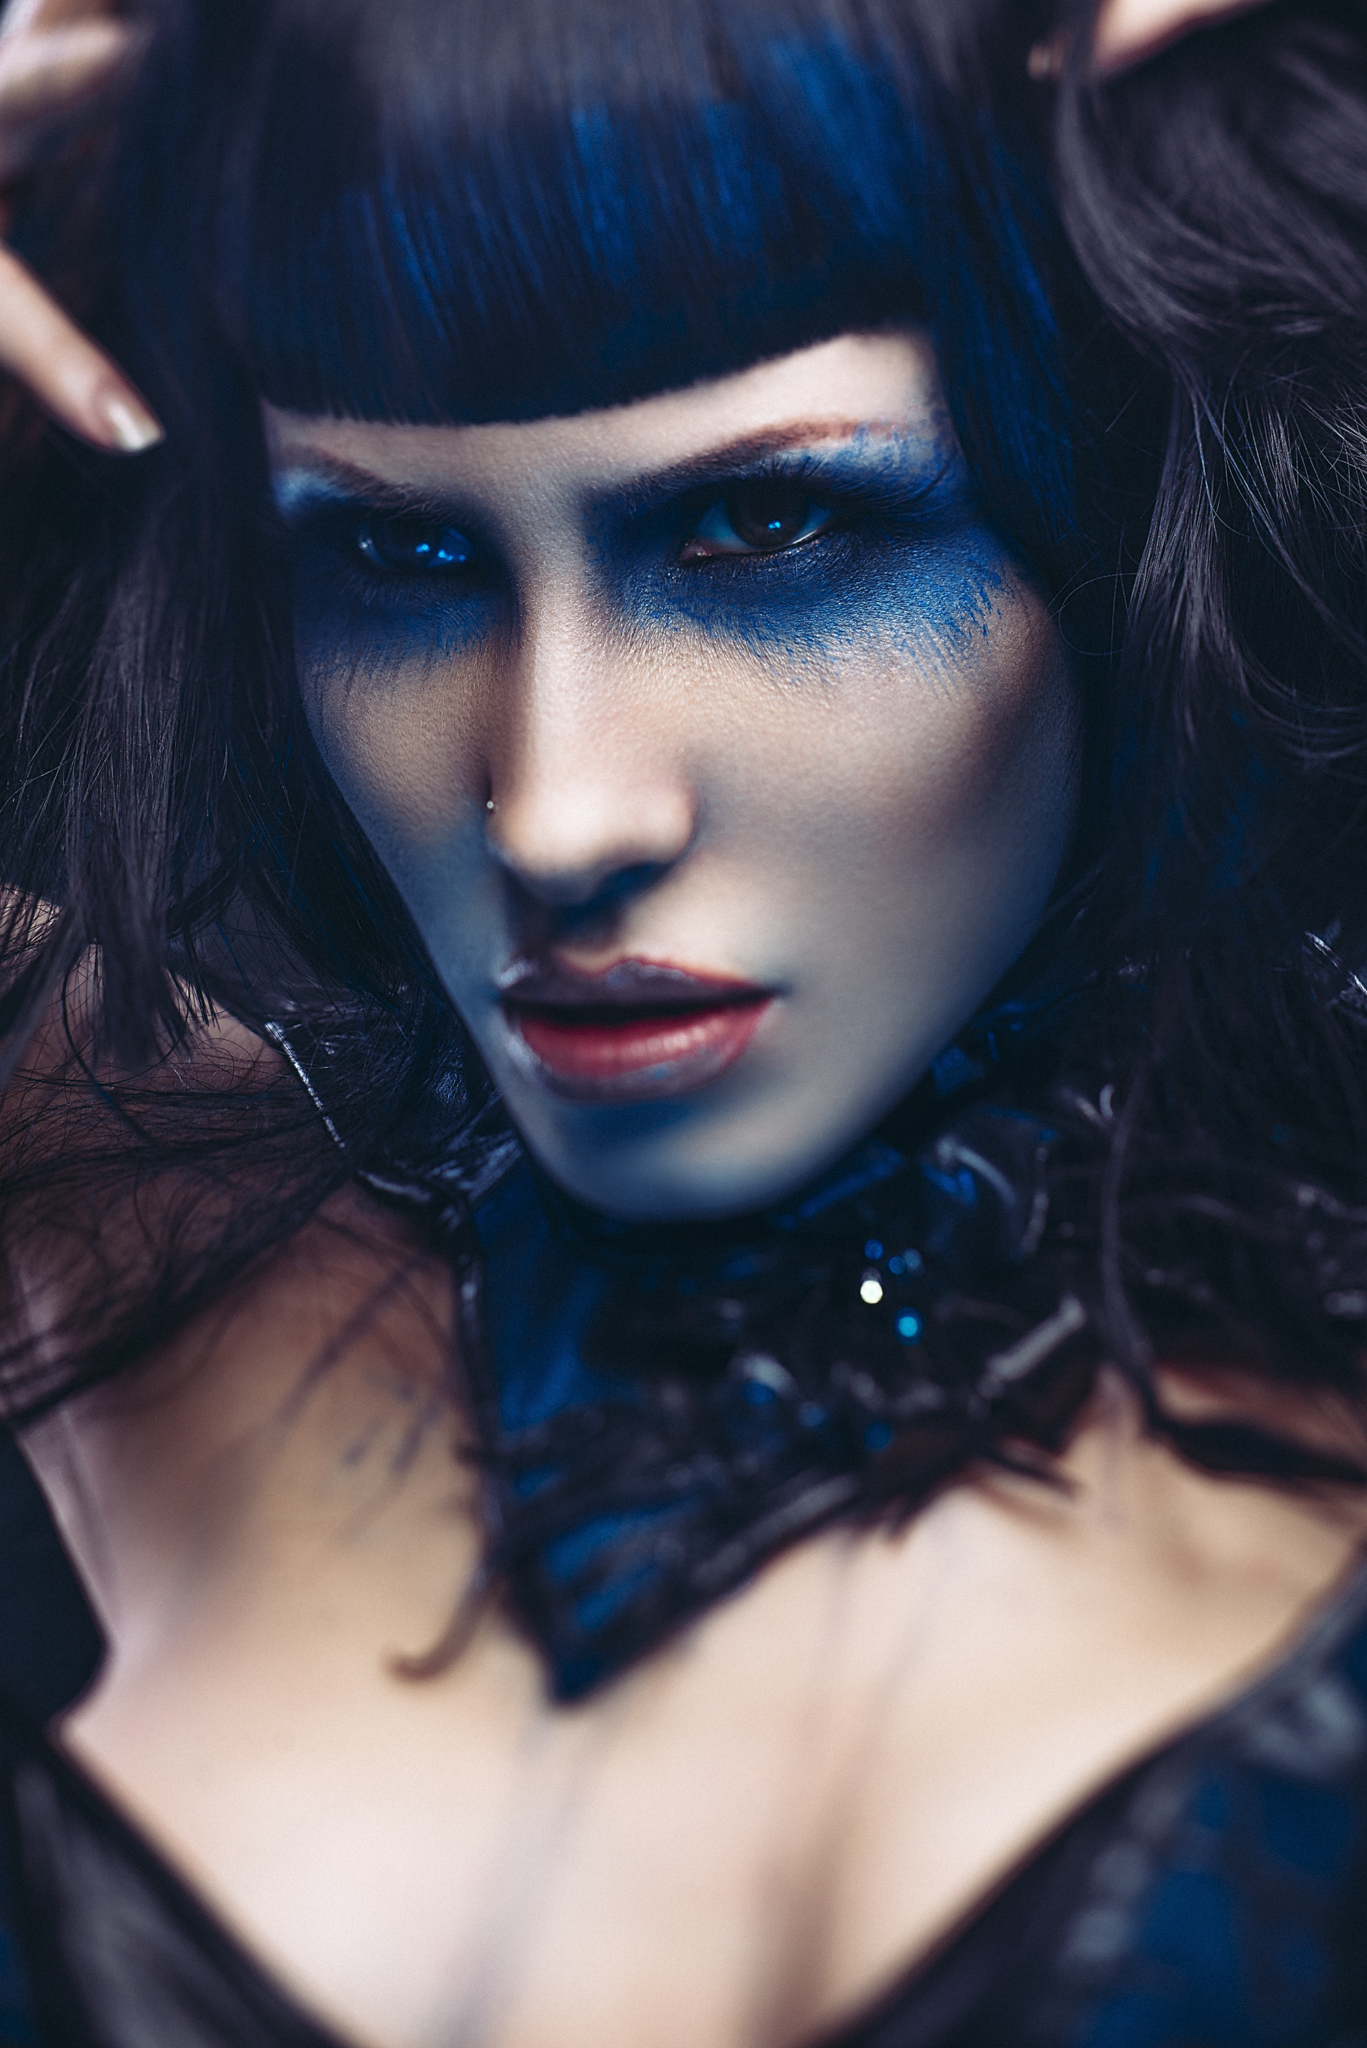
Whilst we are talking about focusing here I really wanted to talk about just how sharp this lens can be. I'll caveat this by saying that I'm not normally very fussy on how sharp a lens is compared to another lens. I like my lenses and resulting images to have a 'soul' and tack-sharpness doesn't really play a factor in that look so I'm happy to use a 50 year old beaten up Russian lens to get a desired look. But after seeing just how insanely sharp this  Edge 80 lens is I was genuinely shocked.

Edge 80 shot with zoom of eye included. Click image to enlarge to confirm just how sharp this lens really is.

I think the sharpness is even more impressive when you consider the fact that this really is an 'art' lens and supposedly not designed to the same ridiculously expensive standards as some other lens manufactures. On that note I know plenty of lenses that cost well in excess of £1000 that are nowhere near this sharp. On top of that, those lenses don't have a huge ball-joint-tilting-mechanism slapped in the middle of them like this Edge 80 and they still aren't this sharp. If Lensbaby ever decide to step away from just the art-lens market I'd be seriously interested in what they come up with.

On that note I even posted the above image online and asked my community to guess what lens had taken the shot. Out of the 70 or so guesses we had everything from the £1800 Nikon 105 f1.4, the 85mm f1.2 from Canon and we even had the Zeiss 85mm f1.4 at £3,300 come up a few times! Suffice to say it created quite a stir and if you're interested you can check out the discussion here 'Would anybody like to make any guesses as to which stupidly sharp lens this is?'

The Lensbaby Edge 80 has been out a little while now and it's another one of the modular lenses from Lensbaby. That essentially means that if you own one or another of the other modular Lensbaby lenses you can simply swop in and out the specific optic you need with relative ease. I personally think this is a smart and very generous move on Lensbaby's part as this saves the consumer a lot of money when not having to purchase an entirely brand new lens each time. Buying the whole lens will cost around £399 whereas just buying the optic alone is around £229.

Most of the Lensbaby lenses come in two parts, the the housing and the optic. On the left in the shot above is my Composer Pro housing and on the right is the Edge 80 Optic. I already owned the housing when I bought my Lensbaby Sweet 50 lens so all …

Most of the Lensbaby lenses come in two parts, the the housing and the optic. On the left in the shot above is my Composer Pro housing and on the right is the Edge 80 Optic. I already owned the housing when I bought my Lensbaby Sweet 50 lens so all I had to do was purchase the Edge 80 optic and slot it in.


What's really going on with Edge 80 focusing?

So what is actually going on in the Edge 80, why do the portrait shots you take with it look like they've been taken at an extremely shallow depth of field?  In this section I'm going to attempt to demystify what's actually going on with the focusing in the Edge 80 and how this can be manipulated for creative effect.

First up let's take a little look at a standard lens and see how that focal plane views its subjects.

In the diagrams above you should now see where the focusing is taking place on standard lens versus the Lensbaby Edge 80. Click to enlarge.

So now that we can see how this slice of focus works and how we can use it to create perspective distortion now lets see how the depth of field interacts with that.

The diagrams above show the focal planes and the drop off of focus that we're all familiar with when using standard lenses at varying apertures. Click to enlarge.

In these diagrams we see how combining a focal plane shift with a shallow depth of field can dramatically effect the look of the depth of filed. Click to enlarge.

From the above illustrations it should now be more apparent as to what's going on with the Edge 80 shots. This should hopefully go some way to explain why some people were rightly tricked into thinking that my Edge 80 shot was taken on a £3000 f1.4 lens when in reality the forced depth of field was created with an Edge 80 lens taken at f2.8.


Edge 80 Images

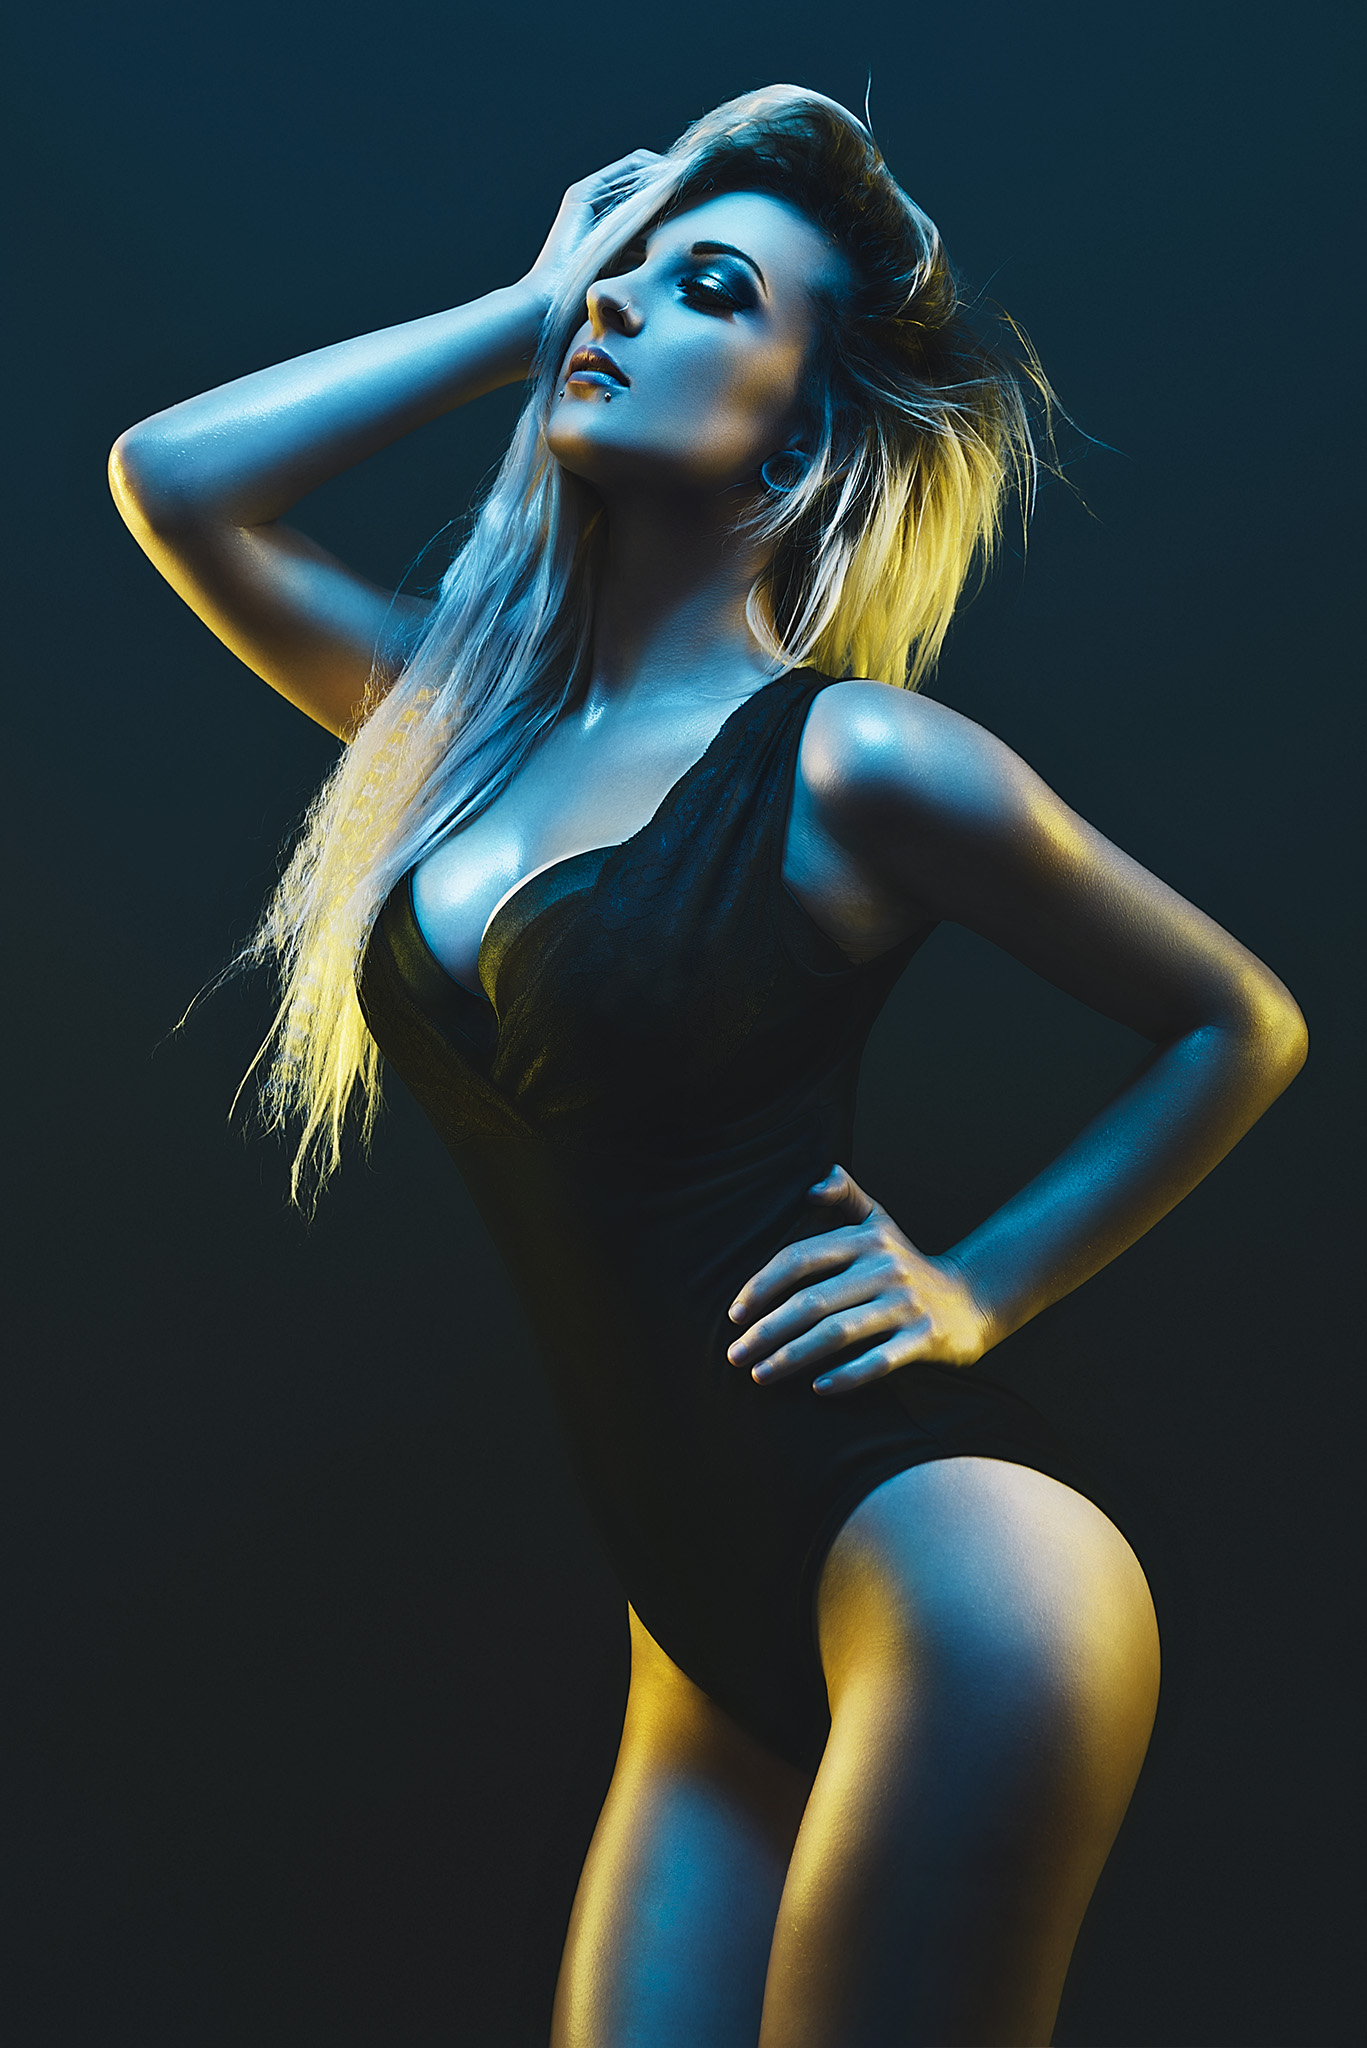
Ok so now we've nerded out with the physics let's take a little look at some of the images I've taken with my Lensbaby Edge 80. In the below shots it's worth paying attention to how the bokeh is rendered too, it's this sort of light play that post-production tools like Photoshop's 'lens-blur' tool has a VERY long way to go to recreate in this detail. 

Click on the images below to enlarge them.

Featured model: Ryo Love
JakeHicksPhotography (1 of 4)-3.jpg
JakeHicksPhotography (2 of 4)-3.jpg
JakeHicksPhotography (3 of 4)-3.jpg
JakeHicksPhotography (4 of 4)-3.jpg
JakeHicksPhotography (1 of 4)-3.jpg JakeHicksPhotography (2 of 4)-3.jpg JakeHicksPhotography (3 of 4)-3.jpg JakeHicksPhotography (4 of 4)-3.jpg
 

Comparing the Edge 80 to a Standard 85mm Lens

My Nikon 85mm 1.8 prime lens was the lens I used for testing the visual difference between the Edge 80 and a 'standard' 85mm.

My Nikon 85mm 1.8 prime lens was the lens I used for testing the visual difference between the Edge 80 and a 'standard' 85mm.

I wanted to explain what the Edge 80 was actually doing with light and perspectives before I jumped into this section as without really understanding what is going on with the Edge 80 optics would make the following images a little hard to explain.

The 'standard' 85mm lens I will be referring to from now on will be the Nikon 85mm f1.8 D lens. This is a great little lens that I've had for years and I would certainly never get rid of this lens because of the Edge because they do very different things.

For this comparison test I shot a bunch of headshots with both the Edge and the Nikon 85 set at exactly the same aperture of f2.8. I tried to compose them at roughly the same crop so you can see the effect that the aperture and tilt has on the same setup.

The shots below are from the Edge 80 at f2.8 - Click on the images below to enlarge them or view the slideshow.

JakeHicksPhotography (1 of 8).jpg
JakeHicksPhotography (2 of 8).jpg
JakeHicksPhotography (3 of 8).jpg
JakeHicksPhotography (4 of 8).jpg
JakeHicksPhotography (1 of 8).jpg JakeHicksPhotography (2 of 8).jpg JakeHicksPhotography (3 of 8).jpg JakeHicksPhotography (4 of 8).jpg
 

The shots below are from the Nikon 85mm at f2.8 - Click on the images below to enlarge them or view the slideshow.

JakeHicksPhotography (5 of 8).jpg
JakeHicksPhotography (6 of 8).jpg
JakeHicksPhotography (7 of 8).jpg
JakeHicksPhotography (8 of 8).jpg
JakeHicksPhotography (5 of 8).jpg JakeHicksPhotography (6 of 8).jpg JakeHicksPhotography (7 of 8).jpg JakeHicksPhotography (8 of 8).jpg

Featured Model: Sammie Howe

Conclusions

To me the difference and look that the Edge 80 creates is outstanding and I personally love it but it is a very unique and certainly not for every occasion. If we look at the above shots from the Edge 80 we can clearly see the plane of focus that it's creating compared to the regular 85mm. Like I mentioned I love the forced depth of field look it gives and I love the bokeh that it can produce as a result. And remember, this can't be done in Photoshop so the looks and shots you create will be pretty unique.

Is the Edge 80 great for every shoot?

No, definitely not.

Can you create some visually stunning shots?

Yes, definitely.

If used in a certain way with portraits and headshots can it look like it's producing images from a lens nearly 10 times its price?

Maybe, but I'll let you decide that one ;)


Lensbaby Edge 80 Specs

  • Focal Length: 80mm
  • Aperture range from f/2.8 through f/22
  • 12-blade internal aperture, controlled by a dial on the front of the optic
  • Focus Type: Manual
  • Tilts from zero to 15 degrees
  • Compatible with the Lensbaby Optic Swap System
  • 5 multi-coated glass elements, in four groups
 

Thinking of getting one?

If you are thinking of picking one of these Edge 80's up then feel free to use my discount code at WEX Photographic. The code is JAKEHICKS10 and it will entitle you to a 10% discount on any of the Lensbaby lenses at WEX. (EDIT: There was previously a problem with this code but it has now been resolved and is confirmed to be working again).

Here's soem direct links if you'd like to check it out.

WEX Photographic

Nikon Lensbaby Edge 80

Canon Lensbaby Edge 80

Lensbaby Edge 80 - Optic Only

If you've got one already then please let me know what you think of yours and if you've tried using them like this for portraits. I say that as I only ever see the 'toy-town' style pics taken with the lens so I'd like to hear from others who use them for portraits too.

Also if you have any questions then feel free to ask away in the comments below and I'll do my best to answer them as soon as I can :)


:WARNING: JHP Products and Services Await Your Love Below!


If you're interested in any of my work and would like to know more about how I created some of my shots then why not check out my workshops. Here you can find out everything there is to know about Gelled Lighting, Long Exposure Flash Photography and my entire Post-Pro Workflow. Jake Hicks Photography - Workshops


I have also just released a brand new 22 hour complete Gelled Lighting Tutorial video. I go over everything from studio lighting setups with gels to being on location with gels plus I also go through my complete retouching and post pro workflow. For more details and complete breakdown of everything that's include check out my Coloured Gel Portraits Tutorial


I also offer comprehensive coloured gel packs. These collections of gels are what I use day to day to create some of the most highly saturated colours around. If you're looking at getting into gelled lighting or need to get stronger and richer colours in your coloured gel work why not check out my Jake Hicks Photography Gel Packs

Tuesday 02.07.17
Posted by Jake Hicks
Comments: 6
 

Hacks for Getting Sharper Manual Focus Shots - Part 2

Last week we covered three of the main tips to bear in mind when trying to get sharper manual focus images. Ambient lighting, contrasting elements to focus on and actual focusing technique. Although all of these tips are essential in giving us the best possible chance to get more of our manual focus shots pin-sharp, there are still going to be times when we need a little helping hand to consistently nail those manual focus images.

So even though manual focusing is a pain you'll be pleased to hear that there are a few additional tools available out there that are designed to help us nail that focus even in the worst possible circumstances.

In last weeks article we also covered just how many different types of manual focus lenses are available to us and to ignore them all because we find manual focusing too tricky might well be a mistake. If you missed the first section of this manual focusing tutorial then you can check it out here Manual Focusing - Part 1. For the rest us, let's take a look and see what tools are available to help us further.

Three tools that enable you to consistently nail manual focus shots

Focusing Screens

I think it's important to point out that as DSLR users, we have it the worst for manual focussing. In fact it's my personal opinion that the older SLR cameras were far better equipped to deal with the issues of manual focusing because they had to be. If we use manual focus lenses on our newer DSLRs we are definitely in the minority and as a result the cameras aren't predominately designed with those issues in mind. The main element that I'm referring to is the 'focusing screen', this is the small sheet of glass that sits at the base of the pentaprism in your camera and it's this very screen that we look through and displays the focus-points on our modern cameras.

The focusing screen is situated at the base of the pentaprism in our DSLRs. Accessing and replacing or changing it is relatively simple.

The focusing screen is situated at the base of the pentaprism in our DSLRs. Accessing and replacing or changing it is relatively simple.

Some examples of focusing screens. Image courtesy of focusingscreen.com

Some examples of focusing screens. Image courtesy of focusingscreen.com

In modern DSLR cameras the focusing screen is very simplistic and generally only has a simple outline of the autofocus node area. The focusing screens in older SLR cameras had more of a job to do as they provided the only way to actually visually display focusing. The older screens were designed to essentially visually split the image you viewed through the viewfinder, the more 'in-focus' you made the scene the less 'split' the image appeared and the more 'in-focus' you made it the more aligned the two images became.

If we take a look at the image above we can see what the viewfinder in an older SLR looked like. We have our split-focus focusing screen and in the centre image we see what the scene looks like when the hand is out of focus and in the right-hand ima…

If we take a look at the image above we can see what the viewfinder in an older SLR looked like. We have our split-focus focusing screen and in the centre image we see what the scene looks like when the hand is out of focus and in the right-hand image we see what the focusing screen looks like when the hand is in focus. With a focus screen like this in your camera it is very easy to tell when we have correctly focused your shot as the two images visually align. Images courtesy of focusingscreen.com

I mentioned in one of the above pictures that the focusing screen is actually very easy to access and change and I have done so myself in the past without too much hassle. You simply remove the lens and pop out the old one and pop in a new one. There is also a massive variety of focusing screens to choose from that alter the out-of-focus scene in different ways from vertical, horizontal or even angled split screens. Focusingscreens.com is by far the best source of focusing screens I've found on the web so if you're interested in seeing all the different types available to your specific camera model then definitely check them out focusingscreens.com

Some of the focusing screens available at focusingscreens.com.

Some of the focusing screens available at focusingscreens.com.

These focusing screens sound great right? S you may be wondering why on earth this simple yet igneous way of assisting in manual focusing isn't in our modern DSLRs anymore, after all this method of focusing practically guarantees pin-sharp results every time in my experience. There are a few important reasons why these focusing-screens have fallen out of favour and first and foremost is their compatibility issues with our modern autofocus. Essentially these screens can conflict with the speed at which autofocus can determine a scene and focus on it accurately.

There is a few reasons why theses screens conflict with autofocus but namely and most importantly it is the fact that these focusing screens reduce the amount of light that enters our eye whilst focusing. The screens display the out of focus areas visually to us by having heavily ground glass in there which diffuses and thereby reduces the amount of light that can enter the viewfinder which in turn makes it a little harder for us to see through.

With very fast lenses (prime lenses that have an aperture of at least f2.8 for example), this isn't too much of an issue as there is already a ton of light entering the lens when we're trying to focus. Remember that our modern cameras only apply the chosen aperture value when we actually press the shutter. For example we may have our camera set to f8 but when we are focusing, the lens is set to it's widest possible aperture. On longer zoom lenses where the aperture only goes as wide as f4 for example the drop off of light is significantly noticeable. Some of these focus screens can limit as much as one whole stop of light from entering and remember one stop in this instance is the same as halving the amount of light entering the viewfinder.

Focusing screens are relatively easy to swap in and out yourself without specialist knowledge or tools being required. The downside is that they can reduce a lot of light from entering into the viewfinder due to the ground glass they are made of lik…

Focusing screens are relatively easy to swap in and out yourself without specialist knowledge or tools being required. The downside is that they can reduce a lot of light from entering into the viewfinder due to the ground glass they are made of like the one seen above. Image courtesy of Matthew (mattdm) Miller

I know of several photographers who use a lot of very fast manual focus lenses and swear by how effective and efficient these focusing screens are. After all it's not the end of the world if you don't get on with them as you can simply put your old focusing screen back in. The cost of these is around £70-£80 ($90-$100) so it's pricey but not so expensive so as to not be worth a look. I'm thinking of getting one for my back-up camera body to use with manual focus lenses.

PROS

  • Very effective at consistently nailing pin-sharp manual focus images
  • Can be replaced and altered without specialist tools or knowledge

CONS

  • Can conflict with autofocus lenses making them sluggish
  • Most of the focus screens will make the viewfinder darker and even effect 'through the lens' exposure readings
  • A little pricey to test out

Cost

£70-£80 ($90-$100)


Magnifying Viewfinder Eyepiece

This next item is the cheapest 'quick-fix' for sharper manual focus shots but as is often the case, this is also probably the least effective in my opinion. A magnifying eyepiece will replace the eyepiece you currently have for one that has a tiny magnifying lens built into it. You remove your current eyecup and slot this on instead and it will then magnify everything you subsequently see in your viewfinder.

A magnifying eyepiece may be the cheapest option but not necessarily the best option.

A magnifying eyepiece may be the cheapest option but not necessarily the best option.

I picked one up a while ago as I thought this seemed like a really smart and effective way of fixing a temporary problem. After all I only use manual focus lenses some of the time so I thought I could pop on this magnifying eyepiece quickly and effectively only when I needed it. In theory it makes sense and yes it does magnify the image when you look through the viewfinder making manual focusing a little easier, unfortunately I also found that it magnifies the image so much that I can't quite see the edges of the frame in my shot making it quite tricky to compose an image effectively.

The magnifying eyepiece that I purchased came with a few additional eyecups and attachments for different camera manufactures.

The magnifying eyepiece that I purchased came with a few additional eyecups and attachments for different camera manufactures.

Different magnifying eyecups come with varying amounts of zoom and mine even came with the ability to zoom the image from 1.08 times to 1.6 times zoom. Even with the ability to dial the zoom right down if you wanted, it still meant that you had a tiny lens attached to the back of your camera which meant that your eye was further from the viewfinder, so even with the minimum zoom selected I still found it hard to see the entirety of the frame within my viewfinder.

I'll just add here that I bought an inexpensive third-party magnifying eyecup. Although I've shared my experiences with this version I cannot say that the more expensive versions won't be better as they may well be. If you have one and haven't come across the problems I've outlined here then please get in touch as I'd love to hear your thoughts on it.

Simply remove your old viewfinder eyecup and replace it with the newer magnifying one.

Simply remove your old viewfinder eyecup and replace it with the newer magnifying one.

PROS

  • Very inexpensive to try out
  • Simple and easy to swap on and off with your existing eyepiece

CONS

  • Additional depth on the eyepiece can make it tricky to view and compose your shots
  • Having the larger eyepiece attached makes your camera prone to getting caught on everything, especially when carrying your camera on a neck strap

Cost

£15-£30 ($20-$40)


Video Loupe

The last item on my list is something that is so simple yet so effective that I was dumbfounded as to how I'd overlooked it for so long. The video loupe is a large viewfinder that covers the entirety of your LCD screen and displays an image in an eyecup that you hold up to your eye. Rather than composing and focusing your shot via the standard viewfinder you now switch your camera to live-view and compose and focus your shot through this video loupe.

DSLR Video Loupe:&nbsp;I'd love to tell you that I spent hours deliberating over which video loupe to purchase, but alas it simply came to the fact that this one had red bits on it.

DSLR Video Loupe: I'd love to tell you that I spent hours deliberating over which video loupe to purchase, but alas it simply came to the fact that this one had red bits on it.

First off, this video loupe is only useful on cameras with a 'live-view' function and thankfully that is a feature that is on most modern DSLR's now. You attach this video loupe by screwing a little plate into the base of your camera via the tripod mount and then slot the video loupe viewfinder in when you want it. This is great as it is very quick and easy to remove when you're not using it.

The video loupe comes with a mount that you attach to the cameras tripod screw mount. You can then slot the video loupe on and off very quickly and easily via the slot attachment you see here.

The video loupe comes with a mount that you attach to the cameras tripod screw mount. You can then slot the video loupe on and off very quickly and easily via the slot attachment you see here.

When you engage live-view on your DSLR you are asking your camera to essentially send a live video feed of what is in the viewfinder to the screen at the back of the camera. Doing so results in a couple of key things happening that is very important to us. Firstly, the cameras mirror has to flip up out of the way for this live-view to work. That doesn't sound like a big deal but it does mean that when you actually take a shot, there is distinct delay between pressing the shutter, the mirror moving again and the shutter actually capturing the image. It is still quick but certainly noticeable if you were trying to photograph something quickly. In reality though it is unlikely that you'd be trying to photograph something that was moving quickly with a manual focus lens so this slow methodical shooting speed is often found when manual focusing anyway. On top of that it does mean that you can't fire off multiple shots very quickly because of this mirror delay, but again I doubt that if you're shooting with manual focus lenses that you're intending to shoot at 10 frames a second.

Of course adding a video loupe to your system will increase the bulk/size/weight a little!

Of course adding a video loupe to your system will increase the bulk/size/weight a little!

For me the biggest feature of this video loupe solution to manual focusing is the fact that your image is now backlit. Remember that you are looking at the bright LCD screen to focus and that automatically brightens the image considerably compared to the viewfinder in most studio situations. As a result your task of seeing when and where the image is in-focus is now incredibly easy, the image is bright and you're looking at a screen that is filling your vision entirely. Even when I was using a 2-stop ND filter on my old manual focus lens in a dimly lit studio environment with tungsten modelling lamps, the live-view image being displayed was bright and easily focusable.

On most of the video loupes you can also choose to flip the actual viewfinder section up like you see here in the left and centre shots. This is great for reviewing images, then you can flip it back down again, as seen in the right hand image above …

On most of the video loupes you can also choose to flip the actual viewfinder section up like you see here in the left and centre shots. This is great for reviewing images, then you can flip it back down again, as seen in the right hand image above to continue taking photos.

For me, having a video loupe for manual focusing is fantastic! One of the key reasons I love using it for manual focusing is simply because of the brightness that is offered from focusing on that big backlit screen and that feature alone easily outweighs the minor downsides for me.

They aren't cheap though I'm afraid and I think that is because it has the word 'video' in its name. Everything related to video is overpriced in my opinion and this is no exception. That being said, there is huge price range starting out at the bottom end with the basic ones like mine for £70 all the way up to the higher quality ones for upwards of £200.

PROS

  • A gorgeous big and brightly lit image for you to nail your manual focus shots
  • Quick and easy to attach and detach on nearly any camera

CONS

  • They are a little pricey
  • Video loupes add a lot of weight and bulk to your system
  • Running live-view constantly will slow down your shooting speed making photographing fast moving subjects tricky
  • Having live-view constantly enabled will significantly reduce the battery life if you're used to never using it

Cost

£70 - £200 ($90-$250)


In Conclusion

So that's my top three tools/hacks available to aid you in your quest for sharper manual focus shots.

Essentially if you're a hardcore manual focus shooter that has a lot of fast lenses I would seriously consider looking at the focusing screens. I will be looking at one for my spare camera body as I feel they are the best balance between effectiveness and ease of use.

If you're after a quick play around with manual focus and aren't overly precious about the exact composition then maybe the magnifying viewfinder eyecup is an option. It's definitely the cheapest and easiest to add and remove as and when it's needed so it's also the item with the lowest risk associated with it too.

For those looking to invest a little more, I seriously recommend you look at the video loupes. I love shooting with mine when I'm manual focusing simply because of how bright the image I'm trying to get sharp is and you'd be amazed at how much easier it is when your subject is big and bright like this.


But what are your thoughts? Do you have a manual focusing aid that you swear by? Have you used any of these ones that I've already mentioned and if so, did you find them effective? Let me know your thoughts in the comments below.

PS can the mirror-less camera owners please keep their gloating to a minimum ;)


:WARNING: Retail Therapy Ahead!


If you're interested in any of my work and would like to know more about how I created some of my shots then why not check out my workshops. Here you can find out everything there is to know about Gelled Lighting, Long Exposure Flash Photography and my entire Post-Pro Workflow. Jake Hicks Photography - Workshops


I have also just released a brand new 22 hour complete Gelled Lighting Tutorial video. I go over everything from studio lighting setups with gels to being on location with gels plus I also go through my complete retouching and post pro workflow. For more details and complete breakdown of everything that's include check out my Coloured Gel Portraits Tutorial


I also offer comprehensive coloured gel packs. These collections of gels are what I use day to day to create some of the most highly saturated colours around. If you're looking at getting into gelled lighting or need to get stronger and richer colours in your coloured gel work why not check out my Jake Hicks Photography Gel Packs

Tuesday 01.31.17
Posted by Jake Hicks
Comments: 2
 

Tips on Getting Sharper Images with Manual Focus Lenses

Ever since Leica presented a camera at the 1976 Photokina with working automated focusing, autofocus technology has taken leaps and bounds in its advancement. Todays autofocus cameras are nothing short of miraculous to the point at which it's hard to imagine where the advancement can go from here. But photographers didn't alway have focusing this easy.

This article aims to provide you with three key areas that if followed correctly should practically guarantee nailing pin-sharp manual focus shots in no time.

This is the first part in a two part article on manual focusing and in part two we will look at some additional tools that you can purchase to aid you in your quest for sharper manual focus shots. Let's get started!

Autofocus History

Although autofocus seems like a given staple of our photographic lives now it's only really seen consistent success beyond a gimmick since the mid 80's and early 90's. Although Konica brought the first mass produced autofocus SLR in the form of the C35 AF to market in 1977, it wasn't until 1992 when Nikon properly integrated motors into the lens itself that autofocus became not only quick but somewhat reliable.

Manual focus lenses come in wide variety and it's not just reserved to older vintage lenses, there are plenty of manual focus art lenses as well as reimagined vintage lenses now too.


Why bother with manual focus lenses?

Photography and focusable lenses have been around since the early 1800's and considering that autofocus didn't come into play until the 1980's, that's a whole lot of lenses that were never autofocus compatible and a whole lot of manual focus lenses that can still create some gorgeous shots.

This Petzval manual focus lens that was re-released in 2016 is focused via this large knob situated at its base.

This Petzval manual focus lens that was re-released in 2016 is focused via this large knob situated at its base.

But it's not just the older 'vintage' lenses that are manual focus, there are new manual focus lenses being released all the time known as 'art' lenses. These are the lenses being created by companies like Lensbaby and Lomography that create a specific look that cannot be recreated with a modern autofocus lens. Learning to manual focus these modern lenses is exactly the same as learning to focus the vintage ones so once you learn it, you're set to explore literarily thousands of manual focus lenses from all around the world.

Also, let's not forget that we're in the minority here, those of us that are prepared to work a little harder for an awesome looking shot will be rewarded. That reward comes in the form of thousands of old manual focus lenses that are crazily cheap, I've picked up some absolute killer lenses for as little as £30 to £50 which is fantastic.

But are manual focus lenses really still viable? Is the hassle of using a manual focus lens really worth the effort? It's my opinion that it most definitely is worth the effort because with a little practice and patience we can open up a whole new world of lenses that really do create some fantastic and unique looking shots.

Focusing my fathers old Olympus OM-1 meant aligning two semicircles correctly. Pictures courtesy of the Olympus manual

Focusing my fathers old Olympus OM-1 meant aligning two semicircles correctly. Pictures courtesy of the Olympus manual

I've been manually focussing lenses for a very long time so I'm a little more used to them than some people. In fact my first camera that was my fathers old Olympus OM-1 and that only had manual focus lenses. to focus properly on that you had to peer through the viewfinder and line up the two adjacent semicircles. When they aligned you knew your shot was in focus. The point I'm making here is that manual focusing to any degree of consistency is a skill like any other, it takes practice and you need to train your eye to know what to look for. So if you've ever given manual focusing a go or if you're about to give it a go, don't be disheartened straightaway, stick with it and I promise it will get easier.

Some tips on making manual focusing easier

Below I will go over the three key things that I think you need to bear in mind to ensure you the best possible number of pin-sharp images.

A manually focused beauty shot from the vintage Helios 85 lens.

A manually focused beauty shot from the vintage Helios 85 lens.

1. Ambient Light

First and foremost is lighting. I'll be honest, manual focusing outside in the middle of the day with plenty of bright lighting and a ton of detail to focus on is relatively easy. I highly doubt that many of you are here because you're struggling to focus outside. I shoot 99% of my work in a room with no windows so believe me when I say that if you can manual focus inside in a studio with limited ambient light, you can manual focus almost anywhere.

Unfortunately, lighting is also the biggest problem, everything I shoot is with flash so although the final shot looks bright once the flash has fired, focusing in the dim light of a tungsten modelling bulb certainly isn't. So first and foremost turn as much ambient light on in the studio as you can stand.

You don't have to set your shot up with all the lights on if you don't want to, you can just have the modelling bulbs on to place your lights but once you're happy, turn all the studio lights on to focus.

If you're unsure if all that lighting is going to affect your shot then turn the flash triggers off and fire a shot in the ambient light to see if anything registers on the camera. It's highly unlikely that even with all the lighting on in the room that anything will show up though because we're often shooting flash at 100ISO with shutter speed in excess of 1/160. You'd be surprised how much ambient light you need to register on the sensor with settings like that.

Here I was taking the beauty shot you saw above and I had as much ambient light on as I could to facilitate easier manual focusing.

Here I was taking the beauty shot you saw above and I had as much ambient light on as I could to facilitate easier manual focusing.

2. Catchlights

I am going to assume for this section that you're trying to get your subjects eyes in focus as a priority. If for some bizarre reason pin-sharp eyes aren't your thing then you can by all means skip this step.

As anybody who has been to my workshops will tell you, I preach/teach until the end of time about getting clean and clear catchlights in the subjects eyes and this is never more important than when you're trying to manually focus on a models eyes. Catchlights are the spectral sparkle of the lighting in the subjects eyes - Check this diagram for more information. If you don't have catchlights in the models eyes then it becomes very hard for us to tell when the shot is in or out of focus because there's simply not enough contrasting data or detail for us to differentiate between in-focus and soft-focus.

The images above show lighting on a model with and without catchlights present in the eyes. The image on the left shows almost no visible catchlights at all, this makes it very difficult to manually focus a shot as there's very little contrast in th…

The images above show lighting on a model with and without catchlights present in the eyes. The image on the left shows almost no visible catchlights at all, this makes it very difficult to manually focus a shot as there's very little contrast in the specific image area to visually lock-on to. The detail in the eyes on the right hand images gives you a far better chance of achieving a sharper image.

Catchlights are not always about light placement though and it can simply be that the model has moved in such a way that you are no longer seeing the tell-tale sparkle. Of course it could just simply be you, you may have moved to get a better angle so now the catchlights have disappeared in your subjects. Either move the lighting, yourself or the subject to get them back, doing so will greatly increase the chance of you getting a sharper shot.

Image taken with the manual focus Lensbaby Composer Pro Sweet 50 lens

Image taken with the manual focus Lensbaby Composer Pro Sweet 50 lens

3. The Technique

Lastly I'll go over what I think is the best technique to use when manually focussing a shot. The technique I'm referring to is the way in which we visually 'lock-on' to the correct focus point by visually recognising when the shot is in focus so that we may ultimately take the picture. Some very experienced street photographers are so adept at manual focusing that they will not even need to look through their viewfinder to get a sharply focused shot. I know this sounds unlikely but some of these street-shooters are so familiar with their camera and so adept at visually judging distance that they merely have to look at how far away their subject is and dial that distance into their lens via the scale on top. This is a seriously impressive skill indeed and unfortunately one that takes many years to master, for the rest of us mere mortals we have to find other ways to help us get there.

It's my advice that when you start manually focusing a shot that you aren't afraid to make big movements on the focusing ring. I see people using a manual focus lens for the first time and tentatively tweaking the focus ring looking for that 'sweet-spot'. I understand why we start off doing that, we're really trying to analyse the scene and we're concentrating on what's in focus and what's not in focus and to do that we only move the focus ring a tiny amount at a time. The problem with this technique is that our eyes are full of tricks to help us through our busy and tiring days, our eyes love to fill in the details for us based on the surrounding data we feed them. For example our eyes take in data at a very slow 60 frames per second, if stuff happens faster than that, like if a light flashes 80 times a second, then our brain reads that as the light being constantly on and not flashing at all. This is rarely a problem and most of us go about our days without incident or fear of what's happening between those frames. The issue becomes a little more noticeable however when we're trying to concentrate on something that is only visually changing very slightly, the in-focus and out-of-focus object or scene becomes harder and harder for us to discern as changing at all the longer we look at it. As a result it becomes harder for us to accurately judge focus when we concentrate like this and if you've tried it with regards to manual focusing you may well remember that you had to stop looking, even look away from the viewfinder for a moment and even rub your eyes before going back to try and focus again. This is simply the eyes and brain failing to concentrate for long enough and to ultimately distinguish between a seemingly unchanging scene.

Nerd-alert
Frame rate and how we visually interact with our world is actually an incredibly complex subject and I'm aware that I am simplifying it greatly here for the purpose of this. I'm certainly no cognitive neuroscientist and you don't need to be to understand what's going on to focus a damn camera, but it does help to know that it isn't simply you being unable to focus, your eyes and brain are literally making it harder for you. I also broadly mentioned that we have a visual frame-rate of 60 frames a second but some peoples frame-rate can be as low as 40 or even as high as 250 (allegedly fighter pilots can train themselves to actually distinguish content that is displayed to them at 1/225th of a second). My point being that manual focusing is a skill and you need to train yourself to get good at it just like anything else. The longer you do it, the better you'll become at being able to distinguish micro changes in the scene in front of you and nail focus every time.

So what's the best way to force your eyes and brain to concentrate? My advice is simply to make big focusing changes not tiny ones, turn the focus ring a lot more than you think you need to and 'scan' through the sharp focal range relatively quickly. It's a technique I refer to as 'snap' focusing and that way your eye will be forced to notice these changes and spot the 'in-focus' section a lot more clearly. Once you've zeroed in on it, quickly adjust to that area and scan in and out of it in smaller and smaller movements, each time getting closer and closer to the sweet-spot. The trick here is actually speed, if you linger for too long your eye will loose attention and the ability to discern changes and thereby actually making it harder and harder to nail it. If this happens, simply reset back to making big adjustments again and your eye will reengage and the process will start again.

I've recorded a few videos below to try and illustrate what I am referring too. The videos on the left show the image being focused and the videos on the right show the hand on the focusing ring and the speed and method being used to focus that correlating image. I couldn't get both videos to play in the same video so my advice is to simply play the two videos side-by-side simultaneously to see what's going on. 

Footage of manual focusing being perform in snap focus.
Manual focusing footage showing snap focusing being performed.

The two videos above show the 'snap' focusing method being applied. It's my opinion that this rapid scanning through the sweet-spot results in more images being in focus as your eye is forced into concentrating on what's happening. Play both the videos at the same time to understand what's going on in the shot.

Manual focusing being performed with slow focusing method
Manual focusing footage showing the speed at which slow focus is performed.

In these two videos above I show what most people tend to do when they first start using manual focus lenses. The instinct is to get the image as close to sharp quickly and then fine tune from there. It's been my experience that this actually takes longer and subsequently produces poorer results as your eye struggles to concentrate on fractional changes in the image. Play both of the above videos simultaneously to see what the focusing hand is doing in relation to the image.

To Conclude

I know that is an insanely long winded way of explaining how to focus a lens but I feel it should help when you realise it's not just you that struggles with it. Our eyes aren't designed to distinguish between fractional changes in a scene and they will very quickly disengage concentrating when they feel they've acquired all the information they see in front of them. It's this reason that many people loose hope and patience with manual focusing and don't stick with it, but trust me when I say it isn't you, and it's perfectly normal to struggle to begin with.

As I said at the top, manual focusing is a skill like any other, it takes practice to get good at it. Give yourself the best possible chance of nailing focus though by firstly doing it in an environment that is as bright as possible. Secondly, make sure that the thing you're trying to focus on has some contrasting elements, for example catchlights in the eyes. Lastly, force your brain and eyes to engage and concentrate by providing them with ever-changing data, scan through the focus point in larger movements first and then quickly zero in on the sweet-spot before your eyes get bored and literally loose focus.

Stick with it though as there are literally thousands of crazy cheap manual focus lenses out there that produce something visually unique and engaging and that is well worth all the extra effort in my opinion.

If all else fails...

You may be relieved to hear that if all that sounds like hard work there are some relatively inexpensive hacks out there that can be utilised to great effect to aid in manual focusing. Essentially with a few additional tools you can negate the need to put all this into practice and a review and rundown of those tools will be revealed in next weeks post.  I shall see you all in part 2.

Let me know your thoughts below though and if you have any tips and words of advice for others or myself then I'd certainly love to hear them :)


:WARNING: Blatant JHP ads below!


If you're interested in any of my work and would like to know more about how I created some of my shots then why not check out my workshops. Here you can find out everything there is to know about Gelled Lighting, Long Exposure Flash Photography and my entire Post-Pro Workflow. Jake Hicks Photography - Workshops


I have also just released a brand new 22 hour complete Gelled Lighting Tutorial video. I go over everything from studio lighting setups with gels to being on location with gels plus I also go through my complete retouching and post pro workflow. For more details and complete breakdown of everything that's include check out my Coloured Gel Portraits Tutorial


I also offer comprehensive coloured gel packs. These collections of gels are what I use day to day to create some of the most highly saturated colours around. If you're looking at getting into gelled lighting or need to get stronger and richer colours in your coloured gel work why not check out my Jake Hicks Photography Gel Packs

Tuesday 01.24.17
Posted by Jake Hicks
Comments: 6
 

First Impressions of the New Bowens XMT Location Flash Units

As promised, here's a sit-down look at the new Bowens XMT Location units. These XMT's are the latest battery powered flash units from Bowens and I've been fortunate enough to have tested them this past week before I shared my thoughts. In this video I go through not only my first impressions on using cable-less flash for the first time but I also go over the units key features and answer some of your questions that I've received too.

Just a heads up that this video does run a little long and I certainly didn't intend it to so if you're after a specific section then skip to it at the times below.
'First Impressions' 1:17
'Key Features' 11:48
'Questions & Answers' 18:26

If there's something I didn't cover or you have something to add or a question to ask then please fire away in the comments below :)

PS This is the first time I've put a casual sit-down video like this together so my apologies for a few learning exercises that I won't be repeating. The 'YouTube Makeup Tutorial' lighting being one of them haha! Plus I won't be using that stupidly overpriced Nikon lens to shoot video again either - insane flaring in the centre for some reason :(
Either way, let me know your thoughts because like I said, it's my first one of these so I'd love to hear what you think.

As promised, here's a sit-down look at the new Bowens​ XMT Location units. These XMT's are the latest battery powered flash units from Bowens and I've been fortunate enough to have tested them this past week before I shared my thoughts.
Tuesday 01.17.17
Posted by Jake Hicks
 

Colour Toning in Photoshop - Why, When & How

There is a million and one ways to colour tone your photos and that certainly isn't even restricted to Photoshop either. This is simply my approach to colour toning and the way that I've done it for years and what works for me. Take from it what you will but remember there are certainly many ways to approach it.

Why?

Why should you colour tone your image? The biggest reason in my opinion is to tie an image together (more on this in a second) or simply set an overall feeling and impression with a sense of colour. I do a LOT of colour toning in my images and I can get away with it because of what I shoot with coloured gels. If you're shooting white background baby photography then you're a little more limited but you can (and I recommend you do) still add some colour toning.

I mentioned a moment ago about "tying an image together" but what do I mean by that? As a general rule of anybodies workflow we tend to go through a process of some skin retouching, mini global adjustments like liquify, maybe some dodge & burn, a little sharpening the list goes on but all of these things will be punishing your pixels. Over time and 10-20 layers later your image may have lost a global look and feel, especially if you're working with a lot of colour like I do. Take a look at the image below, it shows the image on the left as the raw from Lightroom (more on Lightroom in the "when" section) and then the image after all of the retouching has been done in Photoshop. The overall colour theme is still there from the original but for my taste there is simply too many variations of blue in the image.

The above images show the raw image straight from Lightroom on the left and then the final retouched version in Photoshop on the right.

The above images show the raw image straight from Lightroom on the left and then the final retouched version in Photoshop on the right.

As  mentioned above, I simply feel there are too many variations in colour so by applying a final colour tone I believe I can tighten these colours up and give the whole image a more unified look.

Below is the image before the colour toning and after.

The above images shows the final Photoshop retouch version on the left and then with the final colour toning applied on the right.

The above images shows the final Photoshop retouch version on the left and then with the final colour toning applied on the right.

If we take a closer look at what I'm referring to and pin-point specific areas on the image to look at specific blue colours it should make it a little clearer as to what I'm referring to. In the images below I have targeted key blue areas in the images and taken samples from each (a eyedropper setting of 51x51px allowed for an average colour reading at the designated areas). Below each of the images I have provide swatches and you should start to see what I mean.

In the above images I have targeted 9 key areas in each of the images where a strong blue tone is present and sampled each of them. Below each of the images is the resulting colour swatches.

In the above images I have targeted 9 key areas in each of the images where a strong blue tone is present and sampled each of them. Below each of the images is the resulting colour swatches.

On the left the image without colour toning, it is producing what I would consider contaminated blue colours. The resulting swatches contain a lot of yellows, greens and even browns whereas after the colour tone as been applied on the right hand image the resulting swatches are a lot purer in their blue content.

Making these colours a lot purer like this is key in my opinion to making an image visually cleaner and although I'm using a fairly extreme example here the same theory should be applied to all images and even my simple white background shots will have a subtle colour tone applied at the end to tighten up the shot. This colour toning principle is used heavily by composite photographers. They'll have their model shot and a background shot, the easiest way to tie the two together is with a uniform tone. Just look at the the before images and the resulting final image side-by-side and you'll see exactly what I'm referring to.

When?

When should you apply the colour toning? This is actually a two part process for me as I do a lot of colour toning in Lightroom long before I ever even open Photoshop (that's a topic for another day). Once I've added the Lightroom colour tone and then applied my retouching in Photoshop I then add yet another colour tone in Photoshop to finalise it like I mentioned before. This final colour tone in Photoshop is the one we're discussing today.

So when do I add my Photoshop colour tone? The colour tone is actually the very last thing I do in the process before saving the file. After the dodge and burn and even after the sharpening which always used to be the final thing you were supposed to do. Always leaving sharpening to the very end used to be the golden rule but even doing that after colour toning  I found had an effect on the colours.

Let me just take a second to explain how sharpening works. Sharpening in Photoshop is a simulated focusing of pixels but that is only possible by cheating the eye. Photoshop does this by adding contrast to adjacent pixels thereby giving the impression of an image being sharper through micro contrast adjustments. This increase in contrast is normally fine but remember for a second that anytime you increase the contrast of a colour image you are also simultaneously increasing the saturation. Take a look at the example below of a sharpened image and the resulting close up.

I have added a decent amount of sharpening to this image to illustrate my point but look at the close up on the right to see whats actually happening to the pixels.&nbsp;

I have added a decent amount of sharpening to this image to illustrate my point but look at the close up on the right to see whats actually happening to the pixels. 

Sharpening any image in this way will introduce artificial colour artefacts like we see above, specifically look at the introduction of red and cyan pixels. On their own this might not be an issue but if we can try to reduce these additional colours through a subsequent colour tone then why wouldn't you. This is the reason I apply my colour toning right at the end, even after my sharpening.

How?

Ok so finally to the how and I won't judge those of you that jumped straight down here, we are after all feeding a culture of people who enjoy the burger but don't necessarily want to meet the cow. My personal style of teaching is always to explain the reason why I do something rather than just preaching it. Those that simply preach in this way tend to not know why they're doing it to begin with.

So how do I apply my colour tones in Photoshop?

This is a three step process and although you can do it in one easy step I enjoy the flexibly of the additional adjustments afterwards. My colour toning is al done with 'adjustment curves' so I simply add three adjustment curves to the top of my layer stack.

Add three new curve adjustment layers...

Add three new curve adjustment layers...

Layer -> New Adjustment Layer -> Curves...

Like I mentioned I do this three times and name each of them respectively Blue, Green and Red.

Name your three new curve adjustment layers Blue, Green, Red...

Name your three new curve adjustment layers Blue, Green, Red...

It's now that you can go in and start making adjustments to each of them. The key here is to only make adjustments to the Blue curve in the Blue adjustment layer and only make adjustments to the Green curve in the Green adjustment layer and so on.

Only make adjustments to the Blue curve in the Blue adjustment curve layer and so on with the other two curves.

Only make adjustments to the Blue curve in the Blue adjustment curve layer and so on with the other two curves.

When I start the process I prefer to work from the Blue curve up to the Red curve. This may be more to do with my images containing a lot of blue though so experiment with different approaches based on your images.

Blue Curve Adjustments

It's been my experience that by lifting the black point (the far left point on the curve) you add a lot of the same blue colour to the shadows areas of a shot. This simple action alone will even out a lot of the colour variations straight away.

Green Curve Adjustments

In the previous Blue curve we effectively lifted the black point thereby reducing all over contrast. In this Green curve layer I tend to try and bring some of that contrast back by adding what we call an 'S' curve. This effectively darkens the shadows a little and raises the highlights.

Red Curve Adjustments

It's sometimes the Red curve that needs the least amount of work or adjustments but in this instance I decided to add red into both my highlights and my shadows by lifting the whole curve upwards like you see here.

From here you're pretty much done, the only thing I would now add is that with this three step process you can go back to your curve adjustment layers and turn each of them off and on independently. I find this incredibly useful as I can see exactly what each colour channel is doing and adjust them accordingly. Obviously this is something that can't be done if you simply choose to do everything within one single adjustment curve.

Below is a quick and easy way to view the before and after colour tone. Remember that is all that has changed in the below image, just that simple colour tone.

DSC_1771retocuh plus col tone.jpg
DSC_1771afterwork.jpg

PRO TIP: I never, ever, ever, apply a colour tone and then ship the images straight to the client. I will always play with the colours then take a break and come back to it with fresh eyes. Your eyes have an incredible ability to try and neutralise tone in a shot, our eyes are desperately trying to white balance everything we see so playing with colour toning for too long can result in some crazy results if you're not careful. If it's a big job I've even forced myself to sleep on it as I'll often if not always make minor adjustment after a viewing the images again the next morning.

So there you have it, my simple colour toning process explained. Whether you like the resulting colour tone or not is personal preference but one thing is for certain, the difference between not adding a final colour tone and adding one is huge. For me I feel this is a mandatory part of my workflow and I apply this to every single image I publish and print regardless of whether or not the the image is a coloured gel shot or not.

Let me know your thoughts though and how you apply your colour toning if it's different to mine. As always please feel free to ask any questions below and I will answer them as soon as I can. Also if you'd like to know more about my post-pro workflow then I discuss my entire post production process from importing in Lightroom to Exporting in Photoshop. Both for fast paced studio work and for my intense editorial retouch, I cover absolutely everything in my new face-to-face Post Pro Workshop. Click on the link provided to find out more Jake Hicks Photography - Post-Pro Workflow Workshop


:WARNING: Cool stuffs that costs monies ahead :D


Jake Hicks Photography Workshops

If you're interested in learning more about my professional workflow then why not check out my Post-Production Workflow Workshop. On this full day of hands-on learning I walk you through everything from Lightroom to Photoshop including correct import and export, an in-depth look at the powerful colour correction tools of Lightroom, fast and effective studio proofing tools as well as an extensive step-by-step walkthrough of my editorial retouching techniques in Photoshop. Plus everybody on the day will walk away with an in-depth PDF of everything taught on the day PLUS over 15 of my Photoshop Actions and 30 of my Lightroom presets! Find out more here Jake Hicks Photography - Post Production Workflow Workshop

post pro trio set.jpg

Jake Hicks Photography Video Tutorial

I have also just released a brand new 22 hour complete Gelled Lighting Tutorial video. I go over everything from studio lighting setups with gels to being on location with gels plus I also go through my complete retouching and post pro workflow. For more details and complete breakdown of everything that's include check out my Coloured Gel Portraits Tutorial

gel trio set video.jpg

Jake Hicks Photography Gel Packs

I also offer comprehensive coloured gel packs. These collections of gels are what I use day to day to create some of the most highly saturated colours around. If you're looking at getting into gelled lighting or need to get stronger and richer colours in your coloured gel work why not check out my Jake Hicks Photography Gel Packs

gel trio set crop.jpg
Tuesday 12.27.16
Posted by Jake Hicks
 
Newer / Older