Bouncing Light

"If we take one of the fundamentals of photography that says the larger the light source the softer light and skew it a little we can utilise our environment to create some very soft light from very small light sources."

Very nearly every image we view in print or online now has seen some form of digital enhancement. By enhancement I am referring to the commonly perceived idea that it is standard to have photographs that are brighter, sharper with vibrant colours and portraying people with blemish free radiant complexions. In fact without consciously knowing it so many of the images we all see day to day (well into the thousands) have had this baseline treatment that when we actually do see an image 'straight from camera' it looks grey, flat and soft; anything but amazing.
So how long does it take to get an image ready for a client, advert, magazine, billboard? This can vary drastically, some photographers do all their retouching themselves, this makes up the majority, and the very high end work for front covers and billboards etc are farmed out to highly professional and dedicated retoucher's. These work horses are plugged into the whole process and know everything there is to know about the end product and all the profiles, gamut's and colour spaces in-between. Most of the images they work on will be shot on extremely high resolution cameras and as a result they will have a huge number of pixels to manipulate on the page, it would not be uncommon for them to spend over 20 hours on each image. The rest of us who work on our own images can at least take some solace in that we know our own gear and 'usually' have a clear idea in mind of how the final image will look when we start. When we first dip our toe into the vast sea of digital manipulation most of us will start out with the usual button pressing, running downloaded actions and presets and third party plug-ins, but as we slowly realise the potential power of the latest software we add more and more steps to our workflow. in short, the more skilled we get at 'pushing pixels' the longer it takes us to finish the post production of a photograph because there is always something else that can be done to improve the image, it is up to us to restrain ourselves and finally say enough is enough.
The time lapse video shown here demonstrates my retouch process of a single image from a shoot where five images were chosen to be retouched. The image illustrated involved what I would call a standard retouch, nothing to drastic needed to be done, no awkward hair extracting, no removal of products and not even retouching the full body. That being said the image took over two hours to retouch not including editing and raw processing and with 4 other images in the set I spent well over ten hours in post production time. That may not seem a huge amount of time when you consider the time high end retoucher's spend on each image but it does sound like a huge amount of time when you consider I actually only spent 45 minutes shooting them.
One of the biggest problems we have now as professional photographers is justifying the post production time versus cost. In the past it used to be a flat day or half day rate, if we build an invoice based on those times and figures now we would quickly go hungry. We are falling into the trap of becoming so good at post production that the images look like we haven't touched them, they look exactly as the client expects to see them, the same as all the other thousands of images around them, amazing.
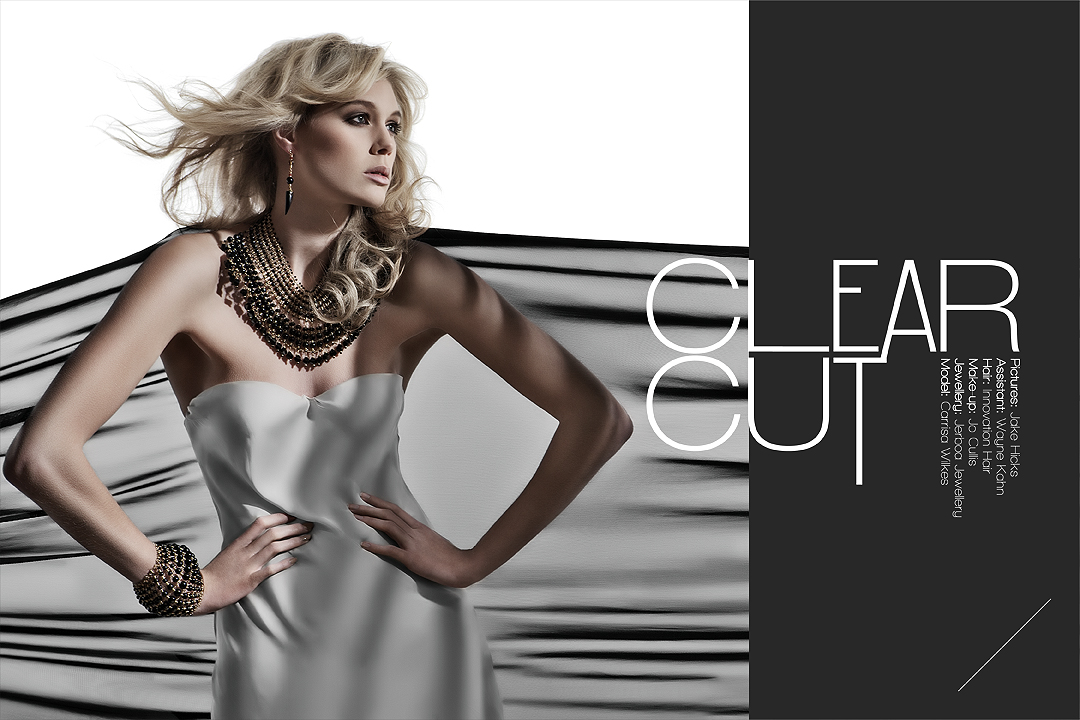
Hair by Claire Higgs - Toni & Guy Essensuals
Canon EOS 5D Mark II - CAMERA
62 mm - LENS
F 8 - F-STOP
1/100 sec - SHUTTER SPEED
100 - FILM SPEED
Flash - LIGHT SOURCE
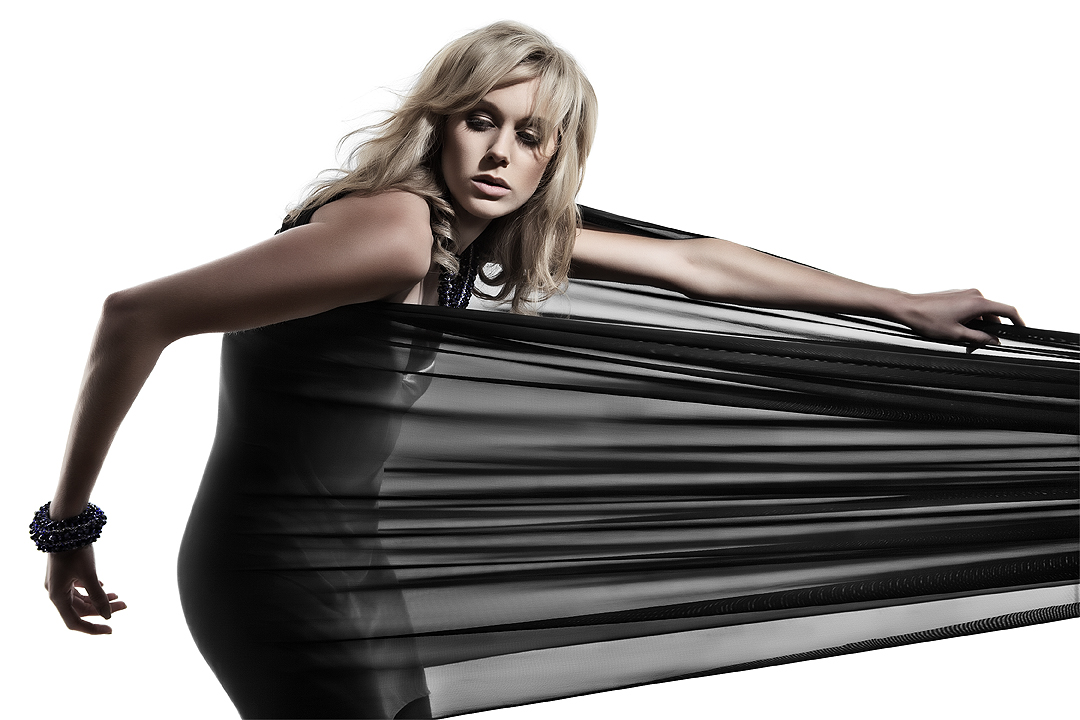
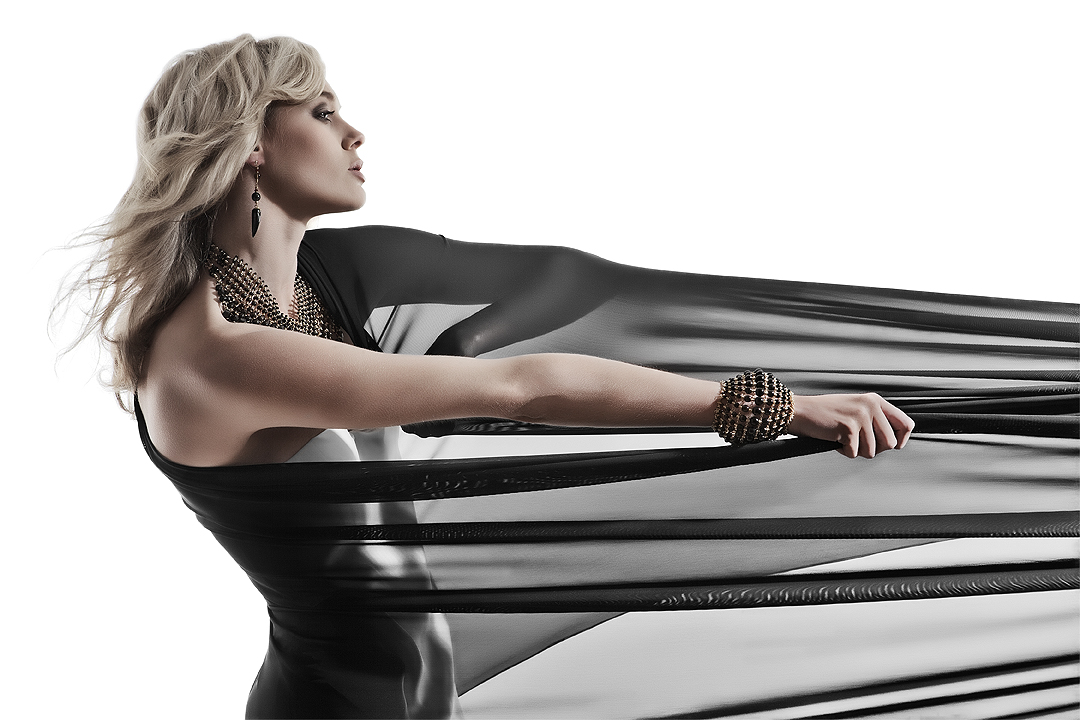
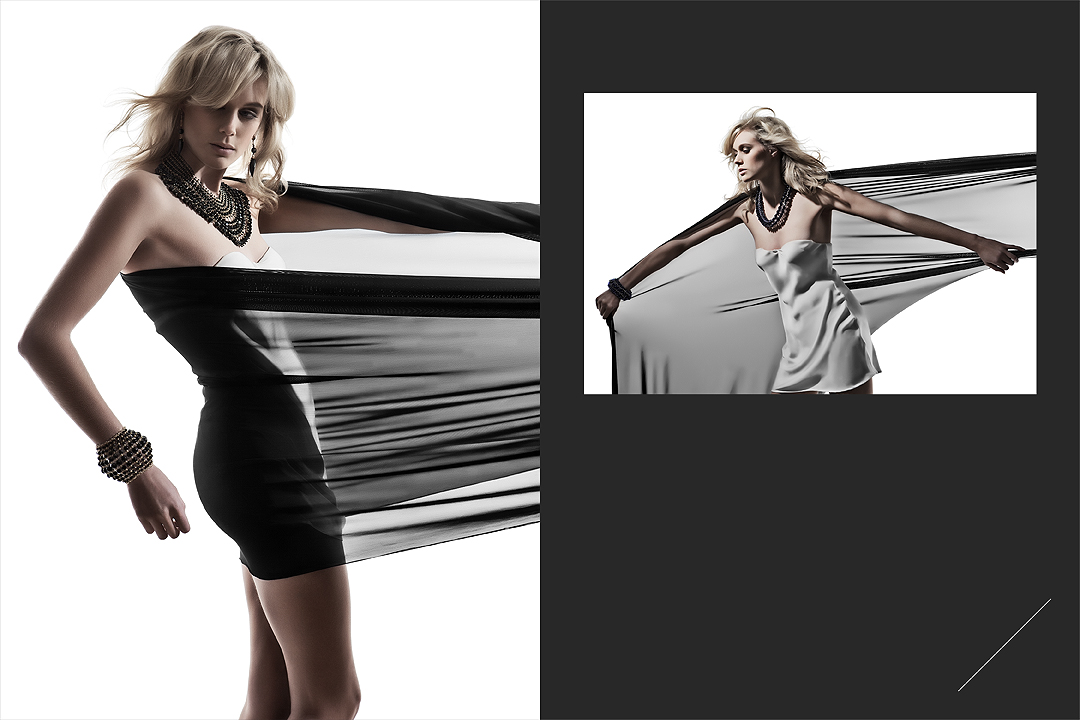
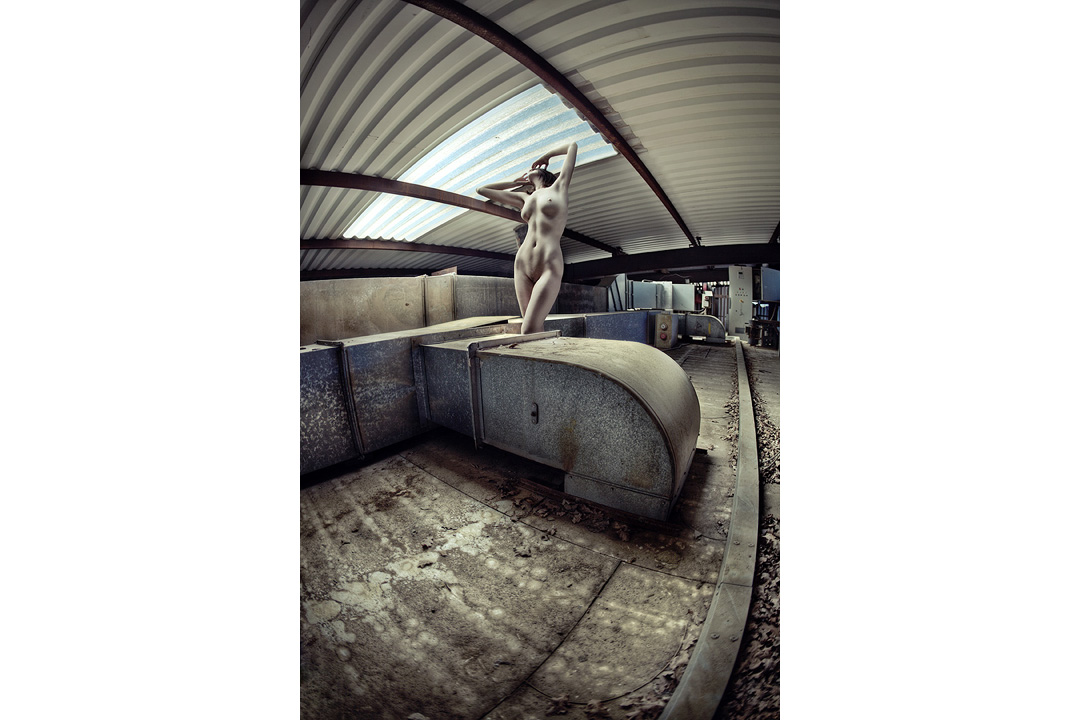
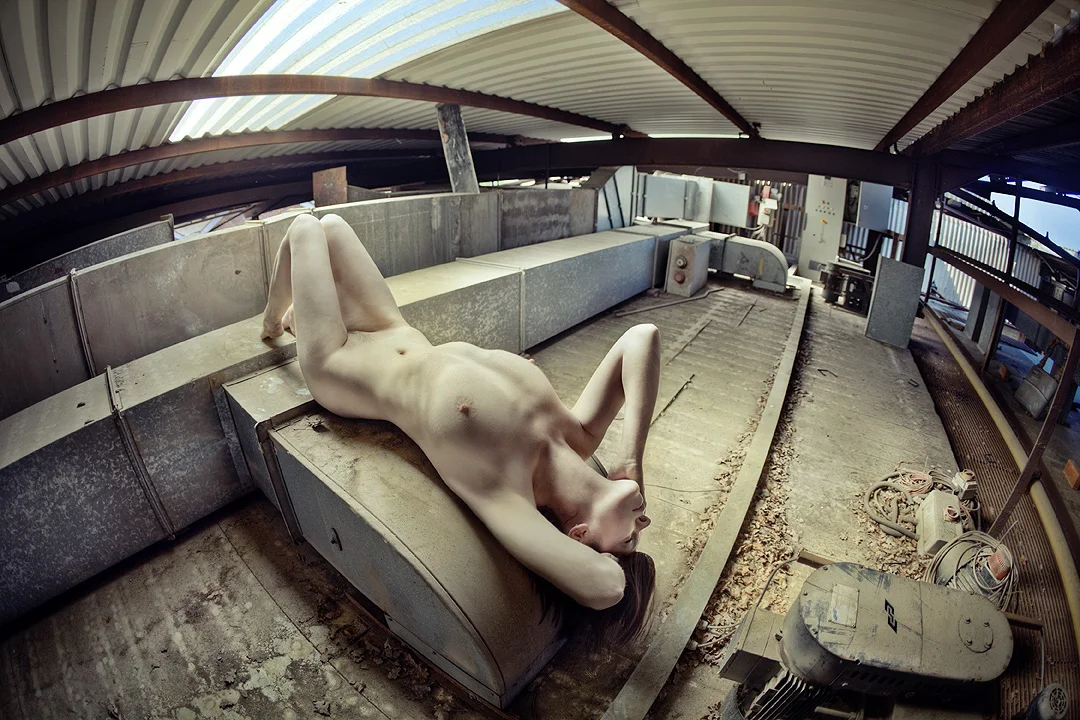
Normally when shooting full body shots I prefer to keep the lighting simple. Atmospheric, but clean and strong; usually relying on a softer more diffuse light if it's going to be directional. The benefits of this are obvious for minimising post production work, predominantly in reference to where 'the rubber meets the road'. Meaning that where two planes connect in a photo, the feet to the floor for example, your have to worry about clean but believable shadows. Here however I wanted strong dynamic lighting on the hair and didn't want to sacrifice that for a bit of extra time in post. Incorperating seven different lights will in theory produce a very confusing 'shadow pool' with the possibilty for every light to cast its own unique shadow. The introduction of the small softbox fill light down low not only throws some much needed light into the dress but also helps to kill all but the key lights strongest shadow.
Another technical difficulty with this shot came when I was trying to capture the huge amount detail and texture in the dress, hence the adding of a further two lights either side set low purely to catch any shape in the folds. As with lighting anything dark, we can only ever see the reflected light, and what with this dress having so many layers of a mesh like material (taffeta) lighting this dress from the front had no effect as the light went in but never came out. By using supplemental lighting from the sides I was able to create more shape with a little amount of highlighting resulting in the dress having the appearance of being lit.
Behind the scenes video shot and edited by David Lloyd photography
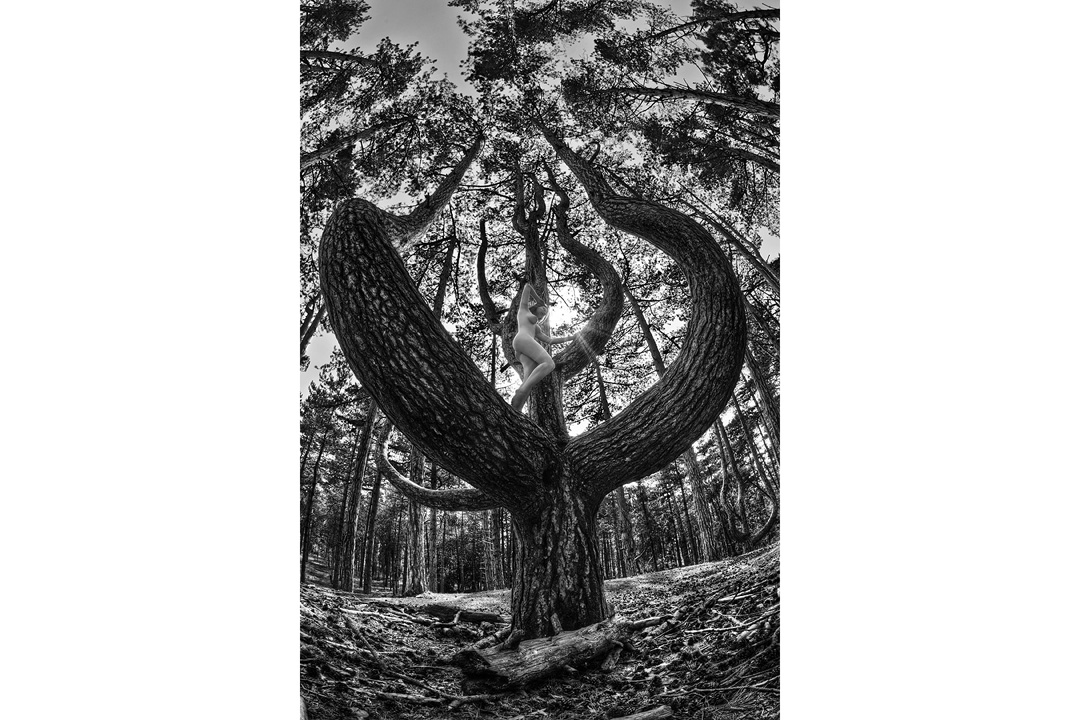
Model: Gem NHDR (higher dynamic range) photography has got increasingly popular over the years and like anything that is 'trendy' and 'cool' many photographers have experimented with the technique, some more successfully than others. The modern day process of HDR is quite digitally intensive and as such you will always get people who push these experiments to extremes and it wasn't long before popular photo sharing sites were deluged by these intense results. The upshot of this was that the technique was quickly seen as 'over processed' and no longer photography but more digital art. Although time consuming, correctly done HDR and tone-mapping photographs can produce some stunning results.
HDR photography or tone-mapping is the process of evening out the range of light in an image. For example by darkening highlight areas and brightening shadow areas. As we go about our daily lives our eyes do this automatically, and they have an incredible range of latitude in what they allow us to see. From being able to see at night by the faintest starlight to seeing the brilliant white sands in the noon day sun. Our pupils expand and contract to allow more or less light in and they do this almost instantly as they move around a scene in front of us, from the a bright white china teapot to the shadow under a table the eye renders all the detail to the point where we barely notice light levels fluctuating.
Model: Roswell IvoryCameras adjust light in a similar way, allowing more or less light in to expose an image correctly. Unfortunately when we capture a whole scene we only get to choose one exposure, whether we choose an average of the whole scene or choose a specific point to expose correctly there will always be areas in the photo that are under and over exposed. HDR tries to combat this by pulling these levels back to the correct exposure by using raw software, dodging and burning or by combing multiple photographs taken of the same scene but at different exposures.
This process of adjusting the highlights and shadows of a photograph has been going on since the dawn of photography. It was most famously popularised when Ansel Adams introduced his outstanding black and white landscapes in the early 1930's, his work was heralded at the time because of the sheer level of detail in his images. He would spend literally days and weeks in a darkroom meticulously dodging and burning an image to limit any 'clipping' of highlights and shadows. Sometimes this would be done with carefully hand cut 'masks' that would perfectly fit an horizon line to allow him to darken the sky without darkening the landscape. This should all sound very familiar to anybody whose even remotely familiar with the modern day Photoshop. We dodge, burn and use masks on a daily basis now and they are all fundamental techniques in the modern day HDR process.
My personal HDR technique utilises raw processing software, dodging, burning and also the combining of these with masks. Firstly though the photographs have to be taken, this requires a little more preparation than normal but once you have your own process it becomes second nature. Firstly a tripod is key to making the separate images taken match up correctly later. Set the camera up to bracket the exposures, all cameras are different but ideally your looking for around 3 to 5 separate photographs to be taken of each scene all at different exposures. For example the shots should be over-exposed by 2 stops, 1 stop over-exposed, correctly exposed, 1 stop under-exposed and finally 2 stops under-exposed.
Model: AllegraOnce the photographs have been taken its time to combine them. Personally I use the software Photomatix by HDRsoft. They have a free trial on the site but the cost of the actual software is minimal. There are lots HDR software out there but for me this one offers the most flexibility. Once opened the software asks you to 'load bracketed photos', from there you have the option to adjust any 'ghosting' (mask out any movement that may of occurred during the shooting the process) then your onto adjustment sliders. Here its down to personal preference but there are a few pre-sets which will get you started and also help to give you a good idea of what the individual sliders do. Once your happy export your TIFF at the required bit depth then its onto the next phase.
Take the original raw images you uploaded to Photomatix and load them into your raw processing software of choice. In here give each shot a little individual HDR treatment being careful not to clip any of the blacks and whites, don't worry about the images looking flat here we are just trying to hang on to as much information as possible for now. Adobe's Lightroom has 'fill light' and 'recovery' sliders, these in themselves are HDR tools used to maximise the dynamic range of individual photographs and anybody that uses them is making a HDR image. Once you have your 'dynamically flat' raws export them ready for your photo editing software (Photoshop), preferably at the same size as the Photomatix export, otherwise you will have to resize them perfectly later.
Import all the rendered raws and the Photomatix image into Photoshop and start to mask in separate areas of each image using the Photomatix file as the base. Sometimes Photomatix can create very noisy areas in an image as it finds it difficult to decide what tone to use, these areas are perfect for masking in the appropriate exposure shot. This stage is where personal feel and interpretation come in, its up to you what you enhance and drop back. As a rule I personally try to choose one exposure of a person if they are in the scene, this will have shadows as well as highlights. The human eye is used to seeing people with this tone depth, take this away with the HDR process and the image can quickly start looking 'wrong'. Once you are happy with final combination its time to start applying your preferred digital treatment like contrast and tone. With your HDR base its amazing to see how much you can now push your process without loosing detail.
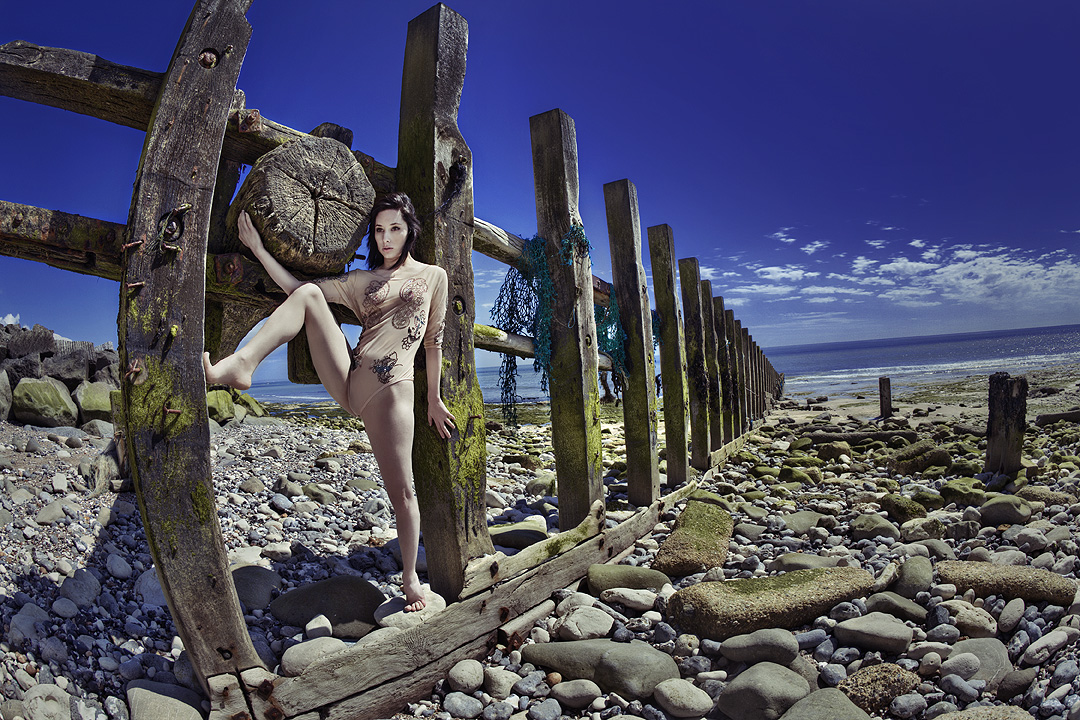
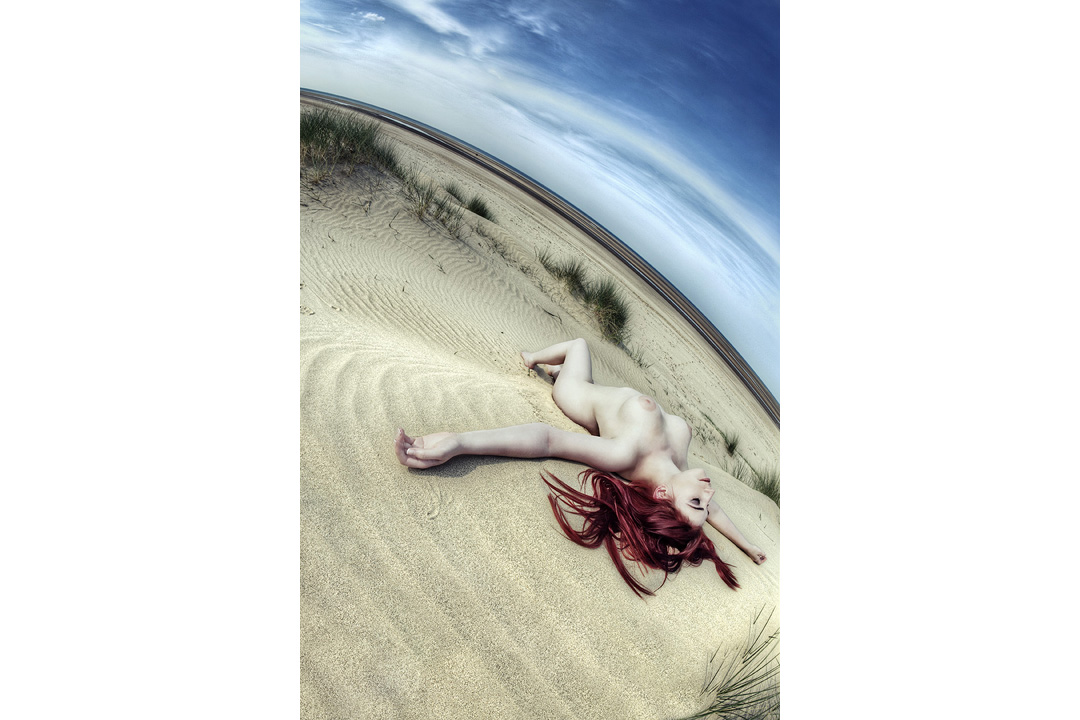
On the left a single exposure file digitally enhanced and on the right a HDR version
As mentioned at the start, this can be a very time consuming process to do this well but like anything after you've done the process a few times it does get quicker, but its certainly quicker than hand cutting masks and locking yourself in a darkroom for days at a time. This idea of extracting as much information as possible from an image has been around for a very long time and as the science has evolved it has got easier. With most high end modern digital cameras now the exposure latitude of each capture is phenomenal and for a lot of circumstances this single raw file holds enough data for the processing software to utilise it effectively and this will only get better. In the future I have very little doubt that a HDR single image capture will be the standard and it will be up to us choose an exposure after the fact. Love it or hate it, HDR is here to stay.
Model: Scarlet DugganCanon EOS 5D Mark II - CAMERA
58 mm - LENS
F 6.3 - F-STOP
1/60 sec - SHUTTER SPEED
200 - FILM SPEED
Mixed - Fluorescent/Flash - LIGHT SOURCE
Fluorescent lights are a notoriously weak light source, the bulb used here had an output of a mere 32w making it very difficult to use flash as a fill light without it overpowering the fluorescent key light. Their are a few things you can do to work around this, firstly you may have an old 200w flash head hidden away that you don't use anymore because it's to weak, this is an ideal time to dig it out. Failing that you can lower the apparent light falling on the subject by either moving the light further away, bear in mind this will make your light source visually smaller in relation to the subject therefore giving you a 'harder' light (imagine your nice wrap-around light of a close softbox becoming not so wrap-around as you move it further away). Alternatively you could leave your nice 500w light where you want it and reduce the apparent light output by using neutral density gels. Once again this is another invaluable piece of kit for a photographer who is shooting on location, these gels placed over lights can diminish the light by as much as 4 stops with a single gel, and as the name suggests they are neutral in colour so they wont leave any strange colour casts. With some careful light metering and patience using fluorescent lights in shots like this can give a very interesting glow to the subject, it is not very often that you would have your key light actually in shot so the fall-off of light can provide very dramatic results if used correctly.
Another point to remember is that fluorescent lights as a rule give out very narrow spectral bands of light which are very deficient in any red waves of light and tend to give off a diffuse eerie green glow. When using film you would normally need to use an appropriate lens filter to compensate for this colour cast, but with digital it is possible to counter this effect in post production. Here I mixed fluorescent with flash meaning that when I altered the colour balance afterwards to compensate for the green hue the areas of the image that were affected by the flash shifted towards the red end of the spectrum which can be seen in flecks of the dark hair. This is something to bear in mind before shooting, I got away with it here because of the dark hair colour, if the hair had been a lot lighter in colour, the cast would be far more apparent.
D.I.Y Ring Light
This light can easily be made at home using just a few key items found at almost any hardware store. The bulb being the most important part comes in many different sizes so choose the one which will best suit the project. Also worth noting is that sometimes you can get additional bulbs that come in different colour temperatures, so maybe getting spare bulbs in different temperatures could prove useful, especially if one breaks.
Inspired Images
Inspiration for an image can come from anywhere, music, films, other images, in fact any seemingly original image we take will have its roots bedded in some way to something else whether we consciously realise it or not. It's when we try to take control of this fact and capitalise on it that we are most pleased with the results. Rather than the 'spray and pray' approach where we may get a lucky shot, try instead to formalise an image before hand, like a brief. This could be as basic as sticking to a certain lighting style or colour, it's with these limits that we can be forced to push and adapt ideas and sometimes create our more original work.
The inspiration for my set of images came from a French film called Eden Log. This 2007 film directed by Franck Vestiel is full of very imaginative lighting ideas, from projections, very hard lighting, to light-play on varied textures. The base idea was the hard light coming up the arm to light the face, the core of the idea I have retained but tweaked it to fit within a commercial use of an alternative hair shot.
