• Technique
    • Latest Techniques
    • FREE TIPS
    • Quick Tips
    • Video
    • Site Search
    • Blog
    • Archives
  • Mentoring
  • >Online Workshops<
  • Workshops
  • Studio Lighting Books
  • Contact
    • Newsletter
    • Contact
    • Statement
Jake Hicks Photography
  • Technique
    • Latest Techniques
    • FREE TIPS
    • Quick Tips
    • Video
    • Site Search
    • Blog
    • Archives
  • Mentoring
  • >Online Workshops<
  • Workshops
  • Studio Lighting Books
  • Contact
    • Newsletter
    • Contact
    • Statement

Camera Shake Podcast - Episode 241 - February 2025

Donate & Support

I've always wanted my photography education on here to be free, so although there is no paywall to any of my -Technique Tuesdays-, any and all support is greatly appreciated. ❤️

PLUS: Donate any amount and I’ll send you a link to the hi-res print version of my studio lighting book.

||

PLUS: Donate any amount and I’ll send you a link to the hi-res print version of my studio lighting book. || PLUS: Donate any amount and I’ll send you a link to the hi-res print version of my studio lighting book. ||


I recently had the privilege of being invited back onto the Camera Shake Podcast. The last time I was on the show, the world was different, not just in terms of how many times we used to wash our hands compared to today, but because back then, I was still shooting exclusively with strobes and coloured gels.

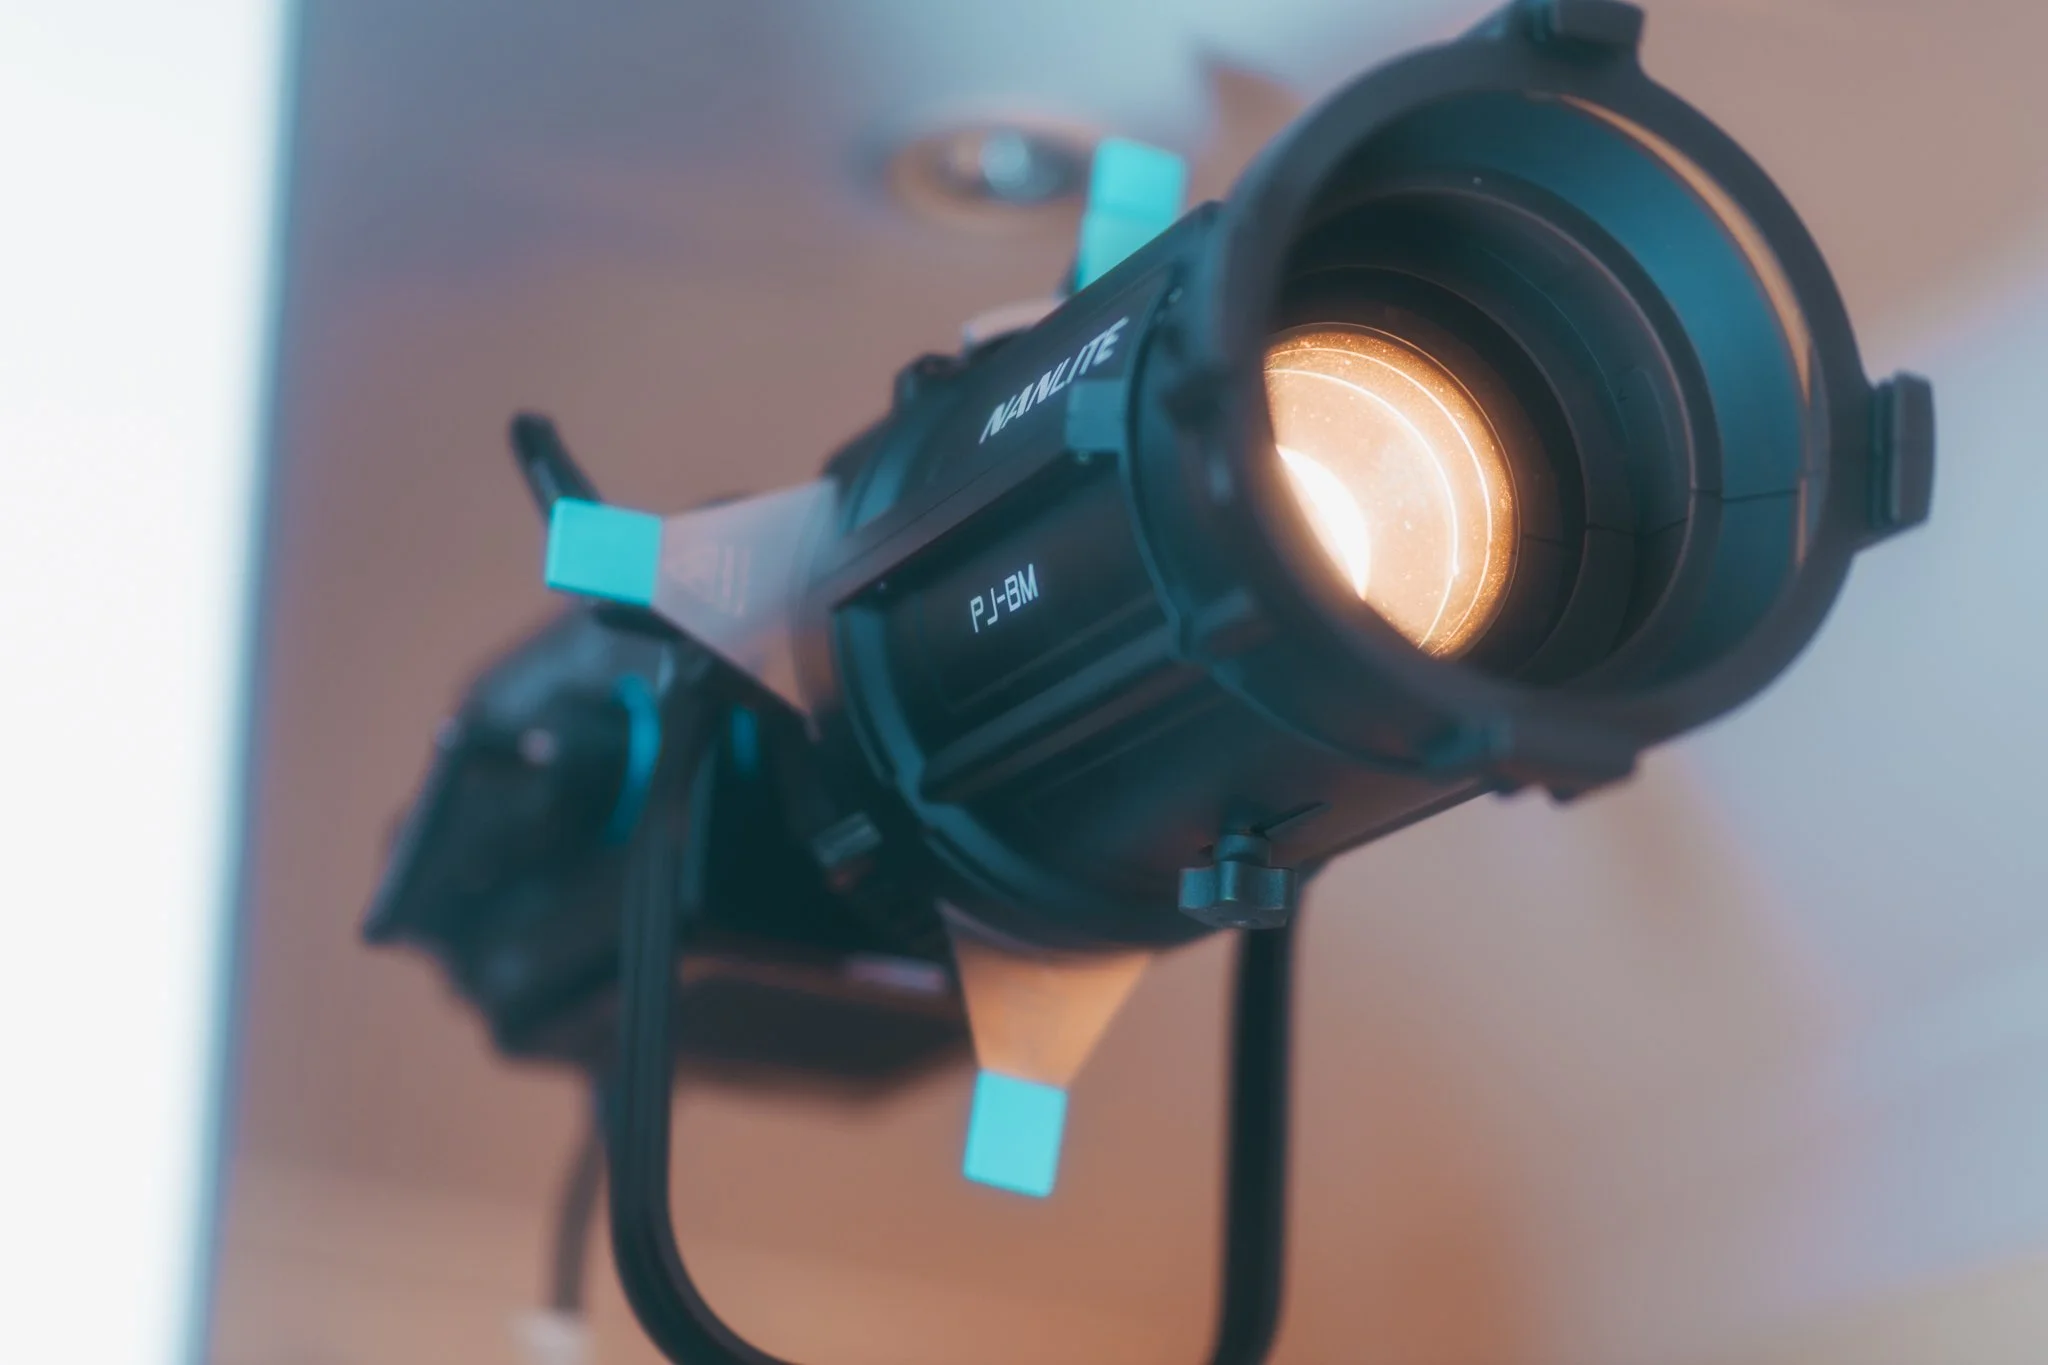
Fast-forward to today, and I now almost exclusively shoot with LEDs. In this interview, we dig into some of the major differences LEDs have presented to those of us who have been used to working with flash for so many years.

I’ve done a great deal of podcasts during my career, but this is certainly among one of the best interviews I’ve had as I felt like so many of the questions were very relevant to the modern world of photography. We discussed tethering and why I hate it. I spoke on how light meters have their place today, but they can get you into trouble if you don’t already know what you’re doing. My pre-production process for shoots and how I use 3D lighting software to prep. How do you deal with pro-models, non-pro-models, and even clients when shooting? How to manage their expectations on set while you’re shooting, and how to pivot and adapt to the shoot as it unfolds.

We cover a ton of ideas in this one, so head over to the Camera Shake Podcast YouTube channel and take a look.


JHP Livestreams…

I livestream every other Tuesday night via YouTube and there I answer your questions, critique your shots, take community images into Photoshop to work on them and discuss all manner of lighting tips and techniques. I look forward to seeing you and your work there real soon. Jake Hicks Photography - YouTube


All of my more advanced lighting classes are now available online!

||

All of my more advanced lighting classes are now available online! || All of my more advanced lighting classes are now available online! ||

LEARN MORE ABOUT MY ONLINE WORKSHOPS

 
Tuesday 02.25.25
Posted by Jake Hicks
 

Nanlite Projection Attachment: The Ultimate Hard Light

Donate & Support

I've always wanted my photography education on here to be free, so although there is no paywall to any of my -Technique Tuesdays-, any and all support is greatly appreciated. ❤️

PLUS: Donate any amount and I’ll send you a link to the hi-res print version of my studio lighting book.

||

PLUS: Donate any amount and I’ll send you a link to the hi-res print version of my studio lighting book. || PLUS: Donate any amount and I’ll send you a link to the hi-res print version of my studio lighting book. ||


Many of us are taught that there are two types of light: soft light and hard light, but I feel it’s an understatement to say this really doesn’t cover the nuance of light density available to us. Today, I’d like to dig a little deeper into the light that falls under the ‘hard light’ umbrella and talk about the potential ultimate hard light in the form of Nanlite’s Projection Attachment.

Most of us are aware of what soft light looks like as softboxes, and their easy-to-use soft light is the ABCs of day 1 photography. Softboxes can come in a huge variety of shapes and sizes, but one defining characteristic that we all understand as a general rule is that the larger the softbox, the softer the light it’ll produce - I’m generalising here, but for the most part, this holds true.

But, although the bigger the modifier, the softer the light is true, sadly, the reverse isn't quite as simple. Yes, many hard light modifiers are small, but their size isn’t what defines their hard light, and today I’ll show you how the hardest light ironically comes from one of the largest hard light modifiers out there.


Preface: I am reviewing this modifier as a stills photographer not a videographer. Nanlite has sent me this Projection Attachment to review. I am not being paid, and they are not previewing or editing my review before I post it.


What is the Nanlite Projection Attachment?

Before I free-fall into the rabbit hole of nerd-talk about this modifier and what it can do versus other hard light modifiers, I should first get you up to speed on what the Projection Attachment actually is and what it sets out to achieve.

I’m not sure if the images here convey just how big this thing is, but the Nanlite Projection Attachment is an absolute beast, and all of its would-be hard light challengers pale in comparison. This modifier really does require a C-stand to support it, and it’s so big and heavy that you have to place the actual modifier on a light stand, not the light- The light then simply hangs off the back of it. This significantly helps with balance, as the lens on the front containing all that glass is very heavy.

Speaking of the lens, there are some options. The lens I have is the 36-degree one, which helps spread the light as quickly as possible, giving you a bigger spot in small spaces. There is also a 19-degree lens which creates a tighter spot, but that would be useful if you were mounting this a long way from the set or in a theatre, for example.

Click to enlarge: The Projection Attachment is so large that a C-stand is a must and even then, you mount the modifier to the stand and the light to the modifier.

Click to enlarge: The entire modifier is made of metal, making very durable, but also very heavy.

Click to enlarge: You can see the 36-degree lens section of the modifier here and that whole lens can be swapped out for a 19-degree tighter spot.

More than just a very hard light

Of course, this Projection Attachment is more than just a very powerful hard light modifier; one of its primary functions is the ability to project gobos via its lens. For those that don’t know, a gobo or go-between is something placed between the light and the subject to create shadows. A modifier like this is purpose-built to accept metal disks (gobos) with patterns cut into them, which, in turn, project those patterns over great distances to shine onto your background or subject.

Click to enlarge: The Projection Attachment is designed to accept and project these custom-cut metal gobos.

Click to enlarge: The unit comes with a selection of gobos, but there are hundreds available. Note: When taking these product shots, I accidentally inserted the gobo in the wrong slot - It should be in the slot behind.

Click to enlarge: As you can see, the projection attachment shines razor sharp light patterns over great distances via these interchangeable gobos.

I’ve outlined the basics of what this Projection Attachment can do, and many photographers will, of course, opt to use it for its primary function of projection gobos as I shared above, but I’m personally more interested in its defining characteristic of being the ultimate hard light.


Defining Hard Light

To get a broader picture of what I mean when I talk about light density and the hardness of light, we should drill down into why we use hard light, what defines hard light, and what I personally look for when using hard light.

For me, hard light comes down to these three core aspects:

  • Control

  • Edge-to-edge quality

  • Shadow transitions


In its most basic form, a hard light should be able to produce a controllable spot of light.

Control

This is the easiest one to discuss as we all understand what I mean when I say, ‘a tight spot of light is easy to control.’

As we know, hard light characteristics are typically bright highlights and very strong, dark shadows. This look is only possible in a studio when the light isn’t bouncing around everywhere and contaminating itself with reflected light. To this end, hard lights are often very controllable with small spots of light.

This is often counter to the extremely hard light of sunlight on a clear day, which is utterly uncontrolled, but the open space outside often limits the amount of bounced light filling in shadows. I mention the sun as an example of hard light here as you’ll often see photographers using bare-bulb lights to produce hard light, and although this is technically hard light due to the very small point of origin, that bare bulb is spreading light all over the studio and thus uncontrolled. As a result, the environment can often contaminate the hard light from bare bulbs, and the dark shadows that hard light may produce will be filled with bounced light.


Edge-to-Edge Quality

We’re getting into the weeds of the defining hard light now, and although controlling hard light is crucial in the studio, the final look of that hard light on our subject is far more nuanced than simply a pool of light. What’s surprising about this nuance is that many photographers simply aren’t aware of the difference until they’re shown it. Kinda like trying to explain great-tasting food. You really have to taste it, or in this case, see it, to understand what all the fuss is about.

Many hard light modifiers simply ‘channel’ the light and don’t technically focus it. And by channel, I mean those modifiers don’t let the light go in certain directions instead of actually focusing it where you want it. This channelling can result in the light bouncing around the modifier multiple times before it leaves the modifier, and the resulting light can often contain odd and unpleasant shadows in the final bright pool of light. Snoots and grinds/honeycombs are the biggest culprits of this.

In short, we want a hard light modifier that focuses the light and not channels it. That said, even modifiers that focus the light can produce unpleasant edge-to-edge quality as they can sometimes vignette the light. Yes, they can produce clean, hard light, but their brighter centre and darker edges can be a pain to work with.

Click to enlarge—Edge-to-edge quality is extremely important, and not just because hard lights have a heavy vignette with darker edges. Some even produce shadow artefacts from snoots and grids. Here, we not only see a strong vignette but also the grid pattern from a grid/honeycomb hard light modifier.


Shadow Transitions

Again, this aspect of light and shadow isn’t readily apparent until you’re shown it. Sadly, once you’ve seen it, you can never unsee it.

I’ve spoken about this at length in previous articles, so I won’t bore you with it all again here, but I’m specifically talking about how to avoid those ugly double and even triple shadows when using certain hard light modifiers. This can happen when the light bounces around the modifier before leaving. The resulting light then casts a shadow from the bulb of the light, and then another one or two shadows are cast from the reflected light bounced off of the insides of the modifier.

If you want a more detailed breakdown of this ugly and very annoying look, you can check my previous article on it here: Refining Hard Light - Avoiding Double Shadows

Click to enlarge - It’s extremely clear how apparent these double shadows can get with more basic hard light modifiers. These ugly double and even triple shadows (top images) can leave an image looking messy very quickly. Also, note how much darker the shadow is from the modifier that does not produce double shadows (bottom images).


What does the Ultimate Hard Light look like?

Controllable

For me, the ultimate hard light needs to be extremely controllable. I don’t want any light bouncing around the studio and affecting my hard light with stray bounced light filling in those strong, dark shadows.

Clean

The hard light needs to be just that, hard ‘light.’ I don’t want any ugly, stray shadows contaminating the pure light that is falling onto the subject. I don’t want any odd shadow artefacts on the skin, and I also want that light to be the same exposure across the entire pool of light; AKA, I don’t want the edges to be a stop darker than the middle.

Shadow Quality

The hard light needs to be casting a single, strong shadow. As we know, the greatest hard light of all time is the sun on a clear day. That hard light casts a razor-sharp, single shadow, and I want my studio's hard light to do exactly that. I don’t want two or even three shadows creating ugly textures on the subjects’ skin.


The Typical Hard Light Contenders

Before we look at what the Nanlite Projection Attachment can do, we should first look at its primary hard light contenders. After all, the Projection Attachment is a serious piece of kit and is priced accordingly. Is it really that much better than its far less expensive counterparts?

Open Reflector Dish

First up is as basic as it gets, and everyone has used it at one point or another; the open reflector dish.

Click to enlarge

  • Control: 2 out of 5 - The light goes everywhere, but I guess it goes forward at least… mostly.

  • Edge Quality: 3 out of 5 - The edge of the spot is extremely vague… but it is smooth, at least.

  • Shadow Quality: Just Don’t - Triple shadows!!! Plus, due to no light control, light bounces around and fills in the shadows.


The Grid/Honeycomb

This is a slight upgrade from the reflector dish… or is it?!?

Click to enlarge

  • Control: 4 out of 5 - The grids do a good job of controlling the light and wider and tighter grids offer even more control.

  • Edge Quality: I swear I’m not making this up - This has to be worst edge transition of all time - Just look at it.

  • Shadow Quality: 3 out 5 - This is not too bad and if you can cope with the other flaws, the shadows cast are ok.


The Snoot

Snoots are pretty cheap, and we all have a few kicking about the kit cupboard.

Click to enlarge

  • Control: 4 out of 5 - This particular snoot is pretty good, but it needs some distance to get a good-sized spot.

  • Edge Quality: 3 out of 5 - A very slow but clean transition. There’s hardly any pure white light at the centre though.

  • Shadow Quality: 3 out of 5- A pretty clean shadow with only a very slight ghost of a double shadow.


The Optical Snoot

These are the focusing modifiers with an actual lens at the front to give more accurate control of the light.

Click to enlarge

  • Control: 3 out of 5 - These lenses require a lot of light to produce this spot.

  • Edge Quality: 3 out of 5 - The vignette is very stong on these and can contain artefacts from the lens.

  • Shadow Quality: 4 out of 5 - Due to the lens on the front, the shadow quality on these is actually very good.


Conclusion

Those results speak for themselves, and it’s pretty surprising how bad some of these everyday hard light modifiers actually are. That said, most of them are very cheap. If you’re just looking for an edge light or a hair light, these will do an okay job, but I would personally never use any of these on the skin for a key light, for example.


Is the Nanlite Projection Attachment up to the challenge?

I fully appreciate you’ve likely found yourself here because you were interested in seeing if the Nanlite Projection Attachment was any good. Still, I think we needed to define the job of a true hard light modifier like the PJ and how other hard light modifiers fall short rather than me just showing you some cool shots and saying, ‘Trust me, bro.’ This isn’t YouTube after all.

Now that we know what qualities a true hard light has to have let’s examine how the Projection Attachment fares when faced with these aforementioned requirements.


Control

Spoiler Alert: It’s already looking pretty damn impressive, right? When we talk about precise control of a light, it doesn’t come any more controllable than this razor-sharp spot of light.

It’s worth nothing here that if you didn’t want that razor-sharp edge to your pool of light, it’s simple enough to soften the edges via the lens-focusing knob at the bottom of the modifier.

Simply unscrew and move the lens of the Projection Attachment forward and back to adjust the hardness of the spots edge. This same mechanism will be required each time you set up your Projection Attachment, as you’ll have to refocus the spot based on its distance from the subject or background.

Click to enlarge: Focusing and de-focusing the Projection Attachment is as simple as unscrewing this knob and moving the lens in and out.


Edge-to-Edge Quality

As I mentioned above, this refers to how ‘clean’ this spot of light is. Are there any artefacts or dark spots in its centre, and are there any heavy vignettes at the edges?

In the initial test of the spot image above, we saw that it was very clean throughout, and there were no funky shadows of artefacts within the spot itself. I’ve also included a cropped image below with the spot underexposed by a stop to see if any vignettes appear at the edges. If we look closely, we can see some slight vignetting, but it's very minor, and it's only noticeable when you start to underexpose the spot, too.

Click to enlarge: As you can see, the entire spot of light is extremely clean with almost no artefacts and very minimal vignetting.


Shadow Transitions

As we know, the light is only half the story; we need to take a look at how it produces its shadows to get a clearer picture of what this modifier can do. Below, we can see how the Projection Attachment renders its shadows, and it should be clear to see how clean they are. No double or triple shadows, and the shadows that are being produced are strong with a smooth edge transition.

Click to enlarge: These shadow transitions are excellent with no double or triple shadows and the shadow itself is very dark as a result.

Some of you may still be sceptical if this hard light really makes that big of a difference in reality. Sure, with the cheaper hard light modifiers, the shadows may be a little brighter, you may have to take a little extra time to manage the vignette, and the double shadows aren’t crazy-noticeable all of the time. It is worth considering that I’m displaying this effect on the most basic 2-dimensional example I could find. All of these shadow issues scale up the more layers of depth you add to a shot. Take a look at a more detailed example below.

Click to enlarge: Image taken with basic hard light modifier

Click to enlarge: Image taken with the Projection Attachment

Without the Projection Attachment, all of the multiple shadows start to overlap and lose density and contrast. Not to mention that light is also bouncing around and filling them in. With the PJ, we still have strong, clean and contrasty shadows and the final shot maintains that extra layer of depth thanks to that contrast.


Practical Results - Model Portrait

Let’s take a break from the nerd-talk for a moment and look at a practical use case of the Projection Attachment. Below, I will share some shots from a recent model shoot where I used the Projection Attachment and one of its gobos to create beautiful-looking textured light.

Click on any of the images below to enlarge them.

Featured Model: Esmeralda_gb


Camera Settings

  • Camera - Nikon D850

  • Lens - 85mm 1.4

  • Shutter Speed - 1/125th

  • Aperture - f1.4

  • ISO - 100

  • Kelvin - 3500K

  • Focal Length - 85mm


Cut out & keep


TL;DR/ADHD/Artist Setup Explanation

  • Place model in front of white backdrop

  • Point Nanlite FC-500-C set to 2700K and Projection Attachment at model and backdrop

  • Insert desired Gobo

  • Set up large softbox behind you set to 7500K

  • Positon Nanlite FC-120C behind model pointed back at her - set to 2700K

  • Set camera to ~3700K


Setup Explanation

This technique is fairly simple, as it’s a familiar formation to many of us: Main light flooding the scene, hair light placed behind, and then a soft light to fill in the shadows. The only slightly more complicated part is the Kelvin manipulation.

Both the hard lights on the model are set to their warmest Kelvin, which is 2700K. That’s the FC-500C with the Projection Attachment in place, as well as the FC-120C behind the model. Note that I’m using an open dish as a hard light behind her. This is due to my needing a very quick spread of light and the fact that I’m not too concerned with the quantity of hard light when the light is placed behind and does not cast shadows on her. This light only casts highlights from where we are with the camera.

Once those two lights are set, we simply bring in the contrasting light in the form of the large softbox and set it to the polar opposite Kelvin, which is a very cool 7500K. Lastly, we just set cameras Kelvin to a midpoint between the lights on set, which is around 4000K. You’ll need to tweak this to your taste, but the goal is to show both cool and warm light from the lights on set, and our goal is not to neutralise any of them.

Lastly, you just need to tweak the gobo in the Projection Attachment. First, you’ll need to choose a Gobo that fits your look, and then you’ll need to decide how sharp and in-focus you want it. You’ll notice here in my shots that I have mine set very de-focused, for example.


Further Considerations

I’m going to start to wrap up my thoughts on this Projection Attachment, but first, I do want to dig a little deeper into the use of gobos with this modifier.

Whenever you use a lens in conjunction with light, you need to be mindful of how that lens is actually controlling that light. For example, we need to look at distortions and vignetting. We’ve already looked at the vignetting, but let's take a closer look at the distortions in this lens. By distortions, I mean how it warps edges and straight lines with these gobos.

I’m mentioning this for a couple of reasons, but I’ve been asked about it in the past, so I thought I’d address it here. These distortions happen for a few reasons, and they appear in every projection unit I’ve used. One reason is that the gobo, a very thin metal disc (it has to be very thin metal to get a sharp image), is heating up due to it being so close to the LED inside. As it gets hotter, this disc will warp, which is one cause of the distorted edges you see above. Secondly, all of my projection units have wide lenses like the 36-degree lens I’m using here. These wider lenses are great for throwing big images in small spaces, but they can also distort at the edges as they try to enlarge that projection so quickly.

This has never been an issue for me and I’ve yet to find a projection unit and gobo that doesn’t do this. One tip that helps is to keep the power of your light low, thereby keeping its temperature low, which will limit the amount of warped edges dramatically. Also, if you really cannot have any warping at all, opt for the longer 19-degree lens as that will also reduce the effect.


Final Considerations

As with all Nanlite products I’ve encountered, this Projection Attachment comes in its own case, but this one isn’t the standard dense polystyrene; this one gets its own hard case. This unit has a significant piece of expensive glass in the form of its lens, so it nice to see that its properly protected when traveling or simply not in use.

Plus, the unit also includes a handful of gobos as well as gel holder that sits snugly on the front… yunno, for those of you still using gels ;)


Closing Comments

I assure you I’m not exaggerating when I say a Projection unit like this is mandatory in my studio. For years, I used what I thought were ‘hard lights’ and although they did the job, after I upgraded to these far more refined Projection Attachments that have a big, clear lens on the front to truly focus that hard light, there is a night and day difference in the results.

If you ever get the chance to try this Projection Attachment, I’d urge you to do so. This modifier goes a long way toward giving your shots that final polish, and you can see that in the clean single shadows and clear, bright edge-to-edge light on the fine details I shared above.

Obviously, if you’re looking for the ultimate hard light, the Nanlite Projection Attachment is definitely it. This is an extremely high-quality unit from a company that genuinely listens to its customers and implements ideas and details into its products based on the feedback of its users who actually use this kit in the field. I look forward to using this unit on the majority of shoots moving forward.


Thanks so much for reading guys, if you have any questions, let me know in the comments below. Catch you in the next one.


Donate & Support

I've always wanted my photography education on here to be free, so although there is no paywall to any of my -Technique Tuesdays-, any and all support is greatly appreciated. ❤️

PLUS: Donate any amount and I’ll send you a link to the hi-res print version of my studio lighting book.

||

PLUS: Donate any amount and I’ll send you a link to the hi-res print version of my studio lighting book. || PLUS: Donate any amount and I’ll send you a link to the hi-res print version of my studio lighting book. ||


JHP Livestreams…

I livestream every other Tuesday night via YouTube and there I answer your questions, critique your shots, take community images into Photoshop to work on them and discuss all manner of lighting tips and techniques. I look forward to seeing you and your work there real soon. Jake Hicks Photography - YouTube


All of my more advanced lighting classes are now available online!

||

All of my more advanced lighting classes are now available online! || All of my more advanced lighting classes are now available online! ||

LEARN MORE ABOUT MY ONLINE WORKSHOPS

 
Tuesday 02.11.25
Posted by Jake Hicks
Comments: 1
 

Nanlite FC-500C RGB LED Light Review - The Goldilocks Light

Donate & Support

I've always wanted my photography education on here to be free, so although there is no paywall to any of my -Technique Tuesdays-, any and all support is greatly appreciated. ❤️

PLUS: Donate any amount and I’ll send you a link to the hi-res print version of my studio lighting book.

||

PLUS: Donate any amount and I’ll send you a link to the hi-res print version of my studio lighting book. || PLUS: Donate any amount and I’ll send you a link to the hi-res print version of my studio lighting book. ||


My guess is that lighting engineers get their nomenclature from the same store as astronomers, and although the FC500C and SAO 113271 both produce an awful lot of light, only one of them is a truly excellent addition to the studio.

No, the Nanlite FC-500-C isn’t quite as bright as the Betelgeuse star off the shoulder of Orion, but its 500w (520w, to be precise) does mark a turning point in LED lighting. Why? Well, for one, this is an extremely well-priced light for its power and quality. Yes, there are many brighter LEDs out there on film sets today, but they are also extremely expensive. The same thing was true 5 years ago too. Back then, 500w LEDs were hitting film sets, but they were $5000 …. and they were only white light!

Fast-forward from the LEDs of Y2K to today, and the very feature-rich Nanlite FC-500-C is now less than a fifth of the price. I can get one here in the UK for a little under £800, and thanks to our economy being weaker than my love for black-and-white photography, it doesn’t cost much more than that in freedom bucks either.

So, the cost of a feature-rich studio head seems palatable to many of us, but why is this a turning point in lighting?

The Goldilocks Light

For me, and I think a lot of studio shooters, 500w is the sweet spot in terms of power. Sure, more power is always a good thing, but to get just one more stop of power from a 500w light, we’d need to get a 1000w light. Once we do that, prices start to get exorbitant. For that extra stop of power, which, as you know, is also the equivalent of switching from ISO 100 to ISO 200, you can end up paying nearly 5 times the amount. For example, many 1000W+ LEDs cost £3,000 and up, and the price difference was the same back in the flash days. If you want that extra stop of light, you gotta pay through the nose for it. The same is also true with lenses. The Canon 50mm f1.4 is around £400, but the Canon 50mm f1.2….. costs £1600! You want a little more light, it’s gonna cost you.

The Nanlite FC-500C

As I said, I believe the 500w is the sweet spot between sensible pricing and very usable power. Sure, you can make it work with a less powerful light thanks to higher ISO values, but a 500w gives you more options with modifiers and distances without you having to buy that f1.2 lens!

For reference, and to give you some perspective on the actual brightness of a 500w light, the Nanlite FC-500C positioned 2.5m (~8ft) from the background comes in at f5.6, ISO 100, and 1/125th.

For 20 years, I primarily used 500w strobes in the studio. Sure, I had a couple of 1000w heads, but I never used them. The 500w heads did everything I needed, and I’m very pleased to see that 500w full RGB LED heads, like this Nanlite FC-500C, are now very affordable for many of us. But what’s particularly impressive about this head is what you get for that price.

If you’re not sure about the specifics of the Nanlite FC-500C, here’s the TL;DR:

  • Full RGB and CCT LED Head (2700K-7500K)

  • Flash head and external power supply - can be powered via batteries if needed.

  • Takes Bowens mount (S-fit) modifiers


Preface: I am reviewing this light as a stills photographer not a videographer. I shoot zero video, so I am not approaching this light from the perspective of fan noise or hertz cycles for frame rates. If that’s what you’re after, you may like to seek another opinion.

Nanlite has sent me this light to review. I am not being paid, and they are not previewing or editing my review before I post it.


NanGuang, founded in 1992, changed their name to Nanlite in 2019

NanGuang Who?

Whenever I review a new product from a new company, I like to include a little lore on who we’re dealing with. This has become even more important now that many of us photographers are migrating from flash to LED, and some of these LED companies, although well established in their own right, are still new to many of us stills-shooters.

I find it incredible that Nanlite, a brand name so synonymous with lighting in today's market, was only introduced back in 2019! Nanlite is one of those brands that feels like it’s been around forever, and I guess in the very fast-paced evolution of LED lighting, it kinda has. But even though Nanlite's name has only been around since 2019, the company behind it, NanGuang, has been around since 1992 and they’ve been making lights for video and photography from the start.

The name change in 2019 makes smart business sense in a global market, but don’t be fooled if you think Nanlite has only been at this a few years, as they have well over 30 years of light-making experience to draw from. Plus, Nanlite is still one of the few lighting companies that still makes its own lights. That may sound odd, but in reality, most lighting companies farm out their lights to be made in other factories, whereas Nanlite still makes them in-house. This means far stricter quality control, and Nanlite is very well known for this quality and reliability. It’s actually this reputation that made me stop and look when I saw the price of this FC-500-C. In my mind, Nanlite is known for making excellent lights, but that quality often comes at a price. So, to see this full RGB 500w head from Nanlite at this price certainly made me stop and pay attention.


The FC-500C

View this post on Instagram

A post shared by Jake Hicks Photography (@jakehicksphotography)

First Impressions - The case

As soon as it arrived, I was pleasantly surprised. Many heads these days don’t come with a case or box, but the FC-500C, along with all the other Nanlite products I’ve seen, do. Their case style is clever; hence my bothering to mention it here. The light comes in a branded grey polystyrene box, and although this may sound cheap, the polystyrene is very sturdy and weighs almost nothing when empty. This is very useful when you have to move a ton of kit, and sturdy, not-soft cases that weigh very little is a big plus.

Parts and Setup

The head itself is not like our monoblocks of yore, which were all one unit; instead, the FC-500C, as with many powerful LED heads today, comes with the light itself as well as the power supply unit. Many brands seemingly ignore the fact that this is a very annoying, heavy box that has to be hung from your light, and I cannot stand that box clanging about and getting caught on anything and everything whenever you touch the light stand. Thankfully, Nanlite has this taken care of, and you can either attach the power supply via a very sturdy super-clamp bracket and quick-release V-lock, or you can simply hang it from the stand via a hidden coated-cable loop that sits snugly in the back of the box.

Nanlite has very efficient ways to deal with the external power supply

The power supply also has a hidden loop that can extended

The power supply box can be attached via a super-clamp and V-Lock

Simply use that loop to hang your power supply


Modes and Menus

Nanlite gets you right to the action immediately, so as soon as the light comes on, you have your power and Kelvin right there. All of the menus are navigated by two large knobs and two buttons, making this light adjustable from any angle, even if you can’t see the menu from where you are. Both of the knobs also double as buttons and can be pressed in to confirm your selections.

Your main screen shows the power (DIM) in percentages, and below that are your Kelvin and Green/Magenta tint.

Hitting the Mode button at any point will take you to the main lighting options and from here, you select…

  • CCT Mode

  • HSI Mode

  • RGBW Mode

  • Gel Mode

  • Effect Mode

Most of these modes are likely obvious to many of you, but I’ll briefly cover them in case some are new to you.

One important note here before we dive in further (and it’s important as most other LED lights don't have this functionality), is that the brightness of the light (DIM) can be adjusted via 0.1% increments. This is actually more useful than you might think, and I’ve already found myself falling between whole percents to fine-tune a light.


CCT Mode

  • Dim 0-100%

  • CCT (White Light) 2700K - 7500K

  • G/M (Green & Magenta) +/- 150

The Kelvin range isn’t the largest, but for the vast majority of users, this will be more than enough. The low 2700K is fairly standard and most LEDs go down that low, but the 7500K is fairly limiting in the top end, but again, there is only extremely niche cases where I’ve had to go above 10,000K.


HSI Mode (Hue Saturation Intensity)

  • Dim 0-100%

  • Hue 0 - 360

  • Sat (Saturation) 0-100

This is your standard full-colour mode that many of us are now used to on these RGB heads. The hue covers the entire spectrum, and you can manage the colours within it using saturation control.


RGBW Mode (Red Green Blue White)

  • Dim 0-100%

  • R (Red) 0-255

  • G (Green) 0-255

  • B (Blue) 0-255

  • W (White) 0-255

This mode is useful if you’re looking to copy a colour from a document like a Photoshop file and is especially useful for maintaining brand colours in product photography, for example. Simply copy the RGB values (and then struggle to translate the brightness 0-100 value into the W 0-255 value).


Gel Mode

Dim 0-100%

CCT 3200K/5600K

Gels Around 140+ popular gels to choose from

These gel modes are becoming increasingly comprehensive for those of us who are used to the gels of yesteryear. This version has a sizable library and although not the largest, at nearly 150 gels (I roughly counted as I couldn't find a number online), it certainly has more than enough of the main colours to keep us happy. As you may imagine, copying a gel number from a previous shoot and transferring it to the light makes life a lot easier. Plus, this is the only mode that actually shows us a visual representation of the pretty colours on the back of the light for us ‘visual learners’ out there. To that point, I’d prefer seeing a visual representation of hue from end to end in the HSI mode, but it’s in the app, and it’s a simple firmware update to add it, and I only say this as the ‘Gel Mode’ here is really the only indication that this is a full-colour screen on the light. I was just surprised they didnt use it more.

One other very important (for me) feature of this mode is the ability to display these gels in either 3200K or 5600K. This may not seem like much, but being able to simulate a tungsten light (3200K) or a flash (5600K) passing through a gel is extremely useful when mixing and matching lights on set, especially if you're trying to match light to a practical light on set, for example. This is the first light I’ve come across that enables this.

These are your core modes for controlling brightness and colour, but I want to discuss the last mode, the Effect Mode, a little more in-depth.


Effect Mode

Lastly, there’s the Effect Mode. This is typically a mode I rarely use, but this time around, I was encouraged to explore a couple of options that Nanlite has that I may be able to utilise in my photography. Before I get into it, let me explain what’s included in the Effect Mode. First, let me cover the ‘loop’ modes.

Hue Loop

  • Dim 0-100%

  • Hue 0-360

  • Sat 0-100

  • Speed 2 seconds - 30 seconds

CCT Loop

  • Dim 0-100%

  • CCT 2700K - 7500K

  • G/M 0-150

  • Speed 2 seconds - 30 seconds

INT (Intensity) Loop

  • Dim 0-100% - 0-100%

  • Colour HSI/CCT

  • CCT 2700K - 7500K

  • G/M 0-150

  • Speed 2 seconds - 30 seconds

These three loop modes allow you to program a transition of light. For example, in the Hue Loop, you can assign the light to play a 8-second loop and during that time, the light will transition from hue 25 to hue 125. You can also assign it a brightness to play the loop and a saturation to play the hue. The CCT Loop is the same for Kelvins, and the INT Loop allows you to loop through a designated brightness value, essentially pulsing the light in a loop.

The Effects Mode also has the standard disco effects that many other LED lights have, including Flash, Pulse, Storm Auto, Storm Manual, Police Car, TV, Paparazzi, Candle/Fire, Disco, Bad Bulb, Fireworks, Explosion Auto, Explosion Manual, and Welding.

To be fair to Nanlite, although these effects are a staple on all LED lights now, Nanlite has included a ton of adjustability and options within each of these, so you can get the perfect Dicso light just for you.

My indifference to the video effects aside, I was encouraged to test out the hue loops, and after a little inspiration from a fellow photographer, I set about looking into how I could use the hue loops as part of a long exposure setup. Here’s how I got on.


Setup 1 - Hue-Loops

First, let’s look at the shots I captured using this effect and then I’ll break down how I achieved them.

Click on any of the images below to see them full-screen

Featured Model: Esmeralda.gb

Camera Settings

  • Camera - Nikon D850

  • Lens - 24-70mm f2.8

  • Shutter Speed - 1.6 seconds

  • Aperture - f2.8

  • ISO - 31

  • Kelvin - 4700K

  • Focal Length - ~50mm


Cut out & Keep


TL;DR/ADHD/Artist Setup Explanation

  • Place model in front of white backdrop

  • Point Nanlite FC-500-C at backdrop with assigned Hue Loop running

  • Position a flash close to model so as not to wash out background

  • Shoot with a 1 - 2 second exposure on your camera

  • Take image, and as soon as the shutter is depressed, move the camera around


Setup Explanation

The trick to this setup is to show various colours from the assigned hue-loop via a long exposure on my camera. I had my shutter set to 1.6 seconds, and the hue-loop speed was set to 2 seconds (its lowest value). During those 2 seconds, the hue-loop played a smooth transition of colours, and I played with several of them to get the different results you see above. During the 1.6 seconds where the camera was taking in light, I would move my camera around the model, intentionally revealing and covering sections of the white background. As I did this, the camera would see various colours from the hue-loop in different sections of the background that the model was effectively masking out during the exposure. Couple this with the fact that I have a flash at the start of the exposure to capture a crisp image of my model, and the whole image starts to come together.

Once we’re comfortable with the basics of the technique, we can then start implementing a little of our colour theory here to understand what’s happening in some of these shots. For example, the easiest one to understand is the image with a white background displayed above.

We’re seeing a white background because I am assigning the full hue-loop of the entire hue spectrum of colours to play during my exposure.

As we know, white light is made up of a rainbow of colours, or a full spectrum of light. If we play the entire spectrum of light during the exposure of my image, that rainbow background will now appear white, where all of the colours have been displayed. But, since I’m moving the camera around the model during that time, not all of the colours are shown to the camera, and that is why we see those coloured masks around the model. It’s worth noting that the hue-loop was 2 seconds and my shutter duration was only 1.6 seconds. This resulted in the camera not seeing the entire spectrum, hence the background not being fully white.

All that makes sense, right? Ready for the advanced hue-loop setup?


Setup 2 - Advanced Hue-Loops

Now that we’ve covered the basics, we can move on to a slightly more involved setup. - I am being slightly tongue-in-cheek when I refer to this as ‘basic’. I fully appreciate we’re now a long way from learning Rembrandt lighting, turning it black & white and calling it art. Long exposure photography is tricky to get your head around at the best of times; couple that with mixing coloured light during an exposure time where the viewfinder is completely black, and we’re now a long way from Kansas.

That said, take a look at this next setup, and hopefully, you can follow my slightly abstract vision for using hue-loops to create truly unique imagery.

Click on any of the images below to see them full-screen


Camera Settings

  • Camera - Nikon D850

  • Lens - 24-70mm f2.8

  • Shutter Speed - 1.6 seconds

  • Aperture - f2.8

  • ISO - 31

  • Kelvin - 4700K

  • Focal Length - ~50mm


Cut out & Keep


You can see the slit of light I created with the Projection Attachment here.

TL;DR/ADHD/Artist Setup Explanation

  • Place model in front of white backdrop

  • Point Nanlite FC-500-C and attach Projection Attachment

  • Adjust the Projection mask blades to a horizontal slit of light

  • Place horizontal slit of light on the background, below model and out of shot

  • Assign relevant hue-loop

  • Position a flash close to model so as not to wash out background

  • Place large gelled soft box behind you - set to flash only

  • Shoot with a 1 - 2 second exposure on you camera

  • Take image, and as soon as the shutter is depressed, move the camera down


Setup Explanation

Look, normally the TL;DR version above is 3 steps, this setup does require a little setting up, but thankfully, with the groundwork from the previous setup, this shouldn't be too bad to explain.

Everything is basically the same as before, except this time, I've added another flash behind me in the form of a large softbox. This is going to be our fill light, and if you look at the images again, you’ll see a dark blue colour in many of the shadows in some of the shots.

The other major difference, of course, is the fact that I've now added a Protection Attachment to the FC-500C. I’ve then positioned the blades of the mask from the Projection Attachment to make a horizontal slit of light on the wall low and behind the model. It’s this slit of light that will play our hue-loop.

So how does this all work? As before, we depress the shutter and a crisp image of the model is captured from the flash. With the shutter open, I now drag the camera downwards and pass the camera over that hue-loop strip of light behind her. As the camera passes that stip, the hue-loop cycles its colours, and it’s through this process of us effectively scanning those varying colours that we get the visualisation of moving sheets of multi-coloured light in the final image. This setup can be a bit of a mind-bender to do at the time, and I was playing with varying hue-loops and camera movements to get a multitude of looks. Granted, I only had limited time before the model thought I’d completely lost my mind from waving the camera around the room and only occasionally pointing it at her.


Here I have the Projector Attachment on the FC-500C and that enables me to mask the light into slits for this setup.

Below are some examples of the hue-loops I created on the white wall whilst I was waiting for the model. These are created in exactly the same way as I explained above, it’s just that the model isn’t standing in place and being lit by the flash.

These are kinda wild, right? They look I just created these with the gradient tool in Photoshop, but I assure you, these are actual photos of hue-loops on the white wall.


Let’s wind it back in a little.

Granted, I went down a rabbit hole with the hue-loops, but I’m always fascinated by products and techniques that can produce something unique. That said, and as much as I absolutely love them, those Y2K portraits above won’t be to everyone’s taste. So now, let’s dial it back and look at what the FC-500C can do in a more traditional setup and with more standard modifiers.

FC-500C & 22” Beauty Dish

Click to enlarge

Click to enlarge

Cut out & Keep


Camera Settings

  • Camera - Nikon D850

  • Lens - 85mm f1.4

  • Shutter Speed - 1/125th

  • Aperture - f1.4

  • ISO - 50

  • Kelvin - 4800K

  • Focal Length - 85mm


FC-500-C & Lantern

Click to enlarge

Click to enlarge

Cut Out & Keep


Camera Settings

  • Camera - Nikon D850

  • Lens - 24-70 f2.8

  • Shutter Speed - 1/125th

  • Aperture - f2.8

  • ISO - 200

  • Kelvin - 4800K

  • Focal Length - 62mm


FC-500C & Softbox

Click to enlarge

Click to enlarge

Cut Out & Keep


Camera Settings

  • Camera - Nikon D850

  • Lens - 85mm f1.4

  • Shutter Speed - 1/125th

  • Aperture - f1.4

  • ISO - 50

  • Kelvin - 4800K

  • Focal Length - 85mm


These images were all taken on a Nikon too, so the light must be doing something right!


Nanlite’s very distinctive LED lens cover.

Modifiers Conclusion

The results speak for themselves, and there were no surprises with whatever modifier I attached to the FC-500C. It is worth noting that the FC-500C and many of the Nanlite heads have that unique-looking ‘lens’ affixed to the front, right in front of the actual LED. Many brands will simply leave that exposed, and I’m sure you’ve all seen the bright yellow disc at the front of your COB (chip on board) lights.

Some brands, like Godox, will encase the chip in a diffusion dome, and this does have the benefit of taking the harshness of the light away, but it can also never be a super-hard light with the permanently affixed diffusion dome. Nanlite opted for the fly’s eyeball-like cover, and I’ve not heard from them what the reasoning for this is. My best guess is that all those mini lenses help push the light out evenly, almost like collimated light. This would have its benefits, but I was concerned that the light wouldn’t spread around the modifier. But those concerns were alleviated when I used the light, and you can see, especially in the BTS of the lantern modifier above, that the light is very evenly spread. I’ll have to try to get an engineer's response for the chip lens choice here though, as I am very intrigued.


Kelvin Range Test

This is a test I often do with the lights I get for review. Essentially, it involves me adjusting the light to the desired Kelvin and then matching that with my camera, for example, 3500K on the light and 3500K on the camera. It’s far from definitive, and there are several variables at work here, but it gives you a pretty good example of the quality of the light. For one, when setting the light to 2700K, they typically use very different LEDs to make that ‘white’ light compared to when you shift it to 7500K.

I’ve done this test with countless manufactures lights, and this is easily one of the cleanest and best I’ve seen. Sure, the whole range seems a touch on the magenta side, but its remarkably consistent throughout the entire Kelvin range whereas other brands shift all over the place.

Another very important point to mention here, is how consistent that exposure is thoughout the Kelvin range. Typically you’d see the light being darker at the extreme ends of 2700K and 7500K, but this is almost a perfectly even exposure throughout. Again, something that is not typical.


Nanlite App

This light review is extremely long already, so I won’t go into this in too much detail here, but I will say that the app Nanlite uses, called ‘Nanlink’, is excellent. Again, this is one of the best LED apps I’ve used in terms of consistency of connection. Sure, it may lack some extreme-nerd functionality of other apps, but this is one of the best apps in terms of stability. I’ve never once lost connection to the light and even with app and light both off and on several times, the app always comes right back on to that light you had. No need to reconnect. No need to restart. There was no need to readjust; everything was very fast and smooth.

You can also see me playing with the Nanlink app live on stream via the video below as I was using it to manage the Hue-Loops from earlier.

The above video will open in YouTube at the correct start point….


Closing Comments

This has been a monster review and I don’t doubt you skipped around a bit up there. So, let me add my final thoughts on Nanlite FC-500C.

Let’s put aside the fact that Nanlite gave up trying to name this product properly here for a moment. Their Foza lights and, of course, Nanlites’s iconic and industry-leading LED PavoTubes are good examples of how names are more memorable to humans than barcodes. So, assuming they aren’t preparing for some secret technological singularity where they only need to sell lights to bots, I hope they return to naming lights, not star clusters.

Now that we’ve addressed the negative aspects of this light, I guess I can tell you what I do like about the FC-500C.

The Goldilocks light - An extremely well thought out and powerful product, and from a company that clearly listens to its customers.

As I said four hours ago at the start of this article, I think this is a great example of a Goldilocks light. 500w is, in my opinion, the sweet spot for lighting in the studio. Couple that with this light being full RGB along with a few other bells and whistles like the Hue-Loops and more, and now, finally, all for a very affordable price.

Those are the important aspects of any LED light today. How bright is it? Is it RGB? Can I get one without having to sell a London parking space? But this light also has a considerable amount extra on top of that. I mentioned the now-renowned build quality of Nanlite, but there are a lot of tiny details that highlight the heritage of Nanlite products, and this simply shows they've been listening to their users over the years.

I swear, if I ever have to use a light with a swinging power block ever again, imma lose it!

Tiny details like….

  • The metal loop that allows the power block to hang from the stand

  • The thumb screw on the light stand tightening bolt is big and very easy to tighten

  • That thumbscrew also stops you from loosening it all the way so it doesn’t pop out and roll across the studio floor

  • Large buttons and dials that can be operated, even if you can’t see the back of the light

  • You can use gels in both tungsten and flash Kelvin modes

  • The top of the light and handle is flush, allowing you to put the head on the floor without it rolling around

  • The case is very sturdy but extremely lightweight. The simple fact that you even get a case is a plus!

  • Generous S-fit attachment that can even be operated with one hand.

  • The fan blows the hot air straight up instead of out to the side, or worse still, back into your face.

I’ve only used this light for a few hours, and these are the things that I’ve noticed already. I’m sure I’ll find more.

It bears repeating, but Nanlite has clearly been listening to its customers over the years. All of these seemingly small features don’t just happen overnight, and many very established lighting brands still overlook basic elements like the swinging power block. This FC-500C light is very well made, comes in at the perfect power, has millions of colours, allows you to use all your S-fit attachments you likely already own, and is a very competitive price. What’s not to like?


Nanlite FC-500C

Learn more about the FC-500C here on Nanlite’s website FC-500C Full RGB LED Light

Includes

  • FC-500C × 1

  • Power Supply × 1

  • Reflector × 1

  • Quick Release Clamp × 1

  • AC Power Cable 6M × 1

  • DC Connection Cable 3M × 1

  • User Manual × 1

  • Carry Case × 1

Thanks so much for reading guys, if you have any questions, let me know in the comments below. Catch you in the next one where I hope to be reviewing the Nanlite Projection Attachment you saw featured here.


Donate & Support

I've always wanted my photography education on here to be free, so although there is no paywall to any of my -Technique Tuesdays-, any and all support is greatly appreciated. ❤️

PLUS: Donate any amount and I’ll send you a link to the hi-res print version of my studio lighting book.

||

PLUS: Donate any amount and I’ll send you a link to the hi-res print version of my studio lighting book. || PLUS: Donate any amount and I’ll send you a link to the hi-res print version of my studio lighting book. ||


JHP Livestreams…

I livestream every other Tuesday night via YouTube and there I answer your questions, critique your shots, take community images into Photoshop to work on them and discuss all manner of lighting tips and techniques. I look forward to seeing you and your work there real soon. Jake Hicks Photography - YouTube


All of my more advanced lighting classes are now available online!

||

All of my more advanced lighting classes are now available online! || All of my more advanced lighting classes are now available online! ||

LEARN MORE ABOUT MY ONLINE WORKSHOPS

 
Tuesday 01.28.25
Posted by Jake Hicks
Comments: 2
 

PSA: How to Avoid the Adobe Price Increase

Donate & Support

I've always wanted my photography education on here to be free, so although there is no paywall to any of my -Technique Tuesdays-, any and all support is greatly appreciated. ❤️

PLUS: Donate any amount and I’ll send you a link to the hi-res print version of my studio lighting book.

||

PLUS: Donate any amount and I’ll send you a link to the hi-res print version of my studio lighting book. || PLUS: Donate any amount and I’ll send you a link to the hi-res print version of my studio lighting book. ||


READ THIS BEFORE JANUARY 15TH 2025

Avoid the Adobe Price Increase

This is a very brief PSA so I won’t be talking about by Adobe is desperate for a quick injection, but if you’re someone who pays around $9.99 a month for the Adobe and Lightroom 20GB package, your price is about to go up on January 15th.

Here’s how to avoid that and below is how to keep that same price. The only downside is that you’ll have to pay for your year in advance and you won’t be able to pay monthly for that grandfathered-in price.

I just did this myself 2 minutes ago, I grabbed some screenshots of what’s involved so take a look below if you’re interested.

Step 1

Open up the Creative Cloud app on your system.

Typically, the symbol is found in the top right of your desktop on a Mac, and it is that cloud/infinity-shaped symbol.

Step 2

This will open up your Creative Cloud app pop-up. Next, you’ll need to click on the ‘Manage Account’ in the top right.

Step 3

This should automatically open up the Adobe Account in your browser. You’re looking for the Manage Plan button. Mine was on the bottom left.

Step 4

Next, you’ll want to find the ‘Update Subscription’. Remember that the only way to keep your current price is to pay annually so you're not actually looking to change your plan. *Others have mentioned that this button is also called ‘Manage Commitment’ in some regions. All have been the button alongside the notepad and pencil icon though.

Step 5

The text will change, giving you the option to pay annually. Double-check this, but it should be your current monthly price (currently $9.99), multiplied by 12 and as you see here, mine changes to $119.

Step 6

Lastly, it should pop up asking you to confirm payment, etc. *I just paid my £9.99 monthly fee earlier today, so that is why Adobe is refunding that after I upgraded to the annual price.

Hit ‘Agree and Subscribe’ at the bottom and your’re done.

That’s it

Once you you hit Agree, it takes a few seconds and you’re all confirmed.


Final Thoughts

My understanding is that the price changes take effect from January 15th 2025 and your next billable month after that date will reflect the new price increase. Ive seen conflicting reports, but the price for some plans is doubling so in my opinion, this annual lock in is worth doing if you can afford it.

Please look into this yourself, especially if your plan is different to the 20GB Photography Plan. I’ve just highlighted the process I went through here in the UK so this may vary from region to region. If you have any further advice or tips to add to this, please leave them in the comments below.


JHP Livestreams…

I livestream every other Tuesday night via YouTube and there I answer your questions, critique your shots, take community images into Photoshop to work on them and discuss all manner of lighting tips and techniques. I look forward to seeing you and your work there real soon. Jake Hicks Photography - YouTube


All of my more advanced lighting classes are now available online!

||

All of my more advanced lighting classes are now available online! || All of my more advanced lighting classes are now available online! ||

LEARN MORE ABOUT MY ONLINE WORKSHOPS

 
Thursday 01.09.25
Posted by Jake Hicks
Comments: 6
 

Lighting Setup: Still Life Portrait

Donate & Support

I've always wanted my photography education on here to be free, so although there is no paywall to any of my -Technique Tuesdays-, any and all support is greatly appreciated. ❤️

PLUS: Donate any amount and I’ll send you a link to the hi-res print version of my studio lighting book.

||

PLUS: Donate any amount and I’ll send you a link to the hi-res print version of my studio lighting book. || PLUS: Donate any amount and I’ll send you a link to the hi-res print version of my studio lighting book. ||


If you’re looking for a tried-and-true lighting technique, then it doesn’t come much more stress-tested than this one. In fact, this is a lighting technique that I’ve been utilising in one form or another for over 25 years, and I learnt it way back in art college. The only difference between then and now is that this lighting was originally designed for still-life shots; now, I’ve scaled it up and use it on my portraits instead.

This ‘dark field illumination’ technique, as it’s often referred to, is a common technique in still-life shoots. It’s typically used to light dark, very shiny objects like wine bottles, for example.

Back in art college when I was lazy and inexperienced - I shot black and white! We all gotta start somewhere.

The technique's basic principle is to place a light behind the subject and then block off most of that light, except a slim bead of light at the edges. When shot with that bead of light cropped out in-camera, the light appears to wrap around the subject.

As you can see in this image here, the blue light is the light behind and it wraps around this lens beautifully.

As you may well imagine, this is a popular technique for several reasons, but chief among them is the fact that this complete ring of light around the object can be achieved with just a single light.


Scaling it Up

So what’s the best way to scale this up for a portrait? Let’s first look at the setup and then I’ll break it all down.

Cut Out & Keep


TL;DR/ADHD/Artist Setup Explanation

  • Place large softbox oriented vertically behind the subject

  • Attach large sheet of black of velvet in front of softbox leaving a gap above and on either side of softbox

  • Position large beauty dish in front and above subject

  • Bring in a small softbox as a fill-light and add a gel to it


Kit Used

  • 3x lights - these can be flash or LED

  • 1x large softbox - 100cm x 80cm

  • 1x 21” beauty dish

  • 1x small softbox - 60cm x 60cm

  • Coloured Gels (not optional)


Camera Settings

  • Camera - Nikon D850

  • Lens - 24-70mm f2.8

  • Shutter Speed - 1/125th

  • Aperture - f5.6

  • ISO - 100

  • Kelvin - 4400K

  • Focal Length - 70mm


The Results

Click to enlarge any of the shots below.

Image with just softbox behind turned on

Image with softbox and beauty dish turned on (FYI there also looks to be a very small amount of coloured fill present here too)

Final shot with all 3 lights turned on

Model: Kayt Webster-Brown


Breaking it Down

Black Velvet

Good news this week boys and girls as this is an easy setup! No need to trawl through pages of nerd-speak this week as the only real trick to this setup is the clever use of that black velvet behind the model.

Black velvet is a great material to use here as its very dense texture soaks up all the stray light resulting in a very dark background behind. The trick is to get the gap around the edge of the softbox right as that’s what dictates the faux edge and top light look.

As you can see in the images I’ve provided here, the gap is about 6 inches at the top and on both sides. No need to worry about the bottom as we won’t see that. I’m suspending the black velvet with simple small bulldog clips with a piece of clear catgut (that’s fishing line to those of you with a 2 at the start of their year of birth) suspending it. Granted, it’s not very technical, but it does allow for a lot of flexibility when adjusting it.

The Top and Edge Lights

Once you have the softbox set up, the other two lights are very simple additions. My advice though, set the softbox up first and get that dialled in. Get the very visible and clear bead of light around the subject before even turning on the other two lights. If you’re not sure what to look for, take another look at the initial shot I shared with only the big softbox on behind.

Here you can see there is no light falling on the front of the subject and that I have a very even spread of light all the way around the subject.

To achieve this even spread of light all the way around, you need to adjust the gap of light all the way around to be even. That means the gap needs to be the same size all the way around, but the model also needs to be in the middle. The other aspect to watch for is the top gap lighting the top of the head. Don’t be tempted to make that gap bigger or smaller, instead, try raising or lowering the height of the softbox behind until the top gap of light is the same distance away from the model as the sides.

The Other Lights

As I said, with that backlight sorted, the other two lights are very easy to manage. Simply bring in the beauty dish key light. Position it high and angled down and ensure that it casts a visible shadow under the chin and nose etc. It’s this shadow area that we can then fill in with, you guessed it, our fill light. I personally think a small softbox is fine here, but a small umbrella will also work. Lastly, add your coloured gel for that extra visual drama and you’re done.


Closing Comments

This is a quick and simple setup, but the final shot looks very impressive for just 3 lights. That backlight is quite literally doing the job of 3 lights alone as that bead of light around the subject is simulating 2 edge lights and a top hair light all on its own. The trick here is getting the black velvet sorted, but once you have that cut to the size of your softbox and the clips attached, it’s very quick to simply throw that back up there next time. I will just leave you with one final pro-tip and that’s to make sure you stingy buggers don’t scrimp on the velvet! Obviously, I would never make this mistake to save a few quid, but just be wary of the cheap black velvet that’s actually shiny! There’s tons of the cheap stuff about at this time of year as it’s a very economical black fabric to make Halloween costumes from, so just be sure to get the slightly more expensive kind. The crushed velvet is the bad one as it’s shiny and the other more expensive one is often referred to as ‘plush’ velvet. Tune in next week for more tips from ‘Haberdashery at Home with Hicks’!


BIG Studio Lighting in small Spaces

You may have noticed that this week’s setup is also a very compact setup. Not that you’d ever do it, but you could technically shoot this setup in an area as small as a corridor. This lighting technique is just one of the setups from my very popular BIG Studio Lighting in small Spaces workshop and the whole premise behind this course is showing you inventive ways to create very dramatic-looking lighting with minimal kit and very limited space. This setup mimics a 5-light setup with only 3 lights and it does it in a way that negates the need for a lot of width and height in your space. These space-saving setups are great if you’re shooting on location with limited resources, but they’re also perfect for those who are working in smaller home studios. Just because you don’t have a ton of room to shoot in, it doesn’t mean you can’t still be very creative with your lighting too.

To learn more and to see what setups are covered and explained in this workshop, follow the link below.

|| LEARN MORE ABOUT THE BIG STUDIO LIGHTING IN SMALL SPACES WORKSHOP ||

Super Simple 2 Light Still-Life Setup

If you were curious about the still-life lighting setup this was originally scaled up from, you can check out my previous article on it here….

Super Simple 2 Light Still-Life Setup


JHP Livestreams…

I livestream every other Tuesday night via YouTube and there I answer your questions, critique your shots, take community images into Photoshop to work on them and discuss all manner of lighting tips and techniques. I look forward to seeing you and your work there real soon. Jake Hicks Photography - YouTube


All of my more advanced lighting classes are now available online!

||

All of my more advanced lighting classes are now available online! || All of my more advanced lighting classes are now available online! ||

LEARN MORE ABOUT MY ONLINE WORKSHOPS

 
Tuesday 11.12.24
Posted by Jake Hicks
 
Newer / Older