We all know how easy it is to get the lighting you want in those big, fancy studios. Tons of height, clean white floors and all the kit you could ever dream of. But anyone can get a half-decent shot in a studio like that, what about creating something cool and creative in a smaller space like a home studio?

Getting a large light and an even larger modifier above your subject can produce some beautiful light, but it sadly requires a surprising amount of vertical space. Thankfully, there is a workaround.
I’m sure we’ve all experienced the dread of travelling to a shoot and not knowing what you’re about to be greeted with space-wise. I’ve done portraits in people’s homes in the tiniest of spaces, in hair salons with wall-to-wall mirrors and in corporate offices with horrendous coloured walls and carpets. As I said, any lukewarm monkey with a twitch can take a decent shot when everything is going well and you have tons of kit, time and space….. but what about the other 99% of jobs?
Learning to be adaptable on set (even if that set is a small bathroom) is a huge part of the job and equipping yourself with a few tricks to make the most of any given space is always a good thing. So in today’s article, I want to look at how we can bring in an effective top light above our model, even if we have very little space to work with.
Top-lights get used all the time on bigger shoots and they’re almost always present on movie sets too, but why? One of the main reasons, is separation as we always need to make sure our subject is kept separate from the background. Many modern photographers achieve that today with simple hair-lights (edge-lights) when height is limited, but it can be tricky to get that very even spread of light up the sides and across the top of the head. This is where the top-lights come into play.
In a larger space like a studio, you’d simply boom over the necessary light and you’re done. This does of course require a lot of height as you not only need vertical space for the modifier and the actual light itself, but you also need to have the light high enough to be out of shot, plus also high enough for the light to spread before it hits the model. Surprise, surprise, this eliminates most smaller rooms and spaces, especially home studios….. but there is a workaround.
The Setup
As always, let’s jump straight into the setup and then discuss some of the finer details from there.
Cut Out & Keep
I apologise for the somewhat scuffed BTS shot here. I hadn’t intended to share this setup so this is the only ‘test’ image I had that showed everything.
Click on any of the images above to enlarge them
TL;DR/ADHD/Artist Setup Explanation
Setup white background
Point 2 lights at the background either side at the top
Suspend silver Mylar above subject
Place red Spotlight on floor behind model and pointed up at the silver Mylar above
Setup a large softbox with blue gel just out of shot next to you and pointed at the model
Kit Used
2x Rotolight AEOS 2’s - Dome modifiers attached
1x Rotolight AEOS 2 PRO - R120 Parabolic attached
Godox SZ150R
Godox Spotlight
2x C-Stands to hold silver Mylar
White Backdrop
Silver Mylar
Camera Settings
Camera - Nikon D850
Lens - AF DC-Nikkor 105mm
Shutter Speed - 1/125th
Aperture - f2
ISO - 200
Kelvin - 4500K
Focal Length - 105mm
The Results
Click to enlarge any of the shots below.

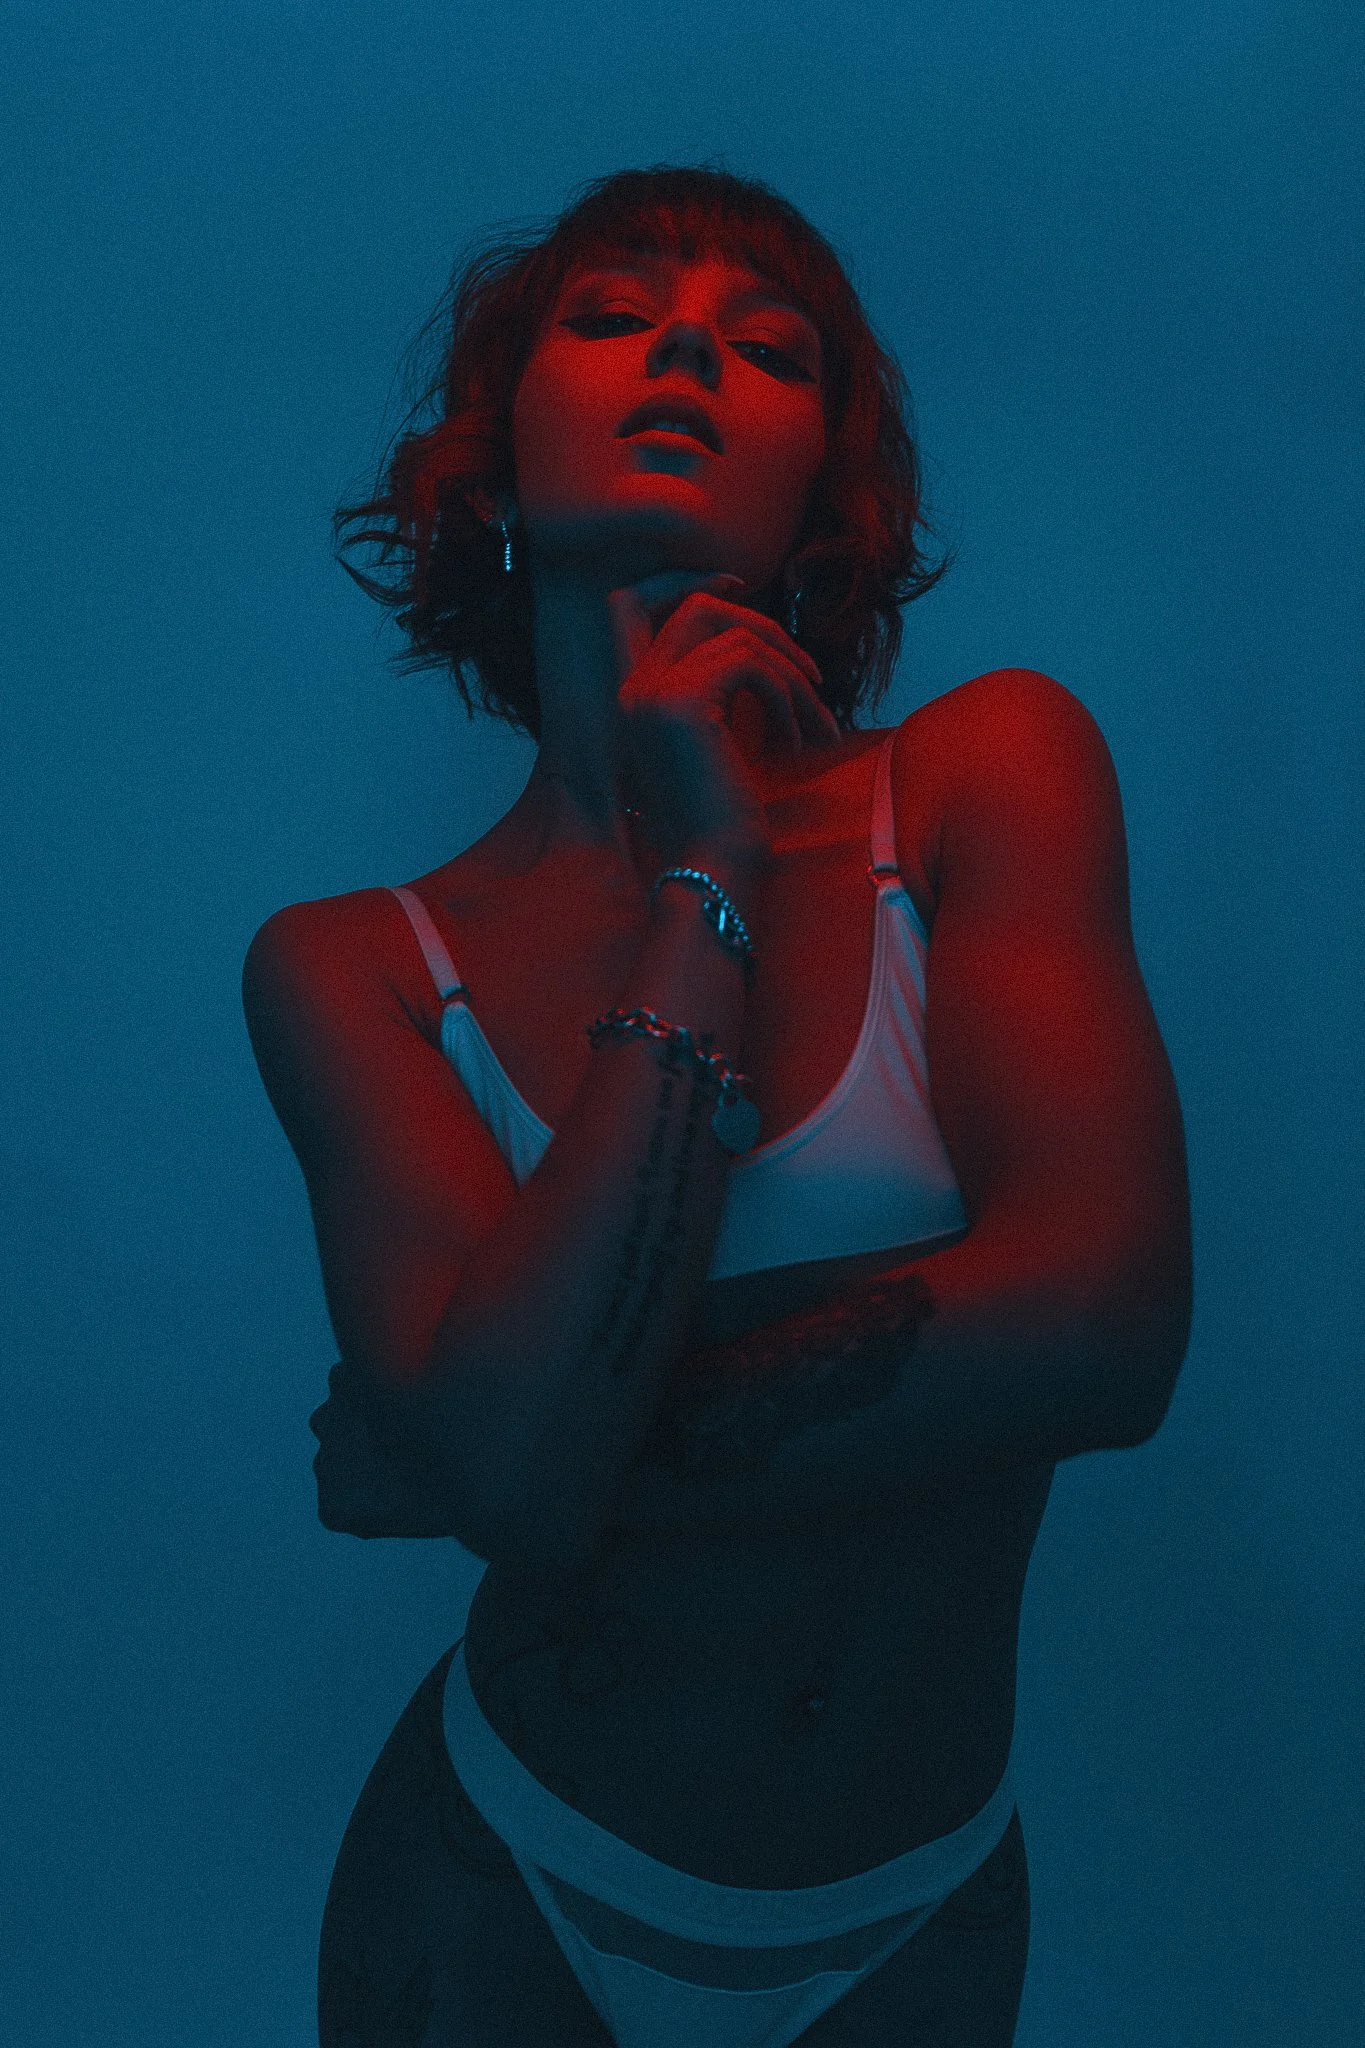
Model: Irina Ludosanu
Breaking it Down
Most of this should make sense now that you’ve seen the setup and diagram, but let me talk you through some of the finer details.

Hopefully, your white background is smoother than mine, but remember, this particular shot is focused on the texture here and when I photograph the model, it’ll be knocked out of focus. Note the grad from light to blue.
White Background
Firstly, the white background. Nothing crazy here and a white wall is just as good, but make sure it's matte and not shiny. Next, we need to set our two lights up high and on either side pointed into the white wall. The goal is to bring these lights in close to the wall and allow them to illuminate the top portion and fade off into shadow towards the bottom.
I’m using 2x AEOS 2 Rotolight LED lights here, but a couple of strobes with small umbrellas up nice and high would likely also work. Failing that, a boomed-in strip-box would be the perfect solution…. but this article is about making it work in smaller spaces so a boom is likely out of the question.
Blue Softbox
This modifier needs to be as big as you can manage here and although mine is 120cm, you can still make this work with something a little smaller and again, even an umbrella would be a great alternative. I’ve coloured mine with that JHP signature steel-blue colour, but you can choose whatever works for you. This light aims to fill in that shadow you’ve just created on the background with the white lights.
I’d recommend testing the white light first and checking that they’re leaving a shadow at the bottom of your background. PRO-TIP: When you’re checking for that shadow at the base of the frame, be sure to use the lens and focal length you aim to use when actually photographing the model.

Red Spotlight
As you can see in the diagrams, this Spotlight is placed low on the floor and then angled up to the silver mylar above the model. There are a couple of reasons for this placement, firstly to keep it out of shot when we’re shooting, but also the lower it is, the further away it is from the mylar and the larger the spread of light you’ll get.
I’m fortunate to have a Godox SZ150R attached to my Spotlight here and that’s a full RGB LED light allowing me to choose any colour I want. The good news is that if you have an optical snoot instead of the Spotlight, then that will be a fine substitute too. Just remember to gel it once you’ve set it up.
Silver Mylar
Of course, we can’t forget the star of the show here and once again the Silver Mylar comes to the rescue. I’ve been preaching about the merits and many uses of silver Mylar for many years now and if you still don’t have some, I highly recommend you remedy that as soon as possible as it has a ton of uses. Plus, it’s super cheap so there’s no excuse not to have some on set.

If you’re searching for some Mylar online, try the terms ‘gardening’ and ‘roll’ in conjunction with silver Mylar as that gives you the most useful results. I also recommend you get it in as wide of a roll as you can find. Often that’s 1.5m and then the length is up to you, but likely 10m is going to serve you well for a while. Prices do vary wildly, but a 1.5x10m roll should be around £20-£40.
With the sales pitch out of the way, what are we doing with silver Mylar here? As you can see in the diagrams above, I’ve positioned a sheet of it above the model and there are several ways you can do this. In the past I’ve literally pinned it to the ceiling above the subject by sandwiching it between light-stands pushed all the way up. This can often work fine, but it can sometimes be too high, so instead I bring it lower by clamping it to a board and then suspending that board between two C-stands like you see me doing here in this setup.

Things to consider
Bounced Light
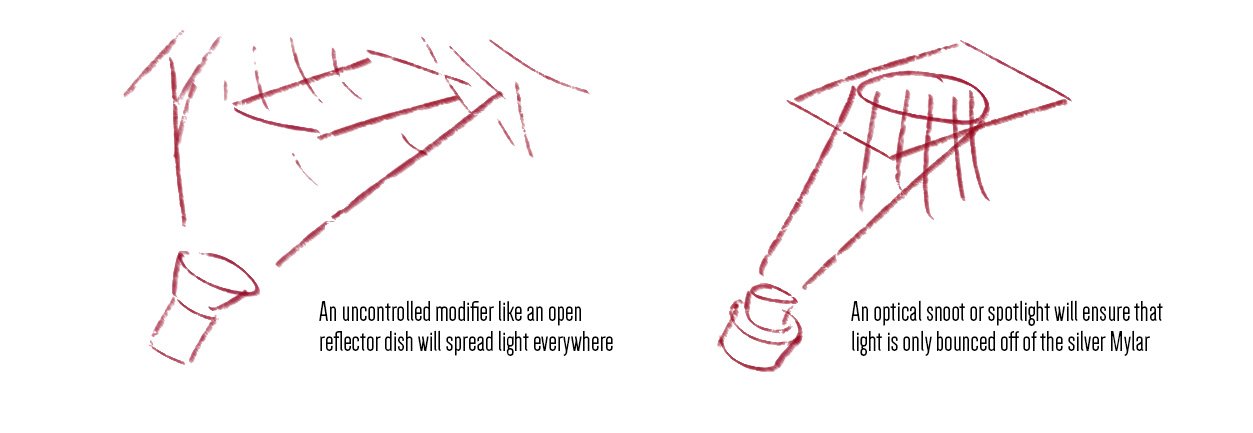
The core premise of this setup is the fake top-light we’re making by bouncing a light off of the silver mylar above the model. The silver mylar is bouncing the size of the light that it receives so with this in mind we need to make sure a few things are happening. Firstly, we need to ensure the light we’re firing into the Mylar is extremely controlled. We can’t be firing an uncontrolled light like an open reflector dish up there. The light should only hit the mylar and it shouldn’t hit anything else like the ceiling around it, hence why the Spotlight and optical snoots are ideal for this very precise and controlled light.
The Secret Fifth Light
The other aspect to be very aware of, is where the model is standing in relation to that spotlight behind. If she goes too far back (away from you), she will be struck by the light before it reaches the Mylar above. This is not as bad as you may imagine and I’ll often lean into this clever illusion as it essentially tricks the viewer into thinking you’re using more lights than you actually have.
You can see in nearly all of the shots that I try and make the most of this faux dual-light hence the hands being up and catching the light. If you try this setup yourself, I’d urge you to do the same, just be sure the model doesn’t block too much light from hitting the Mylar above.
Closing Comments
I appreciate it’s kind of ironic that I'm sharing a setup designed around making the most of small spaces.... and then I use 4 lights to do it. Yes, there is a lot going on here, but as always, every light has its job so make sure you know what that job is and set it up one light at a time.
There are also a few distances you should keep in mind. Firstly, your closeness to the background will play a huge role in the final look. Essentially you want your setup as close as you can to the white wall as this will help make the blue a similar power on both the model and the background. Another distance to watch is going to be the silver Mylar above. It should still work if it's pinned to the ceiling above (within reason), but it will make it harder to balance the brightness of the red coming up from under the model with the brightness coming down.
I’m sure I’ll get asked this so I’ll answer this now,
“can I use a silver reflector instead of the silver Mylar?”
The short answer is yes, but a silver reflector will lose a lot of power from the bounced light compared to the Mylar. In theory, this is fine, but with a more diffused light from the reflector we lose some control of it so be very careful of that red spilling onto the white wall behind. Using a silver reflector will also make it very hard to double up that red light from above and below. I just mentioned that a non-mirror finish material like a reflector will need more light power to bounce the same amount of light back down onto the model. That means the red light will be very bright on the way up and less so on the way down. Again, this will make the 2 from 1 light look that much harder as you never want your light from below to appear brighter than the one from above.
Lastly, I know I’m using all LEDs here, but there’s certainly nothing stopping you from achieving all of this with flash and all the modifiers will work for both LED and flash.
Products Used
Rotolight
Although I am sharing my own personal thoughts and findings about the lights mentioned in this article, many of you will want to know that I am now a ‘Master of Light’ for Rotolight. As such, I have been given a discount code to share with you when purchasing any of their products via the Rotolight website. Use my code ‘JAKEHICKS10’ when purchasing and you’ll save a bunch of money. I’ve never earned a penny of commission on this though, so if you find a better deal elsewhere, go for it.
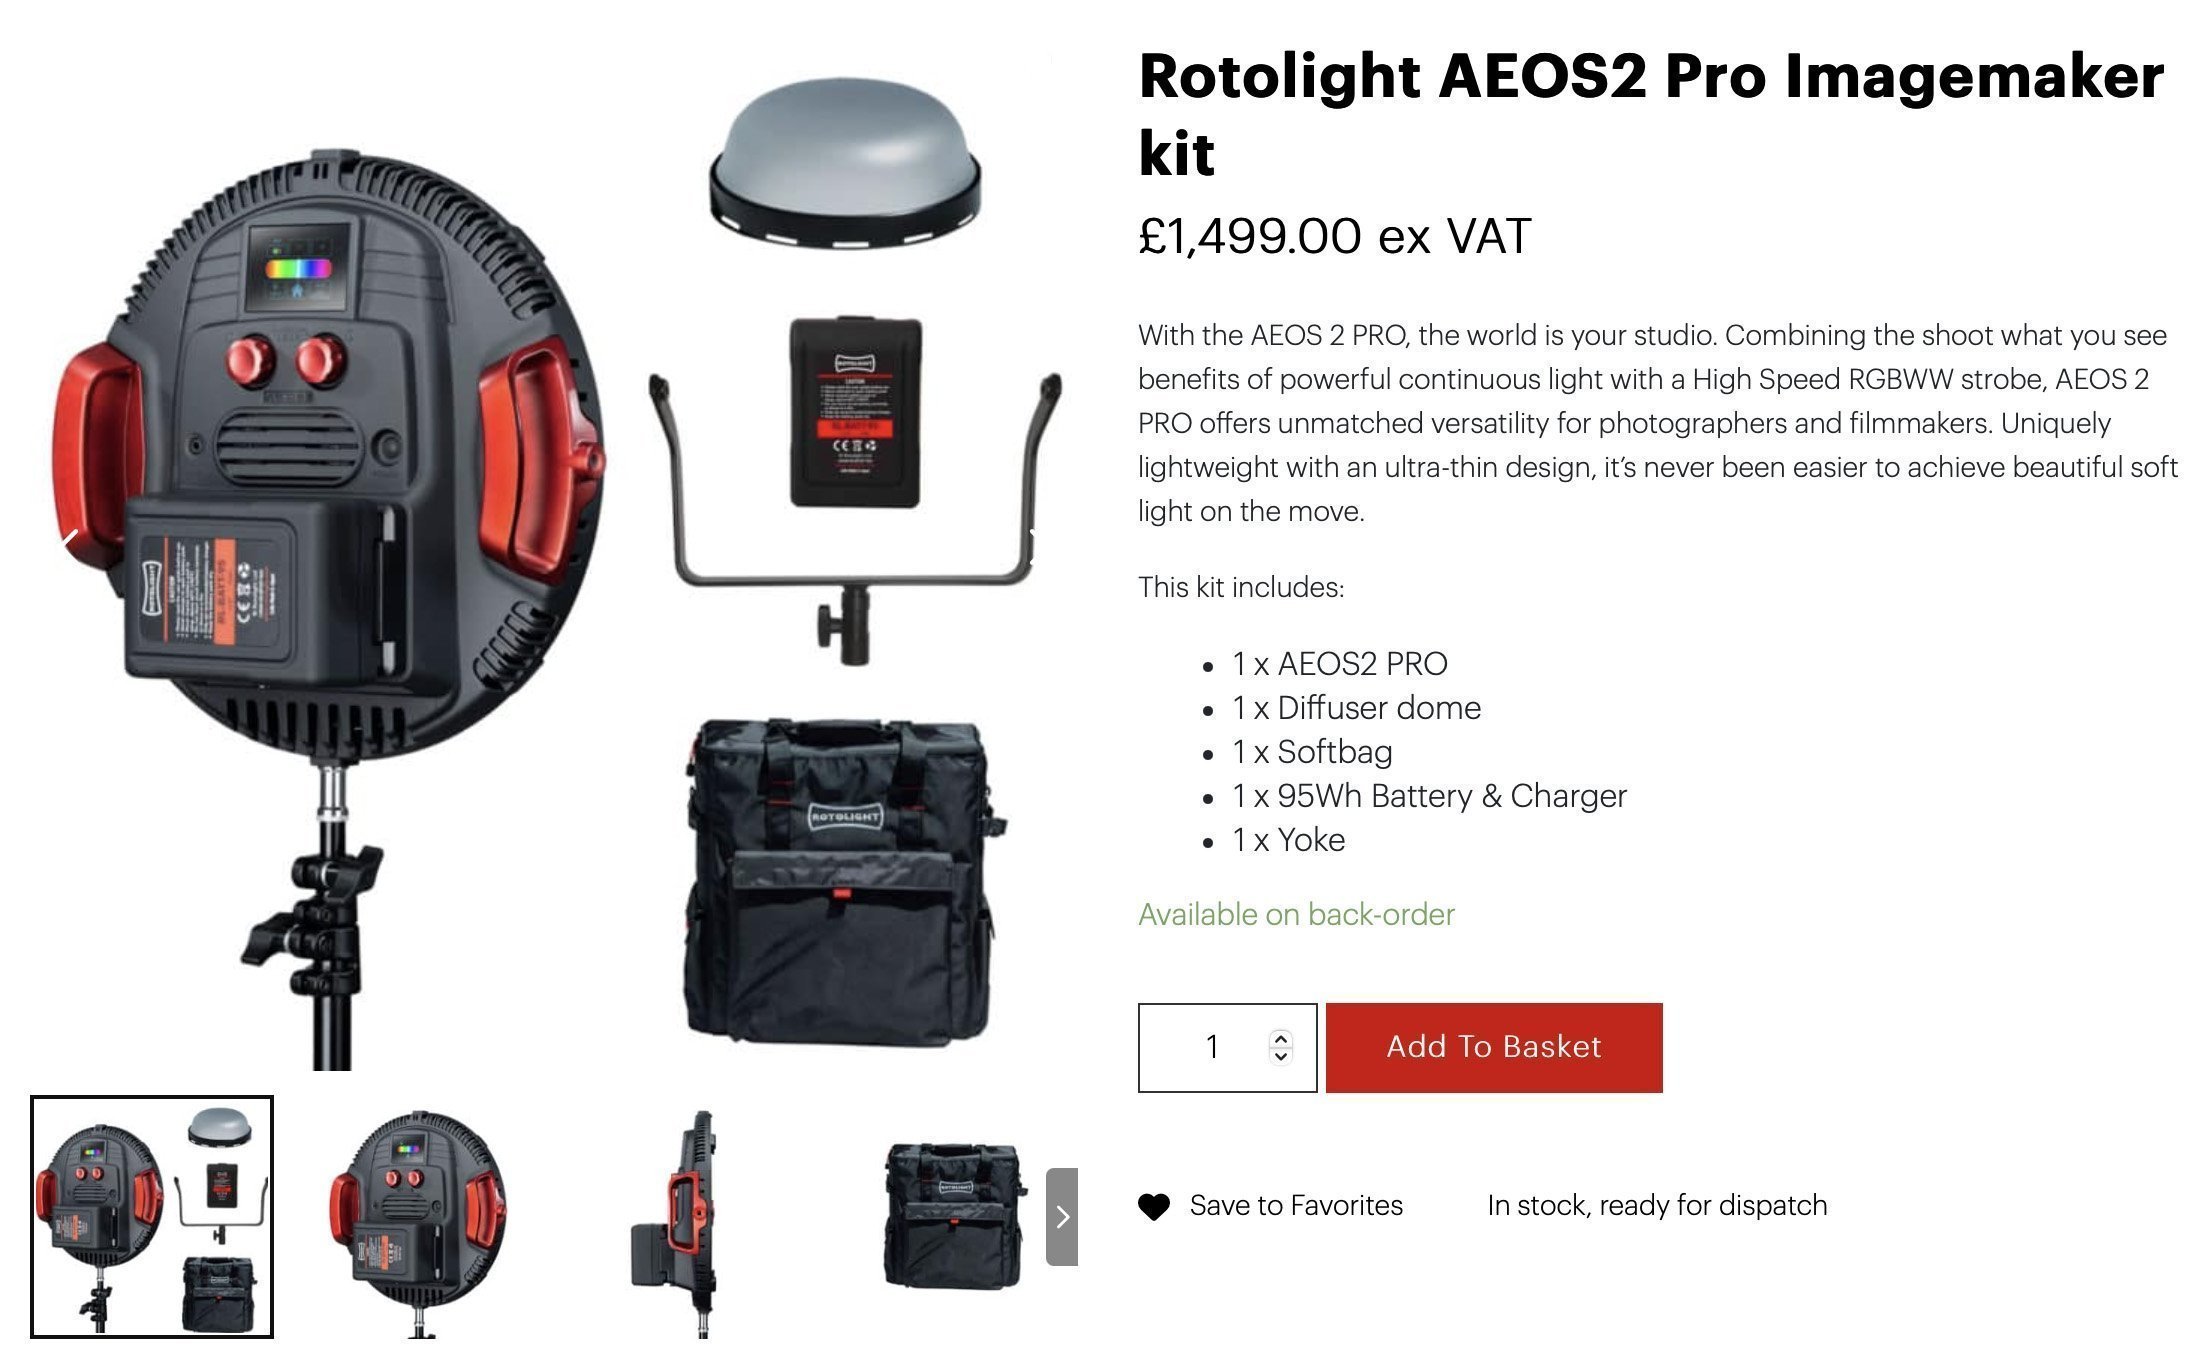
Rotolight AEOS 2 PRO
With the AEOS 2 PRO, the world is your studio. Combining the shoot what you see benefits of powerful continuous light with a High Speed RGBWW strobe, AEOS 2 PRO offers unmatched versatility for photographers and filmmakers. Uniquely lightweight with an ultra-thin design, it’s never been easier to achieve beautiful soft light on the move.

Rotolight R120 Sofbox
A softbox is pretty much a must-have piece of kit for any studio shooter, so if you own any AEOS 2/Pros, this is certainly worth taking a look at. It comes with internal baffles as well as the eggcrate grid on the front. Plus, it has 16 sides making this an incredibly round and clean light source.
PixaPro
Please note that I’ve included affiliate links below for PixaPro and I will benefit (albeit minimally) from the sales of any of these products should you purchase them. To that end, please feel free to use my discount code ‘HICK5-OFF’ at Essential Photo to receive a discount on any purchase via their site.

Godox Spotlight
S-fit spotlight that can be very finely controlled via inbuilt blades or via a range of Gobos. Due to the large lens at the front, this modifier can also produce some of the hardest-looking light available.

Godox SZ150R
Essentially this is an LED studio strobe. You can use it with any S-Fit modifiers like beauty dish and softbox you already own, plus you can also change this to any colour and any Kelvin you’d like. It’s only 150 watts though, so you will want to use this in a controlled studio environment.

Detachable Base C-Stand
Every decent studio has a few C-Stands in them as they’re rock-solid when it comes to holding kit and backdrops. I only have a couple myself, but I always want more. If you have a more permanent space to shoot from, I doubt you’ll ever regret getting some of these.
3m Professional C-Stand Spring Loaded Detachable Turtle Base

JHP Livestreams…
I livestream every other Tuesday night via YouTube and there I answer your questions, critique your shots, take community images into Photoshop to work on them and discuss all manner of lighting tips and techniques. I look forward to seeing you and your work there real soon. Jake Hicks Photography - YouTube