LED lights are everywhere now, and from kids toys to professional studio lighting, LEDs are being used in absolutely everything. At a photographic level there are a ton of great options to look at and a while ago I even reviewed and tested some of the more professional level LEDs from Spekular and their new modular lights (review here).

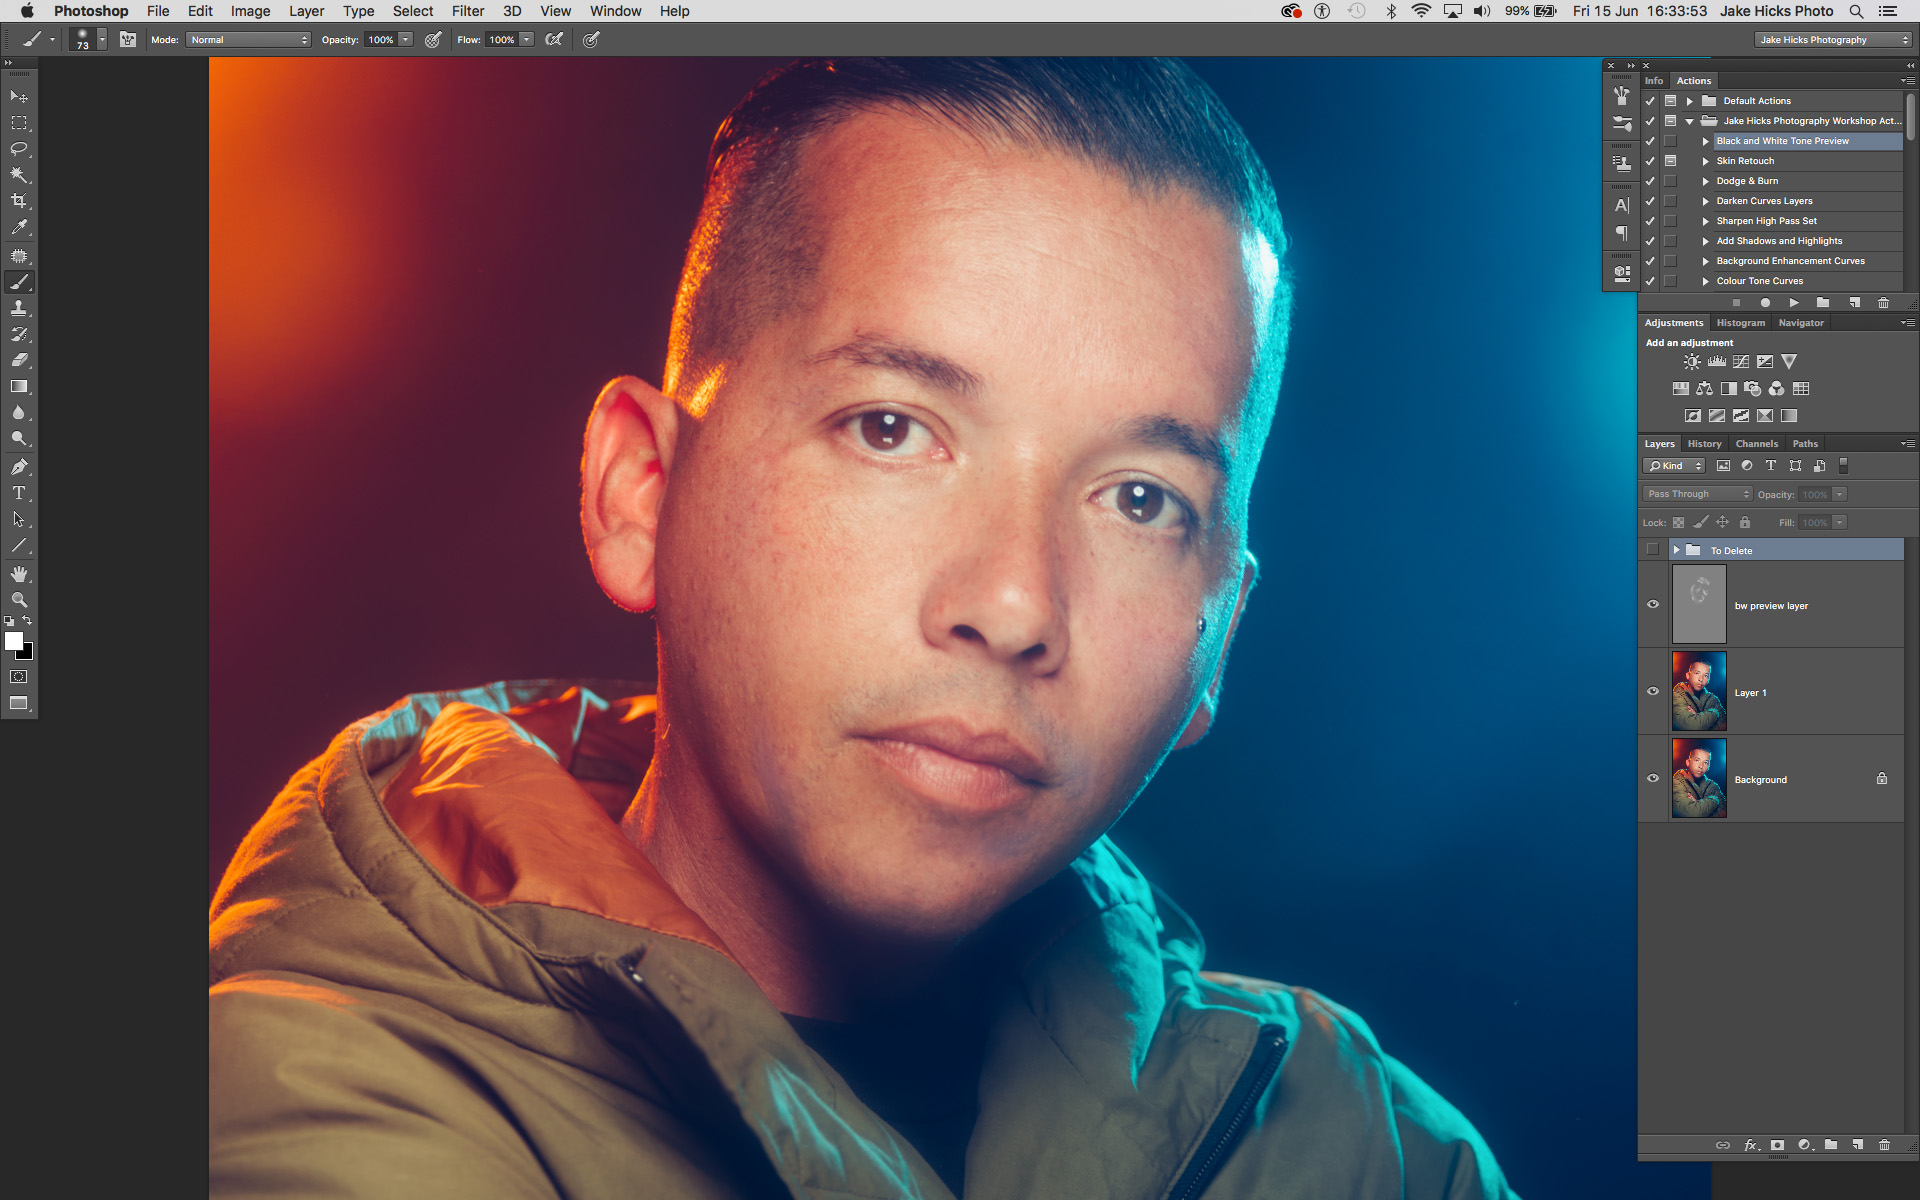
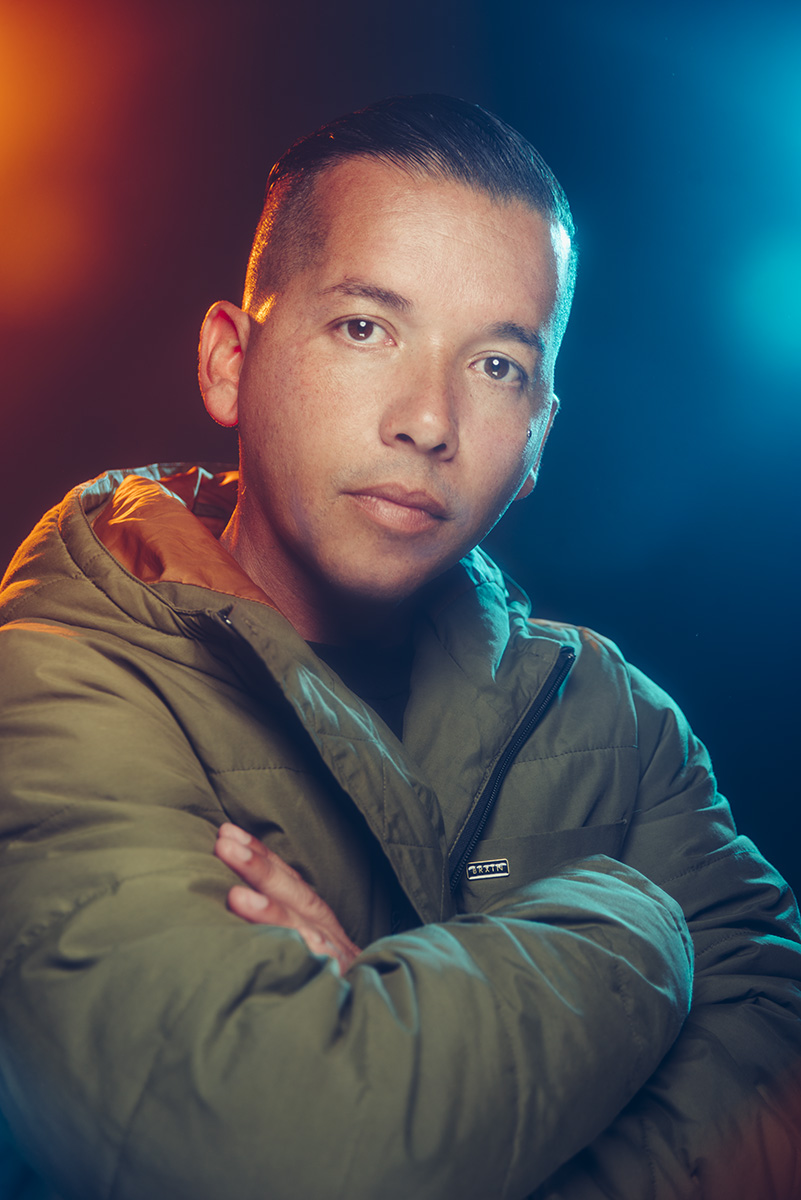
Image shot with £20 LED lighting. Lighting setup explained below.
These lights are clearly excellent and when using them and other similar high-end LED lighting you have a lot of benefits and features including, colour consistency, bright LED's, lighting modifiers and so on. But all of those features come with an understandably high price tag.
So what if you're interested in simply playing with some LED lights? What if you just want to test out some cool lighting ideas but don't want to jump in at the deep end and invest a whole bunch of money on them just yet?
Well thankfully due to LED lights being so prolific right now, there are some very cheap options and in fact you can even make your own LED lights quite easily too.
In this article I'm going to be showing you some lighting ideas that can be achieved with very affordable, off-the-shelf options and that's because LEDs are so cheap that it's practically more expensive to make them yourself. If you're still interested in the DIY option, here's a couple of pointers and places to consider.

Finding LED light strips are now very common and very easy to find. Any number of keyword searches will get you where you need to go.
DIY LED Lighting Kit
The LEDs
First off you'll need the LED light strips and they are very easy to come by. Places like eBay and Amazon are your safest and easiest options and here's a single link to some colour changing LEDS that are controllable with a remote; 5M LED Strip Lights Kit.
The thing you need to be searching for is the 'LED strip lights'. From there you'll get a whole bunch of options but keep an eye out for a remote in the preview picture as it'll show you all the options you have with it. One thing that I found when searching for these, is that 'white light' is not always a colour that comes with these as standard so if you're after playing with white light LED lighting just bear that in mind.

Finding appropriate housings for your LEDs is a little harder but anything round and translucent will do. Alternatively purpose built housings also exist.
The Housing
Next up you'll need some way of actually holding and supporting the LEDs so that you can use them as independent light sources. This is a little harder but that's only because you have so many options. I looked at a lot of translucent piping, extruded acrylics and so on, but I very quickly found that there is in fact several purpose-built housings available which saves you the trouble of going all out on the DIY nature of cutting and sawing etc. For example this Round Frosted Cover for use with LED Strip Lights is a good place to start. Have a hunt about but searching for "LED housing/channel/cover" will give you a bunch of options.

If you're after a one-stop-shop then there are a few dedicated LED shops out there.
Everything LED Related
I did also come across one site that had all the parts you need and all you simply had to do was choose the pieces you liked for your complete custom LED build. Wholesale LED Lights had a entire section dedicated to all the bits you could possibly need including the lights, the housing and even the remote controls. If you're after a one-stop-LED-shop this could be your place.
That seems like a whole lot of work!
So if like me you're thinking,
"Surely somebody out there has done all this for me already. Where the hell is their shop?!"
Thankfully we're in luck :D

In the mood for a spot of school disco and nausea inducing colour rhythm presets? Grab yourself a prebuilt LED light stick.
As it turns out, those cheesy DJ's love a good light changing metre of translucent acrylic, and for just £20 you can pick yourself one up that's all ready to go straight out of the box.
If you want to have a search about then just search "standing LED disco light" and you'll get a whole bunch of options to look at. Here's a couple to get you started though; Gear4music ADJ LED Colour Tube, or on Amazon you have Colour changing LED Standing Disco Light Stick. You get the idea but essentially you're after a metre long, colour changing LED light that preferably has something like a remote control to adjust it.
For £20, it just seemed silly to even try and make it myself so I just bought 4 of the complete LED lights which at the time cost me £60 total. You obviously don't need 4 but for what I wanted to play with, 4 of them would give me plenty of options.
The Purpose Built LED Lights
So I got my four LED lights, they're a metre long and about 8cm in width. They are powered via a mains adaptor and they are all controlled via a remote that has all the colour options accessible via a single button press, plus you can do all sorts of horrendous kids disco light patterns that any epilepsy candidate should avoid at all costs. You also have a handy feature here to increase and decrease the brightness of each colour via those sunshine up and down arrows in the top left of the remote (pic below). Although I initially thought this was not that useful, as surely I just want them all at full power all the time, but as different colours require different exposures this feature turned out to be pretty handy.

I picked up 4 prebuilt LED tubes and attached them to 4 of my light stands.
In the images above you can see that the lights are all mounted on light stands, these are my light stands as the LED lights do not come with any of their own.

What a shock! Gaffer tape fixes yet another problem.
I simply attached the vertical ones by gaffer taping the clamps that the LED lights come with to my light stands. The LED lights themselves are incredibly lightweight so there is almost no pressure or fear of them coming away from the stand once they're attached.
The horizontal light is simply attached via a Manfrotto Superclamp atop another stand. Again these lights are so lightweight that only minimal pressure is required to keep them in place.
The Lighting Setups
So now that we have our lights and have attached them to our stands we're finally ready to start shooting.
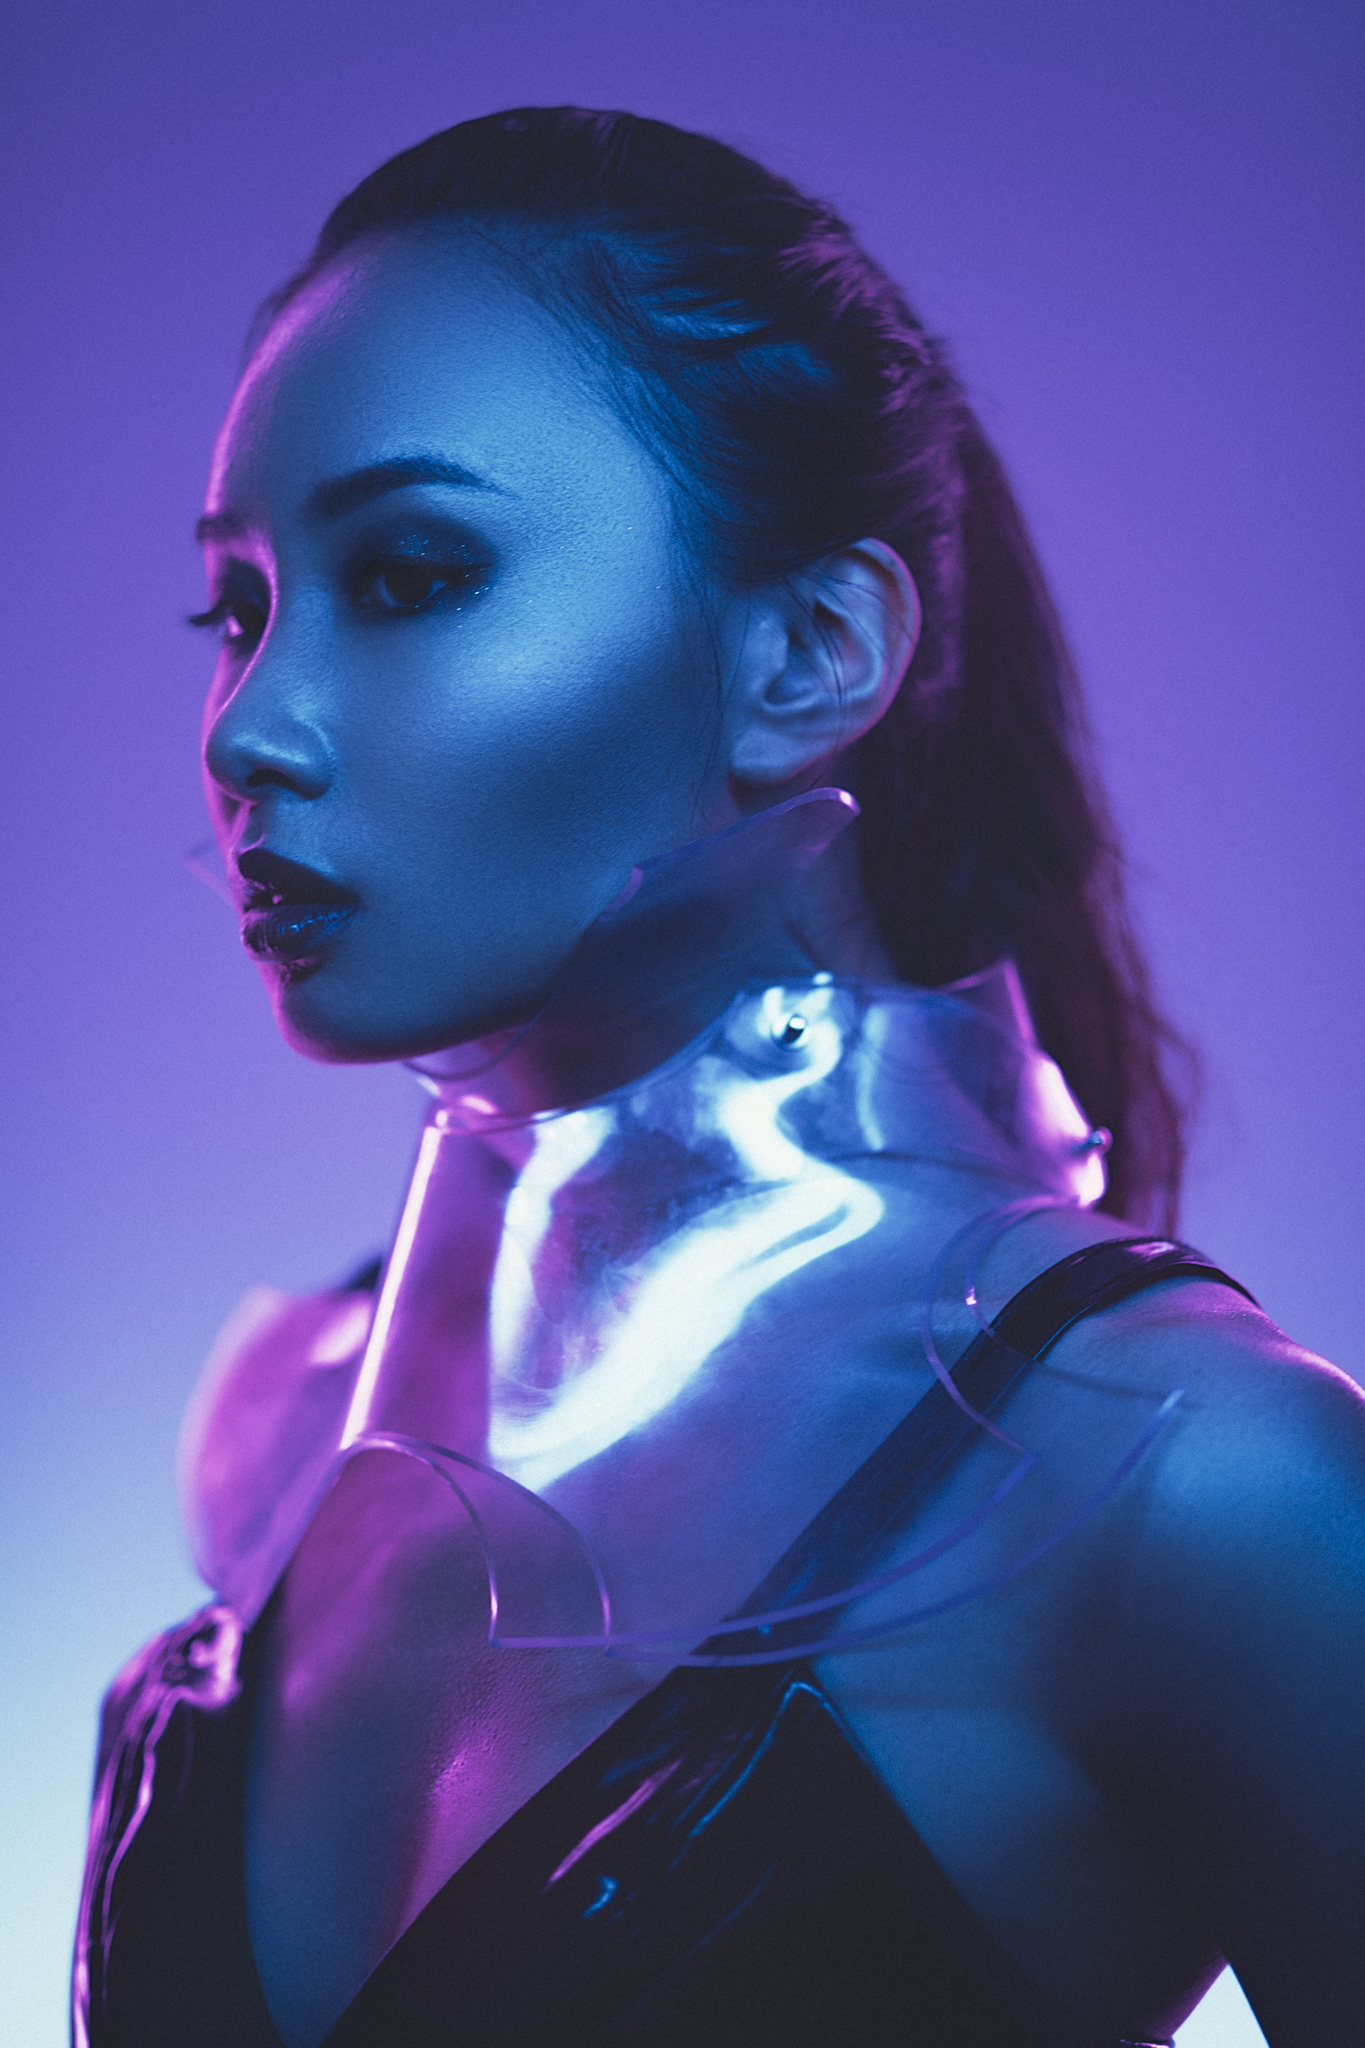
Key Light + Side Lights + Background Light
The first setup I tried was two side lights, one key and one background light.
Teal & Purple
Click to enlarge
Click to enlarge
Click to enlarge
The first thing I noticed was that using an LED light vertically for a key-light just wasn't working. It didn't give enough light coverage across the face in a vertical position so I quickly remounted it at a horizontal angle by simply removing the mount and gaffer tape and re-taped it at the new position. Once that was done the light was far more usable.
The next trick with this setup is using that background light to burn out the ambient colour created by the side lights. Position the model too far away and I didn't get any purple back there, position her too close to the background and the purple washes out the background light.
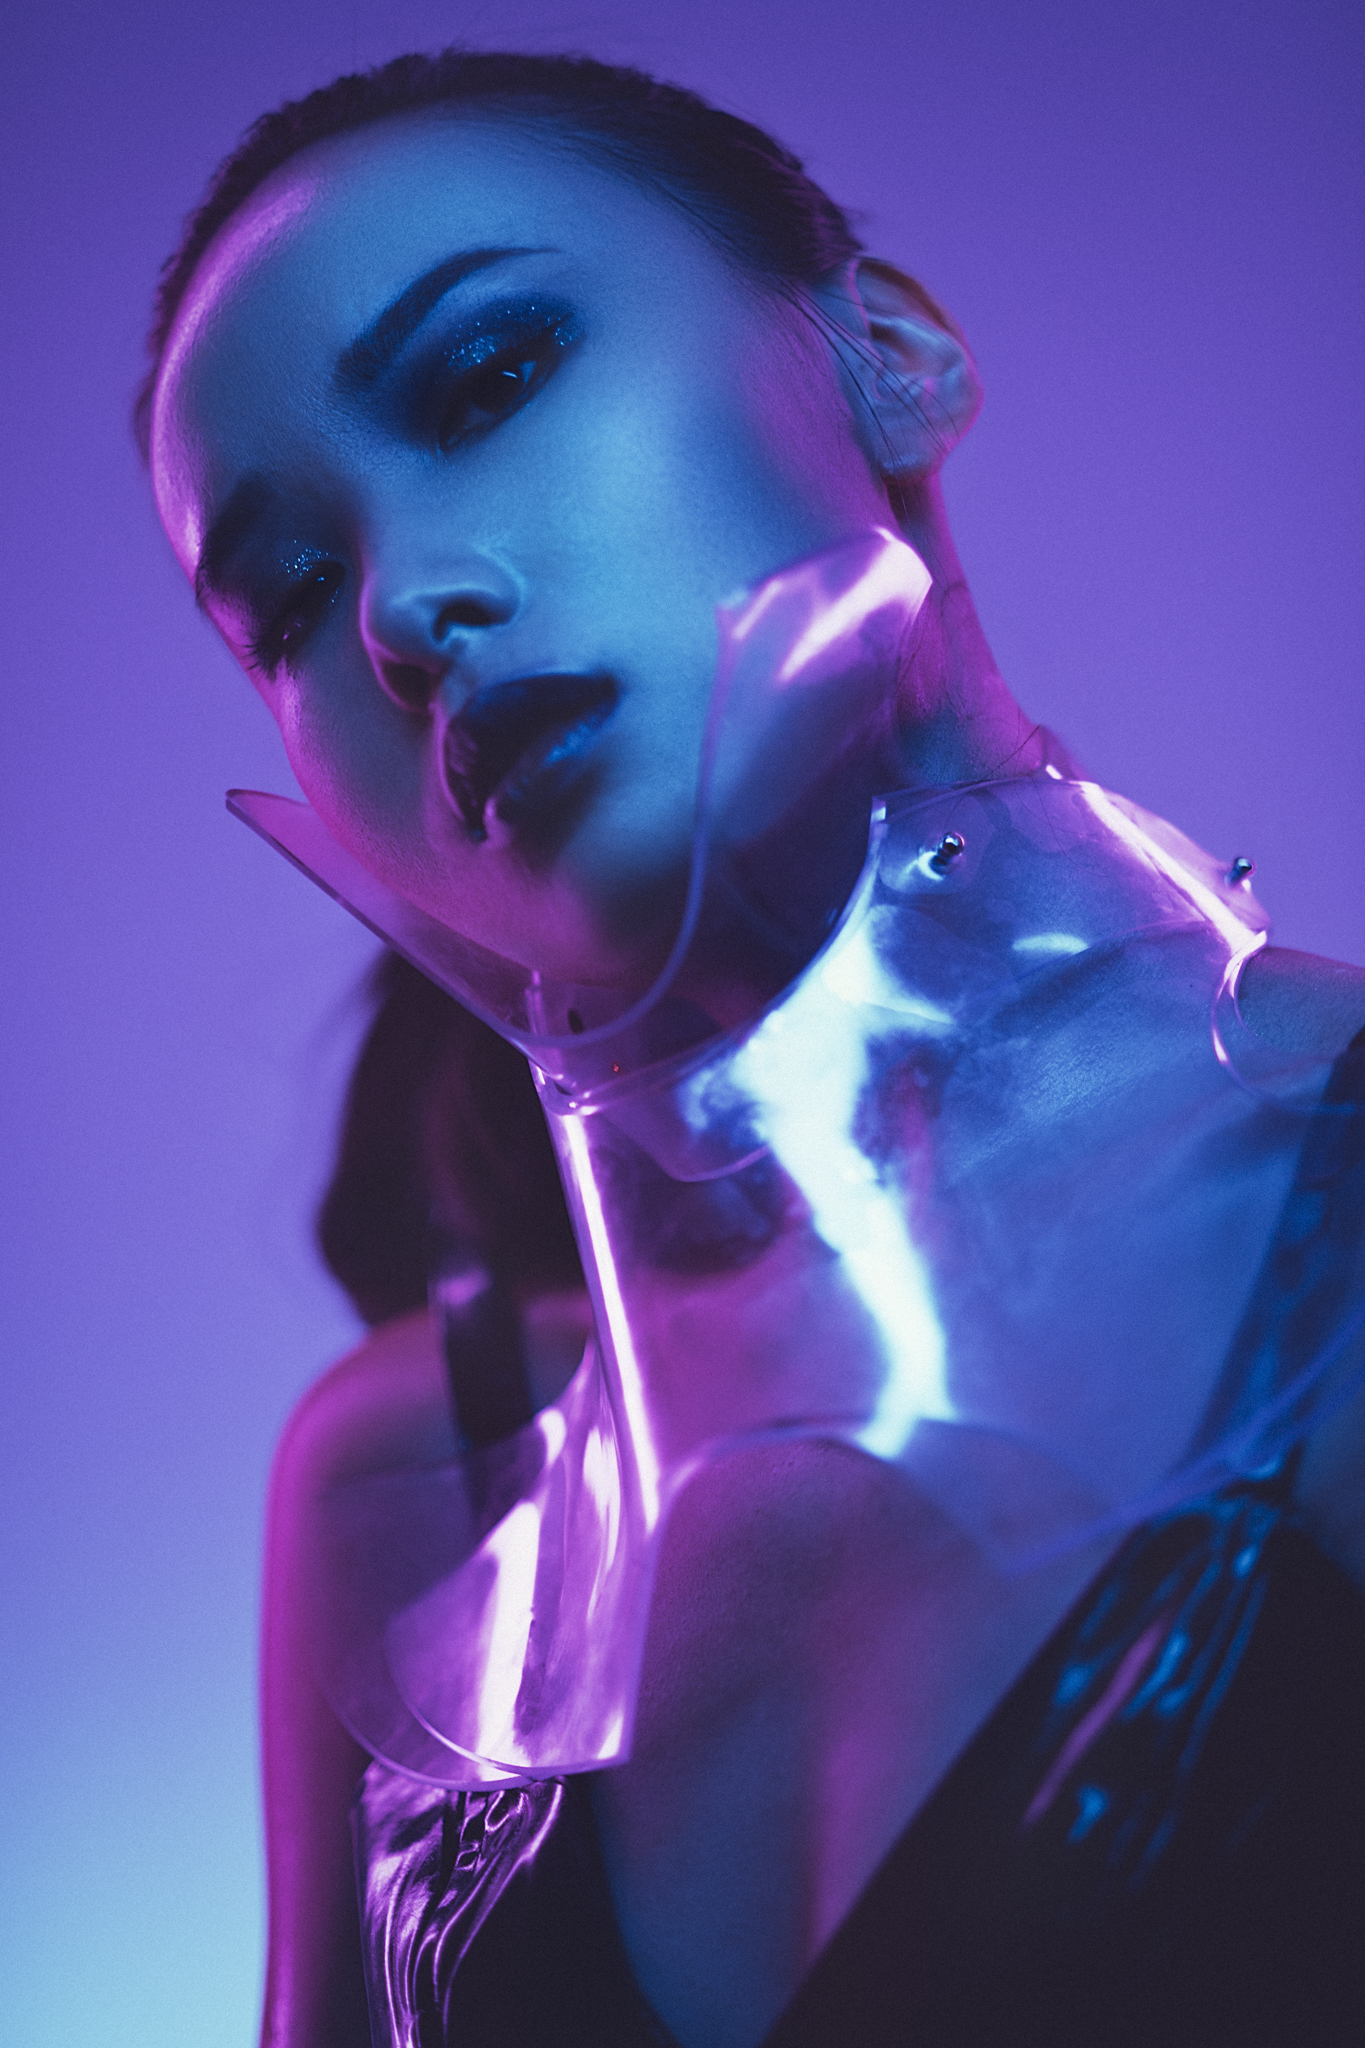
Blue & Purple
Next up I quickly changed the teal to a pure blue colour. There might not seem like much difference in the shots and that's because there really isn't. These LED lights show that they have a whole bunch of variety in their colours, but in reality it really is just subtle variances of Red, Green and Blue when you actually start photographing them.
The LED lights themselves claim to have a lot of variation in colour, but the reality is that they really only have the Red, Green and Blue. The variations are really only different densities of each of those three base colours once you start to photograph them.
Click to enlarge
Red & Purple
Click to enlarge
I was still playing with the colours and combinations and here I simply just changed it to pure blue on top and behind and pure red on the sides.
This quick switching of colours sounds super-easy right? Well although in theory it's really simple and as easy as pressing the button of the exact colour you want, the problem is that these LED lights are all controlled via a remote... a remote that changes ALL the lights at the same time!
This results in some awkward body contorting and hand shielding to try and just change one light at a time without changing them all simultaneously. Without removing each light from the set and taking it into another room to adjust it before bringing it back and then repeating that process three more times, the process of switching colours can be comedically frustrating at times. You can get three lights right and then whilst trying to switch the last one blue you inadvertently turn all four lights blue and the whole process starts again.
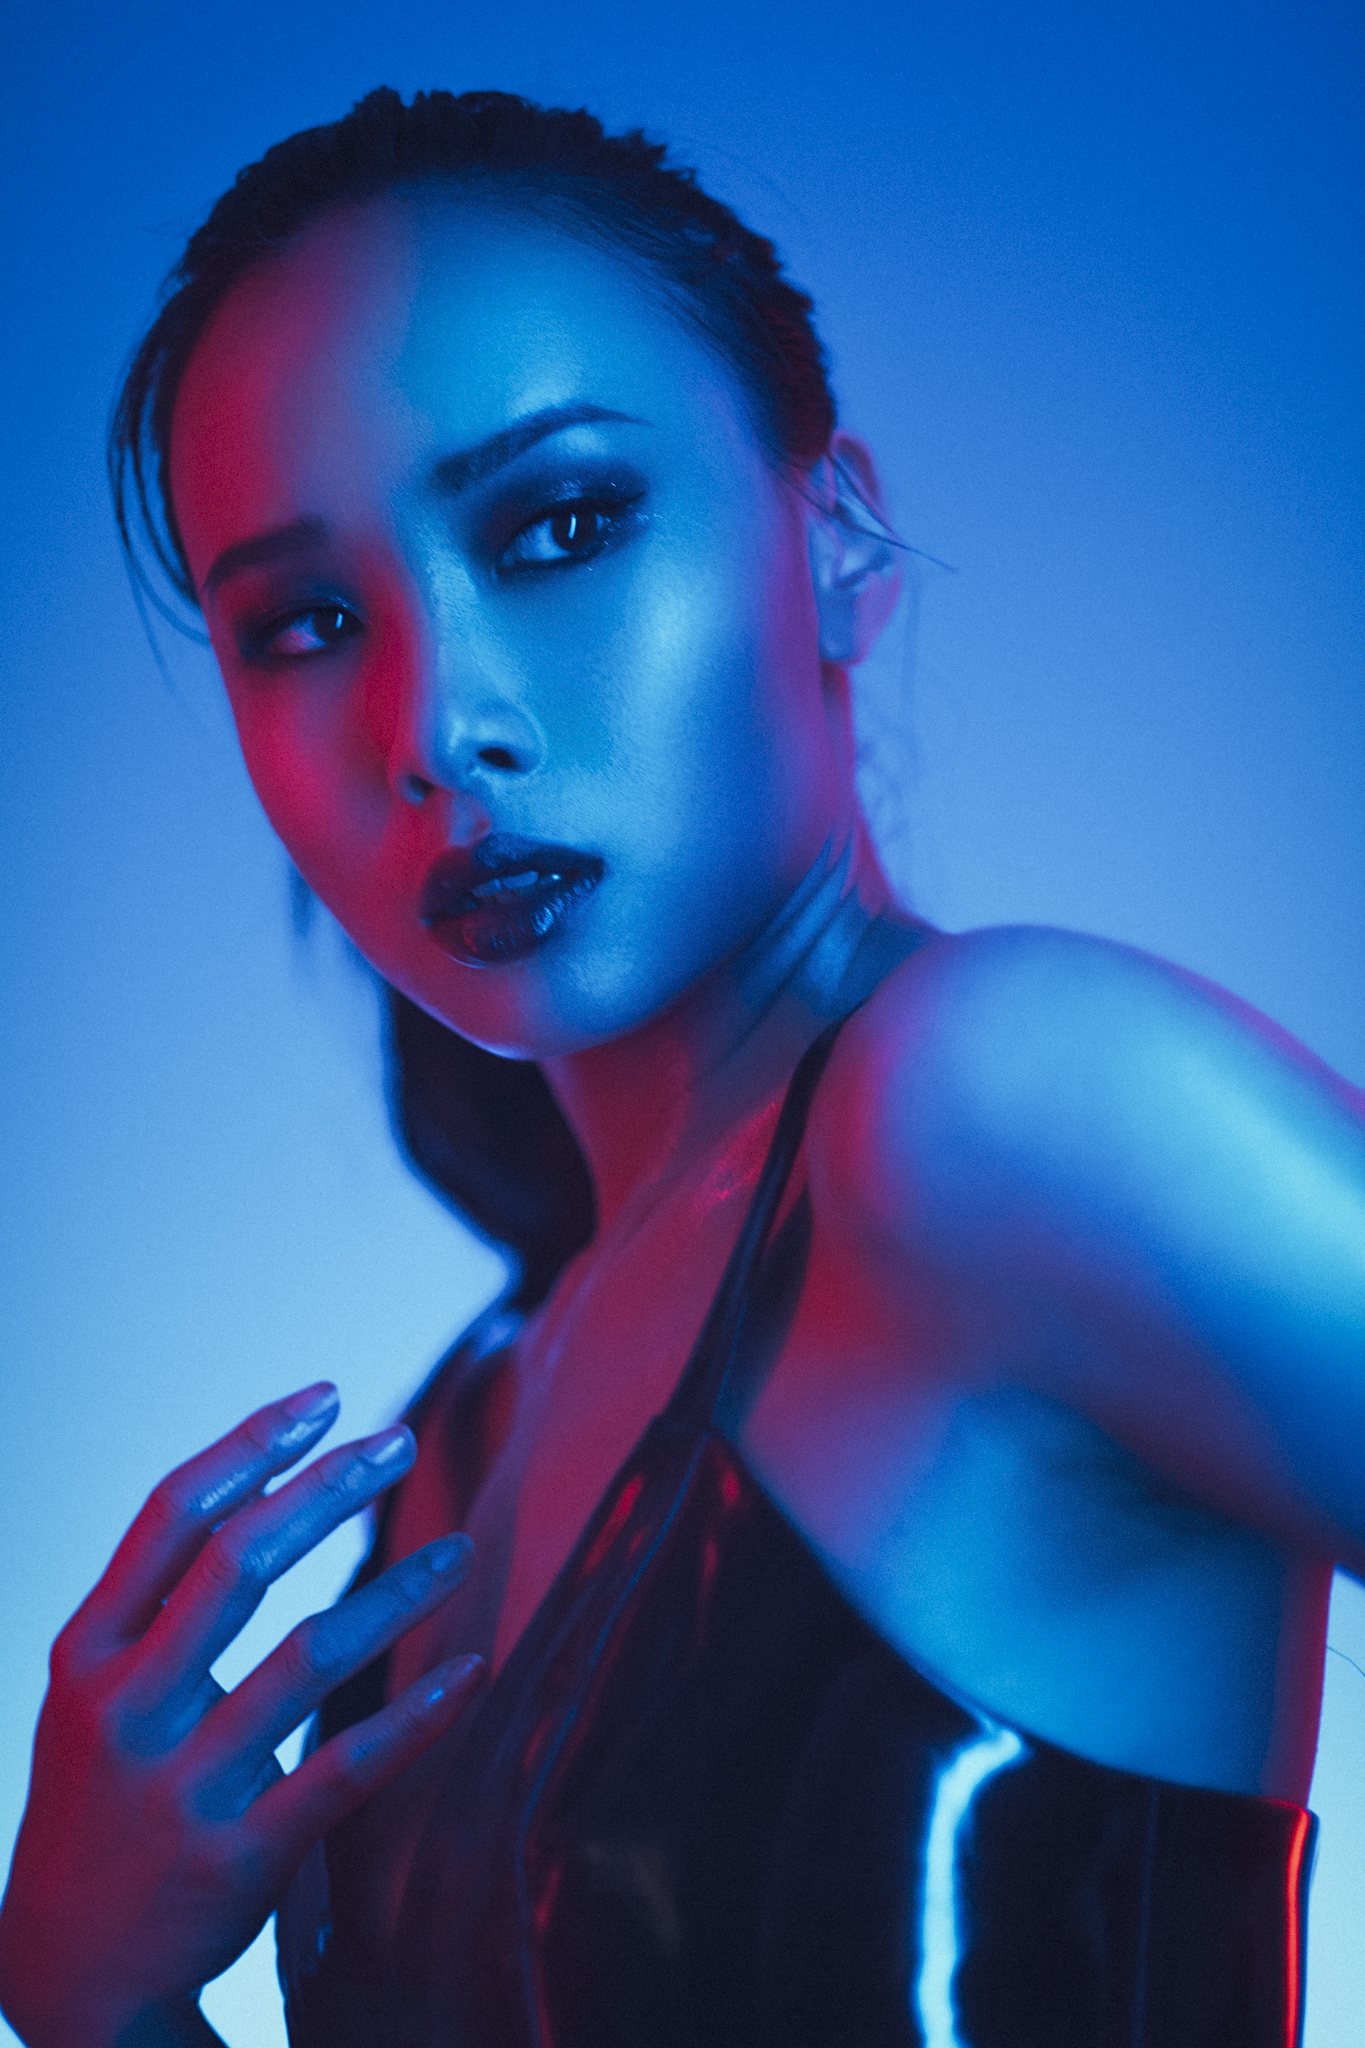
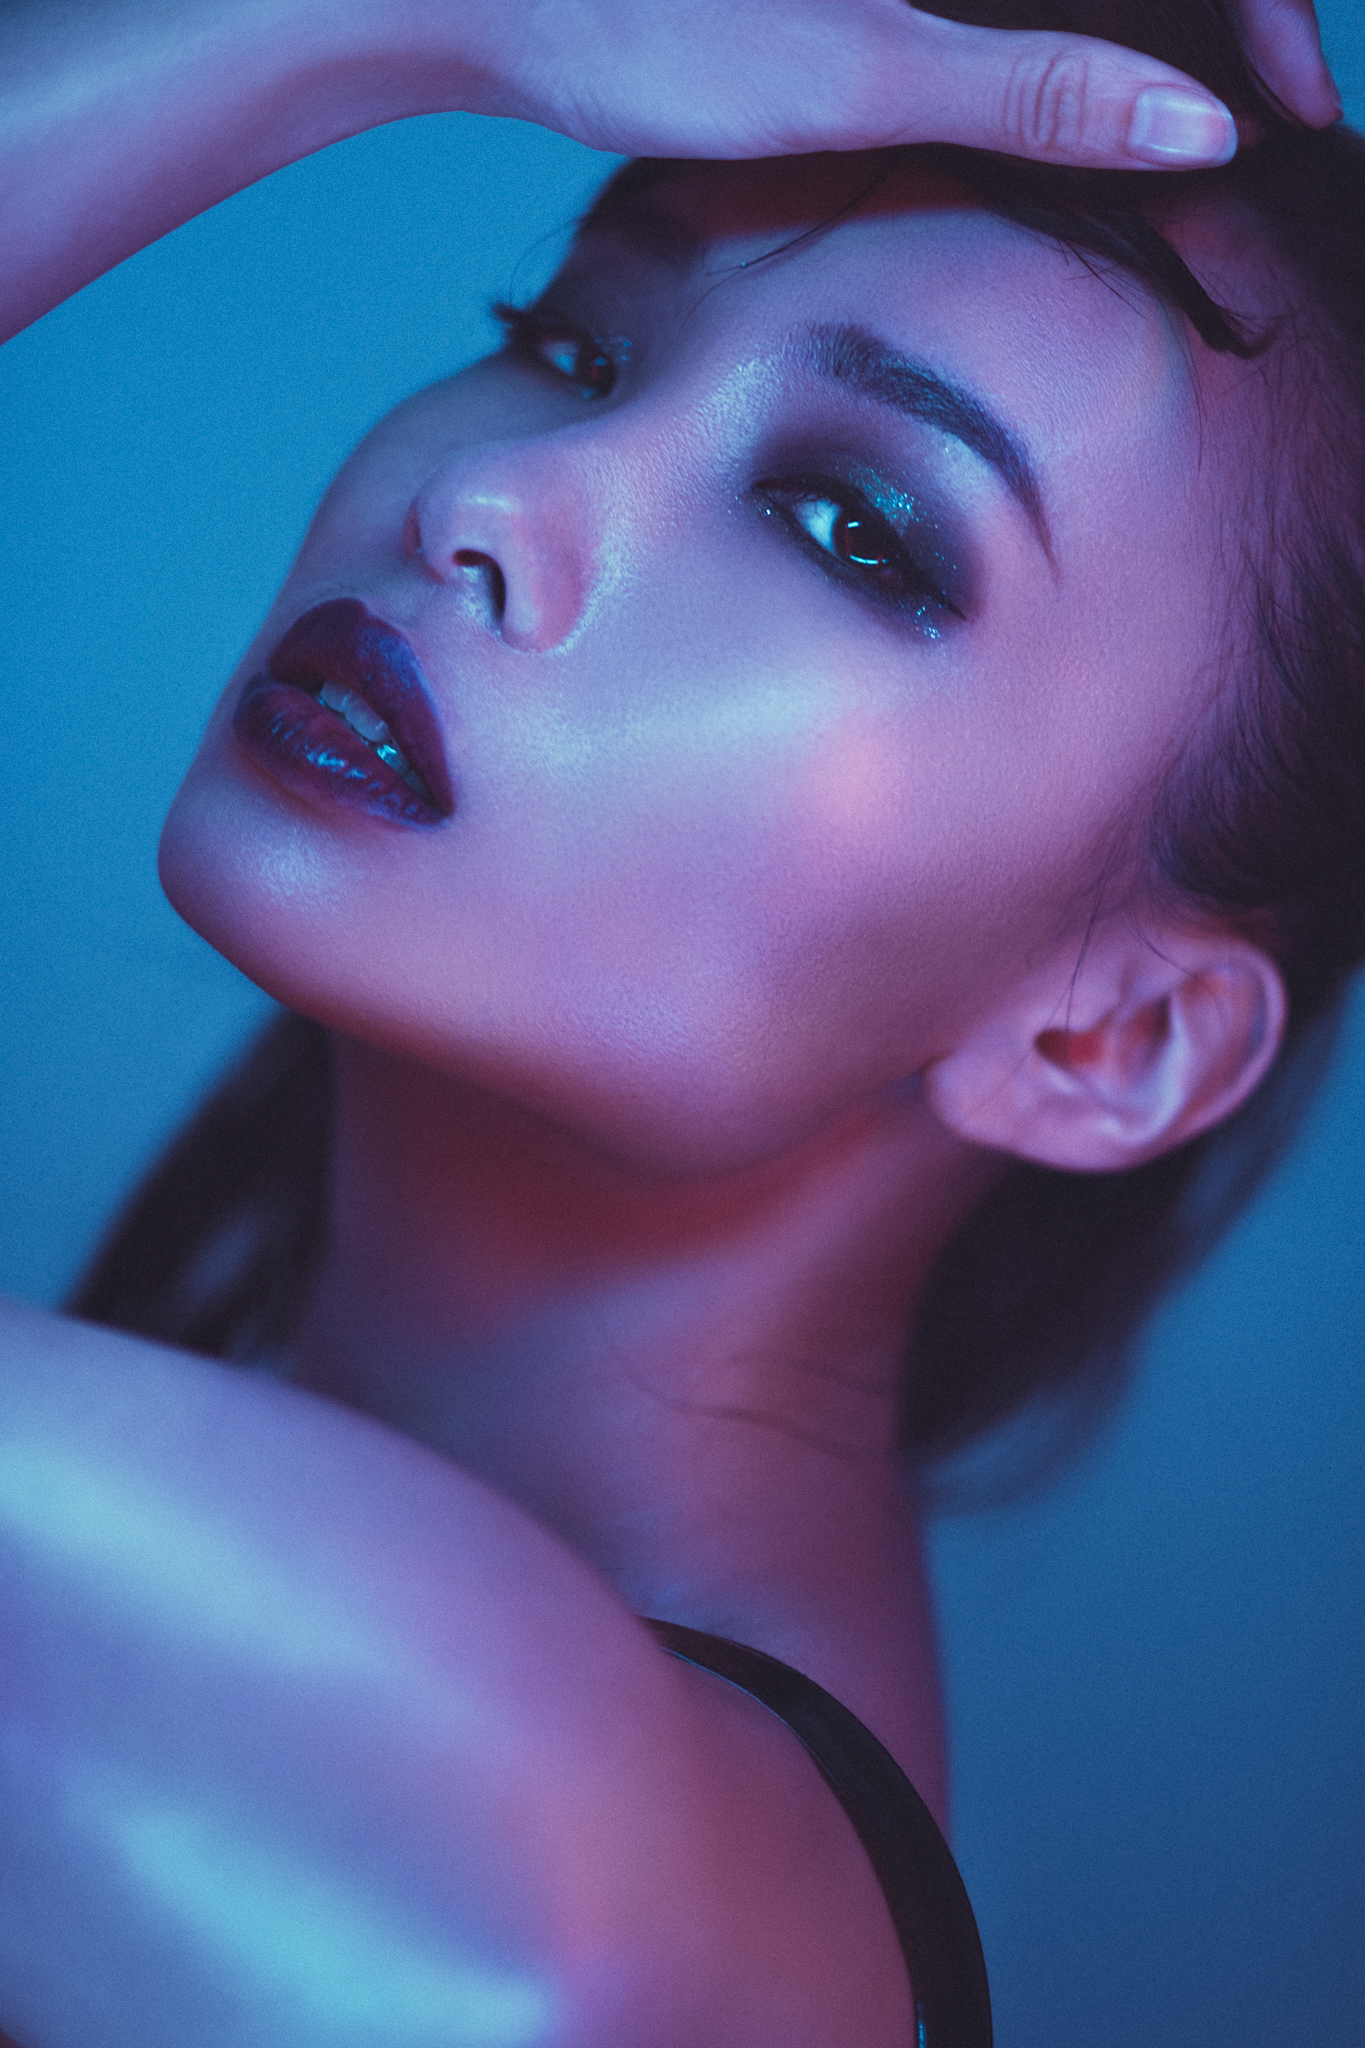
Ring Light Effect
Next up I thought I'd try a ring light effect since I had four lights. I also thought this would be a good opportunity to test out the white lighting look of the LEDs.
White Light
Click to enlarge
As you'd expect, the setup simply involves placing all four lights in front of the model in a square and then you shoot through them.
Those of you with human eyes may have also noticed something not quite making sense in this resulting image that doesn't quite match the setup. That's right the BLUE light!
So the 'white' light given off by these LED lights is very odd to say the least. First and foremost, this wavelength doesn't exist on the Kelvin spectrum so it was impossible to white balance this out in-camera.
After a lot of work in Lightroom I was able to get a somewhat pleasing skin tone but that was only with a 14,380 Kelvin Temp and a -52 Tint. As you can see here in the background though, the background and shadow areas have now gone a cool blue colour.
Cheap LED lights are horrendously bad at white lighting and is why they have such a bad reputation. Yes you can get excellent LED lighting but it costs an awful lot of money to get them. Fancy a nice white LED light? How about a 30cm by 65cm Arri SkyPanel? That'll be nearly £4500 then please!
Of course I've chosen the most overpriced alternative I could find to make my point but I think you get the idea. If you're looking to play with cheap LED lighting, don't beat yourself up if the colour looks horrendous.
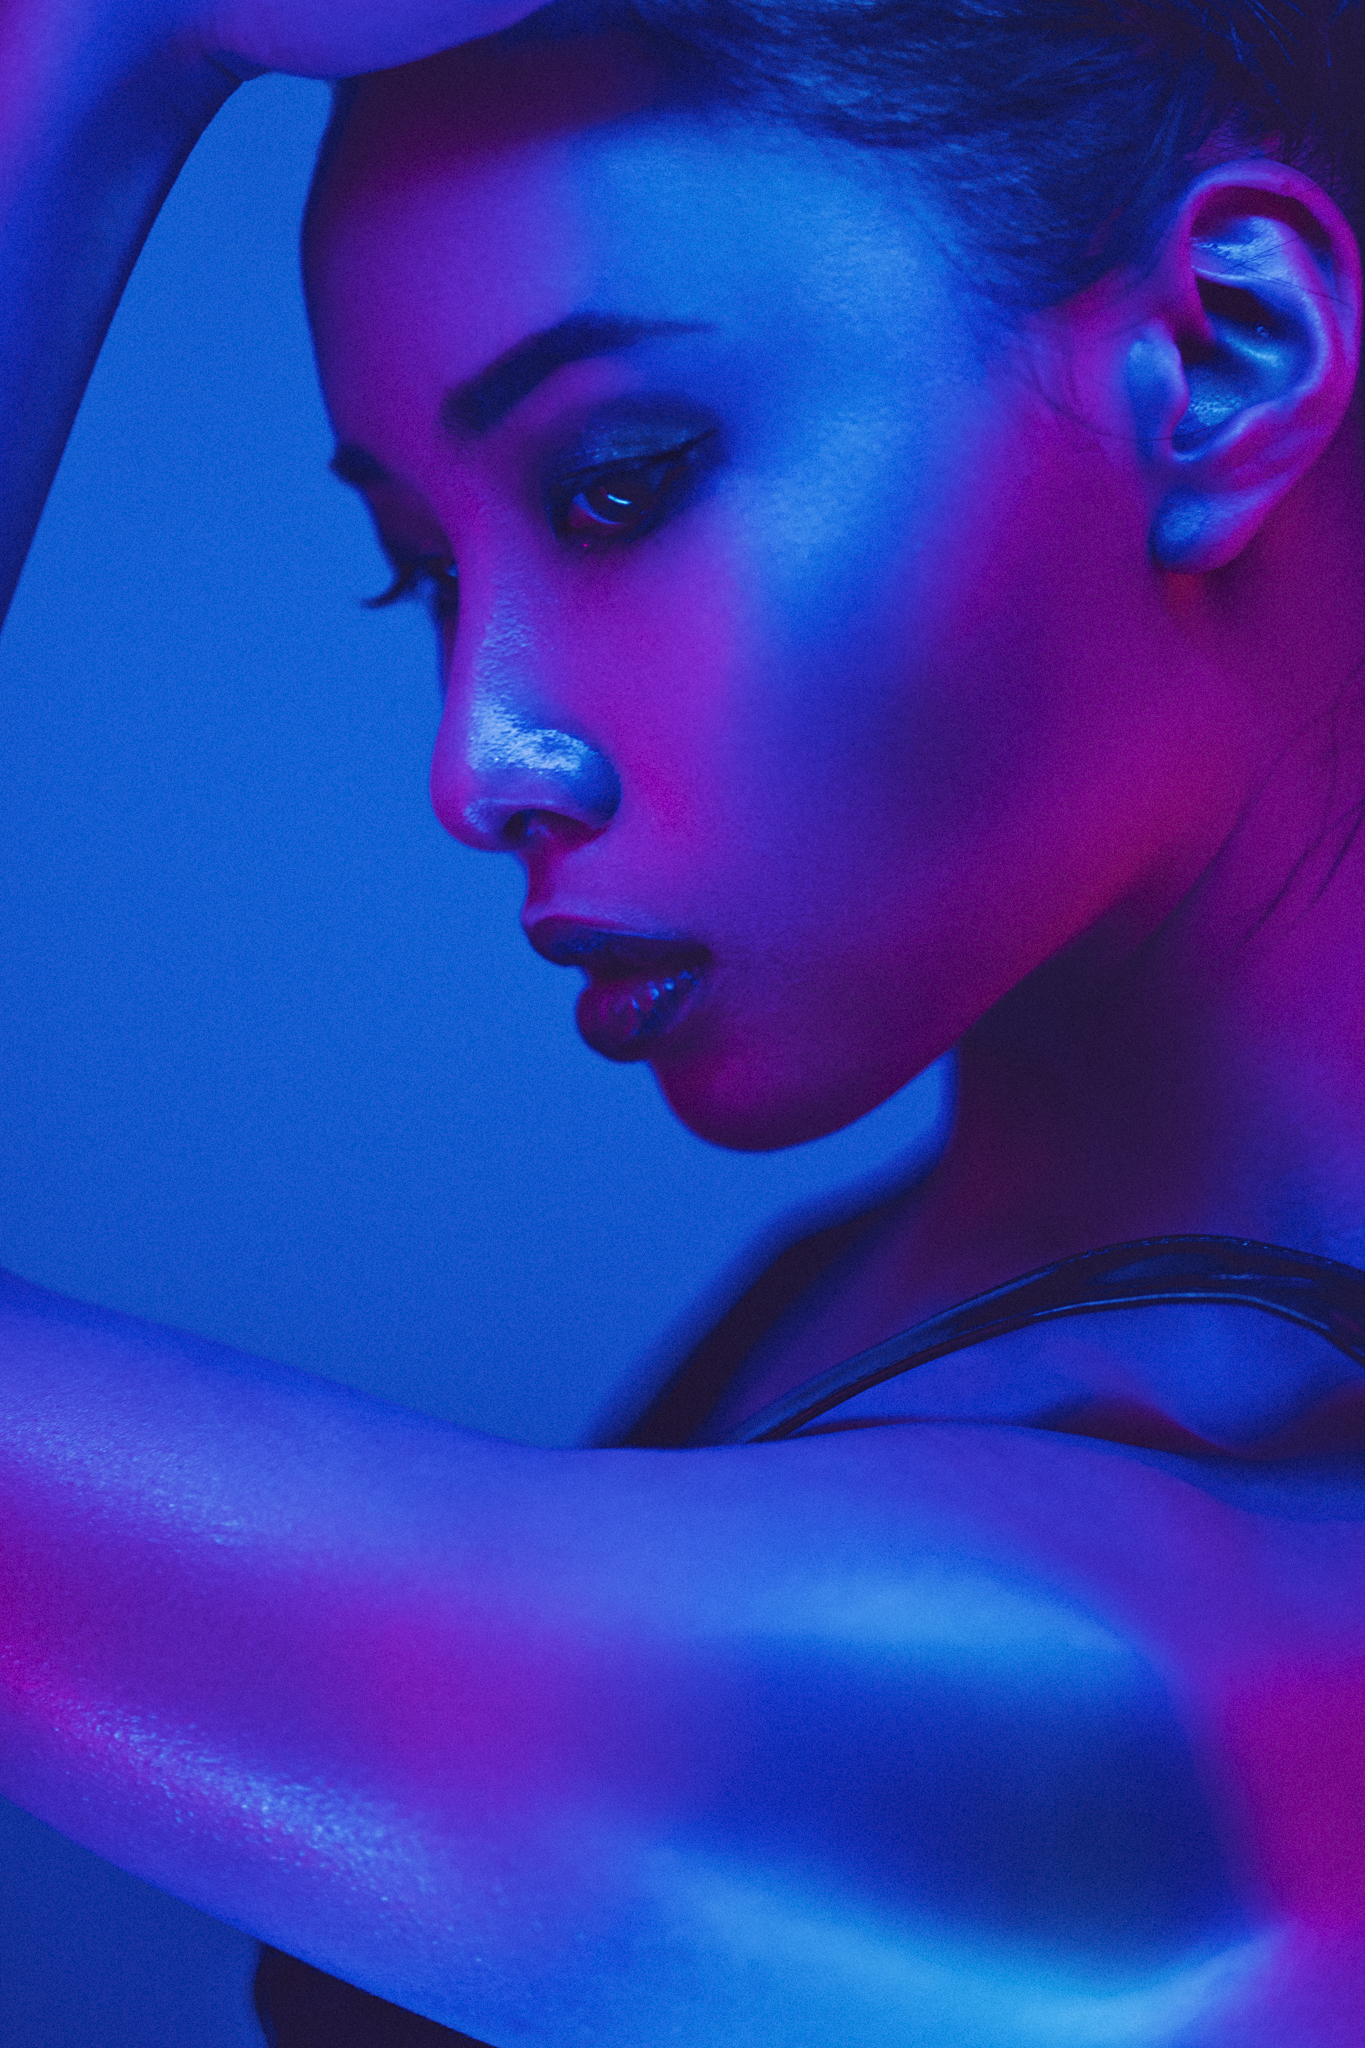
All that aside, I actually quite like the colouring and incredibly soft and beautifying light this portrait has. If you're happy with this alternative look then I think you can have a lot of fun with these.
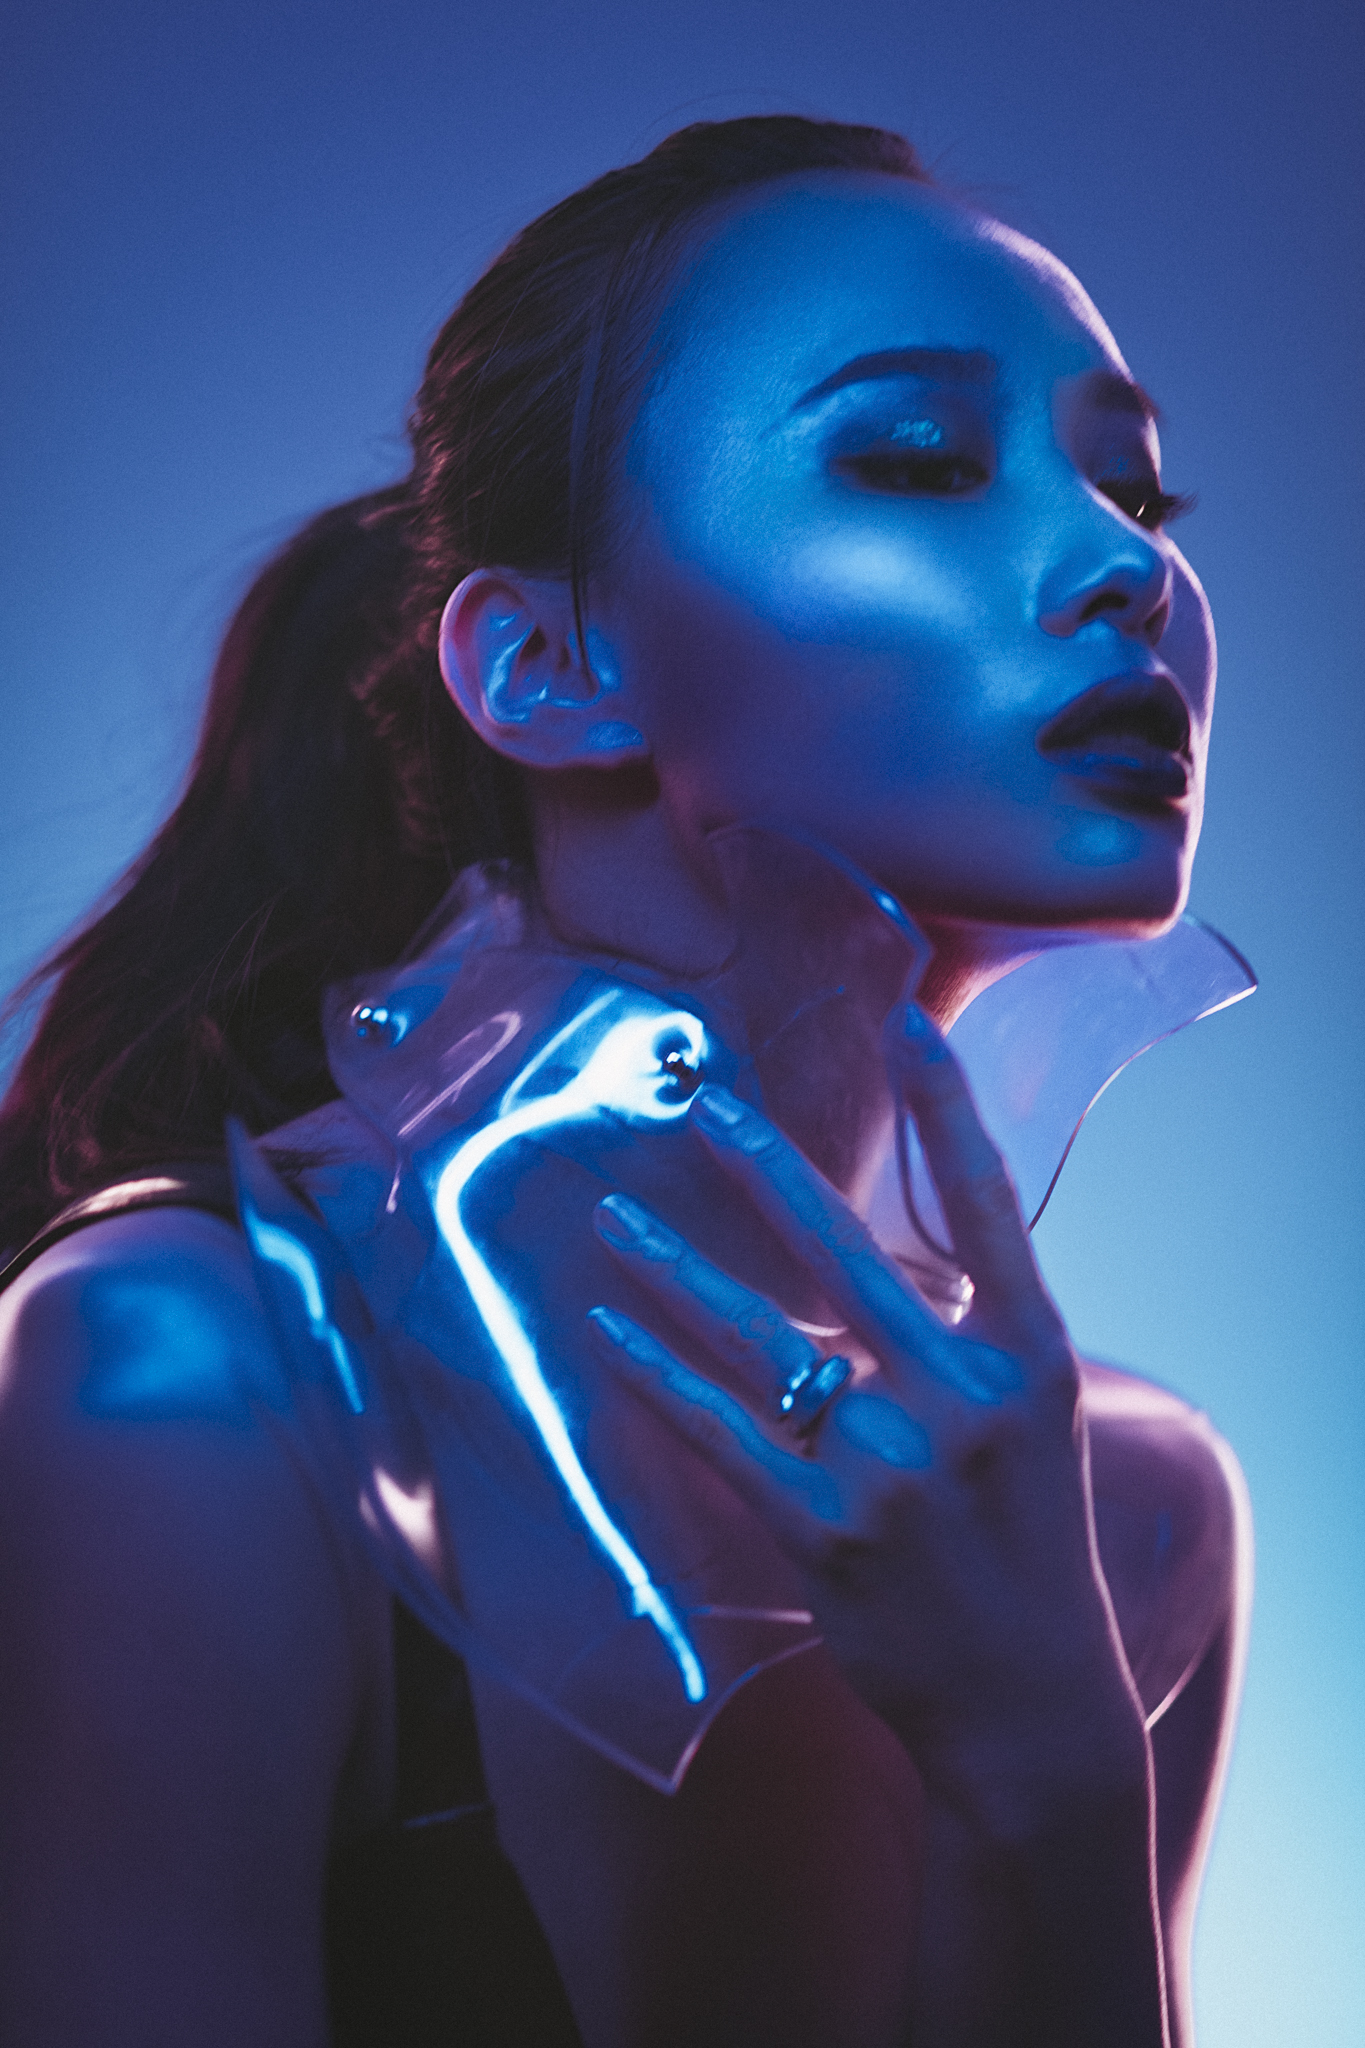
Red & Blue Ring Light
Of course one of the incredibly useful benefits of having separate lights as part of this ring light setup is that you can adjust them independently. For example in the shots below, I'm playing with red and blue; red either side and blue above and below.
With the model really close to these lights you're able to get some very interesting looks. I also experimented with varying amounts of tones and brightness on each of the lights so that I have one far softer and more muted look compared to one that is a lot more saturated.
Click to enlarge
Click to enlarge


Closing Comments
As with so many things in life, you get what you pay for. These LED lights are only £20 each and for four of them at £60 I was able to create some very impressive coloured portraits. But I quickly found some frustrating limitations that you should be aware of before you pick these up yourself and start playing.
Concerns
Brightness
First and foremost, these LED lights are not powerful with regards to their brightness. A lot of these images are shot at ISO 800, f2 at 1/60th second. To those with a bit of experience in ambient lighting, you'll know from those figures that the lights are pretty dark. In fairness most modern cameras are more than capable of dealing with those ISOs with little issue but it's certainly worth bearing that in mind.
Colour Consistency
Based on my tests with the 'white light' shots, it's fair to say that these LED lights do not excel at white lighting portraits. Yes you can make it work in post, but I'd say that I have a fair amount of experience in colour correction and it was a real pain in the ass to get the shot to look as good as it does here. I'd potentially say that these are almost unusable as white lights and whether that's due to their opaque housing or the actual LED themselves, caution is advised.
Usability
The other big stumbling block I found of course was that I couldn't easily adjust these lights independently with their remote control. Changing one light meant that you have to change them all without a lot patience. Was it manageable? Yes, but it certainly wasn't as easy as I first thought it might be. Again, I don't think this is catastrophic but patience is required.

Fun Factor
With those concerns aired, I still recommend playing with these lights, especially as I personally don't see them as a major investment. I had a whole bunch of fun playing with these and having the ability to see colour being shaped on the model in real time is very educational.
But beyond all the negative crap and workarounds, I got some killer shots that I actually really, really like. So to be fair, even if I never use these LED lights ever again, I feel like they were well worth it.
Thanks for Reading
Thanks as always guys for reading this article, I know they're often fairly long so I really do appreciate your precious time. If something doesn't make sense or if you have any questions then please don't hesitate to message me or comment below.
If you'd like to updated once a month with all of my other articles then feel free to sign up to my newsletter here. Signing up now also gets you a free 10 page studio lighting PDF.
See you all in the next one :)
:WARNING: Hardly FREE awesome content below!
If you liked this article and would be interested in more posts like this in the future, please feel free to sign up to my monthly newsletter. I publish one of these articles every week and each month I collect them all up and send them directly to your inbox just in case you missed one. Signing up now also get's you my free 10 page pdf on Studio Lighting Tips and Techniques. Jake Hicks Photography - Newsletter

If you're interested in any of my work and would like to know more about how I created some of my shots then why not check out my workshops. Here you can find out everything there is to know about Gelled Lighting, Long Exposure Flash Photography and my entire Post-Pro Workflow. Jake Hicks Photography - Workshops

I've also just released a brand new 22 hour complete Gelled Lighting Tutorial video. I go over everything from studio lighting setups with gels to being on location with gels plus I also go through my complete retouching and post pro workflow. For more details and complete breakdown of everything that's include check out my Coloured Gel Portraits Tutorial

I also offer comprehensive coloured gel packs. These collections of gels are what I use day to day to create some of the most highly saturated colours around. If you're looking at getting into gelled lighting or need to get stronger and richer colours in your coloured gel work why not check out my Jake Hicks Photography Gel Packs