The other day I was fortunate enough to receive a visit from Mr Bowens to have my first hands-on play with the new Bowens flash units. I don't think it's a secret that these lights have been in the oven a LOOOOONG time now, and I can't tell you how many versions we've gone through to get here in the last couple of years. But, they're finally here and straight out of the bag they are looking pretty damn gorgeous.
For those that aren't aware, I am a Bowens ambassador and a member of TeamBowens. I've been involved with speaking at events and providing training for them for a couple of years now both here in the UK and overseas. As a result of my association with Bowens I was fortunate enough to be involved to some degree in the design process of these heads and although I had a pretty good idea of how they were going to look, actually seeing them realised for the first time was pretty sweet.

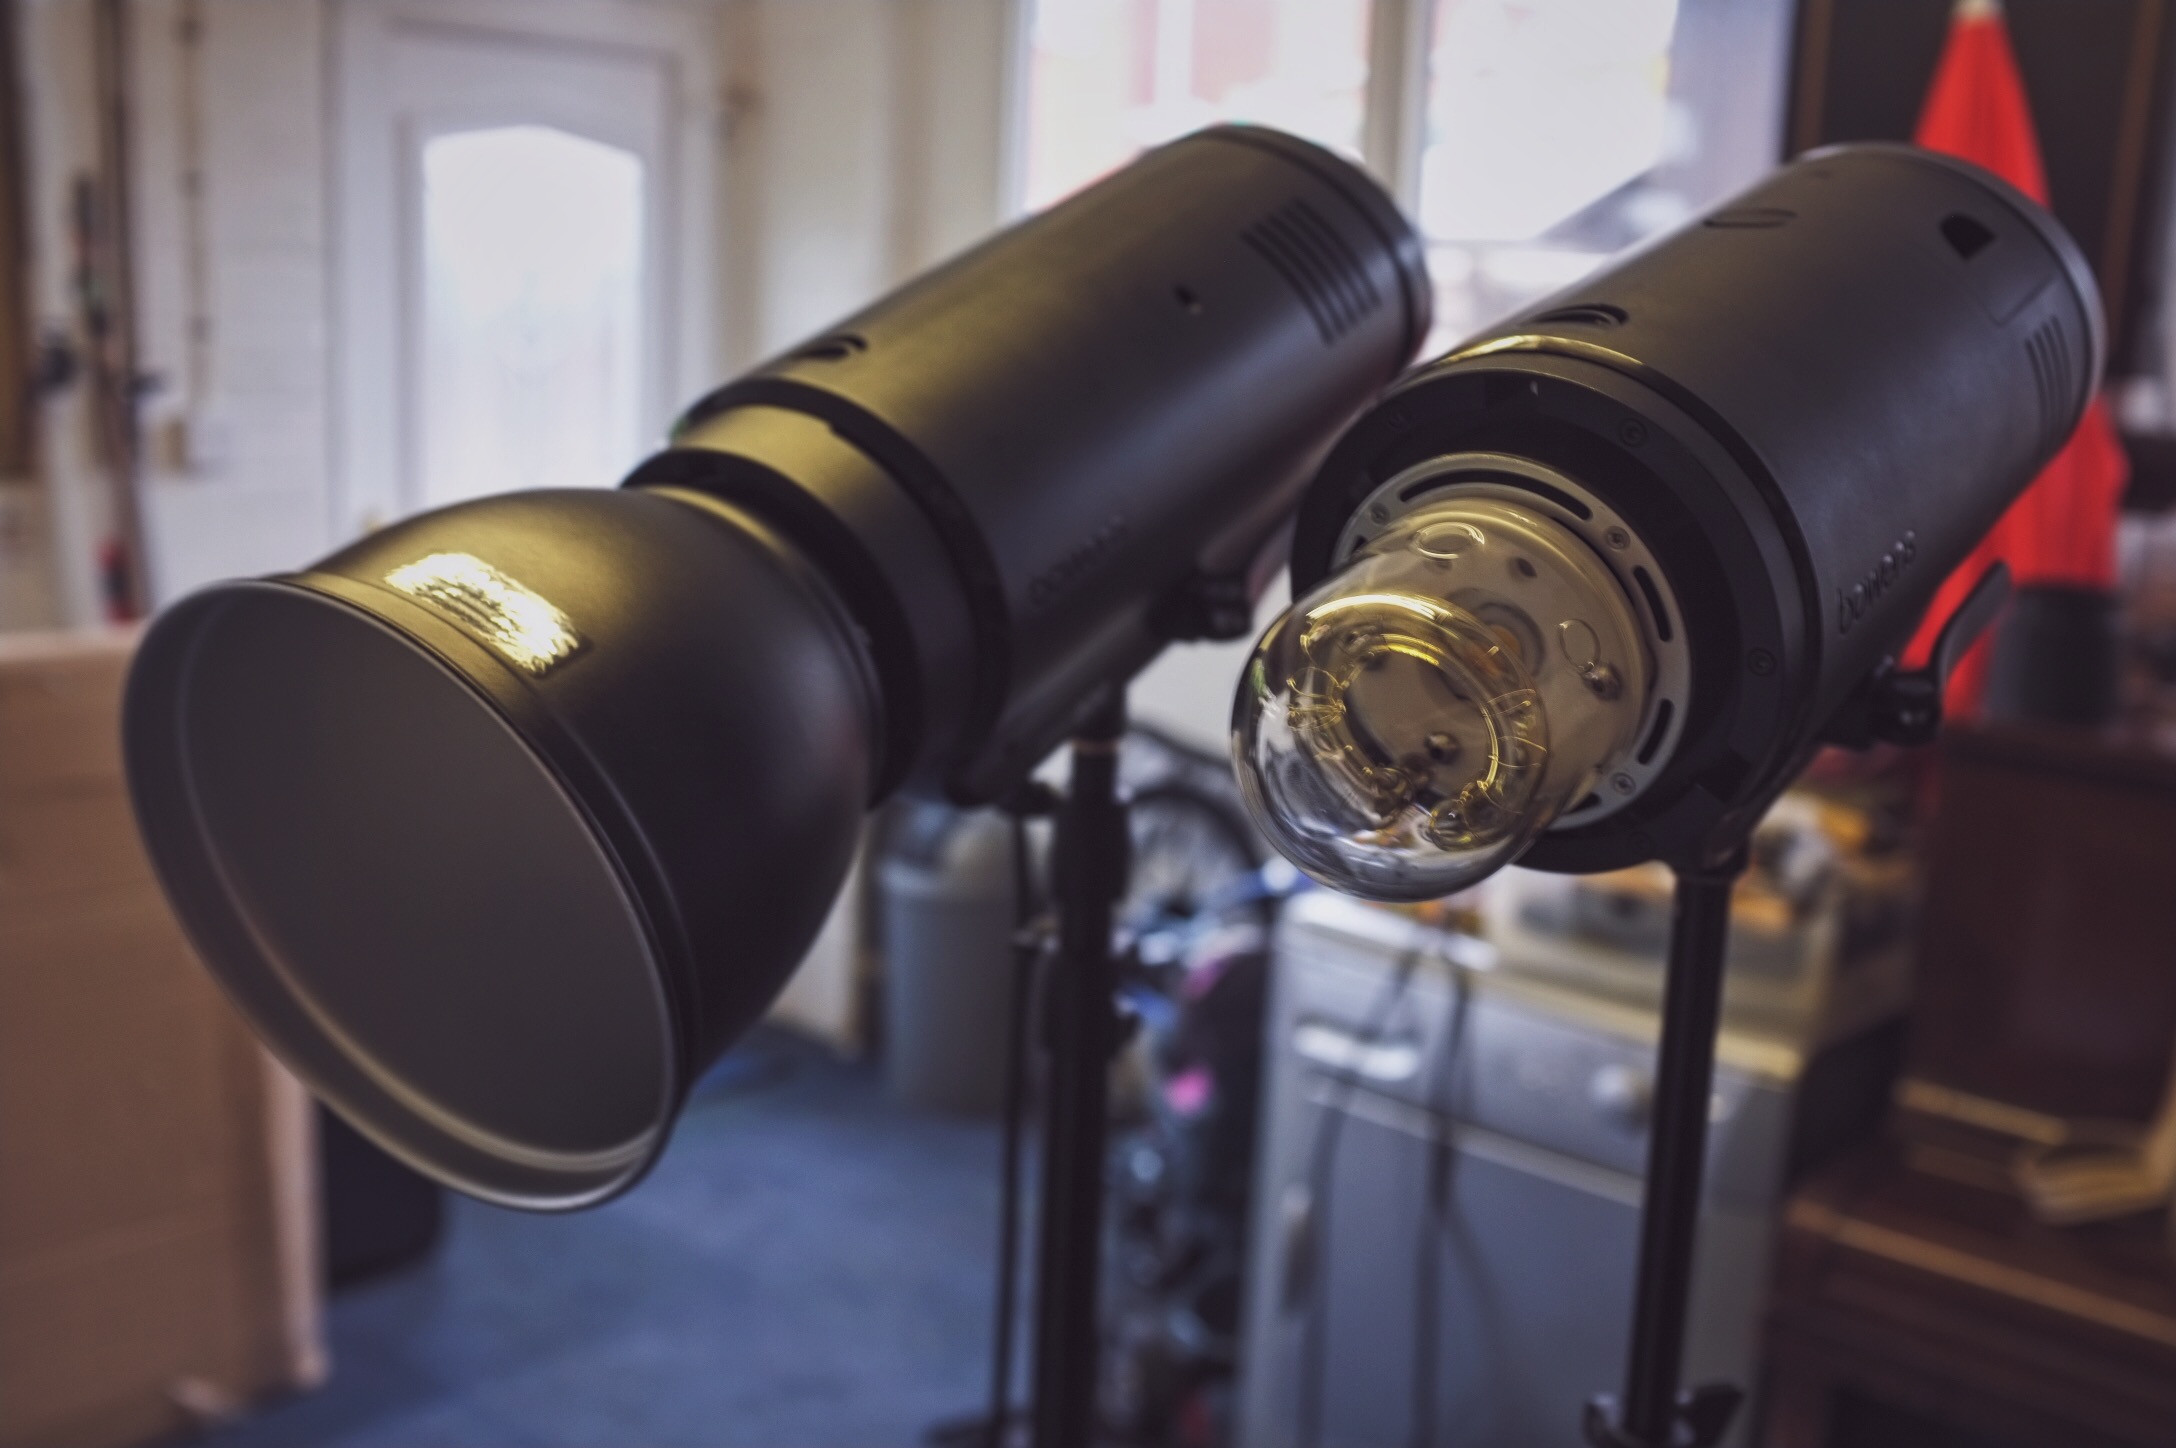
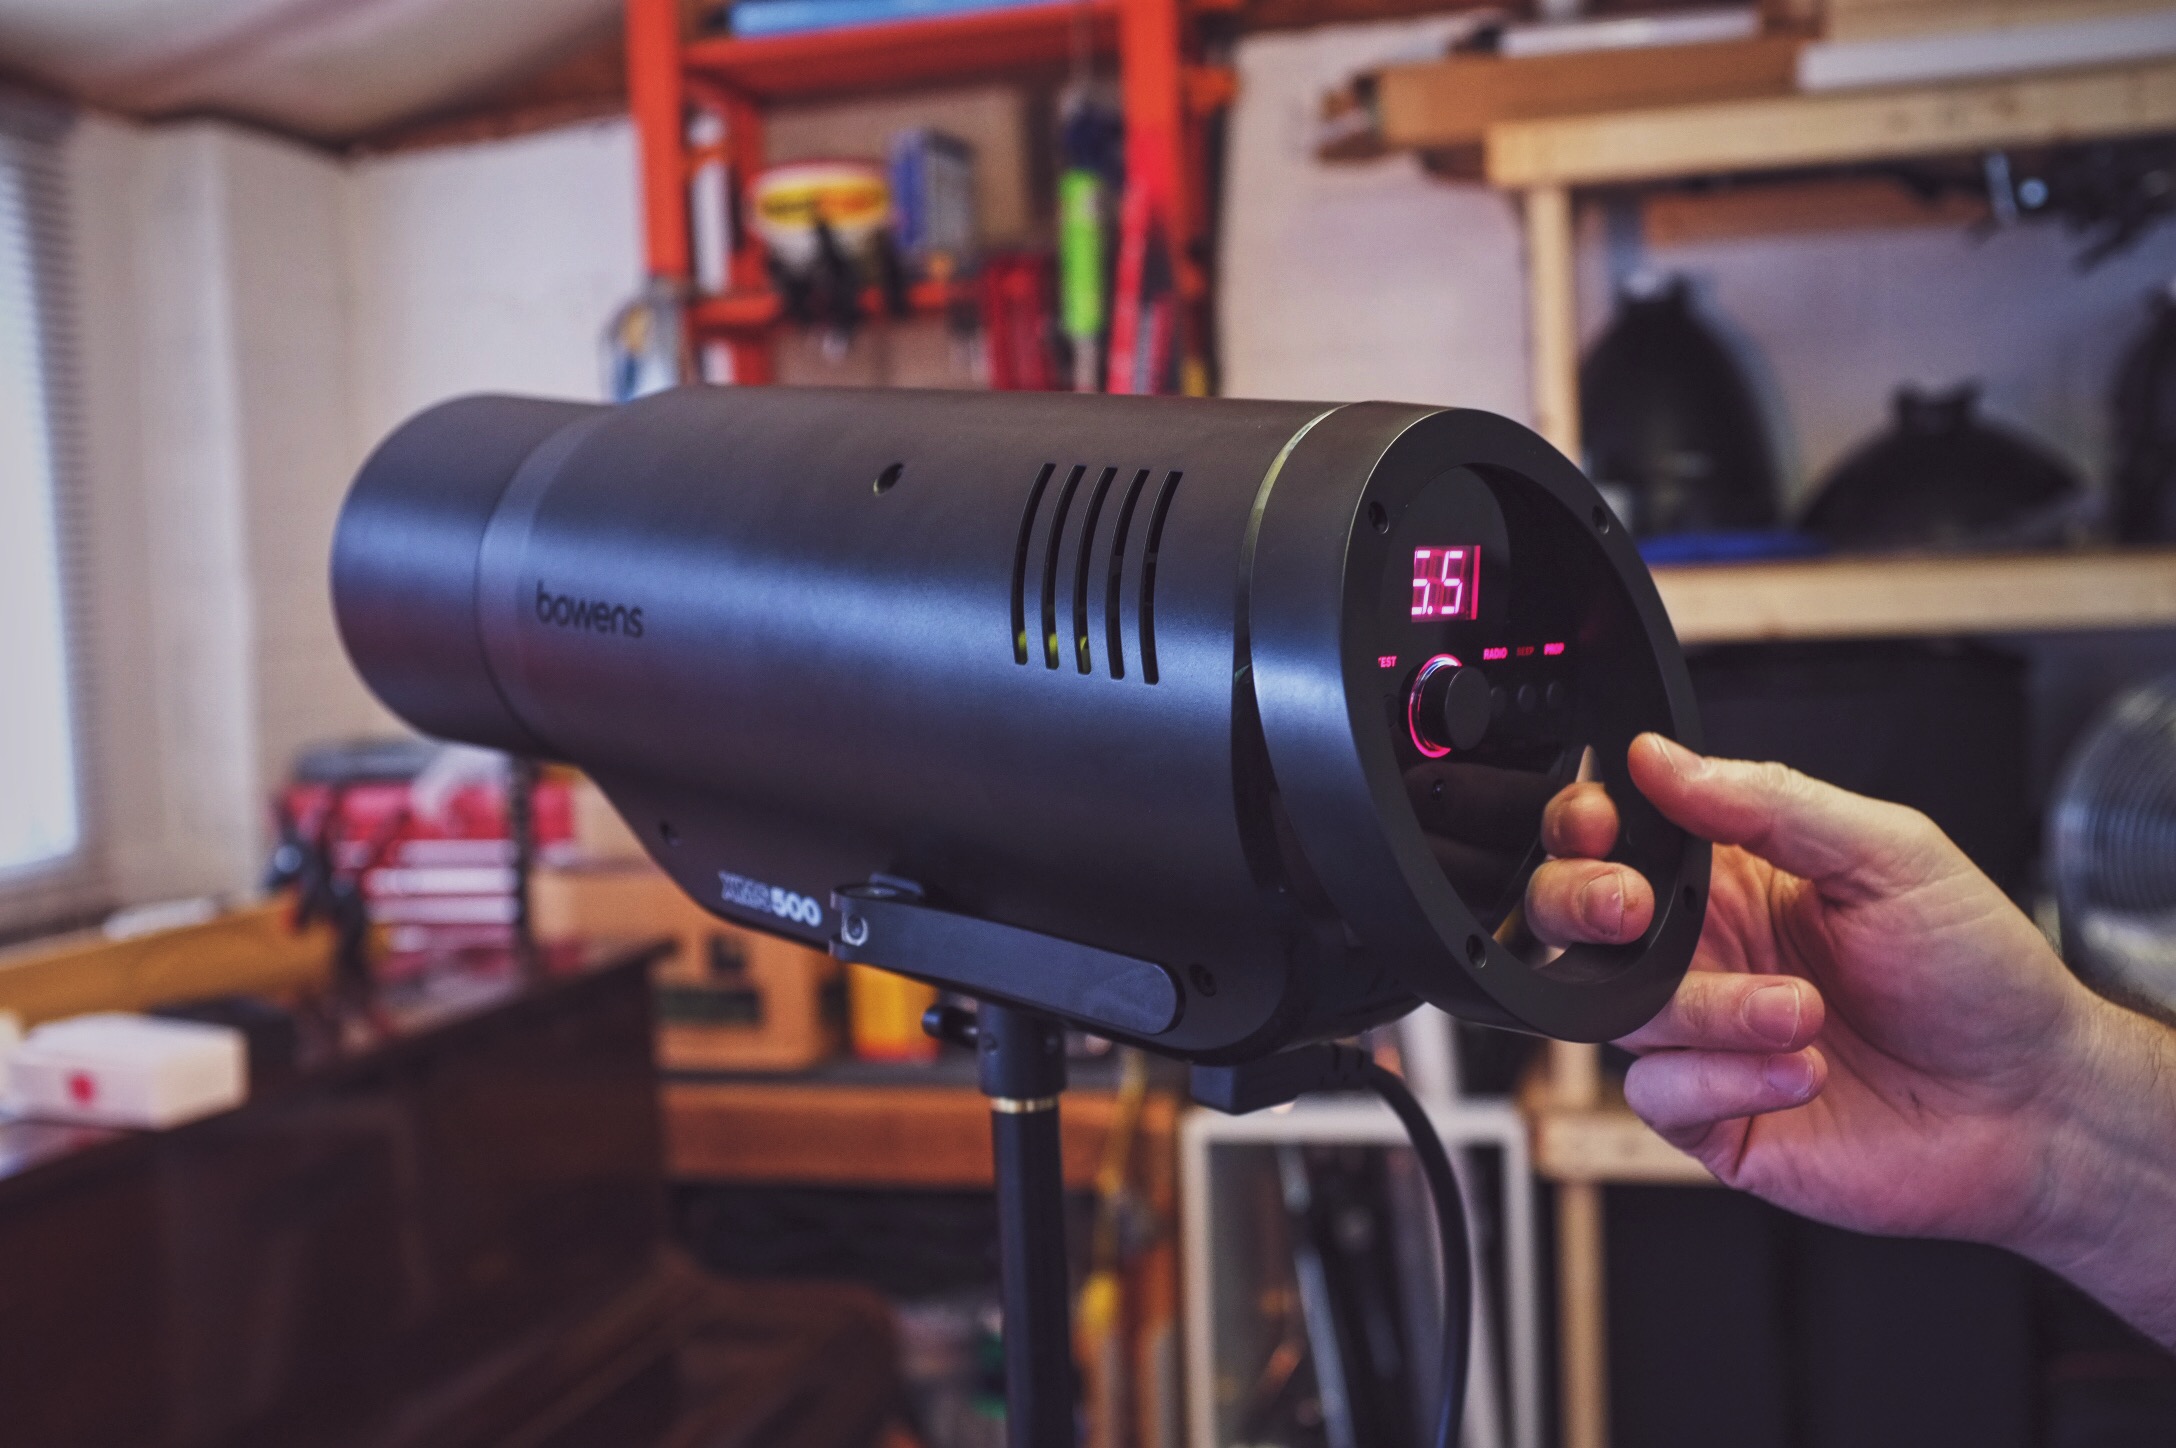
I was able to grab a few quick shots of the new units straight out of the box. This is the brand new Studio head the XMS Studio 500w.
So what's the core differences between the two heads I saw?
Well one is a studio head and one was a location head. Obviously the studio head plugs directly into the mains and the location head is powered by a battery. Base figure on battery life is 500 full power flashes off a single charge plus the batteries are Lithium-ion so they'll withstand a ridiculous amount of re-charges too.

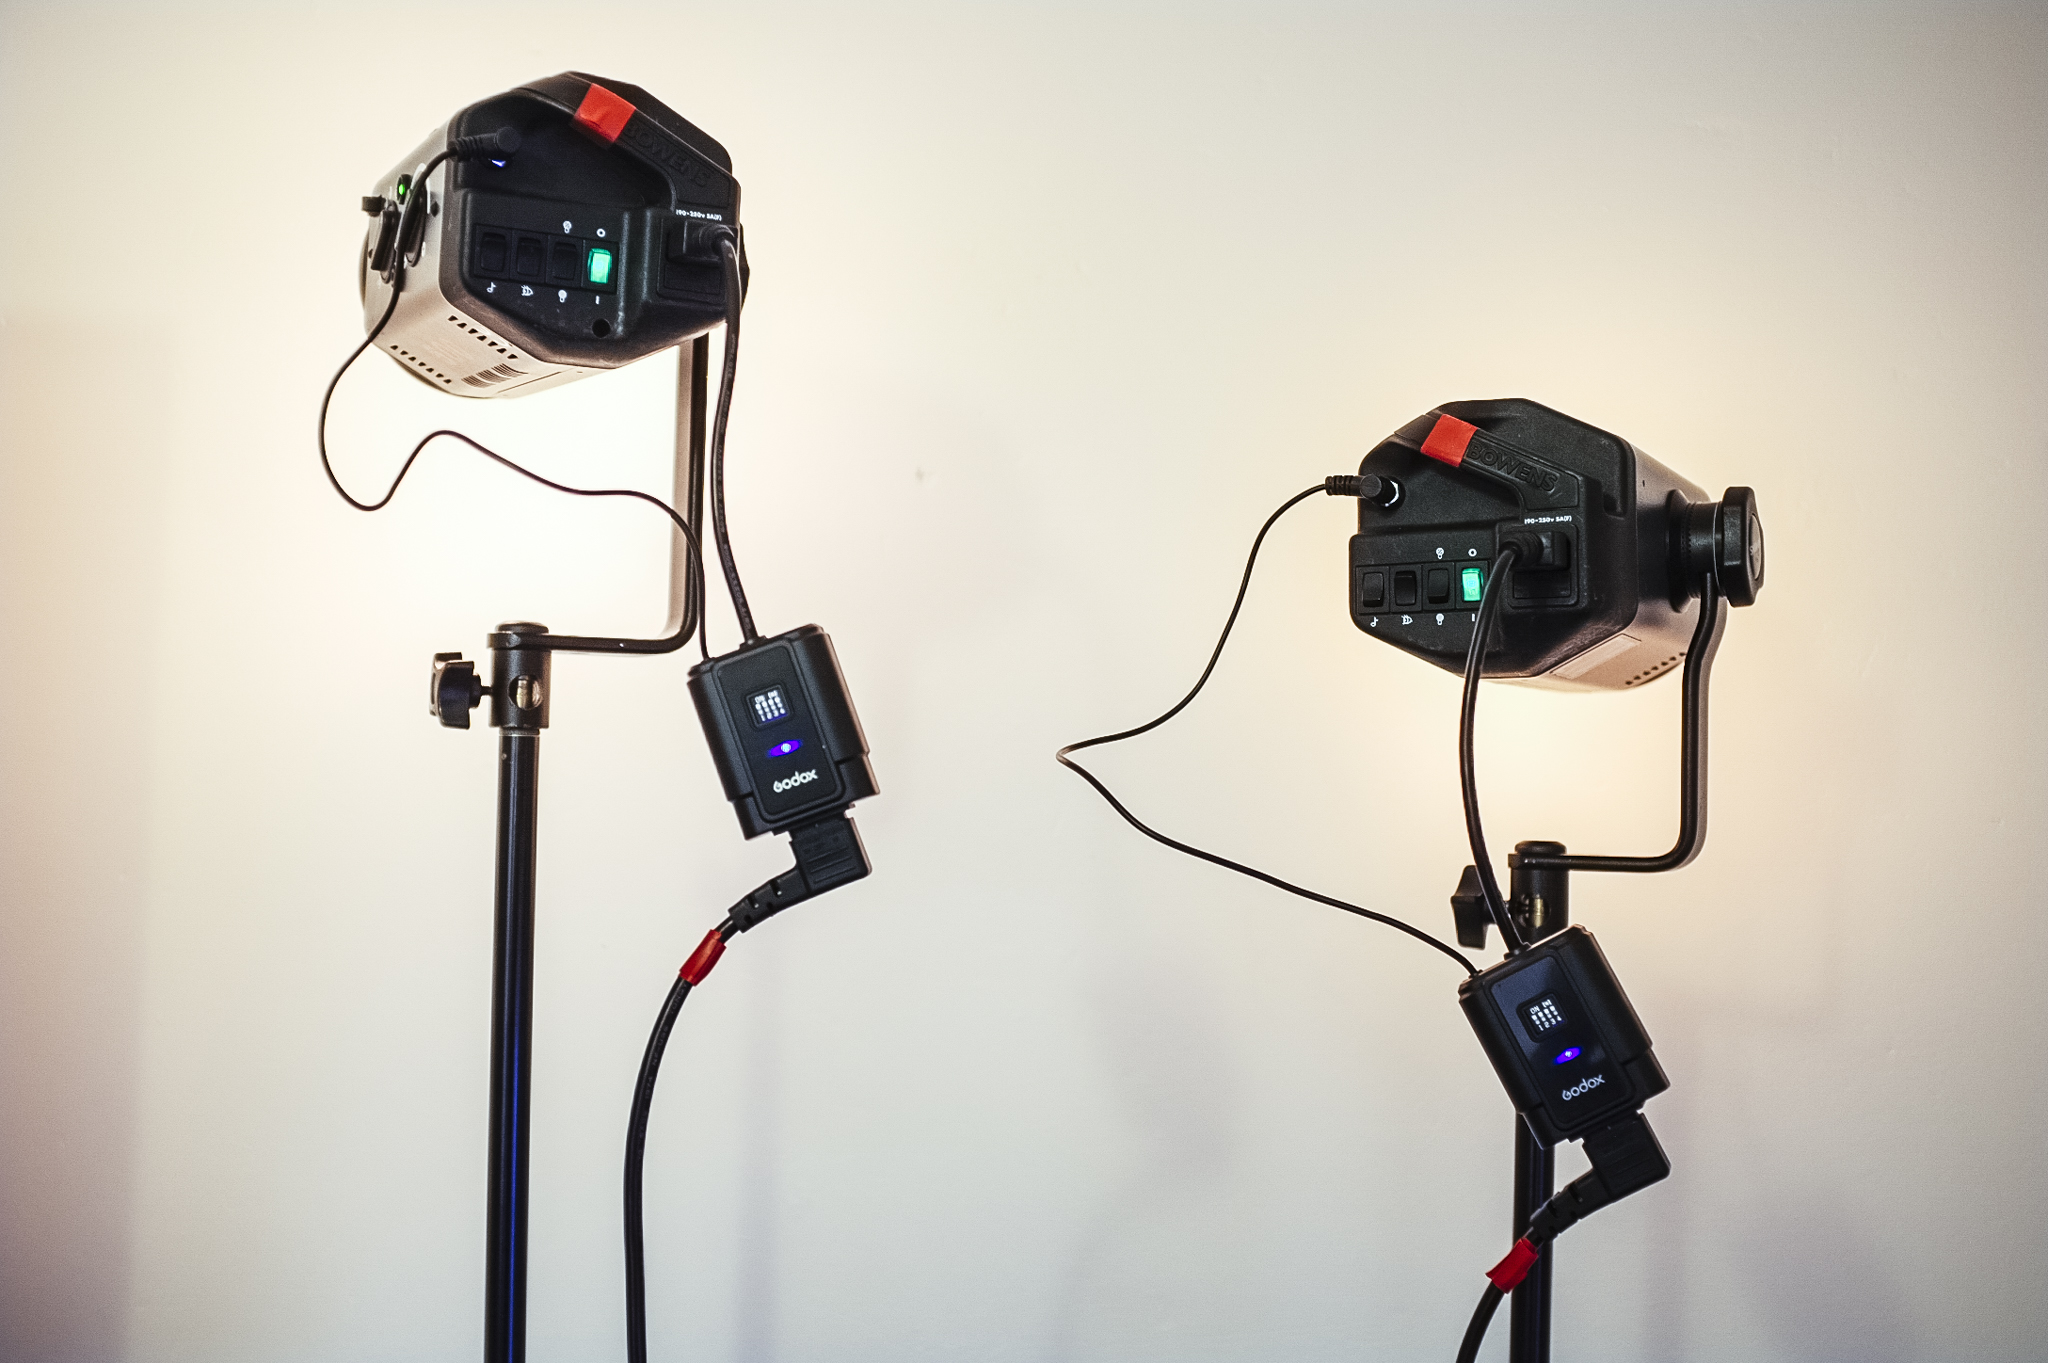
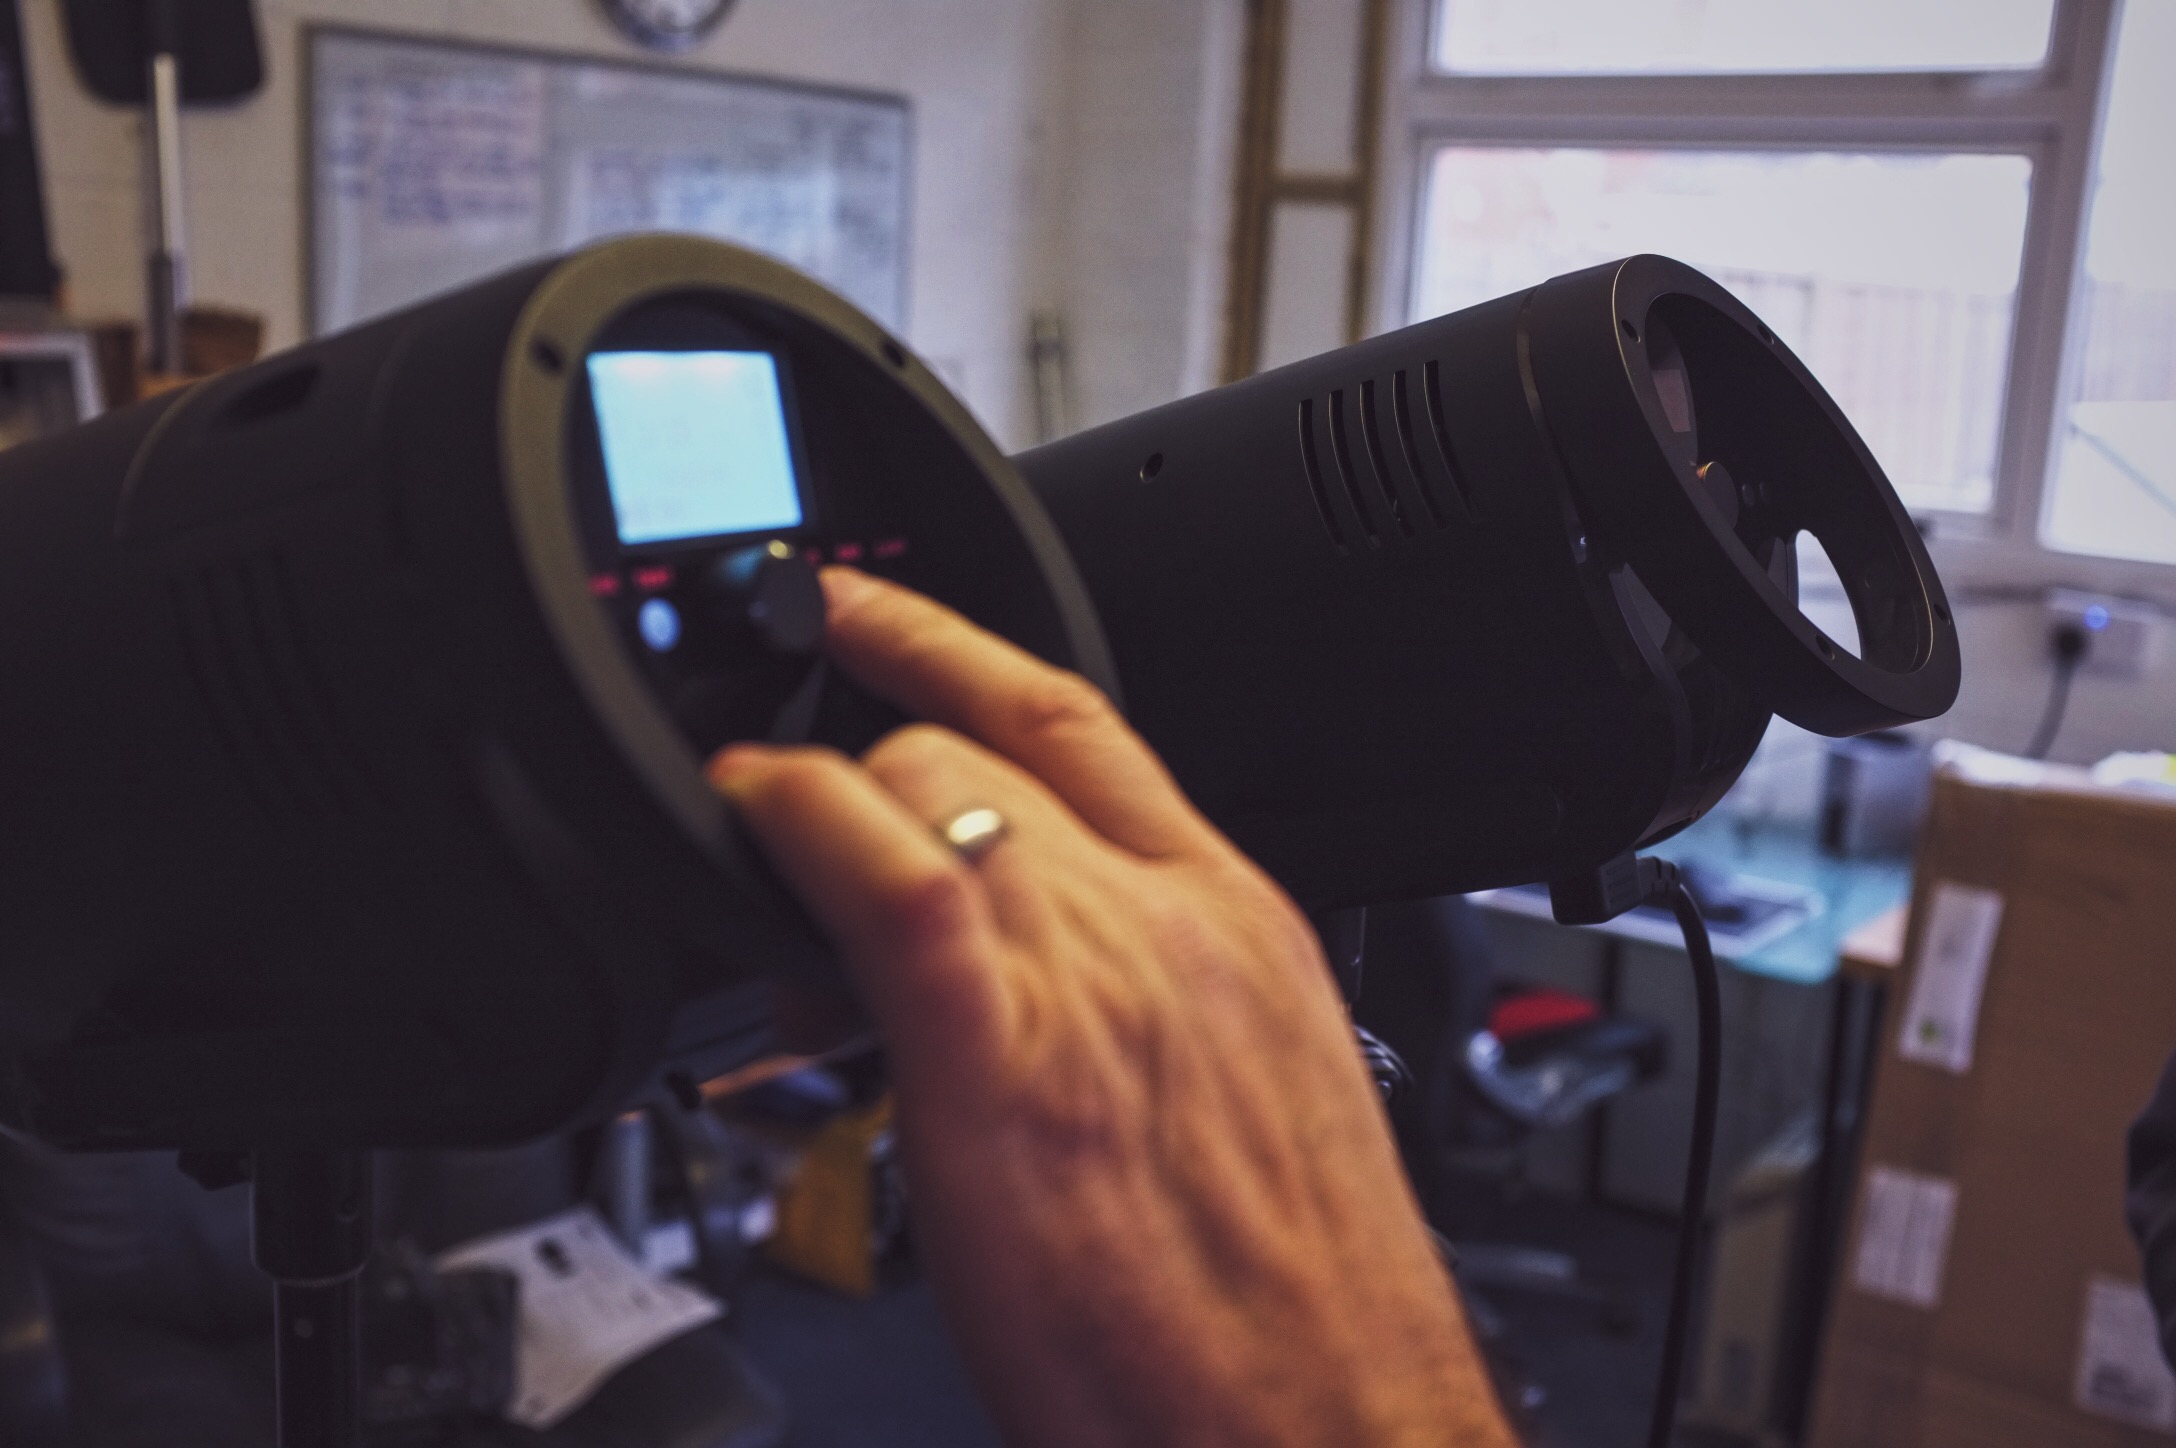
On the lefthand side you've got the 500w studio head and on the righthand side you've got the 500w location head. They're pretty much the same size and weight to be fair but remember the location unit has the battery inside the actually head. If you look closely on the righthand unit you'll see a little hatch towards to the rear, that's the drop-in battery back there.
Straight off the bat these new heads are VERY different looking to the now old Gemini models and in fact very different looking to any of the previous Bowens heads. The whole range is about to receive a complete overall. Obviously the key Bowens feature of the universally adopted S-fit attachment is still firmly in place but everything behind that has been changed. The most notable feature is the removal of the L-bracket, the bracket that attaches the light to the light stand. It has now been replaced with a central attachment with a cool quick-release handle. In practice this is a big improvement, the weight is now more centralised and there is far less stress on the units chassis from one side. As a result it is easier to angle up and down plus it's far quicker to tighten with the quick release handle over the half dozen turns of the knob on the side.

On the left is the old L-bracket on the Bowens heads. It would attach to the side of the head via a knob that you had to tighten. The new lights seen here on the right are attached to the stand via a central stalk that is tightened by a simple quick-release lever shown here.
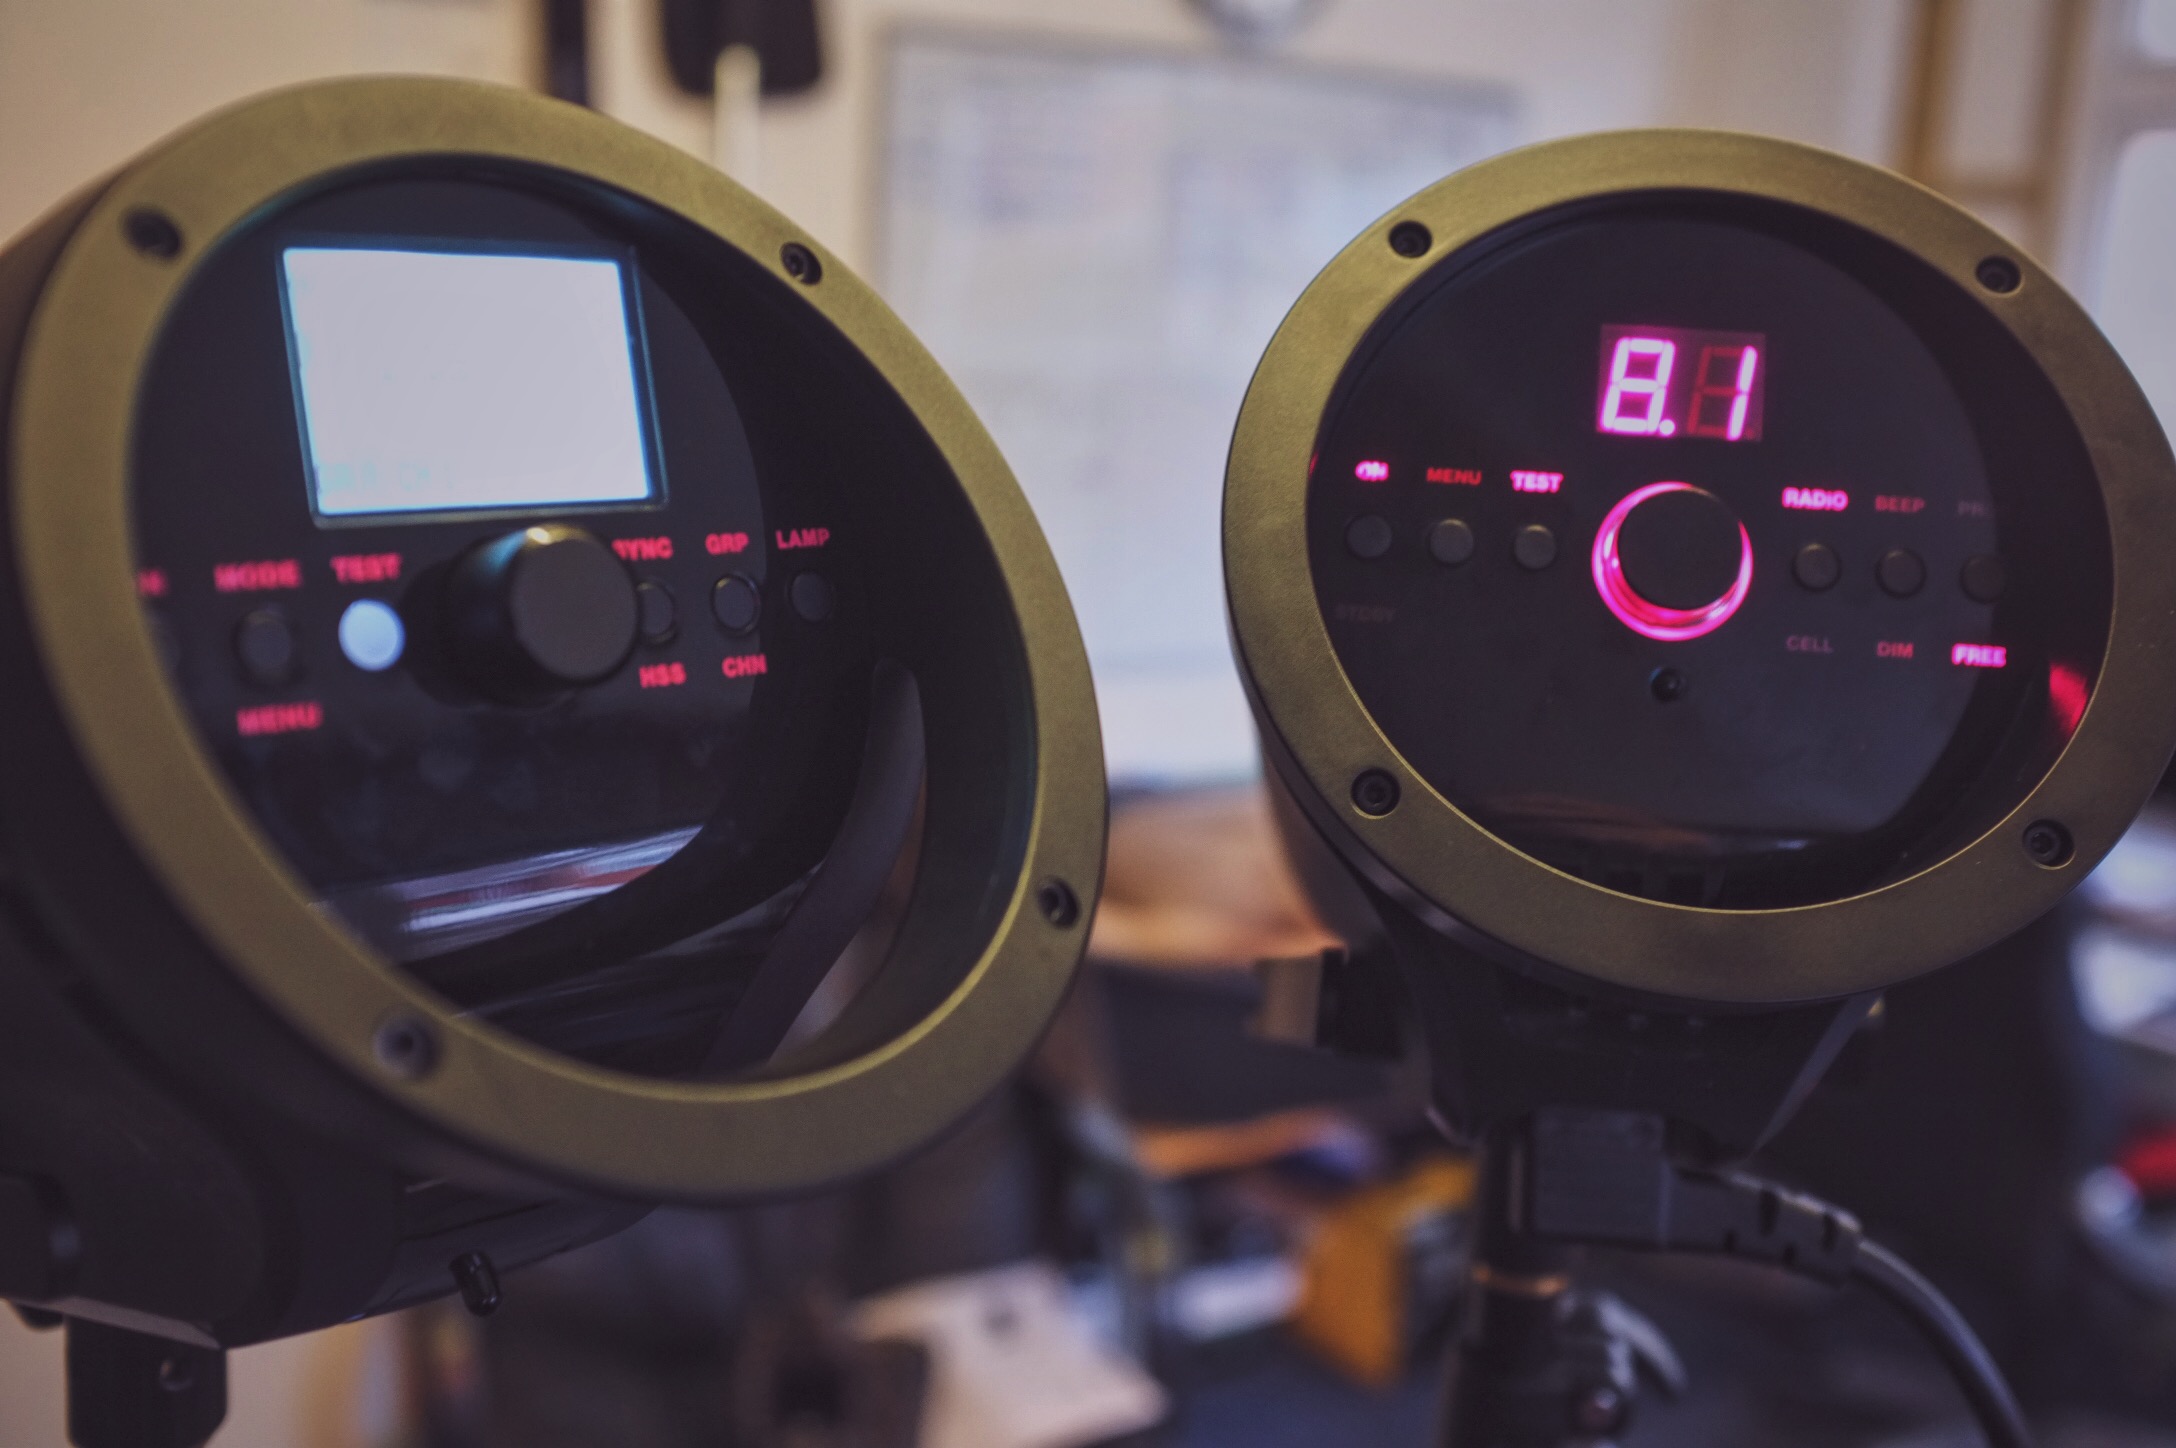
The other most obvious change is of course how streamlined the actual bodies of the lights are now. Everything has been removed from the sides of the units so there's no longer any knobs and dials on the sides and it is now all situated at the rear of the lights in a slick looking disk of buttons and lights.

The rear of the lights now house everything that there is to adjust. No longer are there any knobs and dials on the sides of the lights, everything can be accessed from here. On the right is the studio unit and on the left is the location unit.
What's going on with that colour?
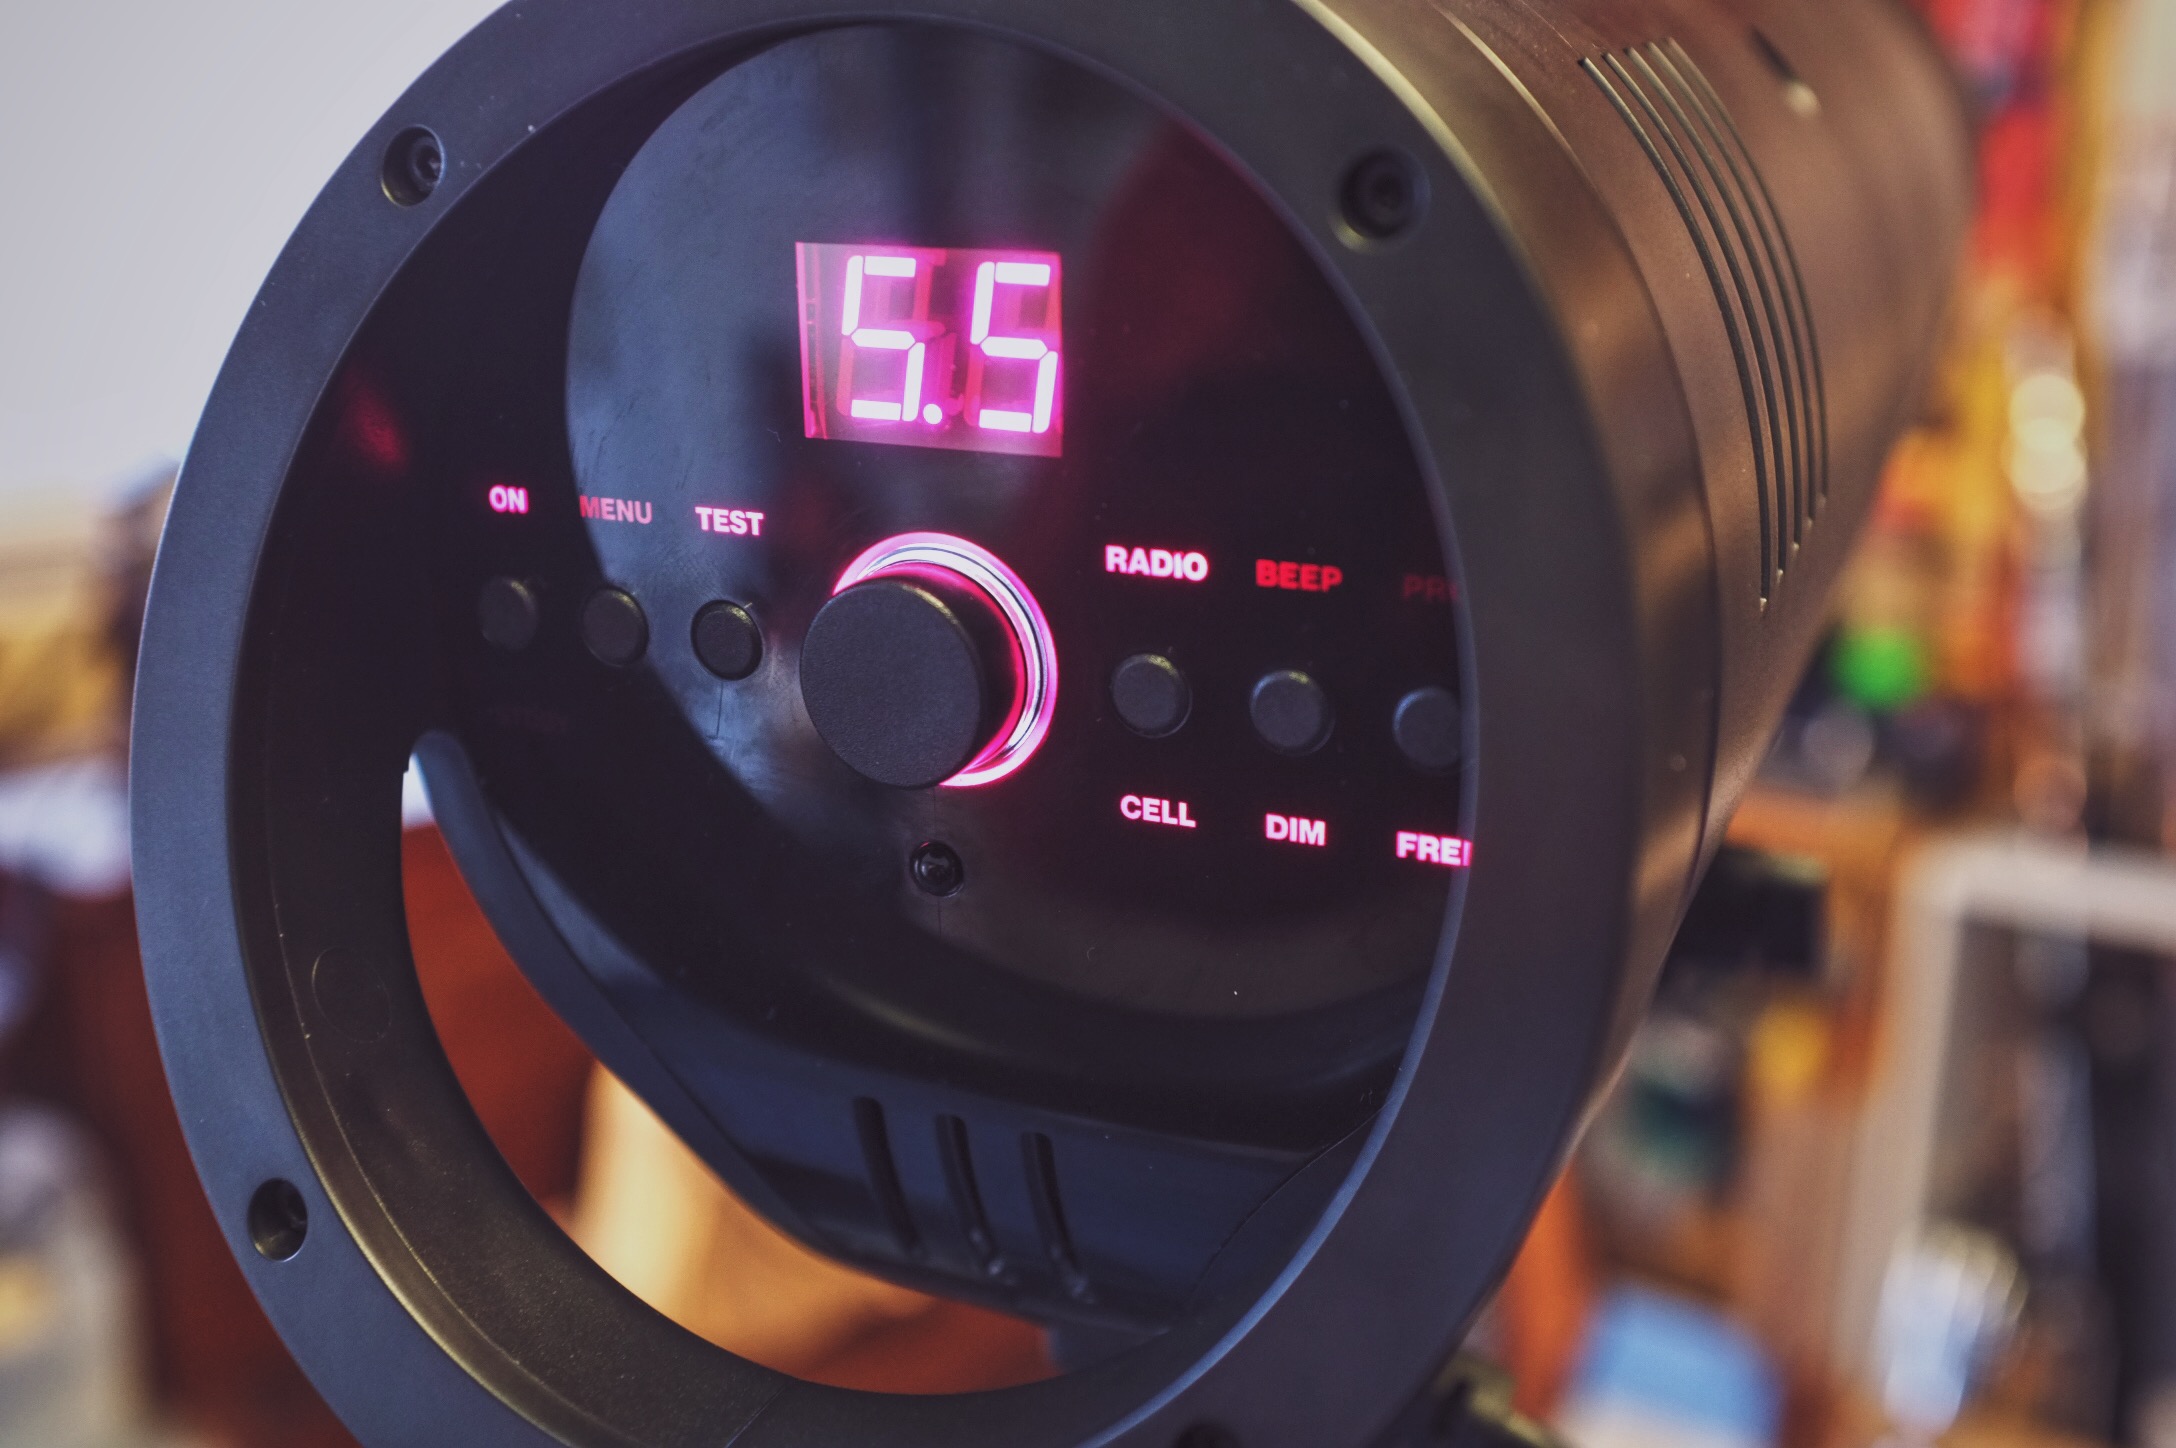
You may have missed it but last year Bowens dramatically changed their brand identity and the core change was the dramatic colour overhaul of the logo and marketing. Bowens has a core colour of magenta (apparently not pink) so as a result all the lights now have a magenta interface with all of the lights buttons and dials being lit by that vibrant colour.

The rear of the studio unit displays its readout and button labels in a vibrant magenta accents.

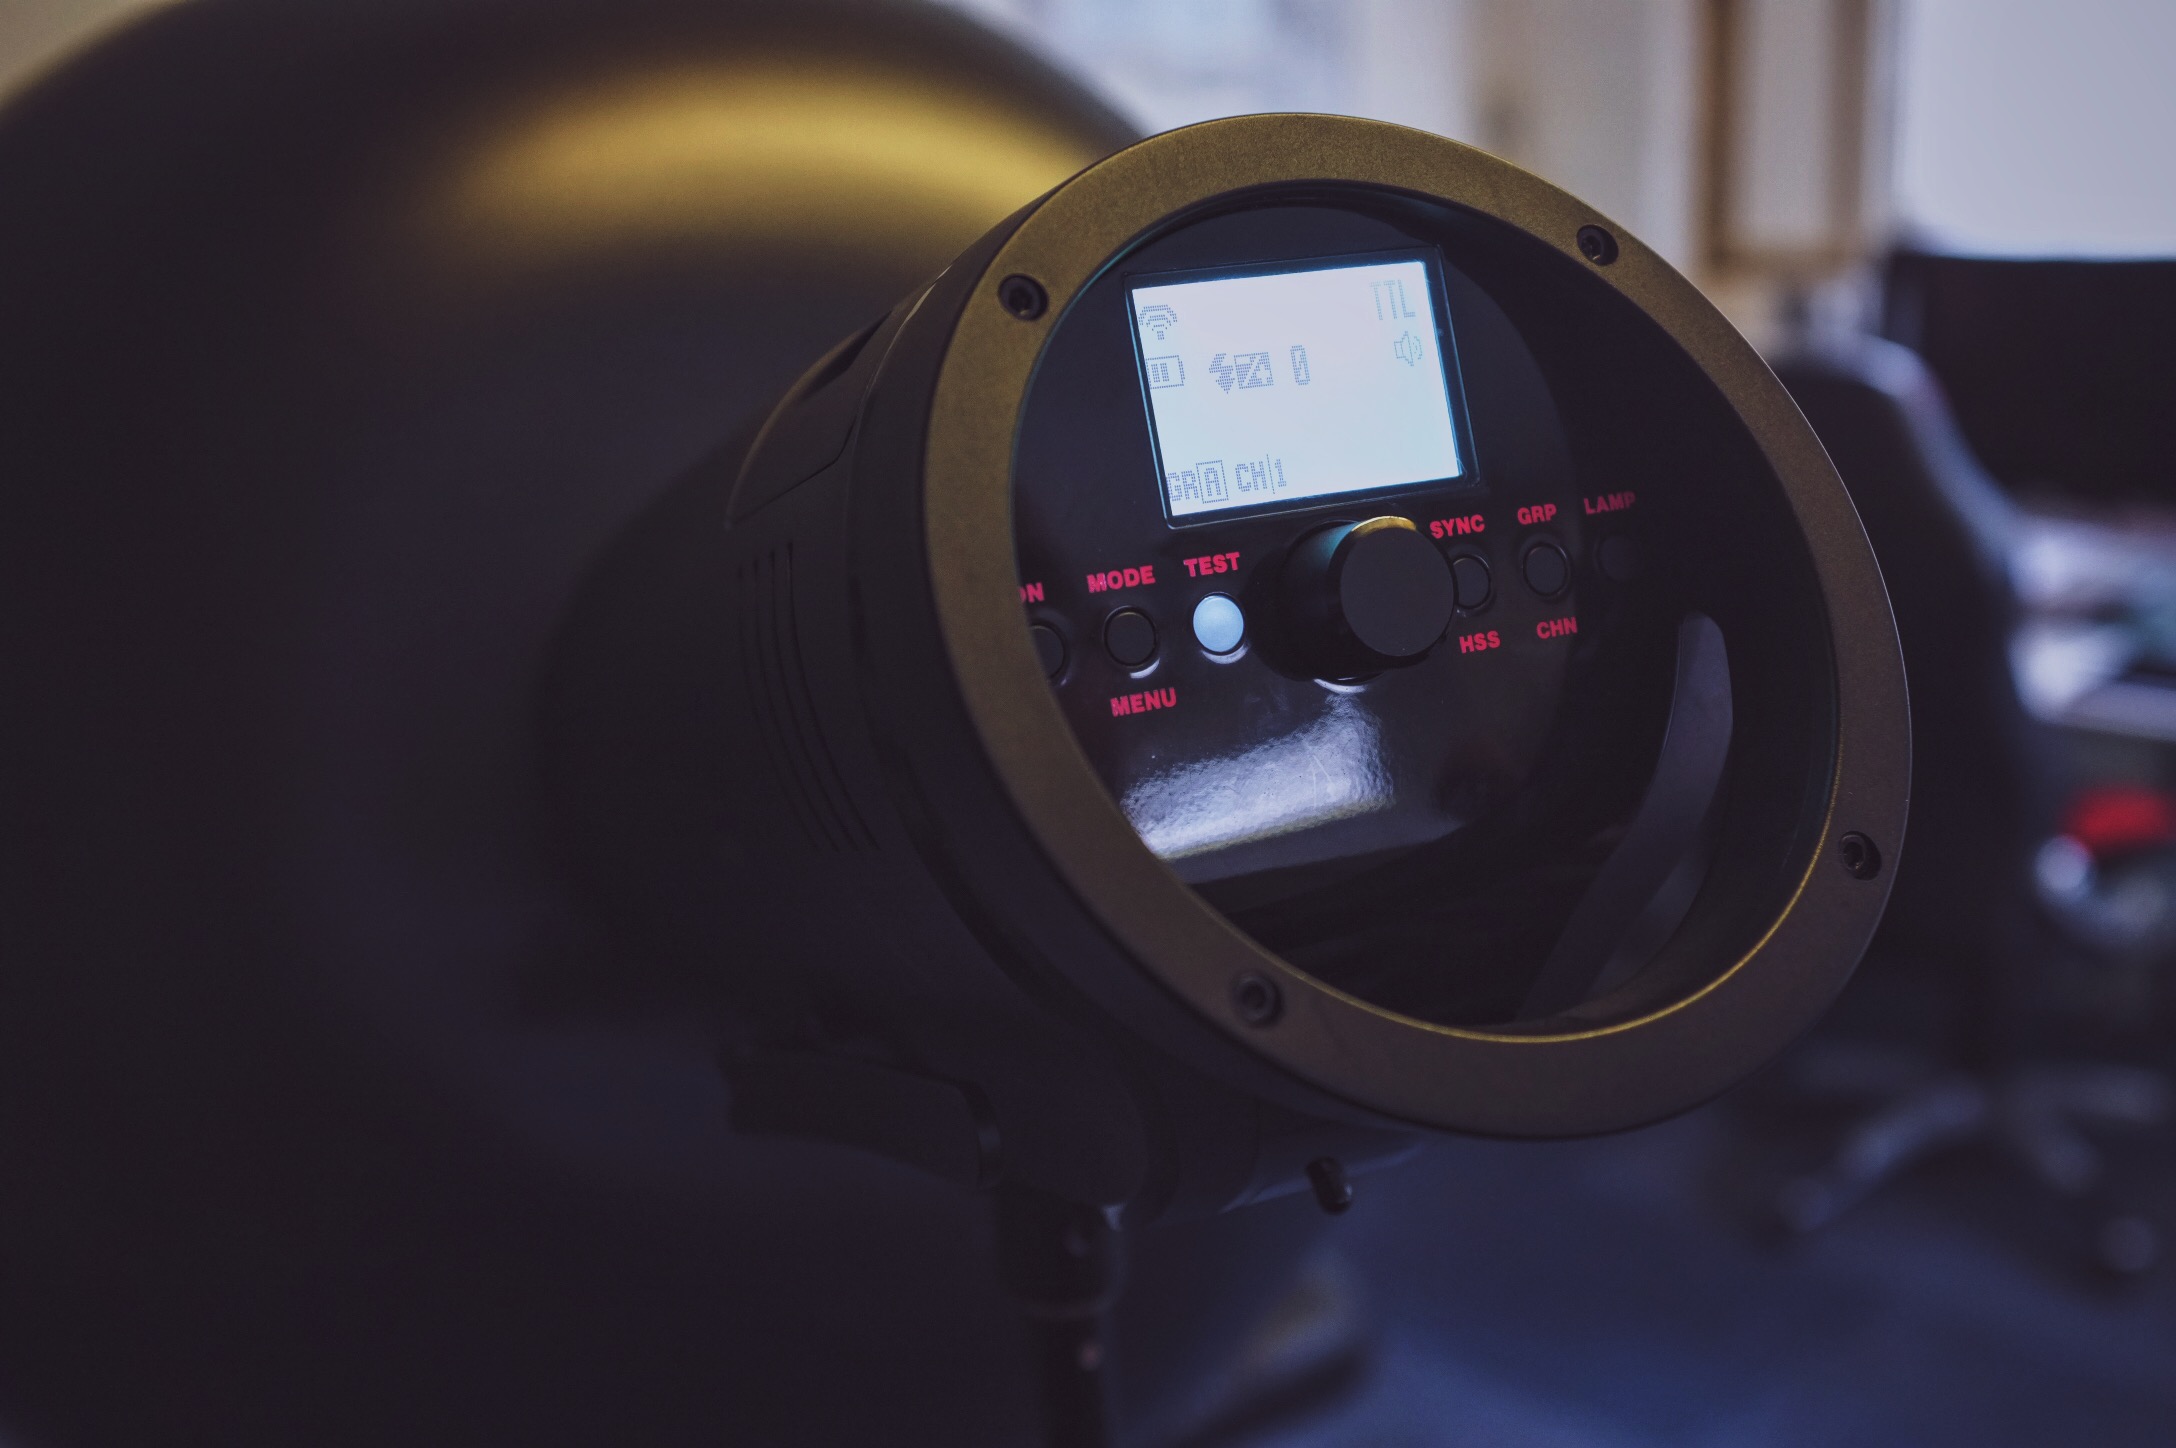
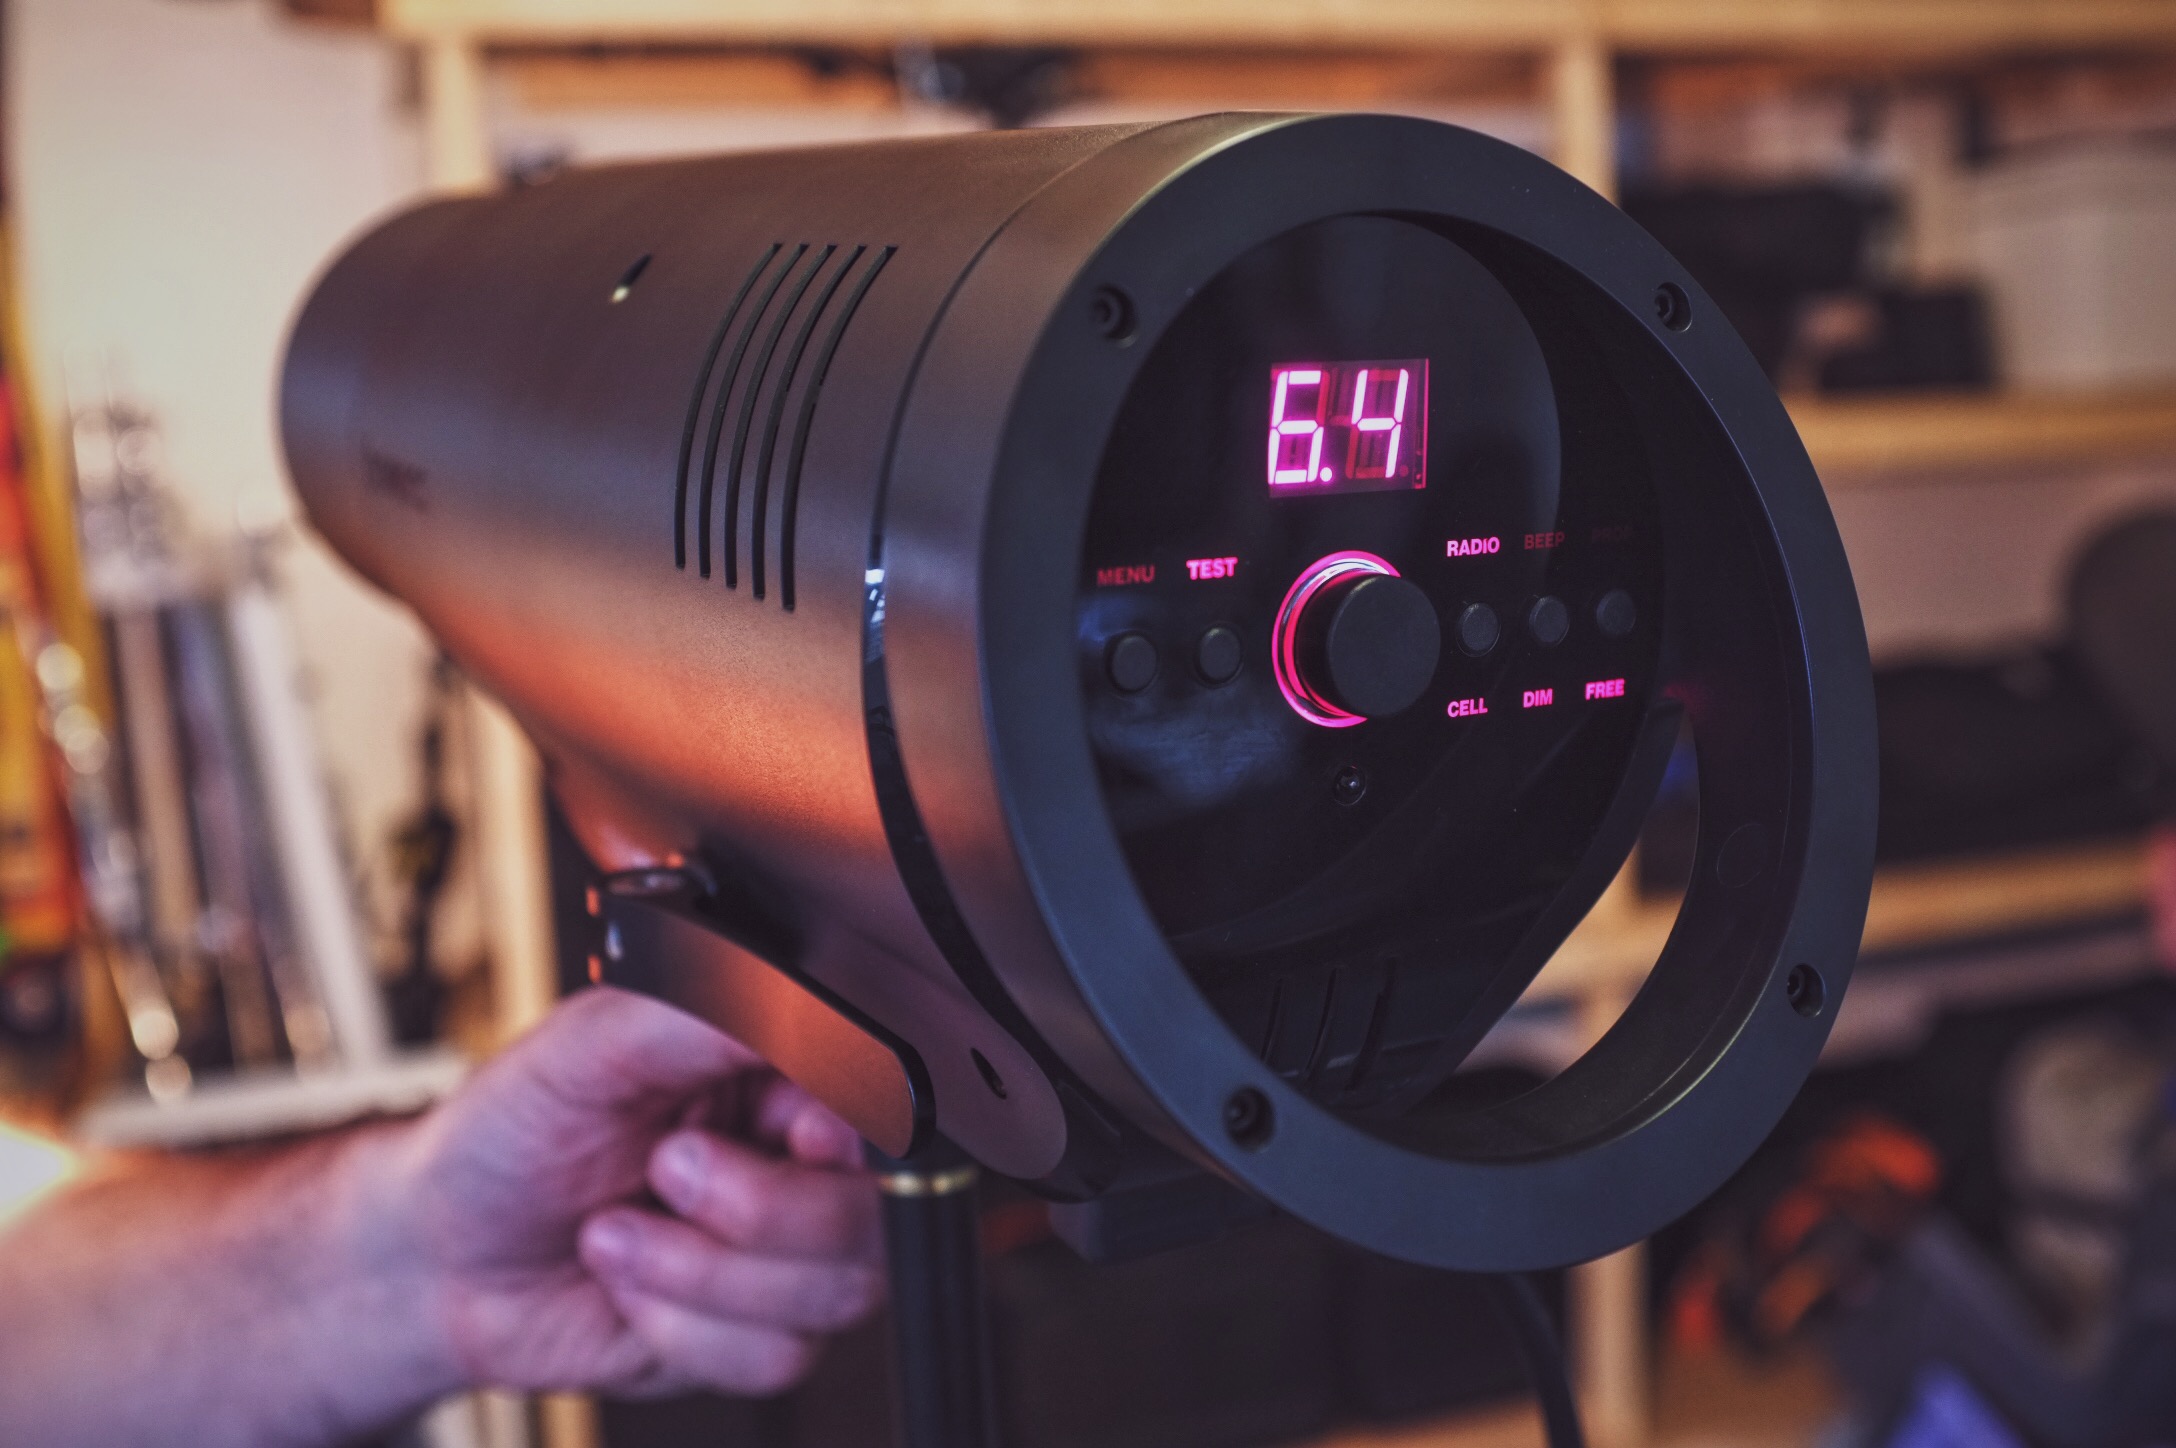
The rear of the location unit has the added feature of a large display as well as the magenta highlights. This large screen quickly and easily tells you what's going on including channel, flash duration (pretty cool feature) flash power, battery power etc. In fact pretty much everything you need to know is clearly displayed on this screen.
Like I said at the outset, this was a super quick play and I didn't really get chance to shoot with them in earnest. I simply fired off the heads to see how fast they fired, how low the power went and how many stops of power they had etc.
Impressions?
First impressions are strong indeed and I have to say that obviously they look good and they fire a flash when you press the button beyond that I'll have to see for myself when they're being used during an actual shoot.
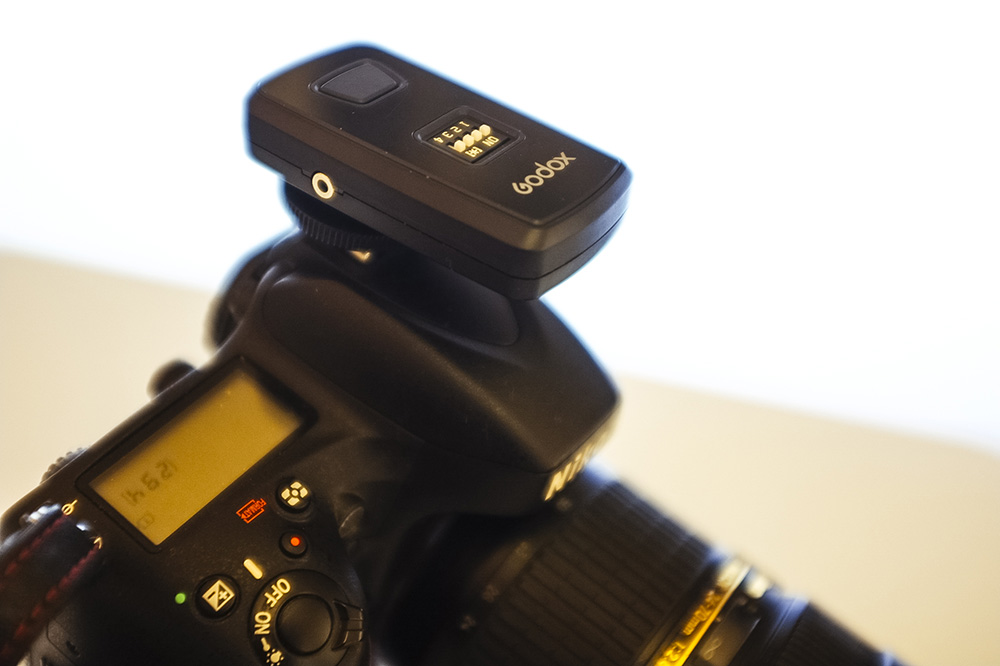
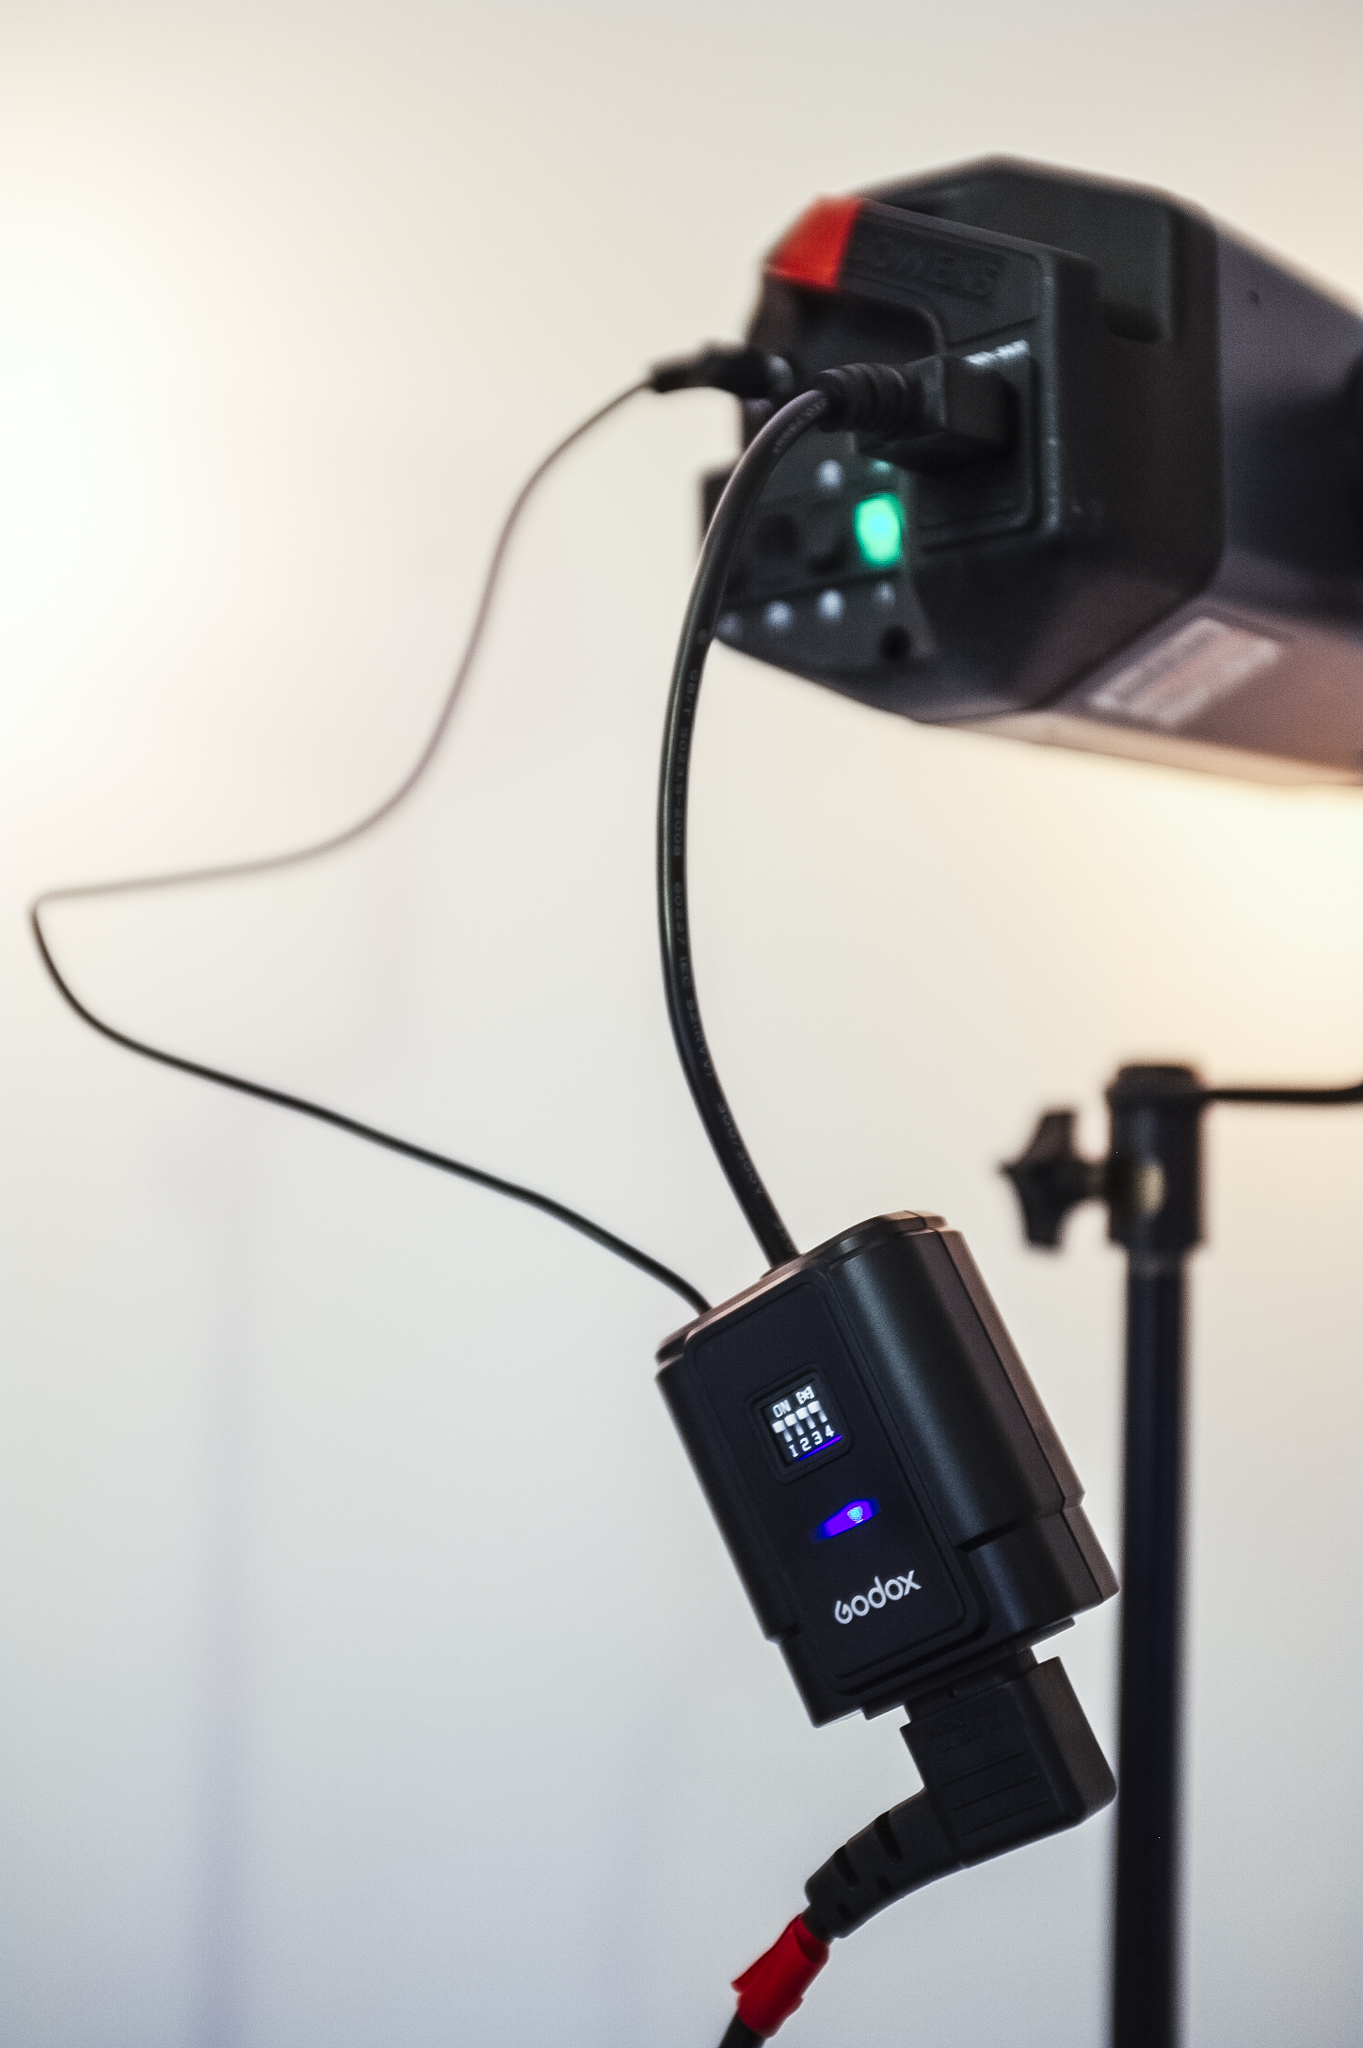
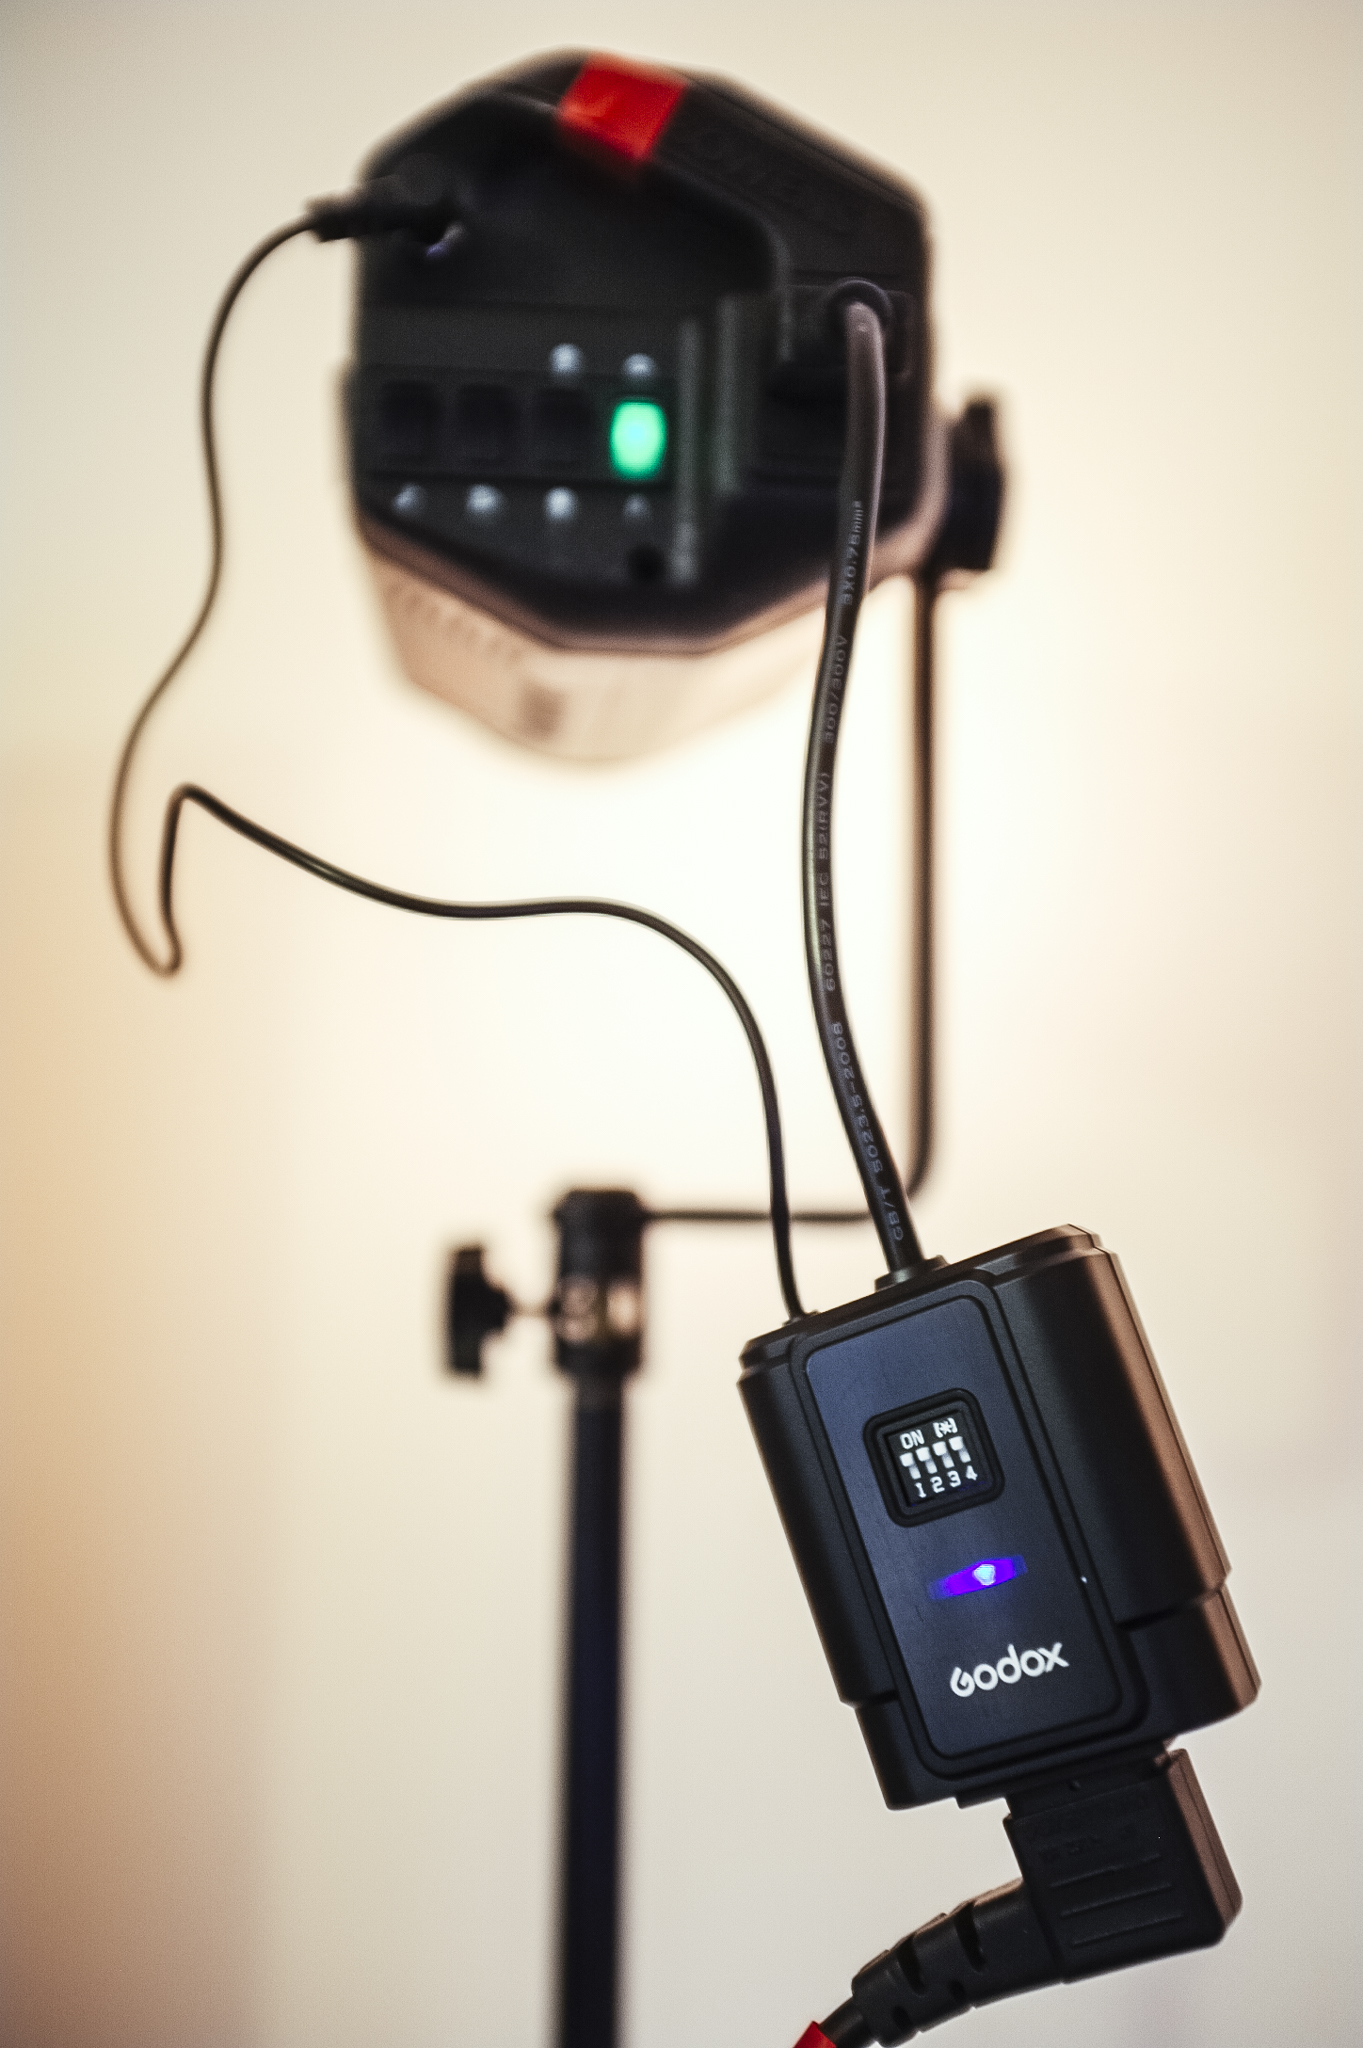
The other points of note is that they both come with independent on-camera telemetry style units. These are the gadgets like Pocket Wizards that speak to the flash form the camera. Both the studio and the location units can be completely adjusted from their independent units. At present is doesn't look like the location and studio units transceivers will work together and you'll need a separate unit for both but I can't confirm that until I've played with them. Obviously you could still optically slave one. For example you set the transceiver to talk to one head and then the others could respond via infra-red so they're still compatible that way.
Also the location unit will have a feature that you can replace the battery with a power cable. It's not currently available but you'd simply pop out the battery and replace it with a drop in power cord so if you wanted to use them in the studio day-to-day then you can do. Then if you want to go out on the road you would simply just switch out your power cable for the battery instead.

The studio units are now made of a super tough exterior but Bowens has now come away from a metal body. The result is a 500w studio mono block that comes in at 3.7kg which is only a little more than the location unit.
The location unit has TTL which is great news for those on the move shooters like wedding photographers that need great quality of light and modifiers but with the responsive features of speedlights. The location unit also has the HSS (High Speed Sync) feature with capture times of up to 1/8000 of a second. For those that want fast moving objects frozen in time then I'm pretty sure 8000th of second is going to do it.


So that's the super quick look at the new Bowens heads. Mr Bowens has graciously promised me some of the first units out of the door so I will be eagerly awaiting my heads to give them a proper test in earnest. I will certainly be letting you know how I get on.
What will I be looking for when I test the new heads
- Things that I will be personally looking at is going to be ease of use with the on camera trigger system. Will it be easier and faster to adjust everything from the box on top of the camera than simply walking over and adjusting the heads themselves.
- I will also be looking at colour consistency. For my work with colour this needs to be consistent not just for the first 100 flashes but for the whole day. This can fluctuate as the bulb warms and cools so I'll interested to see how these new heads cope in reality not just on a colour meter.
- I am also keen to see how they will work at consistently at low power outputs. Strobes don't like to be used on their lowest power and I take a lot of images with a wider aperture so seeing how they perform for extended periods at this setting will be fundamental.
The Stats of the Studio Unit - XMS500
- MAX POWER (WS) - 500
- FLASH DURATION (T=0.5) - f4.0 - f8.7 = 1/2480 - 1/5180 / f8.8 - f10 = 1/3080 - 1/4000
- RECYCLE TIME (100%) - 0.2 (min) - 1.0 (max) sec.
- POWER ACCURACY - 1/10th stop & 1 stop
- POWER CONTROL - Rotary Dial, XMS Remote
- POWER RANGE - 7 stops
- POWER RANGE (WS/J) - 7-500
- POWER RANGE (FRACTION) - 1/64
- FLASH TO FLASH CONSISTENCY (F-STOP) - ±0.05
- FLASH TO FLASH CONSISTENCY (KELVIN) - ±30°K/0.53%
- MODELLING CONTROL - Rotary Dial, XMS Remote
- MODELLING MODES - Off , Proportional, Free Set, Full
- READY INDICATION - Beep, Modelling, Rotary Dial LED, Test Button LED
- COLOUR TEMPERATURE - 5600K (±300K)
- SYNC VOLTAGE - 5V DC
- OPERATING VOLTAGE - 190-250V AC 50Hz, 90-130V AC 60Hz
- 2.4GHZ RADIO CONTROL - Yes
- MULTI-VOLTAGE - Yes
- AUTO DUMP - Yes
- FAN COOLED - Yes
- DIGITAL DISPLAY - Yes
- WIDTH - 136mm
- LENGTH - 485mm
- HEIGHT - 192mm
- WEIGHT - 3.7Kg
The Stats of the Location Unit - XMT500
- MAX POWER (WS) - 500
- POWER RANGE - 9 stops
- POWER CONTROL - Rotary Dial, XMT Remote
- POWER RANGE (WS/J) - 2-500
- POWER RANGE (FRACTION) - 1/256
- POWER ACCURACY - 1/3rd stop
- FLASH DURATION (SHORTEST) - 1/10309s
- FLASH MODES - TTL, Flash, Strobe
- STROBE - Max 100 flashes (per burst)
- TTL (FEC) - ±3-stops
- BATTERY CHARGE TIME - 4 hrs (to full from empty)
- MODELLING - 10W LED
- HIGH SPEED SYNC - up to 1/8000s
- SYNC DELAY - 0.01 - 30s
- WIRELESS CONTROL - 2.4GHz / Optical (IR)
- RECYCLE TIME (100%) - 0.01 - 2.0s
- MODELLING CONTROL - Rotary Dial, XMT Remote
- MODELLING MODES - Off , 100%, 30%, 60%
- READY INDICATION - Beep, Test Button LED
- COLOUR TEMPERATURE - 5600K (±300K)
- SYNC VOLTAGE - 5V DC
- 2.4GHZ RADIO CONTROL - Yes
- AUTO DUMP - Yes
- FAN COOLED - Yes
- DIGITAL DISPLAY - Yes
- WIDTH - 126mm
- LENGTH - 368mm
- HEIGHT - 144mm
- WEIGHT - 3.4Kg