• Technique
    • Latest Techniques
    • FREE TIPS
    • Quick Tips
    • Video
    • Site Search
    • Blog
    • Archives
  • Mentoring
  • >Online Workshops<
  • Workshops
  • Studio Lighting Books
  • Contact
    • Newsletter
    • Contact
    • Statement
Jake Hicks Photography
  • Technique
    • Latest Techniques
    • FREE TIPS
    • Quick Tips
    • Video
    • Site Search
    • Blog
    • Archives
  • Mentoring
  • >Online Workshops<
  • Workshops
  • Studio Lighting Books
  • Contact
    • Newsletter
    • Contact
    • Statement

The New the Old and the Vintage - Nikon's 'Worst' & 'Best' Zoom Lens Comparison

I'm going to preface this by saying that this isn't a lens review article, there are many photographers better suited for this topic, so if you're after refraction index comparisons and chromatic aberration charts this article probably isn't for you. This article is however my personal thoughts on three Nikon zoom lenses and their resulting images but also a broader look at how we as photographers covet lenses and other photographic gear. Is the latest and greatest piece of kit actually worth the investment?

Some of my favourite shots that I've ever taken were captured using my Nikon 28-105mm f3.5 zoom lens. I've had this lens for more than a decade now and you can pick up a second hand one now for as little as £150.

Some of my favourite shots that I've ever taken were captured using my Nikon 28-105mm f3.5 zoom lens. I've had this lens for more than a decade now and you can pick up a second hand one now for as little as £150.

Let me set this up and step back a couple of months and say that I've been fortunate enough to see a lot of growth in my career recently but maybe not in the traditional sense. No I haven't picked up any major campaigns from Nike or Prada but I have seen a large growth in other areas namely socially and from a larger more global audience. I've done a lot of interviews in that time and I've even spent a couple of weeks in the US shooting an extensive training video regarding my lighting, equipment and photographic techniques. The point I'm trying to make here isn't about me blowing my own trumpet but about a common theme that started to run through these interactions with other industry professionals.

During these interviews and Q & A sessions the question about gear inevitably comes up.

'What gear do you use to create your images?'

It's a valid question and one that we're all interested with in todays market because no matter the techniques we use we still need tools to implement them. After the question is asked I would always simply reel off the key pieces I use which everybody cares about; lighting, camera body and lenses. My answer is of course always the same as I've been using the same kit for many, many years; Bowens lighting, Nikon D600 body and a 28-105mm f3.5 lens. What was interesting to me was that the response to my answers was always the same too.

'Wow, that's awesome, you take your stunning images using that equipment?'

At first I didn't really think anything of it but after a while it started to nag at me. Essentially the response they're giving is 'Wow, that's awesome, you take your stunning images with that old, outdated equipment?'. They are absolutely correct of course, yes I do. I have six Bowens strobes that I've had nearly 15 years now, my Nikon D600 came out in 2012 and can be picked up for around $400 and my workhorse lens was over a decade old.

I am not what the industry refers to as an 'early adopter'.

The thing is that my kit just works, it does what it's supposed to do and it creates the images that I want, but I did start to feel a little guilty, almost like a fraud. I'm a professional photographer, I make my living from photography, surely I should have the best possible photographic equipment to take the best possible photographs right?

I've been carting about the same Bowens strobes for nearly 15 years. I think to say that 'I've had value for money out of these heads' would be an understatement.

I've been carting about the same Bowens strobes for nearly 15 years. I think to say that 'I've had value for money out of these heads' would be an understatement.

So the nagging in the back of my mind finally got the better of me and I decided to 'invest' some money back into my craft. The question was where to start, my lighting, camera or my lenses?

Lighting

My strobes produce light, and unless I missed an issue of New Scientist recently light is still travelling at the same speed and still in a straight line, I didn't feel that new lighting was going to make a huge difference to my shots. Does modern lighting offer more control and more convenience? Yes it absolutely does but it still produces light so I didn't feel a new investment there would net me career changing results.


Camera Body

As of August 2016 Nikon has released 7 new full-frame DSLR cameras in the four years since my D600 was released in 2012 and this doesn't even include the 8 cropped sensor bodies they've also brought to market in that time. Has camera technology moved on? Sure, but is it an evolution or a revolution we're seeing?

Prior to my D600 I had a Fuji S2, it was Fuji technology in a Nikon body that took Nikon lenses. That camera did serious work and offered insane results for a cropped frame 6 megapixel camera. I stuck with the Nikon lens mount and waited ever so patiently for Nikon to introduce that D600 full-frame DSLR. Canon had their full frame powerhouse 5D Mk II in 2008 but I held my ground with the other nervous (and very patient) Nikon shooters and waited for the D600. It was well worth the wait in my opinion and I absolutely love my D600 but I personally don't think there has been a newer model that's been released that would change my game considerably.

I use my camera on manual mode 100% of the time and I've seen about two menu screens the whole time I've owned it. I don't personally need all the picture modes and effects, it shoots raw and in full frame, beyond that the new camera models offer me luxuries but not necessities.

In late 2011 I shot this album cover for musician Dan Le Sac. The shot was taken on my 6 megapixel Fuji S2 camera with my old Nikon 28-105mm lens.&nbsp;I shot the image as he and his record label had requested but it later transpired that they would…

In late 2011 I shot this album cover for musician Dan Le Sac. The shot was taken on my 6 megapixel Fuji S2 camera with my old Nikon 28-105mm lens. I shot the image as he and his record label had requested but it later transpired that they would go on to release the image heavily cropped like you see here (oddly no subsequent retouched or enlarged file was requested). The full un-cropped version has never been shown and the cropped image was used for everything from album art to Adshel's. With those bus shelter Adshel's being nearly 2 metre by 1.5 metre that is a terrifying crop to use from a 6 megapixel camera and old lens and I was literally stunned as to how well the image stood up to this type of enlargement.

Lenses

So finally we come to lenses. Lenses are often seen as the soundest investment you'll ever make in photography. Your 'glass' will very often outlive all other equipment you own and they will often see you through multiple camera body purchases. For example the current Nikon F-mount lenses have been around since 1959! I don't want to sound like a Nikon fan-boy here but that is insane. To think that something that was designed and engineered at a time when we barely had a vaccine for polio, no man had been to space and at a time before computers even had a name, Nikon made a lens mount that is still being used to this very day on their most modern cameras. So yes, buying a Nikon lens is a fairly solid investment and I am pretty sure it's a safe bet that any Nikon lens bought now will see you through many years to come.

So thanks to a little judgment from my industry cohorts and unintended peer pressure that left me feeling guilty I begrudgingly decided to finally buy a new lens.

For my type of work that primarily involves photographing people I wanted a fast zoom lens. My previous lens was half way there at least but really in terms of upgrading there is only one clear choice and that was the 24-70mm f2.8. You can't really find a more highly decorated lens and everywhere you turn there are people raving about how good this lens is so I bought one. You can pick one up here in the UK for around £1200 or in the US for about $1800. Like I mentioned lenses stick around for a very long time so I picked up an exceptional quality second hand one for £850. Of course it's nice to buy new but it's a working lens not an ornament so I was more than happy to get a pre-loved one and with modern returns policies there's practically zero risk if you aren't happy.

Are we nearly there yet?

Once again thanks to all of you who made it this far in one of my articles but we can finally take a look at what I thought of the lens. I've only had it a couple of weeks and although I've shot several shoots on it already I actually haven't gotten around to retouching any beyond these specifically shot test images.

So are you happy with the new lens?

Yes I am happy, it produces great shots just like I felt my previous lens did. I loved that lens and I still have it.

Will you use your old 28-105 lens again now that you have this new one?

No, theres no reason to but I doubt I'll ever get rid of it. It's simply not worth anything, you can pick it up for £150 now so its worth far more to me as a backup.

I only did this shoot a few days ago so it hasn't made it into the editing queue yet but here's a back of the camera shot of the club we were in. It had a couple of really low wattage goldfish bowl style bulbs which I wanted to include in the shot b…

I only did this shoot a few days ago so it hasn't made it into the editing queue yet but here's a back of the camera shot of the club we were in. It had a couple of really low wattage goldfish bowl style bulbs which I wanted to include in the shot but to get any light to show I had to shoot at ISO 800 1/60 sec. at f2.8. This shot simply wasn't possible with my older slower lens.

Were you blown away with the quality of this new and highly recommend 'must-have' lens?

No, not really. Don't get me wrong there's nothing wrong with the lens but for some reason I was expecting to be blown away. But that's more to do with the fact that everybody was hinting at the fact that my old lens was crap. It simply wasn't. It's true that about 80-90% of the shots on my site were taken with a lens that you can buy for £150 now but it was a remarkable lens. It had its limitations of course, namely its speed. I could only shoot at a max aperture of around f4 most of the time. Just days ago though I was shooting in possibly the darkest London club I have ever been into. I was shooting a mix of ambient and flash but my settings were ISO 800 1/60.sec f2.8. That is dark! The images I took last week simply would not have been possible a couple of weeks prior, I couldn't go slower on the shutter speed and I really didn't want to go noisier than ISO 800 so for that shoot alone the lens was worth it.

It got me thinking though, how good are these old Nikon lenses? My old lens was first introduced in 1998 and it's a really good lens, how long ago did Nikon nail it in terms of creating great glass? I decided to look into how bad Nikon lenses actually were before they got good. Upon my search I came across our industry legend Ken Rockwell and his list of 'Nikon's 10 Worst Lenses' (it's actually only 6 as he couldn't find 10 crap Nikon lenses). At the top of this list is the Nikon 43-86mm f/3.5 which Ken affectionately coins as 'the worst lens Nikon has ever made'.


In fairness to Nikon this 43-86mm zoom lens was first introduced in 1963. They soon realised their errors and re-released a far superior version in 1975. How can you tell the difference between the two versions? I now have both and the only cosmetic difference is the older version has its lettering inside the filter ring and the later version has it on the outside.

In the image here the lens on the left is the improved version and the lens on the right is the original.


Challenge accepted Ken!

I had to see what the worst Nikon lens ever made is all about so I grabbed one. As you may well imagine, you can buy Nikon's worst lens for a generously low price and I 'invested' in mine for the princely sum of 20 pounds. Score!

Ken Rockwell is no slouch when it comes to lens reviews and the guy knows what he's talking about so I was interested to see how bad Nikon had screwed up here. Thankfully my 43-86mm f3.5 (seriously Nikon what the hell zoom range is that?) lens arrived in time for me to test it alongside my new 'Godly' zoom lens as well.

So begins the New vs. Old vs. Vintage lens comparison test. This is far from scientific, just practical results taken as I would normally shoot and all retouched in the same way I would normally retouch.

Each lens had five 3/4 length shots taken at f5.6 at 50mm and five head-shots taken at f5.6 at 70mm. I chose the 'best' (sharpest) frame from each of the five shots and retouched them all in my normal process with each image receiving the same amount of time. Bear in mind that the vintage 43-86mm is manual focus and seeing as it doesn't talk to the camera directly, user focusing error is also a factor.

Clicking on the images above will enlarge them - The two images above were taken on the Nikon 43 - 86mm f3.5. The 3/4 length shot was taken at 50mm and the head-shot was taken at 70mm and both were shot at f5.6.


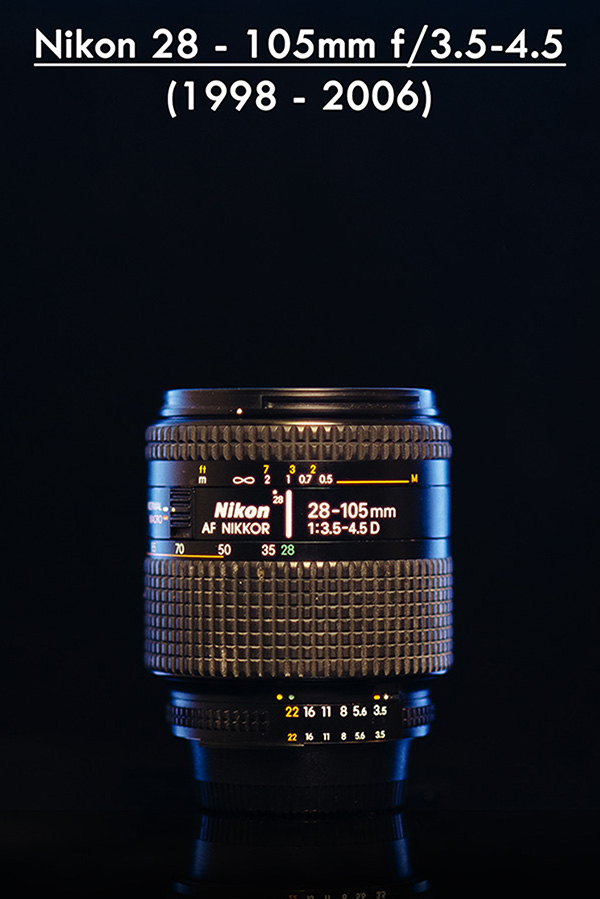
Clicking on the images above will enlarge them - The two images above were taken on the Nikon 28 - 105mm f3.5-4.5. The 3/4 length shot was taken at 50mm and the head-shot was taken at 70mm and both were shot at f5.6.


Clicking on the images above will enlarge them - The two images above were taken on the Nikon 24 - 70mm f2.8. The 3/4 length shot was taken at 50mm and the head-shot was taken at 70mm and both were shot at f5.6.


Below are some cropped-in versions of each of the files above so you can get a clearer picture of what's going on with each of the lenses. Clicking on the images will enlarge them.

View fullsize Vintage - 43-86mm 3/4 Crop
Vintage - 43-86mm 3/4 Crop
View fullsize Vintage - 43-86mm Head Shot Crop
Vintage - 43-86mm Head Shot Crop
View fullsize Old - 28-105mm 3/4 Crop
Old - 28-105mm 3/4 Crop
View fullsize Old - 28-105mm Head Shot Crop
Old - 28-105mm Head Shot Crop
View fullsize New - 24-70mm 3/4 Crop
New - 24-70mm 3/4 Crop
View fullsize New - 24-70mm Head Shot Crop
New - 24-70mm Head Shot Crop

Thoughts...

The Vintage - First off it's no shocker to see that the 50 year old lens is not up to the same standards as the modern lenses, we hardly needed to read a review to find that out. In the 3/4 length shot you can clearly see how soft it is at the edges and up around the face is loses a lot of definition and sharpness. It would also appear that it struggles with highlights greatly and the detail gets lost almost instantly as the brightness gets anywhere near a highlight. You can see in the headshot that the cheek bone highlight gets blurry due to flaring in the lens.

The Old - This lens has been a workhorse for me and I've never had cause for complaint. In the 3/4 length shot again you can start to see a slight blurring at the top of the head at the extremities of this lenses focal plane. Once again I would also say that the headshot sees a very small amount of flaring from the highlights and the pores loose a little definition in the cheek bones highlights because of it. Am I picking holes in this lens? Yes. Do I consider these to be usable and saleable commercial images? Yes.

The New - As you'd expect, the images taken with this lens are great. At first glance the 3/4 length shot may appear to be less than tack sharp to you and I'd agree with you. Personally I don't think this is a fault in the lens, I think this is a byproduct of 'focus and recompose'. You focus on the head and then make minor adjustments in the composition which renders the desired area slightly out of focus. I wrote an article on the effect here to better explain whats going on: 'Stay Focused'. But apart from user error you can see that the image as a whole looks clean and clear from edge to edge. On the headshot we see the same thing and for me the most noticeable differences here are the detail in the highlights. The cheek bone highlights retain all of the pore detail and the shadow areas in those pores are not loosing darkness due to flaring from the surrounding highlights.

More History (sorry)

So what does all this mean to me and why did I bother writing an article on something we as photographers should instinctively know by now? It's obvious that newer lenses create better photographs. It is obvious but I think we may sometimes loose a little perspective on this 'better' scale.

Take the vintage 43-86mm lens, remember this is reputed to be the 'worst' Nikon lens ever, this lens is older than most of its owners and to put it into perspective, one year before this lens came to market audio tapes were invented. That is crazy, you'd expect a lens that is dubbed as the worst lens ever and made at a time before pocket calculators that it would be like shooting through an old sock! It just isn't. Yes it's soft, yes it's blurry at the edges, yes it flares at the highlights but it's still usable and frankly a shot taken with this lens and displayed in the most common format of our generation i.e. our phones, nobody would ever know.

Ok so lets fast forward nearly half a century and compare what Nikon is up to now. The older 28-105mm lens that I've been using for over ten years and taken literally tens of thousands of frames without incident, repair or service, how did those images compare? Pretty damn good in my opinion, yes its an 'old' lens but I have shot commercial jobs on it for my entire career. It's images are in books, magazines, Adshels, posters and nearly every other printed media out there and I've never once thought 'oh that's a bit soft/flat/distorted'. That lens is an absolute workhorse and neither you or anybody else could expect any piece of engineering to withstand those years of day-to-day use and abuse with very little tender loving care with zero maintenance or repair.

Move forward a few more years and we've got Nikon's latest and greatest zoom lens (almost latest, a newer VR version has now been released). As you'd expect this lens takes fantastic shots but is it a quantum leap forward from the older 28-105mm I had? No I don't think it is. It's simply just physics at this point, in fact camera sensor technology is getting so damn good now that we're literally starting to see the physical glass of the lens in our shots. Making something physically solid yet completely transparent was black-magic a few hundred years ago but glass has been around since 3500 BC, we have been refining it for a while now and we're getting pretty damn good at it. But a lens isn't all about sharpness. This lens is very fast through the range and having that f2.8 has already helped me out on a shoot after only having it for a week. It's also a lot quieter to focus than the old one and it focuses a lot faster and in lower lighting, there's no mistaking this a far superior lens.

In Conclusion (you made it)

Lens technology has in my opinion crawled along. We've been working with glass for over 4500 years so its understandable that we already had a handle on it 50 years ago. The apparent slow growth of lens improvements is nobodies fault, you can't blame them for 'nailing it' right out of the gate. Smarter electronics and software companies nail it straight away all the time but slowly drip feed those improvements and updates to eek out the consumer budgets. It's just business. All I'm saying is that even the WORST NIKON LENS is still actually pretty damn good.

Don't fall foul to thinking you always need the latest and the greatest lighting, camera body or lens. What would give you better shots, spending £1000 on a slightly updated lens or spending £1000 on 3 or 4 awesome location shoots with professional models, stylists and makeup artists?
I think you know the answer.
 

Why not let me know your thoughts. Have you bought a lens that you felt revolutionised your images and portfolio? If so I'd love to know which lens it was. Or have you been holding off buying a new lens and think your money would be better spent on a few awesome photoshoots? Fire away in the comments below and as always if you have any questions I'll do my best to answer them.


Another article that is relevant to this lens discussion is the one I wrote on focusing and correctly choosing focusing modes. A lot of the time soft focus shots are the product of user error, not engineering. Stay Focused

I often get asked what is the best focal length for portraits. In this article I look at the key differences between 50mm vs 85mm: Which is best for Portraiture?

Also here's a look at some of the art lens reviews I've done in the past. These lenses are all about creative looks over technical refinement and they each offer something unique.

Lensbaby Velvet 56mm f/1.6

Petzval 58mm Bokeh Control Lens

Lensbaby Twist 60mm


:WARNING: Temptation lies ahead


If you liked some of the gelled lighting shots in this article and you'd be interested in learning how to take those shots yourself or you're simply interested in finding out everything there is to know about Gelled Lighting then why not check one of my workshops: Gelled Lighting Workshop


I also offer comprehensive coloured gel packs. These collections of gels are what I use day to day to create some of the most highly saturated colours around. If you're looking at getting into gelled lighting or need to get stronger and richer colours in your coloured gel work why not check out my Jake Hicks Photography Gel Packs

Tuesday 08.23.16
Posted by Jake Hicks
Comments: 3
 

T.W.i.P Talks Video Interview - Using Coloured Gels with Jake Hicks

After being a massive fan of This Week in Photo for many years I was incredibly honoured to be asked by the legend himself, Fredrick Van Johnson, for a video interview.

If you're not aware, Fredrick is the mastermind at the helm of This Week in Photo, one of the top photography podcasts out there and his weekly show has been in my podcast queue for many, many years.
In the video we discuss my early beginnings, my path to coloured gels and how I organise my model shoots as well as some all important lighting tips with gels.


I hope you guys like it and like I said I'm a huge fan of TWiP and have been an avid listener for many years so to be interviewed by Fredrick was a real treat for me indeed

In this episode of TWiP Talks I speak with Jake Hicks, not only does Jake have amazing style and talent, but he's a master of the art of using colored gels. In this interview you'll be "exposed" to how Jake manipulates his background, shadows and highlights in both exposure and color.
Tuesday 08.16.16
Posted by Jake Hicks
 

Set a Light 3D Software Review and Showcase

Something a little different this week in the form of a video. I've been asked multiple times about the lighting diagram software I use to create my Tech Tues articles so I thought I'd do a little review on the software and it's features.
Set.a.light 3D is the extremely powerful lighting setup software that allows users to build complex 3D lighting diagrams in mere minutes. I was going to write a review but realised there was way to much to cover so I decided to go through and actually record myself as I build a gelled lighting setup that I use to showcase some of its powerful features.
It does come in at 25 minutes which I know is beyond the scope of most internet users but grab a coffee and see what this awesome software has to offer :)
Thanks for watching!

If you're looking to purchase a copy of this software, then head on over to their home on the web https://www.elixxier.com/en/products/... and if you decide to purchase then make sure to use the promo code at checkout for a 15% saving JAKE-ROCKS2016.

Disclaimer - I don't get any kick-backs on that purchase code.  I reached out to the developers and said I was going to write this review, they'd seen my work, they love what I do and so offered up this code to you guys. The review is completely unbiased in terms of any monetary compensation.

Tuesday 08.02.16
Posted by Jake Hicks
Comments: 2
 

Models Beware!

Michael Hunter and his delightful request to see a new model in her underwear before he will photograph her.

Michael Hunter and his delightful request to see a new model in her underwear before he will photograph her.

For the second time in as many months somebody has tried to use my images to deceive models about their skill level in photography.

Because of this deception it's certainly no giant leap to accuse these individuals of ill intent, especially if they are actively seeking out images of models in their underwear in their first messages of contact.

At the weekend I received a concerning email from somebody who follows my work. I have said that I will keep their name anonymous and they have kindly let me share the situation but I will change the models name in question to Sue for the purpose of this article.

 
The above images were sent to Sue as images of models 'we've worked with'. Although the wording is clever in that it doesn't specifically state these images were directly taken by them Sue spotted the shots were not theirs and it was enough of a war…

The above images were sent to Sue as images of models 'we've worked with'. Although the wording is clever in that it doesn't specifically state these images were directly taken by them Sue spotted the shots were not theirs and it was enough of a warning sign to prompt her to thankfully investigate further.

It started when the model Sue was contacted by a lady on Facebook called Jess Nicholl who photographs under the name of Jess Nicholl & Michael Hunter Photography. The conversation began as it usually does, but then Sue asked to see some pictures that Jess & Michael had previously taken. Jess sent some shots and that was when Sue first realised something was up. They'd sent pictures taken by me and Sue recognised them as such straight away.

Jess then requested that the shoot details be finalised via email with her 'partner' Michael (I don't know if this was a security risk on Facebook for them or wether moving to email was just a way to introduce 'Michael').  Once Sue had finalised a date via email, Michael then started to request images of Sue. Then 11 minutes later Michael requested images of Sue in her underwear following it up with a statement that really made my skin crawl 'or should I find another model?' A nasty little threat that insinuates that failing to send underwear pics could result in Sue loosing the shoot.

Below is the screen captures I have from the conversation between Sue, Jess and Michael.

IMG_0017.jpg
Untitled-1.jpg
Untitled-2.jpg
IMG_0021.jpg
IMG_0020.jpg
IMG_0017.jpg Untitled-1.jpg Untitled-2.jpg IMG_0021.jpg IMG_0020.jpg

Now there is couple of ways to look at this, firstly I'm sure there are photographers who would argue that if you were shooting a lingerie shoot that you'd require said underwear pics up front. Personally I don't think that Michael went about this in anywhere near the right way and adding 'or should I find another model?' is just a perfect example of how not to be professional.

Secondly I'm sure there are experienced models out there who are screaming 'RED LIGHT' at the absolute deluge of evidence to suggest that Jess & Michael are the very personification of dodgy.

Either way Sue, spotted the warning signs with the suspect images and Googled both of their names and found no reference anywhere to them shooting anything anywhere. As a result she confronted Michael about the stolen images and called him out as a fraud.

Neither Jess or Michael have yet to respond to Sue and she has either been blocked or all profiles and accounts have been deleted and taken down.

Whether you felt Jess (if Jess ever really existed) and Michael were real and just incredibly unprofessional and stupid it would seem that their response to being confronted could be perceived as proof enough of their guilt and ill intent.

We live in a digital age of photography and connectivity, rightly or wrongly it is now the norm for models to attend a photographers home for a photoshoot, I know I for one have photographed a lot of models in my home. But to others outside of our industry this seems like complete madness. A young lady attending a stange mans house alone?! Surely that is a recipe for disaster?! Well the good news is that 99% of the time it isn't a disaster at all and that's firstly because most people are inherently good and secondly with a little knowledge and experience any model can spot a fraud a mile away.

Not to long ago I was again informed of another &nbsp;little parasite on Model Mayhem operating under the name JHicksStudios and using my images to set up photo shoots with new models. This sort of thing sickens and terrifies me, not only is he open…

Not to long ago I was again informed of another  little parasite on Model Mayhem operating under the name JHicksStudios and using my images to set up photo shoots with new models. This sort of thing sickens and terrifies me, not only is he openly lying but the lie is so blatant that I shudder to think what his real intentions are for setting up photoshoots with young girls are. Model Mayhem doesn't have a reference system in place so if you're starting out be wary of the photographers you're intending to shoot with and try and contact the models they've worked with. The trick here is that a model maybe contacted that has worked with me and be told 'hey Im looking to work with JHcksStudios I see you've worked with him in the past whats he like?'. The model being contacted may well assume that they're referring to me with a name like that so its best to include as much info and links where possible too.

All models start somewhere and remember that at some point even the most experienced models had zero photos in their portfolio to begin with. So what are some of the things to look out for when starting out in modelling to give you the confidence to get some great first shoots under your belt?

 
I had to dig around in the archives to find this shot of Natasha I took nearly 4 years ago on our first shoot together. I'll be honest, I was surprised that even back then I was messing around with gels and long exposures too!

I had to dig around in the archives to find this shot of Natasha I took nearly 4 years ago on our first shoot together. I'll be honest, I was surprised that even back then I was messing around with gels and long exposures too!

First and foremost you can simply ask other models for this advice and that's exactly what I did. When I was building a portfolio I was curious as to why new models would turn up to my home when I didn't have many shots to show them at the start. I asked the first model I ever worked with on Purple Port why she decided to come along. Her name is Natasha Kalashnikova and she already had a ton of shoots in the bag before we worked together and had a wealth of experience in booking shoots at this point so she knew what to look for.

I'll just preface this and say that Natasha was an outstanding model, I would recommend her to anyone as a total professional and I certainly appreciated her being so candid in her responses to my questions about her new-photographer vetting process. It was 3 or 4 years ago now but Natasha said that firstly she Googled my name and looked for my work elsewhere online. She could see that I had done a few shoots previously on Model Mayhem so it seemed like I was legit so far.

Secondly she asked questions in her original messages that were triggers for her to see if I knew what I was talking about. Natasha said that she's been put off shoots in the past because the new 'photographer' just wants you to come over and 'get some shots of you in your underwear'. She went on to say that if a photographer really is looking to create a photograph for artistic reasons then they will have an idea of styling to work with their lighting ideas and will even send example pictures of what they're after. Natasha said that based on my responses and ideas and the fact that I had pictures elsewhere online she felt confident enough to turn up to the shoot.

Lastly Natasha mentioned that when she arrived she stayed in her car and messaged me to say she was outside. She waited in her car until I came to answer the door just so she could get a final analysis of who I was in person. It might seem a little over the top but I thought it was a pretty smart idea. We all have inbuilt warning lights that go off when we see somebody face-to-face for the first time and if something doesn't seem quite right we instantly know it. Natasha gave herself that last option to go with her gut instinct and if it didn't seem right she could quite easily have driven off.

 
Another shot from the archives of the stunning Natasha Kalashnikova.

Another shot from the archives of the stunning Natasha Kalashnikova.

One alternative or additional option I hear a lot is to bring a chaperone to your photoshoot. This is a personal choice but in my opinion, if you don't trust them enough to go alone, bringing one other person with you doesn't help you trust that photographer any more. In fact it means you haven't done enough research in my opinion to decide one way or another. Also in my experience having a chaperone in tow can make for an awkward shoot, yes I know there are lots of cases where it has been fine but the reality is, if you don't trust the photographer enough to go alone, you shouldn't go at all.

On a more personal note my partner also models and I see her getting those warning lights when something doesn't quite seem right with a photographer that she's about to work with. If that's the case she never hesitates to get in touch with a model who has worked with that photographer before and get an honest no bull-shit response as to what that photographer was like. The reason she takes this extra level of precaution is because we all know how saccharin social media and online communities can be and even though there may be a ton of models who are praising the photographer on a public forum there has been occasions where the private story has been a different matter altogether.

Again, go with your gut instinct and don't hesitate to get in touch with other models who've worked with your potential client if you feel something is not quite right. Please models, feel free to correct me if I'm wrong but I cannot think that any of you would mind responding to a fellow models concerns. Every time my partner has reached out to another model the responses have been very quick and extremely honest and informative. These private reviews from other models are invaluable so always use them if you think you'd like that extra piece of mind. No model would ever begrudge you asking them for one.

Just briefly whilst we're on the subject of reviews and testimonials I would also recommend starting modelling on a platform that has a community based around other models and photographers. I know there are plenty of non agency signed models out there who make a very successful living from Facebook and Instagram photoshoot bookings but if you're starting out and you don't yet have the experience then beginning on a modelling community site is probably a safer place to start. For example Purple Port here in the UK has a very active community that tend to look out for one another. If a photographer screws up on there then everybody knows about it very quickly indeed. Purple Port is by no means perfect but it does at least allow for positive feedback to be left by people who have worked with the photographer in the past. No, you can't leave negative feedback (a site initiative to avoid any knee-jerk witch-hunting) but the absence of positive feedback is often proof enough of their experience level. Other modelling websites like Model Mayhem have colossal communities but don't offer the facility to leave any feedback about specific shoots. If you're planning shoots on there then directly message the photographers previous models to find out more.

After my shoot with Natasha she kindly left me my very first reference on Purple Port. Thankfully she was happy with the way our shoot went and I'm sure this first reference helped give other models a clearer idea of bye and my work before they deci…

After my shoot with Natasha she kindly left me my very first reference on Purple Port. Thankfully she was happy with the way our shoot went and I'm sure this first reference helped give other models a clearer idea of bye and my work before they decided to work with me.

So to all the photographers out there, models talk to one another a huge amount about every aspect of the shoot, you have to be on your best behaviour at all times. I recently heard one private review from a model about a tog that went something like this 'he made awful tea but his images were awesome' (glad that wasn't me). One stupid mistake and models far and wide will hear about it long before you've even finished packing up. You have been warned so stick to what was arranged in the pre-shoot messages, don't ask your model to do anything that hasn't been discussed and make great tea and you'll be absolutely fine.

I understand that most of the people who actually read my blog are likely to be photographers but if this warning reaches and helps at least one model then it will have been time well spent on my part. 

So to re-cap some of the points that new models should bear in mind when organising their first shoots.
1. Simply Google the photographers name. If nothing comes up then this should be your first warning sign.
2. Ask your photographer questions, 'what type of lighting or setups will we be shooting?', 'what kind of styling are you looking for?' and 'what sort of makeup do you think will work best?'. If all you're getting back is 'whatever you think looks best just bring lots of lingerie' then this photographer might require a bit more research.
3. Ask the photographer to send you example pictures of the ideas they're looking to achieve. Remember when somebody says 'I want to shoot boudoir' images this could mean anything from suggestive well lit black and white shots or it could mean Playboy centrefold imagery. Make sure you're both aware of what to expect from the shoot.
4. If you decide to arrange a shoot then you could also get them to meet you at a public place like collecting you from the train station or stay in your car until you're happy they seem to be who they say they are. This is not ideal but it is something to consider if you have the option.
5. If you don't trust the photographer enough to go alone but instead would rather attend with a chaperone I'd think about why you're not trusting them in the first place. If you don't trust the photographer enough to go alone, you shouldn't go at all.
6. Reach out to other models who have worked with the photographer in the past. Message them directly, mention that you're starting and get them to give you an honest and private opinion.
7. Use a model community site like Purple Port. They have a community of models that have worked with more well known photographers and you're sure to find plenty of good ones that have a great track record.

The main reason I put this list together is because I know when you're starting out as a model it's tricky to get experienced photographers to work with you. As a result you end up working with less experienced photographers who don't always have a strong reputation in the industry or a lot of testimonials.  Be smart like our model Sue and spot the frauds long before you organise anything.

Remember most of the photographers out there are just trying to get experience with photoshoots just like you are, they have no ill intent and most models go through a career without incident at all. These pointers are there to give you the best possible chance of a successful shoot and highlight some things to look out for when starting out.

If theres any more experienced models out there then please feel free to add any other pointers that you feel are relevant to new models. I'm not a model so I apologise if I've missed anything blazingly obvious. Also feel free to recommend any other modelling communities that you feel might be relevant to new models too and please feel free to share this with any model friends starting out and let me know your thoughts in the comments below. Many thanks indeed for reading.

Tuesday 07.26.16
Posted by Jake Hicks
Comments: 17
 

KEEPING Perfectly Lit Gelled Backgrounds

Technique Tuesday KEEPING Perfectly Lit Gelled Backgrounds.jpg
Sometimes you can have a fairly complicated lighting setup on your model but stopping all those lights from ruining your gelled background can be a real pain.

Sometimes you can have a fairly complicated lighting setup on your model but stopping all those lights from ruining your gelled background can be a real pain.

In the previous article we spoke about the best ways to perfectly light your background with coloured gels. If you missed it then here's the link 'Creating the Perfect Gelled Background '. In that post I went through the best things to keep in mind if strong and vibrant colours across your backdrop are your objective. It turns out, that gelling your background is actually relatively simple, it's keeping those strong vibrant colours that's actually the tricky part.

What usually happens when we begin a portrait shoot is we setup our key-light to light our subject and once we're happy with that, we then move on to place another flash to light and gel the background. This is your first mistake!

What happens next is we set up the gelled background light, take a picture and see that the background gel colour behind the model looks pretty washed out and insipid. There's no rich colour saturation back there and it's not giving you the colour that is promised on the Jake Hicks Photography Gel Packs at all!

The model looks great though, she's evenly exposed, but the background has no saturation whatsoever. So what do you do? Well it's clearly not the key light, as the model is looking great so we go to the gelled background light and faff about with that by turning the power up and down and start moving it closer and further away….. but to no avail. Obviously the gels must be broken!

Thankfully no, the gels aren't broken and there's a relatively easy solution which simply requires you to turn off your key light that's lighting the model and setup up your gelled background light first. As I described in the previous article, this is the easy bit, getting a great looking gelled background is pretty straight forward, but once you're happy with your gelled background DO NOT TOUCH THIS LIGHT AGAIN.

Yup, getting the gelled background is easy, it's keeping that rich colour that's the real problem. The reason this is strange is because we always set up our lighting with a key-light first and then add and adjust the other lights around it. Key-light, fill-light, then hair-lights and so on, but we need to rethink this process with a background light and treat it like a completely separate setup. Think about it like two different lighting setups in one shot rather than one big one, this way you can clearly separate the two. The background gel shouldn't affect the model and the model lights shouldn't affect the gelled background.

Simple Right?

Ok, so let's assume we've followed all the steps to getting the perfect gelled background. We're in love with the colour we've achieved behind the model, it's looking great with all its saturation and strong colour and we know that once we're happy with it not to touch that light again. What are the things we need to know when setting up our key light on our model to avoid ruining that beautiful coloured background?

5 Reasons your Gelled Backgrounds are Getting Ruined:

Modifiers - Soft light modifiers and hard light modifiers on key lights 

Directionality of Key Light - The angle of key light in relation to the model

Distance of Key light to Model - The inverse square law effect

Light Control - Flagging and controlling light spill

Distance of Model to Backdrop - Where in relation to your backdrop to place the model

Don’t panic! I get it, that sounds like a lot of nerd-talk right there, but trust me, if my tiny brain can make this work, anyones can.

The trick to making this easy, is to simply tackle it one piece at a time…

 
On the left you have the umbrellas and softboxes, these are soft light modifiers and on the right you have grids and snoots, these are hard light modifiers.

On the left you have the umbrellas and softboxes, these are soft light modifiers and on the right you have grids and snoots, these are hard light modifiers.

1. Modifiers

The modifiers I'm referring to are the modifiers that are attached to your key-light. I'll keep it simple by breaking them into two groups; hard and soft light modifiers. The soft ones are modifiers like softboxes and umbrellas as these spread the light over a far wider area. The hard-light modifiers are the ones that provide a very directional light like the grids and snoots.

If you light your model with a soft light modifier, you need to be aware that your light will quickly and easily spill onto your gelled backdrop unless you take great care to control it properly. Using hard light modifiers is a lot easier to control, but will obviously give you a very different look to the key-light and how it affects your models appearance.

Choosing your key light modifier shouldn't be dictated by whether or not you're using a gelled background, but you should be aware of what effect each one has so you can plan your setup accordingly. If you're using a hard-light then you can afford to be a little more relaxed with its placement, whereas if you want to use soft-lights like softboxes, you need to pay careful attention to the other factors I'll be going over to ensure your background doesn't get washed out.

Take a look at the diagram below to see how different a gelled background looks when using a soft-light on the model compared to when using a hard-light.

 
On the left is how your gelled background looks before you introduce another light to the set. In the middle we have a softbox as our key light and on the right we have a gridded dish as our key light. It's very clear to see that the key light modifier plays a big role in how our gelled background is affected.

On the left is how your gelled background looks before you introduce another light to the set. In the middle we have a softbox as our key light and on the right we have a gridded dish as our key light. It's very clear to see that the key light modifier plays a big role in how our gelled background is affected.


2. Directionality of Key Light

Even though my model is only a few feet from my gelled background, none of the saturation has been lost because I've placed the models key light to one side of her.

Even though my model is only a few feet from my gelled background, none of the saturation has been lost because I've placed the models key light to one side of her.

The directionality of your key-light refers to which angle you place it in relation to your gelled background. A lot of us like to use varying lighting styles on our subjects like narrow lighting, butterfly lighting, broad lighting, split etc, etc. Some of these lighting styles will lend themselves to gelled backgrounds more than others though.

For example, butterfly lighting is a beautifying lighting technique that requires the light to be directly in front of the model, thereby accentuating symmetry within the look. Conversely, narrow lighting highlights shape and form by placing the light to the side and uses directionality of light to cast shadows on the model in relation to the camera.

Butterfly lighting usually requires you to point the light straight at the model which unfortunately means you often wash out the gelled lighting behind her. Narrow lighting on the other hand requires you to place your light to one side in relation to the camera and model. This usually means that it isn't pointing towards the background. As a result, it doesn't wash out the coloured gel nearly as much.

I appreciate all that came with the expectation you had intimate knowledge about the lighting styles I was referencing, so take a look at the following diagrams to see exactly what I mean.


Never let the gelled background dictate your models key-light. Just because shooting with direct light on the model will make it a little trickier, it doesn't mean you can't shoot popular styles like butterfly lighting, it just means you may have to employ other techniques and workarounds to achieve the desired look.

Butterfly lighting requires our models key-light to be directly in front of her. If we have a gelled light behind her lighting the background, it can mean the background gels are washed out.

Butterfly lighting requires our models key-light to be directly in front of her. If we have a gelled light behind her lighting the background, it can mean the background gels are washed out.

Narrow lighting means our key-light is placed to the side of our model and creates more shape and form by casting shadows across our model. The benefit of this lighting is that our key-light isn't pointed towards the background and thereby isn't affecting our gelled light.

Narrow lighting means our key-light is placed to the side of our model and creates more shape and form by casting shadows across our model. The benefit of this lighting is that our key-light isn't pointed towards the background and thereby isn't affecting our gelled light.

In the image above, we've placed our key-light straight on to the model to get the butterfly lighting effect. Unfortunately, as a result we've lost all the saturation on our gel behind her.

In this setup we've opted for a more directional light on our model and we've placed our key-light to the side and not pointed it straight towards the background. As a result, all of the light is on the model and none is on the background.


3. Distance of Key Light to Model

Utilising this technique of bringing your key light quite close the model is often easiest to achieve on beauty shots. The beauty dish key light I'm using here is probably no more than 3 feet from the model and she in turn is no more than 5 feet fro…

Utilising this technique of bringing your key light quite close the model is often easiest to achieve on beauty shots. The beauty dish key light I'm using here is probably no more than 3 feet from the model and she in turn is no more than 5 feet from the gelled background. Use this technique correctly and you can shoot with gels in very small spaces.

Utilise this technique properly and it may well be the most powerful tool in your lighting arsenal.

The distance of your key-light to your model is crucial to getting uncontaminated gelled backgrounds and it's a common problem that is often overlooked. This is tricky to explain with mere words, but essentially the closer the key light to the model, the less light that actually falls onto the background. The principles of this are based around the inverse square law theory which is a whole other article, but essentially; as you bring your key light closer to the model, the more you have to turn your key light down to compensate for the increase in brightness.

The Inverse Square Law in relation to light states that when you double the distance of the light to the subject, you quarter the amount of light that falls upon them.

For example, if your key light was 2 metres away from your model and you took a correctly exposed picture at f8 (we're assuming a constant shutter speed of 1/160th and an ISO 100 for a normal studio setup) and we moved our key-light closer so that it was now 1 metre away from our model (half the distance) and took a shot it would now be 2 stops overexposed (one stop equals double the light). We don't want to change the settings on the camera because remember our gelled background light is set to those settings, so we turn the power of our key-light strobe down 2 stops (quarter the light to match half the distance moved). If we take a picture now, the model is correctly exposed again.

Like I said this is a real pain to explain coherently with text alone, so let's take look at a diagram below to elaborate on what I mean. Pay close attention to the brightness of the background her. See how different it looks when the light is a lot further away compared to when it’s close?

In this setup our key light is relatively close to our subject but she's evenly exposed.

In this setup we have our key light a lot further away so we have to turn the power of the light up to compensate.

So we can see that by moving the light away and upping the power of that one light, we can still correctly expose the model without having to change any settings on our camera. The same applies if we want to move the light closer, we just have to turn the power of the light down to compensate. We don't have to adjust the camera.

Now lets see what happens when we introduce our gelled background light that we already had perfectly set up before. How does this technique affect the colours of that gel we so painstakingly got right previously.

In this shot our key-light is close to the model and closer to the background, but the gelled background colour has maintained its tone because we've turned down the power of the key light.

In this setup we've moved our key-light a lot further away from the background, but also a lot further away from our model. To compensate for that extra distance we've had to increase the power of the light but in doing so our background gel now looks completely washed out.

As I mentioned a moment ago, if you get your head around this concept, your mastery of lighting will go through the roof and it’s an incredibly powerful tool if you can utilise it to your advantage. I know it's tricky and a little counterintuitive though. When I was teaching this to new photographers in the studio where I worked, this was always the hardest part for them to get their heads around. I think the reason for this is because when you move your light further away from the background you're actually adding more light to the background, whereas normally you'd think that by moving it further away you'd get less light back there. Granted you've added more power the to the light, but it still seems odd when you're starting out that this happens.

There are of course downsides to this technique and that is that by moving your key-light closer to the model you change the effect the light has on the model as well. This is something that you'll have to play with, but if you're happy with how your modifier looks when it's quite close to the model then this may be the technique you need.


4. Light Control

The term light control has many connotations, but in this context I'm referring to controlling the light after it has left the modifier. If you have complete control of your light after it has left the light source, then that means no light is spilling onto your gelled backdrop. This is a little easier said than done, but there are a few little studio tricks that you can employ to ensure your light is only going where you want it to and this technique is often referred to as ‘flagging’ the light. Still-life photographers are absolute masters of this as they’re often working with very small objects like food and bottles, but their light sources are still the same size as ours when we light larger objects like people. As a result, they need to be extra careful of where their light is going and spend a long time before shooting begins ensuring no unwanted light spills anywhere where it shouldn't.

I've used Cinefoil here to mould onto my barn door to create an extra large flag to control the spill of light.

I've used Cinefoil here to mould onto my barn door to create an extra large flag to control the spill of light.

One tool we can use to control the light is Cinefoil or Black Wrap. This is essentially matte black, heat resistant and extra thick tinfoil that we mould onto our lights to control any spill.

It's relatively inexpensive and although more popular in the film and movie industry it's invaluable to have a few sheets in your bag incase you need it. Simply mould it into any shape you want and when you're done, flatten it back back out and return it to your bag for next time. I'm sure the benefits of this speak for themselves but if you're using a hard light source like a snoot or grid a few well placed sheets of this you can make sure that no light from your key light spills onto your gelled background, even if your quite close to it.


I use black velvet sheets as flags instead of the large poly boards when I'm on location. They are portable and cheap, but just make sure you get the cotton based version as the synthetic one acts more like a reflector than a flag.

There are going to be occasions of course when you want to use larger lighting modifiers like softboxes. Flagging unwanted light from a softbox would require either a huge amount of Cinefoil or a larger and easier to manage alternative. One option is black poly-boards, these are present in most studios and they are usually about 6ft high by 4ft wide and painted matte black on at least one side. Simply maneuverer these into place next to your lights and then angle them so they funnel the light away from the background, but still onto your model. I've used these a lot, but I also use a cheap and portable alternative when I'm on location too and that’s simply a couple of large sheets of black velvet. I hang them from spare light stands and they give me complete control of the light after it has left the modifier. It might seem silly at first, but black velvet is great at soaking up unwanted light thanks to its deep texture. Be sure to get the cotton based version though as the synthetic one is shiny and renders it useless as a light flag.


5. Distance of Model to Backdrop

You're nearly there and I'm sure you'll be pleased to know that I've saved the easiest till last. This last solution refers to how far away your model is to the background. Now I know this seems obvious, but you'd be surprised as to how many people place their model right next to their gelled backdrop even though they have the whole studio to play with. Essentially this technique is your 'do whatever you want' card to play. Set up your background gel, then place your model far away from it and you can set up whatever lighting you want with her.

In fact, you can even use the practically forbidden softbox with butterfly lighting from 2 metres away technique if you really want!

The trick to this is to treat this as two completely different lighting setups, each of them being so far apart that they have no influence whatsoever on one another regardless of what you do in them. Obviously there are limitations and you still need to tie the model and background together in one frame with a slightly longer lens, but it's certainly possible in most studios. Up until now I've been dealing with issues that most of us have encountered, but we've only really encountered them because we're dealing with a smaller space like a home studio. Eliminate that space issue and you're free to do as you please.

Even seemingly heretical gelled lighting setups like softbox-lit butterfly lighting from 2 metres away are possible if you separate your model and background. Treat your background and model like two completely different setups and you'll never have to worry about washing out your beautifully lit gelled backgrounds ever again…..as long as you have the space for it that is.

Even seemingly heretical gelled lighting setups like softbox-lit butterfly lighting from 2 metres away are possible if you separate your model and background. Treat your background and model like two completely different setups and you'll never have to worry about washing out your beautifully lit gelled backgrounds ever again…..as long as you have the space for it that is.

All joking aside, the same principle applies even in smaller spaces too. I even tried this in my front room to see if I could force the effect in a small space as well. The result is that yes, even in small spaces by simply moving your model as little as 3 feet further away from the background like I did in this test, can have a dramatic effect on how washed out your background gels look.

When you're &nbsp;shooting in small spaces you need to be aware of how close your key-light is to the background. Even when I'm using a gridded beauty dish really close to the model, I'm still getting a lot of spill onto my gelled backdrop which is washing out the colour.

When you're  shooting in small spaces you need to be aware of how close your key-light is to the background. Even when I'm using a gridded beauty dish really close to the model, I'm still getting a lot of spill onto my gelled backdrop which is washing out the colour.

By simply moving the model as little as two or three feet further away from the background can have a dramatic difference. Now that you're a little bit further away, your gelled background retains its saturation.

By simply moving the model as little as two or three feet further away from the background can have a dramatic difference. Now that you're a little bit further away, your gelled background retains its saturation.


To Conclude…

Well done, you made it to the end and my apologies for the long article on this but I do honestly believe that all the points I've raised here are valid in the pursuit of maintaining clean and saturated gelled backgrounds.

Points to remember;

1. Set up your background light first, before you set up your model lights.

2. Once you've set up that gelled background light correctly DO NOT TOUCH IT AGAIN.

3. Soft light modifiers on your key-light are harder to control and more likely to ruin your gelled background versus hard-light modifiers .

4. Certain lighting techniques like butterfly lighting are harder to implement in small spaces when using a gelled background. Instead, opt for more of a side-lit look like narrow lighting to make it easier to control the spill of light.

5. By bringing your models key-light closer to her and turning the power down, you can actually eliminate any spill of light onto the background.

6. Use Cinefoil, black velvet sheets or poly boards to control and flag the light. Use these tools to ensure no unwanted light falls onto your gelled backdrop.

7. If you have the space for it, don't be afraid to move your model and key-light well away from the gelled background.

So did I miss anything? Is there a crucial element that I've overlooked? Feel free to sound off in the comments below and as always please feel free to ask any questions and I will certainly do my best to answer them all :)


Further reading on gels:

How to perfectly light your gelled backgrounds 'Creating the Perfect Gelled Background'

How many colours can you get from just one gel? 'Colour Gels Exposed'

Some post-pro tips on getting the most out of your coloured gel shots 'Maximising the Colour in your Coloured Gel Shots'


:WARNING: Flagrant Self Promotion Ahead


Want to learn more? Believe it or not the above article just scratches the surface of what there is to know about gelled lighting. If you'd like to know more on how to create gorgeous gelled lighting shots then why not check out one of my Gelled Lighting Workshops where we cover everything from coloured flare in portraits to triadic colour washes in fashion. Click the link to find out more. See you there :)


Need some coloured gels? Why not check out my hand picked gel packs of curated colours that offer you the best saturation and consistent edge to edge tone. I've worked with LEE Filters gels for many years and their quality product offers some of the thickest and longest lasting gels I've used. Follow the link to see what we've put together Jake Hicks Photography - Gel Packs

Tuesday 06.28.16
Posted by Jake Hicks
Comments: 2
 
Newer / Older