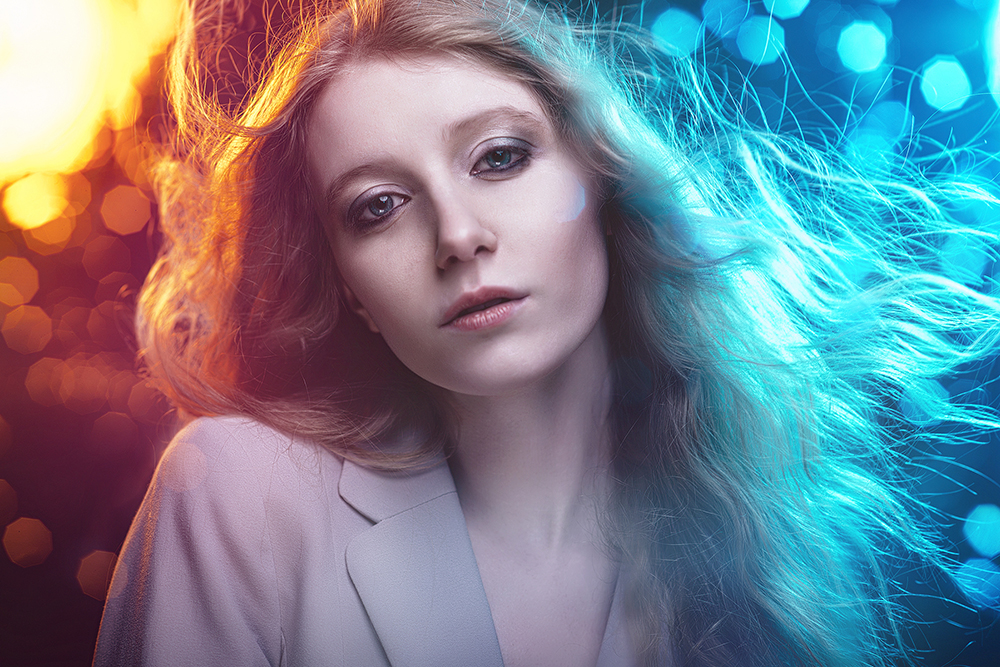
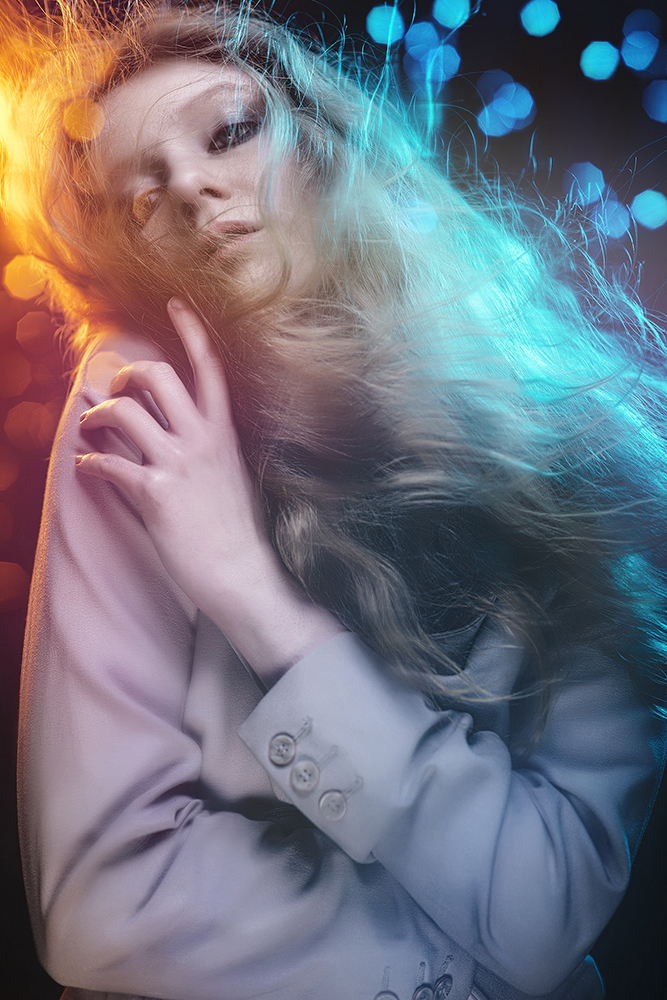
This foreground bokeh look is actually a setup I played around with a few times many years ago now. I was first experimenting with flare and bokeh but I had completely forgotten all about it until I recently came across some of the shots from those shoots and I thought it would be a good, fun setup to share as you can get some interesting results whilst playing around the much loved bokeh.

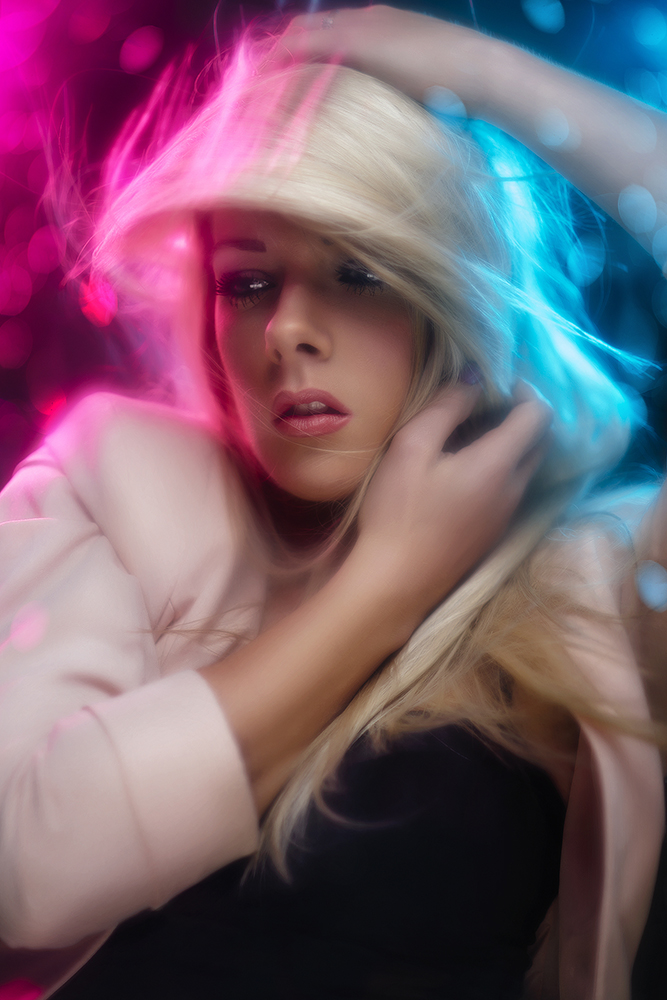
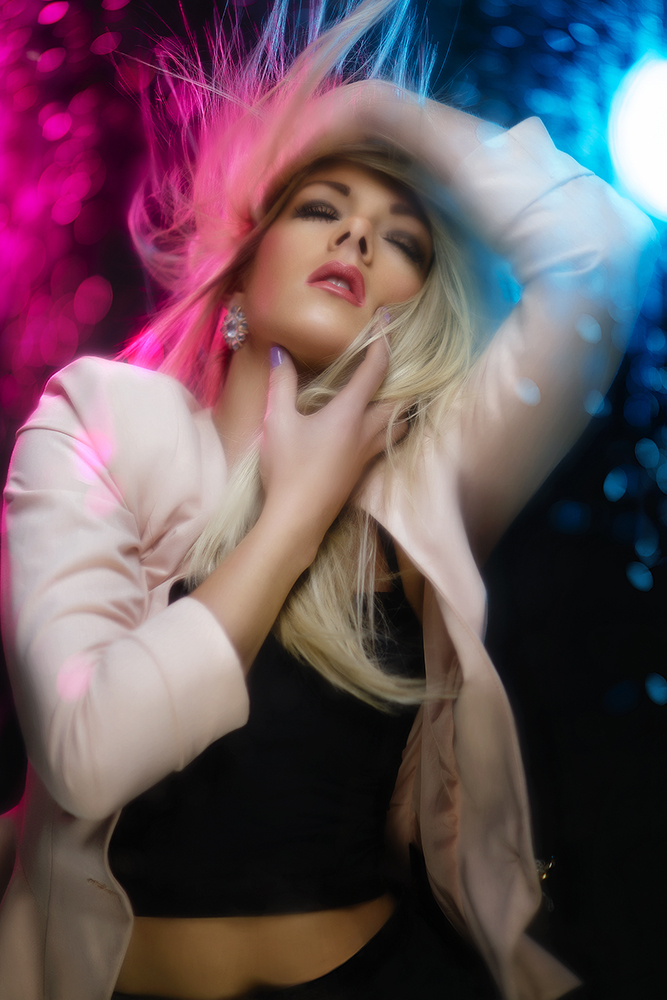
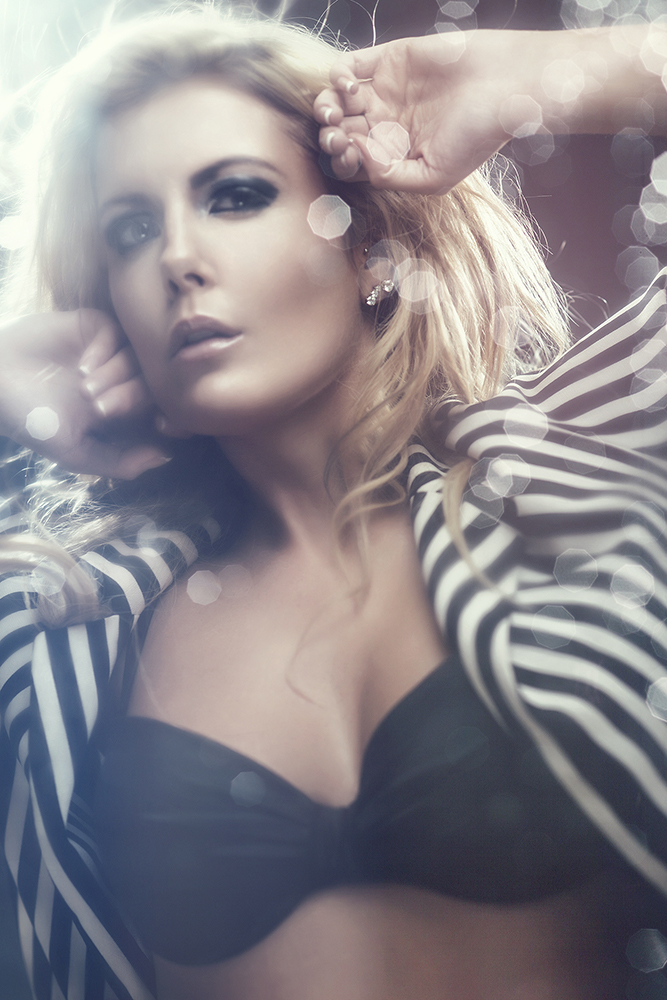
Bokeh is those little sparkly points of light you see here in the image above. They appear like this when your camera captures them when they are extremely out of focus either in the background or like here, in the foreground.
Bokeh is something that us as photographers love but I'm not entirely sure why. We may love it so much because we capture something that isn't actually there, we can't see it with our eyes and so I think it holds a measure of excitement in us as we eagerly check the back of the camera awaiting the image to appear to show us what our eyes cannot. Put simply bokeh are light artefacts that appear in our images when we capture spots of extremely out of focus light.
In my youth I worked in a photo lab where we developed film and I remember customers opening their prints for the first time and exclaiming that they'd captured these "weird mystical orbs" in their shots. To a non-photographer, explaining bokeh is far harder than you might think.
So how can we harness these "mystical orbs" into our studio shots to create something a bit more engaging than yet another sunlight-through-leaves bokeh effect?
You will need
- 1 Sheet of glass/good quality perspex.
- 2 - 4 Lights (the principles of this setup can be achieved with two lights).
- 1 beauty dish/small soft box key light
- 2 directional lighting modifiers - snoot, grid or barn doors etc
- 1 small softbox as a fill light modifier but a reflector can be a substitute here.
- Gels - Optional…. but not really ;)
- Glycerine and water mixture.
- Hand sprayer thingy.
- 1 dark background - This can be anything from a black sheet/velvet to a black colourama.
- 1 shallow aperture lens - Ideally around f2.8 or less.
- 1 patient model/subject.

Adding coloured gels to your back lights will render the bokeh in the same colours which can look really cool.
The basic principles of this setup are that you create water droplets on the glass that will catch the light in the foreground of your image. You simply place a sheet of glass with water droplets on it in between yourself and the model, shine lights onto the droplets and the model, set your camera to a very shallow depth of field and then take some shots. That's the super simple explanation but lets look at each stage in a little more detail.

For my piece of glass I simply removed the glass that was in a large picture frame. Be careful though as this type of glass is often extremely sharp and fragile. If you can find some good quality perspex then that is definitely safer and a lot easier to work with.
First off you'll need a piece of glass. I actually just had a picture frame that I simply removed the glass from and used that. I will just say that this process is likely to render the glass seemingly un-cleanable forever, at least that's what's happened to mine. The sheet I had was about 23"/60cmm square so it doesn't need to be massive and you could probably get away with smaller if you just wanted to test it first. I haven't tried this with perspex but if you have access to some then I think this would be a good substitute as handling large sheets of fragile glass around models terrified me. You have been warned and for safety reasons I recommend the clearest perspex you can find.

For my beading mixture I used three parts water one part glycerine but I would advise doing a couple of tests before the model arrives. Start off with half water and half glycerine first then add more water if needed.
Next you'll need the "mystical orb" creating spray. I simply bought a garden/hair sprayer for 99p at the DIY store and then mixed my formula to put inside it. The formula is pretty straight forward, it's glycerine and water, nothing too crazy. Glycerine is one of those products that you've never heard of until you have and then you see it literally everywhere. Glycerine is used to preserve foods, in cosmetics, inks, glues, antifreeze and even medicine. I think it's also a product that helps with severe eczema so I picked up a big bottle of it at a local pharmacy for about £1. The reason you need this is to thicken your water which glycerin does really well as it's very thick and completely colourless. You want to thicken the water so that it doesn't immediately run off the glass you're about to spray it onto. With the addition of the glycerin in your sprayer you can spray some on the glass and it should bead up to create those little droplets you're after. Food photographers use this trick all the time to get those fresh tomatoes covered-in-water-droplets type shots.

You may be wondering why the points of light/bokeh aren't appearing on/in front of the models face. It's because careful placement of the backlights means that the model is actually casting a shadow that you can't see on the glass, this in-turn eliminates any droplets from catching the light which of course means no bokeh in that area.
No you have your piece of glass/perspex and your droplet spray you're ready to start setting up the shot. This next step was by far the trickiest as you now have to support your sheet of glass vertically between you and the model. Personally I used a healthy mix of will and luck to balance mine on a couple of brackets and lighting stands - I DO NOT RECOMMEND THIS METHOD - You have a sheet of glass so please, please, please be very careful with whatever method you use to support it but raising it up on a table and then clamping it is a way to go for example.

One of the main issues I had with this set up was focusing. The auto focus is crying out to focus on those points of light created by the droplets in the foreground. You just need to be patient or, like I did in the end, switch to manual focus to secure a shot.
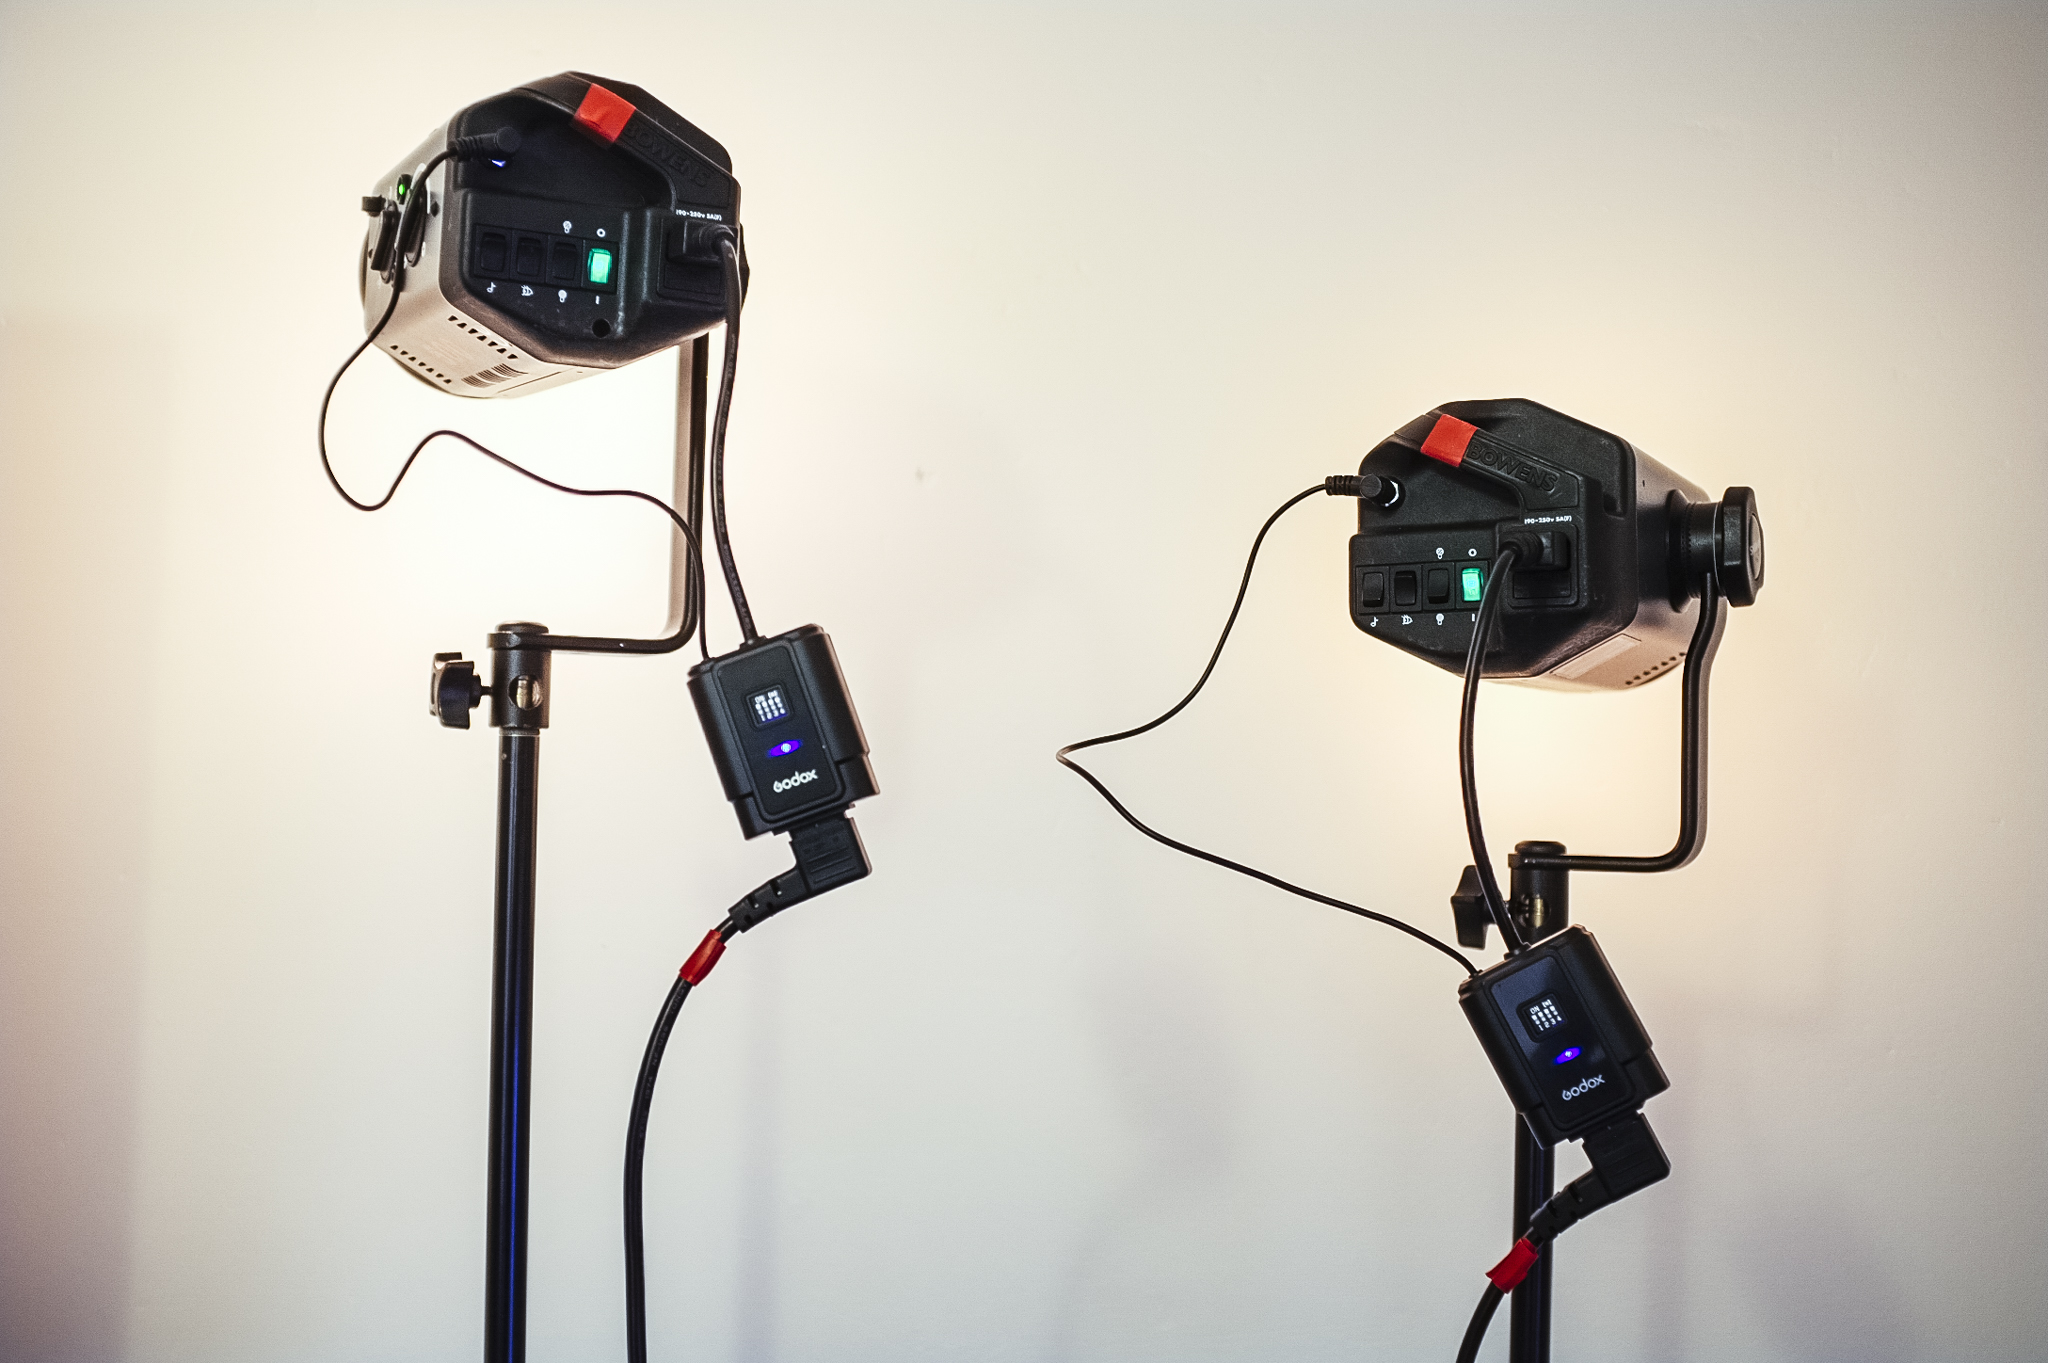
Once your glass is in place you'll want to setup your lights - wait until the last possible moment to spray the glass as it will run off even with the glycerine. I took my shots with four lights but the principles of this setup an be achieved with two lights if that's all you have. I'll explain my four light setup but also show you what to do if you only have two or three.
First off set up your two back lights behind the model and above head height and angled past the model towards where your camera will be. You could choose to add gels to those lights if you want to (of course you want to ;) ). These lights should have directional modifiers on them like grids, shoots or barn doors as we want to control the light in one area rather than bounce around the set.
Second we want to set up our key light. I used a 22" silver beauty dish but you can also use a small softbox instead but just be aware that the light will spread around a lot more so if you're close to the background then the light might spill onto it. Place the beauty dish on the camera side of the glass and have it above the camera and angled down towards the model.
Thirdly I set up a fill light via a small softbox on the floor. This is positioned under the model and obviously out of shot. You could substitute this for a reflector if that's all you have.
Don't worry, a complete lighting setup diagram is showcased below for both four lights and two lights.

This is the "beading" of droplets I'm referring to. These droplets will catch the light perfectly and create gorgeous bokeh in the foreground of your shot.
Next it's time to get the model in position on the other side of the glass to you and now you're ready to spray the glass. It's advisable to have a sheet or newspaper etc below the glass as you will get some run-off. I didn't find it made much difference which side I sprayed the glass, it's just the highlights you're after and the light hits the droplets whichever side they're on but it was just easier to spray it from camera-side.
Finally you're ready to start taking some shots. You'll want to set your camera to a shallow aperture, something around f2.8 or wider will be preferable. Take a shot and adjust your key light around your aperture then once you're happy with that you can adjust the power of your two back lights. More power on those will create more pronounced bokeh and less power will obviously create a more subtle effect.

This is the four light setup. You'll see that the two gridded spots are positioned behind the model pointing towards the camera, these both have gels attached. The beauty dish is positioned nice and close to model and the small soft box is on the floor acting as a fill light.

If you only have two lights then the basic principles can still be achieved. You simply keep your key light and only have one back light. If you have a third light then I would add it to the back and substitute the fourth light (the fill light) with a reflector.
So there you have it, that's the in-camera foreground bokeh lighting setup. It seems like you need a lot of kit and preparation to achieve it but it's really not that bad and like I say, if you really want to give it a go but only have a couple of lights then you can still get the look.
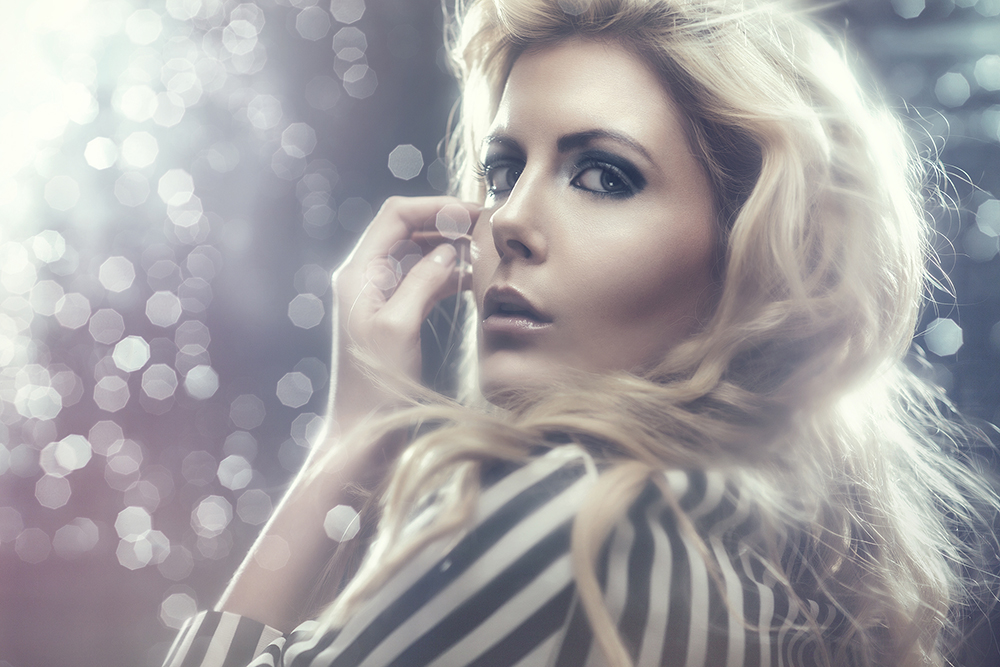
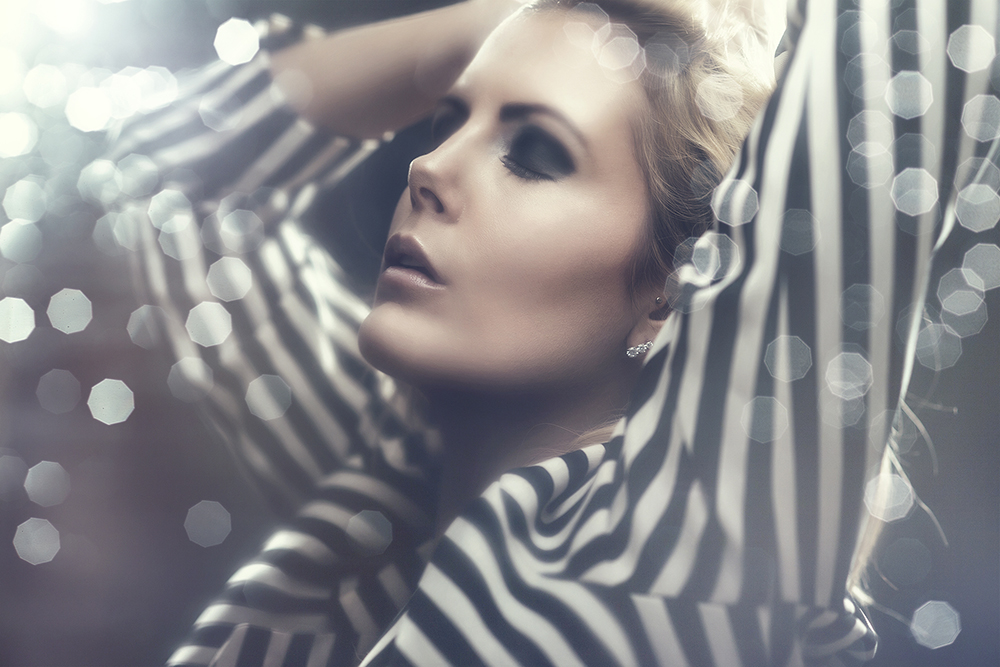
Below is a bunch of images that I took when I was first experimenting with it. Like I say it was many years ago when I took these so please don't look too closely haha :D


Please let me know if you have any questions in the comments below and if you give this technique a go then definitely get in touch as I'd love to hear how you got on and if you have anything to add.
Thanks again for reading this technique guys, good luck and feel free to share with your friends and I'll see you in the next one.
I release photographic tips and techniques each and every week so if you don't want to miss one then simply sign up to my monthly newsletter via my FREE TIPS page.
WARNING: Monies required below!
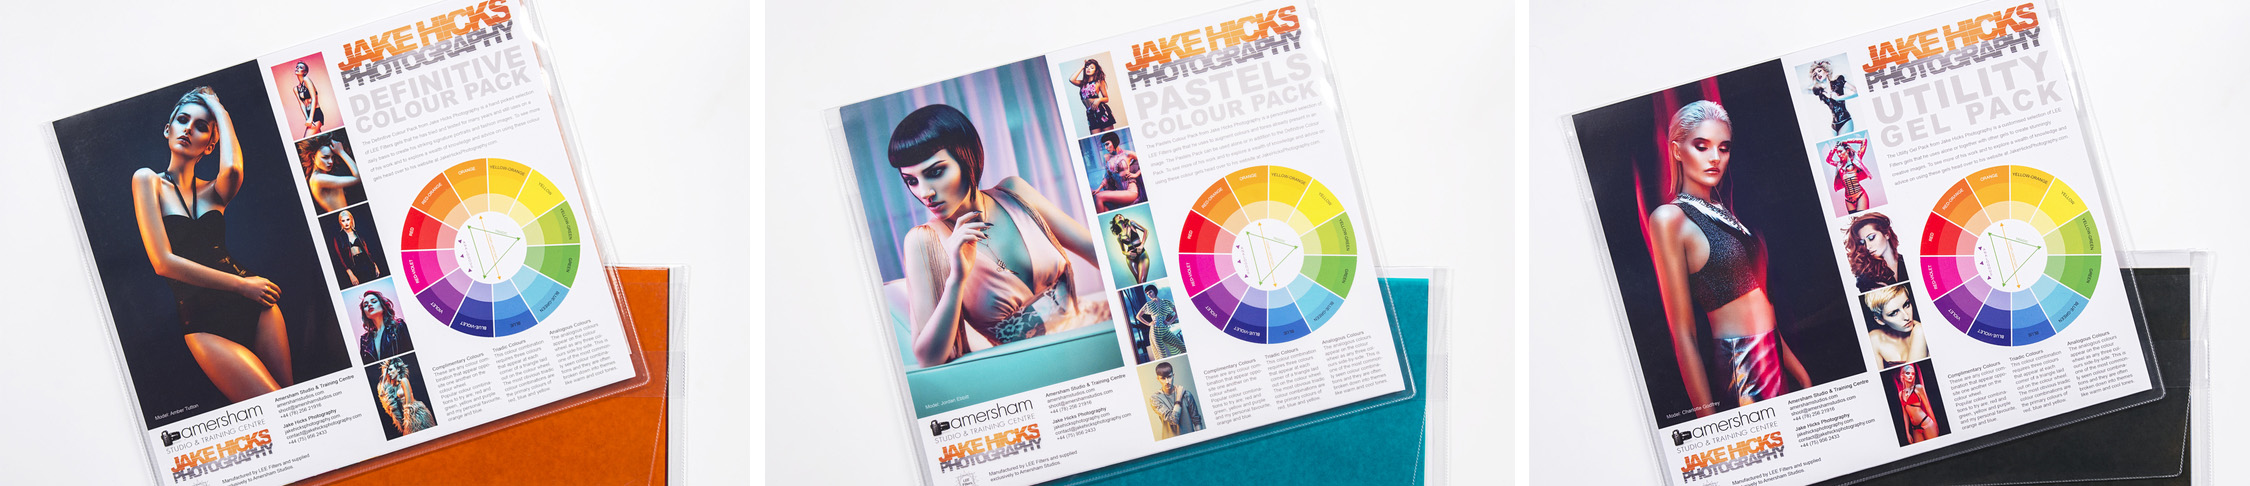
If you liked some of the gelled lighting shots in this article and you'd be interested in learning how to take those shots yourself or you're simply interested in finding out everything there is to know about Gelled Lighting then why not check one of my workshops: Gelled Lighting Workshop

I have also just released a brand new 22 hour complete Gelled Lighting Tutorial video. I go over everything from studio lighting setups with gels to being on location with gels plus I also go through my complete retouching and post pro workflow. For more details and complete breakdown of everything that's include check out my Coloured Gel Portraits Tutorial

I also offer comprehensive coloured gel packs. These collections of gels are what I use day to day to create some of the most highly saturated colours around. If you're looking at getting into gelled lighting or need to get stronger and richer colours in your coloured gel work why not check out my Jake Hicks Photography Gel Packs