• >>>NEW Colour 2.0 Workshop<<<
  • Technique
    • Latest Techniques
    • FREE TIPS
    • Quick Tips
    • Video
    • Site Search
    • Blog
    • Archives
  • Mentoring
  • 2026 Workshops
  • >Online Workshops<
  • Studio Lighting Books
  • Contact
    • Newsletter
    • Contact
    • Statement
Jake Hicks Photography
  • >>>NEW Colour 2.0 Workshop<<<
  • Technique
    • Latest Techniques
    • FREE TIPS
    • Quick Tips
    • Video
    • Site Search
    • Blog
    • Archives
  • Mentoring
  • 2026 Workshops
  • >Online Workshops<
  • Studio Lighting Books
  • Contact
    • Newsletter
    • Contact
    • Statement

Interview with Photographer Magic Owen

I have a been a big fan of UK based editorial photographer Magic Owen for a while, her work has gone from strength to strength in an incredibly short space of time and that is certainly not by chance. Magic's relentless dedication to her craft has been justly rewarded by being published in countless magazines and blogs because she has a unique way of selling her artistic vision. Magic explains in this interview that she has previously had the rare the opportunity to take part in many other roles on the opposite side of the camera, that for me is what makes her style stand out, a style that is the work of somebody that can see the bigger picture not just whats in her viewfinder.

16.JPG

Magic, please give us your elevator speech to begin with

I am a self taught photographer, born in France.
I first layed my hand on a camera when I was 15, but was interested in too many things like psychology, art, and languages to listen to my calling.
I am now based in Oxfordshire, UK. I shoot a lot of different things but my first love is fashion/Beauty. That is where my heart is and where my future is.
I have have started to take photography seriously at 35, 3 years ago and went part time (I have 2 jobs! we all need a regular income!) to let myself express myself artistically

Lets get some of the geeky stuff out of the way, whats in your camera bag? Is there anything in there you can't live without when you're shooting?

I have an OM-D and a 12-50 Olympus lens + a Leica 1:2.8/45 macro lens, and for fun an SLR Magic Toy lens. I use a use a Linux workstation running Gimp/Darktable (no photoshop!).

In my studio i have Bowens lighings, and lots of different coloured gels which I like to play with. I am all about experimenting and I don't have any particular habits which i must follow. 

alissa3.JPG

In your portfolio you have a mix of studio lighting and natural light images, do you have a preference as to how you light your images?

I like all lights, natural and studio, and use them to express the mood I am in at the time of the shoot depending on the concept/vision I have. 

I understand that you started off playing a different role in the creative process of photography. Can you elaborate on this and perhaps tell us how this may of influenced your vision now that you're behind the camera?

I used to model back when I lived in France, which I got into because of low selfesteem! Weird I know! Not all models are up themselves and we all have different reasons for getting into modelling.
I am not ashamed to say that I have had eating disorders, and Body Dismorphia disorders which is very hard to deal with as a teen and an adult. I have always been artistic and used to draw in my spare time. My camera is simply an extension of my pencil if that makes sense. Previously I would borrow my best friend's camera or buy disposable cameras to experiment. Then I got into proper photography and used the darkroom for hours until I discovered digital. Having been a model I understand angles and I am able to guide models into getting the best shapes/poses/facial expressions, depending on if we are going for commercial/fashion....
I also know how important hair and makeup is in getting the best image. As I have worked with muas/hair stylist as a model/photographer I know to look at details a lot of photographers tend not to notice. 

11small.JPG

To have this many great shots in your portfolio already you must be a very self driven person, what would you consider to be the key elements in your development in photography?

1.jpg

I am very self driven but not out of choice, I have tried to give up photography on a few occasions having lost my mojo.

I have artistic visions which won't let me rest! My brain is always creating, shooting and investing in new concepts. Once I have achieved my vision through an image, my brain moves on to the next idea, it never shuts up and it gets particular active when I should be asleep!

The vast majority of your work is conceptual styling and extreme fashion but I notice you also occasionally shoot some very serene and intimate nature shots. Do you find the stark contrast between these two genres helps feed one another?

I see beauty in many places, which could be a face, a fashion piece, a leaf in the forest, textures.....it all comes from the same urge to capture something special. Anything and everything can awaken my senses and inspire me

Leo4lowres.jpg

Going through your portfolio it's clear to see that you use some post production in your imagery, is this something you have a clear vision for from the start and shoot with that in mind or is post production influenced by your photographs?

Every picture I take and load into the Gimp is sometime like an unfinished painting. Sometimes I just tweak somthing little and I am satisfied, and sometimes I feel the need to be more creative with my image.

There are so many steps to creating great images like yours but what is your favourite part of the photographic process?

My favourite part is the chemical reaction that runs through my body once I have my shot :p they are like orgasms lol I listen to my body which tells me when I have achieved my goal.

Do you love planning the shots or are you somebody who loves shooting and hates post production or somebody who loves watching the image transform in post?

I am a control freak and impulsive all at once! I love planning, looking at inspiration, making moodboards....but I also like to be impuslive and feed of my model's personality

A lot of your photographs seem quite conceptual, where do you get your inspiration from for your images? Are you inspired by other photographers and their work or are your images inspired and driven by a mood or theme?

I am always looking at fashion/beauty....websites. Trendhunter is one of them, Fashionography is another. 
I admire photographers like Miguel Reveriego, Andrew Robert Fox, Mario Testino, Steven Klein and Mikael Jansson.

How would you describe your particular style in photography and do you think its important for a photographer to have a defining style to stand out in todays sea of image makers?

I think you have to be true to yourself and develop your own style. To be honest I don't even know what my style is, I would call myself an industrial photographer (like industrial music).
I am always evolving, always experimenting and I am sure my style will change over the years. A camera is just a tool for me, I don't even like calling myself a photographer.

In your opinion what makes a 'great' image, what separates a good photo from an average photo for you?

In my opinion the "eye" is everything. If you don't see potential images when you look at the world, it doesn't matter how much technical knowlege you have or how expensive your camera is, you will never take a great image. 

32small.JPG

What's your favourite image that you've ever taken and why?

13small.JPG

My favorite image changes depending on my mood. One of my all time favourites though is a beauty shot of Leanne James who is wearing a a few headdresses (on her head and around her neck) made of silk roses. I wanted to take Leanne out of the Alternative scene and capture what I see in her. To me she is a beauty girl, she has the most amazing features and skin and I had to experiment with that to see if it would work.

Can you tell us what you're currently working on?

5small.JPG

I am catching up on editing before flying off to Texas in a few days for 2 editorials.

If you could work alongside one photographer for a day who would it be and why?

I would love to shoot alongside An Lee, I love the emotion, tension and darkness of his images. I would love to learn from him to take my work to another level.

What would your dream shoot be?

I can't talk about it as i am going to realise it in a few months!
This is something I dreamt to do a year or so ago and I am in the process or organising it! Eeeeeeee I am very excited!
My other dream shoot would be a Mise en Cage campain shooting Tessa Kuragi! She is pure perfection! One day! ;)

You have already seen amazing success with your photography and you have so many images published and won numerous awards for your work but what's next for Magic Owen, what are your goals with regards to your photographic career?

Take over the world mwuhhaaahhhaahahaah lol lets just say I dream biiiiig!


I must just say a really big thank you to Magic for taking the time to do this interview and for being so candid and honest in her responses, I for one found her to be an inspiration and I look forward to seeing more of her work in the future and her 'big dream project' in a couple of months!

To connect with Magic Owen you can do so at any of her online hubs below, definitely stop by to say hi and to check out more of her fantastic work.

www.magicowen.co.uk

Magic Owen Facebook Page

Magic Owen on Twitter

Magic Owen on Tumblr

Magic Owen on Model Mayhem

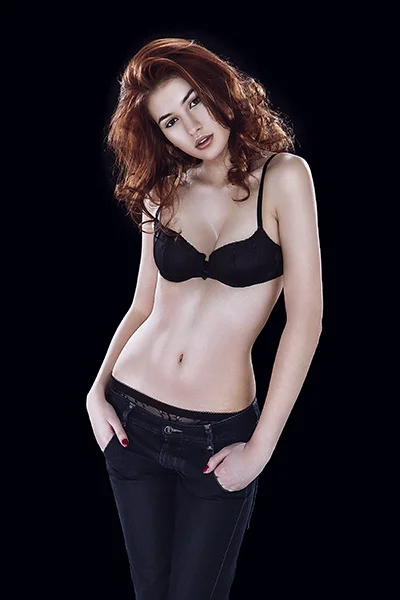
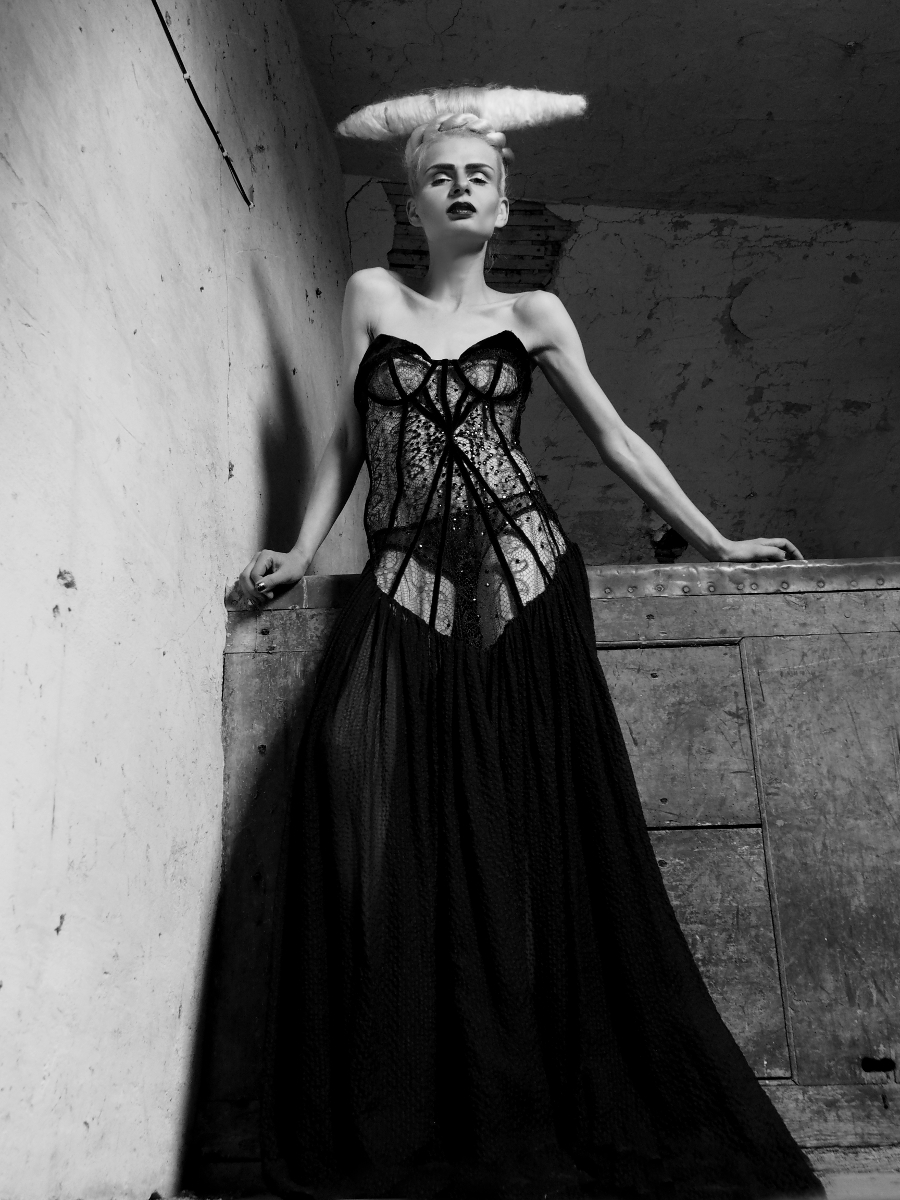
All the images contained within this article are the sole property of Magic Owen. Any copying or reproduction of these images without the prior consent of the copyright holder is strictly prohibited.

Tuesday 02.25.14
Posted by Jake Hicks
 

Stay Focused - Selecting the best focusing method for each shoot

Technique Tuesday stay focused.jpg

The longer you shoot, the larger your repertoire of subjects and assignments you photograph becomes. You start off photographing flowers in the garden, your neighbours dog, your sisters kids, your friends wedding and then before you know it, you're doing product shots for your friends new company. All this happens over time and there is one pretty fundamental skill that must remain paramount throughout this process; properly focused images.

Sure we've all been there, we've all taken that shot once in while which is slightly ‘soft’ (a polite photographers term to describe out-of-focus images), but it's a great shot so we keep it anyway. Even so, we would still of preferred it to be 'tack sharp'.

In focus images has been one of the most fundamental rules of photography right from the dawn of the craft. In the early 1900’s it was a craft in its own right but in the 1960's Leica introduced a rudimentary auto-focus system that changed everything. Since then of course auto-focus has developed dramatically and it's no longer a feature on cameras, its a given.

Modern Auto Focus

So bringing auto-foucs up to date we have a few options to choose from in our modern DSLR's and those are some of the features I just wanted to cover and when to use them. Both Canon and Nikon have very similar settings albeit incorporating different technologies the results are very similar. There are other brands like Sony and Olympus etc. that also follow suit but here I will be discussing the four main focus modes in Canon and Nikon.

This image was shot utilising the 'AF-S/One Shot' auto-focus mode on the camera. Here I focused on the models eyes and then recomposed my image so that she was over to the left of frame allowing for more space in the image where she is looking.

This image was shot utilising the 'AF-S/One Shot' auto-focus mode on the camera. Here I focused on the models eyes and then recomposed my image so that she was over to the left of frame allowing for more space in the image where she is looking.

One Shot / AF-S

First off, you have the mode that’s probably been around the longest, Canon's 'One Shot' and Nikon's 'AF-S'. Both of these will do pretty much the same thing and they are predominantly used for stationary objects like model shoots (most of the time, more on when not to use 'AF-S/One Shot on model shoots later) and anything that doesn't require your subject to move around too much in frame. You half press the shutter in this mode and then you can recompose the image, for example you focus on the models eyes then recompose her to be on the left hand side of the image. This auto focus mode is the most common one and will get you through most situations.

Al Servo / AF-C

Next we have the step up from the single focus to Canon's 'AI Servo' and Nikon's 'AF-C'. Essentially what these settings do is continuously track your initial focus point and readjusts the focus accordingly. This setting is ideal for moving subjects like active children and pets that are constantly on the move within your frame.

AI Focus / AF-A

Finally out of the auto focus settings we have Canons 'AI Focus' and Nikons 'AF-A'. Both of these settings actually leave it up to the camera to decide which is best out of the other two focusing modes to use and will choose to continuously track your chosen subject should it decide to move or focus lock if you would like to recompose.

In theory then I needn't have bothered explaining the other two settings as surely this is the best of both worlds? Not quite, I personally have tested this mode a fair amount with stop-start subjects and although the camera does a good job of keeping up with them, it’s always more accurate to use continuous focus mode. The same also goes for its ability to determine when a subject has stopped and when to focus lock for recomposing. Personally I never use this mode as although it has the best of both it also has the worst of both.

Image taken with an 85mm f1.8 prime in manual focus. Shooting in manual focus negates the need to recompose and loose focus in auto-focus modes.

Image taken with an 85mm f1.8 prime in manual focus. Shooting in manual focus negates the need to recompose and loose focus in auto-focus modes.

So although I have just covered the three basic settings here very briefly, there is of course a whole host of other technological advancements in auto-focus I haven't covered. I know Nikon has extensive, matrix and 3D auto focusing features as well as most modern DSLR also incorporating the 'back button auto focus' which also helps with focus locking, but going over all of that is not the purpose of this article.

Manual Focus

The last focus mode I wanted to cover and one that is rarely used is the Manual focus mode. Now this mode strikes fear into the heart of nearly all modern photographers and that’s simply because they've probably never used it. Do you ever need to use it? That is something that only you can decide and is probably based on the type of photographs you take. If you only ever take portraits of energetic kids or fast paced sports then auto-focus is probably aways your go-to focus mode. If however, you shoot still life, architecture, landscapes and other detailed and relatively motionless subjects then manual focus is probably a good way to go. There's a few reasons for this; landscape photographers will want to find the hyper-focal distance of their scene to maximise the amount of 'in-focus' points in the scene, this is based on an equation so auto-focusing on a specific object is not always a good place to start. Still life photographers will usually have their camera 'locked off' on a tripod so they will not want to focus and recompose once they've set up the shot, its just far easier to focus manually.

There is however another reason to want to use manual mode on some cameras and in certain situations, and this is the catalyst for this article.

This version of the image was shot using the auto-focus mode 'AF-S/One Shot' and meant that after I had focused and recomposed the shot, the models eyes were left 'out' of focus.

This version of the image was shot using the auto-focus mode 'AF-S/One Shot' and meant that after I had focused and recomposed the shot, the models eyes were left 'out' of focus.

The ‘Focus-Recompose’ Issue

I recently purchased a 85mm f1.8 prime lens and I wanted to test the lens out to see what the sharpness was like at f1.8. I predominately only photograph models so I set up my test and went about taking some shots at f1.8 using my usual AF-S/One Shot auto-focusing mode. When I got my shots back to the computer to take a look I was surprised to see that most of them were very 'soft'. It took a few minutes to realise my error and since then, I've adjusted how I shoot with these parameters.

Here you can see that the selected focal node is still situated in the middle of the viewfinder even though I have elected the outer most one when shooting in the portrait format.

Here you can see that the selected focal node is still situated in the middle of the viewfinder even though I have elected the outer most one when shooting in the portrait format.

I haven't done a lot of very shallow depth of field shots up until this point so I hadn't seen the now exaggerated results of my poor focusing technique previously.

At f1.8 you have a very, very shallow amount 'in-focus', so for example a head shot with the eyes in-focus the tip of the subjects nose is 'out' of focus. For the test I was photographing the model at 3/4 length and shooting up at her so my camera height was probably at her waist height. I was about 6ft/2m away from her and I was focusing on her eyes with my focal point in camera then recomposing my shot to capture the 3/4 length crop. The problem with most (DSLR) cameras is that although they have a lot of focusing points, they're all clustered in the centre of the viewfinder so even though I chose the outer most focal point I still have a dramatic amount of recomposing to do.

This diagram clearly illustrates whats actually going on when you recompose an image after focusing in 'AF-S/One Shot' auto-focusing mode. The actual part of the image that was in focus is now out of focus.

This diagram clearly illustrates whats actually going on when you recompose an image after focusing in 'AF-S/One Shot' auto-focusing mode. The actual part of the image that was in focus is now out of focus.

This isn't normally a noticeable problem when recomposing at f8, f11 and f16 but at f1.8 that dramatic shift in the focal plane means the resulting image is very soft around the models eyes. As I recomposed the shot it actually repositioned my focal point further back behind the model, meaning the back of her head and hair were in focus but not her eyes.

There is not too many ways around this pesky little issue, especially as you might not notice it on the back of the cameras little screen. One thing that did resolve it though was by switching to 'manual' focus. I could then compose my shot and manually focus on the models eyes resulting in a fantastically sharp image where I wanted it to be.

Granted there was a few things conspiring together here to really exaggerate the issue. Firstly I was shooting at f1.8; that’s always going to rely on critical sharpness. Secondly I was down low shooting up, this always exaggerates the focal plane shift when recomposing and lastly I was stuck with limited focal nodes. There are many technical reasons why modern DSLR's don't allow focal nodes towards the edges, a lot of smaller frame cameras like the mirrorless, APS-C and micro 4/3 cameras all have selectable focal nodes covering the entire viewfinder, but alas DSLR technology still isn't there yet. Until it does, it’s a good idea to be aware of what’s going on in auto focus modes on your camera and be prepared and ready to switch to manual focus when required. Manual focusing is a skill and as such will take a little practice, but with a little patience you should notice an increase in the hit rate of 'tack sharp' shots. Good Luck!

Thursday 01.09.14
Posted by Jake Hicks
Comments: 1
 

Your 'basic' 6 light set-up

Canon 1Ds Mk II - CAMERA

70 mm - LENS

F 11- F-STOP

1/250 sec - SHUTTER SPEED

100 - FILM SPEED

Flash - LIGHT SOURCE 

This lighting technique is probably best referred to as beauty lighting and suits portraits and head-shots.

This lighting technique is probably best referred to as beauty lighting and suits portraits and head-shots.

Granted the slightly tongue-in-cheek title to this technique teases that there might actually be a 'basic' 6 light set-up but truth be told this is one of the easier ones to get right.


This is a shoot that I did many years ago, way back in 2009. Back then I was looking very closely at other photographers lighting and reverse engineering their set-ups. This lighting is very famously used by Jill Greenberg in her crying baby project and then later with several of her animal projects. In fact looking at her work over the years you can actually see that nearly all of her shots are a variation of this lighting technique in one form or another.

Truth be told I'm not completely happy with my finished shots for this shoot and in hindsight and with more experience under my belt I can certainly see things that I would change. Firstly let me go over the lighting technique itself and then I'll come back and talk about a few tweaks I would make if I was shooting this again. I say 'tweaks' because it's not the set-up and light placement I take issue with but more to do with the power settings for each light that could be adjusted slightly.


The 6 light set-up: 1 hair light above, 2 side lights, 2 fill lights and 1 ring-flash.

The 6 light set-up: 1 hair light above, 2 side lights, 2 fill lights and 1 ring-flash.

The set-up itself obviously requires 6 separate heads: one ring-flash, one overhead hair light, two side hair lights and two fill umbrellas. In my set-up here I was using a beauty dish above as a hair light but this could be substituted by a honeycomb or snoot (space permitting), also I'm using two fill umbrellas but again these could be substituted for soft boxes. Something to note from my diagram here is that I didn't have a boom on the day so my beauty dish hair-light is just on a stand behind the black backdrop. This isn't ideal as it would of been nice to get more light on top of the models head, something that a boom would of enabled, also I was constantly fighting the threat of flare into the lens because that light was so far back and virtually pointed straight into camera.

This technique is probably better suited to portraits, head-shots or half body shots, the reasons for this is that its a very beatifying light, it wraps the model in light and it can be tricky to define structure with so much light. When you're shooting full body or even 3/4 length some of the lighting definition gets lost and in my opinion loses impact. Also this is a major pain to light evenly when showing the full body, the side lights would either have to be large strip-boxes or the sidelights would have to be set quite far back to provide even light. On top of this I dread to think of the 'spaghetti junction' of shadows being cast on the floor at her feet, that would not be pretty to retouch.

The 6 light set-up from above

The 6 light set-up from above

One of the most interesting points to note about this setup is obviously the use of a ring-flash. Anybody who has used a ring-flash will know that its 'drop off' of light is crucial to creating its tell-tale look. The light should appear to 'drop off' enough so as to allow for a slightly darker edge all the way around the body, its seen here in these images around the face and skin. Cleverly though this lighting technique counters that shadow nicely by transitioning to highlights thanks to the edge-lighting. This works particularly well here as the model has volume to her hair allowing for the lighting to remain separated. Something to be mindful of though is that when using a ring-flash your lighting can appear very flat and it takes some tweaking to ensure you still create shape and structure with your subject. Its for this reason that I'm not completely satisfied with the final images and I believe that by dropping the power of the ring-flash a little would of really helped to avoid the current slightly 'washed-out' look I have here.

3/4 length shot using the 6 light setup

3/4 length shot using the 6 light setup

The two sidelights and the hair-light above are metered a stop above (camera set to f11, edge-lights and hair-light metered to f16) and the two fill lights are metered a stop below (camera set to f11 two fill-lights set to f8) and finally the ring-flash was metered to the camera (f11). The tweaks I mentioned earlier are that I would probably dial down the ring-flash a little. There is so much light in this set-up that it is hard to tell whats doing what. The edge and hair-lights are easy its just getting the right combination of light from the ring-flash and the fill-lights that is down to personal preference. 

Granted this lighting technique is not for everybody, firstly you need six studio lights which is not always an option but if you're renting a studio for the day and you have those facilities to play with then it might be worth playing around with it, especially if you're shooting beauty work. In Jill Greenberg's original set-up I think she actually used 7 lights, she had an extra one lighting the background of her subject. For me, I only had 6 lights and I wanted a much darker background to contrast the edge lighting and make the model really stand out in the image.

So if you're feeling brave enough and you've got plenty of time to set-up before the model is ready then give it a go. 

Tuesday 11.05.13
Posted by Jake Hicks
Comments: 2
 

Shooting Tethered...Without the Tether

The Eye-Fi 4GB X2

The Eye-Fi 4GB X2

Many moons ago when digital cameras were first introduced, one of the biggest changes from shooting film was the advent of the LCD screen. No longer did we have to pace up and down outside photo labs to see our shots, we could now see them instantly displayed on the back of our new cameras. This was not only great for us photographers to quickly check our lighting but for everybody else in the team too. The stylist could check for any creases in the clothes, the makeup artist could check uneven eyeliner, the hair stylist could check for stray hairs and the client can check they're happy too. That's fantastic, everybody can check that everything is looking perfect right there on the back of the camera without the anxious waiting for those tardy chemicals to do their job. Well in theory this was great but the novelty of a small crowd of rubberneckers jostling for front row seats behind me, all peering over my shoulder waiting for each image to appear soon wore off.

Menu display of how you would like card slot 1 and slot 2 to manage files

Menu display of how you would like card slot 1 and slot 2 to manage files

Finally came the long awaited introduction of useable tethering, I shoot over here in peace and quiet doing my job with a cable connected to a laptop, you all stand over there gawking at the screen, perfect. Well nearly perfect anyway, I no longer had to worry about people squawking in my ear but now I had to teach everybody how to go forward and back through the images, zoom in and out, rotating and so on. The software just wasn't intuitive enough for everybody yet. On top of that the biggest bane of my life was that damn cable that connected the camera to the laptop. Tripping over it, falling out of the camera, knocking things over, clotheslining clients with it, you name it I did it. 

So now finally with the introduction of the wireless transfer cards such as the Eye-Fi cards I have the best of both worlds. No crowds breathing down my neck and no tether to break my neck.

Showing the iPad as it finds the wifi network of the Eye-Fi card

Showing the iPad as it finds the wifi network of the Eye-Fi card

The way this works is that you can now purchase SD cards that wirelessly send your images to a laptop, phone or tablet. At present this technology only works in SD cards and although I know that there are SD to compact flash converters out there they are unfortunately known to be very unreliable when coupled with a wifi SD card.  A lot of the modern compact digital cameras now will only accept SD cards and even most modern DSLR cameras now have at least one SD slot which is perfect as these little wifi cards are fantastic and I absolutely love them.

So in reality how does it work when actually shooting? Personally I use the Eye-Fi X2 4GB card (they now only do the pro version) and I shoot with a Nikon D600 which has dual SD slots. The first slot I set up to take the Raws and the second slot I set up to take the 'Basic JPEG's'. As I shoot, the camera saves the full resolution Raws to slot 1 and simultaneously saves small jpegs to slot 2 (the Eye-Fi card). Whilst the files are saving to the Eye-fi card its actually uploading them to my 'paired' device. This could be a laptop or even a smart phone but due to the issues with clumsy software not being very intuitive for the rest of the team I actually send my files to an iPad. The simplicity of this means that all but the most vehement tree-killer of the touch screen generation will be able to zoom, rotate and navigate through the images without any instruction from myself. On top of this I don't even need to be connected to a wifi network, the card itself generates its own and the free Eye-fi app on the iPad acts as a server which downloads the images seamlessly as they are taken. So to clarify, this works in the desert, you don't need to find a wifi hot-spot. The reason I mention that is because I didn't believe it would work without one but it does. Bear in mind though, it will download faster with a wifi network selected but I am only transferring small jpegs for review not the Raws so its still very fast without one.

The Nikon D600 synced with the iPad via the Eye-Fi card. The camera displays the Raws and the iPad is displaying the small transferred jpegs

The Nikon D600 synced with the iPad via the Eye-Fi card. The camera displays the Raws and the iPad is displaying the small transferred jpegs

Just so this doesn't sound like a Eye-Fi advert I know that Toshiba makes a FlashAir card that is actually supposed to be easier to set up than the X2 version but Eye-Fi has just now released the Eye-fi Mobi which is said to be even simpler and faster to set up than that.

They range dramatically in price as far as I can tell so its my advice to spend a bit of time shopping around. Also the memory size of the card has a dramatic influence on cost, I use the 4GB one because I only use it to transfer small jpegs. If you feel that you want more flexibility and will likely only be shooting where there is a wifi hotspot available and you'd like to transfer Raws for example, then you may want to buy a bigger card. I think I picked up my Eye-Fi X2 4GB card 18 months ago for £30 on eBay.

It's not a massive investment by any means so I would definitely recommend trying them out especially now that Eye-Fi have now just released the new and improved Mobi version.  Being tethered looks great but the ease of shooting without the cable is a no-brainer. For me though more importantly the client loves to be able to view whats being shot and get involved,  this ensures that things get spotted on the bigger screen before I have to spend ages fixing them in post.

Tuesday 09.03.13
Posted by Jake Hicks
 

Start taking studio lighting shots for under £25

Shot with a single silver umbrella and flashgun

Shot with a single silver umbrella and flashgun

I think we can all agree that we started out shooting at one point or another using the onboard pop-up flash. Lets be honest its not great, blown out images that show up everybody's imperfections with its incredibly hard light. Not a great look, and certainly not a great look if you want to be known for taking 'good' pictures. The next obvious stage was to get a flashgun. These powerful little guys slot on top our DSLR's and give us the much needed control we were after. We can soften the lighting a little, we can even bounce it off the walls or ceiling to soften the look even further. These flashguns are an events and wedding photographers best friend for sure. But for those of us that want the next level of control and want to take our portraits a little further and give them a really polished look we need studio lighting. That right there is a big box of minefields. Every time you go to look at investing in the world of studio lighting it seems like a pretty big commitment. Investing heavily in something that you're not sure you'd want to stick at or get the opportunity to use that often is certainly daunting.

There is another option though and thankfully with the global market for electronics being only a click away you can dip your toe into studio lighting for less than the price of most train tickets.  Plus it can be done using a lot of the equipment you probably already have, especially if you're the sort of person who wants to get into studio lighting anyway, you're bound to of accumulated a lot of the necessary kit by now already.

This one is actually for a light stand but the tripod version looks almost identical

This one is actually for a light stand but the tripod version looks almost identical

Chances are, like we discussed you already have a flashgun and there is an even greater chance you already have a tripod of some description, this doesn't even need to be any good either. If that's the case then we can look at doing a little online shopping and sorting out a great studio lighting setup.

Lets start from the bottom up, you already have a tripod so we need something to attach our flashgun and lighting modifier too. Search 'Flash mount bracket with umbrella holder for tripod'  on your favourite internet electronics wholesaler and you'll be greeted by plenty of options. This £6.99 little gizmo sits on top your tripod and holds your flash as well as our lightweight and compact lighting modifier.

36" Silver umbrella lighting modifier

36" Silver umbrella lighting modifier

The umbrella, in my opinion one of the most underused lighting modifiers around. These lightweight and compact attachments used to be all rage before soft boxes came along but as soon as there awkward and unwieldy rectangular counterparts sprang into are world the umbrella got stuffed to the back of the studio cupboard. Soft boxes are popular for there slightly softer light but I actually quite like the umbrellas crisper less diffused light. Combine that with a silver interior over the white one and you can create fantastically crisp tones across skin. Search 'Silver photographic umbrella' and you're off for as little as £4.19. One thing to note, the larger the size of umbrella the softer the light (within reason, there are other factors at play) so have a look at the different sizes on offer.

This is just a straight connection to the camera, I recommend spending a little more and getting TTL version connector

This is just a straight connection to the camera, I recommend spending a little more and getting TTL version connector

Next and oddly the most expensive is a way to connect all this to your camera. The one that I have pictured here is actually just a straight piece of cable that just makes a physical connection to the camera. The one that I would probably recommend spending a little extra on is the TTL version. This talks to the camera and lets it know how much light has been used and when to stop etc. For this one search 'Flashgun TTL cable' this will bring up a lot a different options and for £13.73 you can get yourself all set up. Bear in mind that for TTL coupling you'll probably need the right cable for your camera brand, for example Nikon and Canons ones are different.

Everything we need to start taking some great studio lighting shots

Everything we need to start taking some great studio lighting shots

So to sum up our extravagant spending spree,

Flash/umbrella bracket for tripod - £6.99

Silver umbrella lighting modifier - £4.19

TTl flashgun connection kit - £!3.73

Grand Total - £24.91

For less than £25 we now have all we need to start taking some cracking studio lighting shots. 

Keep it simple, this is a classic one light setup known as 'butterfly lighting'

Keep it simple, this is a classic one light setup known as 'butterfly lighting'

So now that we have it all lets get some shots, lets start off simple though first, we can always run later.  Start off with a classic lighting setup commonly referred to as 'Butterfly Lighting', this gets its name from the shape of the shadow created under the nose when the light is positioned correctly. The same lighting is also referred to as 'Hollywood' lighting due to its beautifying look.

Positioning the light for this shot is key, the light should be above the subjects head height but not so high as to eliminate catchlights in the eyes. The light should be angled down towards the subject at a 45 degree angle to ensure the light spreads evenly over the face. How far away you place the light is dependent on the look you would like to go for; bring the light closer for a softer more feminine look or move the light further back for stronger shadows that can suit a more masculine image. Play around with this setup because there is a lot than can be achieved with this simple technique.

Model: Jaye 


Shot with the 'Butterfly lighting' setup as outlined above.

Shot with the 'Butterfly lighting' setup as outlined above.

Monday 08.19.13
Posted by Jake Hicks
 
Newer / Older