Constructing an image
As photographers we create two-dimensional representations of three-dimensional objects. This is achieved purely by manipulating light in such a way that it is clear to the viewer exactly what it is we are trying to portray.
Constructing an image should involve the photographer working to a set brief and having a clear goal in mind of what the finished image will look like. Whether it is shooting a portrait, fashion or still life, the photograph should clearly and accurately represent the subject. To do this it is necessary to light the subject correctly so as to portray its features distinctly. The characters face in a portrait or a fashion models clothes will have to be correctly exposed or the highlights on a shiny object in sill life, will have to be accurately placed to clearly show its glossy surface. These things are objective, they are not open to interpretation, and they are there to accurately fulfill the brief in their most fundamental way.
To do this, we must be aware of what we are shooting and have the necessary skills to accomplish the task. This is done through planning and knowing how the equipment works. From subject to background, lights to subject, subject to camera, and every combination in-between, everything in the studio plays a part in affecting the finished image. Failure to acknowledge this fact will result in a trial and error process that will result in a drawn out procedure where the accomplishment of a final image that fits the brief is far from guaranteed.
Although the title quote is true, it can be useful to have few key 'guidelines' in the back of your mind before you release the shutter. The following statements are aimed more towards studio lighting but most of their principles apply to all fields of photography.
- Try and avoid cross-contamination when using multiple lights, overlapping shadows create confusion for the viewer. The most successful photos have always given the ‘appearance’ of being lit from a single source.
- Correctly expose one light at a time with a light meter, then turn them all on and meter them again. This will show you if they affecting one another.
- If you are lighting your background with coloured gels, try under-exposing them by a couple of stops to get strong vibrant colours.
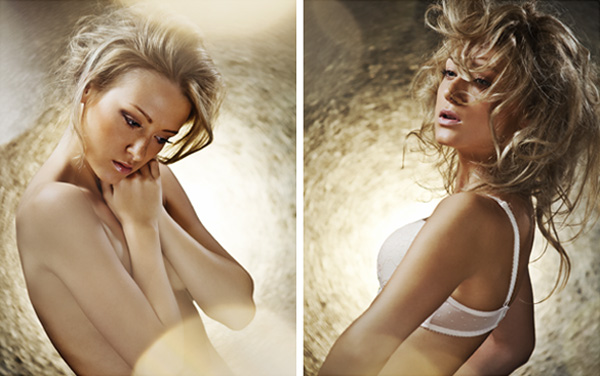
- Ensure that your key light, the one lighting the models face, is working with your models pose. Try to keep clean crisp shadows and try to avoid dark eye sockets without the telltale sparkle or catch-lights in the subject’s eyes. Talk to the model before you start shooting, explain where your key-light is which way you want them to direct most of their poses.
- With your secondary lights, ensure that they are giving you the desired effect. Remember, these lights are subjective; you can use them to either fill in shadows or create highlights in the hair. The power and exposure that they give you is down to your discretion, if you want to blow the highlights in the hair to give it extra shine you can.
- Try to match your poses to your chosen lighting style. If your going for a hard-lit style, try to capitalize on the dramatic shadows with dynamic and strong poses, remember that the absence of light in areas of the image will create shapes, capitalise on this to draw the viewer around the photograph.
- Keep an eye on background clutter. Check for objects that shouldn’t be in the image. A cable coming out of side of models head can take seconds to move on set but hours remove later in post, especially where hair is involved.
- Utilize your space. If your finding your key light spilling onto the background, move your lighting setup further away to compensate.
- Always light meter but above all check the histogram of your images whilst your shooting, it's to late to check them later in post.