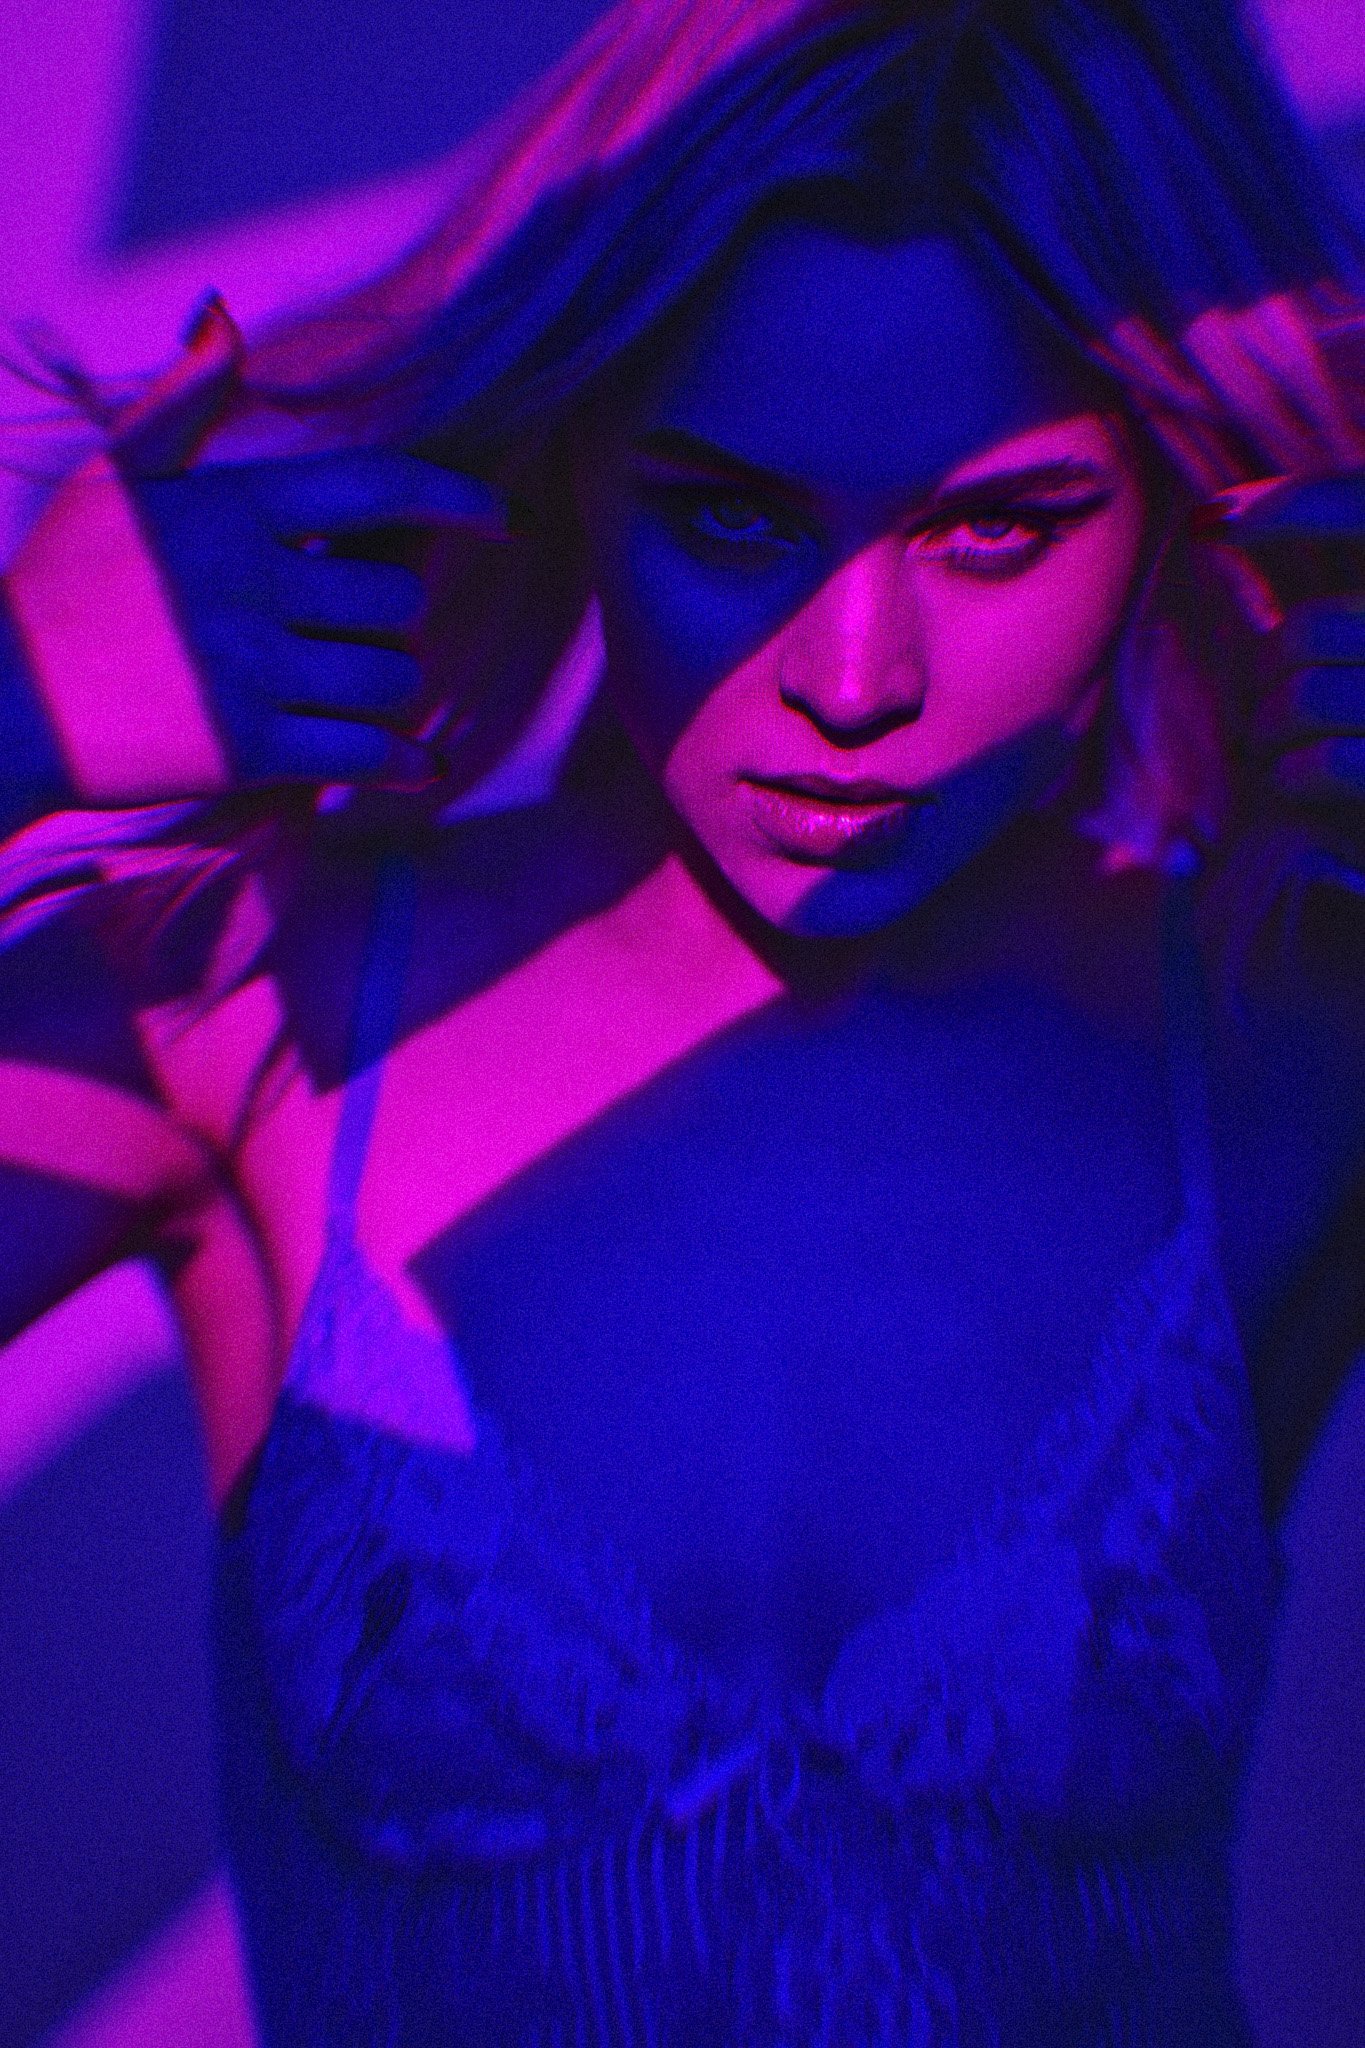
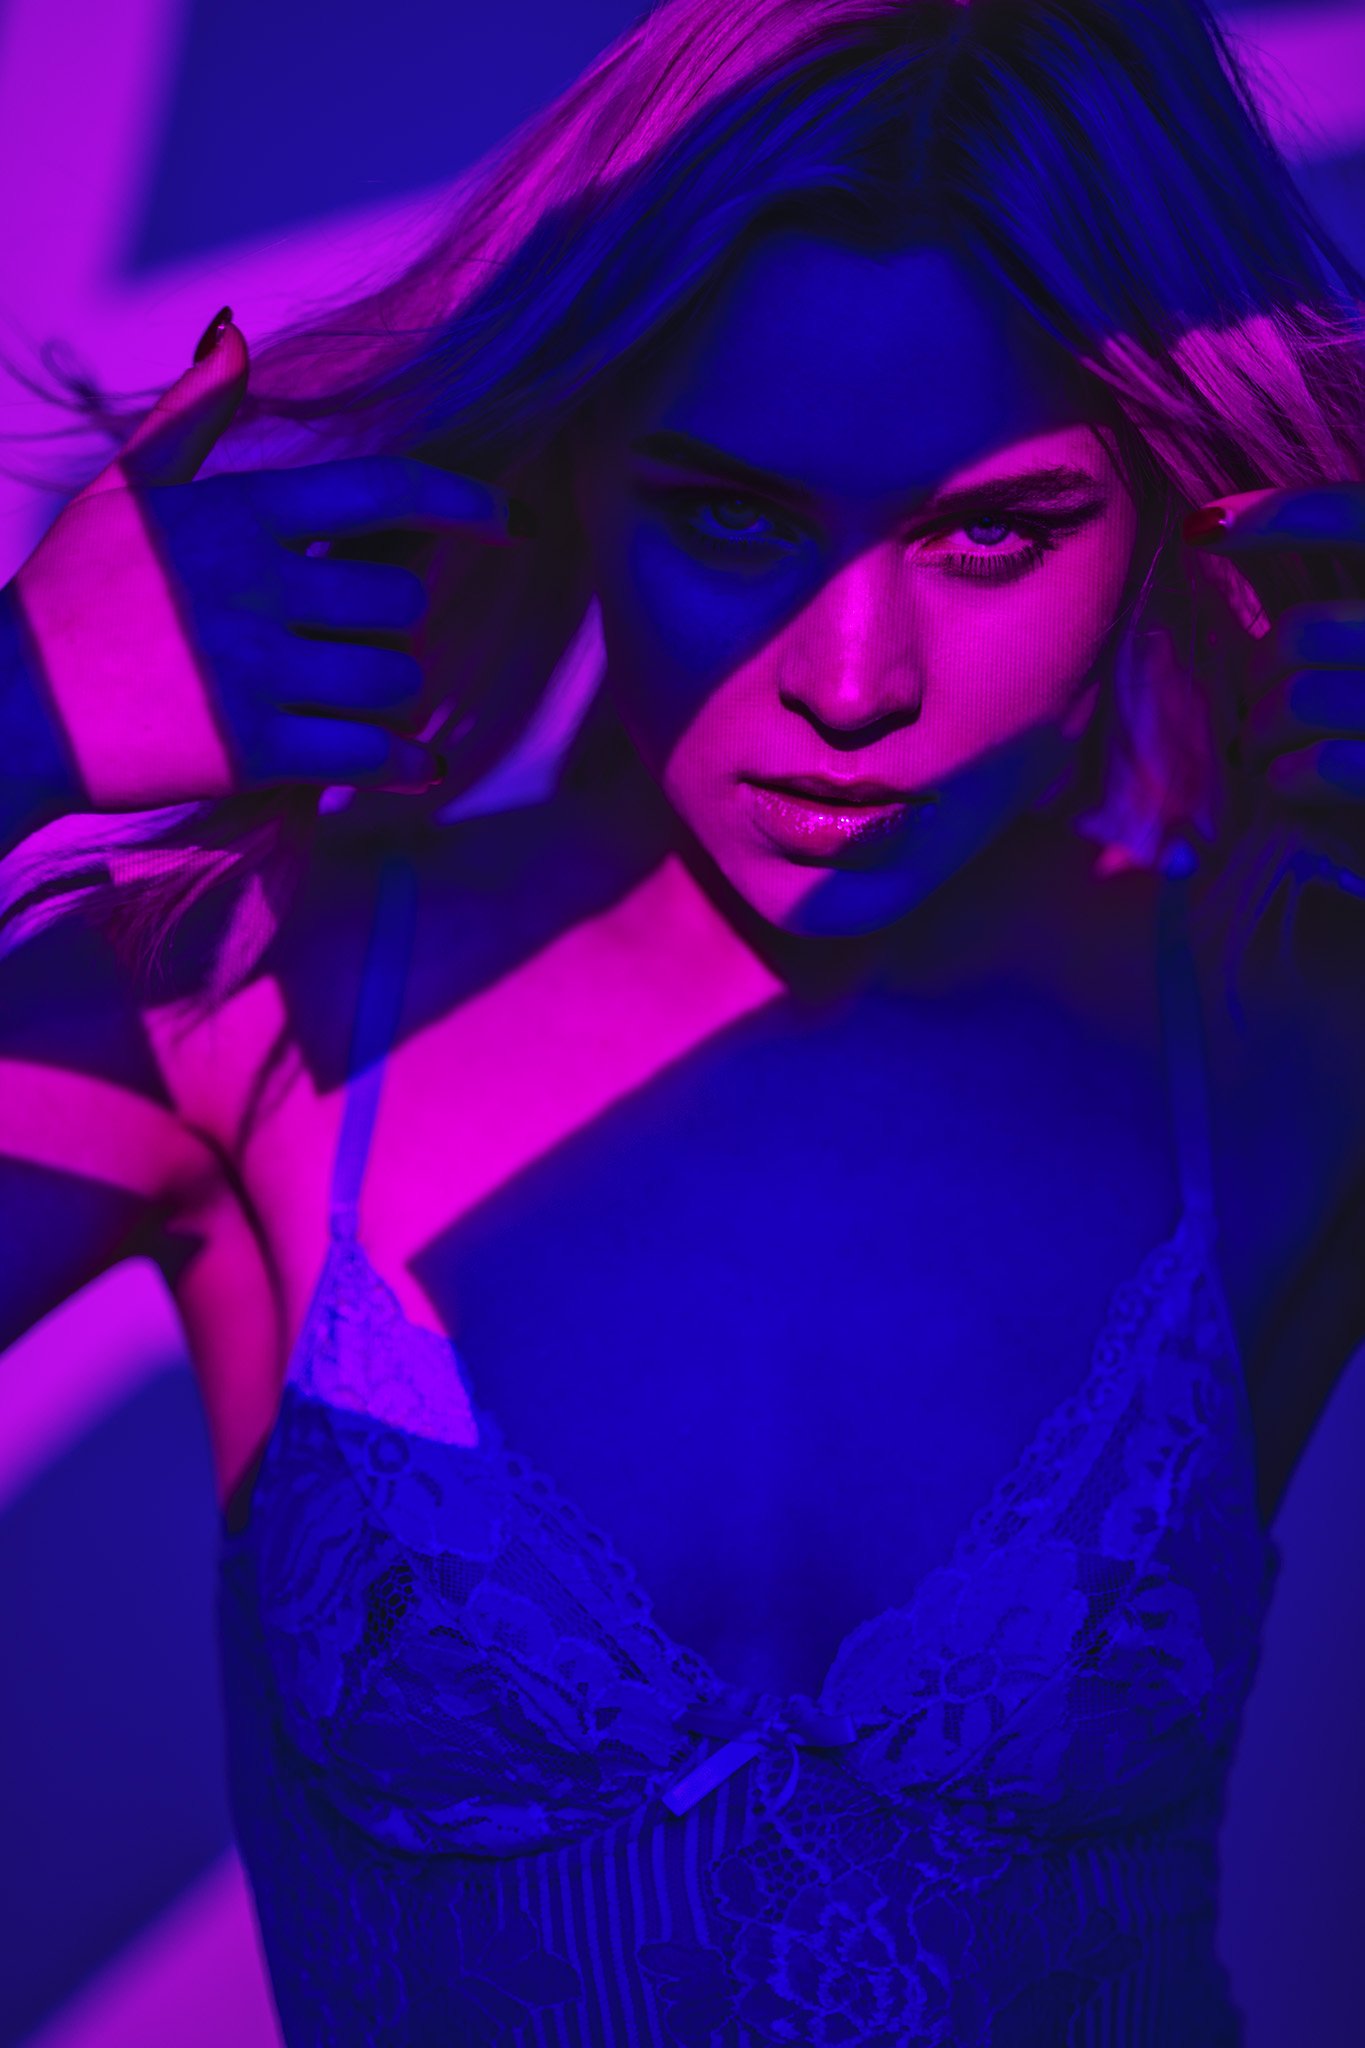
I’ll be the first to admit that I’m not a fan of post-pro effects on your photos. Cheesy filters and overlays NEVER age well and I try and always keep my Photoshop to basic blemish removal and colour grading for that reason.
But recently I came across an issue where digital pixels were present in my photos as a result of my using a projector. Yes, I could have used a 4K projector with smaller pixels at the time of taking the shot to eliminate them, but that didn't happen. As a result, I was looking for a way to reduce or hide the pixels present on my model via other means and a Photoshop solution seemed like a sensible choice.
Note: There is also a video clipped from my Livestream explaining this technique at the bottom too.
One way to remove any sort of digital artefact in photos is to degrade the shot in a meaningful way to hide one artefact with another. For example, one popular way to remove colour banding present as a result of online image compression is to add grain to your photo. This grain hides the colour banding, but as I said, you are essentially hiding one imperfection with another.
Sadly, it would require a silly amount of grain to hide the pixels in these shots, so I looked at alternatives. One immediate thought that came to me, was to degrade the lens the shots were taken on. Don’t hate me for using the word ‘vintage’ in the title as it’s tantamount to saying ‘edgy’ to a designer at this point, but sadly, vintage is pretty much the best fit for what I was trying to do.
Below you can see the before and after of the final result…


Characteristics of a Vintage Lens
Obviously, I’m going to be making some very generalist statements about vintage lenses, but here are some of the characteristics of the very old lenses that I’ve used in the past. Many of them are a little ‘soft’ (photo-speak for blurred) towards the edge of frame and many caused something called ‘chromatic aberration’ to also happen towards the edge of frame.
The blurred part is pretty straightforward, although I won’t simply be using a basic Gaussian blur effect to make it work, it’ll need to be a little more refined than that. The chromatic aberration part is a little tricker though.
If you’re not sure what chromatic aberration is, then it’s where we get an almost rainbow edge to high-contrast areas or bright highlights in our shots. We can kinda simulate it via shifting the RGB layers in varying amounts, but it’s not simulating the lens effect as that is more pronounced towards the edges rather than the same all over.
Thankfully Photoshop has a tool to ironically ‘correct’ these imperfections and we’ll be abusing that to actually add them back in.
Lastly of course we’ll add some grain to tie it all together.
Adding the Chromatic Aberration
Firstly, your image will need to be ‘finished’ and by that I mean we’re going to be doing this process after you’ve done all your dodge and burns, skin clean up, colour grading etc.
Once all that’s done;
Make a ‘stamp visible’ copy of your final image by selecting the top layer and hitting Command + Shift + Option, + E (Ctrl + Shift + Alt + E on PC).
Go to Filter -> Lens Correction…
3. A new window will open up and from here we want to input the following…
Switch to the ‘Custom’ tab at the top right (circled below).
Then add +1.00 in the Remove Distortion slider.
Below that you’ll add -100.00 in the Fix Red/Cyan Fringe
Keep 0.00 in Fix Green/Magenta Fringe
And lastly, +100.00 in the Fix Blue/Yellow Fringe
Once that’s done, simply hit ‘OK’.
Click to enlarge
At this point, you may be wondering if you’ve even done it correctly as not much seems to have happened. As I mentioned above, this lens correction tool is designed to ‘fix’ aberrations, so it can be subtle. To increase the effectiveness of what we’ve done, we simply need to repeat the process a few times and we can easily do that by hitting the Command + F key or by going to ‘Filter -> Lens Correction…’ at the very top of the dropdown to quickly repeat what you’ve just done. Your tastes may vary, but I run mine an additional 2 times to apply the lens correction a total of 3 times.
Adding the Lens Blur
As I mentioned at the start, the blur that’s inherent in many older lenses is not simply a uniform blur across the whole image, instead, it is more pronounced near the edges of the frame. Another thing we don’t want to do though is simply blur the edges with Gaussian blur, as this will look very odd and it’ll also be very tricky to blur smoothly. So instead, we’ll be using ‘Radial Blur’.
To access this, go to Filter -> Blur-> Radial Blur…
2. In the Radial Blur panel you’ll need to enter an amount to your tastes. A little goes a long way though I use a value of 3.
Also, be sure to select ‘Zoom’ under the Blur Method and set the ‘Quality’ to ‘Best’.
Lastly, you can also try to move the central point from which the zoom emanates. You need to be subtle with this as we’re trying to reproduce a lens blur and that happens at the edges, but I do try and move the central point a little closer towards the models’ eyes. Here you can see that I placed the crosshair a little up and to the right.
Once you’re happy, hit OK. Just be aware that you won’t get a preview of what it’ll look like until you hit OK. If you need to adjust the blur, you’ll need to undo what you just did and try again, but don’t be afraid to test varying ‘Amount’ values to see what works.
Adding the Grain
All that’s left to do now is add the finishing touches and adding film grain will certainly help tie it all together. There are loads of ways to do this, but one of the best options is to add actual film grain from real film. I found a great site online that allows you to download film grain stock for free and I recommend you go check them out at FilmComposite.com
Once you’ve downloaded their files, simply chose the film grain that you prefer, I opted for old faithful and went with ‘Kodak Portra’. Import it into your file, align it and resize it, and then simply change its blending mode to ‘Overlay’ and reduce the opacity if it’s too strong for your tastes.
That’s it, you’re done!
As with all digital effects like this, use it sparingly as it’ll really only be good on certain shots.
Lastly, if all of that sounded like too much work, you can of course just download the action I made for you instead 😅
Born After the Year 2000? - Video Included Below
No judgement here, but I realise for some of you who were born after Band of Brothers first aired, that reading is pretty boring! So if you’ve never heard the term ‘Zip Disk’ before, I’ve included a video of what to do just for you guys too. It’s only 10 minutes long, you’ll be fine ❤️
This video is a snippet from one of my recent Livestreams, so if you want to tune in and hang out with other lighting nerds like us, I go live around 7pm GMT every other Tuesday on my Facebook Page (Facebook is a place where us old people chat online BTW).
Examples of the final results
Below are some of the final shots with the vintage lens style effect applied. Click on any of them to fill the screen.
Thank You
As always, thanks for checking out this article and spending a little bit of your day with me here. I hope you found it useful and if you left with a little more knowledge than when you arrived, it’s been worth it.
If you have any questions or comments, or if something doesn’t make sense, by all means, fire away in the comments below and I’ll do my best to answer what I can. Thanks again and I’ll see you in the next one.
Don’t forget to sign up to my newsletter to be sent all of these photo tips and techniques articles every month in case you miss one.
JHP Livestreams…
If you give this technique a go, I’d love to see how the shots turn out, so feel free to share them my way. One way to do that is via my Livestream. I Livestream every other Tuesday night via my FB Page and there I answer your questions, critique your shots, take community images into Photoshop to work on them and discuss all manner of lighting tips and techniques. I look forward to seeing you and your work there real soon. JHP Facebook Page


