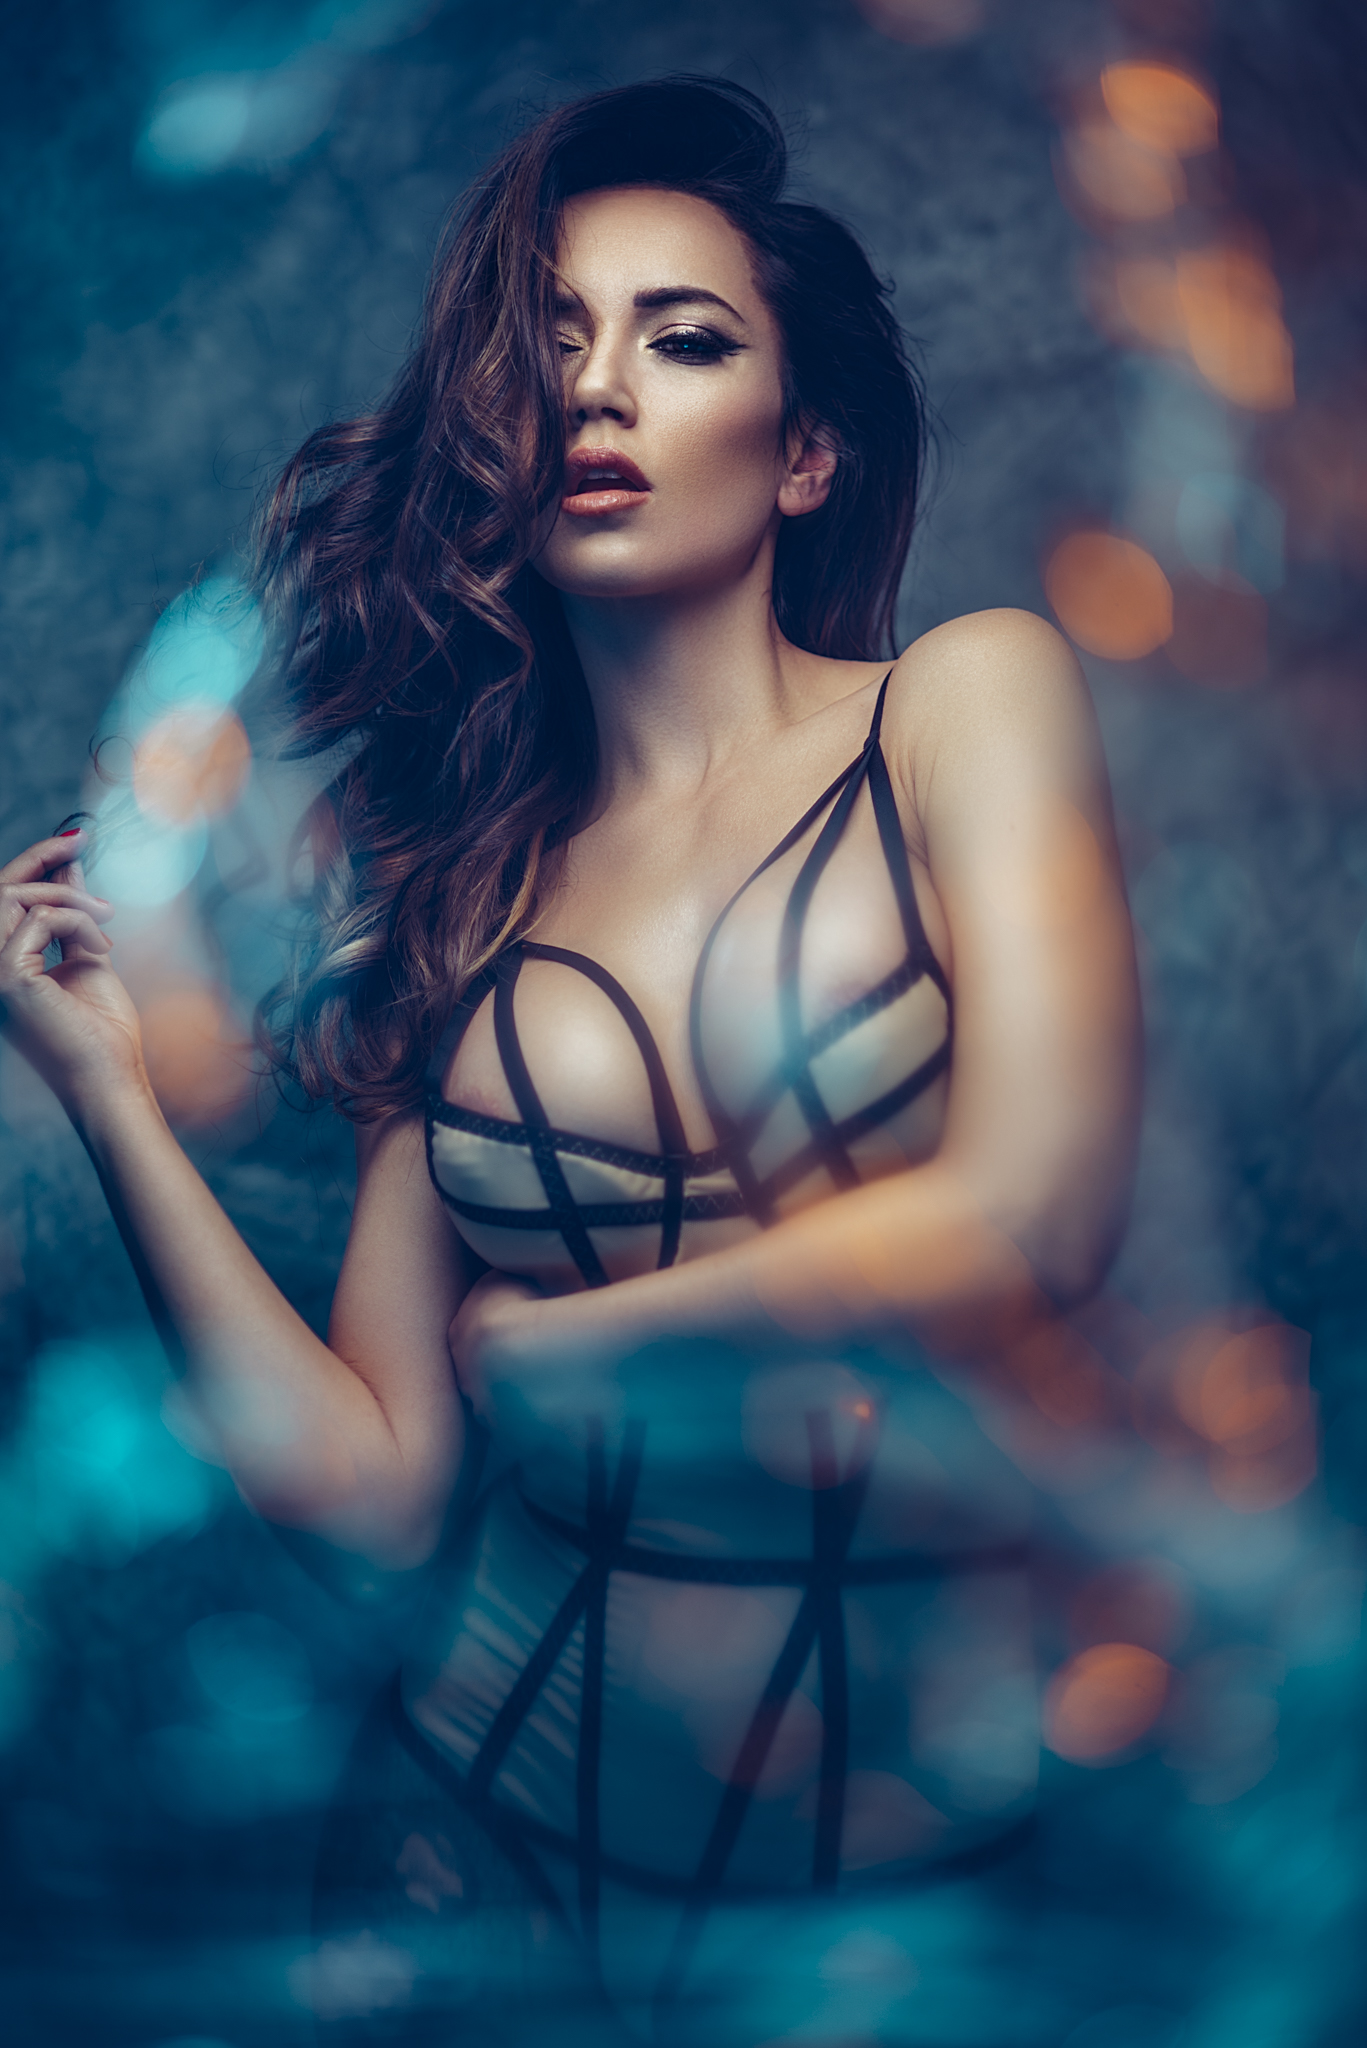
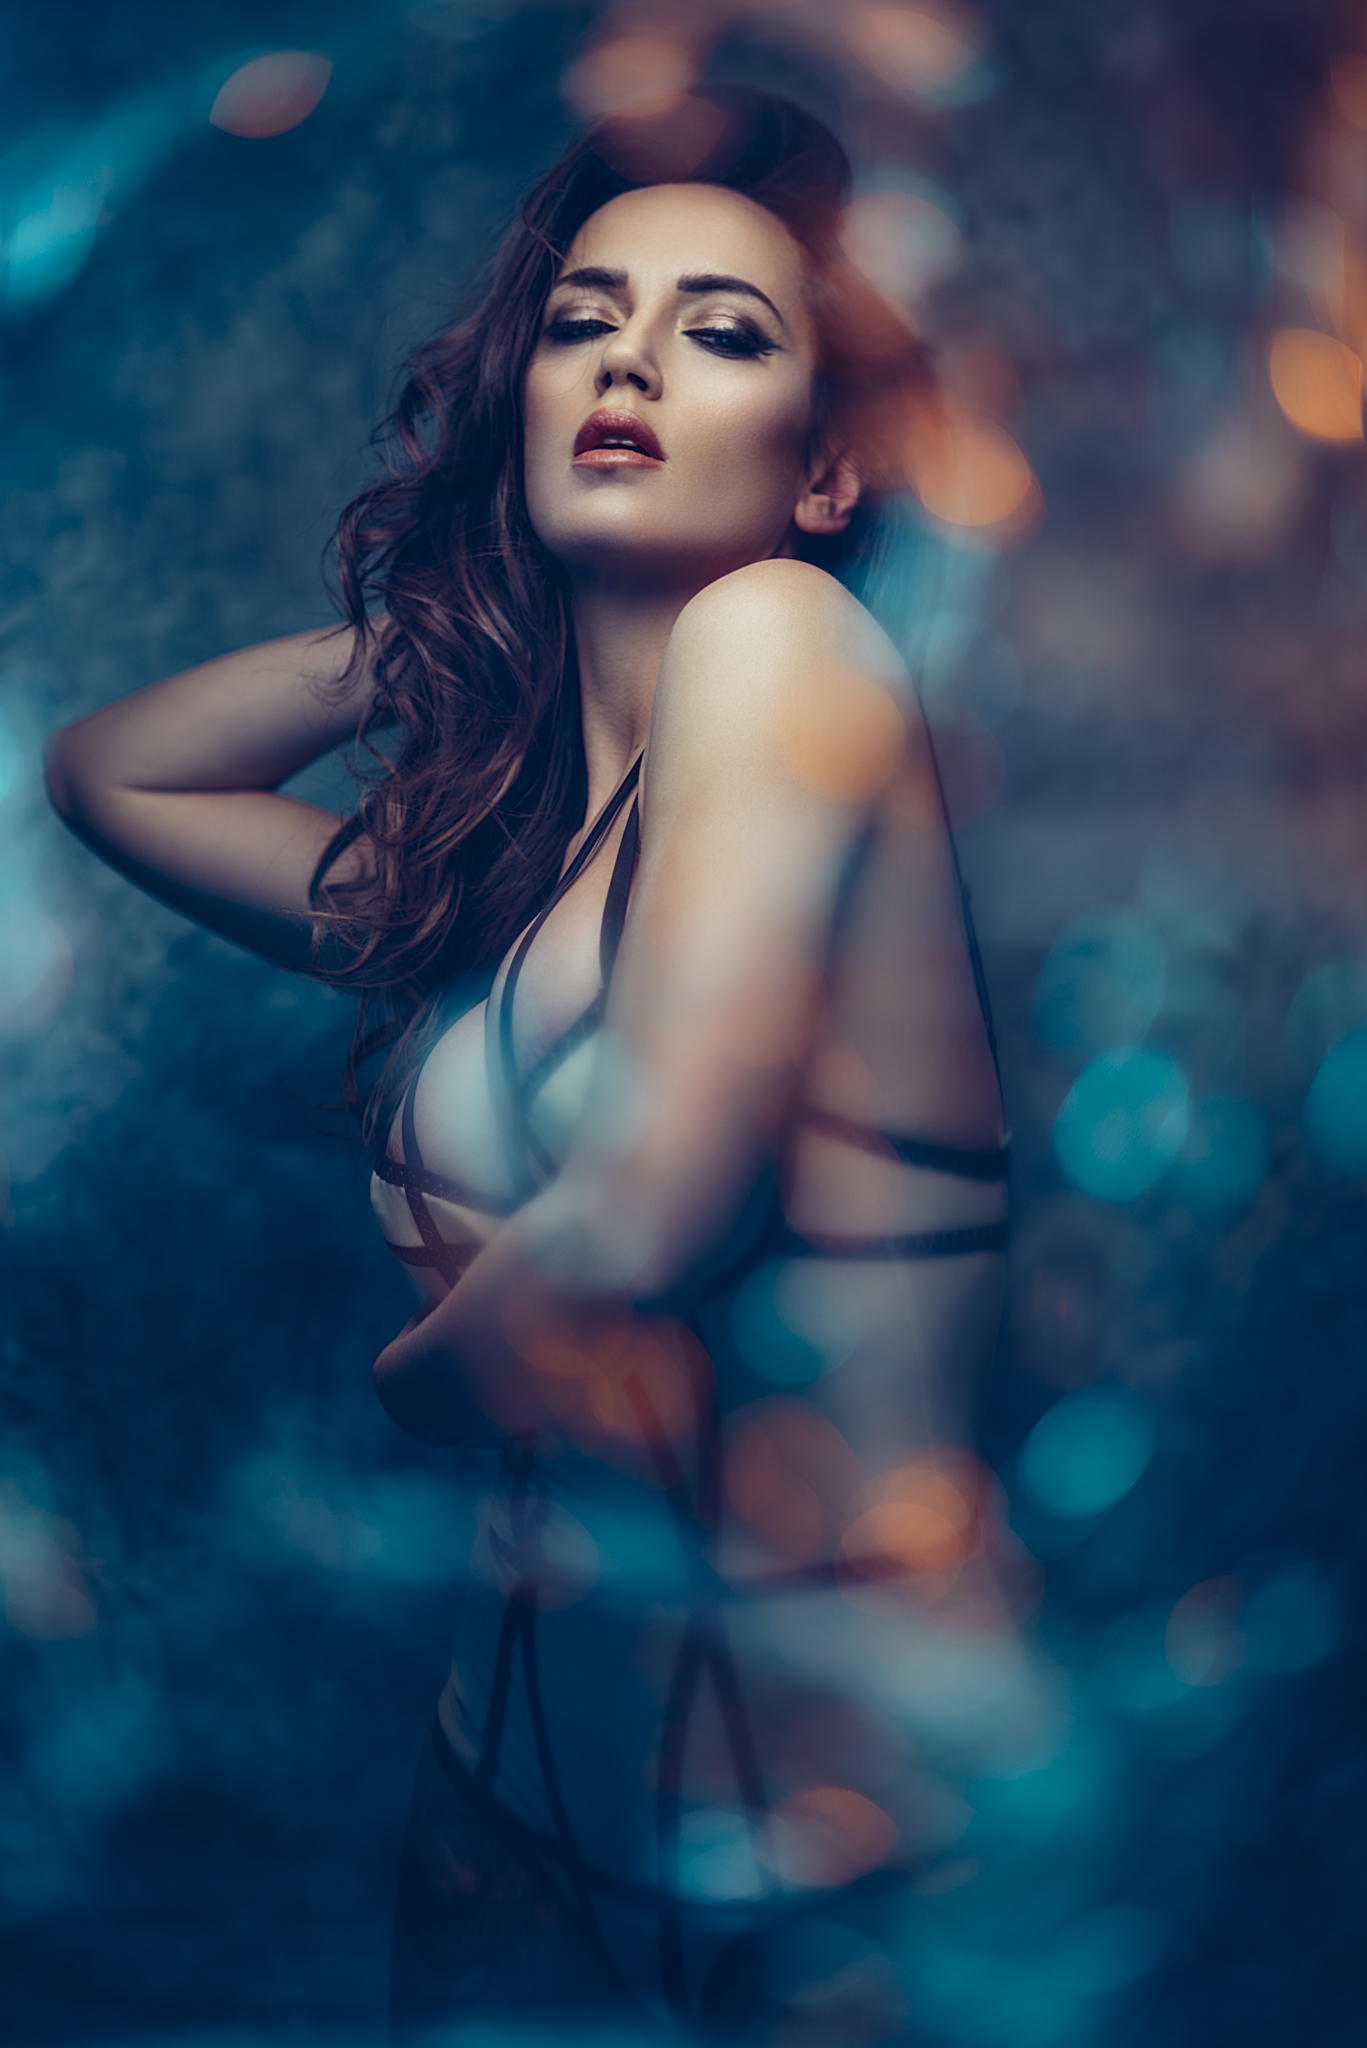
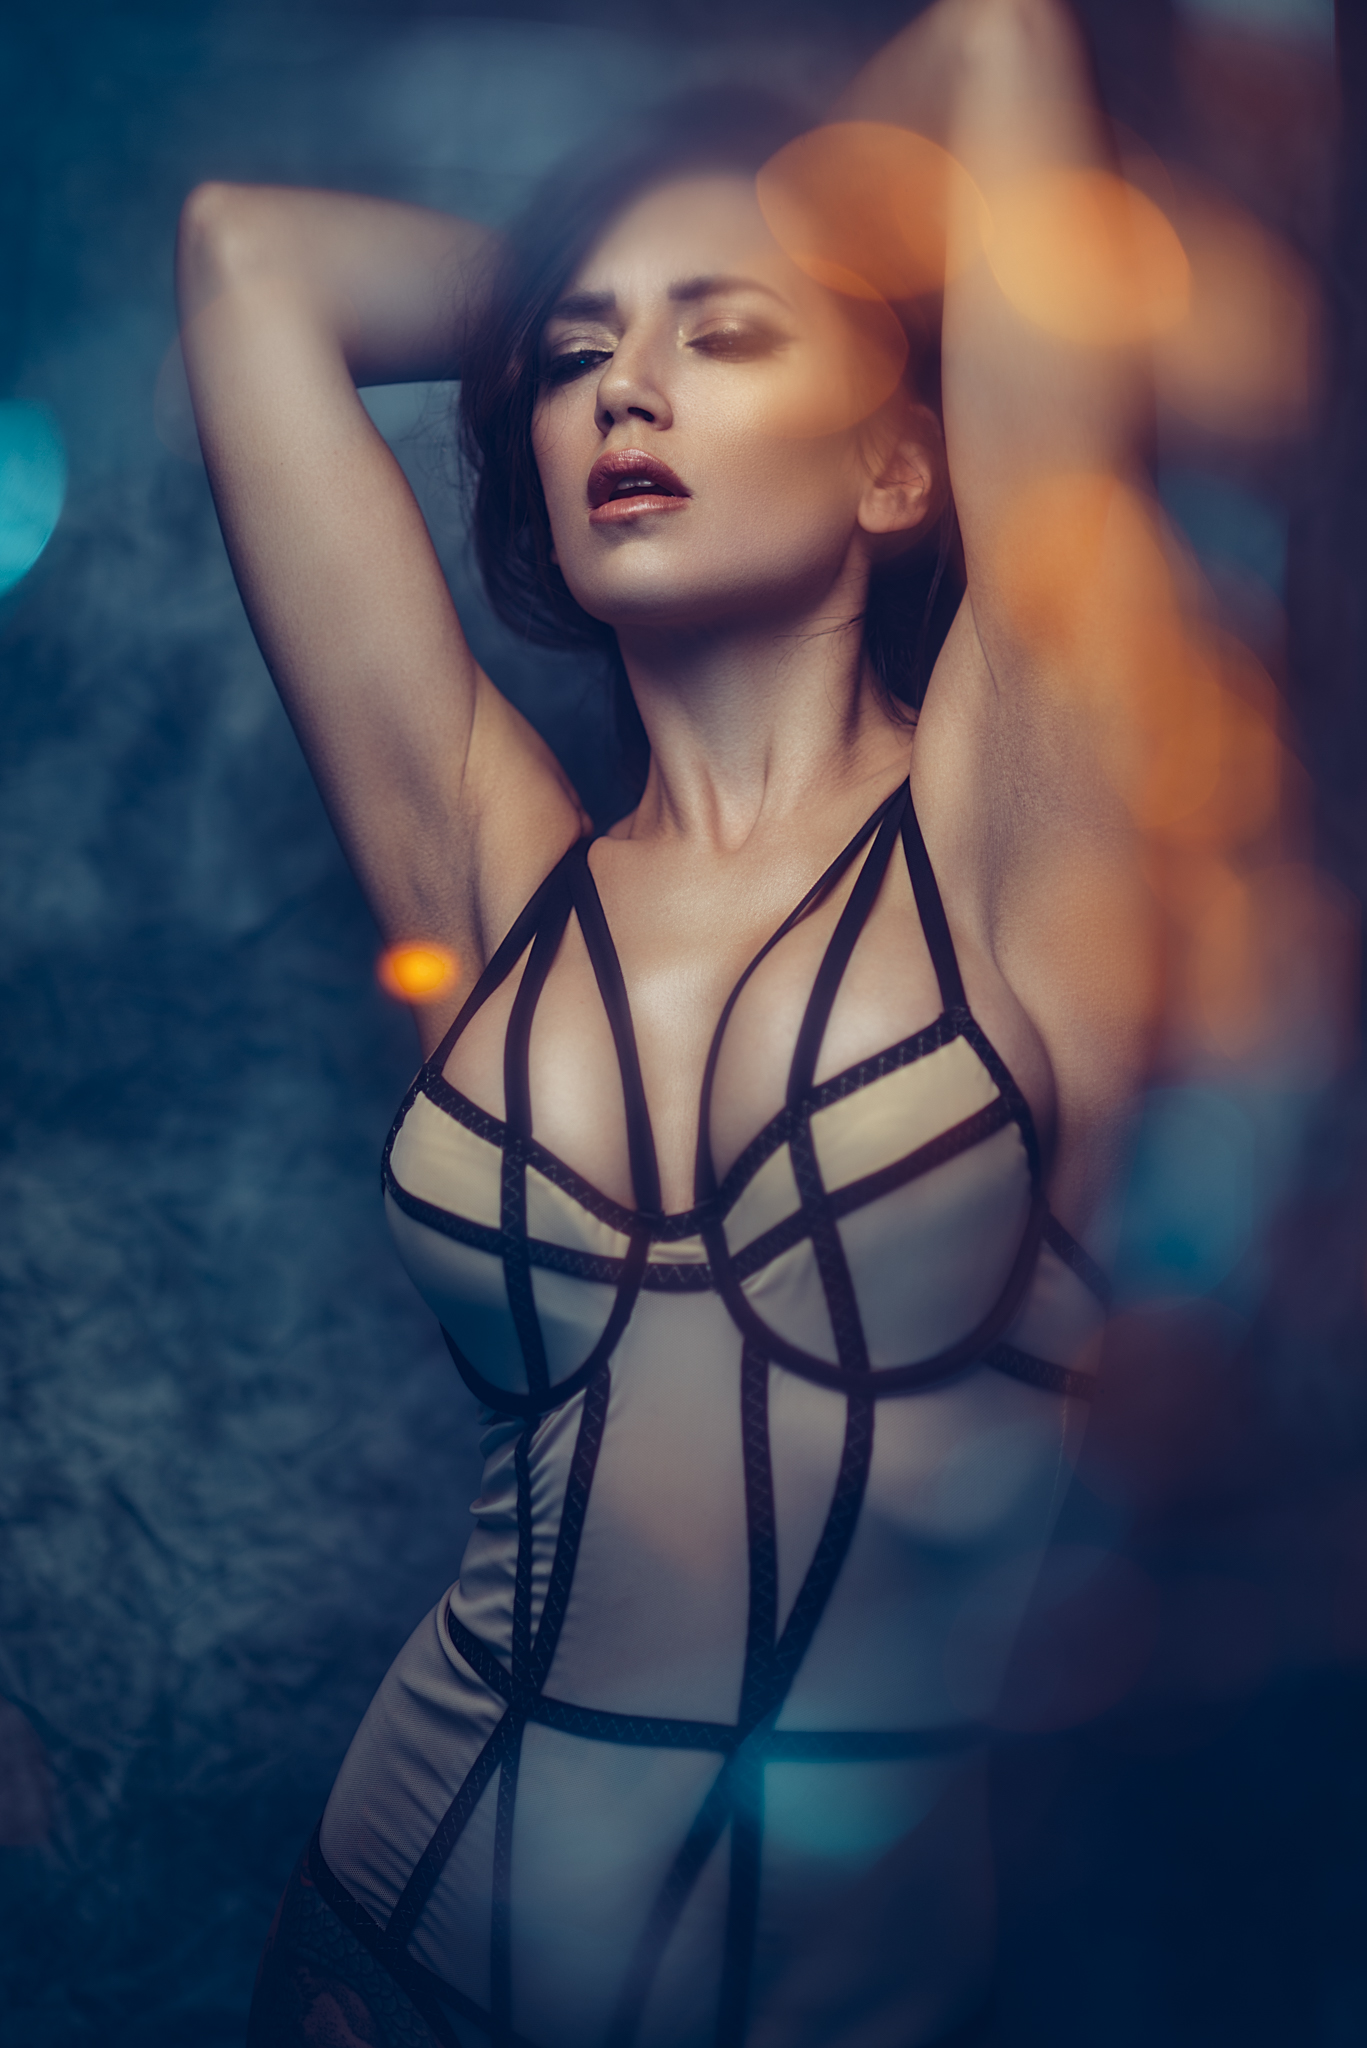
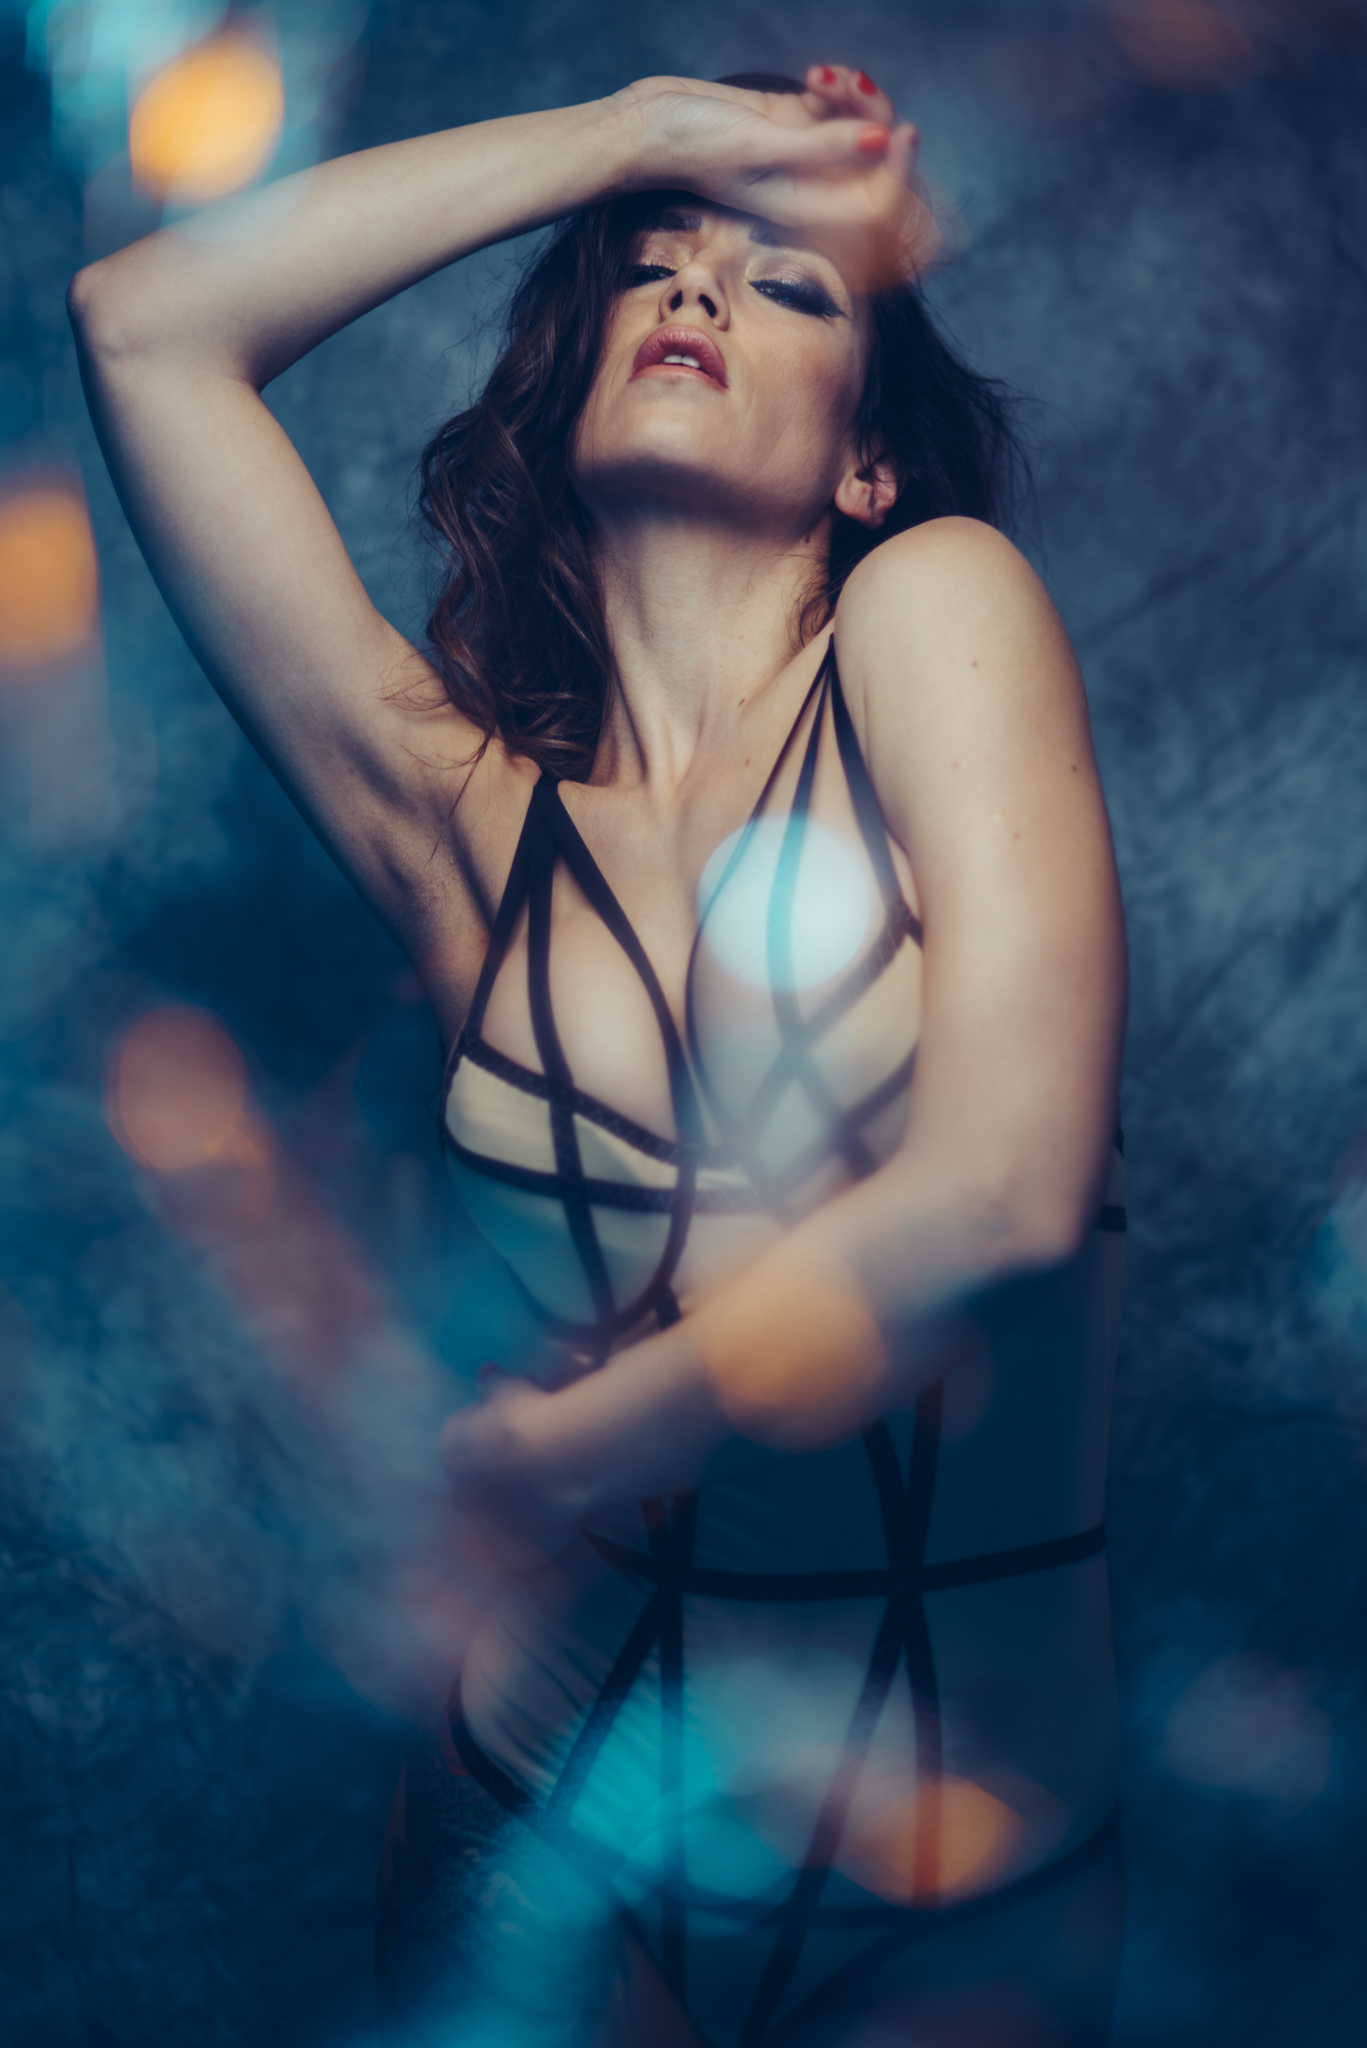
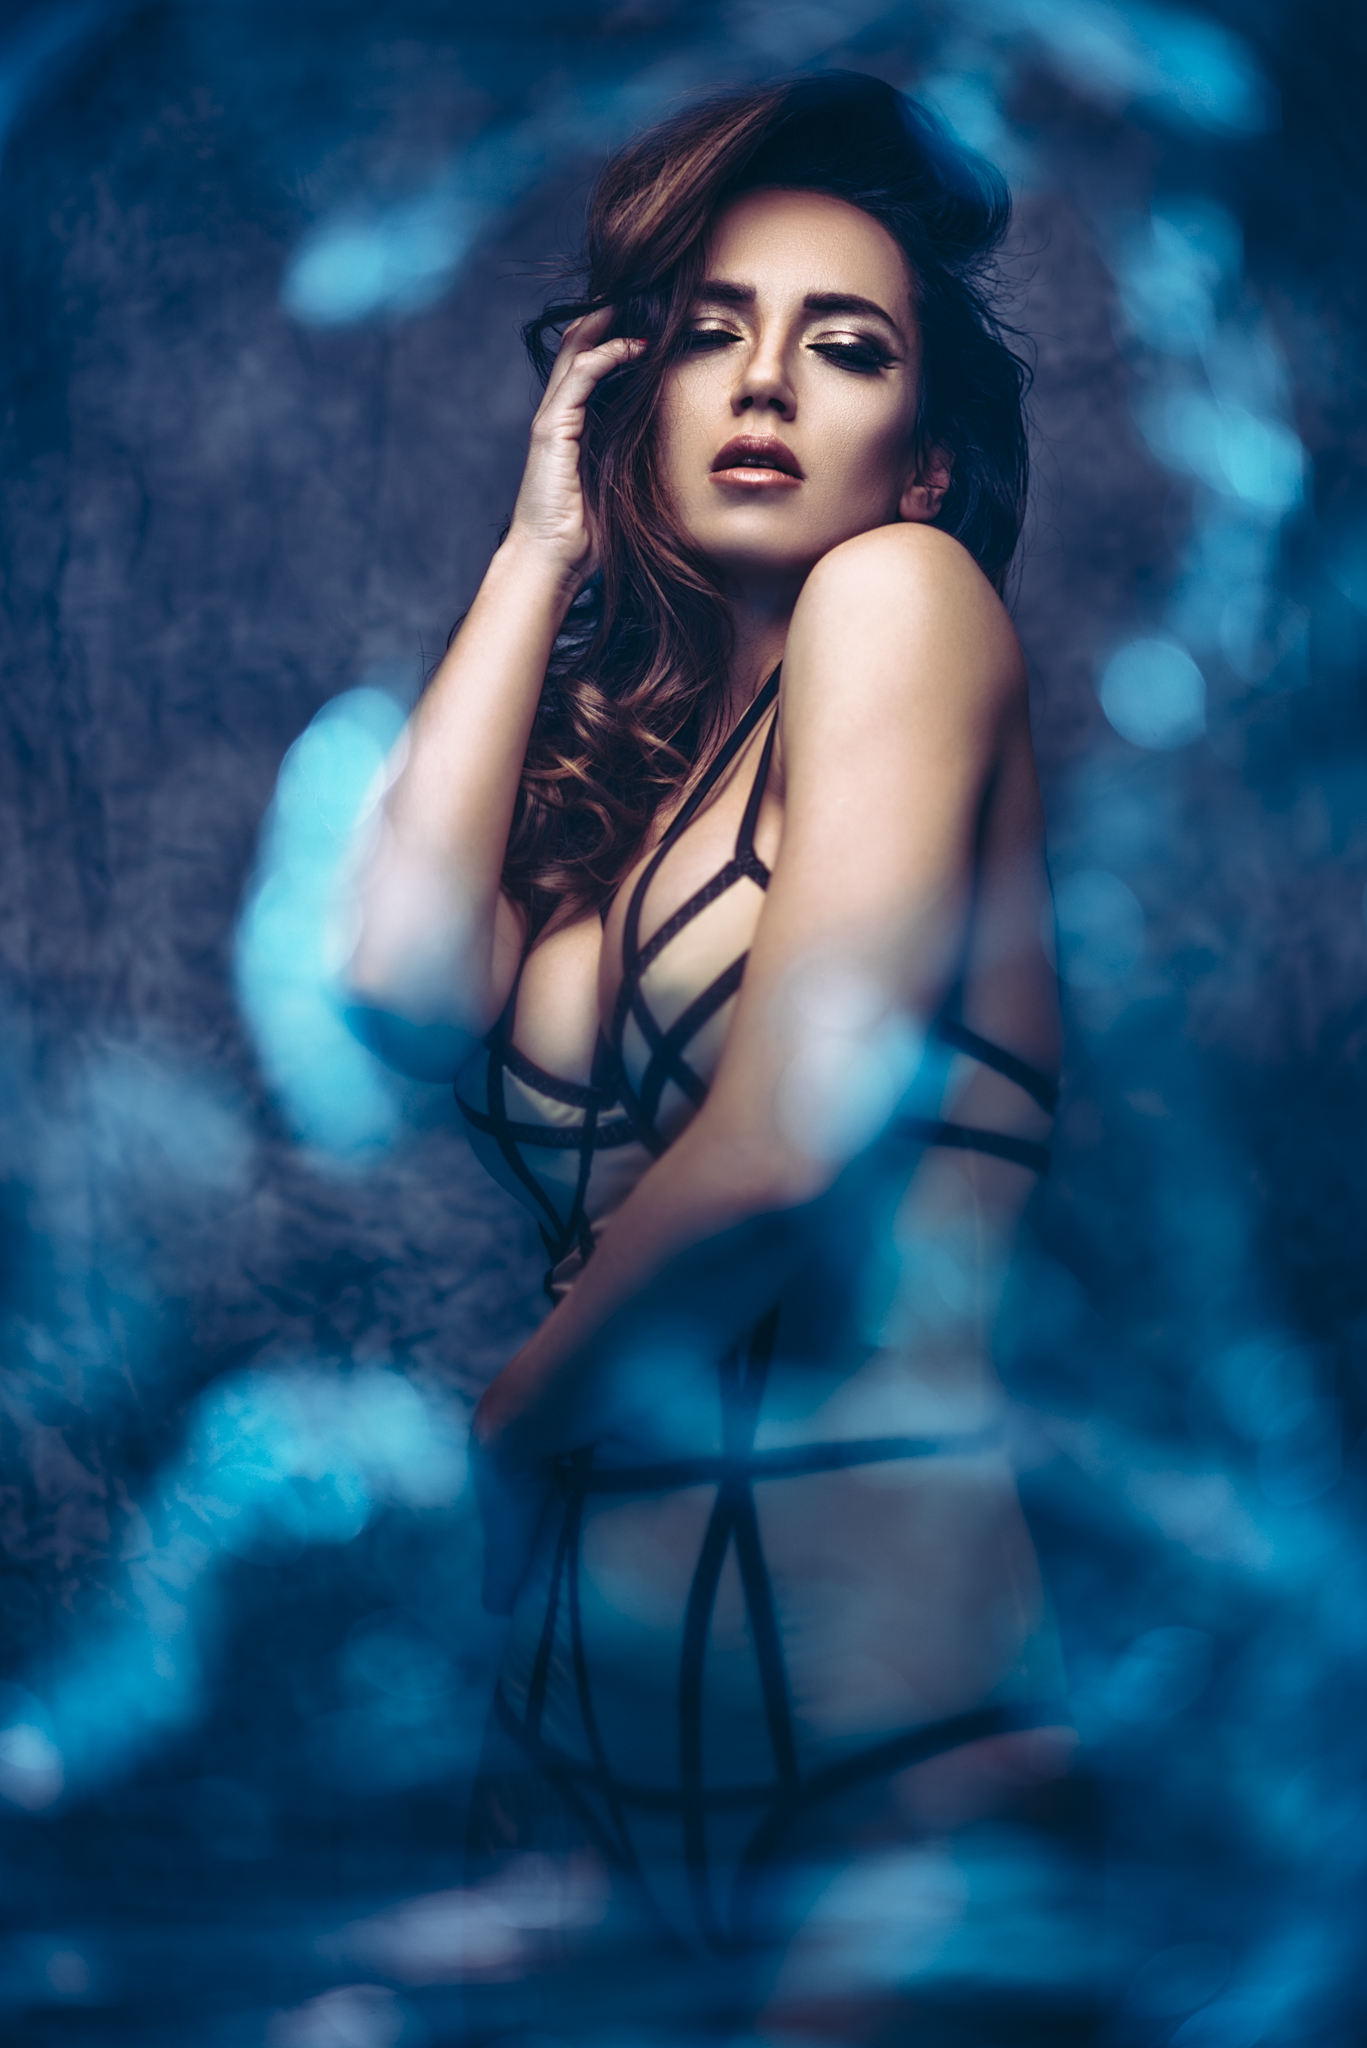
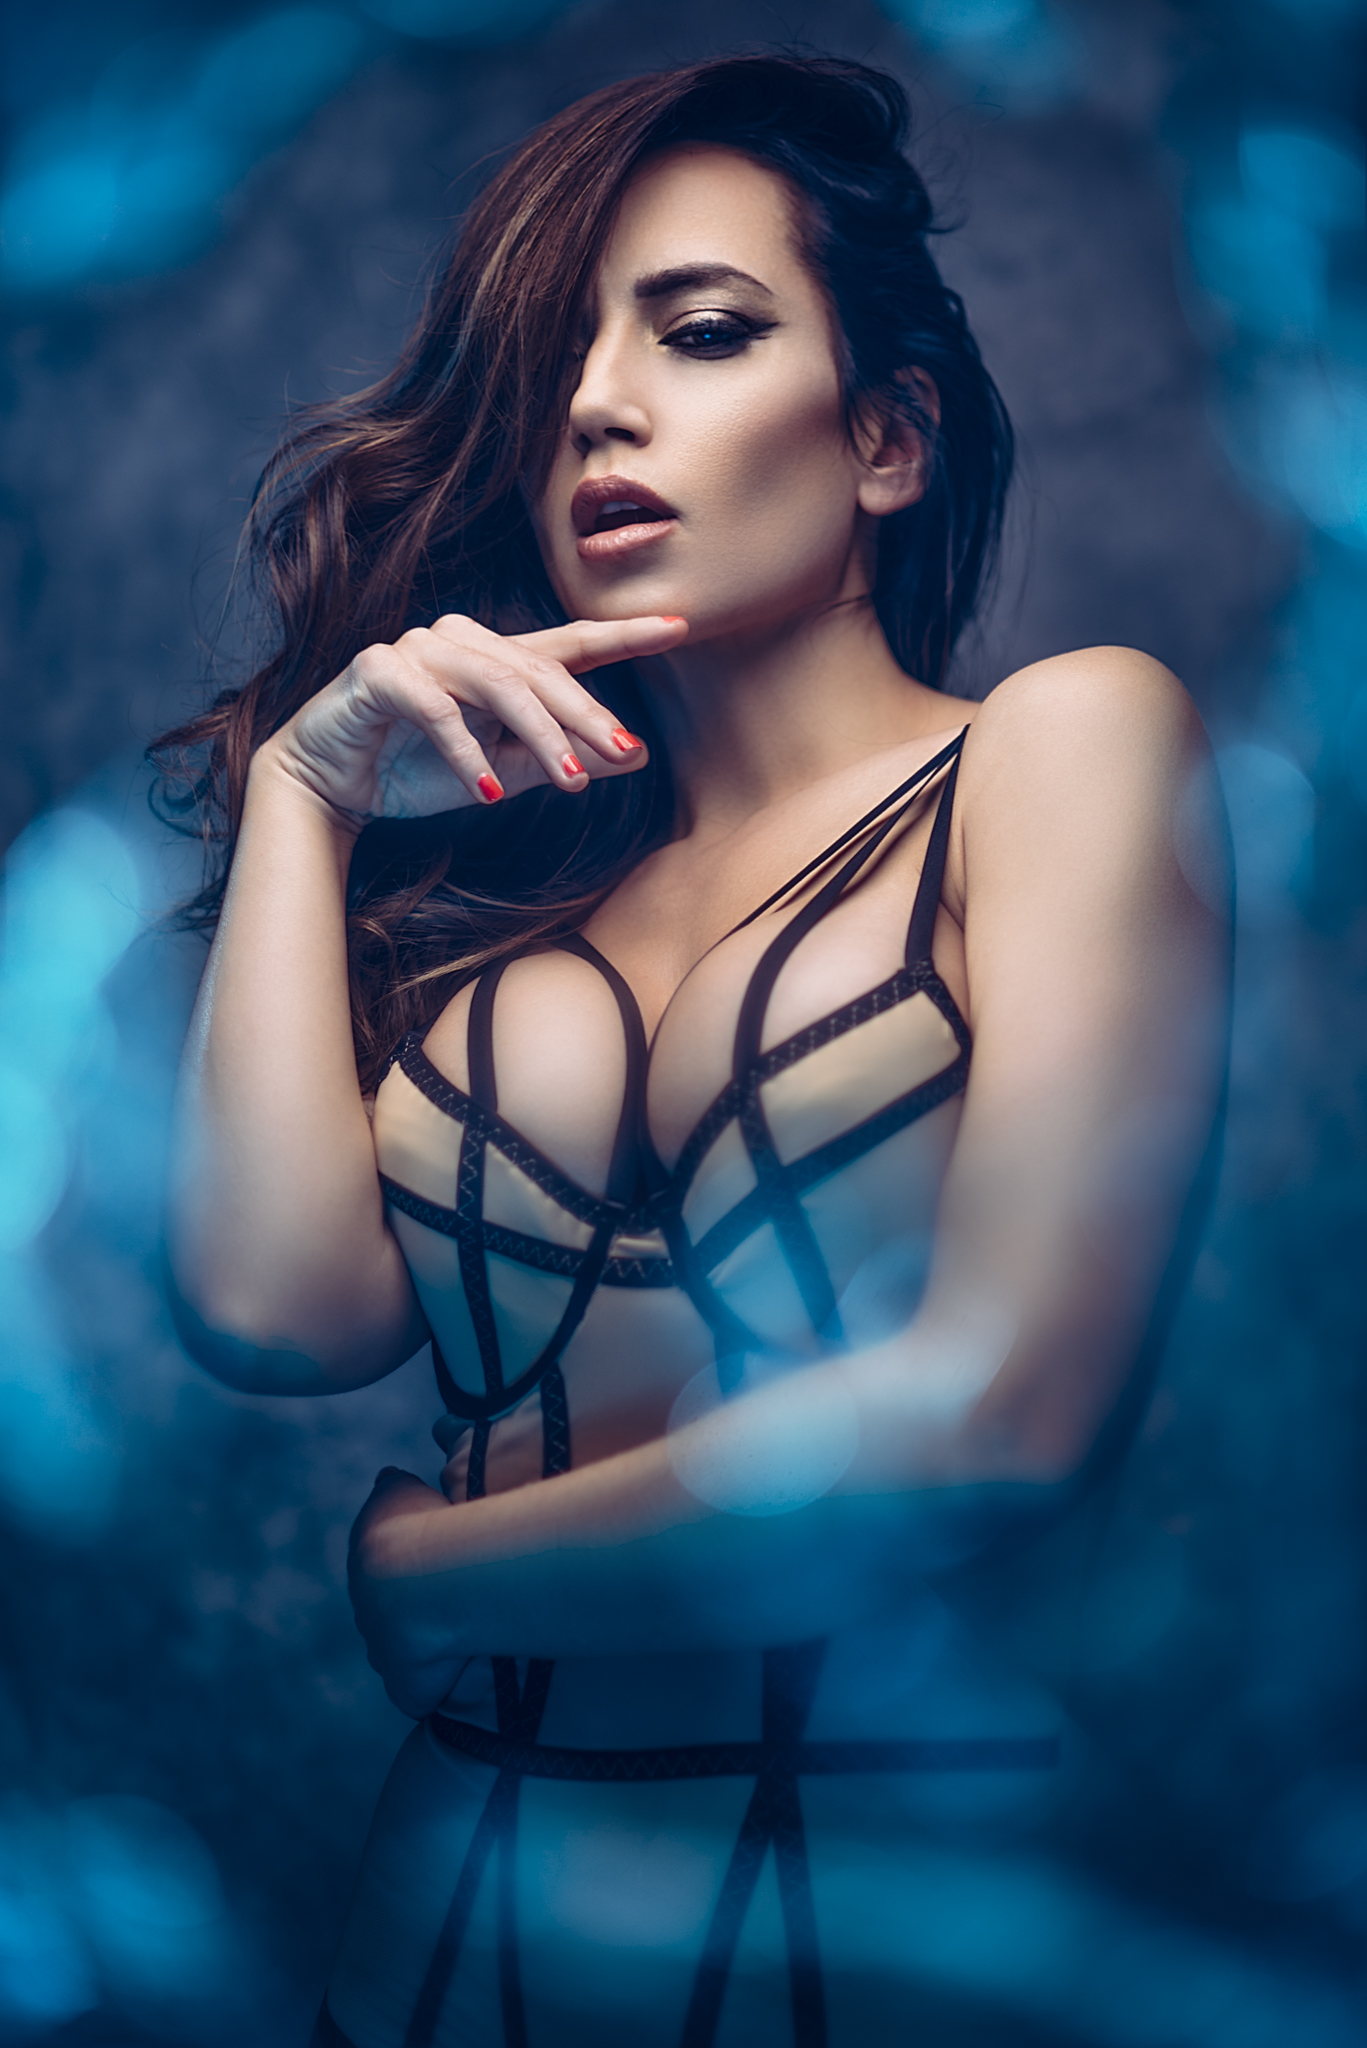
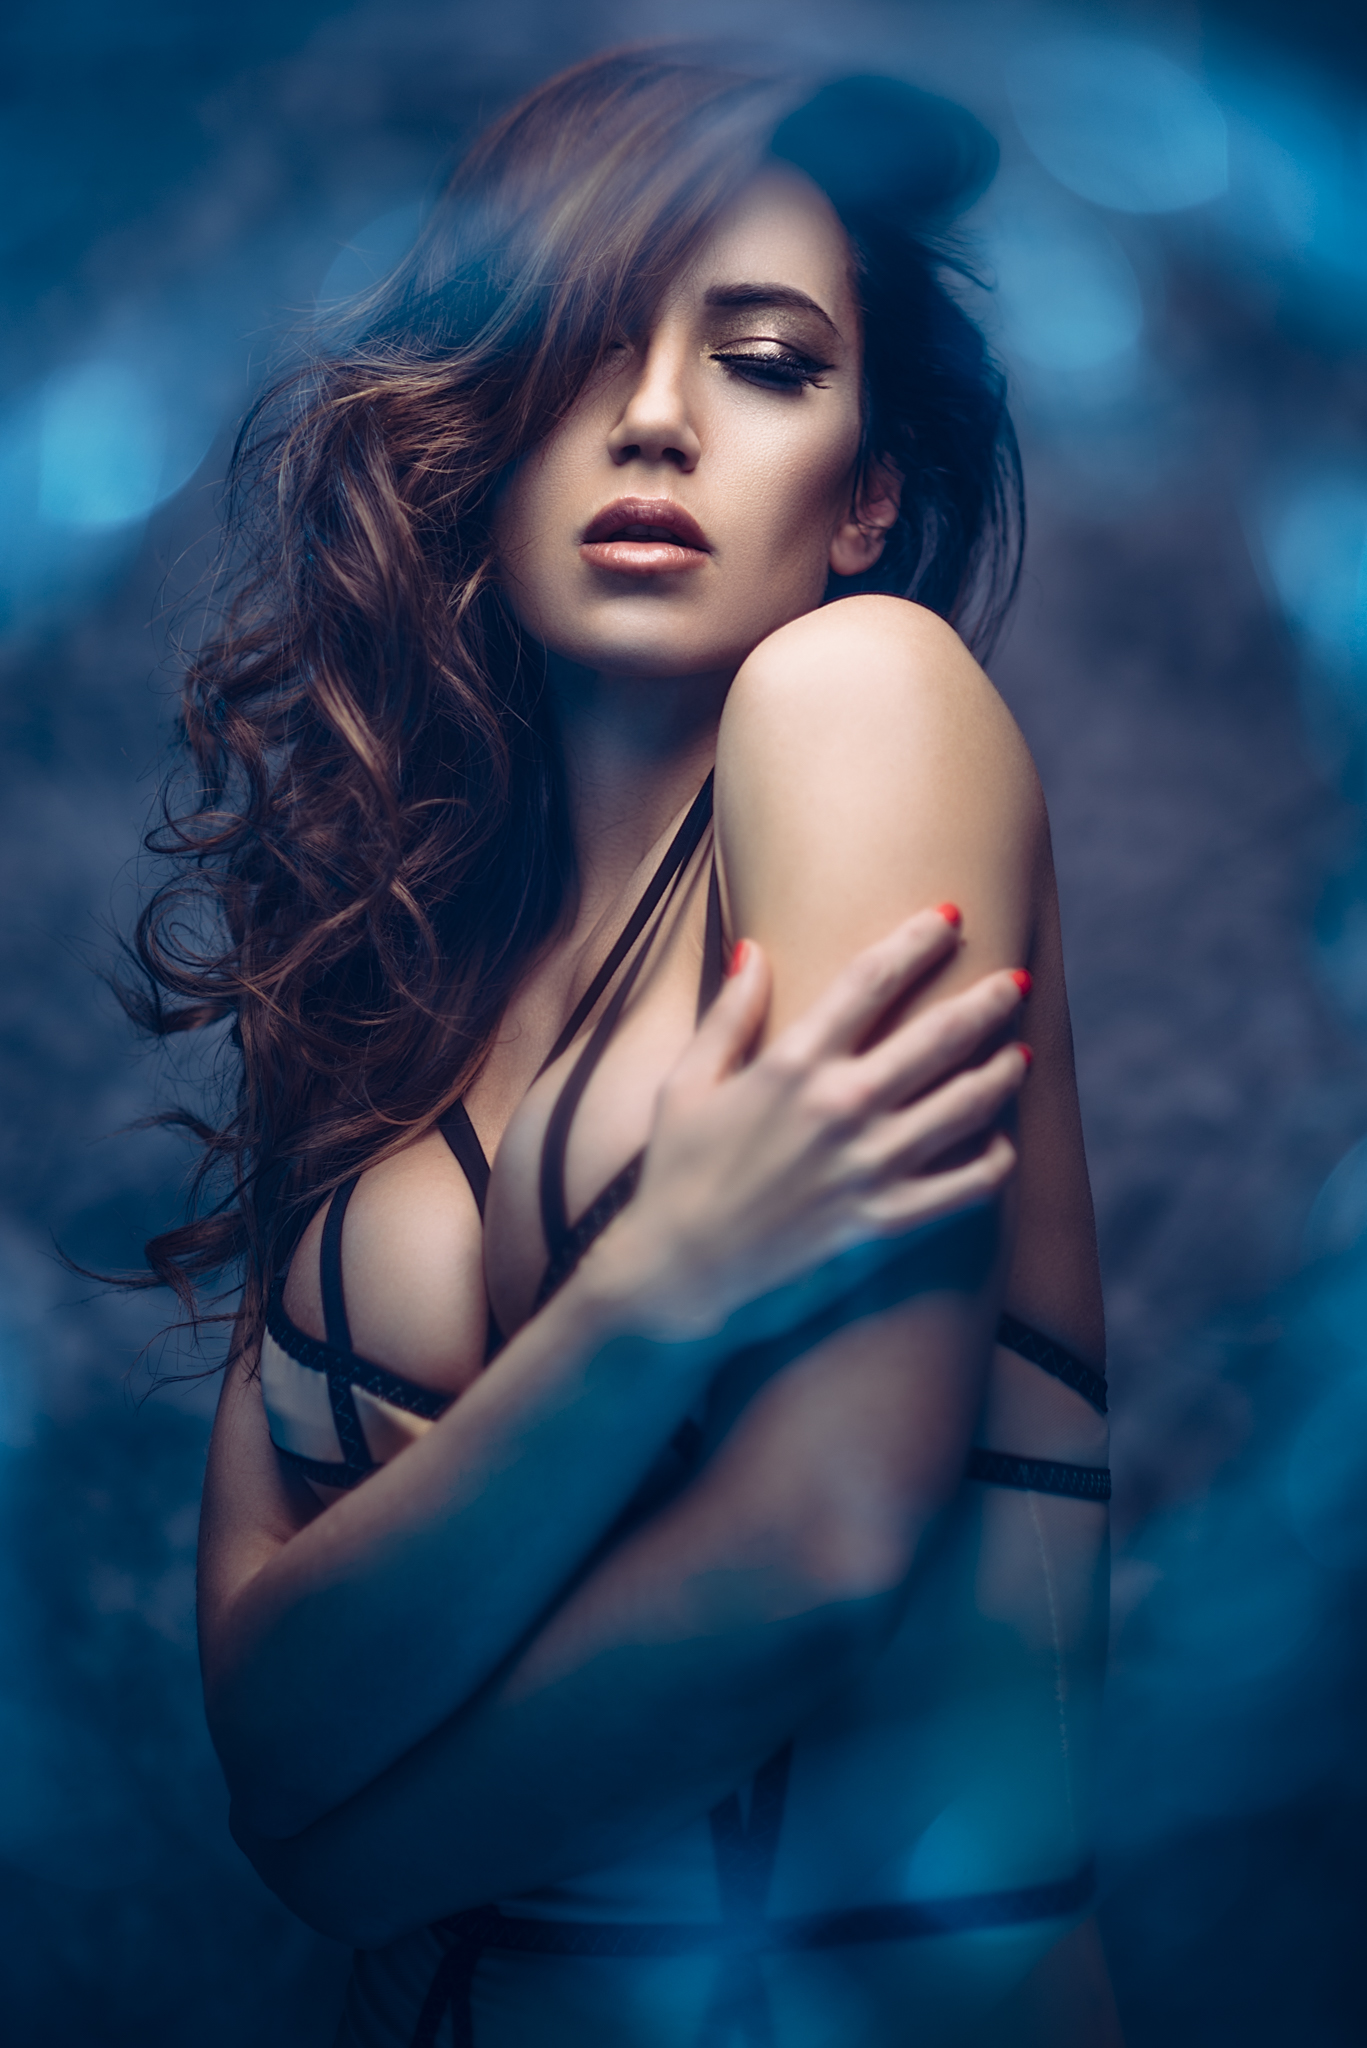
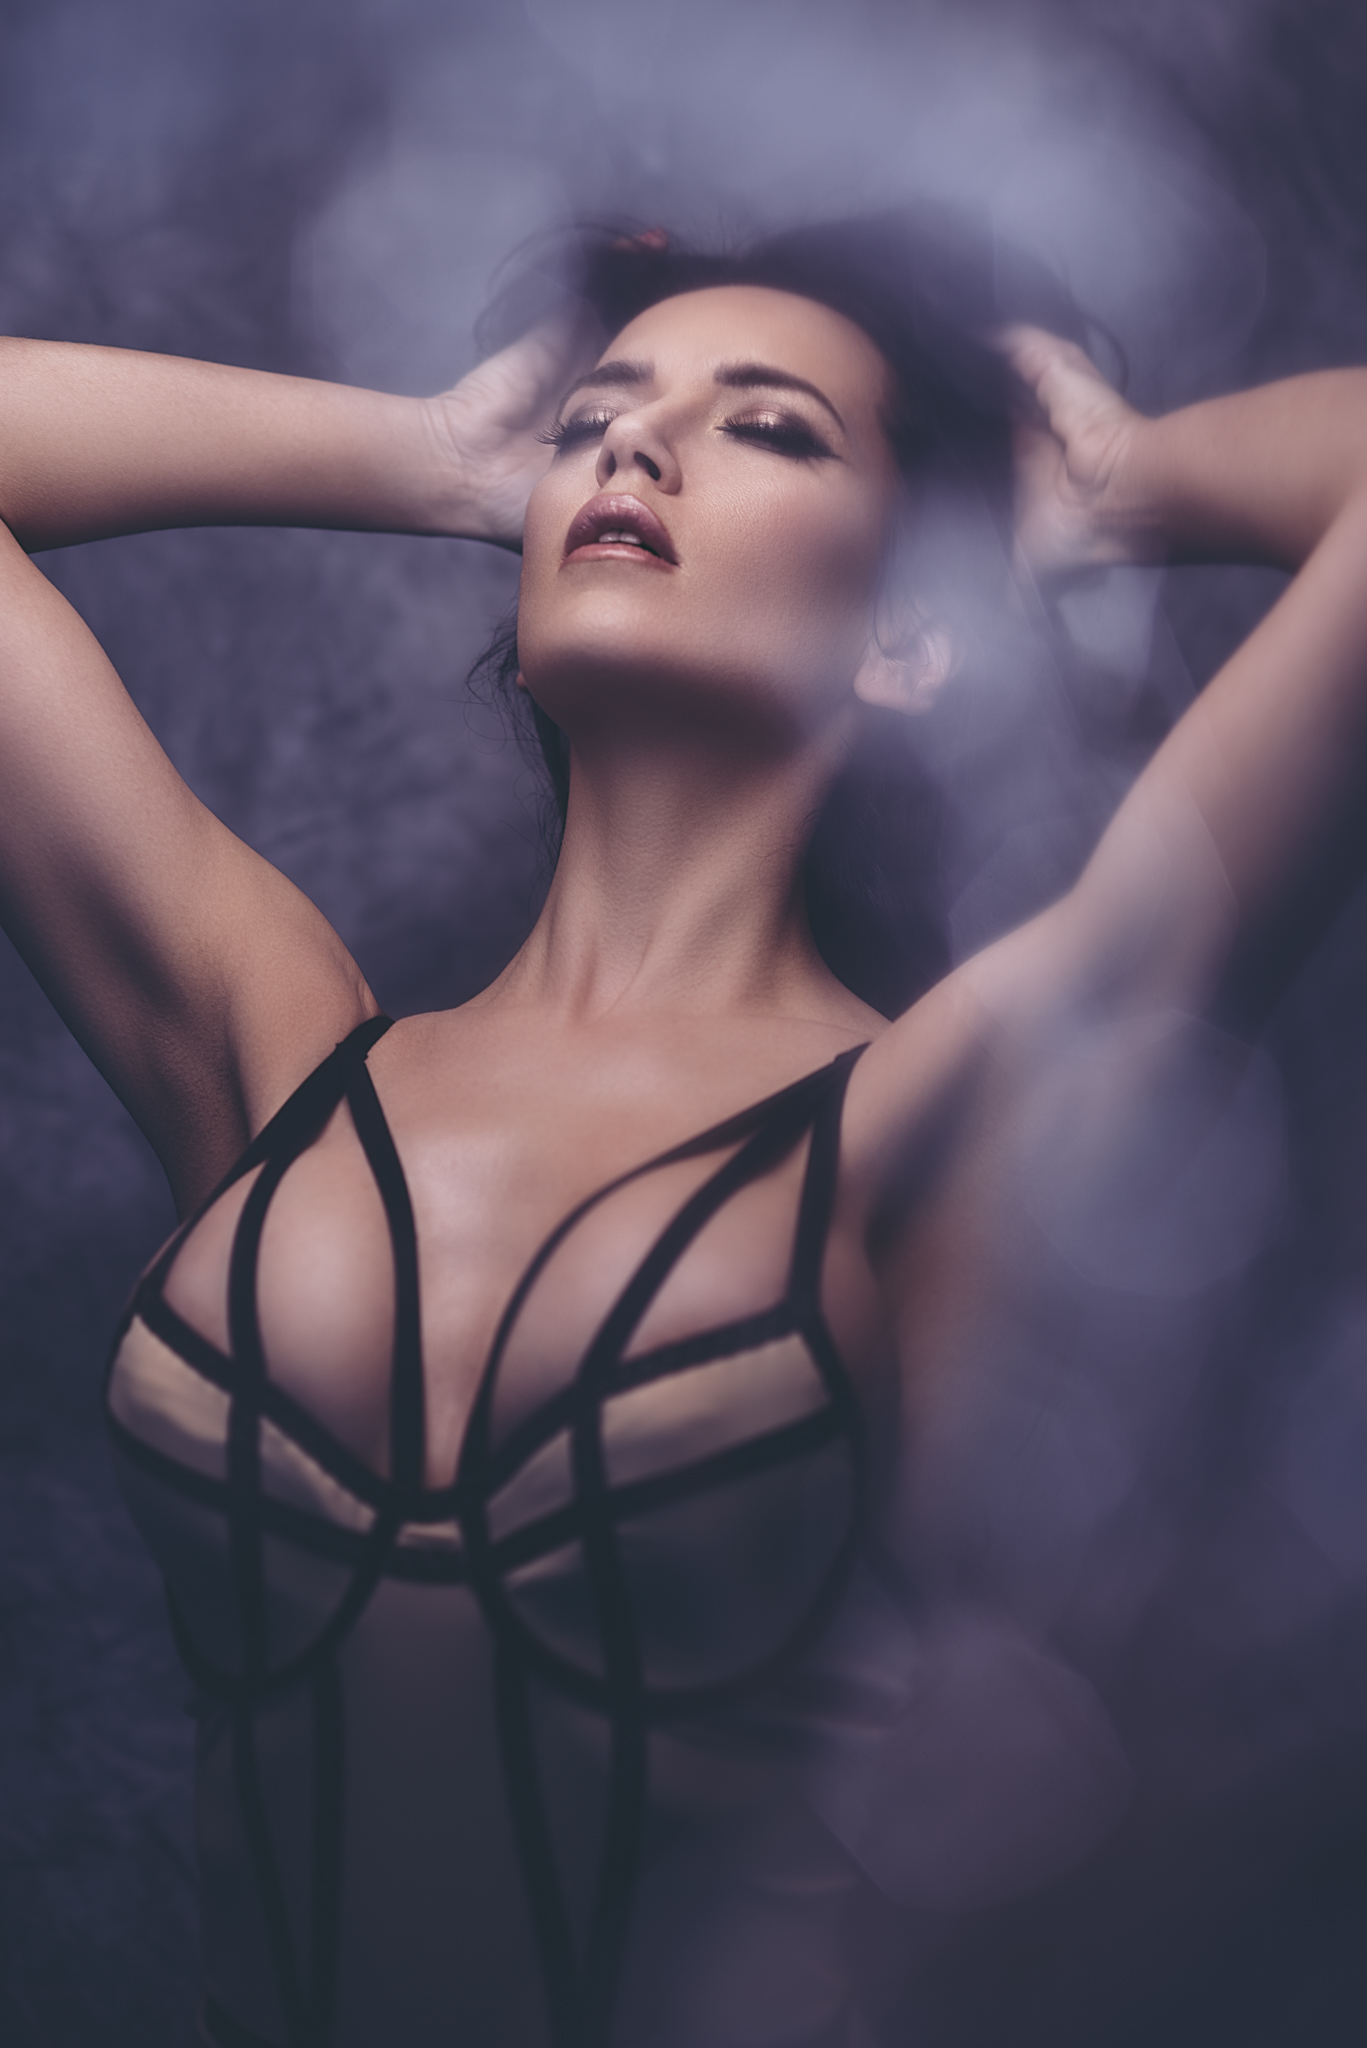
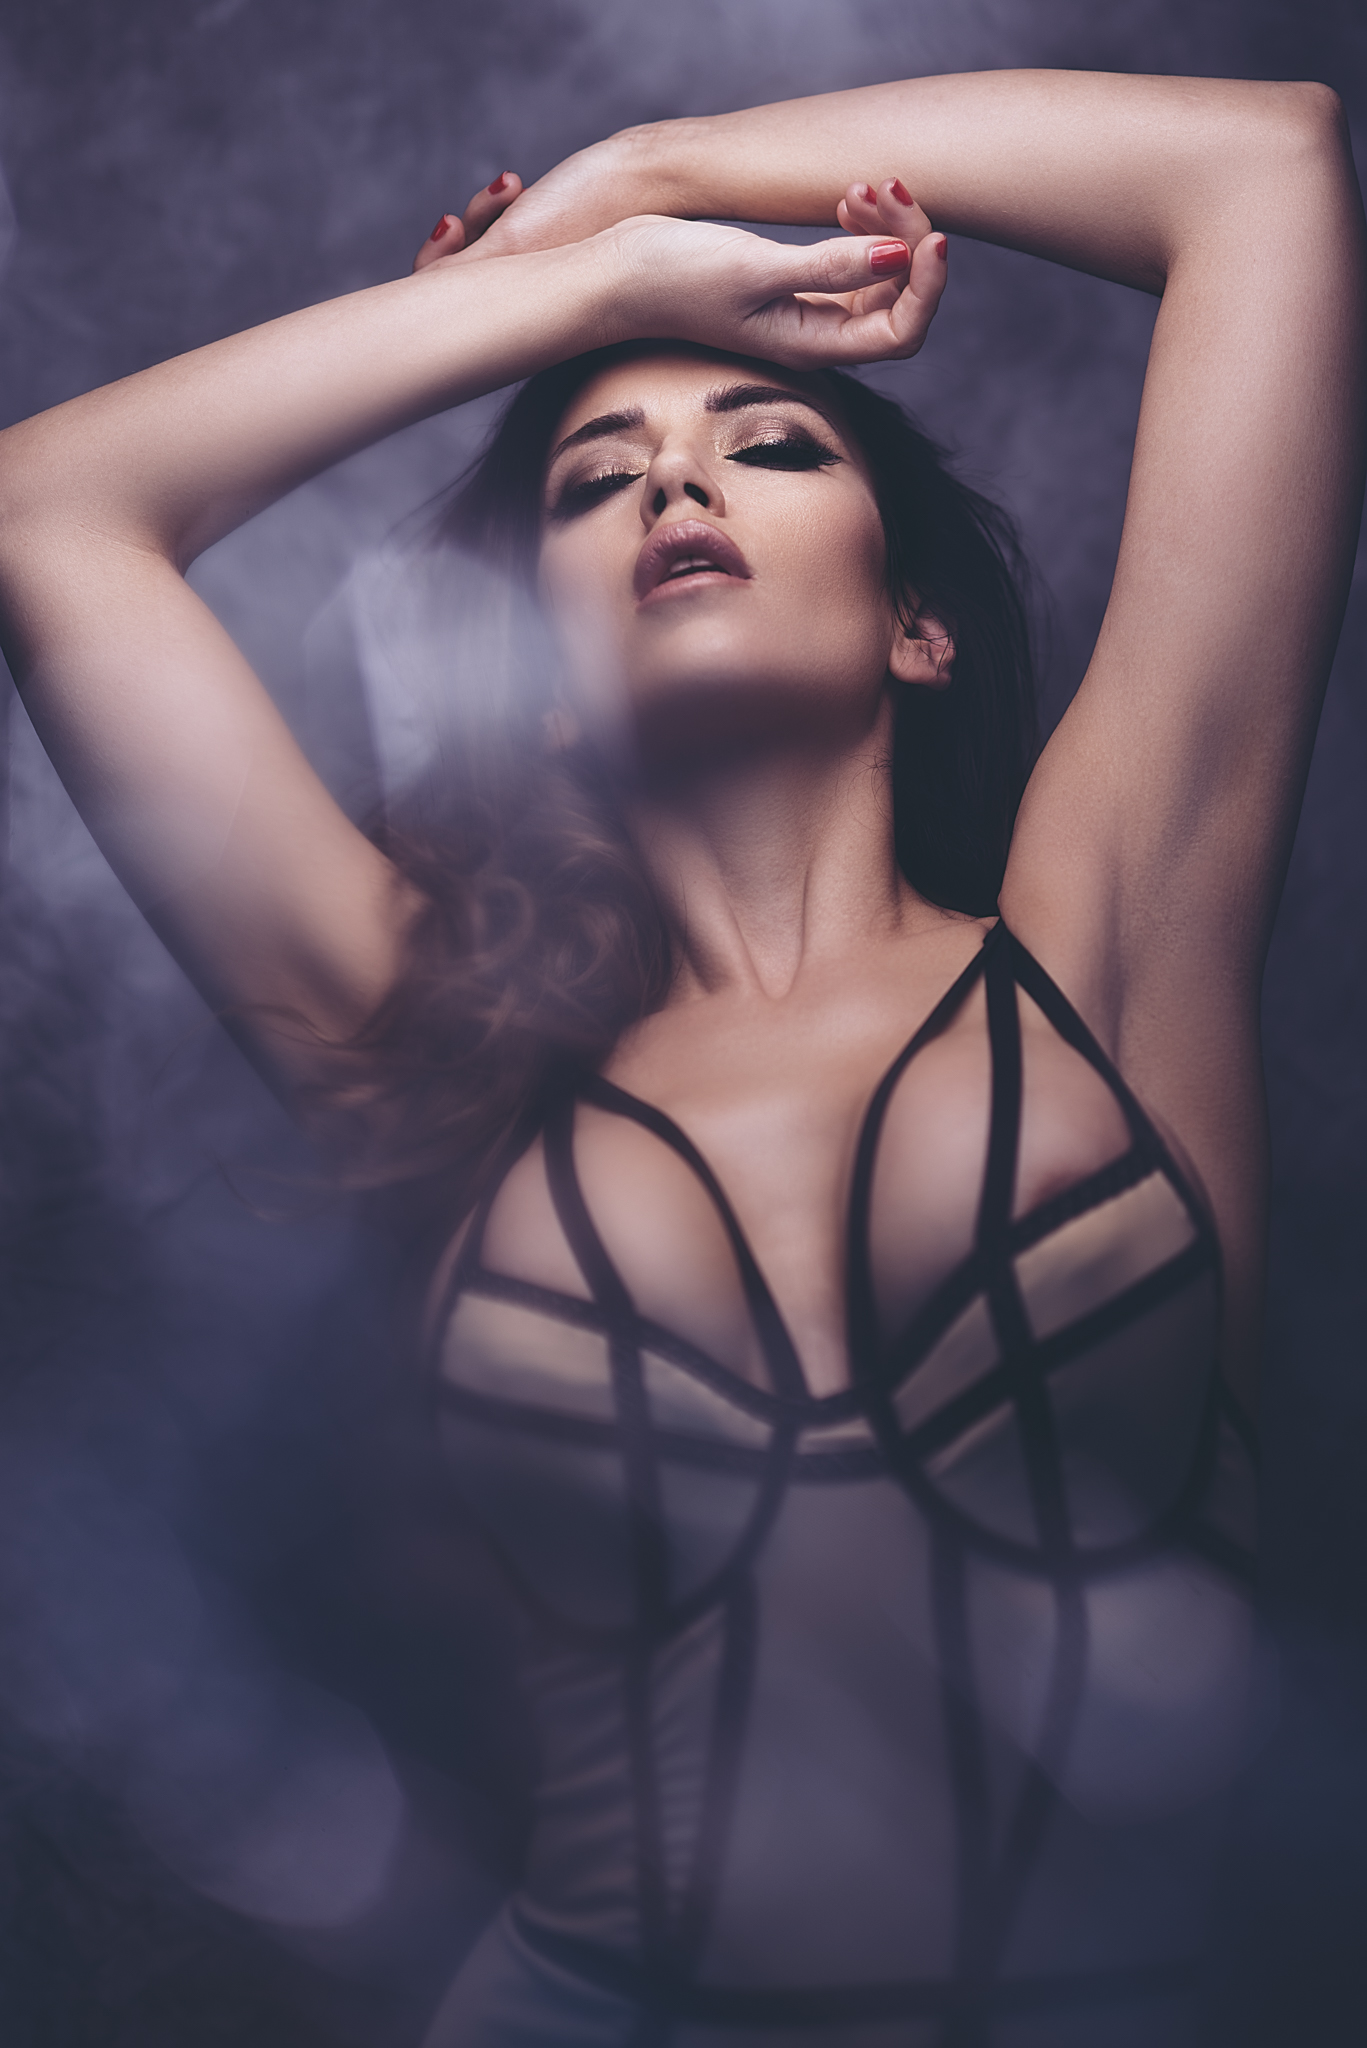
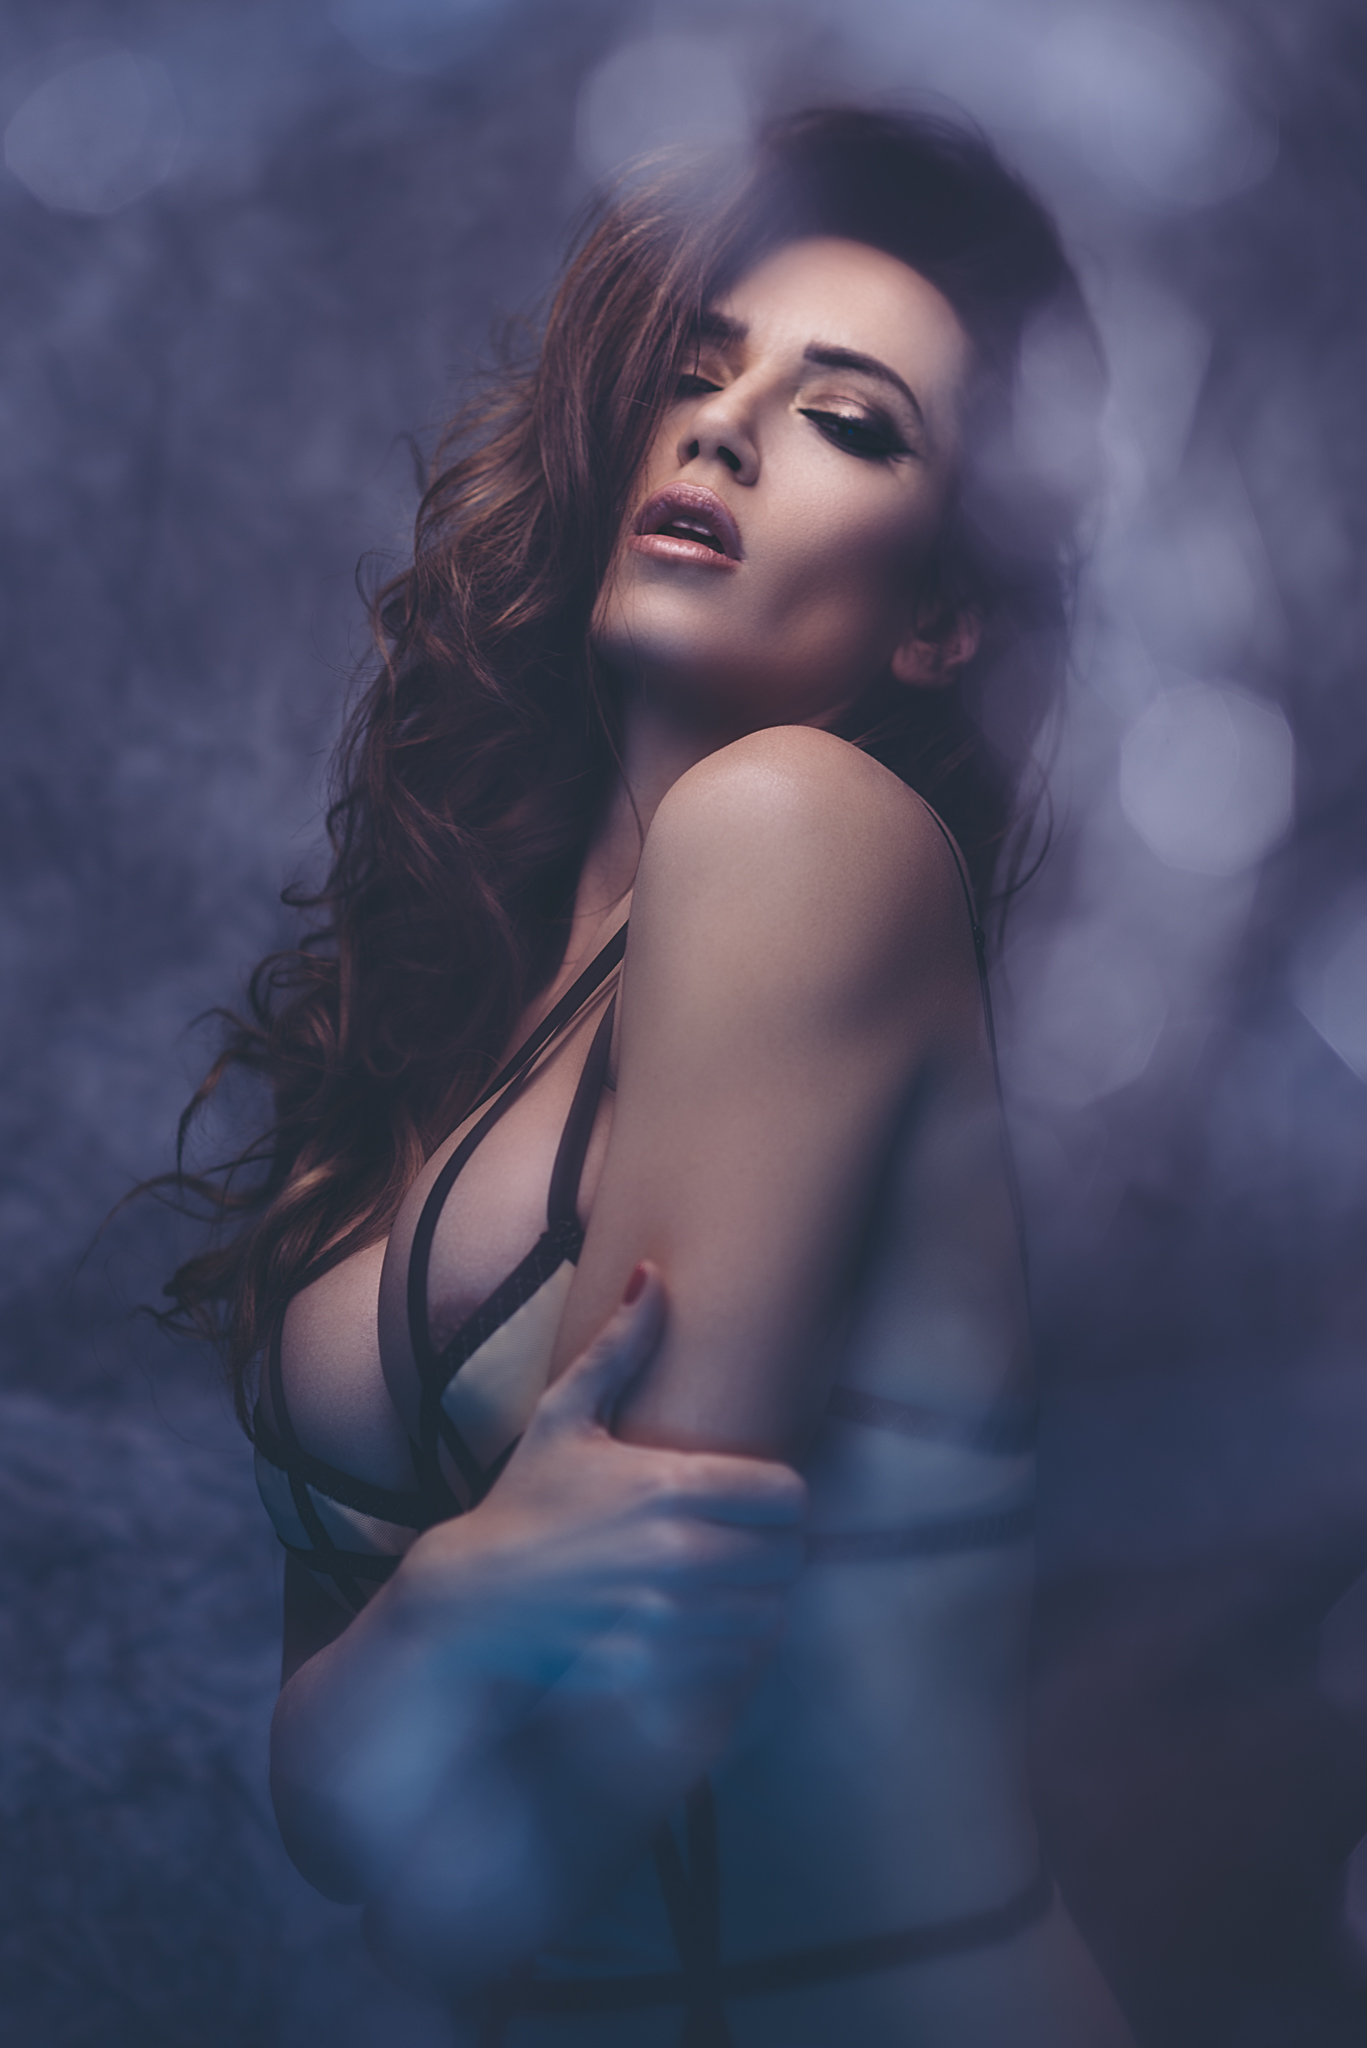
With some simple household items you can get some really interesting and creative looks.
We all love to spend money on the latest and greatest photo gear, whether it be a $120 reflector with a hole in it (I'm just jealous I didn't market this myself haha ;) ), or a $500 tube with LED's inside! We love to spend money on our passion. But sometimes, you can create some fantastic looking shots for next to no money at all. I present to you, the wonders of the humble cling film!
The Look
The principles of the technique are that you place the cling film in front of the camera at such a distance as to create bokeh in the foreground of the shot. In my opinion this creates a really interesting look because the effect is twofold, firstly the bokeh in the foreground always looks interesting but you're also creating a lot of interest in your image for your viewers eyes to be drawn to. This is always a goal of mine when creating images; 'how can I hold my viewers attention a fraction of second longer?' If your viewers eyes have to work a little harder to absorb a photo then you've caught them.
The cling film produces the bokeh by catching the carefully placed lights that you've positioned either side of the model pointing back to camera. Another key point here is that you'll need a fairly fast lens, this is a lens that has an aperture of around f2.8 or wider. In these setups I used a cheap 85mm prime lens that you can pick up for around $150/$200. Having this fast lens is crucial to getting the look to work and if you don't already have a 'nifty-fifty' or fast 85mm prime then I highly recommend you get one as it can open up a lot of different creative opportunities.
I'll also add that although the actual items to make the look cost next to nothing, this setup does assume you have a few bits of photographic kit already at your disposal.
What you will need:
The Basic Setup
- 2 lights
- 1 hard light modifier (grid/snoot/barndoors)
- 1 soft light modifier (softbox/umbrella)
- 1 sheet of perspex/glass
- Clingfilm
This basic setup of the technique is the bare-bones of the look. If you just want to test it out or only have two lights at your disposal then this is the setup for you.
The Full Setup (What I used to create the shots in this article)
- 4 lights
- 2 hard light modifier (grid/snoot/barndoors)
- 1 Beauty dish (22" Silver)
- 1 Small softbox (90cmx90cm)
- Coloured Gels
- 1 sheet of perspex/glass
If you have four lights and a little more time then you can try the more advanced version of the setup. This is the setup that I used to create the shots you see in this article.
Place the model midway between the key light and background
The Setup
The Key-Light
Let's first look at the lighting setup involved. There are a couple of key factors to bear in mind with this setup not least of all the model placement in relation to your background and key light. The key light that lights the model in this setup actually lights the background as well so making sure your model is close enough to whatever she has behind her will ensure a nicely lit background too. As a guide, try to place your model halfway between your backdrop and key light. According to the inverse square law of light this will mean that your backdrop will receive 1/4 as much light as your subject resulting in a natural drop off and slightly darker background.
Attaching a gel to a softbox needn't be a massive pain. Check the 'Quick Tips' page of my site for more info.
The Fill-Light
Now that we have our key light and subject in place let's place are fill light. I simply placed a small softbox on the floor at the base of the key light stand and angled it up at my subject. I added a gel to my softbox but it's up to you as to whether you'd like to do that or not. You can see how I attach the gel to my softbox in one of my 'Quick Tips' pages section of my website. I class this fill-light as a 'subjective' light meaning that the exposure is dependant on your personal taste but as a guide I would never have it more powerful than my key light.
For my piece of glass I simply removed the glass that was in a large picture frame. Be careful though as this type of glass is often extremely sharp and fragile. If you can find some good quality perspex then that is definitely safer and a lot easier to work with.
The Foreground Element
Once we're happy with our model lighting it's now time to get our foreground element in place. This is the object that creates that foreground bokeh. For this setup I used glass but you could also use perspex just as easily. This next section comes with a word of warning. If you're going to use a large sheet of glass like I did then please be very careful not only for your own safety but for the safety of your model too.
For my sheet of glass I simply removed it from a large picture frame I had. If you're going to do the same then take extra care because framing glass doesn't have sanded edges for handling so its incredibly sharp. The sheet I had was about 23"/60cmm square so it doesn't need to be huge and you could probably get away with it being smaller if you just wanted to test it first.
Big sheets of glass can be very dangerous indeed so I would strongly recommend going down the perspex or acrylic route if possible. The quality of acrylics now is so high that there will be very negligible difference in the clarity over glass especially when you consider this will be in the foreground and completely out of focus. Perspex is also a lot easier to store so you can reuse it many times for other projects as well.
Once you have your glass/perspex it's now time to place it in the scene correctly. In the setup you'll actually see that I placed mine behind the key light and fill light and between them and the camera. The benefits of this are twofold in that not only does no unwanted light from the key and fill light fall onto the glass and cling film but it actually brings the cling film further away from your model and thereby increasing the bokeh effect. It's up to you as to how you want to support it but I simply used a few stands and clamps to support it off the ground and high enough to shoot through.
Cling film is very cheap and can be bought in nearly every supermarket and other food shops.
The cling film
Attaching the cling film to the glass is thankfully very easy (finally something easy to look forward to). I simply tore off selection of strips and placed them in arcs around the glass and around where I was going to be shooting through. You want to place the Clingfilm roughly and not completely flat because the bunches, creases, bubbles and pockets are actually the features of the Clingfilm that the light will catch on and create the bokeh. Experiment with different looks and shapes of Clingfilm later on but for now we just need a rough idea of where the Clingfilm will be on the glass so that we can place our final lights correctly.
Using hard light modifiers like grids, snoots and barn doors on the back lights are essential to achieving the bokeh effect.
The Bokeh Lights
The last major step in this setup is going to be placing the bokeh producing lights. For my setup I used two lights placed either side of the model with grids attached to them. I personally didn't want the lights to light the edge of the model in any way so that's why I put them beside her rather than behind her. I also used grids on my lights to channel the light exactly where I wanted it. The only job of these lights is to create boken on the Clingfilm, I don't want that light bouncing around or even flaring into my lens so the control of the grids provided that. You could just as easily use snoots or barn doors here too as they all control the light without modifying it too much. A key point to make here is that these bokeh lights really need to be hard lights so you have to use modifiers like grids and snoots etc, if you use a soft light modifier like a softbox then it becomes increasingly difficult to create the bokeh. This is down to the fact that hard light modifiers create strong specularity in highlights resulting in the bokeh when photographed out of focus. I actually originally tried this technique with two gridded strip softboxes and although the light is directional it simply doesn't create enough specularity and in turn produces very little in the way of bokeh.
Getting Creative
Once you have everything in place for the setup, it's now time to get creative. I played around a lot with changing the coloured gels on the bokeh lights to get different effects.
All the hard work has now been done so it's time to get creative with the look and start playing with a few ideas. One thing to consider playing with is coloured gels on the bokeh back lights. I started out with no gels to begin with, that produces a very clean look but then I played with two of the same coloured gels on the lights and then different colours on each.
Playing around with different cling film placement on the glass is going to be your next step. Cling film allows for you to play around with the shape and look of the bokeh as many times as you like.
The other major creative factor you have to play with is of course the actual cling film placement on the glass. Thankfully cling film allows you to move, remove and adjust it as many times as you like. Play with different shapes, holes, bubbles, torn edges and even leaving sections hanging loose. These will all create different looks with the bokeh and the way in which they catch the light.
The Results
Two Different Coloured Gels
The shots below show the setup with two different coloured gels on the back lights.
Click on the images above to enlarge them
Two Gels of the Same Colour
The shots below show the results from a setup where I was using two gels of the same colour.
Click on the images above to enlarge them
White Bokeh Light
The images below were taken with no coloured gels on the back lights so just white light was hitting the cling film.
Click on the images above to enlarge them
Featured model: Sammie Howe
Points to Consider
So to close out this lighting technique I'll just mention a few pointers to consider:
- Always be careful when handling large sheets of glass
- I shot most of these images at around f1.8 but experiment with different apertures and lenses
- Don't be afraid to experiment with a variety of different shapes and looks with the cling film
- Using strobes over speedlights will make life easier as the modelling bulbs of the strobes will give you a pretty good idea of what the bokeh will look like
- Experiment with a variety of coloured gels and see what works with not only your models styling but also your background
- It's probably a good idea to explain to the model what you're doing and showing them the back of the camera so they can see what you're trying to achieve. Failing to do so might just make you look crazy ;)
Closing Comments
So there you have it, a setup that although looks a little complicated at the four light end of things, the basic principles can still be achieved with as little as two lights. Remember the point is to create an engaging look to your portraits so make the bokeh a feature rather than the subject itself.
If you have any questions about any of this then definitely let me know in the comments below and I'll be sure to answer them as soon as I can. Good luck with the setup and I look forward to seeing your shots :D
P.S. If you need some coloured gels to try this technique you've come to right place ;) Jake Hicks Photography Coloured Gel Packs
PLUS: If you'd rather not miss articles like this one in the future then make sure to sign up to my monthly newsletter where I send you all the articles I've written every month direct to your inbox. Monthly Newsletter Signup
:WARNING: Amazing Purchase Opportunities Ahead!
If you're interested in any of my work and would like to know more about how I created some of my shots then why not check out my workshops. Here you can find out everything there is to know about Gelled Lighting, Long Exposure Flash Photography and my entire Post-Pro Workflow. Jake Hicks Photography - Workshops
I have also just released a brand new 22 hour complete Gelled Lighting Tutorial video. I go over everything from studio lighting setups with gels to being on location with gels plus I also go through my complete retouching and post pro workflow. For more details and complete breakdown of everything that's include check out my Coloured Gel Portraits Tutorial
I also offer comprehensive coloured gel packs. These collections of gels are what I use day to day to create some of the most highly saturated colours around. If you're looking at getting into gelled lighting or need to get stronger and richer colours in your coloured gel work why not check out my Jake Hicks Photography Gel Packs


