• Technique
    • Latest Techniques
    • FREE TIPS
    • Quick Tips
    • Video
    • Site Search
    • Blog
    • Archives
  • Mentoring
  • >Online Workshops<
  • Workshops
  • Studio Lighting Books
  • Contact
    • Newsletter
    • Contact
    • Statement
Jake Hicks Photography
  • Technique
    • Latest Techniques
    • FREE TIPS
    • Quick Tips
    • Video
    • Site Search
    • Blog
    • Archives
  • Mentoring
  • >Online Workshops<
  • Workshops
  • Studio Lighting Books
  • Contact
    • Newsletter
    • Contact
    • Statement

Stay Inspired - Inspirational work from 10 Photographers and Artists 002

Stay Inspired thumb 002.jpg

"Stay Inspired" is a weekly post on my Facebook Page where I share the work of an inspirational photographer or artist every Thursday. I've been doing this every week since 2013, so there is now a vast number of outstanding creatives from all genres and disciplines that we've looked at over the years. In fact I’ve been doing it so long now that even I’ve forgotten some of these great artists so why not try and collate them all into one place for not only myself but for you as well.

This is the second compilation, so if you missed the first one and are interested in an inspiration overload, here’s the link to the previous one Stay Inspired - Inspirational work from 10 Photographers and Artists 001

These new posts will look at a collection of 10 artists each and they should prove to be an excellent resource for not only inspiration but motivation as well. With each artist shared, I will include a short overview of their work including things to consider and look at whilst on their portfolio.

Please bear in mind that these opinions are mine and as such, very subjective. I could just share a link but I believe a more personal point of view of another artists work may be of more value to you over simply stating their name and age for example. But this does mean you may not always agree with me and I would encourage that. Art is subjective and like music, the best art does not appeal to everybody.

Inspirational Work from 10 Photographers and Artists 002

Stay Inspired Facebook Thumbnail Temp copy.jpg

If we were playing 'Photographer Top Trumps' and I had the Elizaveta Porodina card, you would loose!

Prepare to be demoralised and inspired by this outstanding fashion photographer from Russia.

Porodina is seemingly obsessed with reflections and colour harmonies and can think of no other who displays them better. Although beauty is throughout her portfolio, an ability to see in a variety of different ways is real skill in and of itself. So what with the stunning contrast and colours throughout this portfolio and an ability to see images that others don’t, you have a style that is both perfectly executed as well as seemingly raw and spontaneous. This is why Porodina’s work is one of my all times favourites to this day and certainly deserved of your time and attention without hesitation.

Elizaveta Porodina

 
Stay Inspired Facebook Thumbnail TempAaron Feaver.jpg

I love this guys style as it’s pretty eclectic, just the way I like it! Aaron Feaver is like any self respecting fashion photographer who likes flare in their shots he's based in L.A. and like Aaron's style, his port is a jumble of campaigns, looks and eras and it’s actually quite refreshing to see somebodies work laid out like this. There’s no stories, no campaigns, no real discernible order, just great image after great image which is actually pretty engaging to look through. Head on over to his site and check it out for yourselves.

Aaron Feaver

 
Stay Inspired Facebook Thumbnail Georgi Andinov.jpg

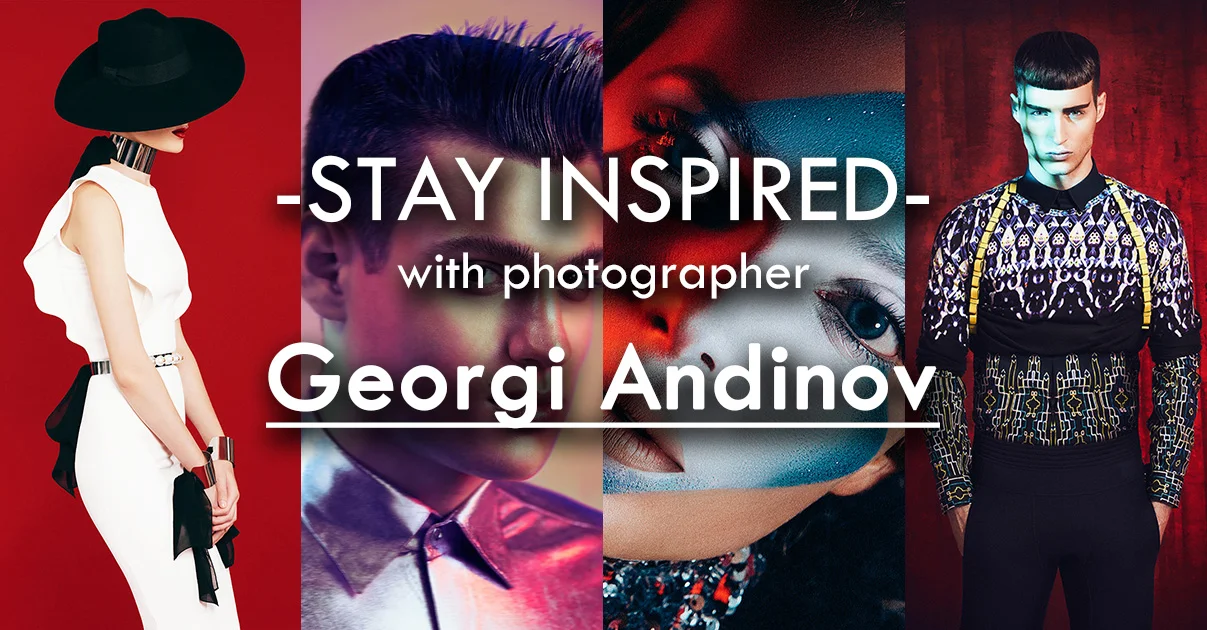
Bulgarian born Georgi Andinov fashion photography shows a stunning mastery of technical lighting, and for somebody who says they've only been shooting since 2011 his work is outstanding. This link takes you to his Instagram as his site is no longer available. His Instagram shows a huge range of work but scroll back a little way and you’ll see some his earlier fashion work and if you like that, I strongly urge you to simply Google image search his work to as some of it most certainly worth your time.

Georgi Andinov - Instagram

 
Stay Inspired Facebook Thumbnail TempFrederico Martins.jpg

Portuguese Fashion Photographer Frederico Martins' work is phenomenal. Period. He's currently working out of London UK and is regularly featured in every big name glossy you can name. Flawless attention to detail with lighting as well as impeccable post production (granted not all of this is done by him these days) means that every shoot he does is very bold and very clean. Go check him out

Frederico Martins

 
Stay Inspired Facebook Thumbnail TempStockton Johnson.jpg

For our inspiration this week we head to the far east for some super clean fashion and editorial work from Shanghai based Stockton Johnson. For the curious among you its worth finding and trawling through his blog to check out some of the more glamourous behind the scenes shots.

Stockton Johnson

 
Stay Inspired Facebook Thumbnail  Jenny Brough.jpg

London based Jenny Brough has some outstanding fashion and beauty shots over on her port. She has a super crisp style but isn’t afraid to make things a little interesting with her use of old films and lenses, especially with her Polaroid work.

Head on over and don't forget to check her Facebook page which has some more recent conceptual work.

Jenny Brough

 
Stay Inspired Facebook Thumbnail Camilla Åkrans.jpg

Swedish born Camilla Akrans has a phenomenal body of work spanning many different photographic styles. Here she is showcased by one of Sweden's foremost agencies, LundLund. We are very privileged to have access to such a huge amount of her work here and Ive linked directly to the editorial section where most of it can be found. Take the time to spend the time as I assure you it’ll be time well spent.

Camilla Akrans

 
Stay Inspired Facebook Thumbnail ChuanDo and Frey.jpg

Chuan do and Frey are a rare duo of outstanding fashion photographers. They are currently based in Asia and their clients span Louis Vuitton, Harpers, Levi's and many charities such as Action for Aids and Breast Cancer. Check out their work and see the eclectic and inspirational nature of working with another so closely for so many years.

Chuan do and Frey

 
Stay Inspired Facebook Thumbnail An Le.jpg

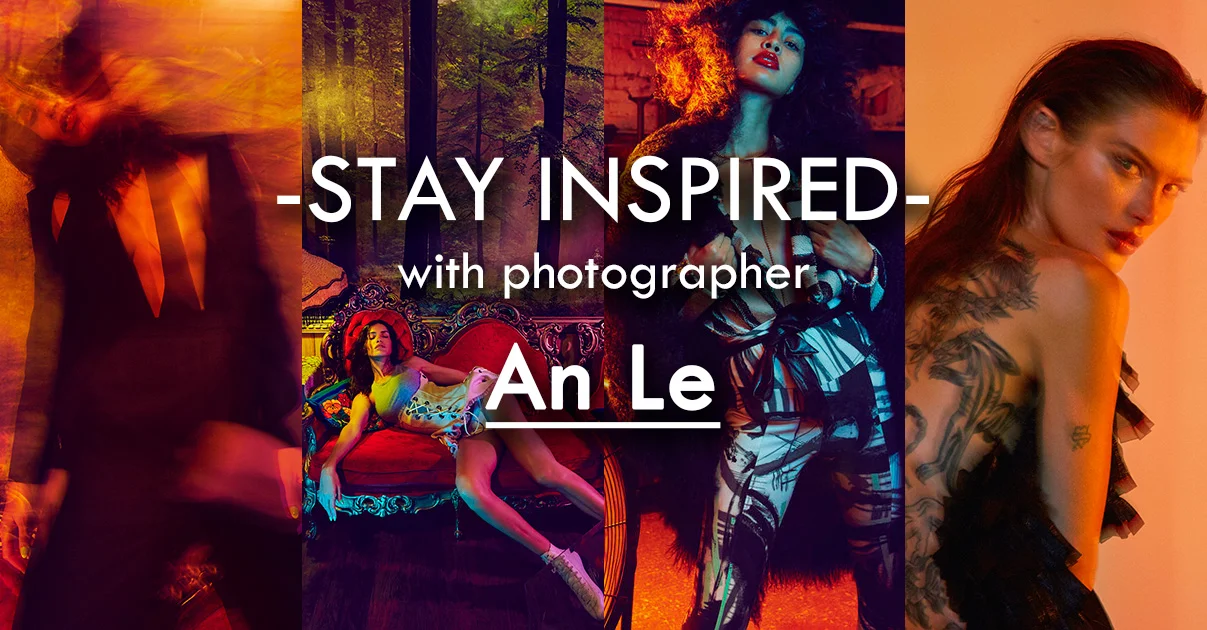
An Le is a Vietnamese born US based photographer who has a huge amount of content on his site http://www.anlestudio.com His style although editorial in presentation is firmly based in the conceptual realm and in an Interview with MODA mag last year,( http://www.modamagsg.com/?p=161) the 23 year old describes the influences that have shaped his work (that’s right, I said 23 year old!) :O

http://www.anlestudio.com/

 
Stay Inspired Facebook Thumbnail VictorDemarchelier.jpg

Here I wanted to showcase somebody who personifies what it means to be a great editorial photographer. New York born Victor Demarchelier has been shooting for the big name glossies for…. well, ever and his photography is as refined as comes. If you look through his work you will notice that his lighting is impeccable, granted he's not breaking the mould artistically but this refinement in lighting is often lost on newer photographers as they dive into the sea of fancy lighting modifiers, adding blues to the shadows in post and finishing up with some artificial grain. There's nothing wrong with this but I think it’s also worth taking the time to study others like Victor and see what they define as important in an image.

Look at the nose shadows, crisp catch-lights in the eyes and most importantly lighting the clothes perfectly in the process. Those photographers seeking agency representation will have to master and showcase this mastery of light long before they take interest in a portfolio of blurry bums solely shot at f1.8. I hope you enjoy his work.

Victor Demarchelier


Closing Comments

As with all of my posts, I welcome your comments and thoughts on the artists I've shared here. Although all of the photographers and creatives I've mentioned above come from my own personal tastes and appreciations, I still feel they are all incredibly varied, which ultimately means there will be at least one persons work here that you'll love.

Granted we've really only looked at 'people' photographers here including, portraits, fashion and editorial shooters with none of the other photographic genres being covered, but it's still incredible to me as to how varied this single discipline can be.

I think one of the core things I want you to take away from this series is how another person interprets their subject into a photograph. Sure you can simply reverse engineer the lighting or copy a pose of an image but I hope you take away a lot more than simply the mechanics of a photograph.

Look at their style and see how that is impacting their work for the better. Look for similarities in pose, expression, subject, lighting, theme and colour. All of these things play a role in any image and by appreciating that in others work we can be better equipped to express it into our own images.


If you liked this article and would want to be shown more posts like this in the future, please feel free to sign up to my monthly newsletter. I publish one of these articles every week and every month I collect them all up and send them directly to your inbox in case you've missed one. Signing up now also get's you a free 10 page pdf of studio lighting tips and techniques. Jake Hicks Photography - Newsletter 


:WARNING: Free advertising space being liberally used by myself below!


If you liked this article and would be interested in more posts like this in the future, please feel free to sign up to my monthly newsletter. I publish one of these articles every week and each month I collect them all up and send them directly to your inbox just in case you missed one. Signing up now also get's you my free 10 page pdf on Studio Lighting Tips and Techniques. Jake Hicks Photography - Newsletter 

gel trio newsletter.jpg

If you're interested in any of my work and would like to know more about how I created some of my shots then why not check out my workshops. Here you can find out everything there is to know about Gelled Lighting, Long Exposure Flash Photography and my entire Post-Pro Workflow. Jake Hicks Photography - Workshops

gel workshop trio.jpg

I've also just released a brand new 22 hour complete Gelled Lighting Tutorial video. I go over everything from studio lighting setups with gels to being on location with gels plus I also go through my complete retouching and post pro workflow. For more details and complete breakdown of everything that's include check out my Coloured Gel Portraits Tutorial

gel trio set video.jpg

I also offer comprehensive coloured gel packs. These collections of gels are what I use day to day to create some of the most highly saturated colours around. If you're looking at getting into gelled lighting or need to get stronger and richer colours in your coloured gel work why not check out my Jake Hicks Photography Gel Packs

gel trio set crop.jpg
Tuesday 09.18.18
Posted by Jake Hicks
Comments: 4
 

5 Professional and DIY Light Painting Tools For You to Try

Technique Tuesday 5 Professional and DIY Light Painting Tools For You to Try.jpg
My new Long Exposure Portraits tutorial shows how to use a lot of light painting tools and long exposure techniques in conjunction with your studio flash portraits. Click on the image above to find out more.

My new Long Exposure Portraits tutorial shows how to use a lot of light painting tools and long exposure techniques in conjunction with your studio flash portraits. Click on the image above to find out more.

Since the recent release of my new Long Exposure Portraits tutorial from RGG EDU, I've been inundated with messages and questions relating to the light painting section.

Questions like:

'What's the best light paining tool to use?

'Where can I get them?'

 'Which ones did you use in your video?

With this in mind, I sought to put together this guide to answer all of these questions and more. I'll not only be explaining the ones I personally used in the video and where to get them, but I'll also show you other light painting tools that are fun to try and that you likely already own.

DIY Light Painting Tools

One of the best things about long exposure photography for me, is the ability to turn seemingly uninteresting objects and locations into exciting and visually engaging imagery. I'll be showing you some examples of simple household objects you can use to get awesome shots and I think this perfectly illustrates how practically anything that emits light, can create interesting long exposure effects.

Torches/Flashlights

First up we'll look at a tool you all should have somewhere at home and that's a torch (flashlight). In the example images below I'm actually using Maglite torches. Maglite's have a fairly unique ability in that their tops can be removed to expose the bulb and you can do this when they are turned on. This means we can have a very small, but bright bulb isolated in the shots to create light trails incredibly easily. All you have to do is turn them on, remove the top, and then move them around whilst the shutter is open and you're done.

More details on the smaller handheld Maglite’s can be found here

Maglite’s were very popular before LED's came along, but if you still have some in a drawer somewhere then they create great long exposure results very easily.

Maglite’s were very popular before LED's came along, but if you still have some in a drawer somewhere then they create great long exposure results very easily.

The light trails produced by simple torches/flashlights are very easy to produce. Here I'm simply holding two torches together to get this dual streak effect.

The light trails produced by simple torches/flashlights are very easy to produce. Here I'm simply holding two torches together to get this dual streak effect.


LED Work-Light

Next up we have the LED flashlight alternative in the form of this handheld work-light. These particular lights generally have a long line of LED's attached to a handle and this is perfect for waving around during the long exposure time period without fear of getting your own hand in the shot.

For my one, I simply added a diffusion gel to eliminate the harsh individual LED bulbs and then I also cut a series of gels to wrap around it too. I not only cut individual colours from old gel sheets but I also cut several smaller, different coloured gels and taped them together to get multi coloured streaks in the final images you see below. These gels were then held in place with an elastic band to avoid them slipping or falling off.

These lights are pretty easy to find online by searching 'handheld LED work light'. Here's an example of one on Amazon to get you started. LED Work Light Handheld Flashlight LED

Click to enlarge. In the above shot (top left) you can see my original LED handheld lamp. It has a single sheet of diffusion gel wrapped around it to soften the individual bright bulbs. Next to that (top right) I have a single pink gel attached to i…

Click to enlarge. In the above shot (top left) you can see my original LED handheld lamp. It has a single sheet of diffusion gel wrapped around it to soften the individual bright bulbs. Next to that (top right) I have a single pink gel attached to it as well. Lastly I cut up some old gels into strips and then taped them together with black tape before attaching the whole thing to the lamp (bottom right).

In the top left we have the result of just the white light. In the top right we have a single coloured gel attached, and in the bottom two shots we have the different coloured gel strips attached instead.

In the top left we have the result of just the white light. In the top right we have a single coloured gel attached, and in the bottom two shots we have the different coloured gel strips attached instead.

Click to enlarge. In these portraits we can see the simple LED work-lights creating some very cool effects when they have different coloured gel strips attached to them.

Click to enlarge. In these portraits we can see the simple LED work-lights creating some very cool effects when they have different coloured gel strips attached to them.


Smart Phone

Here's one that you'll almost certainly already have; a smart phone. These are actually excellent light painting tools for a number of reasons; firstly, you can put any colour you want on your screen, even graduated colours. Another bonus to using them is that you can adjust the brightness of the screens, and some go very bright indeed which is perfect for combining them with flash and other brighter light sources. Lastly the other benefit of using your phone is the clean colour it produces. Sometimes when mixing flash and ambient lights you get odd mismatching colours, the phone screen is a very consistent colour that is very similar to that of flash.

Normally I'd provide a link here, but I think it's highly unlikely that you need my help to find a smart phone.

Smart phones make great light painting tools because they are bright, can display any colour or gradient you like and they produce a colour that is very similar to flash.

Smart phones make great light painting tools because they are bright, can display any colour or gradient you like and they produce a colour that is very similar to flash.

In the above shots we have light trails produced by my smart phone. On the left I have a single pure pink colour being displayed on my screen and in the other two images I have a gradient of colour being displayed. With the ability to display any co…

In the above shots we have light trails produced by my smart phone. On the left I have a single pure pink colour being displayed on my screen and in the other two images I have a gradient of colour being displayed. With the ability to display any colour or image on a hand held screen the possibilities for long exposure light trails with your phone are practically limitless.


Fairy Lights

As with so many of the other DIY long exposure tools, the options are huge when it comes to this next one. Fairy lights are perfect as they are very small and very bright points of light which is ideal for what we need them for. There is nothing stopping you from using the regular plug-in fairly lights but the cable can get a little cumbersome when you're trying to produce shapes and swirls during a long exposure. My advice would be to pick up a couple of LED fairy light strings that are powered by batteries. That way you can put the battery in your pocket and move around with the lights far more freely.

Again just searching LED fairy lights will bring up a variety of choices to use but here's one to get you started Battery Operated Fairy Lights

These tiny little LED fairy lights are very cheap and also incredibly easy to use.

These tiny little LED fairy lights are very cheap and also incredibly easy to use.

Due to the nature of the tiny bulbs, LED fairy lights produce very strong and clean results that are easy to use and control.

Due to the nature of the tiny bulbs, LED fairy lights produce very strong and clean results that are easy to use and control.


Professional Light Painting Tools

Light Painting Brushes

So as well as having fun with a variety of light painting tools that you can find at home, I wanted to share the tools I actually used in my tutorial and where to get them for yourself. Of course there is nothing wrong with playing around with any light source to create the light trails, but these purpose built tools really are excellent and in my opinion really do elevate the look and feel of the long exposure effect to another level.

The tools I used were from a company called Light Painting Brushes and if you head over to their site, you'll quickly see that they have an absolute ton of clever tools to get your long exposure imagination going. But although there are so many viable options to play with, I personally decided to work with their Plexiglas brushes. These come in a variety of shapes but the ones I fell in love with were the Plexiglas Diamond and the Plexiglas Rectangle as the results they produced in conjunction with my flash photography were outstanding.


How do they work?

Thankfully these couldn't be simpler to use, all you need is the Plexiglas brush, their connector and a torch/flashlight. You connect the brush to the connector and then you insert the torch into that and you're done.

The Plexiglas brushes couldn't be simpler to use. Attach the connector to the brush and then insert the flashlight and you're done.

The Plexiglas brushes couldn't be simpler to use. Attach the connector to the brush and then insert the flashlight and you're done.

One recommendation I will make here is to use a powerful flashlight and ideally it needs to be an LED flashlight. The reason for this is due to the nature in which this product works. For example the Plexiglas appears to light up but in fact the torch is only catching light off the edges of the Plexiglas so a lot of the power is seemingly lost. Also, having an LED torch means that the colour produced with it will be very similar to the colour produced by your flashes making combining the two light sources in a single shot much simpler.

Click to enlarge. In the images above you can see how incredibly clean and crisp the Plexiglas brushes look with a variety of movements during the long exposure.

Of course don't stop your creativity there as we can very easily add and change the colour of these beautiful ribbons of light by simply applying coloured gels to them.

Below are just some of the shots I captured with the coloured gels and I say 'some' because I took so many images whilst I was testing these out. The process of trial and error and then reviewing these stunning results immediately, is actually very addictive. As you begin to shoot you very quickly learn what works and what doesn't. Experimenting with moving it slower, faster, big movements, small movements... the list goes on but it never ceased to amaze me just how different every single frame was.

Click to enlarge: Above we can see some stunning examples of the Plexiglas brushes being used in conjunction with coloured gels. These are all single shots, there’s no layering of frames here and the hi-res versions of these genuinely feel like art in their own right due to how crisp and clean the coloured light ribbons are.

But why stop there?

With those incredibly clean and crisp coloured ribbons of light, it only seemed sensible to add them to my coloured gel portraits with flash as well.

All of the images below are captured within a single frame and they all use the Light Painting Brush’s Plexiglas tools in them to create the effects.

Click to enlarge. All three of the images above are each captured in a single frame and use both flash and the Light Painting Brush’s Plexiglas tools.


Closing Comments

Like I mentioned at the start, almost anything that emits a constant light source can be used to create light trails within a long exposure shot. I've shared 5 products that I recommend playing with, 4 of which you most likely own already. Plus the beauty of the DIY versions I've mentioned is that you can start to play around with the technique immediately, then if you decide you really enjoy the looks you're producing, upgrade to the Light Painting Brushes to get those more refined and polished looks.

Lastly, if you would like to know more about how I created some of these Long Exposure Portraits, please feel free to check out my 6+ hour video tutorial. This step-by-step tutorial not only explains the light painting techniques shown here, but many other long exposure fashion and portrait lighting setups as well as how to incorporate long exposure into your location shots. For more details of what's included please follow the link Jake Hicks Photography - Long Exposure Portraits

Business_Facebook_NowAvailable.jpg

Lastly, I also have a Long Exposure and Light Painting workshop on September 22nd in London. Join us as we use these Plexiglas Light Painting Brushes in shots of our beautiful model for the day. For more details follow the link Long Exposure & Light Painting Workshop

master long exposure light paint ws 2.jpg
Tuesday 09.11.18
Posted by Jake Hicks
Comments: 6
 

TWiP Talks: Creative Lighting and Coloured Gels with Jake Hicks

I mentioned a couple of weeks ago that I had the pleasure of speaking to the prince of podcasting Frederick Van Johnson over at TWiP (This Week in Photo). Frederick has been releasing photo related podcasts once a week since podcasting began and I think he's on episode 550+ or something insane like that!

In this interview we discuss the importance of an audience. Is it more important for you as a photographer for your images to have a little impact on a lot of people, or for your work to have a lot of impact on a few?

We also talk about the value of social media in the current photo world as well as go through some of my personal ideas and beliefs on what makes a successful photographer today.
We also look at the importance of gear and understanding light plus a whether you're actually a photographer or an artist.

It's also available as an audio only podcast on iTunes and Spotify etc. All those links can be found underneath the video on this TWiP page.

*I apologise in advance for the drop in quality for this as Skype craps out half way through for some reason :(

Thursday 09.06.18
Posted by Jake Hicks
 

Can you use your LED Modelling Lamps for Long Exposure Photography? PLUS: How to Make Your Own Modifiable Tungsten Lamp

Can you use your LED Modelling Lamps for Long Exposure Photography? PLUS- How to Make Your Own Modifiable Tungsten Lamp .jpg

Long exposure photography is tricky, especially in the studio when you're trying to combine multiple light sources within a single frame that have very different brightnesses and colour temperatures etc.

So although I believe this article will be very useful to many of you, there will most certainly be others that perhaps have little to no experience with long exposure photography and as such this article might seem to brush over certain long exposure lighting ideas. That is because as lot of you know, I now have an extremely comprehensive Long Exposure Portraits video that goes over everything there is to know about shooting long exposure shots and this article is designed to help those that may have very sensible equipment questions after watching it.

Personal_Facebook_NowAvailablepan.jpg
In the video tutorial I only use tungsten modelling bulbs, but what if you don't have tungsten modelling bulbs? What if you only have LED ones? This article aims to answer the question 'Can you use your LED modelling lamps for long exposure photography?'
 
led mod lamo.jpg

First off, let's just double check we're all talking about the same thing here when we're referring to LED modelling lamps. In the context of this article I am actually specifically referring to the modelling light that comes with the studio strobes you likely already own. These newer strobes are often used for location work and are often battery operated with no direct power supply via a plug into the wall.

The LED modelling bulbs on these lights are ideal because they consume very little power which is perfect for those more popular battery operated flash heads.


Characteristics of LED lights versus more traditional tungsten modelling bulbs

Bulb Size

LED

This should come as no shock to you all but size most certainly does matter. LEDs by their very nature are tiny and that has significant disadvantages when we're referring photographic lighting. For example one of the core reasons I encourage people to upgrade from speedlights to strobes is their size. Speedlights have a tiny light source point which creates a fiercely harsh and contrasty light that is very difficult to modify in a flattering way. LEDs have exactly the same problem and in fact they are even smaller than speedlights with many strobes LED modelling bulbs being no bigger than your fingernail.

Tungsten

Contrast the tiny LEDs to the considerably larger tungsten modelling bulbs. These bulbs are not only far larger but they also protrude into the lighting modifiers thereby allowing their light to be spread far more evenly and create a much softer light. Remember that lighting modifiers are designed to work specifically with flash tubes and flash tubes are physically large and spread light all around themselves when they are fired. Tungsten bulbs do exactly the same thing so the look of the light produced by them looks very similar to the actual flash light itself.

Click to enlarge


Bulb Colour Temperature

LED

LEDs can be made to produce practically any colour light we could imagine but most of the LED modelling bulbs in our strobes produce a clean white colour. This colour is designed to be very similar in colour temperature to our flash bulbs. This makes our lives a lot easier if we are trying to mix both LED light and flash light in a single shot which is something you'll need to do a lot if you're shooting long exposure shots.

Tungsten

Tungsten modelling bulbs produce an entirely different colour of light to flash and is far warmer in comparison. If you're familiar with white balance and the Kelvin scale, tungsten produces a colour around 2500-3000 Kelvin whereas flash and daylight produce a far colder 4500-5000 Kelvin colour. This drastic difference in colour temperature becomes a major issue when you're trying to combine both tungsten and flash in a single shot and this mismatch in colour often requires you to use additional colour correction gels to match the two colours together.

tungsten vs led colour temp.jpg
 

Bulb Heat

LED

We just spoke about colour temperature but here I'm referring to the physical heat emitted from these two light sources. LEDs require very little power to operate as they are incredibly efficient at converting power to light and this efficiency results in very little heat being produced as a result. This means that they can be left on at full power surrounded by lighting modifiers and gels with little fear of melting anything.

Tungsten

Tungsten on the other hand is incredibly inefficient at converting power to light. If you didn't already know, tungsten light is produced by passing an electric current around a tightly wound coil of tungsten metal. The warn coloured glow you receive from that light is simply super heated metal. The tungsten metal is only used as it's one of the strongest metals around meaning it can withstand this incredible heat for thousands of hours without breaking or melting. This is great if you want to warm a small room but not ideal if you want to encase that tungsten bulb in a lighting modifier alongside colour correction gels. A constants vigilance is required to ensure you don't your gels and equipment.

Even the most durable gels will eventually warp, melt and ultimately crack under the extreme temperatures of high wattage tungsten modelling bulbs.

Even the most durable gels will eventually warp, melt and ultimately crack under the extreme temperatures of high wattage tungsten modelling bulbs.


Bulb Power

LED modelling bulbs usually come with a fixed power but tungsten modelling bulbs can be switched out at any time for more powerful ones if needed.

LED modelling bulbs usually come with a fixed power but tungsten modelling bulbs can be switched out at any time for more powerful ones if needed.

LED

As I previously mentioned, LEDs are often very small in size and even larger LEDs are ultimately only made up of multiple smaller LEDs. This lack of size unfortunately does mean that there are often not that bright when compared to other photographic lighting. Also the LED modelling bulbs that come with your strobes are fixed and unchangeable by the end user. This means that you're stuck with the brightness of the modelling bulb the manufactured gave you and this can vary significantly from brand to brand.

Tungsten

The older strobes that come with tungsten modelling bulbs had to come with the ability to be replaced by the consumer. After all, tungsten bulbs die and will need to be changed out for new ones. This ability to replace them also means that we have the ability to adjust the power of the modelling bulbs we put in them. If you're old enough like me, you may remember a time before all the energy saving bulbs where we had the ability to purchase fairly powerful and extremely bright bulbs. Those old tungsten bulbs ranged from 30 watts all the way up to 240 watts which is what I currently use in my strobes today and is a very bright light indeed.


Recap

So now that we've discussed some of the key differences between LED and tungsten modelling bulbs, let's quickly recap the positives and negatives of each.

LEDs

  • Small light source that results in a very different looking light when used in consecution with certain modifiers.
  • Produces a very similar colour temperature to flash meaning that colour correction gels are not required when using both LED and flash in the same shot.
  • Produces very little heat meaning you are able to use them for extended periods with any modifier and gel without fear of melting anything.
  • Fixed modelling bulb power means you are stuck with a low powered LED light that cannot be changed or increased by the end user.

Tungsten

  • Large physical size that replicates the look and appearance of the flash tube enabling you to use them with any lighting modifier.
  • Produces a very warm colour temperature compared to flash meaning that colour correction gels are required if you plan on using both tungsten and flash in the same image.
  • Very hot when operating at full power. This requires constant supervision to ensure you are not melting both lighting modifiers or gels.
  • Bulbs can be switched in and out as often as required meaning the end user can increase the power of their modelling bulbs as required.
 

My Recommendations

Ultimately the choice is yours but more often than not, this situation will be dictated to you by the strobes you already have. If you have some modern battery powered strobes then they will often come with LED modelling bulbs as standard. If this is the case then you will need to bear a couple of things in mind should you want to use them for long exposure photography; namely the way that the LED distributes light around your chosen modifier and the power of the LED.

If you're using hard-light modifiers where the LED will not be diffused in any way before it reaches its destination, I strongly recommend you try and soften the light a little during the process. For example, if you're shining an LED through a straight reflector dish, add a diffusion gel to the front to soften the light a little. This will distribute the light more evenly onto the target resulting in a far more even exposure rather than the light coming straight out and not using the modifier in any way.

On the left we have an LED modelling lamp with a beauty dish reflector. You should see that resulting light casts some odd shadows onto our wall due to the incredibly small and harsh nature of the tiny LED lamp. On the right we have a tungsten model…

On the left we have an LED modelling lamp with a beauty dish reflector. You should see that resulting light casts some odd shadows onto our wall due to the incredibly small and harsh nature of the tiny LED lamp. On the right we have a tungsten modelling bulb and the resulting light shadow if far smoother. In fact its appearance is almost identical to that of the strobe flash.

The power problem is far harder to fix I'm afraid and is ultimately why I personally prefer to use tungsten modelling bulbs in my long exposure work over the LED ones.

The power difference may not seem significant and most of the time it's only about 2 stops of light difference between LED modelling bulbs and tungsten modelling bulbs. For example you could just compensate for an LED lamp being 2 stops darker by increasing the ISO on your camera from 100 ISO to 400 ISO (2 stops) and get exactly the same shot using the same shutter speed and aperture.

The problem comes when you try and combine LED light with flash. Most strobes actually produce a fairly powerful flash even on their lowest powers, so when you combine powerful flash with weak LEDs in the same shot, the flash just washes out the LED effect.

For example, your flash is on its lowest power and your LED is on its highest power but the difference is still 2 stops of light. You can't increase the power of the LED's and the only way to decrease the power of your flash any further without changing the camera settings is to add neutral density (ND) gels to your flash. It's possible but it becomes a real pain.

 
This long exposure image is all crated in a single exposure. It uses four heads;&nbsp;2 heads are firing flash and the other 2 are simply shining their tungsten modelling lamps.

This long exposure image is all crated in a single exposure. It uses four heads; 2 heads are firing flash and the other 2 are simply shining their tungsten modelling lamps.

DIY Tungsten Modelling Light 

It's worth pointing out here that when I use flash and ambient light simultaneously in my long exposure images, I only use a strobe head to flash and separate strobe heads to light for the ambient. Think of these ambient heads simply as modifiable lamps, not flashes.

The model image displayed here is a great example. It uses 4 strobes but only 2 of those strobes are firing flash, the other 2 are only shining their tungsten modelling lamps.

So what if your strobes all have LED modelling bulbs but you'd like to incorporate brighter tungsten long exposure effects? Here's a very cheap and quick DIY alternative that is super easy to setup.

All you'll need is:

  • Clip-on lamp
  • Tungsten bulbs (of varying powers if needed)
  • A bayonet to screw fit bulb converter if needed
  • S-fit (your strobe Bowens/Godox/Elinchrom etc.) to speedlight L-Bracket
  • Cinefoil optional

Click to enlarge


Then all that's left to do is set it up. Get your Speedlight L-bracket on a stand, attach your clip-on lamp to it and then add your required tungsten bulb power. Finally all that's left to do is add your desired modifier like you normally would to your flash head.

The best part about all of this is that you can use your strobe modifiers on this tungsten lamp. I've used a regular reflector dish here but you could just as easily use a beauty dish or soft box.

Click to enlarge


Just incase you were curious as to how the strobes modelling bulb compared to the clip-on modelling bulb, they're displayed below. Plus I've also included how the LED modelling bulb stacks up against the two tungsten lights too (once the ISO on the camera had been increased by two stops to compensate for the darker LED lamp).

three modeling bulbs.jpg
 

Closing Comments

So there you have it, if you have some old strobes tucked away, dig them out as they will likely have the tungsten bulb for a modelling lamp and this can make your life a little easier when shooting long exposure work. If you only have LED lamps in your strobe then that's also fine, you have a couple of options. You can either shoot with an increased ISO value and simply ND or strobe lights, or you can very easily and cheaply make your own tungsten modelling lamps that can be modified with your current strobe modifiers.

If any of this long exposure work sounds a little complicated, I assure you it isn't, it just requires you to think in a slightly different way....oh and to work in complete darkness ;)


If you'd like to learn more about Long Exposure Portraits then I have a brand new 6+ hour video tutorial that RGG EDU is practically giving away. More details can be found here Long Exposure Portraits

long exposure trio.jpg

PLUS: If you'd like to learn more about Long Exposure & Light Painting in person then I have a lighting workshop available on September 22nd that is specifically all about learning how to create beautiful images like these. For more details including exactly what we'll be covering on the day follow the link Long Exposure & Light Painting Workshop

gel workshop trio.jpg

Tuesday 08.28.18
Posted by Jake Hicks
 

Is the Sensor or the Lens to Blame for Poor Image Quality?

Technique Tuesday Is the Sensor or the Lens to Blame for poor Image Quality.jpg

Embarrassingly a few years ago I was very vocal about how disappointed I was about some of the Nikon lenses. I've been using Nikon cameras and lenses for decades and although I was very pleased with the image quality and colour rendition their cameras produced, I strongly considered jumping the Nikon ship in search of crisper, cleaner looking lenses. In fact I was so close to leaving Nikon a couple of years ago that I went through the process of hiring and testing other brands to see if other manufacturers could deliver what Nikon could not. If you're interested, here was findings as I tested the Nikon against the Sony and Fuji - Comparing the Nikon D610 vs Fuji X T-2 vs Sony A7R II

But what was my issue with the Nikon lenses?

My biggest gripe with regards to the Nikon glass was the obscene amount of flaring that was being produced in the highlights, especially when that was seen in contrast to surrounding dark areas. In fact I was so puzzled by this horrendous effect that I even thought it was designed by Nikon as a sort of 'skin-smoothing' effect to try and appeal to the portrait and wedding market.

In the images above you can see how flared the highlights are when in contrast to the darker surrounding areas. Look at how fluffy that white text on black looks!

In the images above you can see how flared the highlights are when in contrast to the darker surrounding areas. Look at how fluffy that white text on black looks!


Defining Image Quality

Before we get any further, I just want to quickly take a look at what I mean by 'image quality'. This is a term we all use regularly but I think it means different things to many of us. I think for a lot of people starting out in photography, image quality refers to the megapixels of a camera, the bigger the number, the more image quality you have. Although there is a lot of truth in this, it's filled with ambiguity. For example a lot of us really don't need any more than an 8 megapixel camera. Years ago I shot ad campaigns that were printed huge but they were all shot on an 6 megapixel camera and the shots looked fine. Conversely, we're now told that cameras on our phones have 23+ megapixels of image quality, yet the images look utter trash.

So what's going on here?

Well it's because image quality and our perception of it is made up of a few factors and both sensor quality and lens play a fundamental role in that. My 6 megapixel DSLR had a good lens and my images we lit cleanly resulting in them being able to be blown up huge. Camera phones have huge megapixel counts but they still take an image through a tiny porthole that lives in your pocket filled with 6 week old receipts, dust, fluff and old sweet wrappers. Megapixels certainly isn't everything but it definitely helps when used in conjunction with a great quality lens.


So why did I stick with Nikon?

Like I mentioned before, I tested several cameras to replace my Nikon system and ultimately I didn't leave them because I'm somebody who focuses heavily on colour and the Nikon sensor was incredible at colour rendition. The depth of the colours was superior in my opinion to other brands and that colour depth was what ultimately kept me invested in Nikon and I just resigned myself to their very odd lens flaring.

Thankfully though, I was very, very wrong about Nikon's lenses!
 
Clicking on the image above will take you to my article on comparing the image quality of the Nikon D610 vs D850.

Clicking on the image above will take you to my article on comparing the image quality of the Nikon D610 vs D850.

Lenses are not the problem

In 2017 I was offered a Nikon D850 to replace my D610 for a price I couldn't refuse and so I upgraded my camera. Unbeknownst to me, I had just acquired a beast of a camera and trust me, I'm no tech-nerd, not even remotely. I'm a working professional and my camera is a tool to me just like a hammer is to a builder. I rarely update my kit because I don't believe that kit make me a better photographer. Because of this slightly laissez faire attitude to camera technology, I actually know very little about cameras and their modern features. It wasn't until I wrote a review last year on the difference in image quality between the D610 and the D850 that I realised just how wrong I had been about the Nikon lens quality up until that point. What the camera tests showed me was that it was most certainly not the lenses that were the issue, but in fact it was the sensor.


Comparing old and new lenses on old and new cameras

So in an attempt to share my foolishness with you, I thought I'd grab a few test shots with both the older Nikon D610 and the newer Nikon D850 just to show you how careful you need to be when considering one lens superior to another.

As you scroll down through the images below, pay close attention the highlight area on the gold sequins, look at how the area surrounding those highlights are blown out to the point of creating a flare effect.

JakeHicksPhotography all 1500px.jpg

From the images above, you should now be able to see what I'm referring to when I ask 'Is the sensor or the lens to blame for image quality?'

If you'd like to take a closer look, I've included the larger images below for you to enlarge separately.

I'll be honest, I find it staggering to me just how incredibly awful that sensor in the D610 is when compared to the newer D850. Don't get me wrong, that D610 made me a lot of money over the years and no client ever mentioned 'Hmm, what's that odd flaring?'. The camera still produces excellent results but when compered to the newer D850, the D610 shots look like it's shooting through a Fisher-Price lens!

Some of you may even be looking at these shots and thinking

'I bet Jake's got snot on the sensor or something. It wouldn't look that bad if he cleaned his camera once in a while'.

That would be a fair assessment but I also have a D600 here which has exactly the same results and I also tested other photographers lenses and camera bodies and all resulted with the same flaring effect.


Here's the shots again but a bit bigger if you'd like to click and enlarge any individually to see the results up close.

All Image taken below on the Nikon D610

View fullsize JakeHicksPhotography sensors d610 24-70mm f2.8.jpg
View fullsize JakeHicksPhotography sensors d610 28-105mm f3.5-f4.5.jpg
View fullsize JakeHicksPhotography sensors d610 85mm f1.8.jpg
View fullsize JakeHicksPhotography sensors d610 86mm f3.5.jpg
View fullsize JakeHicksPhotography sensors d610 105mm f2.0.jpg
View fullsize JakeHicksPhotography sensors d610 Helios 85mm f1.5.jpg

Click on the images above to enlarge them


All Image taken below on the Nikon D850

View fullsize JakeHicksPhotography sensors d850 28-105mm f3.5-f4.5.jpg
View fullsize JakeHicksPhotography sensors d850 85mm f1.8.jpg
View fullsize JakeHicksPhotography sensors d850 86mm f3.5.jpg
View fullsize JakeHicksPhotography sensors d850 105mm f2.0.jpg
View fullsize JakeHicksPhotography sensors d850 Helios 85mm f1.5.jpg
View fullsize JakeHicksPhotography sensors d850 Nikkor 24-70mm f2.8.jpg

Click on the images above to enlarge them


Closing Comments

I feel this image comparison should really speak for itself but I'll just pull out a couple of sobering areas for your consideration. Firstly, let's just highlight the two extremes of this test by taking a look at the image taken with the D610 with a 2007 Nikon lens versus an image taken by the D850 with a Nikon lens from 1963.

Click to enlarge

So just to be crystal clear once again on the madness that's happening here, but on the left we have the D610 using a modern lens from 2007 and on the right we have the D850 using a lens from the 1960's.

The D850 is using a lens nearly FIFTY YEARS OLDER than the 24-70mm lens on the D610!

I find it very hard to believe that you all wouldn't join me in choosing the D850 with the old lens compared to the D610 with the modern lens. And just to clarify what that old lens is, this is what Ken Rockwell said about the Nikon 43-86mm f3.5, and I quote 'The original Nikon 43-86mm is the worst lens Nikon has ever made.' Source

Granted there are other things to consider when choosing lenses beyond their simple flaring. For example in the 86mm shot above you can see the blurred edge off to the left, but nonetheless the results are still very impressive.

Technique Tuesday nikon comp.jpg

If you wanted to see me compare that old Nikkor lens against its modern counterparts then that can be seen here - The New the Old and the Vintage - Nikon's 'Worst' & 'Best' Zoom Lens Comparison - Ironically, those test shots were all taken on the D610 so the results would be even more impressive had they been shot on the newer D850 today.


In Conclusion

As I mentioned at the top, we're really splitting hairs here and this article is likely more aimed at those who are interested in squeezing every last drop of quality from their shots. For the most part, you use any camera or lens manufactured in the last 20 years and get fantastic results. But if you're after the crispest and sharpest files around, you may have to do a bit more research.

The biggest reason for me writing this and sharing it with you is the fact that I hear countless people talking about how important the lens is when it comes to 'image quality' and sharpness. And although lens choice is a fundamental decision when it comes to getting sharp shots, I think this exercise very clearly highlights just how important the sensor is when it comes to the image quality and sharpness. Even if you're browsing files online and comparing lenses for yourself, you really need to see those lenses results when the images are shot on exactly the same camera body.

For example, if you found an image of the Helios 85mm taken on the D850, you'd be forgiven for thinking that the Helios is a sharper lens than the Nikkor 85mm if you'd see that image taken on the D610.

When considering the sharpness of a lens, be very careful of what camera actually took the shot you are reviewing. Comparing the D610 with a Nikkor 85mm image versus a D850 with a vintage 85mm lens yields results that are misleading. The Helios looks far sharper when in reality it most certainly isn't.

Nearly all lenses out there right now are excellent and spotting variances between them can be very tricky and often futile. But whatever lenses you ultimately choose to own, just be sure of how the images will look on your particular camera body to avoid any disappointment.

This article is not about how impressive the Nikon D850 sensor is but on how important all camera sensors are when it comes to apparent lens quality. If you're checking other peoples reviews of a lens before purchasing one, you need to know exactly what camera body they shot their images with before you can make any real decisions and even then I would still recommend hiring the lens and testing it on your own camera before fully committing to spending thousands on it.

Thanks for Reading

Thanks as always guys for reading this article, I really do appreciate your precious time. If something doesn't make sense or if you have any questions then please don't hesitate to message me or comment below.

If you'd like to be updated once a month with all of my other articles then feel free to sign up to my newsletter here. Signing up now also gets you a free 10 page studio lighting PDF.

See you all in the next one :)


:WARNING: There is a high chance of irresistible temptation ahead!


If you liked this article and would be interested in more posts like this in the future, please feel free to sign up to my monthly newsletter. I publish one of these articles every week and each month I collect them all up and send them directly to your inbox just in case you missed one. Signing up now also get's you my free 10 page pdf on Studio Lighting Tips and Techniques. Jake Hicks Photography - Newsletter

gel trio newsletter.jpg

If you're interested in any of my work and would like to know more about how I created some of my shots then why not check out my workshops. Here you can find out everything there is to know about Gelled Lighting, Long Exposure Flash Photography and my entire Post-Pro Workflow. Jake Hicks Photography - Workshops

gel workshop trio.jpg

I've also just released a brand new 22 hour complete Gelled Lighting Tutorial video. I go over everything from studio lighting setups with gels to being on location with gels plus I also go through my complete retouching and post pro workflow. For more details and complete breakdown of everything that's include check out my Coloured Gel Portraits Tutorial

gel trio set video.jpg

I also offer comprehensive coloured gel packs. These collections of gels are what I use day to day to create some of the most highly saturated colours around. If you're looking at getting into gelled lighting or need to get stronger and richer colours in your coloured gel work why not check out my Jake Hicks Photography Gel Packs

gel trio set crop.jpg
Tuesday 08.14.18
Posted by Jake Hicks
Comments: 1
 
Newer / Older