It's long been joked about that, although I use a lot of coloured lighting in my photography, 90% of the time I actually use the auto white balance setting on my camera.
But why?
The reasoning is relatively simple; sometimes, there are just far too many colour variables at work in some of my shots to actually use a "correct" white balance. You see, there is no "correct" white balance, just like there is no "correct" aperture. In my opinion, white balance is a creative modifier, and the white balance you choose has just as much creative impact on your shot as the aperture you choose.

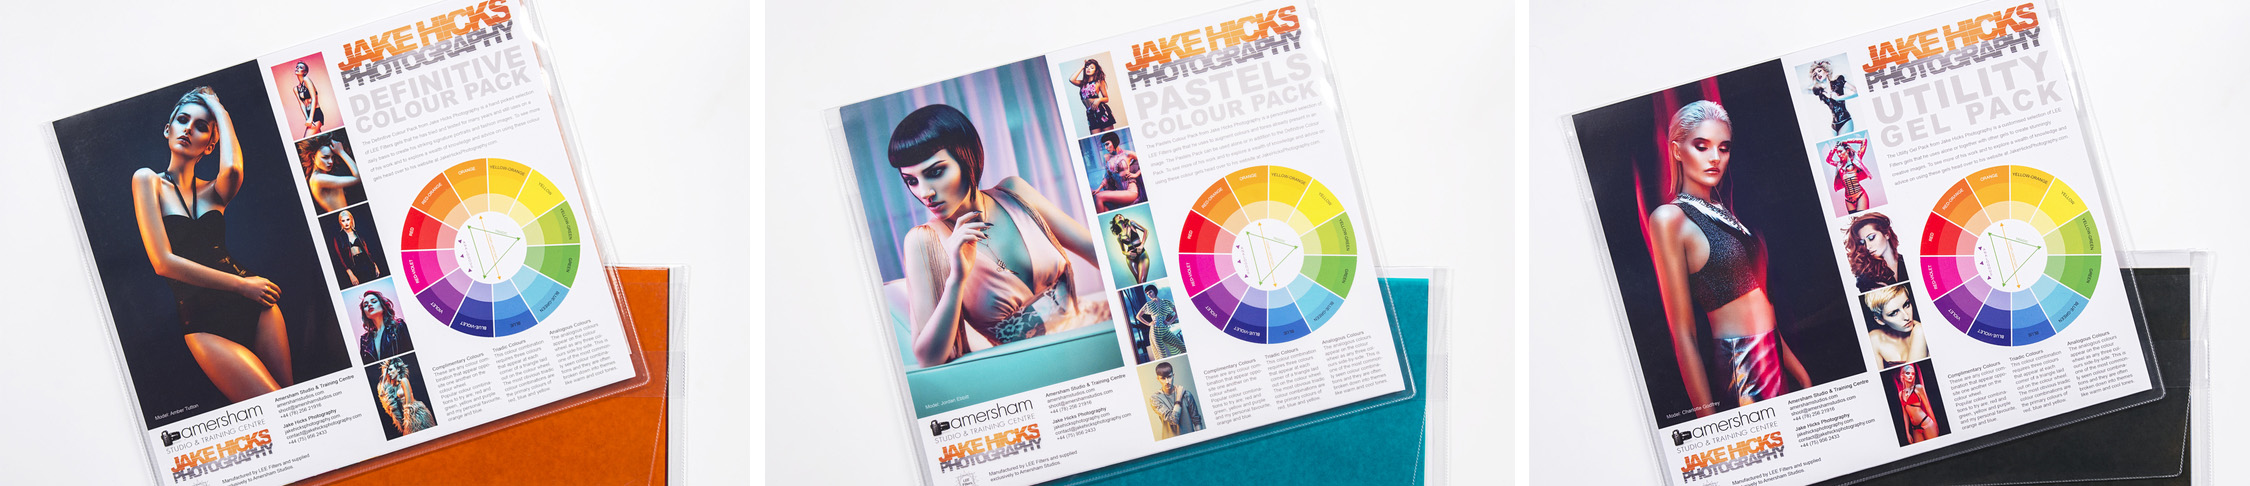
Here's one of the pages from the notes of my Colour and Exposure Workshop - This shot was taken with five completely different colour temperatures at work in a single shot. A pink, blue, and orange gel plus straight flash and cloudy daylight. It would almost be impossible to give this image a "correct" white balance value, so I let my Nikon camera do the work for me and set it to Auto White Balance.
A few months ago, I was doing a lot of research on white balance (exciting as that sounds), and as I was writing the course notes for my new Colour & Exposure workshop, I stumbled upon even more proof that there is no correct white balance. I put together a table of the Kelvin values that the two largest camera manufacturers in the world use. You'll see below that even they can't agree on what is "correct".

Take a look at the table above of the Kelvin values I got from the worlds two largest camera manufactures white balance charts. Neither Canon or Nikon can agree on what the "correct" Kelvin value is for Flash photography. Not only that but they're massively different.
Nikon says that when you set their cameras to flash white balance mode, the shot will be captured with a Kelvin value of 5400K, and Canon's flash white balance setting is 6000K. That's a difference of 600K - that's a hefty wedge of Kelvin difference right there. So, which camera manufacturer is correct? Well, neither... and both, because it's an arbitrary figure that's based on a personal preference. Now I know some of you will be struggling at this point because surely we've always been told what the correct white balance for daylight is? Well, those traditional photographers among you may well remember that film had exactly the same variables, daylight Fuji film was a lot "cooler" than the Kodak film that was renowned for producing a far "warmer" looking image. There was no correct film to use back then, and photographers regularly argued about which was the superior colour film. But there wasn't; it was simply personal preference.

Back when we used to shoot film, we would have to buy specific tungsten film to shoot indoors under tungsten lighting and use daylight film for shooting outside in the daylight. Things are a lot simpler now, and we simply adjust the white balance or Kelvin values on our cameras to suit the situation as it arises.
What is Kelvin?
Before we get too deep into this rabbit-hole, though, let me just catch everybody up to speed on what we're talking about when I mention the word Kelvin. Essentially, Kelvin is the number that dictates white balance on your camera. Just like we use pounds or kilos to measure weight, we use Kelvin to measure colour temperature, which is your white balance.
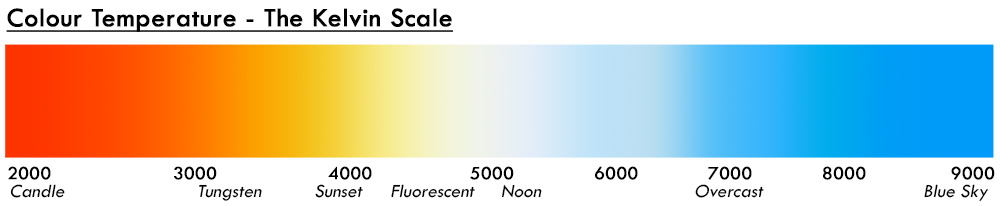
Kelvin is a scale that measures colour temperature; we then interpret this into our cameras and images with white balance.
HISTORY ALERT - SKIP IF NECESSARY
Long story short, Lord Kelvin decided to burn a block of pure carbon in the mid-1800s. He recorded the various colours the carbon changed to at different temperatures, resulting in the colour temperature scale we use today. The Kelvin numbers scale is also actually a temperature scale and is one that is used frequently in physics because it has no negative value. For example, zero Kelvin is actually absolute zero or -273 Celsius. Zero Celsius (water's freezing point) is 273.15 Kelvin, and 100 Celsius (water's boiling point) is 373.15 Kelvin, and so on.
Ok, so now that we know what Kelvin is, and that White Balance seems fairly arbitrary when taking our shots, how come I feel like I've been told otherwise my entire life? It's simply easier to teach anything when there are rules and constraints in place to work within, like the saying goes, "You have to know the rules before you can break them".
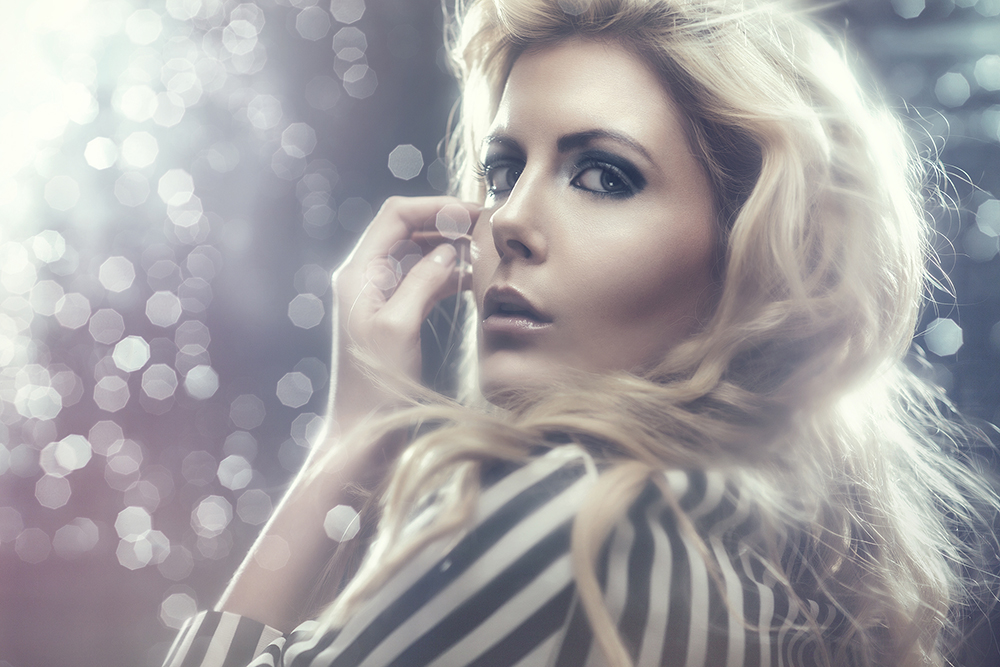
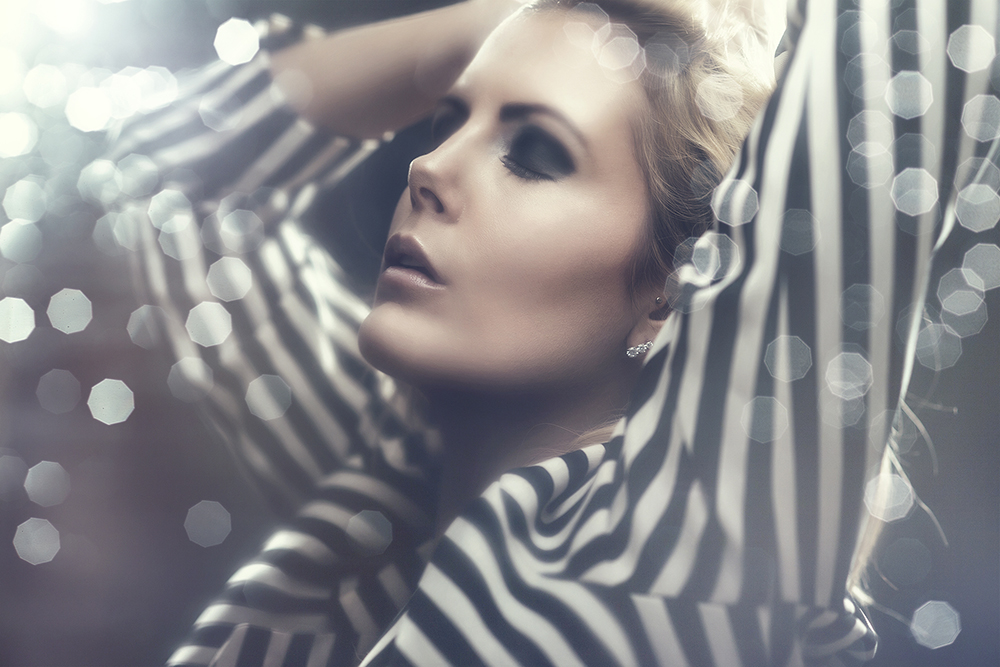
Take a look at the shoot below to see what I mean by breaking the rules. All of the images below were taken in the daylight on the same day - I had to go a LOOOOONG way back in the archives to find a shoot that I had taken with natural light! All the shots have a different Kelvin value attached to them, but quite often the better-looking shot is the incorrect one.

All of these shots were taken on the same day in the daylight, and I have played with the Kelvin values in Lightroom to illustrate how varied Kelvin values can be, yet still visually acceptable.
Granted, some of the above shots might seem a little extreme in colour variation, and you may have a strong preference towards one end of the Kelvin scale or the other, but I still believe that these are all still viable and all "correct". It just goes a little way in illustrating my point that white balance and Kelvin values are personal choice, but also a strong creative modifier that can set the tone and mood of an image or series of shots. Take a look at the silver jumpsuit shots above: the technically correct white balance is probably closer to the 6200K mark, but when I cool the image right down with a 5200K the jumpsuit starts to pop and shine with those rich blue tones. Although the 6200K one is closer to actually being correct, the 5200K is certainly a more fashionably aspirational look and certainly makes it a better image in my opinion.
Where do gels come into this? - I know it's coming.
So, yes, now that we know we are allowed to break the rules of white balance, let's step it up a gear and not only change the colour of our shots via the camera's white balance, but let's also change the colour of our subject and our surroundings with coloured gels too.
For a lot of my work, I will only use coloured gels and no uncoloured lighting. Essentially every light in my set will have an artificial colour placed in front of it called a coloured gel, this means that the Kelvin value on my camera is completely open to me to abuse and play with as I see fit.
For example, if I am taking a classic portrait shot with no gels, I have to be careful not to push my white balance choice too far, otherwise it will just look bad and not creative at all. Yes, I know I said you can do what you want, and there is no correct value, but with classic lighting shots, you still have to be a little cautious. See the three images below.

You can clearly see above that if you're using classic lighting, you'll still need to be careful not to push the white balance too far. Yes, you can warm it up or cool it down a little, but drastic adjustments like we see here are never going to be acceptable.
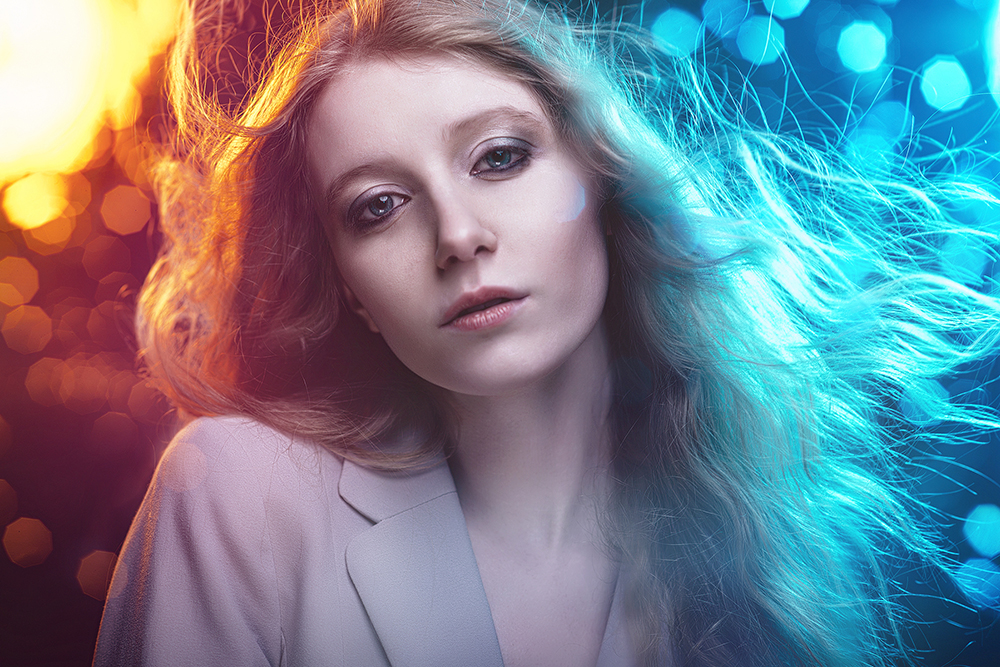
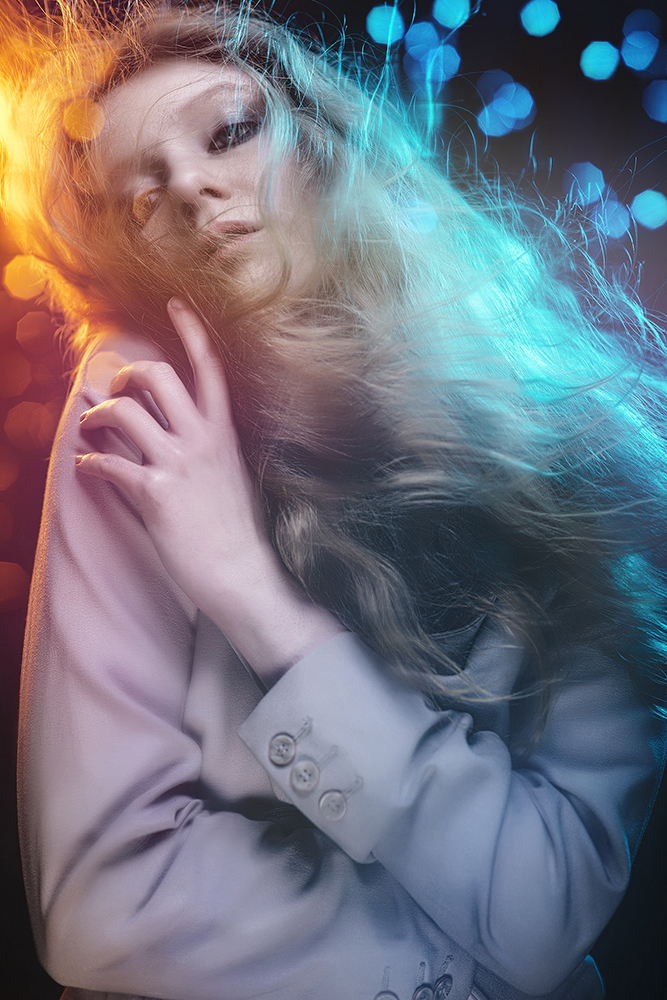
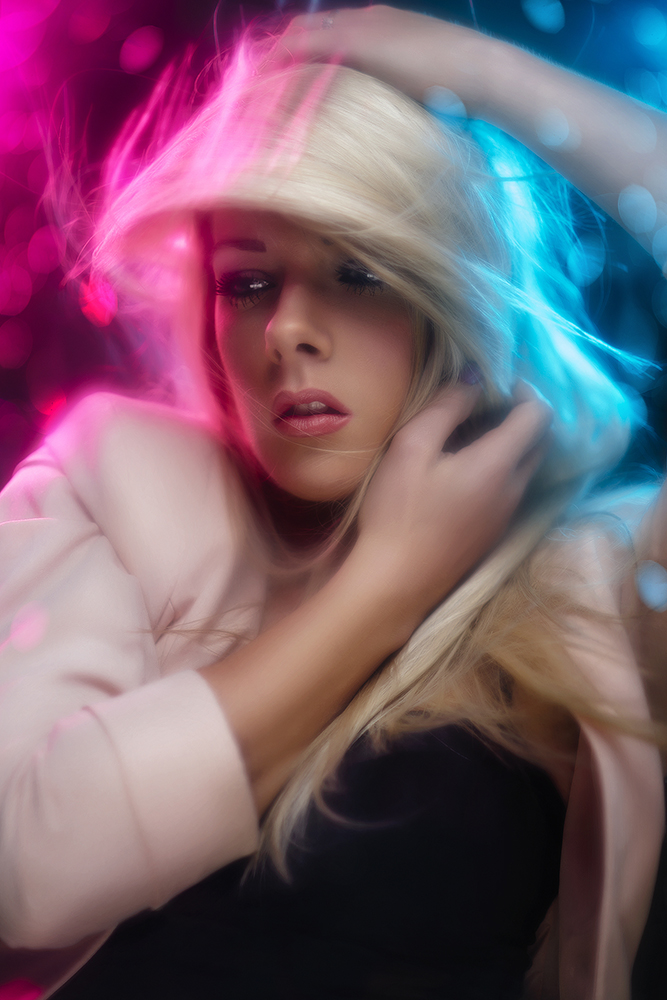
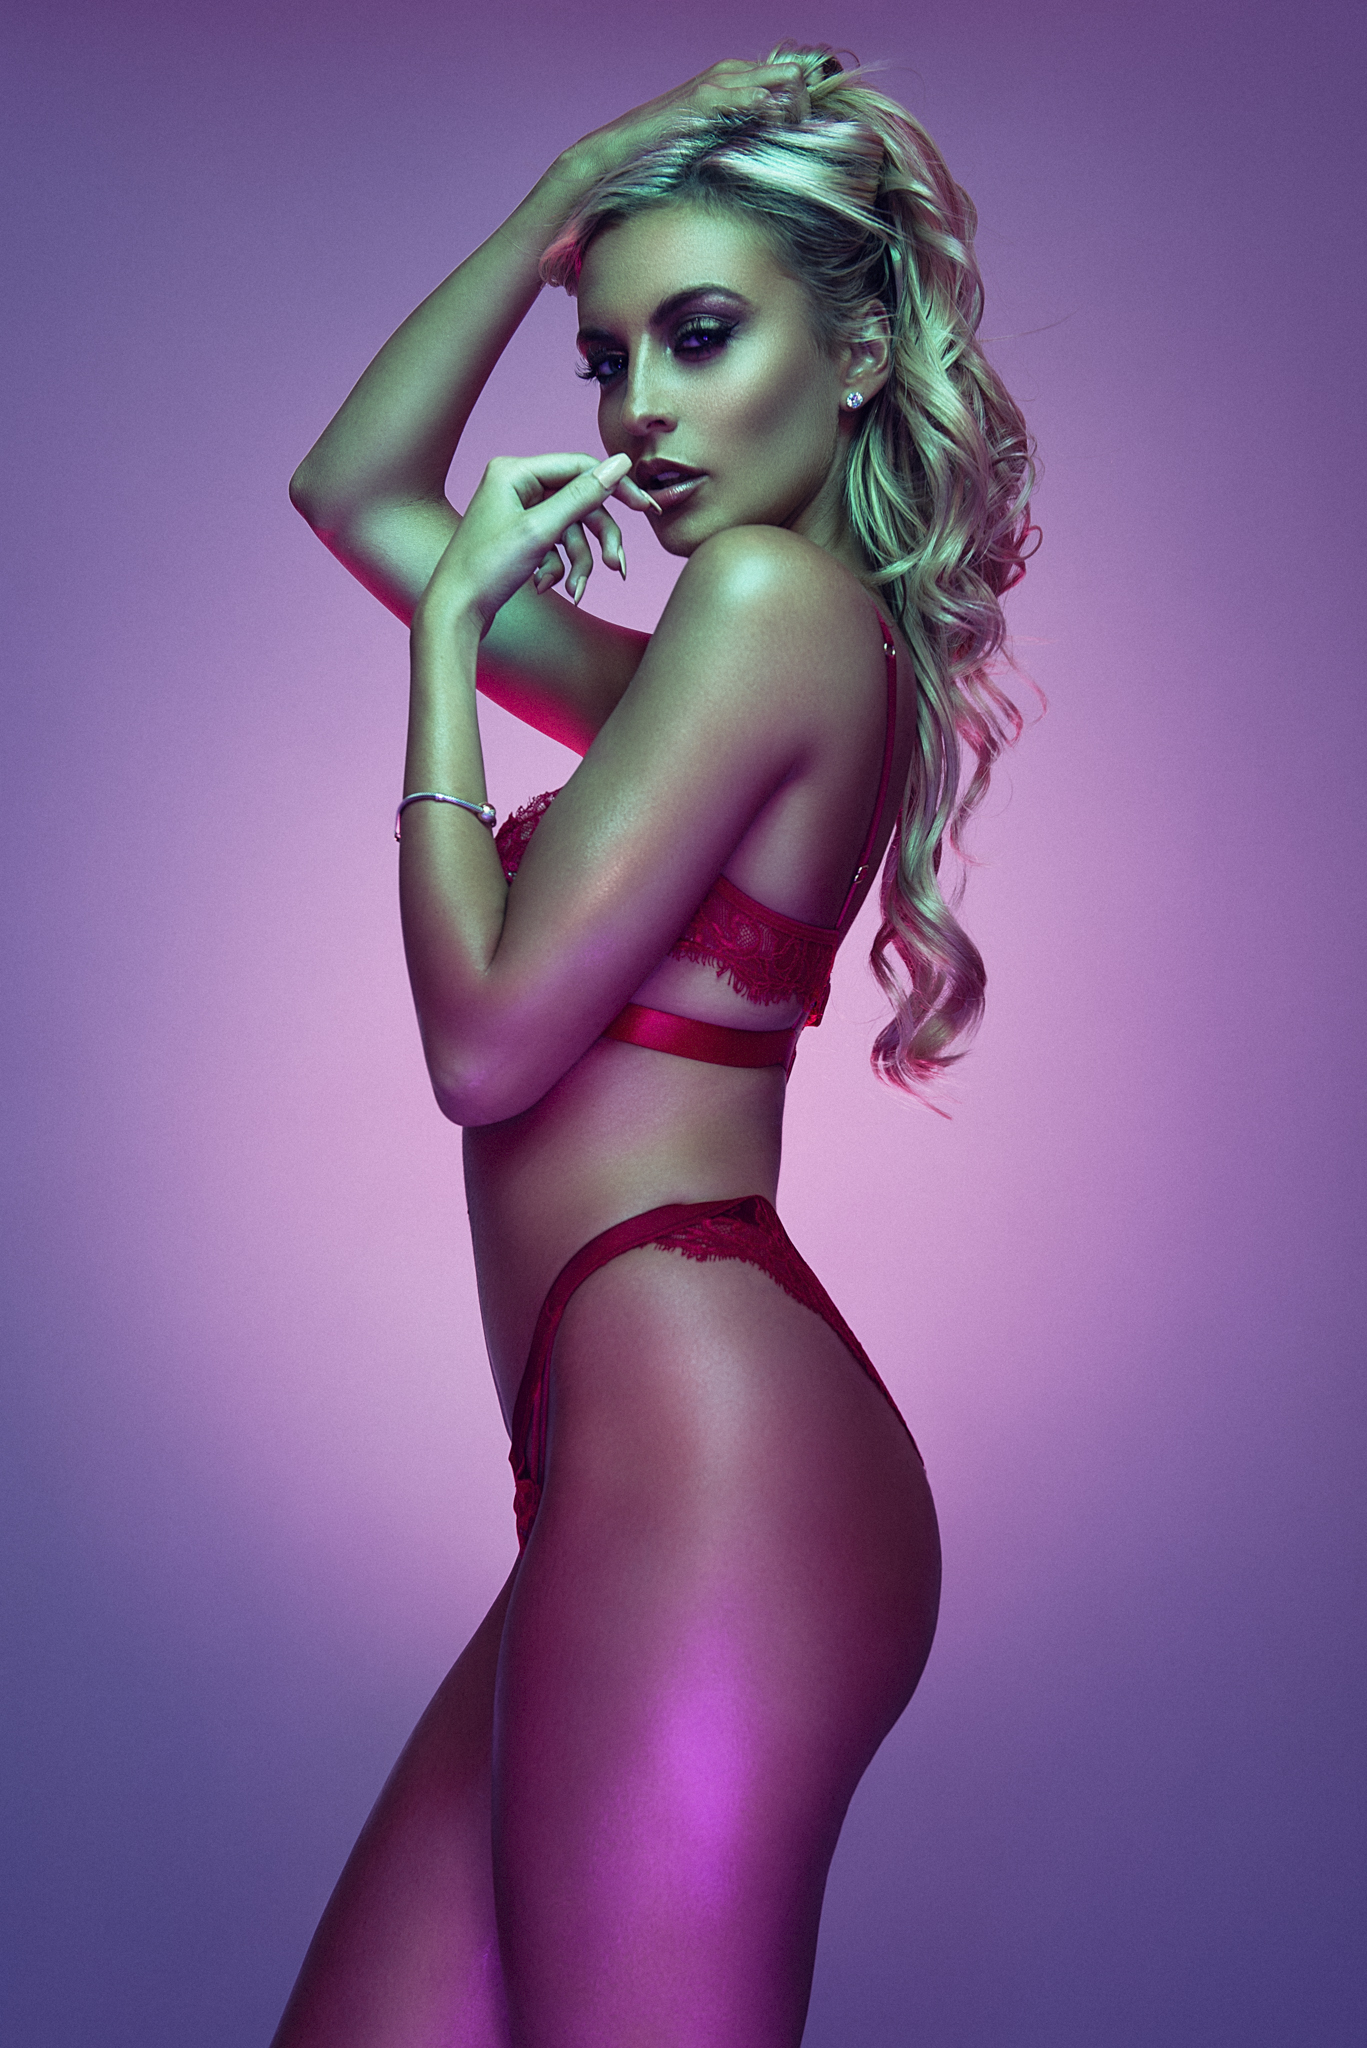
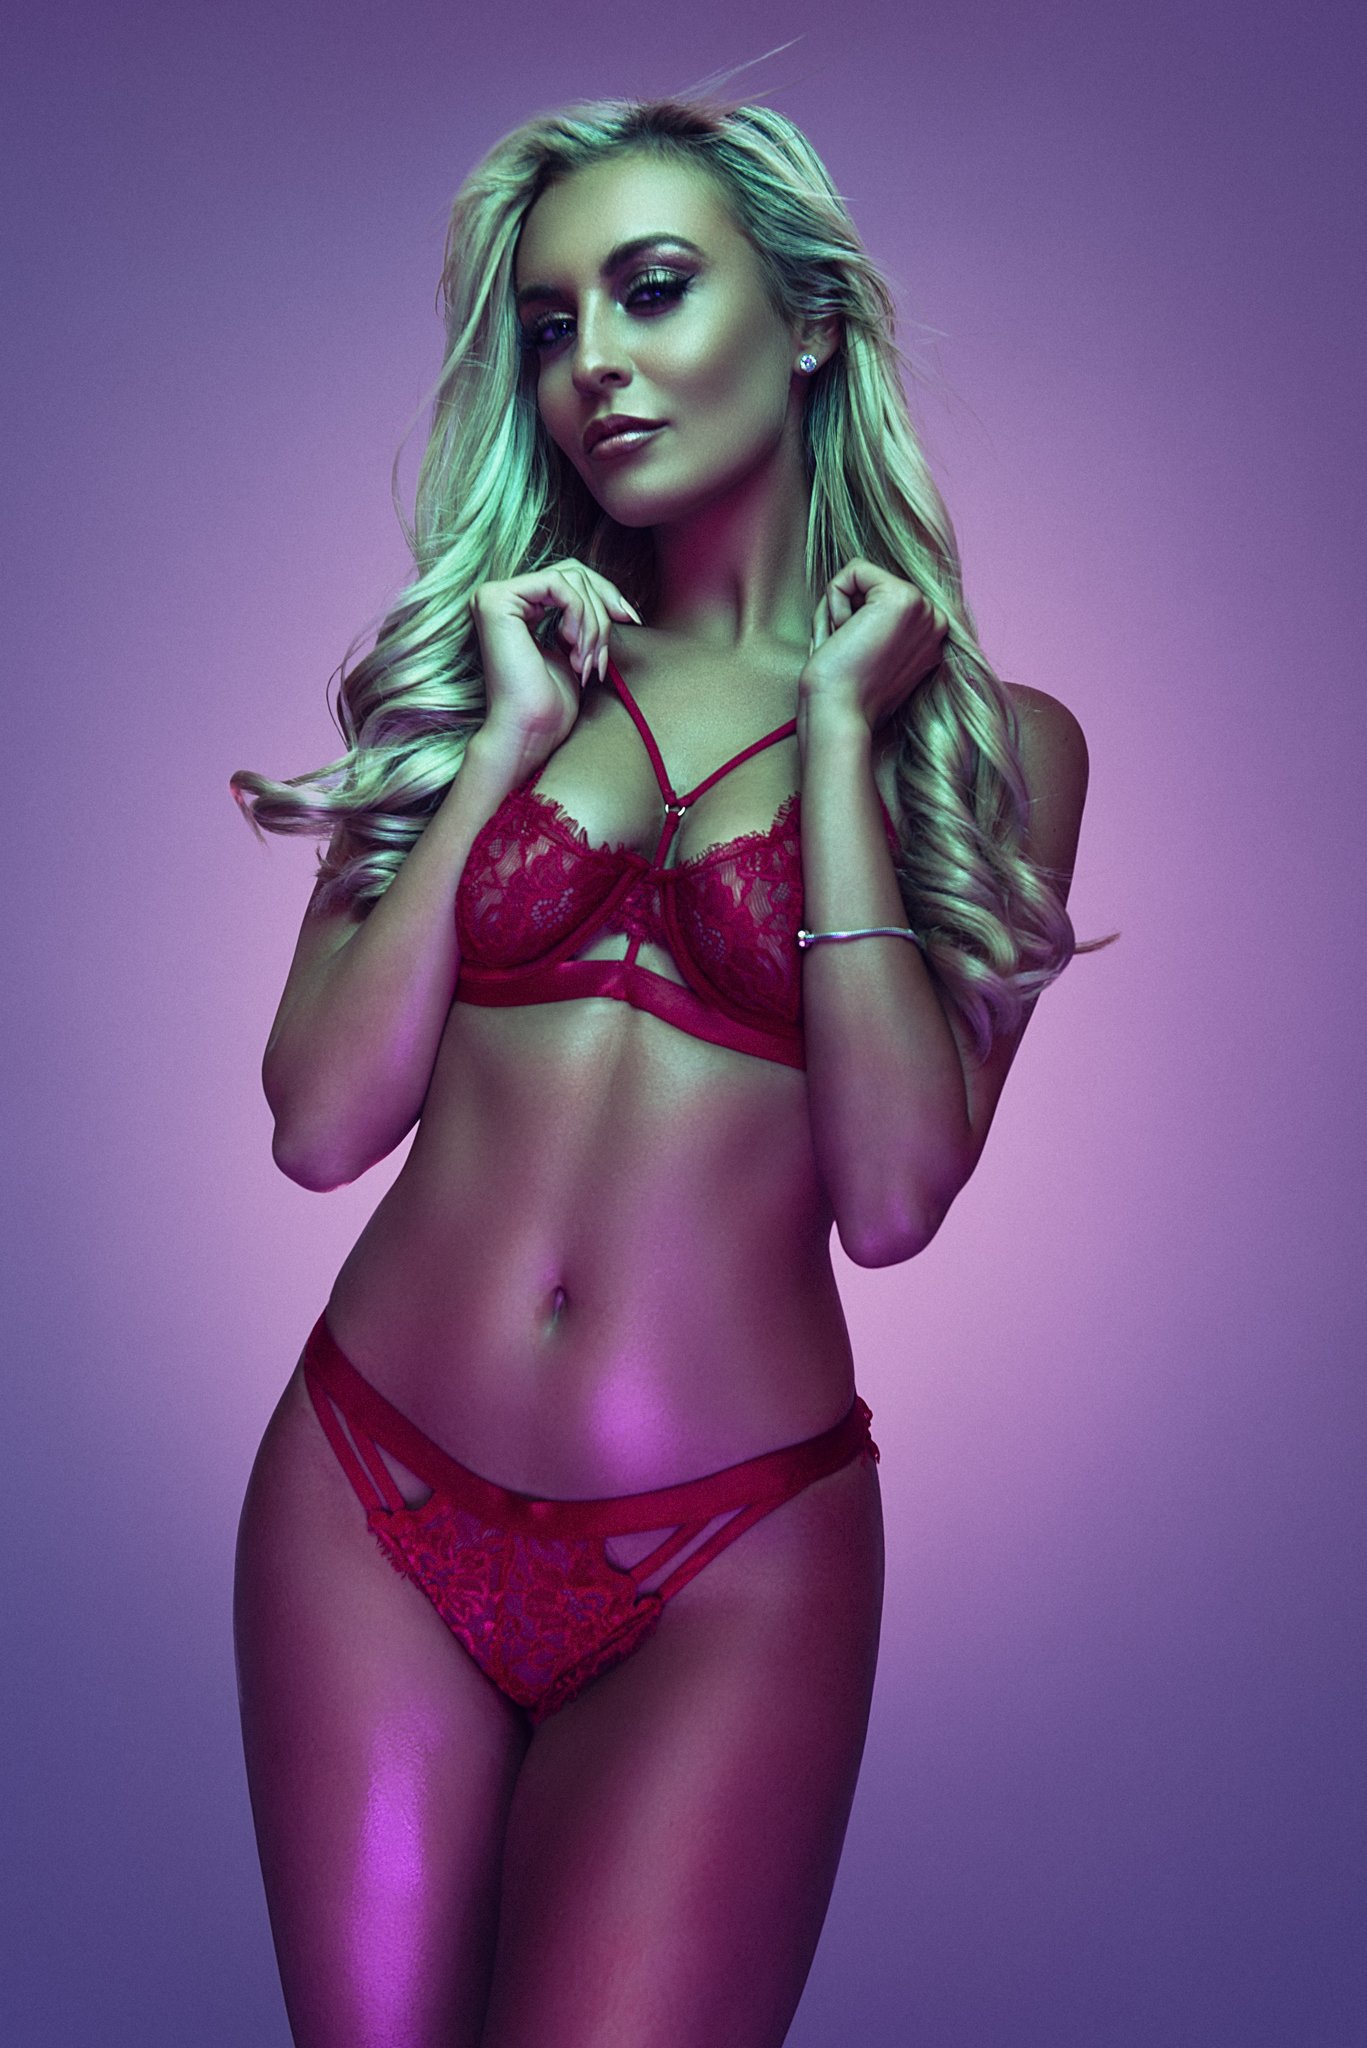
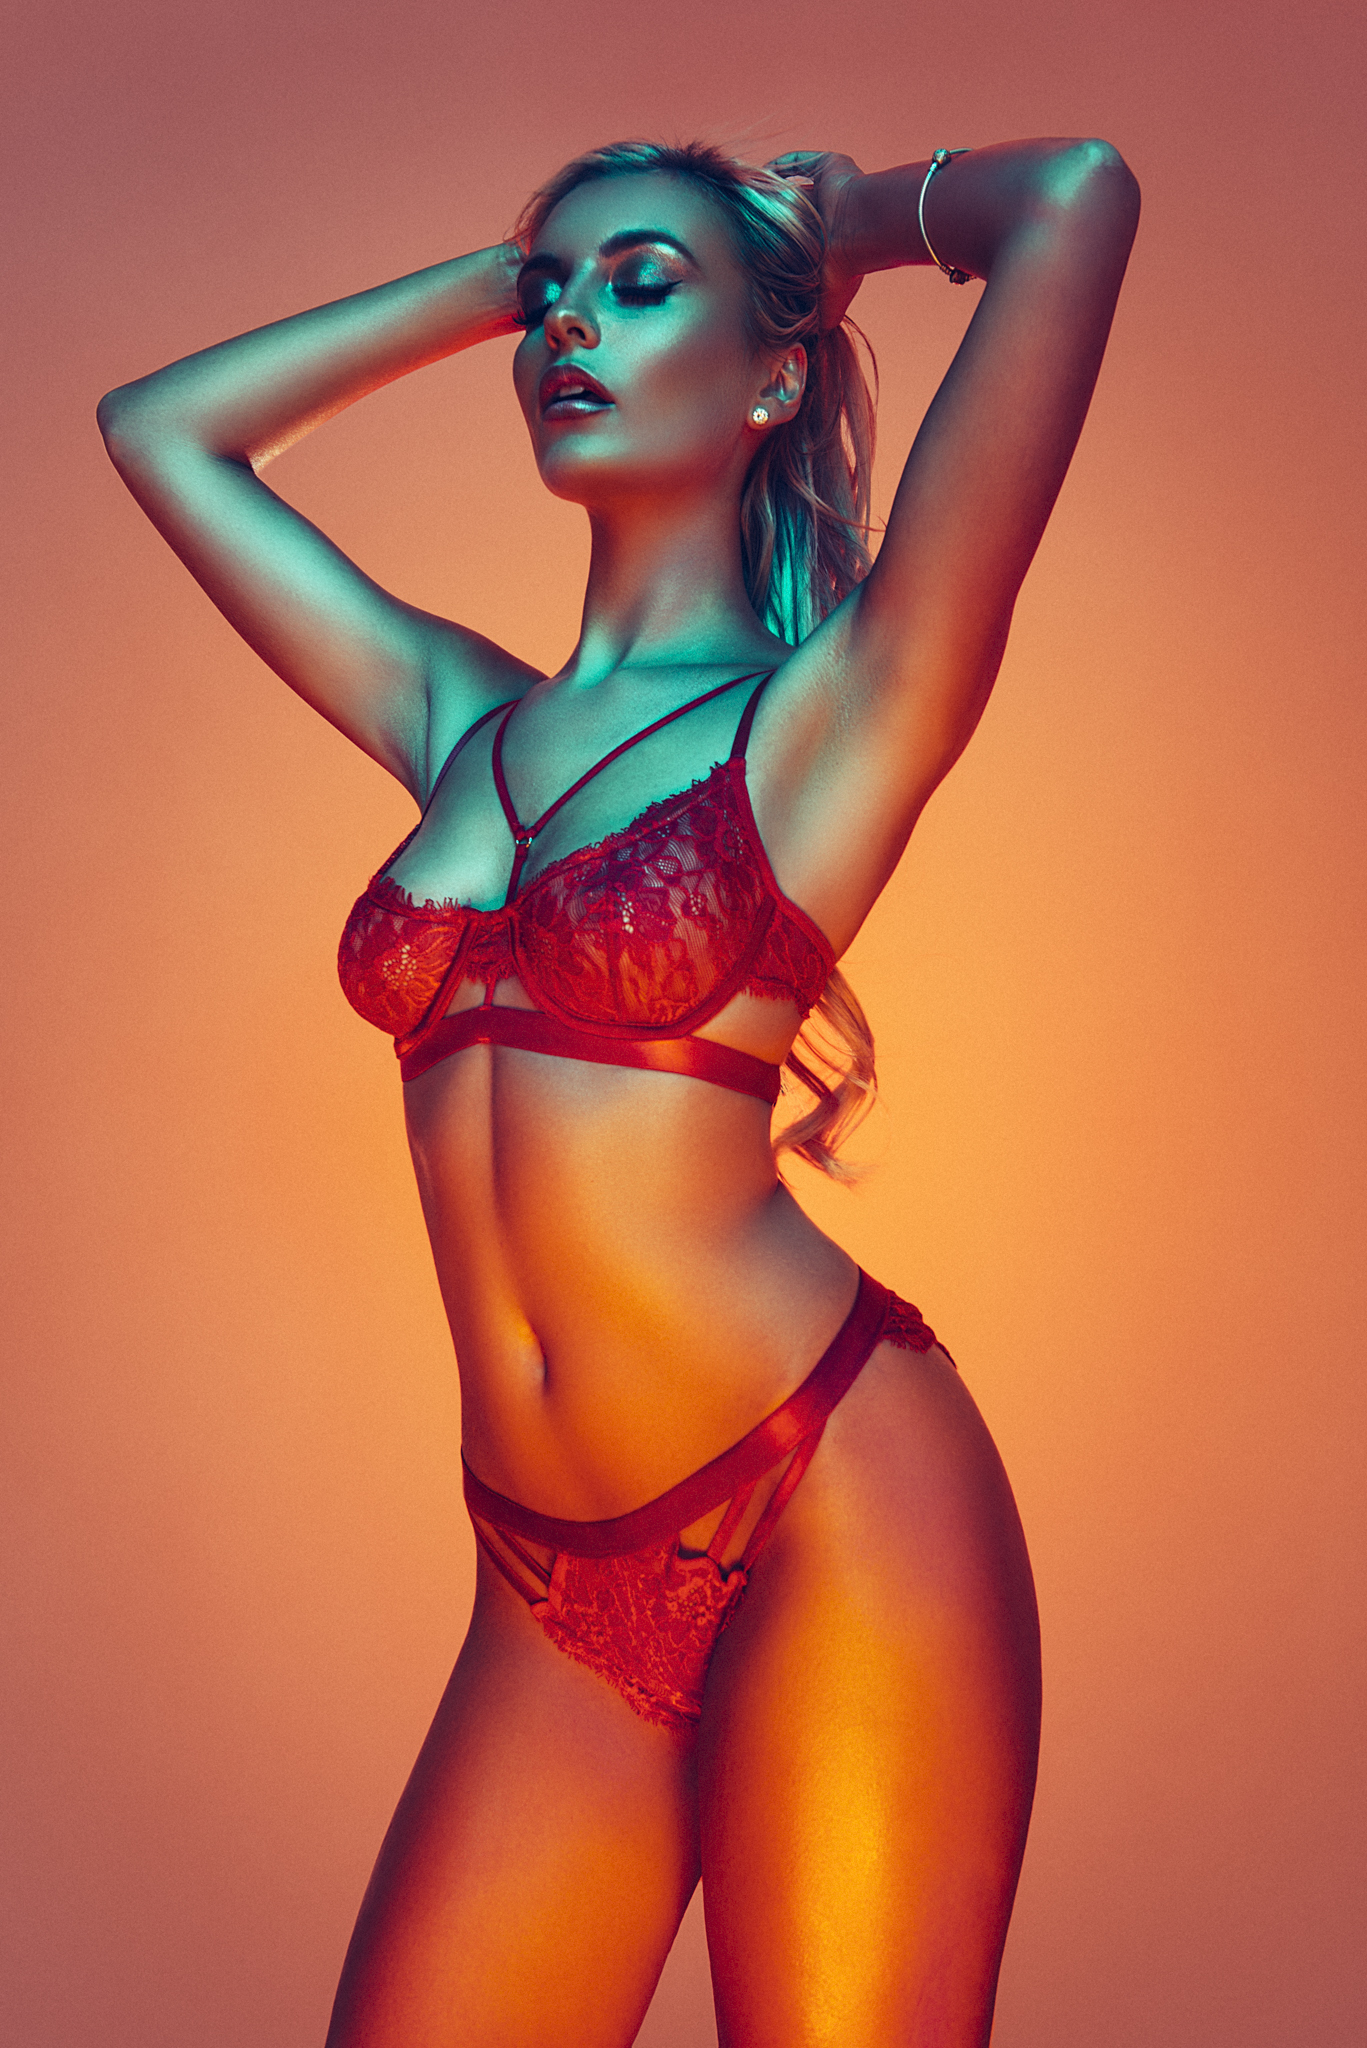
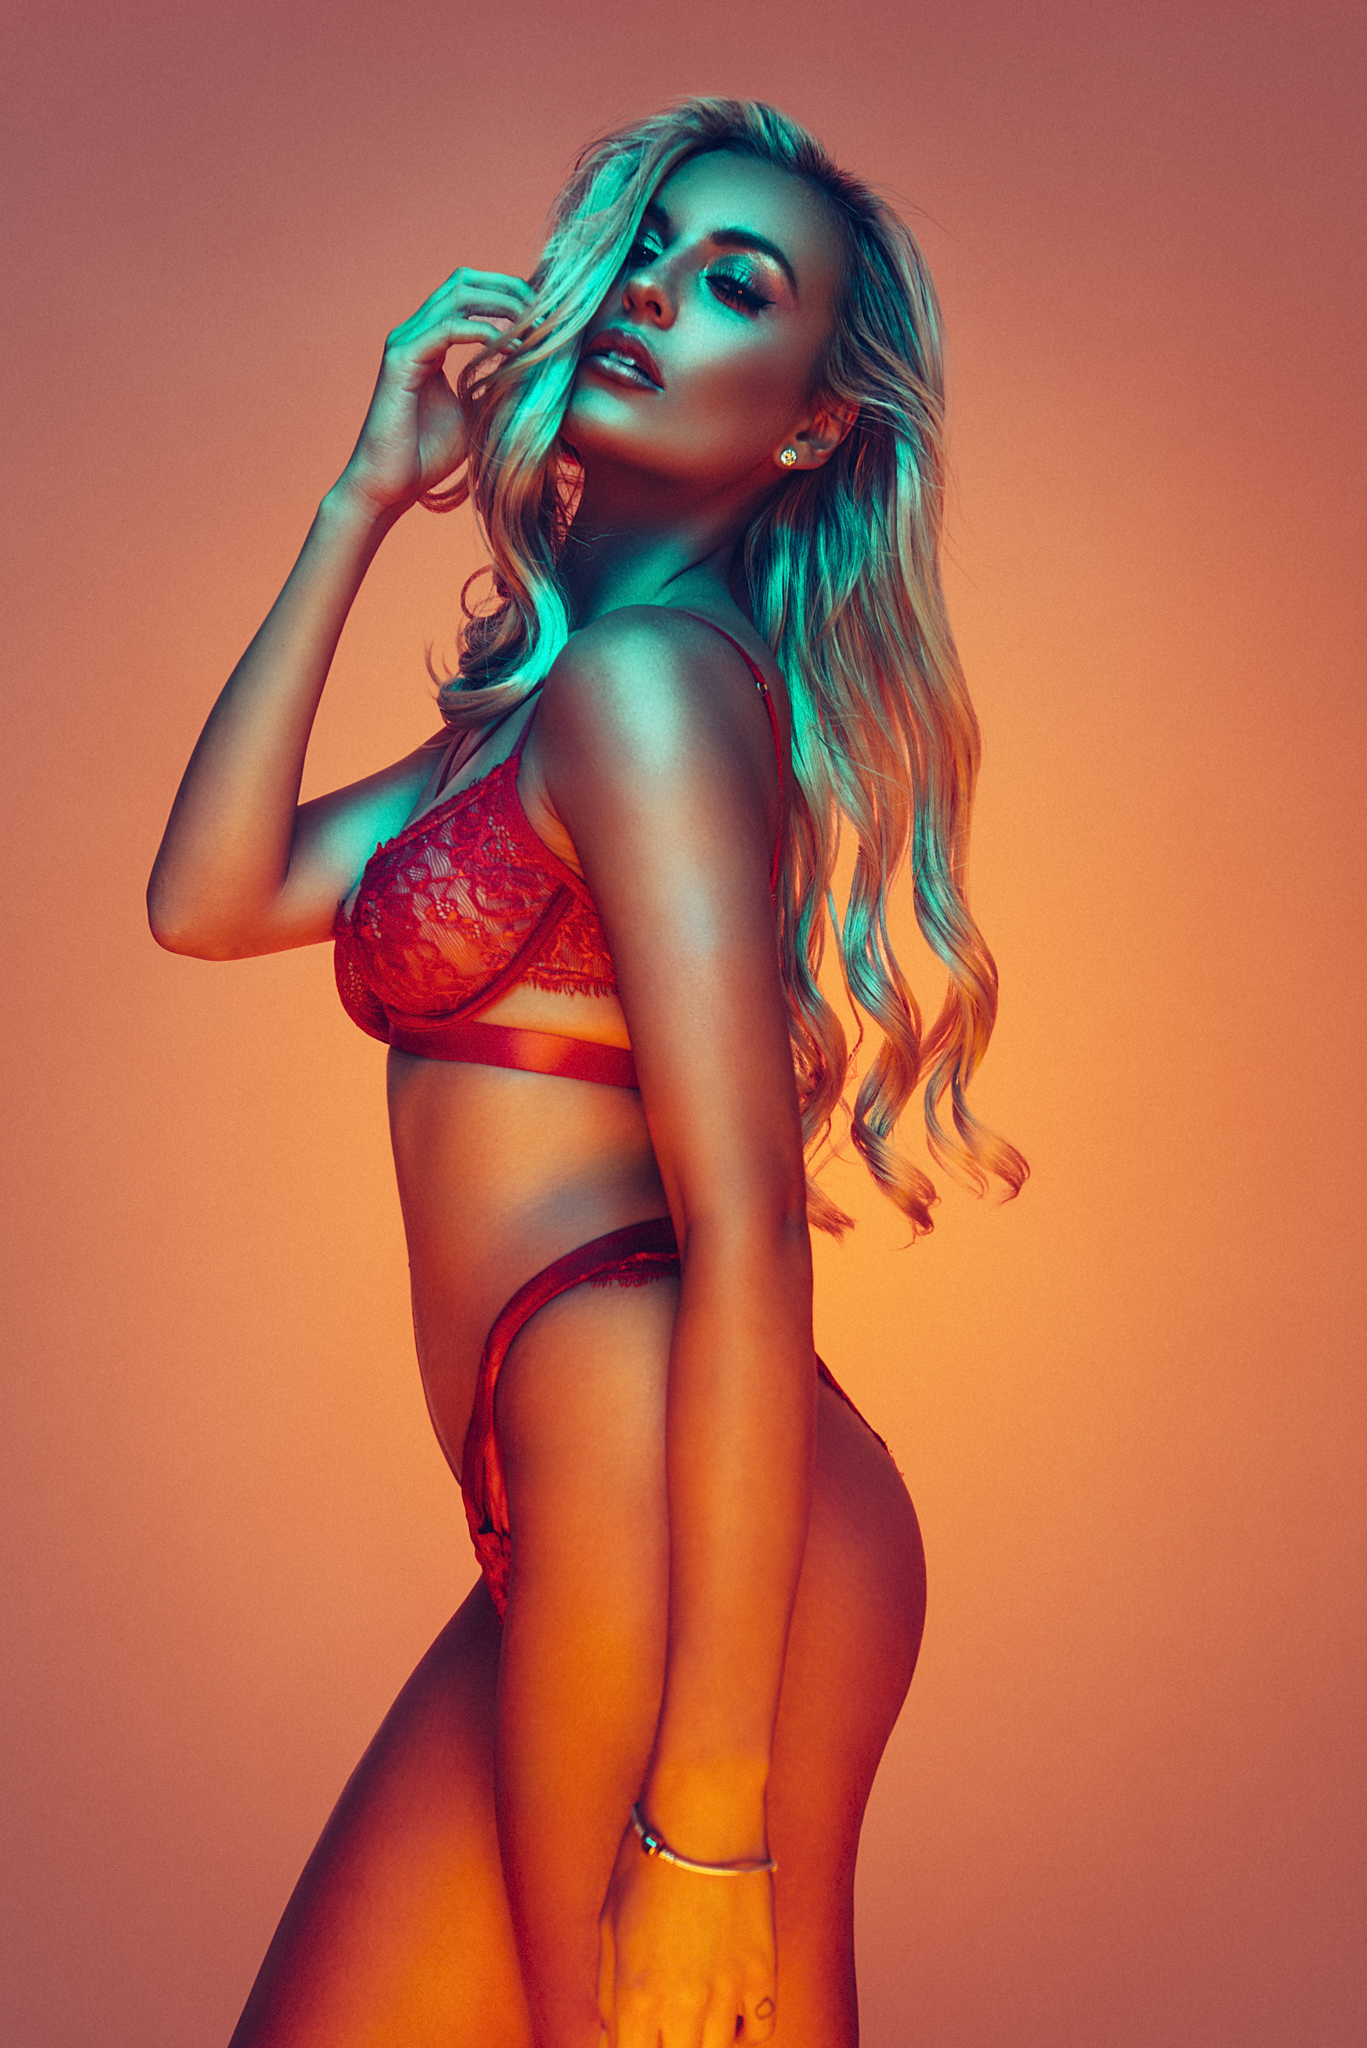
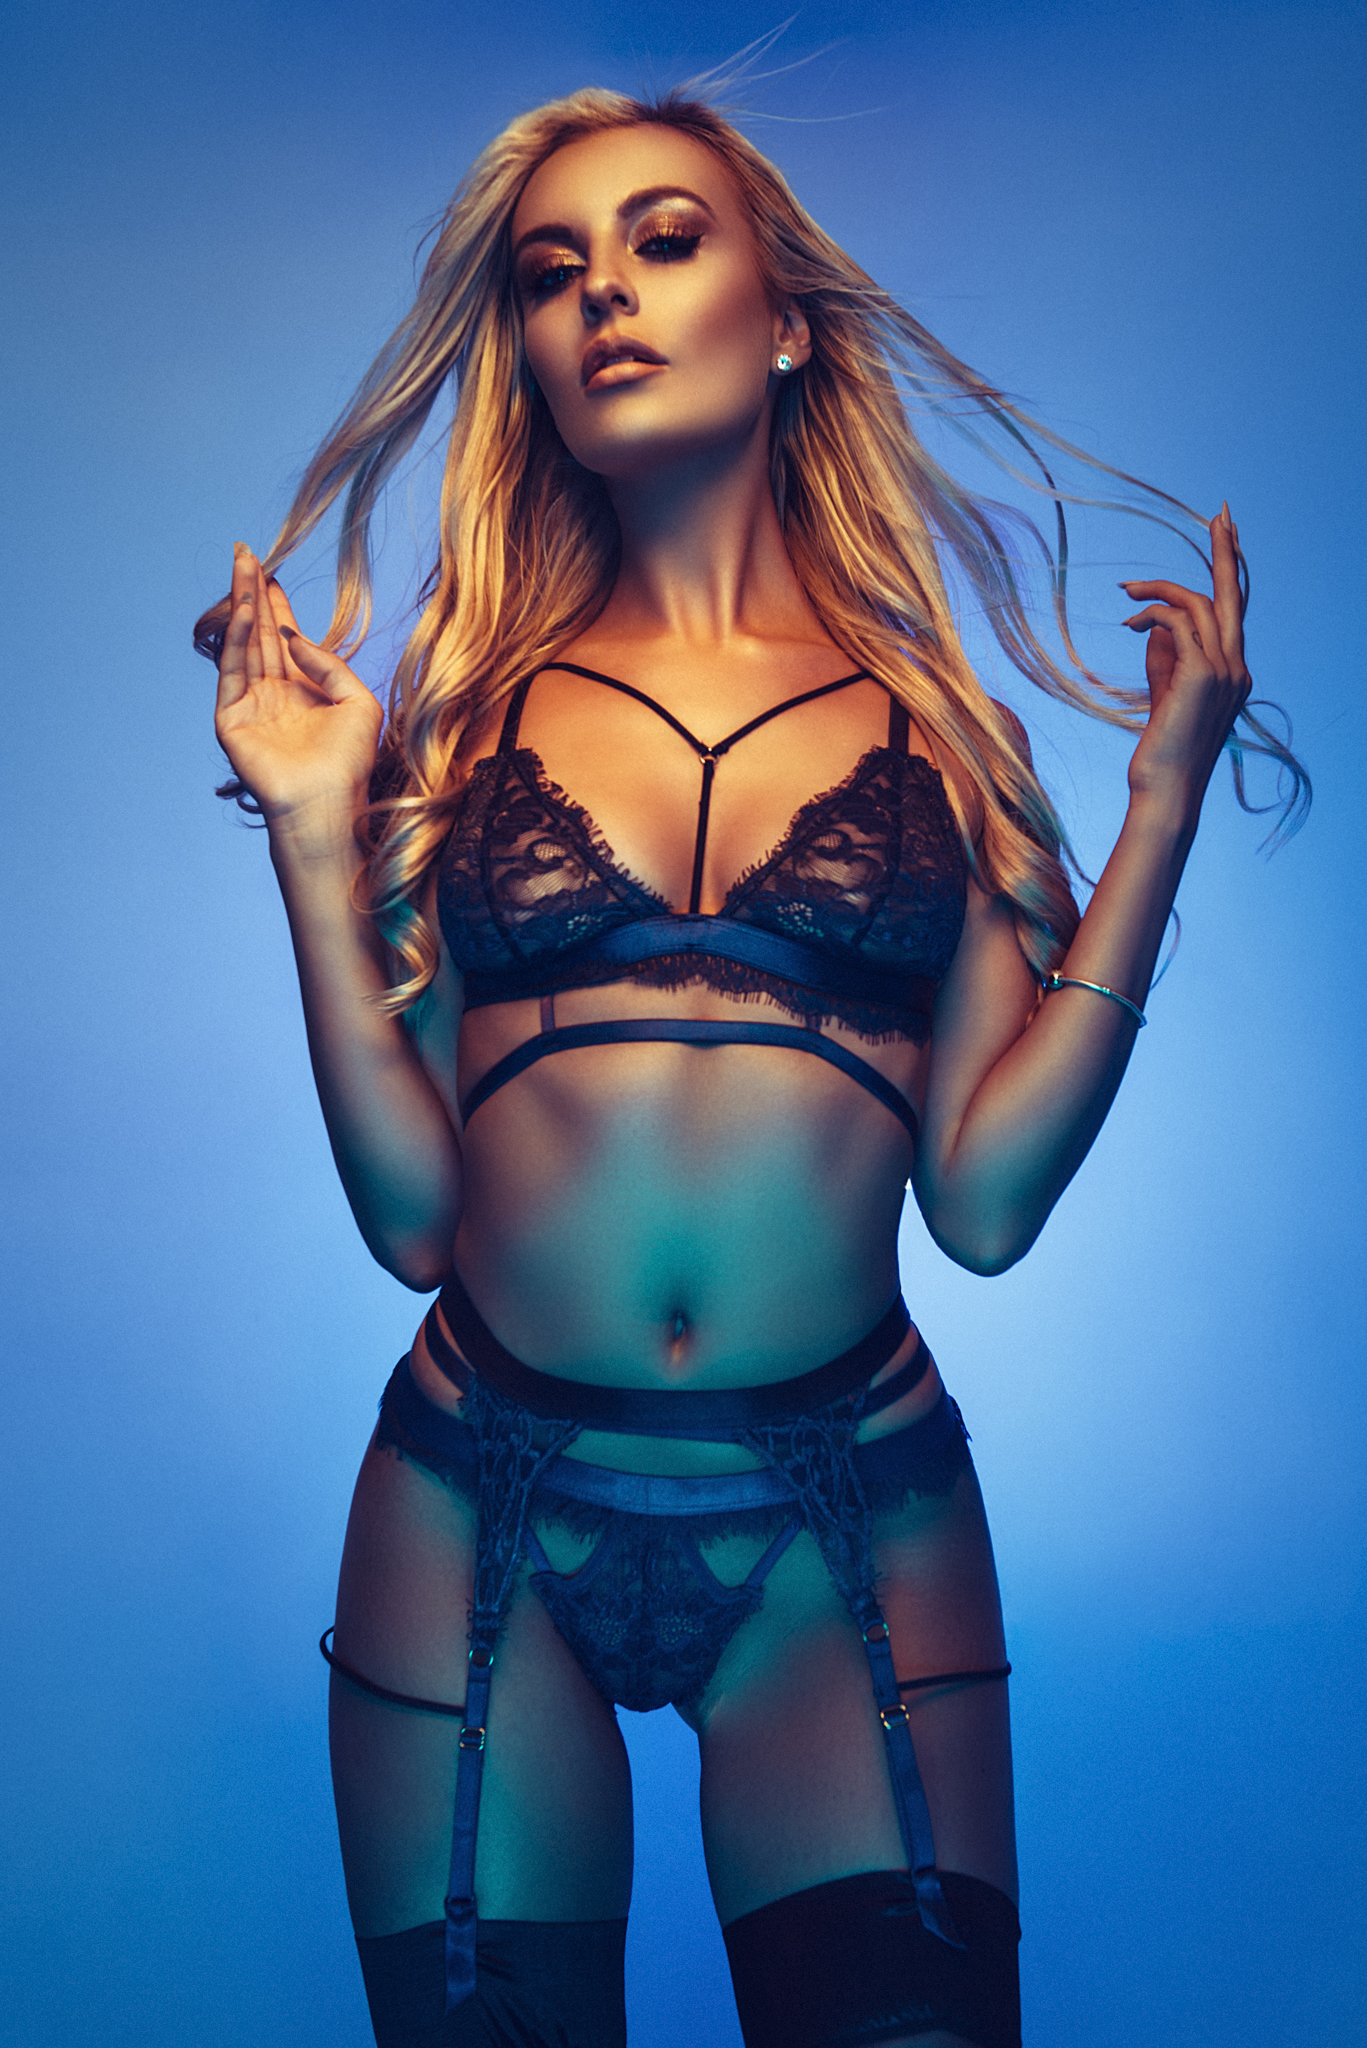
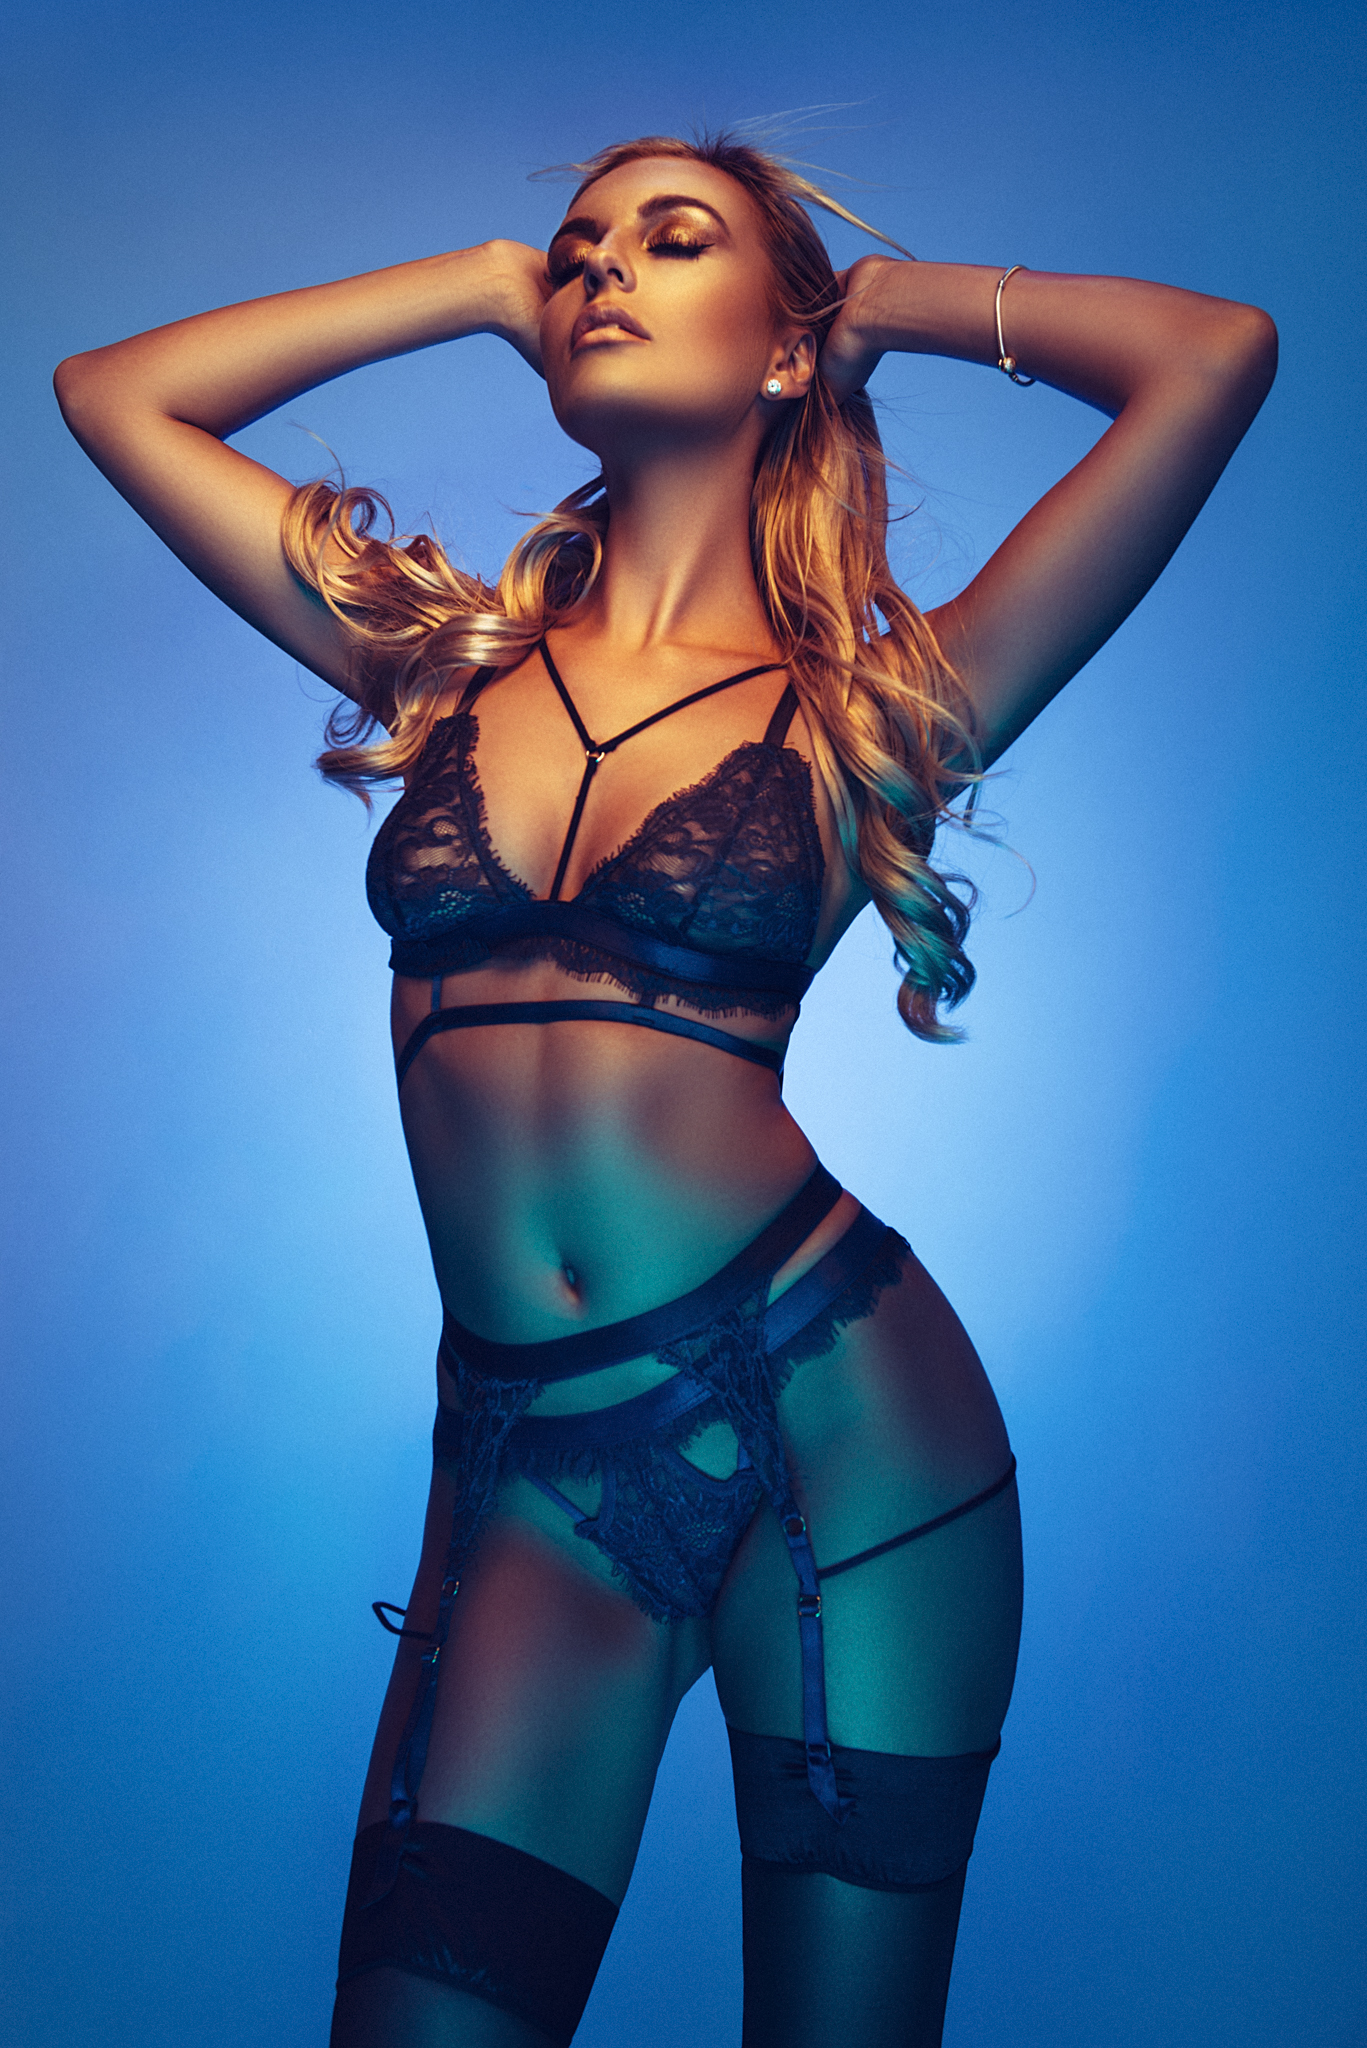
If, on the other hand, you'd like to use only coloured lighting and no bare flash or daylight, then the creative options available to you via white balance and Kelvin are seemingly limitless.
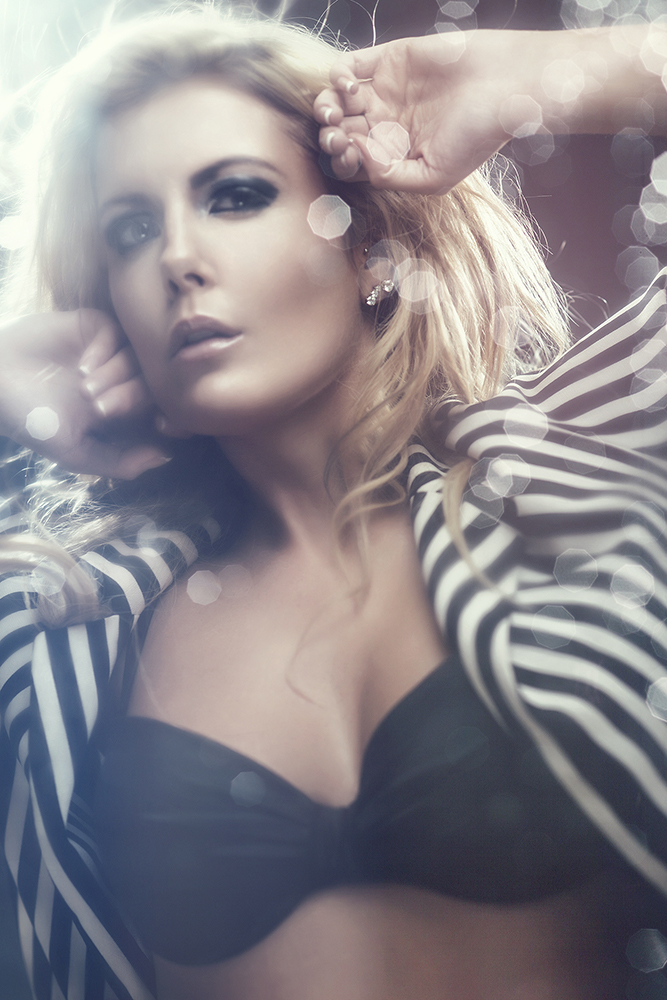
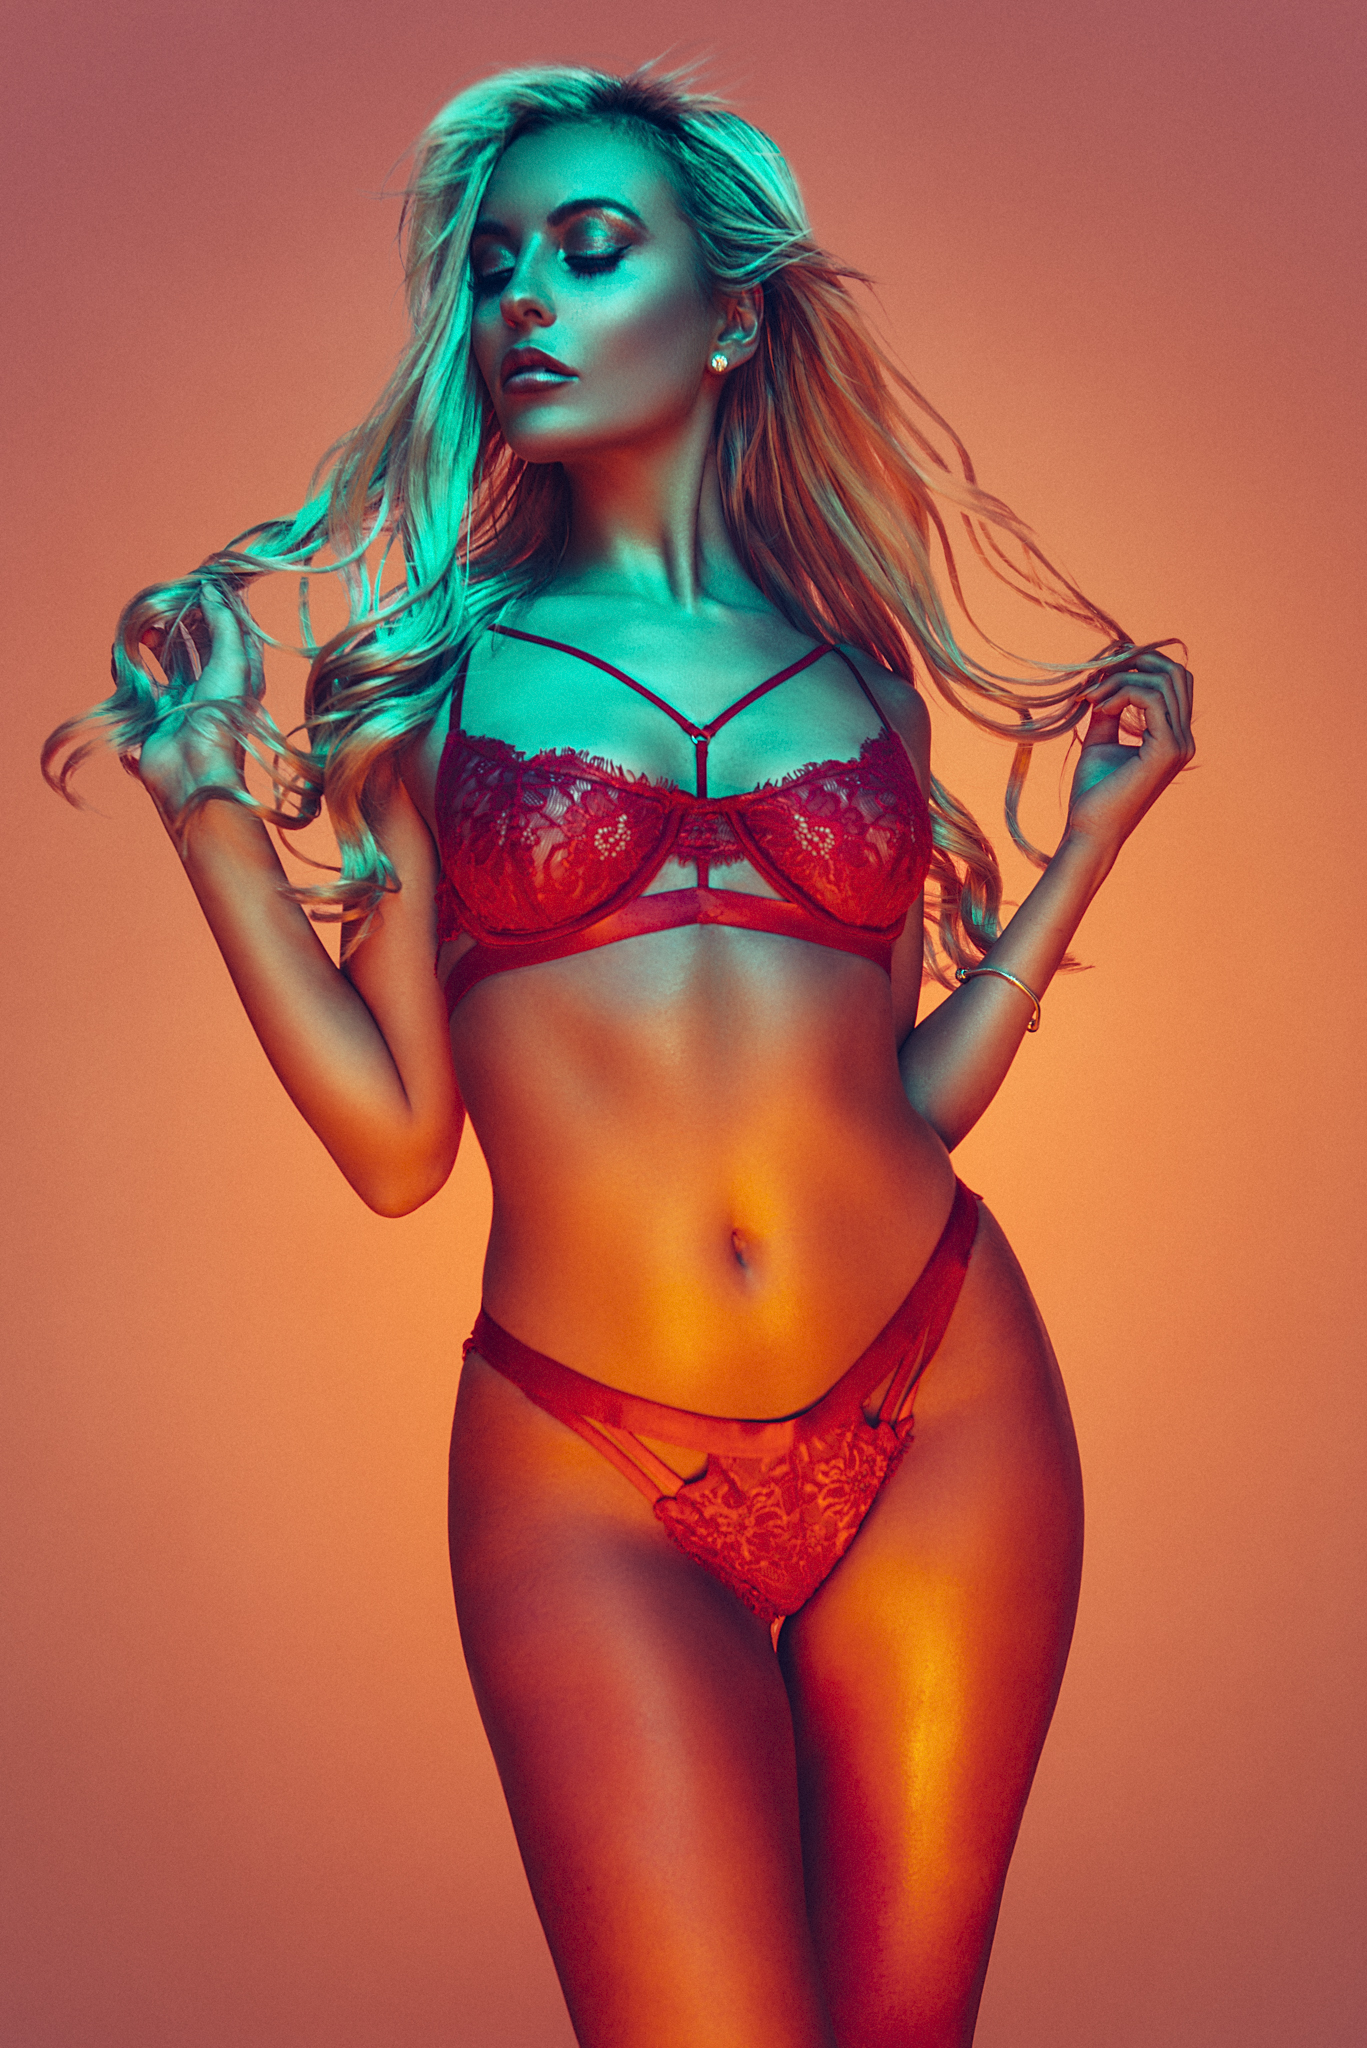
Take a look at the three shots below with the same Kelvin values we saw earlier to see what I mean. The model is completely washed in colour, so there is literally no "correct" value whatsoever. Granted, the three setups are using different coloured gels in each, but I still feel it illustrates the point of how powerful Kelvin is. Yes, I could have set my Nikon camera to 5400K for flash photography, as I'm supposed to have done, and I would have gotten some very pleasing shots too. However, it's also fun to experiment with other looks that the Kelvin adjustments can offer.

The shots above were all captured using coloured gels on all of my lights in the scene, so it opens up a whole world of creativity when playing with white balance and Kelvin values.
It is, of course, worth remembering that you don't need to set the camera to a specific white balance whilst you're shooting. Remember that as long as you're capturing raw files, you can play with the Kelvin value until your heart's content later on in post-processing software like Lightroom, Capture One, or Adobe Camera Raw.
Featured Model: Remi Curtice
In Summary
So what did we learn? Well, first and foremost - if you take nothing else away from this article - it's simply that you shouldn't worry too much about the white balance setting on your camera. Most of the time, AWB (auto white balance) will be totally fine for what you need, especially if you're shooting raw, as you can tweak it later on in post-pro.
Secondly, bin the grey card! There you go, I said it. Seriously, unless you work in the Pantone department at Adobe, a hermetically sealed factory at Mercedes or the office of Saatchi & Saatchi (to be fair, I still think they'd laugh you out of the building), then that grey card literally isn't worth the paper it's printed on. I have a close friend who works as the photography manager in one of the industry's top online retail fashion departments, photographing clothes that demand precise colour rendition, and he says that he sees colour variations in grey cards all the time. There is NO industry standard for grey cards. Base your white balance on what looks best to you, not what other companies deem to be correct. If you've read this far, then you're definitely ready to break the rules!
Lastly, make sure to play with varying Kelvin values in your natural light shots, but also play with full colour wash shots too. Apply coloured gels to all of the lights in your setup and adjust the Kelvin in the camera to see how different amounts can significantly influence the look and feel of the shot.
If you give the colour wash shots a go, definitely share them my way with the Kelvin values you've used as I'd love to see what effects you come up with. Yes, that's right, I'm a nerd too :)
As always, feel free to ask any questions below, and I'll answer them as best I can.
If you need some coloured gels then feel free to check out my own coloured gel packs here Jake Hicks Photography - Coloured Gel Packs
Remember: AWB for the WIN ;)
:WARNING: Temptation is only a quick scroll away...
If you liked some of the gelled lighting shots in this article and you'd be interested in learning how to take those shots yourself or you're simply interested in finding out everything there is to know about Gelled Lighting then why not check one of my workshops: Gelled Lighting Workshop

I have also just released a brand new 22 hour complete Gelled Lighting Tutorial video. I go over everything from studio lighting setups with gels to being on location with gels plus I also go through my complete retouching and post pro workflow. For more details and complete breakdown of everything that's include check out my Coloured Gel Portraits Tutorial

I also offer comprehensive coloured gel packs. These collections of gels are what I use day to day to create some of the most highly saturated colours around. If you're looking at getting into gelled lighting or need to get stronger and richer colours in your coloured gel work why not check out my Jake Hicks Photography Gel Packs