Many moons ago when I first left art college my first real assignment came along: it was a big hair shoot for one of the Toni & Guy hair salons here in the UK. The brief was to shoot 6 models – all head and shoulder shots and of course, all showing the hair in the best possible light.
At this stage I didn't have any lighting equipment; in fact I think I even used my friend’s Nikon film camera for the shoot – I certainly needed to think about getting my own lighting system.
So I had the camera for the shoot sorted, but no lighting equipment. Art college was great, you went along signed your name and they loaned out all the kit you could possibly need; but those days and privileges were now gone so I needed to start investing in my own equipment. Since I knew that photography was going to be what I wanted to do long-term, I wanted to invest my very limited finances wisely.

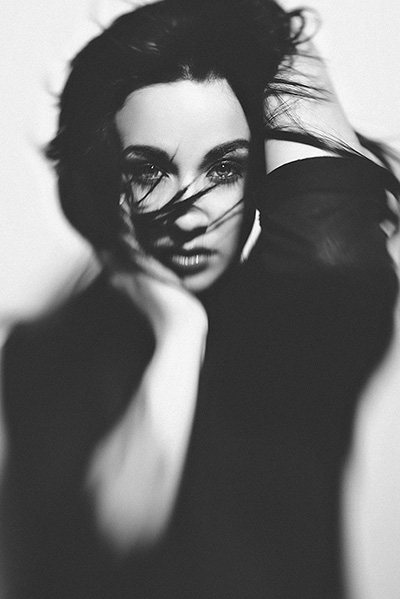
My very first commercial shoot way back in 2013, I was straight out of art college and I had a hair shoot for Toni and Guy. This image was shot with my brand new Bowens Esprit 500w strobes that I still use to this day.
This shoot took place in the salon in the evening after their working day. Although this particular shoot required flash lighting, I knew that most of my work in the future will need supplemental lighting too since I've always been an artificial light shooter. All I needed was to figure out which lighting system was best for me: should I just grab a couple of extra speedlights, or should I plump down a lot of money upfront and get some studio strobes which would have everything I needed for my shoots for the foreseeable future?
The two main choices I had were speedlights or strobes, each certainly have their key features and trade-offs.
I don't have the exact figures for back then, but let's look at modern day equivalents in terms of specs and pricing since the same lighting options are still available and nothing new in terms of lighting systems has really been introduced over the past few decades. Apart from LED lighting – this is not strictly relevant as a comparison here as this is a constant light and geared more towards video than stills.
For some reason the most common route many photographers seem to take when they start building their kit is to buy some speedlights. I had a cheap one initially and I know most people always have a speedlight before that have a strobe, but in hindsight I’m not really sure why.
Speedlights are small and light: you can attach them to the top of your camera, and now most modern cameras will also control that flash with incredible accuracy. So I suppose from that perspective, speedlights are the less technically intimidating choice. I also think that it's easier to build your lighting kit piece by piece with speedlights without any seriously large investment up-front - you buy your speedlight then you buy all the little add-ons, slaves, modifiers and so on. You can take your time and build your kit as you go along giving you the impression of saving money, but investing in a strobe kit does require you to make more of an initial investment. However, if you want to make it more financially viable, picking up a kit of lights will save you a considerable amount rather than buying all the pieces individually.

Ten years on nearly to the day, I still have my same strobes. I've certainly added a lot more modifiers to my kit but essentially I've been carting around the same original four Bowens Esprits from the beginning, making these lights a pretty solid investment for me.
So before we start out down the road of investing in a lighting solution there are certainly many choices to consider in both the speedlight and strobe camps. We are going to look at the optimal setup; and considering we are starting out we will be looking for value as well as long term investment in quality. There are many cheap knock-off speedlights and strobes available but they are generally not very well made and don't offer long term reliability when shooting for and in front of paying clients, so I won't be considering those here. Remember: we are “investing”.
First and foremost you want know exactly what you want to be shooting; knowing what your “bread-and-butter” work is going to be will dictate your kit. It's easy for wedding and press photographers – they know they need speedlights, no “if’s” no “buts”, they need them to do their job. If something special comes along, then sure they can hire a strobe kit occasionally, but they need the speedlights to be light on their feet whilst shooting.
Still-life shooters like car photographers and other fields that require them to be in a studio 99% of the time will need strobes. They are dealing with detailed work where the quality of the work is paramount for big clients. They need the best quality of light they can get so strobes and their plethora of attachments is the only way for them to go.
For the rest of us though, the decision might not be so obvious. I think for this it just comes down to personal choice of what you actually want to shoot. Fashion photographers can choose to only shoot on location so they might rely heavily on natural light, but other fashion photographers may also only exclusively shoot in a studio so may prefer to use strobes for their specific style. Once you've figured out how you want to shoot you can better make the judgement on your system – there is clearly little point in investing in a flash lighting system if you predominantly work with natural light.
So let’s assume that we want to be mindful of value as we are starting out, but will be predominantly shooting with flash lighting, and shooting for clients with most of our work being done inside in a controlled environment, whether that be a studio, a client salon or even a home-studio. We also want to consider the size of our initial studio lighting kit; realistically a lot can be done with two lights and I will discuss the pricing for that, but to get anything really special and worth charging for you really want to look at three to four lights to be able to offer a client some semblance of choice and variation within the shoot.
So what are some of our choices and what are the pros and cons for each?

My first and only speedlight. I picked this one up when I had to shoot the occasional wedding when I started out. The Nikon SB600 is very light and fairly easy to use even if the menu system is a little convoluted.
The speedlight-er’s two light studio kit
Please bear in mind that all the prices listed below are guides and I have tried to give an average cost using prices from stores like Amazon. Photographic stores like Calumet can sometimes charge double these prices for a higher quality similar product but conversely places like eBay will charge half for a lesser quality similar product. The resulting final prices reflect this and although you could probably save money on inferior items you could certainly spend more on others.
The actual flash itself; the Nikon SB600 or SB700. These are not top end but they are still very good speedlights and these retail for around £200-£250 each. Heres the SB700 on Amazon, for higher end options you could also look at the top of the range Nikon speedlight which is currently the SB910 and retails for £339
The light-stand for a pair of speedlights £25-£30. Very flimsy at this price so be aware of the weight of attachment you will be applying to stands like this. 2x 220cm lighting stand.
Attaching the speedlight to the top of a light-stand via a bracket – around £20 each. These will also have the ability to hold an umbrella. Generic ball head hot shoe mount and umbrella bracket.
An umbrella lighting modifier. These vary drastically depending on size and quality but you can pick them up for around £20 each. Lastolight 80cm umbrella.
A soft-box lighting modifier; again these vary drastically but for a reasonable size and quality soft-box that includes the attachment to a speedlight you can pick them up for around £50. Heres a little 22cm x 22cm speedlight softbox by Lastolite.
The speedlight power source; 4 rechargeable batteries £7.50 (realistically you will need at least one spare set for each speedlight so 1 speedlight would require 8 batteries) plus a battery charger at £9. Amazon link.
We will also need to sync our speedlights to our camera; this is one of trickiest pieces to get right as the prices vary so dramatically that you're never quite sure why and if you should go cheap or not. They realistically range from £30-£300 for a transceiver and receiver but you only need to buy one cheap set to realise that you should have spent a little more. You can probably get a decent one for £50-£100 though, (here’s a great review on varying quality triggers and prices by Digital Camera World). Remember that this will only fire one speedlight so to fire two you will need another receiver and that will cost £299 for a transceiver and two receivers.
So to sum up the speedlight kit for two heads:
2x speedlight SB700 at £225 each is £450
2x light stands £25
2x speedlight to lightstand bracket at £20 each is £40 for a pair
1 umbrella lighting modifier £20
1 soft-box lighting modifier £50
Speedlight power source consisting of 4xAA plus 4 spares plus a charger is £24
Speedlight wireless sync including one transceiver and two receivers is £299
Total: £908 for a two light speedlight studio setup
Total for a four light studio speedlight setup is £1816

My preferred lighting weapons of choice, my original Bowens Esprit 500w heads.
The strobist’s two light studio kit
I chose a good starter option of two strobes with a power output of 400w. This power is going to cover nearly all of your strobist needs for a while and even though not hugely powerful for a strobe it still offers more power than nearly every speedlight on the market. This subject of comparing powers between speedlights and strobes is a slightly controversial one as you can't strictly compare the two power outputs accurately due to several variables such as modifiers on strobes, and speedlights always being focused in their housing. Though, as a very rough guide I know that an SB900 speedlight at full power gave the same exposure as a 300w strobe at 1/4 power.
Currently you can pick up a kit of two 400w Bowens heads for £557 at Calumet. This is actually the newer RX model with the built-in Pulsar radio receivers enabling you to fire the lights remotely from your camera but you can still pick up the older kits without them and they are going for £466 at Calumet.. If you feel that you won't need all that power then you can save a little and go for the 200w heads for around £399.
What do you get with that kit? Well pretty much everything we looked at for the speedlight-ers kit; 2x 400w heads, 2x heavy duty light stands, 2x 90cm Umbrellas, 1x sync lead, 1xPulsar Tx radio trigger (these fire the strobes wirelessly) and a carrying bag for it all.
You could also pick yourself up a soft-box lighting modifier too for around £50-£100 and here's a great portrait size 80cm x 100cm Bownes softbox from Wex for £75.
Total: £632 for a two light strobist studio setup including the extra soft-box.
Total for a four light strobist studio setup plus the two extra soft-boxes is £1264

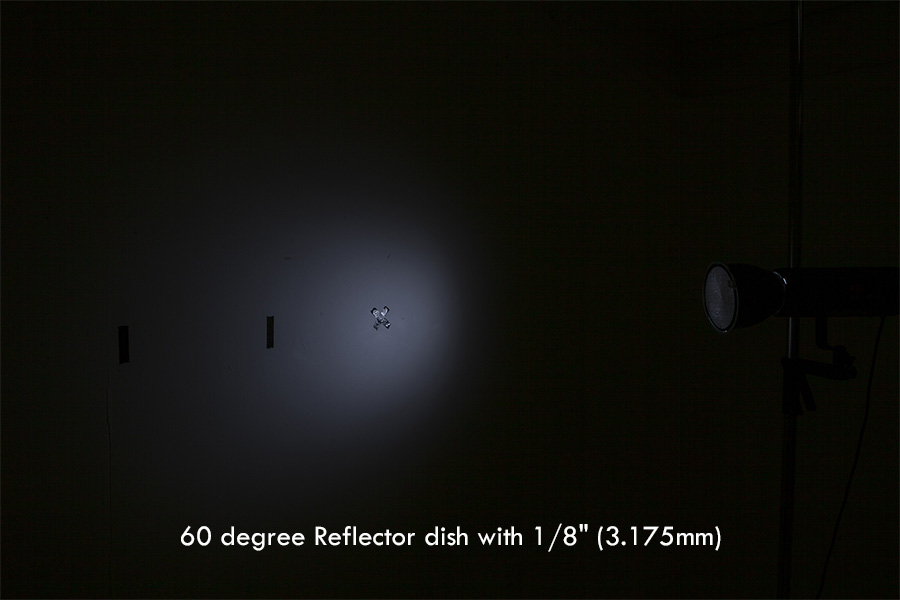
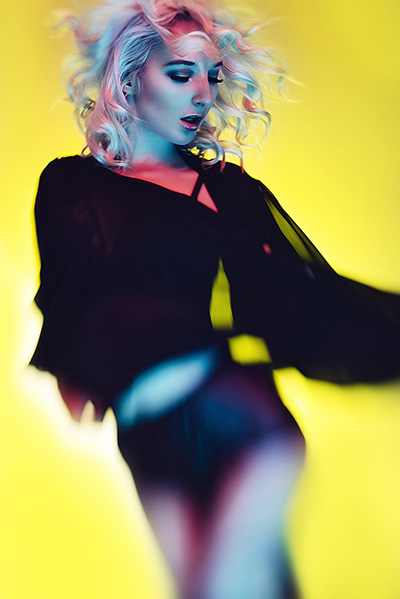
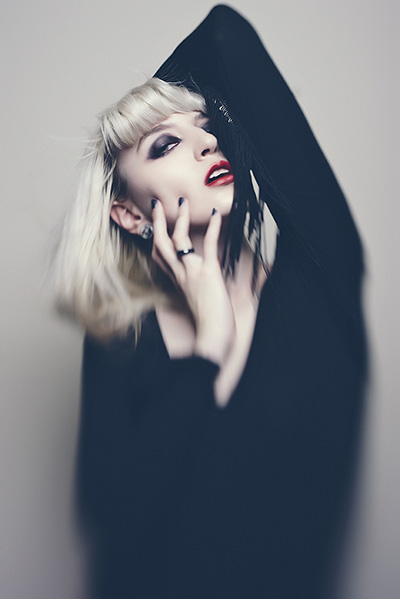
This shot was taken using four Bowens Esprit 500w heads, 2x floor stand, 1x small softbox, 1x strip softbox, 1x 60 degree reflector, 2x umbrellas and a variety of gels. Most of this equipment comes straight out of the initial 2 kits I originally purchased over a decade ago.
So to recap, if you are looking to be shooting in a home studio or at clients’ premises or anywhere that you can drive to, and has power, the strobist setup is definitely the only choice in my opinion. The speedlights will take up a lot less space; they will be a lot lighter and will always be the go-to choice for wedding, press and any other shooter that has to be light on their feet. But for home studio users like portraiture, model portfolios etc, the strobes are certainly going to offer the best versatility and value in the long-term.
Like I mentioned at the start, I think people start down the speedlight-ers path because it’s easier to build your kit piece by piece. I think we all start out with a speedlight, play with that on the camera for a few months then maybe buy a couple of modifiers then eventually think about getting it off the camera and pick up some wireless triggers. That's the natural progression but if you know you want to stay the course with your photography and you have the money for the initial investment upfront, going for the strobist kit it will save you money long-term for sure.
There are of course many other things to consider between the speedlights and strobes – light quality, which I believe is the most important factor. Light quality is something rather subjective and like everything else, needs to be traded off against other variables. This is a huge subject and beyond the scope of this article, but I will certainly be testing and exploring it in the near future.
A final word on that investment statement is that the four Bowens Esprit 500w heads that I bought and used on that first shoot straight out of college over a decade ago. I actually still use those same four heads today. That’s a pretty good return on my investment considering I've had four digital cameras since then and they cost a lot more than all my lighting equipment combined many times over.
But please, by all means if you have an example of a great starter kit for speedlight or strobe shooters then please feel free to share them in the comments down below.
Further reading...
So you've got your two lights, here's a great and simple way to use them with this lighting set-up and diagram 'Using Two Lights to Create Incredibly Flattering Portraits'
Still not convinced you want to take the plunge on investing in a strobe kit, why not look at a cheap alternative to a studio lighting set-up by reading this article on 'Taking Studio Lighting Shots for Under £25'
Think you'd like to expand your kit even further? Here's a lighting set-up with lighting diagrams on 'Your Basic 6 Light Set-Up'