6. Cinefoil

Cinefoil can either be bought in sheets or in a roll for custom lengths.
Cinefoil is a very heat resistant, matte black, malleable foil. It gets used a lot in the film industry where the need for heat resistant light flags on the constant 'hot lights' is a must. Cinefoil can be moulded into any shape, from simply moulding it to the side of a light, to a makeshift snoot; shaping the foil into a cone shape for very directional light. It's not a permanent solution by any means but it can certainly come in handy when you run out of certain bespoke tools like flags and light modifiers, cinefoil can certainly fill many roles temporarily. Its also possible to puncture the foil and create masks and gobos with it, this can be especially useful if you just want to create a slightly more interesting look to the light.

Cinefoil can be moulded to virtually any surface, heat resistant and tearable.
7. Clamps

Nylon clamps in varying sizes
This is a pretty basic one, and in my mind has the same mandatory nature as gaffer tape. I cant remember the last shoot where I didnt use several of these clips, clamps and holders. Clamping backdrops to booms, holding gels, clipping flags they are done that much more quickly with a range of clamps. I personally have a wide range of sizes to assist with any task, from the very small clips to hold the gels all the way up to the monster powerful clamps to hold heavy backgrounds. I try and only the use the slighter softer nylon clamps as they are less likely to leave marks or damage some of the objects they hold.
8. Gels

Neutral density gels and CTB gels.
Gels have been a staple in many a creatives bag for a very long time, they are very thin transparent sheets of heat resistant polycarbonate. Their most common use is to change the colour of the light that passes through them, back when Shakespeare was on stage they were limited to varying densities of wine in decanters to alter the lights colour, now we have literally thousands of different colours and tones to choose from. It's always great to play with coloured lighting but here I'm specifically referring to the gels that are often overlooked but are invaluable to many lighting situations. Specifically I'm referring to 'neutral density' gels and 'CTO/B' gels. Firstly, the neutral density gels appear grey but don't change the colour of the light but rather reduce it, they effectively stop down the power of the light much like a neutral density filter would on the front of your lens. These are especially useful when your'e shooting with monobloc flash heads that find it difficult to produce lower amounts of light, a neutral density gel in front of the light will open up more lighting possibilities when shooting on wider apertures.
The CTO/B (colour temperature orange/blue) gels are most commonly used for changing the orange of continuous tungsten lights to the same colour as flash and conversely changing the blue of flash to the orange of tungsten. This is really useful when you are trying to mix flash with continuos lighting in the same shot without any perceptible colour shift.
9. Mini Torch
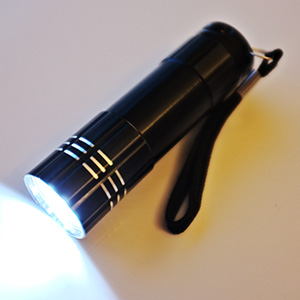
Mini LED torch with one handed on/off switch.
This is one that doesn't get used quite as much as the rest of the items but when I need it I'm certainly glad I have it in the bag. I use the mini torch most often in dark situations where I'm having difficulty focusing accurately. It can be those times when I'm shooting long exposures and don't have any modelling bulbs on or it can be because the ND filter on the lens is cutting to much ambient light to focus properly. Worst of all though its for those insufferable times when I don't have my strobes and Im trying to take a shot at night with speedlights that don't even have modelling bulbs. Of course you could just use it to find your last chocolate bar at the bottom of your bag.
A couple of important things to note are that LED torches are best as they're the brightest for the size and that it has an on/off switch that can be operated with one hand, the twist ones are great at stopping it from turning on in your bag but if you have to put your camera down each time you want to use it you'll get pretty annoyed very quickly.
10. Light Meter

Basic light meter, more of a learning and development tool than a modern necessity.
I was unsure whether I would include this one, in this digital world of the instant feedback loop of image assessment surely a light meter is a bygone relic from a time when models posed in neck braces. Granted the light meter doesn't get used on every shoot but it's been in my bag for the last ten years because once in a while there will be a shoot that comes along when something just doesn't add up. There has been times when I've forgotten an ND filter on the lens, times when strobes have been intermittent and even times when the LCD screen has been set to maximum brightness from a previous location shoot.The light meter has been useful to analyse where the failure is. Granted these were complacent mistakes that I affirmed with the light meter but it really comes into its own as a learning tool. We see an image take shape over time on the back of the camera, making the hair light brighter, take another shot, review, reduce the fill light, take another shot, review. We have an idea of what looks good and we get to the image in our minds eye by trail and error but sometimes we don't exactly know whats going on in an image. Without that knowledge its harder to pre visualise and plan more complex shots in the future and so I see it as more of a learning tool than a crutch or a necessity.