• Technique
    • Latest Techniques
    • FREE TIPS
    • Quick Tips
    • Video
    • Site Search
    • Blog
    • Archives
  • Mentoring
  • >Online Workshops<
  • Workshops
  • Studio Lighting Books
  • Contact
    • Newsletter
    • Contact
    • Statement
Jake Hicks Photography
  • Technique
    • Latest Techniques
    • FREE TIPS
    • Quick Tips
    • Video
    • Site Search
    • Blog
    • Archives
  • Mentoring
  • >Online Workshops<
  • Workshops
  • Studio Lighting Books
  • Contact
    • Newsletter
    • Contact
    • Statement

HDR - love it or hate it

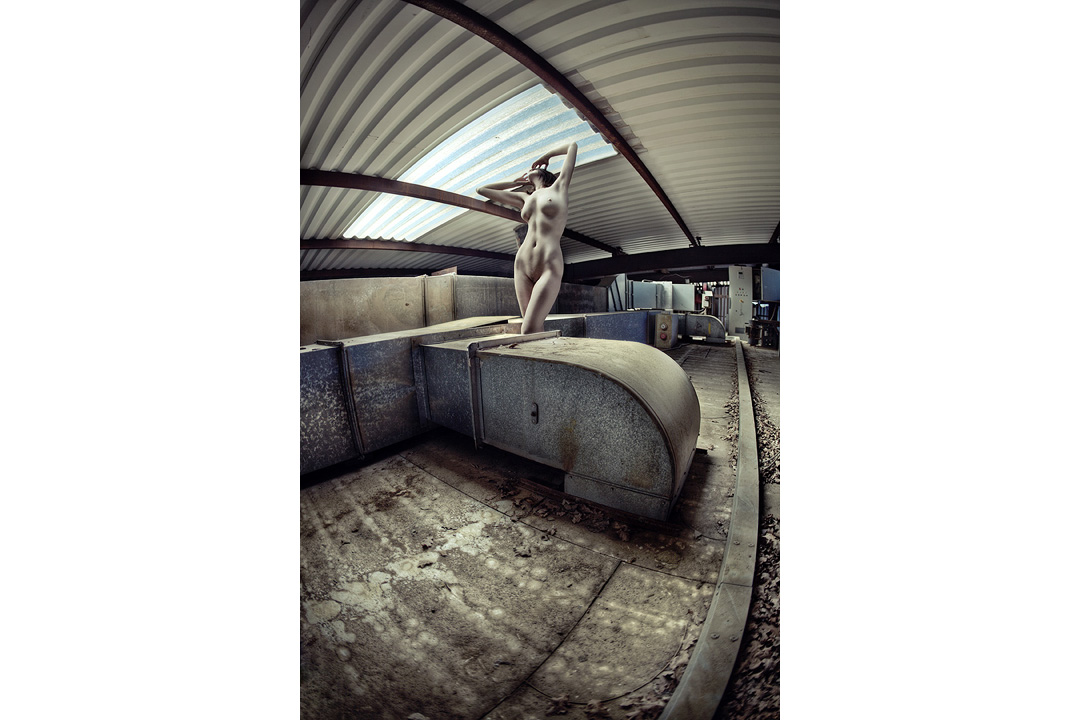
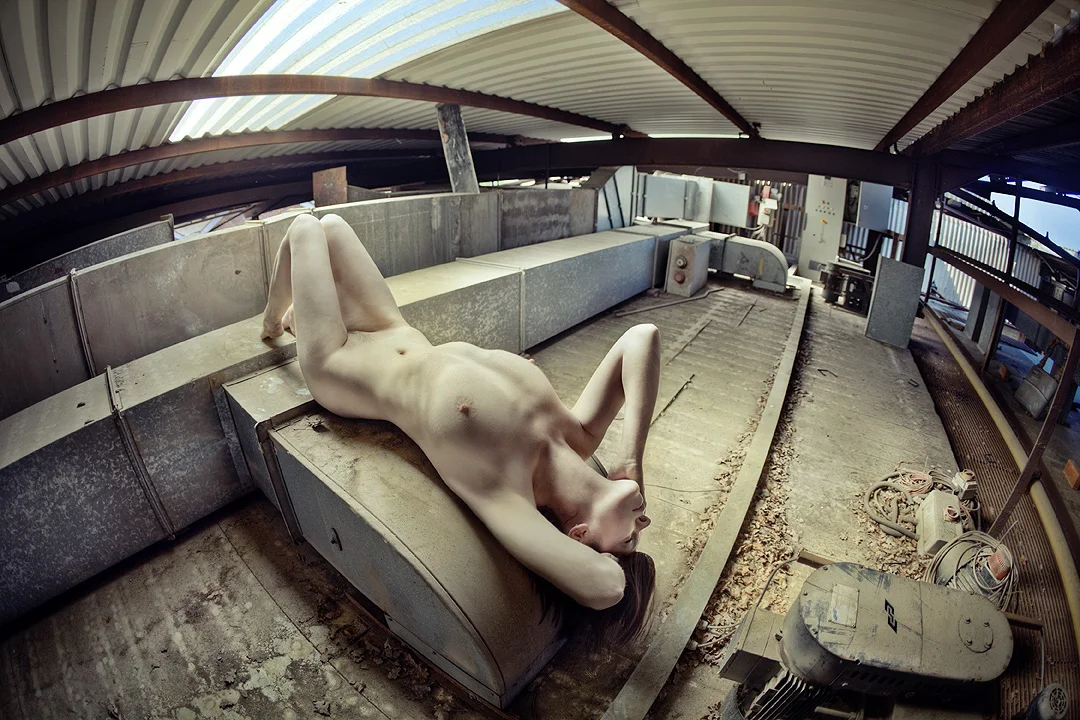
Model: Gem NHDR (higher dynamic range) photography has got increasingly popular over the years and like anything that is 'trendy' and 'cool' many photographers have experimented with the technique, some more successfully than others. The modern day process of HDR is quite digitally intensive and as such you will always get people who push these experiments to extremes and it wasn't long before popular photo sharing sites were deluged by these intense results. The upshot of this was that the technique was quickly seen as 'over processed' and no longer photography but more digital art. Although time consuming, correctly done HDR and tone-mapping photographs can produce some stunning results.

HDR photography or tone-mapping is the process of evening out the range of light in an image. For example by darkening highlight areas and brightening shadow areas. As we go about our daily lives our eyes do this automatically, and they have an incredible range of latitude in what they allow us to see. From being able to see at night by the faintest starlight to seeing the brilliant white sands in the noon day sun. Our pupils expand and contract to allow more or less light in and they do this almost instantly as they move around a scene in front of us, from the a bright white china teapot to the shadow under a table the eye renders all the detail to the point where we barely notice light levels fluctuating.

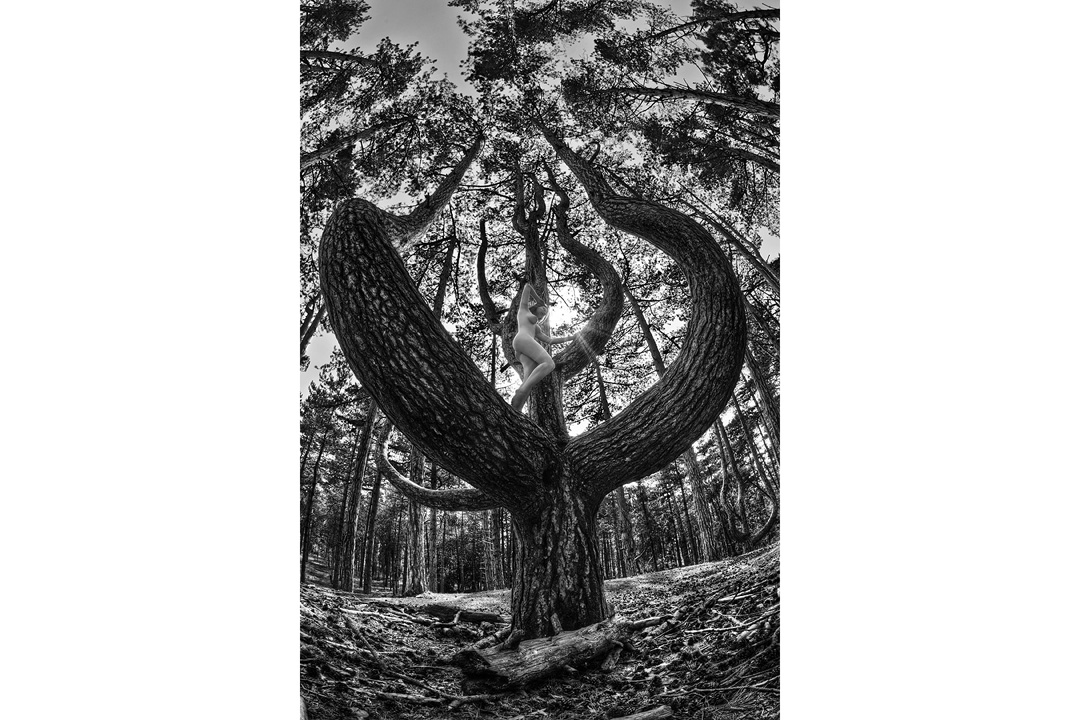
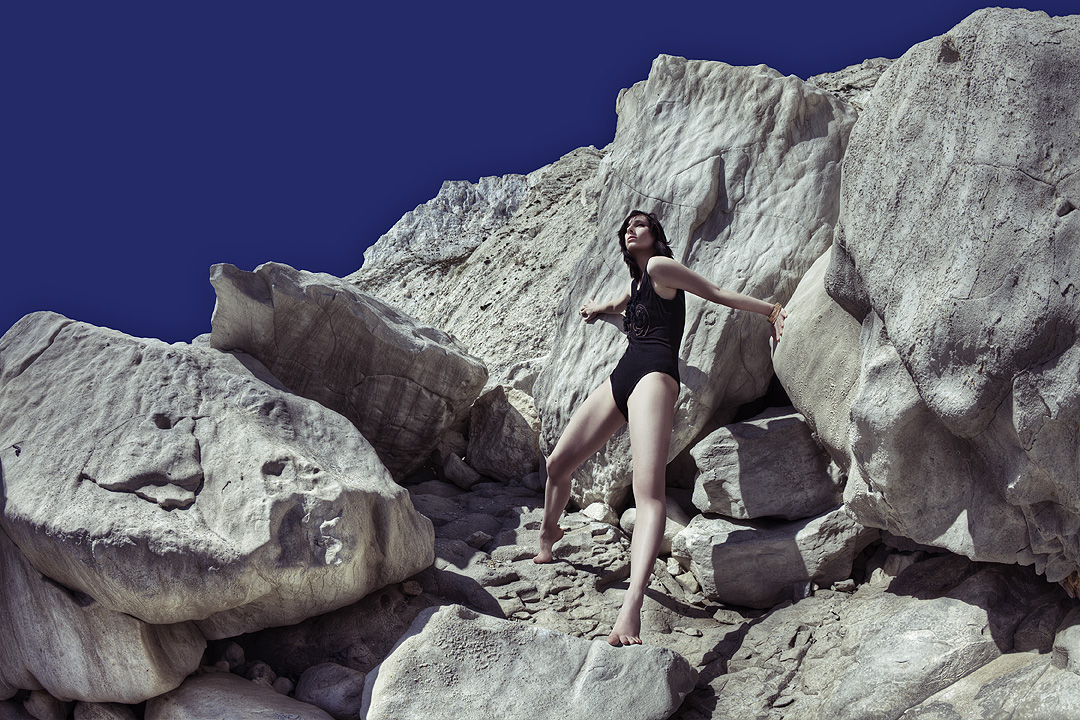
Model: Roswell IvoryCameras adjust light in a similar way, allowing more or less light in to expose an image correctly. Unfortunately when we capture a whole scene we only get to choose one exposure, whether we choose an average of the whole scene or choose a specific point to expose correctly there will always be areas in the photo that are under and over exposed. HDR tries to combat this by pulling these levels back to the correct exposure by using raw software, dodging and burning or by combing multiple photographs taken of the same scene but at different exposures.

This process of adjusting the highlights and shadows of a photograph has been going on since the dawn of photography. It was most famously popularised when Ansel Adams introduced his outstanding black and white landscapes in the early 1930's, his work was heralded at the time because of the sheer level of detail in his images. He would spend literally days and weeks in a darkroom meticulously dodging and burning an image to limit any 'clipping' of highlights and shadows. Sometimes this would be done with carefully hand cut 'masks' that would perfectly fit an horizon line to allow him to darken the sky without darkening the landscape. This should all sound very familiar to anybody whose even remotely familiar with the modern day Photoshop. We dodge, burn and use masks on a daily basis now and they are all fundamental techniques in the modern day HDR process.

My personal HDR technique utilises raw processing software, dodging, burning and also the combining of these with masks. Firstly though the photographs have to be taken, this requires a little more preparation than normal but once you have your own process it becomes second nature. Firstly a tripod is key to making the separate images taken match up correctly later. Set the camera up to bracket the exposures, all cameras are different but ideally your looking for around 3 to 5 separate photographs to be taken of each scene all at different exposures. For example the shots should be over-exposed by 2 stops, 1 stop over-exposed, correctly exposed, 1 stop under-exposed and finally 2 stops under-exposed.

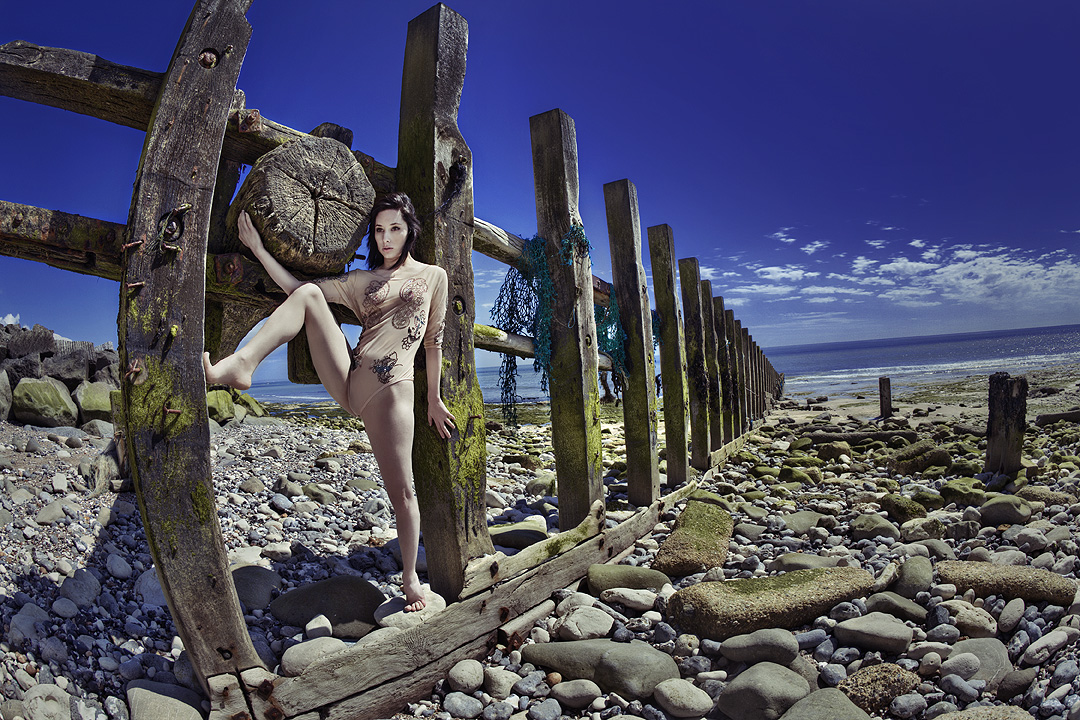
Model: AllegraOnce the photographs have been taken its time to combine them. Personally I use the software Photomatix by HDRsoft. They have a free trial on the site but the cost of the actual software is minimal. There are lots HDR software out there but for me this one offers the most flexibility. Once opened the software asks you to 'load bracketed photos', from there you have the option to adjust any 'ghosting' (mask out any movement that may of occurred during the shooting the process) then your onto adjustment sliders. Here its down to personal preference but there are a few pre-sets which will get you started and also help to give you a good idea of what the individual sliders do. Once your happy export your TIFF at the required bit depth then its onto the next phase.

Take the original raw images you uploaded to Photomatix and load them into your raw processing software of choice. In here give each shot a little individual HDR treatment being careful not to clip any of the blacks and whites, don't worry about the images looking flat here we are just trying to hang on to as much information as possible for now. Adobe's Lightroom has 'fill light' and 'recovery' sliders, these in themselves are HDR tools used to maximise the dynamic range of individual photographs and anybody that uses them is making a HDR image. Once you have your 'dynamically flat' raws export them ready for your photo editing software (Photoshop), preferably at the same size as the Photomatix export, otherwise you will have to resize them perfectly later.

Import all the rendered raws and the Photomatix image into Photoshop and start to mask in separate areas of each image using the Photomatix file as the base. Sometimes Photomatix can create very noisy areas in an image as it finds it difficult to decide what tone to use, these areas are perfect for masking in the appropriate exposure shot. This stage is where personal feel and interpretation come in, its up to you what you enhance and drop back. As a rule I personally try to choose one exposure of a person if they are in the scene, this will have shadows as well as highlights. The human eye is used to seeing people with this tone depth, take this away with the HDR process and the image can quickly start looking 'wrong'. Once you are happy with final combination its time to start applying your preferred digital treatment like contrast and tone. With your HDR base its amazing to see how much you can now push your process without loosing detail.

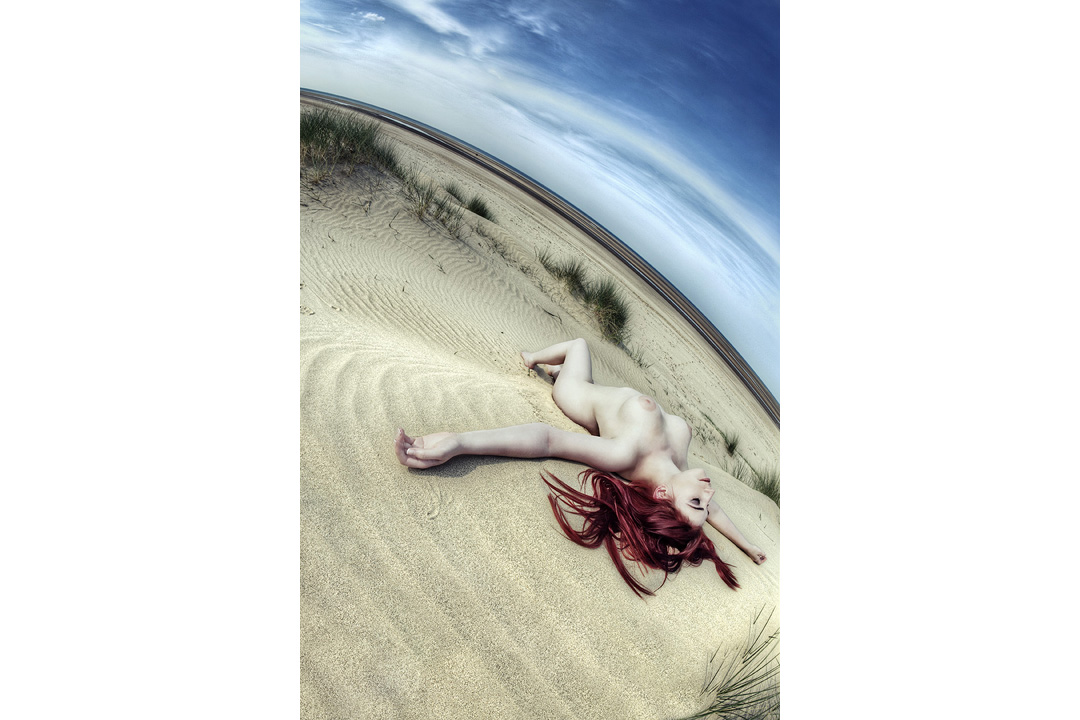
On the left a single exposure file digitally enhanced and on the right a HDR version

As mentioned at the start, this can be a very time consuming process to do this well but like anything after you've done the process a few times it does get quicker, but its certainly quicker than hand cutting masks and locking yourself in a darkroom for days at a time. This idea of extracting as much information as possible from an image has been around for a very long time and as the science has evolved it has got easier. With most high end modern digital cameras now the exposure latitude of each capture is phenomenal and for a lot of circumstances this single raw file holds enough data for the processing software to utilise it effectively and this will only get better. In the future I have very little doubt that a HDR single image capture will be the standard and it will be up to us choose an exposure after the fact. Love it or hate it, HDR is here to stay.

_MG_8418ellieflatnew.jpg
_MG_8515hdrfaithflatnew.jpg
_MG_8847flatbnew.jpg
_MG_8630hdrfaithflatnew.jpg
_MG_8432ellieflatnew.jpg
_MG_8949flatnew.jpg
Saturday 11.05.11
Posted by Jake Hicks
 

FLUORESCENT LIGHT

Model: Scarlet DugganCanon EOS 5D Mark II - CAMERA 

58 mm - LENS

F 6.3 - F-STOP

1/60 sec - SHUTTER SPEED

200 - FILM SPEED

Mixed - Fluorescent/Flash - LIGHT SOURCE


Fluorescent lights are a notoriously weak light source, the bulb used here had an output of a mere 32w making it very difficult to use flash as a fill light without it overpowering the fluorescent key light. Their are a few things you can do to work around this, firstly you may have an old 200w flash head hidden away that you don't use anymore because it's to weak, this is an ideal time to dig it out. Failing that you can lower the apparent light falling on the subject by either moving the light further away, bear in mind this will make your light source visually smaller in relation to the subject therefore giving you a 'harder' light (imagine your nice wrap-around light of a close softbox becoming not so wrap-around as you move it further away). Alternatively you could leave your nice 500w light where you want it and reduce the apparent light output by using neutral density gels. Once again this is another invaluable piece of kit for a photographer who is shooting on location, these gels placed over lights can diminish the light by as much as 4 stops with a single gel, and as the name suggests they are neutral in colour so they wont leave any strange colour casts. With some careful light metering and patience using fluorescent lights in shots like this can give a very interesting glow to the subject, it is not very often that you would have your key light actually in shot so the fall-off of light can provide very dramatic results if used correctly.

Another point to remember is that fluorescent lights as a rule give out very narrow spectral bands of light which are very deficient in any red waves of light and tend to give off a diffuse eerie green glow. When using film you would normally need to use an appropriate lens filter to compensate for this colour cast, but with digital it is possible to counter this effect in post production. Here I mixed fluorescent with flash meaning that when I altered the colour balance afterwards to compensate for the green hue the areas of the image that were affected by the flash shifted towards the red end of the spectrum which can be seen in flecks of the dark hair. This is something to bear in mind before shooting, I got away with it here because of the dark hair colour, if the hair had been a lot lighter in colour, the cast would be far more apparent.


D.I.Y Ring Light

This light can easily be made at home using just a few key items found at almost any hardware store. The bulb being the most important part comes in many different sizes so choose the one which will best suit the project. Also worth noting is that sometimes you can get additional bulbs that come in different colour temperatures, so maybe getting spare bulbs in different temperatures could prove useful, especially if one breaks.


Inspired Images

Inspiration for an image can come from anywhere, music, films, other images, in fact any seemingly original image we take will have its roots bedded in some way to something else whether we consciously realise it or not. It's when we try to take control of this fact and capitalise on it that we are most pleased with the results. Rather than the 'spray and pray' approach where we may get a lucky shot, try instead to formalise an image before hand, like a brief. This could be as basic as sticking to a certain lighting style or colour, it's with these limits that we can be forced to push and adapt ideas and sometimes create our more original work.

The inspiration for my set of images came from a French film called Eden Log. This 2007 film directed by Franck Vestiel is full of very imaginative lighting ideas, from projections, very hard lighting, to light-play on varied textures. The base idea was the hard light coming up the arm to light the face, the core of the idea I have retained but tweaked it to fit within a commercial use of an alternative hair shot.

Tuesday 08.23.11
Posted by Jake Hicks
 

"T.E.A.M, Together Everyone Achieves More"- Mathew Jordan Smith

Wayne Kahn discussing poses with the modelTheir are many fields of photography that will require more than just you the photographer to achieve a certain shot, even if its just one assistant to bounce some light around with a reflector. With fashion some photos may even require 10 or more people to be involved, hair stylists, clothes stylists, prop makers, make-up, art directors, models, clients, all of these may also have assistants as well and thus the list goes on. Some of the most seemingly simple shots will often have scores of people peering over the photographers shoulder all giving their input. So who is in charge of all these creative minds all eager to make their mark, unfortunately their is no one hard and fast answer. It varies from job to job, as a guide though if there is an art director present they will be the one who usually has the final word, but even they can be swayed, they are creatives at the of the day and even they are susceptible to a certain amount of creative inspiration from the photographer. Sometimes though the client will be there overseeing how their money is being used, occasionally they will sit back and take solace in the fact that they have chosen the right art director, photographer etc for the job, safe in the knowledge that the people around them know their specialties and jobs better than anyone. The reality all to often unfortunately is that they rarely have the ability to visualise the final product or image through the preceding working process, and regularly fall foul to taking control. One point to remember here is that they are generally a person who is used to being in charge of their own professional field or company, that is why it comes naturally for them to try and take control if you let them.

Jo Basten hair stylist with modelHair stylist Zoe Adams with modelIn my experience with fashion, hair and editorial shots the process is usually very organic, by that I mean their are many variables involved that cannot be controlled nor should they, you are trying to create something new after all. As photographers we should be able to adapt to any given situation and overcome them, occasionally this may create something great you couldn't of anticipated prior to shooting. This rule applies to all members of the team as well, perhaps the models hair doesn't have the right volume for a particular cut, maybe the clothes aren't quite fitting the model, perhaps the models complexion is playing havoc for the make-up artist, even the weather on your location shoot could be throwing your exposure readings off. This list can go on and all these potential problems threaten to disrupt or even ruin the shot, it is only through having an amazing team of people who know their specific jobs inside out that this can be avoided.

So how do you get this amazing team of creatives? Some photographers will only work with a specific team that they know and trust. This has its advantages of course, you know what you will get and you can rely on them to provide it without the hassle of having to chase them or worry about personalities clashing. Sometimes you wont get a choice, the art director may already have a well oiled team of people in place and photographers get brought in and out as styles change. This can be tricky for a photographer to manage as you are the new guy trying to create something new and creative with a close and comfortable team without treading on too many toes. The other option, and perhaps the one that I feel most beneficial for all involved is to take it on a job by job basis. Just as you would never ask an architectural photographer to do a fashion shoot, you would never ask a wedding make-up artist to do make-up for a fashion shoot or a hair stylist who specialises in hair-up styling to do session styling. All of these people know their field in broad terms,  I could take an 'alright' picture of some architecture because I have a broad understanding of my subject but a dedicated architectural photographer will take a comparatively 'outstanding' picture. The same applies across all disciplines and should be considered on a case by case basis.

If you are fortunate enough to be able to choose your team prior to shooting their are a few key points that I would recommend bearing in mind, and if you don't get to choose them at the very least you should take the opportunity to meet with them before hand. Ideally though you will be an integral part of the creative process from the very beginning. Normally I pitch a concept or specific lighting style to a client and already know that a specific models bone structure will work better with the light than others for that particular shot. For example will I be using hard or soft lighting and by being involved from the start I can be at the model castings and be able to visualise how the final shot will look and who is best suited to sell that look. On shoot day I normally work closely with another photographer called Wayne Kahn, he has a different perspective to myself and he will often see things that perhaps in the energy of shooting you would normally overlook, this can sometimes be the key to capturing those rare shots that you hadn't previously perceived. Depending on what your shooting you may need a clothing stylist, some photographers like a stylist to just turn up with the clothes and then just go and sit quietly and not interfere with the shoot, personally I like them to get involved. Polly Errington is a great fashion stylist I have had the pleasure of working with on many shoots, she is never afraid to jump in to tweak and pull the clothes, sometimes because its just not clear how certain outfits are supposed to be worn. Make-up, as I mentioned earlier is another key component, make-up that is applied at weddings for other people to see is very different to make-up that is applied for the camera to see, getting this wrong can mean the difference in you spending days retouching images or hours. Hair as well is a personal skill, a hair stylist who has any experience will have a book of photos they can show or email you, getting a look at these before hand will give you a clear idea of what they can do. Asking them how long some of styles took to achieve is a good question to ask, knowing that a particular look will take them three hours to achieve will definitely make or break the shoot.

British Hairdressing Awards shoot at Wella UKWhen Shooting starts, all of these people will want to have an input, not just because its a chance to make their mark but because their name will be attached to the final photographs. At some point though you will have to say now is the time for you to start taking pictures. With a lot of people behind you shouting in your ear, it can occasionally be difficult to please everybody all of the time and sometimes this should just be seen as part of the process of creating something with other passionate people. A word of warning however, the one person in my opinion as photographers we should never annoy is the model. They are the only person actually in the shot and essentially are actors and actresses, if they are upset or angry for any reason this will show in the final images and can have an overwhelming impact on how the shoot turns out. No matter how amazing the lighting, styling, hair or make-up is, the viewer of any photograph will always be overridden by the human element of the image.

With all these elements in play producing a series of unique photographs at the end can be an incredibly rewarding experience for the whole team, but one final word of caution, if for any reason the photographs turn out badly their is only ever one person that gets blamed, the photographer.

Friday 08.05.11
Posted by Jake Hicks
 

WATER & LIGHT

Canon EOS 1Ds Mark II - CAMERA

85 mm - LENS

F 5.6 - F-STOP

1/125 sec - SHUTTER SPEED

100 - FILM SPEED

Flash - LIGHT SOURCE


Caution is always the staple of any shoot that mixes 4000w of electricity with water, consequently I made sure that all four of the flash heads were wrapped in plastic to avoid impromptu flying trips across the studio. It is also worth noting that the make and model of the flash used will have an effect on how the falling water droplets appear in the finished image. I was using the older model Bowens Esprit 500w monobloc heads, these are great multi purpose studio and location lights but they are certainly not renowned for their short flash duration. Monobloc flash heads like these will light up quickly but will still glow as the flash fades. This may not seem to the human eye as slow, but when flash durations range from 1/700th of a second to 1/7000th it can have a dramatic effect on how sharp your final image will look. When shooting relatively stationary objects or portraiture it goes unnoticed, but when you are trying to capture fast moving objects like water droplets it can create an issue. The flash can capture the droplets with its initial burst but as the light fades it is still capturing the image as the droplet falls further, resulting in the droplet to appear as if it is travelling up not down. The type of photography you do should have a distinct effect on the flash unit you choose, if your planning on shooting a lot of fast moving objects or people like dancers then choosing a flash unit with a short flash duration is paramount.

Tuesday 07.19.11
Posted by Jake Hicks
Comments: 3
 

"As photographers we create 2D representations of 3D objects" - Dave Montizambert

Objective and Subjective Lighting

Previously I have mentioned how we all make a conscious decision on how we want our finished image to look like before we release the shutter. No matter how vague that initial idea, there will still be a deliberate choice to allow light to be exposed to the frame therefore representing our subject in a chosen way. In its most basic form this idea will be that there is enough light hitting (reflecting off) the object to make it visible in the image all the way up to deciding if and how we want to modify the size, angle, intensity and shape of our light source to intentionally capitalise on the semiotic relationship the viewer has with the subject. Included here are two images of the same subject but lit in two very different ways to evoke varying responses. The image on the left is shot with a directional soft light that envelops the skin and emulates the light from a window. The image on the right however is shot using a very hard-light from a ring flash that accentuates any tone with a sharp drop-off in light to dark and is used to give a more fashion feel to the shot. I have not even mentioned the choice of pose, styling, colours or post production options, all of which should be decided upon consciously or otherwise, to achieve a shot. In short, apart from actually lighting a subject accurately to portray its shape and features, and by accurately I mean correctly exposed, the rest is down to personal style. To photograph a fresh green apple correctly it would be lit to portray it as green, this is objective, portraying it as anything else is seen as the image looking wrong. You choosing to hard-light the apple to accentuate its shine with spectrals or deciding to add more light to fill in the shadows and minimise shine by using a softer light to portray it as a more natural and organic apple is subjective, this is up to you.

Areas of Illumination

If you were to point a single light source at an object that is of one tone you would see at least three different densities occur. The areas of light on a subject can be classified as shadow, diffused and specular. You would also witness the areas of change between these regions, they are known as edge transfers.

Diffused Area

This is the correctly exposed area, representing the true tonality of the subject, or the natural brightness of the subject. This is objective, to truly represent the subject in question we have to document it accurately. A purple ball photographed in any other way than to depict it as purple would be classed as the image looking wrong.

Shadow Area

This is under exposed in relation to the correctly exposed diffuse area. This is subjective, there can be no light or it can have a fill light to lessen the shadow. You can’t say this shadow is wrong, you can only say I like it or don’t like it. Altering the shadow edge transfer and the rate of transfer from the shadow tone into the diffused value tone can control how much shadow there is.

Specular Area

This is over exposed in relation to the correctly exposed diffuse area. Traditionally called, shine, hot-spot or sheen. It is the mirror image of the light source seen on the surface of the subject, most commonly seen as catch-lights in people’s eyes. Speculars as well as shadows, have edge transfers, only these govern how shiny a surface appears. Speculars are subjective and the size of them can be adjusted to personal preference, not rightly or wrongly.

Tuesday 07.12.11
Posted by Jake Hicks
Comments: 1
 
Newer / Older