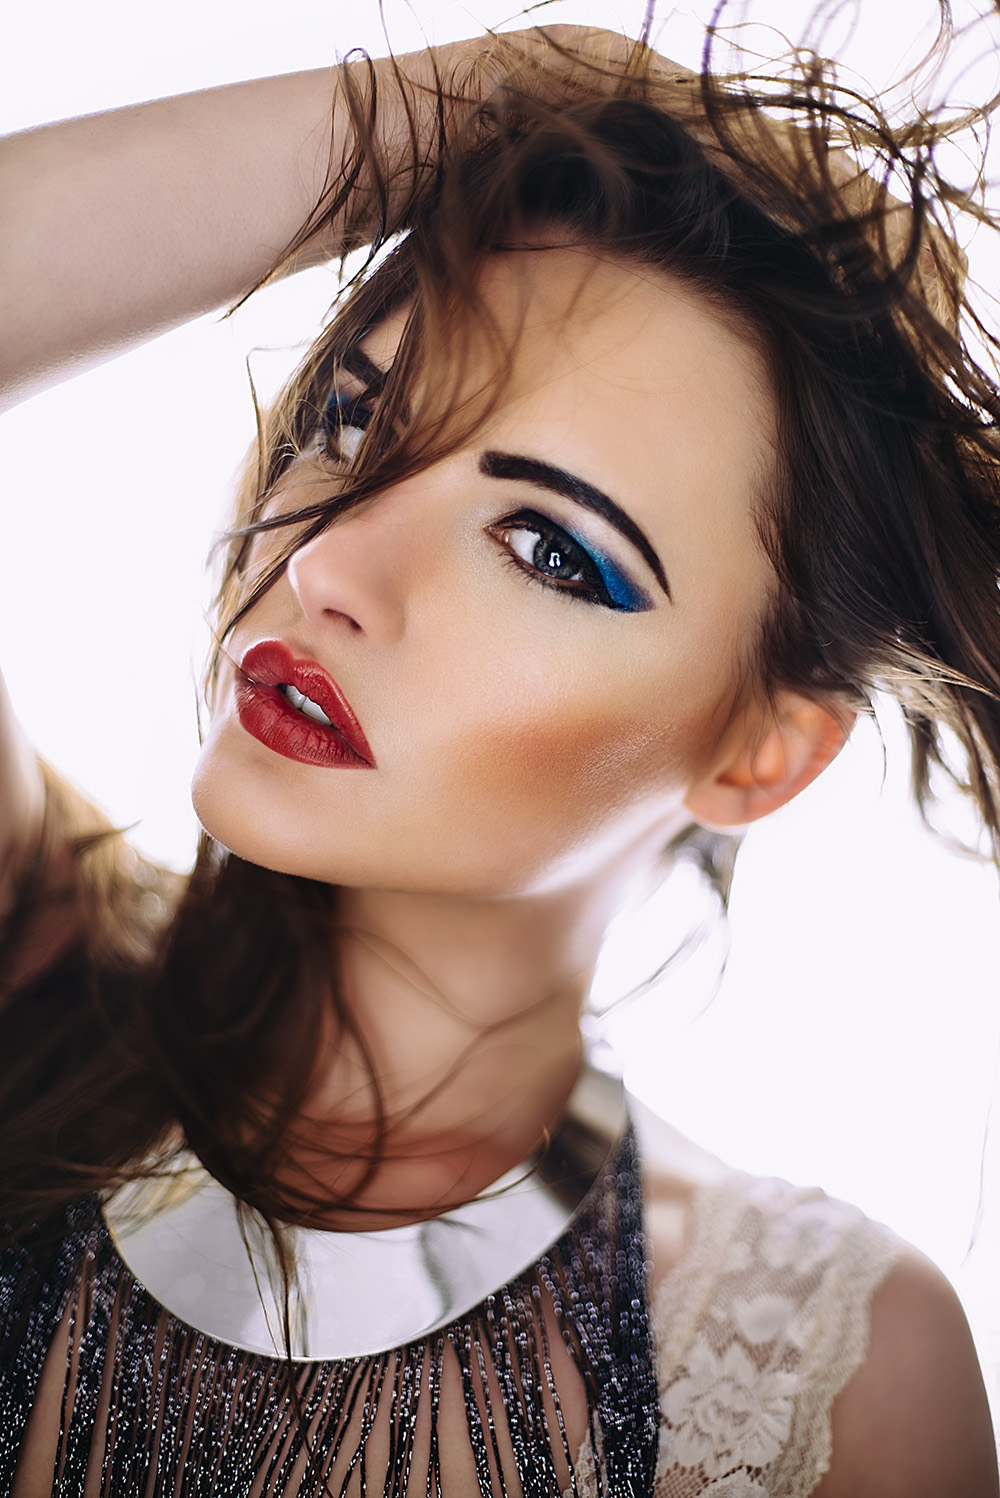
A lot of the time when we're shooting with flash photography in a big white studio our portrait images can appear a little stark or cold. This quick fix in Photoshop takes less than two minutes to do but can add a lot of warmth and life back to our models skin.
Step One
It is up to you when you apply this effect but seeing as it is such a global transformation I tend to apply it near the end of a edit.
Start off by adding a new Curves Adjustment Layer
Go to Layer -> New Adjustment Layer -> Curves...
Adding your first adjustment curve.
Step Two
Next we want to adjust that Curve so we'll open up the Curve Adjustment window and select the Red Channel from the drop down menu. Simply drag a point up from the centre of the red curve, this will be different for every image but as a guide mine had an Input of 122 and an Output of 133.
Now adjust the Red Channel Curve
Step Three
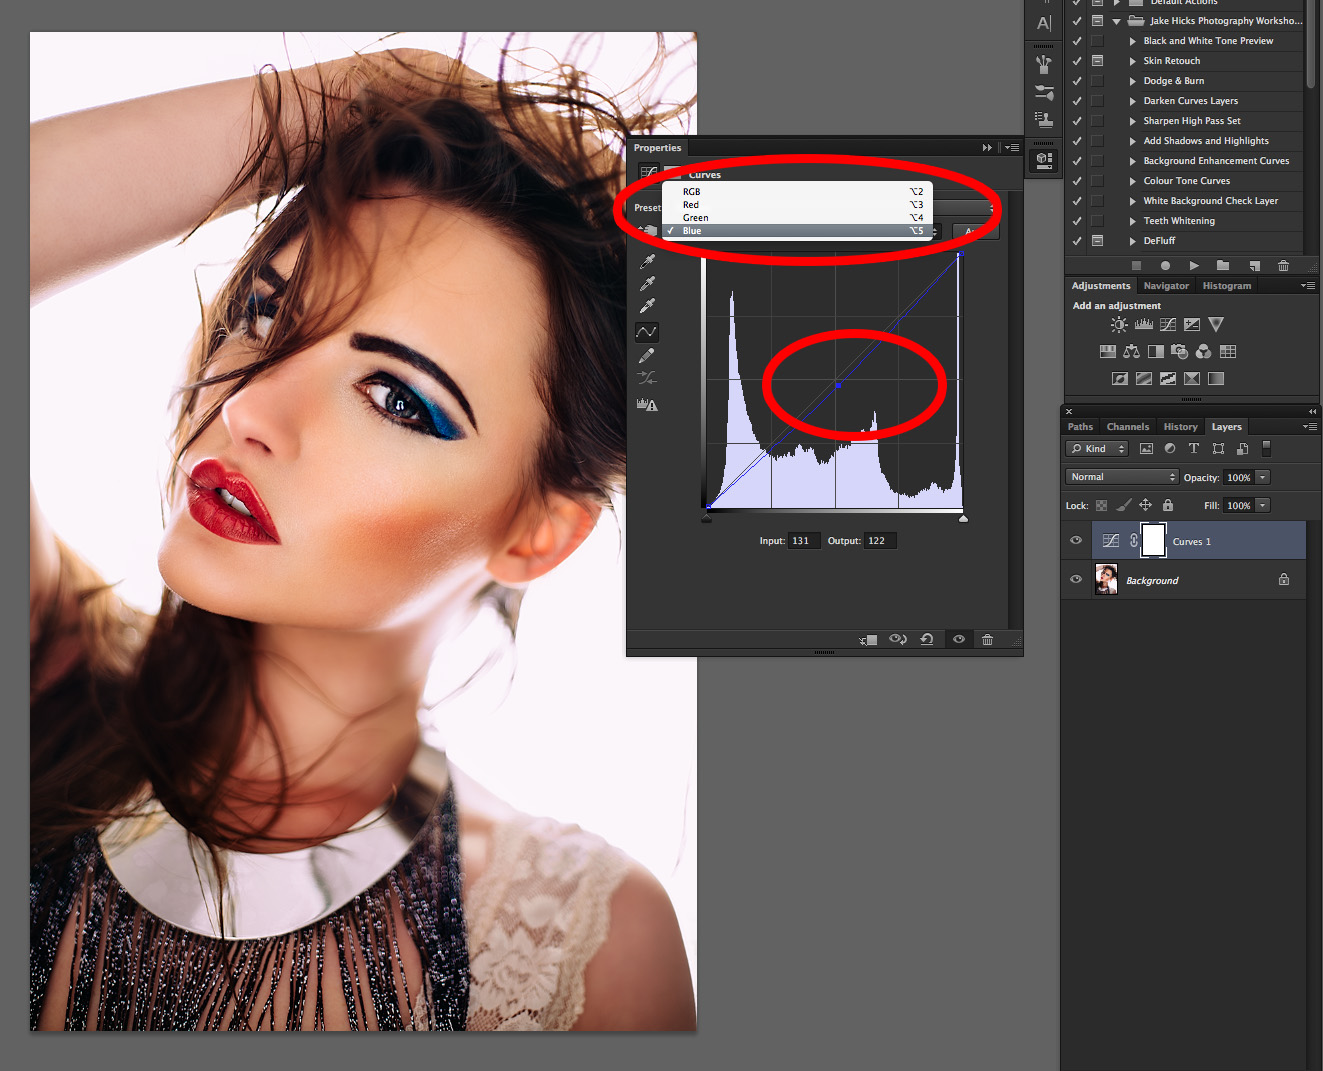
Next we need to adjust the Blue Curve. Click on the RGB drop down menu again and this time select the Blue Curve. This time we want to select the centre of that curve and pull the Curve down. For reference mine had an Input of 131 and an Output of 122.
Next we adjust the Blue Curve by pulling it down.
Step Four
At the moment those colour adjustments are affecting the whole image but ideally we only want them to appear in the darker, shadow areas of the shot to make the effect more believable.
We need to mask the colour to do this so go to Image -> Apply Image...
*It's worth pointing out that your Adjustment Curve Mask must be selected before the Apply Image will work*
Next we mask the colours to our shadows via Apply Image.
Step Five
The following dialogue box will prompt you to select either the highlight areas of the shot or the shadow areas of the shot. To make sure that only the Shadow areas of the shot are masked tick the Invert box. You should also be able to see that in the Curves Adjustment Layer mask window there is now an inverted black and white preview of your shot as well.
Hit OK.
Mask the colours to the shadows by ticking the Invert option.
Step Six
You can now toggle the effect on and off via the layers panel to see the difference. You can of course go back into the Curves and tweak the red and blue channels if necessary or simply reduce the opacity of the Curve Adjustment layer to your liking. Either way you should see that you've warmed the skin tones to give a natural glow.
You can by all means stop here but I personally like to add a little contrast back into the shot with colour and I do that by now cooling down the highlights. This effect isn't as dramatic but it compliments what you've done to the shadows already so I personally feel it's worth doing.
To avoid complications, now is probably a good time to rename that Curves Adjustment Layer as we're about to add another one. Rename the previous one "Shadows" and then add another Curves Adjustment Layer and rename it "Highlights".
Add a new Curves Adjustment Layer and rename it Highlights.
Step Seven
Again we want to go into the Curve and select the Red Curve from the drop down.
This Highlights Curve is even more subtle than the Shadow Curve so the adjustments tend to be even smaller than before. This time though I am looking to cool down the highlights so I am dragging the Red Curve down slightly. My Input was 127 and my Output 123.
Adjust the Red Curve by dragging the centre down slightly.
Step Eight
Now go into the Blue Curve and make another adjustment, again though we want the opposite effect to the Shadows so this time we pull the Blue Curve up slightly. My Input value was 122 and output 127.
Adjust the Blue Channel Curve for the Highlights Curve Layer.
Step Nine
Now all we need to do is mask those adjustments to the Highlights only.
Go to Image -> Apply Image… (again ensure the Adjustment Curve layer Mask is selected)
When the dialogue window opens this time you'll want to make sure the Invert box is NOT ticked. Again you should also see that the black and white mask preview on the Adjustment Layer is not Inverted.
Hit OK
For the Highlights you want make sure the Invert box is un-ticked.
That is it, you're done.
Although when I explain it in a step by step process like this it seems long-winded but it really isn't, this whole process literally takes less than two minutes to do and it's super simple and effective once you've done it a few times.
This is one of those subtle effects in Photoshop that although on first impressions doesn't seem to create much of an impact I urge you to give it a try. Photoshop and high-end retouching in m y opinion is all about lots of subtle effects adding up to create a seemingly un-retocuhed image. If your client looks a the image and doesn't immediately think they've been retouched when in reality they have then youve done your job well.
So much of retouching is about subtle effects like this so give it a go good luck :)
Any questions please feel free to ask below and I'll do my best to answer them when I can.
Featured model: Layla Leigh
Jake Hicks Photography Workshops
If you're interested in learning more about my professional workflow then why not check out my Post-Production Workflow Workshop. On this full day of hands-on learning I walk you through everything from Lightroom to Photoshop including correct import and export, an in-depth look at the powerful colour correction tools of Lightroom, fast and effective studio proofing tools as well as an extensive step-by-step walkthrough of my editorial retouching techniques in Photoshop. Plus everybody on the day will walk away with an in-depth PDF of everything taught on the day PLUS over 15 of my Photoshop Actions and 30 of my Lightroom presets! Find out more here Jake Hicks Photography - Post Production Workflow Workshop
Jake Hicks Photography Video Tutorial
I have also just released a brand new 22 hour complete Gelled Lighting Tutorial video. I go over everything from studio lighting setups with gels to being on location with gels plus I also go through my complete retouching and post pro workflow. For more details and complete breakdown of everything that's include check out my Coloured Gel Portraits Tutorial
Jake Hicks Photography Gel Packs
I also offer comprehensive coloured gel packs. These collections of gels are what I use day to day to create some of the most highly saturated colours around. If you're looking at getting into gelled lighting or need to get stronger and richer colours in your coloured gel work why not check out my Jake Hicks Photography Gel Packs


